1
Page 2 of 4
!
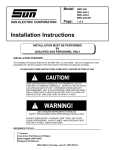
THIS UNIT MUST BE PLUGGED INTO A PROPER AC OUTLET FOR UNIT
TO OPERATE CORRECTLY. REFER TO THE UNIT ID PLATE LOCATED
ON BACK OF UNIT. EXTENSION CORDS ARE NOT RECOMMENDED,
BUT IF AN EXTENSION CORD MUST BE USED, USE A CORD THAT IS
LESS THAN 50 FEET WITH A 16 AWG, OR ABOVE 50 FEET AND LESS
THAN 100 FEET WITH A 14 AWG.
!
USE STANDARD REFRIGERANT HANDLING
SAFETY PROCEDURES WHEN PERFORMING INSTALLATION
ALWAYS WEAR SAFETY GOGGLES, DON’T SPILL OR TOUCH LIQUID
REFRIGERANT, AVOID FLAMES, AND EXCESSIVE HEAT. USE ONLY IN
WELL VENTILATED AREA.
PARTS & ACCESSORIES SETUP __________________________________________
1. Remove the Blue and Red Hoses from the box, along with the plastic-tie-wrap. Remember to
OIL the seals on each end of the hoses.
2. Connect the high (red) and low (blue) couplers to their respective hoses. Rotate coupler knobs
fully CCW (closed).
3. Route both hoses in-between the master filter bracket and the hose that connects to the filter.
4. Attach other end of the (red) hose to upper, red labeled (high side) port on the back panel of the
Eco Xtreme™ unit.
5. Attach other end of the blue hose to lower, blue labeled (low side) port on the back panel of the
Eco Xtreme™ unit.
6. The plastic-tie wrap will be used later, to secure the hoses to the master filter bracket.
(Page 4, line 12).
7. Install plastic oil bottle (1-05585A) to the white cap mounted in the front of the unit.
8. Remove the User's Manual, MAC Form/Certification, Product Registration Form, and Warranty
Registration from the box. Hand these items to the Owner or Manager.
9. Remove Recovery Tank (EAA0275L05A) from its box. Remove cardboard wrap from Recovery
Tank and set on floor.
TEEAC316A0 (08/27/2004) REV D.