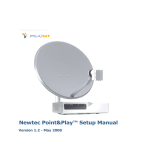
1
Sat3Play Point&Play Manual
Version 1.0 - January 2008
Contents
Contents
1
Introduction .................................................................... 4
2
Setting up the antenna .................................................. 11
About this guide........................................................................... 4
Safety precautions........................................................................ 5
Material provided in the box.......................................................... 7
Material you need to provide yourself ............................................ 9
Installation overview .................................................................. 10
Step
Step
Step
Step
Step
1
2
3
4
5
- Choosing a suitable location ........................................... 12
- Mounting the antenna pole............................................. 13
- Mounting the antenna.................................................... 14
- Fixing the antenna cabling ............................................. 21
- Pointing the antenna...................................................... 29
Version 1.0 - January 2008
Sat3Play Point&Play Manual - page 2
Sat3Play Point&Play Manual - page 3
Version 1.0 - January 2008
Introduction
1 Introduction
About this guide
This guide provides a step-by-step procedure to install the Sat3Play terminal (consisting of the
antenna and the IPmodem).
Before installing
Before starting to install the antenna, it is important to read the following sections:
- Safety precautions (page 5)
- Material provided in the box (page 7)
- Material you need to provide yourself (page 9)
Follow the entire procedure
When installing the antenna, it is important that you follow the entire procedure step-by step.
When pointing the antenna, you may need to repeat the steps from the section Rough pointing:
horizontal (azimuth) (page 36) onwards to obtain optimal signal reception and transmission.
Related documentation
When installing the satellite dish, you will need to refer to the following documents:
- The Antenna Pointing Information document, which contains the geographical pointing data
(leaflet included in the box);
- The software user manual (document included in the box);
- Terminal User Manual (available on the cd included in the box).
Proprietary & Confidential
The material contained in this document is confidential and intended for use only by parties
authorised by Newtec. Any unauthorised duplication or distribution to any party not covered by a
non-disclosure agreement is expressly prohibited.
Version 1.0 - January 2008
Sat3Play Point&Play Manual - page 4
Introduction
Safety precautions
This section lists the safety precautions to follow when installing the antenna.
Safety precautions are grouped into warnings and cautions.
Local regulations
Always install the Sat3Play antenna in accordance with local regulations.
Warnings
A warning refers to an action or situation that could result in injury, long term health hazard
or death if you do not follow the instructions.
Antenna
- RF Radiation Hazard. The transmitting equipment is capable of generating RF levels above the
maximum permissible exposure level. Do not enter the radiation beam pattern of the iLNB or
the antenna dish when the transmitter is on. Keep the space between the iLNB and the antenna
dish clear.
IPmodem
- There are no user-serviceable parts in the IPmodem. There are potentially lethal voltages inside
the equipment. It should only be opened by a technician trained and certified to service the
product.
- When the IPmodem is powered on, DC voltages are present on the rear panel Tx and Rx
connectors.
- Do not expose the IPmodem to rain or moisture to prevent fire or shock hazard. Do not expose
the IPmodem to dripping or splashing and do not place any objects filled with liquids, such as
vases, on it.
- Postpone antenna and IPmodem installation until there is no risk of thunderstorm or lightning
activity in the area.
- To prevent electrical shock, if the unit is provided with a polarized plug, do not connect the plug
into an extension cord, receptacle or other outlet unless the plug can be fully inserted with no
part of the blades exposed.
- Connect the in-line power supply input power cord to a properly grounded three-prong AC
outlet. Do not use adapter plugs or remove the grounding prong from the plug.
- Do not use the in-line power supply power cord when damaged in any form.
Sat3Play Point&Play Manual - page 5
Version 1.0 - January 2008
Introduction
Cautions
A caution refers to an action or situation that could result in equipment damage or
destruction if you do not follow the instructions.
IPmodem
- Always use the in-line power supply with the IPmodem. Using a different power supply may
cause equipment damage.
- To ensure regulatory and safety compliance, use only the provided power and interface cables
or cables which conform to the specifications within this manual.
- Do not open the unit. Do not perform any servicing other than that contained in the installation.
Refer all servicing to qualified service professionals.
- Avoid damaging the IPmodem with static by first touching the coaxial cable connector when it
is attached to the earth grounded coaxial cable wall outlet. Always first touch the coaxial cable
connector on the Sat3Play IPmodem when you are disconnecting or re-connecting your
Ethernet cable from the Sat3Play IPmodem or your PC.
- To prevent overheating, do not block the ventilation holes on the sides and top of the unit.
- Only wipe the IPmodem with a clean, dry cloth. To avoid equipment damage, never use fluids
or similar chemicals. Do not spray cleaners directly on the unit or use forced air to remove dust.
- Install an AC surge arrestor in the AC outlet to which the IPmodem is connected. This will avoid
damage to the equipment by local lightning strikes and other electrical surges.
Version 1.0 - January 2008
Sat3Play Point&Play Manual - page 6
Introduction
Material provided in the box
1
1x
2
2x
3
2x
4
1x
6
2x
9
1x
7
1x
20 mm
12
1x
10
1x
11
4x
50 mm
5
1x
8
4x
13
1x
8 mm
18
1x
14
1x
19
1x
20
1x
21
1x
16 mm
15
4x
6 mm
16
7x
17
1x
22
1x
23
1x
Sat3Play Point&Play Manual - page 7
Version 1.0 - January 2008
Introduction
Material provided in the box: list
Number on figure
Item
Quantity
1
Masthead
1
2
Brackets
2
3
Pole clamps
2
4
iLNB clamp
1
5
iLNB (Interactive Low Noise
Block downconverter)
1
6
Screw 50 mm M6
2
7
Screw 20 mm M6
1
8
Screw 16 mm M6
4
9
Hex key
1
10
Cap
1
11
F-connectors
4
12
Parker Screw
1
13
Feed arm
1
14
Satellite dish
1
15
Nut M8
4
16
Nut M6
7
17
Grounding nut
1
18
Headphone
1
19
Point&Play Tool
1
20
IPmodem
1
21
Coax cable
1
22
Power adapter
1
23
Network (ethernet) cable
1
CD and documentation
Version 1.0 - January 2008
Sat3Play Point&Play Manual - page 8
Introduction
Material you need to provide yourself
-
A solid base for the antenna;
An antenna pole;
A Phillips head screwdriver PZ2;
Ppen-end spanners of 10, 11 and 13mm;
Tie-wraps;
A cutter;
A compass;
A spirit level;
A grounding cable;
This cable needs to meet the following specifications: UL style 1007/1569, PVC insulated, 300V,
80°C (C.S.A. Type TR-64) 18AWG, Yellow/Green attached to 4,3 mm insulation and 5,0 mm
non-insulation supported ring terminal.
- Geographical pointing data, available in the Antenna Pointing Information document.
Antenna pole requirements
-
The antenna pole must be installed on a solid base.
The pole must be made of galvanized steel.
Minimum diameter: 40 mm.
Maximum diameter: 70 mm.
The antenna pole needs to be grounded according to local regulations. Consult with a licensed
electrician if in any doubt.
Sat3Play Point&Play Manual - page 9
Version 1.0 - January 2008
Introduction
Installation overview
The image below shows the results of a typical installation as described in the following pages.
Please read these pages carefully to perform the installation.
Satellite
Power supply
with adapter
iLNB
IPmodem
Antenna
Rx cable
Tx cable
Ethernet cable
Version 1.0 - January 2008
Sat3Play Point&Play Manual - page 10
Setting up the antenna
2 Setting up the antenna
Assuming you already have a solid base (made of concrete, or firmly attached to a wall), installing
the antenna includes the following steps:
Step 1 - Choosing a suitable location (page 12)
Step 2 - Mounting the antenna pole (page 13)
Step 3 - Mounting the antenna (page 14)
Step 4 - Fixing the antenna cabling (page 21)
Step 5 - Pointing the antenna (page 29)
Sat3Play Point&Play Manual - page 11
Version 1.0 - January 2008
Setting up the antenna
Step 1 - Choosing a suitable location
Outdoors: antenna
- When setting up the antenna base, take account of the orientation the antenna must have.
Orientation data are available in the Antenna Pointing Information document.
- The antenna needs a clear view towards the satellite (without any buildings, trees... that may
hinder the signal).
- To connect the antenna to the IPmodem, you will use coax cable. You can use the coax cable
provided in the box or a cable of your choice.
- The coax cable connecting the antenna to the IPmodem must not exceed 30 meters. The coax
cable included in the box is 30 meters long.
About your Sat3Play Terminal
For more information on the Sat3Play Terminal, refer to the section Getting to know your Sat3Play
Terminal in the Manual for Sat3Play terminal (available on the cd included in the box).
Indoors: IPmodem and computer
Put the IPmodem in a dry room.
Indoors, you will need to connect the IPmodem:
- To the antenna (with the coax cable);
- To your computer (with a network cable). You can use the network cable provided in the box
or a cable of your choice (for example if you need a longer cable to connect the IPmodem to
your computer);
- To a wall outlet (with the power adapter provided in the box).
These steps are described further in this document.
Version 1.0 - January 2008
Sat3Play Point&Play Manual - page 12
Setting up the antenna
Step 2 - Mounting the antenna pole
When fixing the antenna pole on the base, use a spirit level to make sure the antenna pole stands
upright.
Sat3Play Point&Play Manual - page 13
Version 1.0 - January 2008
Setting up the antenna
Step 3 - Mounting the antenna
1
Insert the 2 brackets in the masthead (as shown).
2
Use the 2 pole clamps and nuts to attach the masthead to the pole.
- If the pole is low enough, you can first assemble the masthead, brackets and clamps and
slide the assembly over the antenna pole.
- If the pole is too high or does not have an open ending, you will have to fix the masthead
around the pole.
- Do not attach the clamp too tightly as you will need to adjust it later on, but make sure the
clamp is attached tightly enough to prevent it from sliding down the pole.
Version 1.0 - January 2008
Sat3Play Point&Play Manual - page 14
Setting up the antenna
- Make sure the masthead is already pointing in the general direction of the satellite. To do
so, use the pointing data available in the Antenna Pointing Information document.
- Make sure to attach the masthead upright to the pole.
Sat3Play Point&Play Manual - page 15
Version 1.0 - January 2008
Setting up the antenna
3
Attach the dish to the masthead with the appropriate screws and nuts.
Version 1.0 - January 2008
Sat3Play Point&Play Manual - page 16
Setting up the antenna
4
Insert the feed arm in the cut-away at the bottom of the dish and fix the arm with the
appropriate bolts.
Sat3Play Point&Play Manual - page 17
Version 1.0 - January 2008
Setting up the antenna
5
Attach the clamp around the iLNB using the appropriate nut and bolt.
Do not to attach the clamp too tightly as you will need to adjust it later on.
Version 1.0 - January 2008
Sat3Play Point&Play Manual - page 18
Setting up the antenna
6
Slide and click the iLNB clamp into the feed arm.
Sat3Play Point&Play Manual - page 19
Version 1.0 - January 2008
Setting up the antenna
The antenna is mounted. The result should look like the figure below.
Version 1.0 - January 2008
Sat3Play Point&Play Manual - page 20
Setting up the antenna
Step 4 - Fixing the antenna cabling
Fixing the antenna cabling includes the following steps:
- Connecting the F-connectors on the coax cable (page 22)
- Connecting the iLNB to the IPmodem (page 24)
- Grounding the iLNB (page 25)
- Adjusting iLNB polarisation (page 26)
- Connecting the IPmodem to your computer (page 28)
Sat3Play Point&Play Manual - page 21
Version 1.0 - January 2008
Setting up the antenna
Connecting the F-connectors on the coax cable
You will need a cutter (and possibly pliers) to connect the F-connectors. To connect an Fconnectors to a cable:
1 For the outdoor end of the cable, first slide the rubber boots over the coax cable.
outside use
2
1,4cm
Strip the coax cable as shown below. Do not remove the aluminium foil or fold it back.
outside use
1,4cm
3
Strip the coax cable further as shown below.
1,4cm
1cm
4
Fold the wire shielding backwards over the cable jacket.
0,4cm
Version 1.0 - January 2008
Sat3Play Point&Play Manual - page 22
Setting up the antenna
5
Cut away the plastic shield as shown below and screw the F-connector to the wire by hand.
The result should look like the figure below (example showing the indoor end of the cable).
0,4cm
Repeat this procedure for all 4 F-connectors.
Sat3Play Point&Play Manual - page 23
Version 1.0 - January 2008
Setting up the antenna
Connecting the iLNB to the IPmodem
To connect the iLNB (Interactive Low Noise Block downconverter) to the IPmodem:
1 Identify the cables marked RX and TX on the coax cables (these marks are print on the cables
every 50 cm).
2 Put the TX and RX connectors in the appropriate RX and TX jacks on the iLNB.
The outdoor connections need to be waterproof:
- Make sure to use the outdoor connectors (with rubber boots) for the iLNB.
- When the cables are connected, slide the rubber boots over the connectors.
3 Put the indoor TX and RX connectors in the appropriate RX and TX jacks on the IPmodem.
Use an 11 mm spanner to screw the connectors on the IPmodem.
LAN
DC 15V
iLNB
iLNB
TX
RX
Version 1.0 - January 2008
Rx
Tx
RESET
Sat3Play Point&Play Manual - page 24
Setting up the antenna
Grounding the iLNB
As you will use the antenna for internet access, you need to ground the antenna. To do so, you
need a grounding wire (for grounding wire specifications, see page page 9) and a bolt fitting the
grounding connection on the masthead. The iLNB has a stud that you can use to ground it.
To ground the iLNB:
1 Connect the grounding wire to the stud on the iLNB.
2 Connect the wire to the grounding connection on the masthead.
Rx
Sat3Play Point&Play Manual - page 25
Tx
Version 1.0 - January 2008
Setting up the antenna
Adjusting iLNB polarisation
Polarisation of the iLNB allows correct data reception and transmission.
To adjust iLNB polarisation:
1 Check the scaling of your iLNB. Depending on the type of iLNB you have, the scaling of the
iLNB may range:
- from 0 to 180°
- from -35 to +35°
120
40 130
110 100 90 80 70 60 50 40
30
iLNB side view
feed scale
Version 1.0 - January 2008
15 25 35
5
5
35 25 15
0 120
40 13
110 100 90 80 70 60 50 40
30
angle
marker
polarization
scale
Sat3Play Point&Play Manual - page 26
Setting up the antenna
2
3
4
In the Antenna Pointing Information document, look up the value that applies to the city
closest to your position.
Set the iLNB to the angle you have found in the document.
Lock the iLNB in the clamp with the securing bolt available on the iLNB.
Sat3Play Point&Play Manual - page 27
Version 1.0 - January 2008
Setting up the antenna
Connecting the IPmodem to your computer
1
2
Plug the network cable in the IPmodem’s and your computer’s ethernet ports.
You can use the network cable provided in the box or a cable of your choice.
Use the power adapter provided in the box to connect the IPmodem to a wall outlet.
The result should look like the figure below.
DC 15V LAN
iLNB
TX
iLNB
RX
RESET
to antenna
Version 1.0 - January 2008
Sat3Play Point&Play Manual - page 28
Setting up the antenna
Step 5 - Pointing the antenna
Pointing the antenna includes the following steps:
- Setting the IPmodem software to pointing mode (page 30)
- Using the Point&Play Tool (page 32)
- Rough pointing: horizontal (azimuth) (page 36)
- Rough pointing: vertical (elevation) (page 34)
- Fine-pointing the antenna (page 39)
- Checking the antenna pointing (page 42)
- Confirming antenna pointing in the software (page 44)
Warning
Do not stand in front of the iLNB or the antenna dish during pointing. Keep the space between the
iLNB and the antenna dish clear.
Sat3Play Point&Play Manual - page 29
Version 1.0 - January 2008
Setting up the antenna
Setting the IPmodem software to pointing mode
Before you start
The procedure below assumes:
- that your computer is DHCP enabled;
- that you will connect a single computer to the IPmodem.
If this is not the case or if you have another configuration, you will find more information in the
Termincal User manual on the cd, in Appendixes A (Local Network Configuration) and E (Changing
your IP settings).
Before fine-pointing the antenna, you need to access the status page of the IPmodem.
1 Make sure the IPmodem is turned on and properly connected to your computer (with a
network cable).
2 On your computer, start your internet browser (for example, Internet Explorer, Mozilla Firefox,
Opera, Safari...).
The status page is located on the IPmodem itself. You do not need an internet connection to
access this page.
3 Type 192.168.1.1 in the address bar of the browser and press Enter.
The status page opens.
4 Depending on your situation:
- If the page contains a list with more than one pointing carrier, keep the preselected carrier.
If pointing fails during the procedure, you will need to select the other pointing carrier in
the list and restart the entire procedure.
- If the satellite has only one pointing carrier, you will not see this list.
5
Click the Start Pointing button.
You can now start pointing the antenna.
Version 1.0 - January 2008
Sat3Play Point&Play Manual - page 30
Setting up the antenna
Note
Whenever you redo the pointing procedure and access the IPmodem software, the button will be
labelled Restart Pointing instead of Start pointing.
Sat3Play Point&Play Manual - page 31
Version 1.0 - January 2008
Setting up the antenna
Using the Point&Play Tool
The Point&Play Tool will help you point the antenna correctly. During the pointing procedure, the
Point&Play Tool can produce various sounds, each having a specific meaning described below. You
will thus need to put on the headphone whenever needed during the pointing procedure.
Correct tone
The high uninterrupted tone means the antenna points correctly towards the satellite.
Possible tones are:
Very low uninterrupted tone
The antenna is not pointing to a satellite and has not been pointing to the correct satellite yet.
Low uninterrupted tone
The antenna points to a wrong satellite and receives the strongest signal so far.
Higher tone
The antenna points to the correct satellite and receives the strongest signal so far.
Higher interrupted tone
- The antenna points to the correct satellite and receives the strongest signal so far.
- The antenna only points to the correct satellite.
- As soon as you hear this tone, you are sure that the antenna points to the correct satellite.
High uninterrupted tone (correct tone)
The antenna points to the correct satellite and is receiving the strongest signal possible: you have
the optimal pointing position.
Version 1.0 - January 2008
Sat3Play Point&Play Manual - page 32
Setting up the antenna
Setting up the Point&Play Tool
To
1
2
3
set up the Point&Play Tool:
Connect the headphone to the appropriate port of the Point&Play Tool.
Remove the TX connector from the iLNB and connect it to the Point&Play Tool.
Make sure the Point&Play Tool is turned on and the volume is high enough.
LAN
DC 15V
iLNB
iLNB
TX
RX
Rx
Tx
RESET
Sat3Play Point&Play Manual - page 33
Version 1.0 - January 2008
Setting up the antenna
Rough pointing: vertical (elevation)
Important notes
- The procedures relating to rough horizontal and vertical pointing are described below in a
sequential way. In reality, you will have to perform these two procedures simultaneously.
- Whenever the procedure tells you to loosen a securing bolt or nut, slacken it just enough to
allow the corresponding element to move freely.
- While performing this vertical rough pointing, you will need to hold the antenna to prevent it
from inadvertently losing its position.
1
In the Antenna Pointing Information document, first check the elevation for the city
closest to your location.
Elevation
Version 1.0 - January 2008
Sat3Play Point&Play Manual - page 34
Setting up the antenna
2
Loosen securing bolts (1) and (2).
10
1
20
E
E
30
40
50
60
3
2
3
3
4
5
Use the hex key to rotate the eccentric (3) until the letters E on the eccentric and the
masthead point towards each other, as shown in the figure above.
While keeping the eccentric in this position (with the hex key), set the dish to the elevation
you found in the document. Bolt (2) indicates the elevation. In the figure above, the elevation
is set to 49°.
You can now release the eccentric.
Secure bolts (1) and (2).
It is recommended not to secure the eccentric (as you may damage it by doing so).
Sat3Play Point&Play Manual - page 35
Version 1.0 - January 2008
Setting up the antenna
Rough pointing: horizontal (azimuth)
3
A
A
To start horizontal pointing:
1 Loosen the lock bolts (1) and (2) of the eccentric (3).
1
4
2
2
3
4
Rotate the eccentric (3) with the hex key until the letters A on the eccentric and the masthead
point towards each other, as shown in the figure above.
Secure the lock bolts (1) and (2).
Loosen the bracket nuts (4).
You can now move the antenna horizontally. Set the antenna to the azimuth the Antenna
Pointing Information document mentions for the city closest to your location.
Version 1.0 - January 2008
Sat3Play Point&Play Manual - page 36
Setting up the antenna
Azimuth
4
5
6
Move the dish horizontally and vertically until you hear the highest possible continuous high
pitch tone.
Make sure to position the antenna in the middle of this tone range.
As soon as you hear this continuous high pitch tone, secure the bracket nuts (4).
It is recommended not to secure the eccentric (as you may damage it by doing so).
Sat3Play Point&Play Manual - page 37
Version 1.0 - January 2008
Setting up the antenna
Persistent low pitch
If you keep hearing a low pitch tone, this might indicate one of the following issues:
- Check if you have a clear line of sight, and no building, tree or other obstruction is blocking
the path between the antenna and the satellite.
- The pointing carrier selected in the IPmodem status page is not correct.
If so, on the IPmodem status page on your computer:
- Click Pointing completed.
- Click Restart Pointing.
- Select the other pointing carrier in the list and restart the entire pointing procedure.
- The antenna might be pointing to the wrong satellite.
If so, you need to
- repoint the antenna a few degrees to the left or right until you receive a signal;
- perform the horizontal and vertical steps above until the antenna is pointing correctly
towards the satellite.
Version 1.0 - January 2008
Sat3Play Point&Play Manual - page 38
Setting up the antenna
Fine-pointing the antenna
If the Point&Play Tool produces a persistent high pitch tone, you can skip this section and move to
section “Checking the antenna pointing” on page 42.
If you do not hear a continuous high pitch tone after securing the bolts, the antenna will probably
have moved slightly. You then need to fine-point the antenna.
Important note
The procedures relating to vertical and horizontal fine-pointing are described below in a sequential
way. In reality, you will have to perform these procedures simultaneously.
Sat3Play Point&Play Manual - page 39
Version 1.0 - January 2008
Setting up the antenna
Fine-pointing: vertical
1
Loosen bolt (1).
10
1
20
E
E
30
40
50
60
3
2
3
2
3
4
Rotate the eccentric (3) until the Point&Play Tool produces a continuous high pitch tone.
Secure bolt (1).
Place the cap on bolt (2) and secure it with the appropriate nut.
Version 1.0 - January 2008
Sat3Play Point&Play Manual - page 40
Setting up the antenna
Fine-pointing: horizontal
A
Loosen the horizontal lock bolt (1) and (2).
3
A
1
1
4
2
2
3
Rotate the eccentric (3) until the Point&Play Tool produces a continuous high pitch tone.
Secure the horizontal lock bolts (1) and (2).
Sat3Play Point&Play Manual - page 41
Version 1.0 - January 2008
Setting up the antenna
Checking the antenna pointing
Perform the following checks to make sure the antenna will resist external movements (wind...):
1 Make sure all bolts are tightly secured.
2 Shortly place your hand between the iLNB and the dish. As soon as you remove your hand,
you should hear the continuous high pitch tone again.
3 Exerce some pressure on the antenna to make it move about 3 cm to the left, right and
upwards, then release it.
If the antenna is still pointing correctly, you will hear the continuous high pitch tone again. If
not, repeat the pointing procedure from the section Rough pointing: horizontal
(azimuth) (page 36) until you obtain optimal signal reception and transmission.
4 When the antenna is pointing correctly, the status lights next to Modem State and
Demodulator on the IPmodem status page will be green, as shown in the following picture.
Troubleshouting
If you keep having problems with the installation, refer to the Terminal User Manual on the cd
(Appendix C - Troubleshooting Guide).
Troubleshooting the IPmodem software
If the content of the IPmodem status page does not change anymore, refresh the page manually
(Internet Explorer: menu File > Refresh; Mozilla Firefox: menu View > Reload...)
If the status page does not reload, reboot your IPmodem as described in the Terminal User
Manual.
Version 1.0 - January 2008
Sat3Play Point&Play Manual - page 42
Setting up the antenna
Finishing installation
1
1
2
3
When pointing is completed, you can turn off the Point&Play Tool
Remove the Tx cable from the Point&Play Tool and connect it to the iLNB.
Slide the rubber boots over the connectors.
Use tie-wraps to attach the cables to the feed arm.
Make sure to leave some slack on the cables.
The result should look like the figure below.
Rx
Sat3Play Point&Play Manual - page 43
Tx
Version 1.0 - January 2008
Setting up the antenna
Confirming antenna pointing in the software
1
Back to your computer, in the status page of the IPmodem, click the Pointing Completed
button.
You are now ready to surf the internet.
Version 1.0 - January 2008
Sat3Play Point&Play Manual - page 44