1
Replacing the Photomultiplier Tube (PMT)
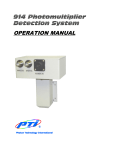
Caution! To avoid possible damage to the sensitive photomultiplier tube, it is suggested
that the tube be kept in darkness as much as possible until it is installed in its socket and
the housing is closed. It is best to work in a darkened room, as a light shock will increase
the background count of a PMT.
Turn the power switch off and disconnect the power supply and signal lines.
1. Loosen completely, but do not remove the four semi-captive screws from the housing
cover and take the lid off.
2. Remove the PMT shroud and carefully pull the tube downward out of its socket.
3. Plug the new tube into the socket.
4. Replace the shroud and close the housing lid tightly. Check that the connectors for
the cables that run from the PC board to the housing lid are secure before closing the
unit.
5. Reconnect the power supply and signal lines.
Caution! To avoid possible damage to the sensitive photomultiplier tube, it is suggested
that the tube be kept in darkness as much as possible until it is installed in its socket and
the housing is closed.
Other PTI Systems
Information about other Photon Technology systems can be found in appropriate
hardware manuals.
214