1
SN8 C Studio
User’s Manual
SN8 C STUDIO
USER’S MANUAL
V1.0
SONIX reserves the right to make change without further notice to any products herein to improve
reliability, function or design. SONIX does not assume any liability arising out of the application
or use of any product or circuit described herein; neither does it convey any license under its
patent rights nor the rights of others. SONIX products are not designed, intended, or authorized
for us as components in systems intended, for surgical implant into the body, or other applications
intended to support or sustain life, or for any other application in which the failure of the SONIX
product could create a situation where personal injury or death may occur. Should Buyer purchase
or use SONIX products for any such unintended or unauthorized application. Buyer shall
indemnify and hold SONIX and its officers, employees, subsidiaries, affiliates and distributors
harmless against all claims, cost, damages, and expenses, and reasonable attorney fees arising out
of, directly or indirectly, any claim of personal injury or death associated with such unintended or
unauthorized use even if such claim alleges that SONIX was negligent regarding the design or
manufacture of the part.
SONiX TECHNOLOGY CO., LTD
Page1
SN8 C Studio
User’s Manual
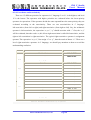
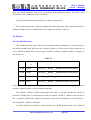
AMENDMENT HISTORY
VER 1.0
Date
14/02/2007
Description
V1.0 first issue
SONiX TECHNOLOGY CO., LTD
Page2
SN8 C Studio
User’s Manual
Table of Content
TABLE OF CONTENT................................................................................................................................................. 3
PART1 INTEGRATED DEVELOPMENT ENVIRONMENT ................................................................................. 6
1 INTRODUCTION ...................................................................................................................................................... 6
1.1 SYSTEM OVERVIEW ........................................................................................................................................... 6
1.1 SYSTEM REQUIREMENTS ......................................................................................................................................... 7
2 INSTALLATION ........................................................................................................................................................ 8
2.1 HARDWARE INSTALLATION ..................................................................................................................................... 8
2.2 SOFTWARE INSTALLATION ...................................................................................................................................... 8
3 MENUS AND TOOL BUTTONS ............................................................................................................................ 12
3.1 FILE MENU AND TOOLBAR ................................................................................................................................... 12
3.2 EDIT MENU AND TOOLBAR .................................................................................................................................. 14
3.3 VIEW MENU AND TOOLBAR ................................................................................................................................. 16
3.4 BUILD MENU AND TOOLBAR ................................................................................................................................ 17
3.5 DEBUG MENU AND TOOLBAR ............................................................................................................................... 18
3.6 TOOL MENU ......................................................................................................................................................... 21
3.7 WINDOW MENU ................................................................................................................................................... 21
3.8 HELP MENU.......................................................................................................................................................... 21
4 WINDOWS OVERVIEW ........................................................................................................................................ 22
4.1 THE WORKSPACE WINDOW ................................................................................................................................... 23
4.1.1 Project View..................................................................................................................................................23
4.1.2 File View.......................................................................................................................................................24
4.2 OUTPUT WINDOW ................................................................................................................................................ 27
4.2.1 Build Message Window ................................................................................................................................27
4.2.2 Debug Message Window ..............................................................................................................................28
4.2.3 Find in Files Window ...................................................................................................................................28
4.2.4 Popup Menu for Message Window...............................................................................................................28
4.3 DEBUG VIEW ........................................................................................................................................................ 29
4.3.1 Watch Window ..........................................................................................................................................29
4.3.2 Variable Window..........................................................................................................................................31
4.3.3 Memory Window ..........................................................................................................................................31
4.3.4 Register Window...........................................................................................................................................33
5 DESIGNING PROJECT.......................................................................................................................................... 34
5.1 PROJECT MANAGE ................................................................................................................................................ 34
5.1.1 Create a New Project ...................................................................................................................................34
5.1.2 Open and Close a Project ............................................................................................................................36
5.2 MANAGE THE SOURCE FILE .................................................................................................................................. 36
5.2.1 Creating a New Source File .........................................................................................................................36
5.2.2 Add a Source file ..........................................................................................................................................38
5.2.3 Delete a Source File.....................................................................................................................................38
5.3 CONFIGURE THE PROJECT .................................................................................................................................... 39
5.3.1 General setting .............................................................................................................................................39
5.3.2 Chip Setting..................................................................................................................................................40
5.3.3 Directory Setting ..........................................................................................................................................41
5.3.4 Assembler Setting .........................................................................................................................................41
5.3.5 Linker Setting ...............................................................................................................................................43
5.3.6 Code Option .................................................................................................................................................43
5.4 COMPILE THE PROJECT ........................................................................................................................................ 44
SONiX TECHNOLOGY CO., LTD
Page3
SN8 C Studio
User’s Manual
5.4.1 Compiling Source Files................................................................................................................................44
5.4.2 Linking .........................................................................................................................................................45
5.4.3 Make.............................................................................................................................................................46
5.5 BUILD THE PROJECT ............................................................................................................................................. 46
5.6 DEBUG THE PROJECT ............................................................................................................................................ 47
6 QUICK START......................................................................................................................................................... 49
6.1 CREATE A NEW WORKSPACE ................................................................................................................................ 49
6.2 CREATE A NEW PROJECT ...................................................................................................................................... 49
6.3 CREATE A NEW SOURCE FILE ............................................................................................................................... 53
6.4 EDIT PROGRAM .................................................................................................................................................... 53
6.5 COMPILING AND BUILING ..................................................................................................................................... 62
6.6 DEBUGGING.......................................................................................................................................................... 63
6.7 SETTING BREAKPOINTS ........................................................................................................................................ 65
6.8TRACE THE PROGRAM ........................................................................................................................................... 65
PART2 PROGRAMMING LANGUAGES AND DEVELOPMENT TOOLS ....................................................... 67
7 ASSEMBLER ........................................................................................................................................................... 67
7.1 ASSEMBLY LANGUAGE ......................................................................................................................................... 67
7.1.1 Label.............................................................................................................................................................67
7.1.2 Operand........................................................................................................................................................68
7.1.3 Comments.....................................................................................................................................................69
7.1.4 Chip Reserved Word.....................................................................................................................................70
7.1.5 Number Expression ......................................................................................................................................70
7.1.6 Arithmetic Operation....................................................................................................................................70
7.2 ASSEMBLY INSTRUCTIONS .................................................................................................................................... 71
7.2.1 Program Start and End.................................................................................................................................71
7.2.2 User Define the Title.....................................................................................................................................72
7.2.3 Variable expression ......................................................................................................................................72
7.2.4 Section Definition.........................................................................................................................................75
7.2.5 Definition of Byte Data ................................................................................................................................77
7.2.6 Definition of Programming Data .................................................................................................................78
7.2.7 Bit Arithmetic Function ................................................................................................................................79
7.3 ASSEMBLY DIRECTIVES ........................................................................................................................................ 79
8 SN8 C LANGUAGE ................................................................................................................................................. 83
8.1 OVERVIEW ............................................................................................................................................................ 83
8.1.1 Structure of C Source Code ..........................................................................................................................83
8.1.2 Character Set of C Language.......................................................................................................................83
8.1.3 Glossaries of C Language ............................................................................................................................84
8.2 DATA TYPE ........................................................................................................................................................... 86
8.2.1 Constants and Variables...............................................................................................................................87
8.2.2 Data Storage Type and Structures ................................................................................................................92
8.2.3 Bank Configuration ......................................................................................................................................94
8.3 BASIC OPERATORS AND EXPRESSIONS .................................................................................................................. 95
8.3.1 Arithmetic Operators and Expressions.........................................................................................................95
8.3.2 Relational Operators and Expressions.........................................................................................................96
8.3.3 Logical Operators and Expressions .............................................................................................................96
8.3.4 Bitwise Operators.........................................................................................................................................97
8.3.5 Assignment Operators ..................................................................................................................................97
8.3.6 Conditional Operator...................................................................................................................................99
8.3.7 Comma Operator..........................................................................................................................................99
8.3.8 Pointer Operators ......................................................................................................................................100
8.3.9 The Sizeof Operator....................................................................................................................................100
8.3.10 Special Operators.....................................................................................................................................100
8.3.11 Precedence and Associativity ...................................................................................................................101
8.4 PROGRAM FLOW CONTROL ................................................................................................................................ 102
SONiX TECHNOLOGY CO., LTD
Page4
SN8 C Studio
User’s Manual
8.4.1 Sequential Structure ...................................................................................................................................102
8.4.2 Conditional Structure .................................................................................................................................103
8.4.3 Loop Structure ............................................................................................................................................ 113
8.5 ARRAY ................................................................................................................................................................ 121
8.5.1 Array Types.................................................................................................................................................121
8.5.2 The Form of Arrays ....................................................................................................................................123
8.6 POINTER ............................................................................................................................................................. 125
8.6.1 RAM/ROM Pointer.....................................................................................................................................125
8.6.2 Generic Pointer..........................................................................................................................................126
8.7 FUNCTIONS ......................................................................................................................................................... 127
8.7.1 Function Definition ....................................................................................................................................127
8.7.2 Argument Passing.......................................................................................................................................132
8.7.3 The Variable Scope.....................................................................................................................................136
8.7.4 The parameters and Global Variables........................................................................................................147
8.8 THE APPLICATION OF STRUCTURES AND UNIONS IN SN8 C PROGRAMMING ....................................................... 149
8.8.1 Structures....................................................................................................................................................149
8.8.2 Unions ........................................................................................................................................................154
8.9 INTERRUPTIONS ............................................................................................................................................... 159
8.9.1 The Definition of Interruption Functions ...................................................................................................159
8.9.2 Interruption Analysis..................................................................................................................................163
8.9.3 The Interruption Function Structure...........................................................................................................163
8.10 BIT OPERATION ................................................................................................................................................ 165
8.10.1 Bit Definition............................................................................................................................................166
8.10.2 Bitwise Operators.....................................................................................................................................169
8.10.3 Bit Comparison Application in the Flowing Control................................................................................172
8.11 PREPROCESSORS ............................................................................................................................................... 174
8.11.1 Overview...................................................................................................................................................174
8.11.2 Macro Definition ......................................................................................................................................175
8.11.3 Files Include .............................................................................................................................................178
8.11.4 Conditional Compile.................................................................................................................................179
8.12 EMBEDDED ASSEMBLY ..................................................................................................................................... 180
8.12.1 How to embed..........................................................................................................................................181
8.12.2 The Transference in Embedded Assembly Programmes ...........................................................................182
8.13 OTHER OPTIONS ............................................................................................................................................... 185
8.14 CUSTOMIZED C LIBRARY.................................................................................................................................. 186
8.15 REFERENCES .................................................................................................................................................... 190
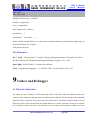
9 LINKER AND DEBUGGER ................................................................................................................................. 190
9.1 WHAT THE LINKER DOES .................................................................................................................................... 190
9.2 LINKER OPTIONS ................................................................................................................................................ 191
9.3 FUNCTIONALITY ................................................................................................................................................. 192
9.3.1 Linker .........................................................................................................................................................192
9.3.2 Librarian ....................................................................................................................................................193
9.3.3 Dump Utility...............................................................................................................................................194
9.4 MAP FILE FORMAT ............................................................................................................................................. 195
9.5 ERROR AND WARNING MESSAGES ...................................................................................................................... 196
9.6 DEBUGGER ......................................................................................................................................................... 196
9.7 SINGLE STEP....................................................................................................................................................... 197
9.8 BREAKPOINTS..................................................................................................................................................... 197
10 SIMULATOR........................................................................................................................................................ 199
10.1 SOFTWARE SIMULATION .................................................................................................................................. 199
FAQS........................................................................................................................................................................... 200
SONiX TECHNOLOGY CO., LTD
Page5
SN8 C Studio
User’s Manual
Part1 Integrated Development Environment
1 Introduction
1.1 System overview
The SN8 C Studio is Windows-based software development platform that combines a robust
editor, project manager, and make facility. This article explains how to setup an operating
environment.
The SN8 C STUDIO, is a high performance integrated development environment designed
around SONiX 8-bit MCU devices. Incorporated within the system are the hardware and software
tools necessary for user’s rapid applications SONiX 8-bit serial MCU. The key components are
the SN8 C Compiler, which provides a powerful C Compiler; SN8 ICE, which provides in circuit
emulating. The third are the SN8 OTP writers which provide the user with all the tools required to
run your program in real time.
As for the software, the SN8 C Studio provides a friendly workbench to ease the process of
user’s application, by integrating all of the software tools, such as Editor, Assembler, Linker,
library and symbolic debugger into a user friendly Windows based environment. All fundamental
functions of the SN8-ICE hardware are valid for the simulator. More detailed information on the
SN8 C Studio_SN8_1.00 is contained within this manual.
SONiX provides regular amendments service packs. These Service Packs, which can be
downloaded from the SONiX website.
There lists some of the special features provided by the SN8 C STUDIO.
Emulation
Real-time program instruction emulation.
Hardware
Easy installation and usage.
Breakpoint mechanism.
Software
SONiX TECHNOLOGY CO., LTD
Page6
SN8 C Studio
User’s Manual
Windows based software utilities.
Source program level debugger.
Workbench for multiple source program files (C source program file or assembly source program
project).
All tools are included for the development, debug, evaluation and generation of the final
application program code.
1.1 System requirements
- PC with Pentium-II or compatible processor
- OS: Windows-98, Windows 2000, Windows XP
- Memory: 16 MB RAM minimum
- HD: 20 MB free disk space
SONiX TECHNOLOGY CO., LTD
Page7
SN8 C Studio
User’s Manual
2 Installation
2.1 Hardware Installation
Plug the power adapter into the power connector of the ICE;
Connect the target board to the SN8-ICE by using the flat cable;
Connect the ICE to the host machine using the printer cable;
The LED on the ICE should now be lit, if not, there is an error and your dealer should be
contacted.
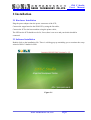
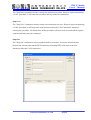
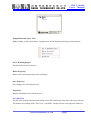
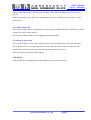
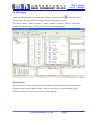
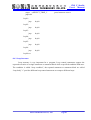
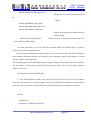
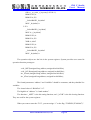
2.2 Software Installation
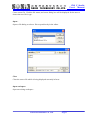
Double click on the installation file. There is a dialog pop-up reminding you to continue the setup
wizard of SN8 C Studio for SN8:
Figure 2-1
SONiX TECHNOLOGY CO., LTD
Page8
SN8 C Studio
User’s Manual
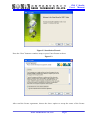
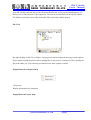
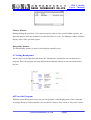
Figure2-2 Installation Wazard
Press the “Next” button to continue setup or press Cancel button to abort.
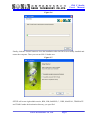
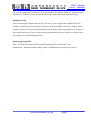
Figure2-3
After read the license agreement, choose the above option to accept the terms of the license
SONiX TECHNOLOGY CO., LTD
Page9
SN8 C Studio
User’s Manual
agreement and click the “Next” button;
Specify the path you want to install the development system software and click the Next Button;
Figure 2-4
Click the “Install” button to begin installation
Figure 2-5
During the installation processing, the dialog below will be shown to display users the status:
SONiX TECHNOLOGY CO., LTD
Page10
SN8 C Studio
User’s Manual
Figure 2-6
Finally, click the "Finish" button to close the installation after the IDS is successfully installed and
restart the computer. Then you can run SN8 C Studio now.
Figure 2-7
SETUP will create eight subdirectories, BIN, LIB, SAMPLE, C, CHIP, MANUAL, TEMPLATE
and TOOLS under the destination directory you specified.
SONiX TECHNOLOGY CO., LTD
Page11
SN8 C Studio
User’s Manual
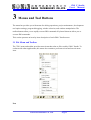
3 Menus and Tool Buttons
The menu bar provides you with menus for editing operations, project maintenance, development
tool option settings, program debugging, window selection, and window manipulation. The
toolbar buttons allow you to rapidly execute IDS commands. Keyboard shortcuts allow you to
execute IDS commands.
This section presents an item-by-item description of each SN8 C Studio menu.
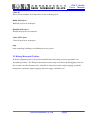
3.1 File Menu and Toolbar
The "File" menu and toolbar provides menu items that relate to files used by SN8 C Studio. To
conform with other applications, this menu also contains a preferences item and an exit menu
item.
New
SONiX TECHNOLOGY CO., LTD
Page12
SN8 C Studio
User’s Manual
Create a new file. Click the file menu, and a new dialog box will be displayed for the user to
choose the new file’s type.
Open...
Opens a file dialog to select a file to open directly in the editor.
Close
Close the source file which is being displayed currently in focus.
Open workspace
Open an existing workspace .
SONiX TECHNOLOGY CO., LTD
Page13
SN8 C Studio
User’s Manual
Save Workspace
Save the current workspace.
Close Workspace
Close the current workspace.
Save
Write the active windows data to the active file.
Save All
Write all windows data to the corresponding opened files.
Save File As...
Open a file dialog to allow entry of a new file name with which to save the active file. This will
rename the opened file.
Print...
Display the "Print" dialog for printing of an editor file.
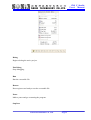
3.2 Edit Menu and Toolbar
SONiX TECHNOLOGY CO., LTD
Page14
SN8 C Studio
User’s Manual
Undo
Cancel the previous editing operation.
Redo
Cancel the previous "Undo" operation.
Cut
Remove the selected text from the file and place it onto the clipboard.
Copy
Place a copy of the selected text onto the clipboard.
Paste
Paste the clipboard information to the present insertion point.
Delete
Delete the selected text.
Find
SONiX TECHNOLOGY CO., LTD
Page15
SN8 C Studio
User’s Manual
Search the specified word from the editor active buffer.
Find In Files
Search the specified word from specified directory.
Replace
Replace the specified source word with the destination word in the editor active buffer.
Select All
Select all text in the active file.
Configure
Configure the text color.
3.3 View Menu and Toolbar
The "View" menu provides users the following commands to control the window screen:
Toolbars
Display the toolbar information on the window. The toolbar contains 5 groups of buttons whose
function is the same as that of the command in each corresponding menu item. When the mouse
cursor is placed on a toolbar button, the corresponding function name will be displayed next to the
button. If the mouse is clicked, the command will be executed.
Status bar
SONiX TECHNOLOGY CO., LTD
Page16
SN8 C Studio
User’s Manual
Display the status bar information on the window.
Workspace
Open or close Workspace Window.
Message
Open or close Output Window.
Debug
Open or close some windows about debugging.
3.4 Build Menu and Toolbar
The build menu provides the user several commands to build the source file and the build toolbar
for quick building.
Compile Current File
Compile the active file for the working project.
Build Project
Build the working project.
Rebuild Project
Delete all the output files and then build the working project.
SONiX TECHNOLOGY CO., LTD
Page17
SN8 C Studio
User’s Manual
Clean all
Delete all intermediate and output files for the working project.
Build All Projects
Build all projects in workspace.
Rebuild All Projects
Rebuild all projects in workspace.
Clean All Projects
Clean all projects in workspace.
Stop
Stop compiling, building or rebuilding the active project.
3.5 Debug Menu and Toolbar
In the development process, the repeated modification and testing of source programs is an
inevitable procedure. The IDS provides many tools not only to facilitate the debugging work, but
also to reduce the development time. Included are functions such as single stepping, symbolic
breakpoints, automatic single stepping, and trace trigger conditions, etc.
SONiX TECHNOLOGY CO., LTD
Page18
SN8 C Studio
User’s Manual
Debug
Begin to debug the active project.
Exit Debug
Stop debugging.
Run
Run the executable file.
Restart
Reset registers and ready to run the executable file.
Pause
Make a pause and go on running the program.
Step Into
SONiX TECHNOLOGY CO., LTD
Page19
SN8 C Studio
User’s Manual
The "Step Into" command executes exactly one instruction at a time. However upon encountering
a CALL procedure, it will enter the procedure and stop at the first instruction.
Step Over
The "Step Over" command executes exactly one instruction at a time. However upon encountering
a CALL procedure, it will stop at the next instruction after the CALL instruction instead of
entering the procedure. All instructions of this procedure will have been executed and the register
contents and status may have changed.
Step Out
The "Step Out" command is only used when inside a procedure. It executes all instructions
between the current point and the RET instruction (including RET), and stops at the next
instruction after the CALL instruction.
SONiX TECHNOLOGY CO., LTD
Page20
SN8 C Studio
User’s Manual
Run to Cursor
Run to the cursor line and make a pause.
Animate Step Into
Run the program step by step automatically and the same to the subroutine.
Animate Step Over
Run the program step by step automatically but don’t run into the subroutine.
Animate Stop
Stop running the program step by step.
Breakpoints
Choose this command from the "Debug" menu to specify where you want to set breakpoints. For
each breakpoint, you can click "Condition" button to configure skip times.
3.6 Tool Menu
Customize
Customize tools. You can customize displayed tool bars, bit buttons, user tools and hot keys.
Preferences
Provide miscellaneous settings and format settings
3.7 Window Menu
The Window menu provides several methods to arrange editor windows opened at present.
3.8 Help Menu
The Help menu help you to know information about this software and how to use it.
SONiX TECHNOLOGY CO., LTD
Page21
SN8 C Studio
User’s Manual
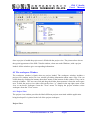
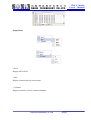
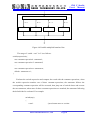
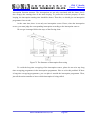
4 Windows Overview
This chapter introduces the structure of SN8 C Studio’s main windows and how to find your way
around it. When a project has not been loaded into SN8 C Studio, the project area in the centre is
left blank. Only the menus, toolbar and status bar are visible. Menus and toolbar buttons that are
to control the project will be disabled. The following picture shows a typical appearance of SN8 C
Studio when a project has not been loaded.
SN8 C Studio Opened Without a Project Loaded
SN8 C Studio Layout Overview
SONiX TECHNOLOGY CO., LTD
Page22
SN8 C Studio
User’s Manual
Once a project is loaded the project area is filled with the project view. The picture above shows
the typical appearance of the SN8 C Studio window, when run under Windows, with a project
loaded. All the windows give corresponding information.
4.1 The workspace Window
The workspace window is blank when no project loaded. The workspace window includes a
project view window and a file view window providing information about source files. You can
switch them by clicking the buttons about their names at the bottom of this window. They can be
resized or hidden. The user can click and drag the divider that separates it from the work space
area. To hide the project view either click on the close (“x”) button in the top right corner of the
view or un-choose workspace from the "View" menu. To display the project windows select
workspace from the "View" menu.
4.1.1 Project View
The project view window provides the labels different projects associated with the application
being developed. It is placed to the left of the project workspace.
Project View
SONiX TECHNOLOGY CO., LTD
Page23
SN8 C Studio
User’s Manual
Popup Menu on Project View
Right-clicking on the project name, a popup menu will be displayed showing various options:
Set as Working Project
Set this project as active project.
Delete Project(s)
Remove the selected project(s) from workspace.
Save Project(s)
Save changes for selected project(s).
Properties
Display information for selected project.
4.1.2 File View
The file view window lists the names about source files and header files with a directory structure.
The folders are working under "File View", and SN8 C Studio will not create physical folders in
SONiX TECHNOLOGY CO., LTD
Page24
SN8 C Studio
User’s Manual
your disk. Double click the label of the file name then the file will be opened and displayed. At
the top (root) of the structure is the output file. The next level under this root are the file folders.
The folders contain the source files and header files associated with the project.
File View
By right-clicking on the files or folders, a popup menu will be displayed showing various options.
These options include functions such as adding files to the project, creating new files, opening the
file in the editor, etc. The following sections describe these options in detail.
Popup Menu on workspace Item
* Properties
Display information for workspace.
Popup Menu on Project Item
SONiX TECHNOLOGY CO., LTD
Page25
SN8 C Studio
User’s Manual
Set as Working Project
Set the selected project as active one.
New Folder
Create a new folder.
Add Files
Append an existing file to selected project and classify it to the exactly folder.
Delete Project
Remove the selected project.
Save Project
Save changes for the selected project.
Build
Build this project.
Clean
Clean this project.
SONiX TECHNOLOGY CO., LTD
Page26
SN8 C Studio
User’s Manual
Settings
Display a dialog to configure project settings.
Properties
Display information for the selected project.
Reorder Files
Change order for files within the project.
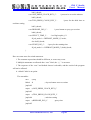
4.2 Output Window
"Output Window" consists of building message window, debug message window and find in files
message window.
4.2.1 Build Message Window
Display detailed messages and results on the building process. When error or warning messages
appear on the window in an easy-to-read format, you may look for them by double click on the
message line, and the errors will be highlighted.
Build Window
SONiX TECHNOLOGY CO., LTD
Page27
SN8 C Studio
User’s Manual
Be careful that this method doesn’t suitable with such source files which haven’t been compiled
successfully.
4.2.2 Debug Message Window
This window is set to show messages about debugging process.
4.2.3 Find in Files Window
When you execute "Find in Files" command from the "Edit" menu, corresponding messages will
appear on this window to show the finding result. This menu let you search some words from
some files specified by users.
4.2.4 Popup Menu for Message Window
Copy
Place a copy of the selected text onto the clipboard.
Select All
Select all text in the active file.
Save As
Save the content into a log file.
SONiX TECHNOLOGY CO., LTD
Page28
SN8 C Studio
User’s Manual
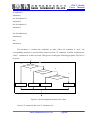
4.3 Debug view
After building successfully, the user may begin to debug the program. The debug view provides a
friendly environment as the following figure for easy debugging. After the application program
has been successfully constructed in the debug mode, the first execution line of the source
program is displayed. The IDS is now ready to accept and execute the debug commands.
Debug Window
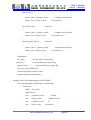
4.3.1 Watch Window
The "Watch" window displays values of selected variables or watched expressions. It is divided
into three parts with different labels so that there is enough space to display variables. The
"Watch" window is only updated when execution is stopped at a breakpoint or exception occurs.
Values that have changed since the last break are highlighted. To add a variable to the "Watch"
window, just select and drag it into the "Watch" window. The variable name, location, address
and value will be shown .The user can change the displayed radix by left click the popup menu.
SONiX TECHNOLOGY CO., LTD
Page29
SN8 C Studio
User’s Manual
Watch Window and Popup Menu
* Add
Append a new expression to watch.
* Delete
Delete an existing item.
* Edit
Edit expression for "Name" column or value for "Value" column.
* Radix
Display value format depended on various radices.
SONiX TECHNOLOGY CO., LTD
Page30
SN8 C Studio
User’s Manual
4.3.2 Variable Window
Variable window displays values of local variables. This feature is meaningful under C source
program. The displayed radix can be changed by left click the popup menu.
Variable Window
Popup Menu
4.3.3 Memory Window
The "Memory" window displays the contents of the program data memory space. The contents of
the RAM window can be modified directly for debugging purpose. All the digits are displayed in
hexadecimal format. You can enter address in "Goto" field to go to the exact memory space. The
field can receive decimal format or hexadecimal format.
Memory Window
SONiX TECHNOLOGY CO., LTD
Page31
SN8 C Studio
User’s Manual
Popup Menu
* Ascii
Display ASCII field.
* Unit
Display content based on various units
* Columns
Display content by various column candidates.
SONiX TECHNOLOGY CO., LTD
Page32
SN8 C Studio
User’s Manual
4.3.4 Register Window
The "Register" window displays all the registers defined in the separated chip selected in the
project. The picture above shows an example of the "Register" window. The contents of the
"Register" window can be modified for debugging. The displayed radix can be changed by left
click the popup menu.
Popup Menu
* Edit
Edit register value.
* Radix
Display in different radices.
SONiX TECHNOLOGY CO., LTD
Page33
SN8 C Studio
User’s Manual
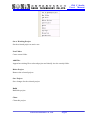
5 Designing Project
This chapter shows you the key steps of manage your project with SN8 C STUDIO. There are
also directions on how to set the system options correctly.
5.1 Project Manage
5.1.1 Create a New Project
SN8 C Studio includes a project manager that makes it easy to design applications. You need to
perform the following steps to create a new project:
Step1
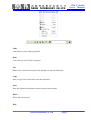
Choose the new command from File menu or toolbar, a "New" dialog box will popup.
Create a New Workspace:
Step 2
Click "Workspace" button to create a workspace file, and name this new workspace. Then, a new
workspace is created successfully and IDS will show the Workspace Window and Output Window.
SONiX TECHNOLOGY CO., LTD
Page34
SN8 C Studio
User’s Manual
Step 3
Repeat the first step.
step 4
Click "Project" button to create a project file, and choose the IC type to be used in the project.
Don’t forget to name your project and locate it correctly. Then this project is bound to the active
workspace.
Otherwise, you can skip the step of creating workspace. You can create a project directly. The IDS
will create a workspace automatically, and binds the project to the workspace.
Create a New Project:
Name
Enter a name you want to create. It has an extension name of " .PRJ".
Location
Click the "…" button to select an existing path.
SONiX TECHNOLOGY CO., LTD
Page35
SN8 C Studio
User’s Manual
Thus you have finished the processing of project setting. Next you should to go deep into enrich
the project established currently.
5.1.2 Open and Close a Project
The SN8 C Studio can work with only one project at a time, which is the active project, at any
time. If a project is to be worked upon, the project should first be opened by using the "Open"
command. Then, insert the project name directly or browse the directories and select a project
name. Use the "Close" command to close the project.
5.2 Manage the Source File
The user can use the "New" command to add or "Edit" command to remove source program files
from the opened project. The order of the source files displayed in the list box, and it is the order
of the input files to the "Linker". The "Linker" processes the input files according to the order of
these files in the box.
The following steps illustrate how to manage your source file:
5.2.1 Creating a New Source File
Choose the new command from "File" menu or "Project" menu
Click "Files" button to create a source file, then this file is bound to the working project.
There are several types of source files for you to choose. Select an appropriate type to create your
new file.
Create a New File
SONiX TECHNOLOGY CO., LTD
Page36
SN8 C Studio
User’s Manual
* Assembly file
Collection of assembly instructions and directives.
* C source file
Collection of C instructions and directives.
* Head file
Symbol declarations shared and/or included by assembly source files.
* Text file
For pure text
* Binary file
For any binary data
Press the source file type you wanted in the dialog box. And then insert the source file name,
choose the drive and directory where the source files are to be located by using the browse
SONiX TECHNOLOGY CO., LTD
Page37
SN8 C Studio
User’s Manual
"Drives" and "Directories" items. Double-click the "OK" button to add the source file to your
project.
When the selected source file has been added, this file name is displayed on the list box of the
project Files.
5.2.2 Add a Source file
You can also right click the working project in workspace window and select "Add Files" to add a
exiting file to the selected project.
The new file will be added to the working project automatically.
5.2.3 Delete a Source File
If you want to delete a source file from the project, click the right button on the file name and
select "Remove File" item. Deleting the source files from the project does not delete the file
actually but refers to the removal of the file information from the project.
There are other two text files IDS supports:
Link file (lk)
Linker script file by which linker locates segments in an order specifically.
SONiX TECHNOLOGY CO., LTD
Page38
SN8 C Studio
User’s Manual
Instrument definition file (def)
Instrument definition.
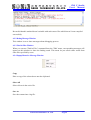
5.3 Configure The Project
Choose the setting command from "Project" menu, and then "Project Setting" window will appear.
5.3.1 General setting
Project Information
Display project type and description.
Primary setting
Choose to enable simulator or ICE otherwise.
Choose to embed debug information to output file.
Choose to set protected attribute to code segment.
Choose to configure target file name. This is not enabled for current version.
log setting
SONiX TECHNOLOGY CO., LTD
Page39
SN8 C Studio
User’s Manual
Set log script file (generated by linker) and log file for LOG directive and "Simulator/ICE" will
store memory log values or register value to the log file. The file name configuration is not
opened to user for current version.
Debug Window
Set variables in watch window case sensitive.
Advanced Setting
This capability is not enabled now.
5.3.2 Chip Setting
From the chip definition, you can select the exact chip you want to use. The "Chip List" gives all
the IC in the serial you’ve chosen .The "Description" displays the choose result.
SONiX TECHNOLOGY CO., LTD
Page40
SN8 C Studio
User’s Manual
5.3.3 Directory Setting
Stand Library
Set the standard (OS kernel) library version and path. If the value is not assigned, the compilers
use one defined in INI file automatically.
Additional Path and Libraries
Set included path, library paths and libraries to be linked
5.3.4 Assembler Setting
SONiX TECHNOLOGY CO., LTD
Page41
SN8 C Studio
User’s Manual
Defined
Defining the macro processor so that the project can recognize, and it will treat those defined
symbols as defined.
List File
Set to generate list file information.
SONiX TECHNOLOGY CO., LTD
Page42
SN8 C Studio
User’s Manual
5.3.5 Linker Setting
Output
Show the detailed path of the relevant output files.
Map file
Set to create the general map file and display its exact path. SN8 C Studio will name this map file
same with the project extension ".map" file. By default, each of these output file shares the same
filename as the source file. However, each has a different file extension.
5.3.6 Code Option
SONiX TECHNOLOGY CO., LTD
Page43
SN8 C Studio
User’s Manual
There are two sections in the code option dialog. At the top is the "ICE MODE" setting. If the
project is only need to do some stimulation, then choose the enable option, otherwise choose the
disable option. The bottom section is provided to set the value of six options including security,
Fcpu, High_clk, Watch_Dog, Reset_Pin and Noise_Filter. Just clicking the corresponding value
tab, choose the value you want in the pull down menu.
5.4 Compile The Project
This section illustrates the way of compiling an opened project. The project must have one file at
least in the project able to be compiled.
5.4.1 Compiling Source Files
Compiling a source file is the act of running the compiler with a C file and the instruction set table
file as the input files to produce a releasable object file and a list file. The relocatable object file
produced will be placed into the project directory.
Errors and warnings are issued by the compiler when the compiler detects an error or warning in
the files being compiled. The error and warning messages will be displayed in the output window.
SONiX TECHNOLOGY CO., LTD
Page44
SN8 C Studio
User’s Manual
Double clicking those message line to locate them in source file and the relevant lines will be
highlighted. What you need to do is to modify the source file and recompile until there’s no error.
Compiling Architecture
5.4.2 Linking
Linking is the act of running the compiler with those relocatable object above and library files as
input files. It will produce one or more output files specified in the project placed into the project
directory.
The link step can be run at most once when compiling. The user can find the specified messages
of linking in the Output Window.
SONiX TECHNOLOGY CO., LTD
Page45
SN8 C Studio
User’s Manual
5.4.3 Make
"Make" will compile the project files performing dependency checking, so that only source files
that are out-of-date are recompiled and linking is only performed when necessary.
Before "Make" begins, the project source files that are being edited will be checked to see if they
have been modified. The action performs when a source file has been modified which is specified
in the dialog below. As a rule, you should choose "Y" to rebuild the project.
Modified Hint Dialog
If no error is issued during "Make" time, it will be considered as a successful "Make". This also
means that the compiler was able to produce an updated "make.exe" file. Warnings do not effect if
the compilation was successful but they may be important when debugging the application in
development.
5.5 Build The Project
Make sure that the following tasks have been completed before building the current active project.
The project options have all been set correctly, especially the selected chip must match the
declaration in the source file.
Run the Build command can divides into several steps:
* Assemble the source files of the active project, by calling SONiX Generic Macro Processor
and Assembler.
* Link all the object files generated currently and generate a map file and an out file.
* Load the task file into the ICE.
* Display building result in the build window.
SONiX TECHNOLOGY CO., LTD
Page46
SN8 C Studio
User’s Manual
There are two commands related to the building of a project: "Build" and "Rebuild".
5.6 Debug the Project
After building the project, several target files will be generated. The file with extension name
".bin" is the final executable file. The file with extension name ".map" describes where the
segments and labels stay in ROM.
Output File (out)
For debugging.
Binary File (bin)
Executable raw binary file.
Map file (map)
Created by linker which describes addresses of symbols and locations of segments.
List file (lst)
Created by assembler.
* Begin to Debug
Click "Begin Debug" in main menu and "Debug" to start the debugger. IDS will display a
progress window to show the downloading percents. After downloading task complete, all the
debug windows (and simulator windows) appeare and all opened documents are begin to be in
read-only state.
* Tracing Project
After "Begin Debug", you can see an indicator that locates at left side of the editor window. The
indicator points out the source line which represents the current program counter. You can trace
project by click debugging commands, ie. "Step Into" , "Step Over" , "Run". For each ending of
tracing command, the indicator indicates the next instruction which will be executed and all debug
windows will update the results.
SONiX TECHNOLOGY CO., LTD
Page47
SN8 C Studio
User’s Manual
* Setting Breakpoints
IDS provides breakpoints you may use to conditionally halt the execution of your target program.
It is common during debugging to reach a breakpoint where you require information from such as
special register and IOs. There are two ways to set break points. The first one is by toggling a
breakpoint from text editor. The other way is set from breakpoints dialog.
When an instruction is set to be an effective breakpoint, the simulator or ICE will stop before
executing the instruction. That is to say, the instruction will become the first one to be executed
next time when you start running. Although an instruction is an effective breakpoint, the IDS may
not stop at this instruction due to execution flow or conditional skips. If an effective breakpoint is
in the Data Space (RAM), the instruction, which matches this conditional breakpoint data, will be
executed always. The IDS will stop at the next instruction.
* Exit to Debug
After users complete debugging their programs, click ‘Exit Debug’ to quit the debugger. Then all
opened documents release the read-only lock.
SONiX TECHNOLOGY CO., LTD
Page48
SN8 C Studio
User’s Manual
6 Quick Start
This chapter shows users a detailed description on how to construct and perform a project with
SN8 C STUDIO. This may avail to first time users in quickly familiarizing themselves with
project development.
6.1 Create a New Workspace
Choose the "New" command in the File menu, the "New" dialog box will display as bellow.
6.2 Create a new Project
After creating a workspace successfully, there’s none project in the "Workspace" window.
Therefore, next step is to create a project according to the chip you have selected.
Choose the "New" command in the "File" menu, and SN8 C STUDIO will default it to create a
new project. Choose the right chip matrix in the "Project List" window in the pop-up "New"
dialog box. SN8 C STUDIO shows the catalog of the currently created workspace automatically,
in the "Location blank". It i s accustomed not to do modification on the default route. Fill in the
"Name" blank, which is often same to the workspace name.
SONiX TECHNOLOGY CO., LTD
Page49
SN8 C Studio
User’s Manual
Choose the "New" command, and click the right chip matrix.
Click the "OK" button.
Set the Project Options
The pop-up dialog box, "Project Setting", displays for setting project options, where the left
window shows the project name created currently.
Project setting dialog box:
SONiX TECHNOLOGY CO., LTD
Page50
SN8 C Studio
User’s Manual
Choose the right chip type:
Setting code option and "ICE MODE":
SONiX TECHNOLOGY CO., LTD
Page51
SN8 C Studio
User’s Manual
Click "OK" button, thus you have created a project without any files. In the "Workspace" window,
there is the currently created project in active (note that the project name is over-striking.).
Open relevant folder, and you will find the IDS has made some new files. The suffixed with ".prj"
file is the project file. Others are configuration files and header file for the project.
SONiX TECHNOLOGY CO., LTD
Page52
SN8 C Studio
User’s Manual
6.3 Create a New Source File
(1) Choose the "New" command in the "File" menu.
(2) Click the "Files" icon in the "New" dialog box, and choose the "Assembly File" or "C Source
File" from "File List". Finally, please don't forget to fill in the file name in the "Name" edit box,
and specify its location in the "Location" edit box.
(3) Click "OK" button.
(4) Then, SN8 C STUDIO shows an active edit window named as the source file which is created
currently .
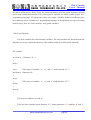
6.4 Edit Program
Now, program the following assembly file. The main control section "Main. asm" is absolutely
necessary, which includes the "Calling" function and external variables.
Example:
//////////////////////////////////////////////////////////////
//
s_a_pro.asm
//
/////////////////////////////////////////////////////////////
;*************************************************************
SONiX TECHNOLOGY CO., LTD
Page53
SN8 C Studio
User’s Manual
;
main
;*************************************************************
chip
SN8P2604
extern
code
reset
extern
code
mnkey
extern
code
int_rs
extern
code
mnintgnd
.nolist
includestd
macro1.h
includestd
macro2.h
includestd
macro3.h
.list
.data
include
Tsn8p2604.inc
include
custom.h
.code
user_seg segment code
jmp
main00
org
8
jmp
int_rs
org
10
at
0x00
main00:
mov
a,#0fh
b0mov
stkp,a
mov
A,#0c0h
b0mov
pflag,a
call reset
b0bset
;Initial cpu register
fgie
main10:
@rst_wdt
.
.
SONiX TECHNOLOGY CO., LTD
Page54
SN8 C Studio
User’s Manual
.
call mnintgnd ; Interface between interrupt and main.
call mnkey
main90:
jmp
main10
///////////////////////////////////////////////
//
tb_key
//
////////////////////////////////////////////////
chip
sn8p2604
extern
data
keychat
extern
data
aplcode
extern
code
public
mnkey
relaysw
.nolist
includestd
macro1.h
includestd
macro2.h
includestd
macro3.h
include
custom.h
.list
.data
include
Tsn8p2604.INC
;****************************************
keyinbuf0 ds
1
; bit0 > key 1
; bit1 > key 2
; bit2 > key 3
; bit3 > key 4
; bit4 > key 5
; bit5 > key 6
; bit6 > key 7
SONiX TECHNOLOGY CO., LTD
Page55
SN8 C Studio
User’s Manual
; bit7 > key 8
keyinbuf
ds
keychkbuf
1
ds
keycvtbuf
ds
1
keyoldbuf
ds
1
keystat
ds
; bit0 > run_key
1
1
; bit0 > key processing
; bit1 > pin processing
; bit7 > clean key buffer
K1t
equ
keystat.2
//keychat
ds
1
keycode
ds
1
;***********************************************
.code
;***********************************************
;
keyBoard scan
;***********************************************
mnkey:
;Scan key loop.
mnkey10:
call keyin
call
keychk
call keycvt
;Read into in buf.
;Read into check buf.
;Read into convert buf.
mnkey90:
ret
;************************************************
; keyoutport
;Scan output.
;
;Scan input.
keyinport
;************************************************
SONiX TECHNOLOGY CO., LTD
Page56
SN8 C Studio
User’s Manual
keyin:
clr
keyinbuf
;Clear the scan content.
b0bts1
key1_p
;Inspect the key
station.
b0bset
keyinbuf.0
b0bts1
key2_p
b0bset
keyinbuf.1
b0bts1
key3_p
b0bset
keyinbuf.2
b0bts1
key4_p
b0bset
keyinbuf.3
ifdef
key5_p
b0bts1
key5_p
b0bset
keyinbuf.4
endif
keyin90:
ret
;************************************************
;
check keyinbuf AND keychkbuf
*
;************************************************
;
keychk:
b0mov
a,keyinbuf
;Confirm the depressing of keys.
xor
a,keychkbuf
jnz
keychk10
b0bts1
keystat.0
;Process with a key, quit.
jmp
keychk90
;
;If it is the same.
;Wait chatter.
SONiX TECHNOLOGY CO., LTD
Page57
SN8 C Studio
User’s Manual
b0mov
a,keychat
;Check keychat.
jnz
keychk90
;Whether have finished eliminating
flutter .
;Key bounce time=0,copy chk buf into cuv
buf.
b0mov
a,keychkbuf
; Finished eliminating flutter and store
the key station.
b0mov
keycvtbuf,a
b0bclr
keystat.0
jmp
keychk90
;Clear the flag of key processing.
keychk10:
b0mov
a,keyinbuf
b0mov
keychkbuf,a
b0bset
keystat.0
mov
a,#7
b0mov
keychat,a
;Deal with eliminating flutter.
;Set key processing.
;Constant of eliminating flutter.
keychk90:
ret
;************************************************
;
compare keycvt and keyold
; and find the different.
*
*
;************************************************
keycvt:
b0mov
a,keycvtbuf
xor
a,keyoldbuf
jnz
keycvt0
jmp
keycvt90
;
;Quit.
; Check the new pressed key from table.
keycvt0:
b0mov
a,keycvtbuf
b0mov
keyoldbuf,a
SONiX TECHNOLOGY CO., LTD
Page58
SN8 C Studio
User’s Manual
b0bts1
keycvtbuf.0
jmp
keycvt10
call relaysw
jmp
;Judge the key1_p station.
;Run the relay.
keycvt90
keycvt10:
b0bts1
keycvtbuf.1
jmp
keycvt20
mov
a,#1
b0mov
aplcode,a
jmp
keycvt90
keycvt20:
b0bts1
keycvtbuf.2
jmp
keycvt30
mov
a,#2
b0mov
aplcode,a
jmp
keycvt90
keycvt30:
b0bts1
ifdef
keycvtbuf.3
key5_p
jmp
keycvt40
jmp
keycvt90
else
endif
mov
a,#3
b0mov
aplcode,a
jmp
keycvt90
keycvt40:
b0bts1
keycvtbuf.4
jmp
keycvt90
mov
a,#4
SONiX TECHNOLOGY CO., LTD
Page59
SN8 C Studio
User’s Manual
b0mov
aplcode,a
jmp
keycvt90
keycvt90:
ret
;**********************************************
C source file:
/*****************************************************
*
* File Name : SN8C_Ex.c
* Test History : V1.00.220
*
describe: test 2708 interrupt
*
*******************************************************************/
#include <sn8p2708a.h>
struct word{
unsigned fint:1;
unsigned :7;
}intword;
unsigned int tc0cvalue=0x64;
unsigned int accbuf = 0x00;
unsigned int pflagbuf = 0;
__interrupt intserv(void)
{
//The data will auto store!
_bCLR(&INTRQ,5);
TC0C = tc0cvalue;
intword.fint = 1;
}
void initIO(void);
void initINT(void);
SONiX TECHNOLOGY CO., LTD
Page60
SN8 C Studio
User’s Manual
void main(void)
{
STKP=0x07;
initIO();
initINT();
while(1)
{
if(intword.fint!=0)
{
P1=0x00;
P2=0x00;
P3=0x00;
P4=0x00;
P5=0x00;
P0=0x00;
}
else
{
P0=0xff;
P1=0xff;
P2=0xff;
P3=0xff;
P4=0xff;
P5=0xff;
}
}
}
void initIO(void)
{
P0M=0xFF;
P1M=0xFF;
SONiX TECHNOLOGY CO., LTD
Page61
SN8 C Studio
User’s Manual
P2M=0xFF;
P3M=0xFF;
P4M=0xFF;
P5M=0xFF;
}
void initINT(void)
{
INTRQ=0x00;
INTEN=0x00;
TC0M=0x00;
TC0M=0x20;
TC0C=0x64;
_bCLR(&INTRQ,5);
_bSET(&INTEN,5);
_bSET(&TC0M,7);
_bSET(&STKP,7);
}
Note that the programs above is only cited here as reference.
6.5 Compiling and Builing
Choose the "Compile Current File" command in the "Build" menu, or click the "Compile" button
in the toolbar. Besides, you can use the hot-key "Ctrl+F7", to start compiling your project. The
system will show error messages and warning messages in the "Output" window if there are errors
or warnings. You can make over your source file now: if it is solecism, double click the error
message and the corresponding source file line will be highlighted.
If you finished compiling successfully, the next step is to make building. The processing of
building will go with creating some needed configuration files, and the system checks hardware
station at the same time.
SONiX TECHNOLOGY CO., LTD
Page62
SN8 C Studio
User’s Manual
6.6 Debugging
Choose the "Begin Debug" command in the "Debug" menu or click the
icon in the toolbar
directly. Then, the system interface changes into the following appearance.
The "Ram" window, "Watch" window, "Variable" window, "Register" window, "Call Stack"
window and "Disassembly " window are all to be used during debugging.
Watch Window
Watch window is used to watch the specified variables. Double click the variable you want to
watch and drag it into the Watch Window, then you can observe its value changing .SN8 C
STUDIO will set the value into red color if it really changed.
SONiX TECHNOLOGY CO., LTD
Page63
SN8 C Studio
User’s Manual
To facilitate your observing, you can split the Watch window into three parts.
Variable Window
Variable window is used to display the format and its content is manual change by users. This
window just shows you the changed local variable automatically.
Register Window
Register window shows the current value of SFR which lie in the RAM space from ox80 to 0Xff.
Click the plus ‘+’ then the currently changed value will be red highlighted.
Call Stack Window
Call stack window is used to display the stack station and the 入栈函数. You can judge whether
the function calling is right or wrong.
SONiX TECHNOLOGY CO., LTD
Page64
SN8 C Studio
User’s Manual
Memory Window
During running the procedure, if you want to get the value of some specified Ram registers, just
input the address in the box behind Go to and click Enter to verify. The Memory window will then
display value of the specified register.
Disassembly Window
The Disassembly window is used for watching the assembly code.
6.7 Setting Breakpoints
Put the cursor on the right line and choose the "Breakpoint" command to set a breakpoint in a
program. Then, the program will stop right on the breakpoint without execute the instruction of
the line.
6.8Trace the Program
With the system debug tools, users can trace the program so that keeping track of the command
executing. Based on actual condition, you can choose "Step by Step" mode or "Step Over" mode.
SONiX TECHNOLOGY CO., LTD
Page65
SN8 C Studio
User’s Manual
The system provides three manners to trace the program: the "Debug" menu, the "Debug" toolbar
and hot-keys. The next section will mainly discuss the output files of the program tracing:
Emulation result
After connecting the emulator and your PC correctly, you are suggested to eliminate the "Use
Simulate" option in project setting and connect the objected hardware. Press the "Debug" button
or hot-key then you can get the programming result showed with the connected board. If there are
some station unexpected, you can amend your program until the result is what you wanted. Then,
the program can be downloaded correctly.
Download program file
SN8 C STUDIO will generate the downloaded program file prefixed with ".sn8"
automatically under the default catalog, which is included by the current active project.
SONiX TECHNOLOGY CO., LTD
Page66
SN8 C Studio
User’s Manual
Part2 Programming Languages and Development
Tools
7 Assembler
7.1 Assembly Language
In general, the instructions in assembly language are made of four columns that can be separated
by pressing "space" or "tab". The four columns are shown as follows.
LABEL INSTRUCTION OPERANDS
COMMENTS
Example:
START:
ADD
MOV
A,#36H
DAA
JMP
A,#0X35
;A = 0X35
;A = 0X6B
;A = 0X71
START
There are some restrictions and rules to write the comments for label, instruction, operands, and
comments. To see the following sections which show detailed description about the four parts.
7.1.1 Label
The first character of label should be: A~Z, a~z, @, _ .
The rest of characters except the last character of label can be: A~Z, a~z, @, _, 0~9.
The last character of label should be written as symbol ":" .
There is no limitation on how many characters for a label, but label name can not be repeated.
In order to prevent using so many different label names, the following instructions can be used to
indicate the different label names.
SONiX TECHNOLOGY CO., LTD
Page67
SN8 C Studio
User’s Manual
Firstly, use symbol of "@@ :" as a tentative label name, and take use of this tentative label to
indicate its previous label name and next label name.
Secondly, use "@B" to point out the previous label name located at right before the tentative label
name of "@@ :".
Thirdly, use "@F" to point out the next label name, which is located right after the tentative label
name of "@@ :".
Example:
JMP
@F
; Jump to the next " @@".
@@:
…
…
JMP
@B
; Jump to the previous "@@".
7.1.2 Operand
If there are two operands, they should be separated by a symbol of ( " ’ ").
Example:
MOV
A , #43h
MOV
A, #’C’
or
// Block the Operand by ’ ’.
If there is a bit-operand, then use " . " to separate.
Example:
B0BSET 0X86.2
// To set bit2 of 0x86 as 1.
or
B0BSET FC
// To default the constant value by system.
If operand is a memory unit, numbers can be sued to represent its address. If the number is
a constant value, then the number should start with "#".
Example:
SONiX TECHNOLOGY CO., LTD
Page68
SN8 C Studio
User’s Manual
B0MOV 0x80, #3
// RAM[0x80] = #3.
Besides, the symbol of "$" represents current active complier program address.
Example:
JMP
$
// To represent unlimited loop.
JMP
$+1
// Equivalent to two NOPs.
More, the symbol of "$" can be used to obtain the byte in high (h), middle (m), low (l) of a
label.
Example
B0MOV X, #DATA1$H
// X = 0X12
B0MOV Y, #DATA1$M
// Y = 0X34
B0MOV Z, #DARA1$L
MOVC
// Z = 0X56
// ACC = 0X90,R = 0X78
…
ORG
0X123456
Data1
DW
7890H
Last, the symbol of "$" can also be used to define bit 14-17 label as high nibble.
Example:
B0MOV
JMP
PFLAG, #Far_Lab$J
; =B0MOV PFLAG, #30h
Far_Lab
…
ORG 0XC000
Far_Lab:
…
7.1.3 Comments
In general, ";" and "//" both represent the remarked statement. A serial wording statement written
after the symbol ";" or "//" until the end of line is remarked statement.
SONiX TECHNOLOGY CO., LTD
Page69
SN8 C Studio
User’s Manual
Example:
; This is an example of demo code.
// This is an example of demo code.
Besides, the symbol of /*….*/ can also be used to block a remarked statement which can be
written in one or two lines.
Example:
/* this is an example of demo code.*/
7.1.4 Chip Reserved Word
Each SONiX 8_bit series MCUs has her own system registers, and they have been defined in the
assembler as the "Chip Reserved Word" already. For example, the H/L register could write in the
program directly without declaration in program. And all bit-map memory space is the same.
When the bit memory is used in program, a "F" prefix should be add in the name of the memory.
For example, if the "GIE" bit is to be set, "b0bset FGIE" is correct. Please refer to datasheet for
detailed system register names and description of each chip.
7.1.5 Number Expression
The first digital of the number should be: 0~9.
Example:
255
;Decimal expression.
0xFF
;Hexadecimal expression.
0FFh
;Hexadecimal expression.
11111111b.
;Binary expression.
7.1.6 Arithmetic Operation
Users can use "+", "-", "*", " /", " %", " &", " | ", "^", " ~", "( )", …, etc for arithmetic
operations.
Example:
SONiX TECHNOLOGY CO., LTD
Page70
SN8 C Studio
User’s Manual
2+3–4
1
2+3*4
14
The followings are the arithmetic meanings of the symbol in order of priority:
()
= sub-expression
+
= plus
-
= minus
~
= not
!
= logical not
*
= multiplication
/
= division
%
= modulo
+
= addition
-
= subtraction
<<
= shl; Logical shift left.
>>
= shr; Logical shift right.
>
= greater than
<
= less than
>=
= greater than or equal to
<=
= less than or equal to
==
= is equal
!=
= is not equal
&
= and
^
= xor
|
= or
&& = logical and
||
= logical or
7.2 Assembly Instructions
Directives give direction to the "Cross Assembler", specifying the manner in which the "Cross
Assembler" generates object code at assembly time. Directives can be further classified according
to their behavior as described below.
7.2.1 Program Start and End
(1) Syntax: CHIP SN8XXXX
SONiX TECHNOLOGY CO., LTD
Page71
SN8 C Studio
User’s Manual
Description: to select IC. Users can know which IC is available currently from menu
[option]->[chip info]. The command should be defined prior to any assembly language and could
only be defined once.
Example:
Chip sn80211
(2) Syntax: ENDP
Description: force to end the program and the program written right after this command would
then not be compiled/assembled.
Example:
Endp
7.2.2 User Define the Title
Syntax:
TITLE
descritpion statment
Description: the statement written after the title is the description statement.
Example:
TITLE
This is a demo code.
7.2.3 Variable expression
(1) EQU
Syntax:
VARIABLE EQU VALUE or BIT
Description: fixed variables can not be modified.
Example:
TRUE EQU 1
FALSE EQU 0
PIN1
EQU P0.0
NUM1 EQU 0X20+0X3
SONiX TECHNOLOGY CO., LTD
Page72
SN8 C Studio
User’s Manual
(2) =
Syntax: VARIABLE = VALUE | BIT
Description: changeable variables can be modified.
Example:
TEMP = 0
TEMP = TEMP + 1 // TEMP = 1
TPIN = TEMP.7
(3) TEXTEQU
Syntax:
STRING
TEXTEQU
<STRING>
STRING
TEXTEQU TEXT MACRO
STRING
TEXTEQU
% VARIABLE
STRING
TEXTEQU
% (ARITHMETIC)
Description: text macro would be changed to use for the replacement of STRING. The variable or
arithmetic after "%" would turn to be serial words. Catstr, substr, sizestr, instr can be used to
express above four different serial words.
Example 1:
<STRING>
CLRA
TEXTEQU
<MOV A,#0>
Example 2:
TEXT MACRO
CLRALU
TEXTEQU
CLRA
Example 3:
% VARIABLE
TEMP = 30
STR1 TEXTEQU %TEMP
; TEXTEQU <0x1E>
STR1 TEXTEQU %0d:TEMP
; TEXTEQU <30>
STR1 TEXTEQU %0x:TEMP
; TEXTEQU <1e>
Example 4:
% (ARITHMETIC)
TEMP = 20
SONiX TECHNOLOGY CO., LTD
Page73
SN8 C Studio
User’s Manual
STR1 TEXTEQU %(TEMP+6)
; TEXTEQU <0x1A>
(4) CATSTR
Syntax:
STRING
CATSTR
<STRING1>, <STRING2>
STRING
CATSTR
TEXT MACRO 1, TEXT MACRO 2
STRING
CATSTR
%VARIABLE1, %VARIABLE2
Description: joint two serial word/text macro to create a new text macro. For more information of
the format of "STRING", please refer to TEXTEQU.
Example:
S1 TEXTEQU
S2 CATSTR
<12>
<0x>, S1
// "S2" equivalent to “0x12”.
(5) SUBSTR
Syntax:
STRING
SUBSTR
<STRING>, START, [LENGTH]
STRING
SUBSTR
TEXT MACRO, START, [LENGTH]
STRING
SUBSTR
% VARIABLE, START, [LENGTH]
STRING
SUBSTR
% (ARITHMETIC), START, [LENGTH]
Description: retrieve one of serial words from "STRING". "START" is the starting position of that
retrieved serial words and the first character of serial words is in position 1. "LENGTH"
represents the length of characters. If omit the "LENGTH", the serial words would be retrieved up
to the end of that serial word. For more information of the format of "STRING", please refer to
TEXTEQU.
Example:
S1
TEXTEQU
<123456>
S2
SUBSTR
S1, 4, 2
S3
SUBSTR
S1, 3
// "S2" equivalent to “45”.
// "S3" equivalent to“3456”.
(6) SIZESTR
Syntax:
VALUE
SIZESTR
<STRING>
VALUE
SIZESTR
TEXT MACRO
SONiX TECHNOLOGY CO., LTD
Page74
SN8 C Studio
User’s Manual
VALUE
SIZESTR
% VARIABLE
VALUE
SIZESTR
% (ARITHMETIC)
Description: uers can tell the string length form "STRING". For more information of the format of
"STRING", please refer to TEXTEQU.
Example:
V1
SIZESTR
<123456>
// "V1" Equivalent to 6.
(7) INSTR
Syntax:
VALUE INSTR
START, <STRING>, <SUBSTRING>
VALUE INSTR
START, TEXT MACRO, <SUBSTRING>
VALUE INSTR
START, % VARIABLE, <SUBSTRING>
VALUE INSTR
START, % (ARITHMETIC), <SUBSTRING>
Description: find out substring from string beginning with start position in which the first
character is in position 1. If substring cannot be found, value is to be 0 string. For more
information of the format of "STRING", please refer to TEXTEQU.
Example:
S1
TEXTEQU <12,34,56>
V1
INSTR
1, S1, <,>
V2
INSTR
V1+1, S1, <,>
//"V1" equivalent to 3.
// "V2" equivalent to 6.
7.2.4 Section Definition
Syntax:
.CODE
.DATA
.CONST
Description: set current address as programming section (.CODE), data section (.DATA) or
constant section. (.CONST). The size of programming section depends on the space of ROM size.
The size of data section depends on the space of RAM size. There is no size issue in constant
section. Each section can be inter-replaceable. The system defaults the section as programming
section (.CODE) and its starting address is 0.
Example:
.CODE
MOV A, #0
SONiX TECHNOLOGY CO., LTD
Page75
SN8 C Studio
User’s Manual
…
.DATA
RAM0 DS 1
// Equivalent to ram0 equ 0.
RAM1 DS 1
// Equivalent to ram1 equ 1.
.CODE
…
.DATA
BUF0
DS 2
// Equivalent to buf0 equ 2.
BUF1
DS 1
// Equivalent to buf1 equ 4.
.CODE
…
ORG
Syntax: ORG NEW
ADDRESS
Description: User can re-set the programming address that is generally used to interrupt the
position of programming address. If there is no specific programming address be set up at the
beginning of program, the system defaults the programming address is 0.
Example:
MOV
A, #0FH
B0MOV
STKP, A
// Disable interrupt, and set stack to bottom.
B0MOV
PFLAG, #0
// At the first 16k ROM.
JMP
START
ORG
8
CLR
INTRQ
//The t0, t0c, t1c, p0 … interruption’s starting address.
// Clear all interrupt requests.
RETI
START:
…
ORG
_TMP = $
ORG
($+15) & 0X3FF0
DW
…
ORG
ORG_TMP + 0X100
// Re-position 16 times alignment.
//Re-position 0x100 apart…
SONiX TECHNOLOGY CO., LTD
Page76
SN8 C Studio
User’s Manual
.ALIGN
Syntax: .ALIGN
NUMBER
Description: use ".ALGN" to adjust the value of alignment for next instruction or variable.
Number must be 2 multiplier such as 2、16、256,and the maximum number is 65536 (0x10000).
Example:
// IF $ == 7
. ALIGN
16
//SAME AS ABOVE ORG ($+15) & 0X3FF0
// THEN $ == 16
7.2.5 Definition of Byte Data
Syntax: [LABEL] DB D1 [, D2 , …]
Description: define data in the program. The date must locate between 0 ~ 0xff or be a serial
words blocked by the symbol of “ “. Every two data become a word. Two bytes made up a word.
The fist byte is low byte and the second byte is high byte. If the data can not be a word, high byte
is set to be 0.
Example:
DB 12, 34, 30, “ABCD”
equivalent to:
DW 0X220C, 0X411E, 0X4342, 0X0044
Syntax: [LABEL] DB “STRING” [, “STRING”, … ]
Description: define data in the program. The date must locate between 0 ~ 0xff or be a serial
words blocked by the symbol of “ “. Every two data become a word. Two bytes made up a word.
The fist byte is low byte and the second byte is high byte. If the data can not be a word, high byte
is set to be 0.
Example:
TEMP = 45
DW
0X1234, 5678H, TEMP+3, 2*5
DW
“ABCDEFG”, 23H
HERE
DW
“HERE”, “SONIX”
SONiX TECHNOLOGY CO., LTD
Page77
SN8 C Studio
User’s Manual
…
B0MOV
X, #HERE$H
B0MOV
Y, #HERE$M
B0MOV Z, #HERE$L
MOVC
// ACC = ‘H’, R = ‘E’.
7.2.6 Definition of Programming Data
DD
Syntax: [LABEL]
DD
D1 [, D2 , …]
Description: define data in the program. The date must locate between 0 ~ 0xffffffff or be a serial
words blocked by the symbol of “ “. Four bytes made up a dword that is often used to save label
since data of label is over 64K.
Example:
TABLE
DD
L1, L2, L3
…
L1
DW
“HELLO”
L2
DW
“GOOD”
L3
DW
“SONIX”
DS
Syntax:
[LABEL]
DS SIZE
Description: "DS" is a general term to define the ram. "SIZE" is a figure value to represent the
pace in RAM. The size would be arithmetic.
Example:
BUFFER1 DS 4
XBUF
DS
0
// XBUF EQUIVALENT TO BUFFER2.
BUFFER2 DS 8
.CODE
….
B0MOV
H, #BUFFER1$M
B0MOV
L, #BUFFER1$L
MOV
A, DP0X
// ACC = [BUFFER].
SONiX TECHNOLOGY CO., LTD
Page78
SN8 C Studio
User’s Manual
7.2.7 Bit Arithmetic Function
Syntax:
@BIT(parameter);
@INT(parameter);
@FIELD(parameter)
Description: regarding bit operand, retrieve bit by: "@BIT( )",retrieve integral number by:
"@INT( )",or retrieve bit column by : "@FIELD( )".
Example:
P_XOR
EQU
P1.4
…
B0BSET @INT(P_XOR)-0X10.@BIT(P_XOR)
// b0bset p1m.4s set up out mode.
…
MOV
A,
#@FIELD(P_XOR)
// MOV A, #10H.
; (BIT4)
XOR
@INT(P_XOR), A
// XOR P1, A ; TOGGLE PIN.
7.3 Assembly Directives
(1) Conditional Directives
Conditional-assembly directives let you test for a specified condition and assemble a block of
statements if the condition is true. They are enclosed with IF and ENDIF directives. The
optional ELSE block follows the IF directive and its statements.
Syntax:
IF expression_1
statements_1
{ ELSEIF expression_2
statements_2}
{ ELSE
statements_3}
ENDIF
SONiX TECHNOLOGY CO., LTD
Page79
SN8 C Studio
User’s Manual
Description: the statements within the "IF" and "ELSE" statement can be any valid instructions or
directives. The preprocessor processes the statements following the "IF" directive only if the
corresponding expression is true. If the expression evaluated is false the preprocessor only
processes the statements following the "ELSE" directive as the block contains the "ELSE"
directive. Otherwise the preprocessor process nothing. The following table shows other directives
you can use.
Directive
Condition
IF expression
expression is true
IFE expression
expression is false
IFDEF symbol
symbol has been defined previously
IFNDEF symbol
symbol has not been defined previously
IFB argument
argument is blank
IFNB argument
argument is not blank
IFIDN arg1, arg2
arg1 equals arg2
IFIDNI arg1, arg2
arg1 equals arg2 (case insensitive)
IFDIF arg1, arg2
arg1 does not equal arg2
IFDIFI arg1, arg2
arg1 does not equal arg2 (case insensitive)
(2) Include Directives
Syntax:
[INCLUDE]
filename
[INCLUDE]
“long file path name”
[INCLUDE]
<long file path name>
Where [INCLUDE] is defined by the following
INCLUDE, INCLUDESTD, INCLUDEOS, INCLUDEBIN,
INCLUDEWAV, INCLUDEPCM ( For SNC8X only)
INCLUDEMLD, INCLUDEMD4 ( For DSP only)
Description: the filename in the INCLUDE directive must be fully specified. The files specified
by include directives can be of DBT type(".dbt" files). The DBT file is a source file encrypted
SONiX TECHNOLOGY CO., LTD
Page80
SN8 C Studio
User’s Manual
with internal encryption algorithm.
An include file may specify another include file. The preprocessor processes the second include
file before returning to the first. Your program can nest include files as deeply as the amount of
free memory allows. If the specified include file is not in the source file directory, the
preprocessor will automatically searches the paths assigned in command-line options or in the
IDE option dialog box.
(3) File Control Directives
Syntax:
.LIST
.NOLIST
Description: the directives .LIST and .NOLIST decide whether or not the source program lines
are to be copied to the program listing file. .NOLIST suppresses copying of subsequent source
lines to the program listing file. .LIST restores the copying of subsequent source lines to the
program listing file. The default is .LIST.
Syntax:
.LISTMACRO
.NOLISTMACRO
Description: the directive .LISTMACRO causes the "Cross Assembler" to list all the source
statements, including comments, in a macro. The directive .NOLISTMACRO suppresses the
listing of all macro expansions. The default is .NOLISTMACRO.
Syntax:
.LISTIF
.NOLISTIF
Description: the directive .LISTIF lists including conditional directives and .NOLISTIF
doesn’t list conditional directives.
(4) System Environment Directives
Syntax:
CHIP chipid
Description: target platform and include library path are assigned by this directive. The target
machine ID assigned here must equal to the chip ID assigned by command-line /MACHINE. The
SONiX TECHNOLOGY CO., LTD
Page81
SN8 C Studio
User’s Manual
preprocessor locates the INCLUDEOS directory by searching for the OBJ_DIR key with "chipid"
section from the configuration ".ini" file.
Example
CHIP SNL3XX
// For DSP SNL300 series
CHIP SN8XXX
// For MCU SN8 series
Or
Syntax:
.SYS n (For DSP only)
Description: the preprocessor includes test codes from the encrypted ".dbt" file “DSP#n.dbt”. In
debug mode, the system includes source “DSP#n.asm” file.
Syntax:
.SYS “filename” (For DSP only)
Description: the preprocessor includes test codes from file “filename”. The file can be an
encrypted ".dbt" file.
Syntax:
.INIT(For DSP only)
Description: command preprocessor to include test codes defined in ".ini" file. This directive must
follow CHIP directive.
Example
CHIP SNL3XX
// For DSP SNL300 series.
.INIT
SONiX TECHNOLOGY CO., LTD
Page82
SN8 C Studio
User’s Manual
8 SN8 C Language
8.1 Overview
8.1.1 Structure of C Source Code
1.C language source code consists of one or more source files.
2.Every source file can be made up of one or more functions.
3.No matter how many files are there in a source code, there can be only one main function.
4.Source code may have Preprocessor Instructions (“include” instruction is just one of them),
preprocessor instructions are usually put in the front of a source file or source code.
5.Every statements and comments should end with a semicolon, except preprocessor
instructions, function head and the bracket”}”.
6.There should be at least one space between the key words or between identifiers, if there is
obvious space, the blank is not necessary.
The rules to follow while writing a programme:
Follow these rules to make a programme easy to write, read, easy to be understood and
maintained.
1.There should be only one statement or comment in every line.
2.The segment involved in “{ }” usually indicates one single level in a programme, put “{ }”
in order with the first character of the same statement level, and “{” ,”}” should take up a
single line.
3.The lower level of statements can indent some character from the higher level statements,
this makes the programme more clear. Try to follow these rules to form a good coding style.
8.1.2 Character Set of C Language
Character is the basic element to comprise a language. The character set of C language consist
of letters, numbers, spaces, interpunctions and special character. Chinese characters and other
figure notations can be used in character constants, character string constants and comments.
SONiX TECHNOLOGY CO., LTD
Page83
SN8 C Studio
User’s Manual
1. Letters Lowercase letters a ~ z totaled 26, uppercase letters A ~ Z totaled 26.
2.Numbers
0~9 totaled 10.
3.Blanks. Spaces, tabs, and newline symbols are called by a joint name—Blanks. Blanks only
work in character constants and string constants. The compiler will consider the blanks
appear in other place of the programme as intervals and ignore them, so whether to use
blanks in a programme has no effects while compiling, but it makes a programme easy to
read when the blanks are properly used.
4.Interpunctions and special characters
8.1.3 Glossaries of C Language
There are six kinds of glossaries in C language: identifiers, keywords, operators, intervals,
constants and comments.
1.
Identifiers
The names of variables, functions and notations are called identifiers. The library function
names are defined by the system, and other identifiers are all defined by the users. As C language
prescribes, identifiers are the character strings only consist of letters (A~Z, a~z), numbers (0~9)
and underline, and the first character of an identifier should be a letter or underline.
These identifiers are valid:
a,x, 3x,BOOK 1,sum5
These identifiers are invalid:
3s Begin with a number
s*T The * is invalid
-3x
Begin with a subtraction sign
bowy-1 Subtraction sign is invalid
Here are some notes when using identifiers:
(1) Standard C does not have restrictions on the length of the identifiers. However, the
identifier length is restricted by various versions of the C compilers and the specific
machines. For example, one version of C prescribes the first 8 characters of an identifier
SONiX TECHNOLOGY CO., LTD
Page84
SN8 C Studio
User’s Manual
is available, when two identifiers have the same first 8 characters, they are considered
identical.
(2) Identifiers are case-sensitive. BOOK and book are different.
(3) Programmers can define identifiers at will, but it’s commended that the name of an
identifier has the corresponding meaning of its usage to make a programme easy to
understand.
2. Keywords
Keywords are character strings that have specific meanings and defined by C. The user-define
characters should not be the same of the keywords. The keywords in C language are classified into
several kinds:
Type declarator
Used for the declaration and defination of variables, functions or other kinds of data
structures. “int”,”double” in the previous examples are type declarators.
Statements definition symbol
Used for indicating the function of a statement. The “if else” in EX.1.3 is a kind of statements
define symbol for condition statements.
Preprocessor command word
Used for indicating a preprocessor command. “include” in the previous examples is one
preprocessor command word.
Except the standard ANSIC C, SN8 C Compiler adds a number of new keywords list in figure7-7.
Figure 7-7
Keyword
Related Chapter
__interrupt
Interrupt Functions
__RAM
Memory Qualifier
__ROM
Memory Qualifier
#progma bank
Bank Configuration
SONiX TECHNOLOGY CO., LTD
Page85
SN8 C Studio
User’s Manual
3. Operators
There are various operators in C language. Operators, variables and functions make up of
expressions, and they indicate the operation functions and comprise one or more characters.
4. Intervals
The intervals in C language can be comma or blank. Comma is used in the type declaration and
the parameter list of functions to compart the variables. Blank is used as intervals among words of
a statement. One or more blanks between keywords and identifiers are necessary to avoid syntax
errors.For instance, write “int a “as “inta”, and C compiler will consider “inta” as an identifier
mistakenly.
5. Constant
The constant in C including number constant, character constant, string constant, symbol
constant and ESC.
6. Comments
Block comments: The comments in C language are strings begin with “/*” and end with
“*/”.The statements between “/*”and“*/” are comments. C compiler will do nothing with the
comments. Comments can exist in anywhere of a programme. Comments are used for explaining
the purpose of a programme. The statements, that will not be used while debugging, can also be
involved by “/*”and“*/” to make the compiler ignore them, and “/*”and“*/” can be deleted after
debugging.
Line comments: line comments is begin with “//”, the parts after “//” are comments.
8.2 Data Type
All C data types are supported by SN8 C, but SN8 C is for 8-bit singlechip, so the definition and
length of data types should be taken into consideration. SN8 C has its own specific definition and
data length, which should be distinguished. Please refer to the following table:
Data Type
Size(Byte)
Range of the data
Signed char(short、int)
1
-128~+127
SONiX TECHNOLOGY CO., LTD
Page86
SN8 C Studio
User’s Manual
Unsigned char(short、int)
1
0~255
Signed long
2
-32768~+32767
Unsigned long
2
0~65535
float、double
4
Pointer
2
enum
1
Table 3-1 Data types and ranges
8.2.1 Constants and Variables
While designing a programme, we may have some referenced values or pre-set values which
expected not to be changed throughout the whole programme, and we can use them in anywhere
of the programme. We use them to decide if certain standerds are met or not, etc.
Refer to these values directly instead of defining them, many programmers will do this while
writing an assembler language programme. It requires the programmers to remember the values,
and make sure they are uniform thoughout the whole program.This is a process that errors may
occurs easily, and the readability of the program is decreased. Then the edit and the maintenance
of the program will become difficult, any where of the program is not modified will cause the
whole program to have a wrong result. So it’s strongly recommended to define these referenced
and pre-set values in advance, name these values according to their meanings, this is a constant
definition process, and the value is called constant.
In standard C, the powerful CPU and the large capacity of memory can help us to ignore the
constant location. However, for a singlechip system, the RAM is so small and the system will put
some tables into the ROM area. The constants we defined will be replaced with the exact values
by compiler automatically. We can leave this work to the computer.
Here we can see how to define constants in an assembler language.
For example:
door_service_c equ
#80
;80ms
SONiX TECHNOLOGY CO., LTD
Page87
SN8 C Studio
User’s Manual
t0int_c
equ
#224
;t0 interupt time
segment_c
equ
#3
;3 cooks at most
Note: the “#” before the values which indicates an instant value is followed, is one symbol
of SN8 Assembler.
The code above defines 3 reference values that will be used in 3 programs. By the way, it’s
necessary to add comments while defining, otherwise it may be possible to forget the usage of
your last definition action. In the definitions above, the keyword “EQU” in assembler language is
used. The words before “EQU” will be replaced by the value after “EQU” while compiling. The
programmers’ loading is lightened by this action.
Here we can see how to define these constants in SN8 C:
For example:
#define door_service_c 80 //80ms
#define t0int_c 224
#define segment_c
//t0 interupt time
3
//3 cooks at most
The 3 values defined above are identical with the 3 values defined in previous assembler
language. These constants will be replaced by the corresponding values.
There is a special case—the value list. In assembler, the items of the list are all put in Code, and
they are handled as Code. These values are constants too, but they are special handled and have
only one entry.
Here is an assembler list:
disp_automenu:
;table
dw 0000h
dw 0ae1fh
;A-1
dw 0ae2fh
;
dw 0ae3fh
;
dw 0ae4fh
;
dw 0ae5fh
;
dw 0ae6fh
;
dw 0ae7fh
;
We can see that a “word” is defined by keyword “DW” in assembler list, this list is stored
SONiX TECHNOLOGY CO., LTD
Page88
SN8 C Studio
User’s Manual
in .code segment, and we use the head address of the list to obtain every corresponding value.
How to handle these lists in SN8 C?
Before relating the handle of the lists, the keyword for defining variables should be mentioned.
When define variables in SN8 C, the locations of the variables can be specified (in RAM or in
ROM), they are specified by the keywords “__RAM” and “__ROM”. See:
Unsigned int __RAM ramVariable; // Store the variables in RAM
__RAM unsigned int ramVariable2;
Unsigned int __ROM romVariable; // Store the variables in ROM
__ROM unsigned int romVariable2;
We know that a value can not be modified when it has been put into ROM, and this is constant
in fact.
There are a certain variables in C that can be accessed via one head name. Array is one
convenient kind of them, an array can be defined to store the values of the lists, and then the
values can be queried by accessing that array.
For example:
unsigned long __ROM disp_automenu[]=
//table
{
0x0000,0x0ae1f,0x0ae2f,0x0ae3f,0x0ae4f,
0x0ae5f,0x0ae6f,0x0ae7f
};
This list is the same with the above assembler list, and we store it in ROM. Query this list by
calling the array, we have the detailed introduction in the following.
There is another kind of values will be modified constantly in the program. For instance, the
program counter, flags register will be changed while the program is running, and these values are
called variables.
Let’s take a look at the way to define variables in an assembler language.
.DATA
org
temp1
0h
ds 1
SONiX TECHNOLOGY CO., LTD
Page89
SN8 C Studio
User’s Manual
temp2
ds 1
temp3
ds 1
temp4
ds 1
led_dp
ds 1
step
ds 1
The codes above define 6 variables:
; current status
temp1, temp2, temp3, temp4, led_dp, step6, each of them
occupys one Byte RAM memory, and variable names can be used to read or write the
corresponding memory. Of course, one variable name can be used to access two or more RAM
memory in assembler language, this is similar with the operation of query a list, its definition is
shown below:
Job_mode
Power_mode
ds 2
ds 4
The memory of variable “job_mode” can be read and write by “job_mode” and
“job_mode+1” ,the variable “power_mode” or other variables defined in RAM can be accessed by
the same method. Thus, the way for defining variables in SN8 Assembler is using keyword “DS”
to apply for a variable memory, once a memory has been allocated, it will be occupied throughout
the whole process of a program. This means one more variable, one less memory. This is such a
waste for singlechip who has only a few RAM memories.
How dose SN8 C Compiler define variables?
The scope of a variable should be mentioned when we talk about the variable of C.
The variables defined in assembler language are available through the program. Values of the
variables can be modified in anywhere of the program, and the problem that the programmers
usually meet is: variable value is found invalid while debugging, but it’s impossible to decide
where the value of the variable has been wrongly modified, so the break points have to be set
everywhere in the program, and the problem may be found out eventually by debugging for many
times. This is the inconvenience of the way to define variables in assembler language.
The scope of variable in C are distinguished, they are classified into global variables and local
variables, and the ways to distinguish them is easy—just define them in different locations. This is
the same with standard C, we will discuss it later.
SONiX TECHNOLOGY CO., LTD
Page90
SN8 C Studio
User’s Manual
The format for defining variables is : Type Variable1, Variable2,…; for example:
Here are some variables defined in SN8 C
unsigned int temp1;
unsigned int temp2;
unsigned int temp3;
unsigned int temp4;
unsigned int led_dp;
unsigned int step;
//current status
unsigned long job_mode;
unsigned long power_mode1;
float powerValue;
int temp1_1;
//signed int type
long temp2_2;
Here are some notes when define variables:
1. Variables of the same type can be defined after one type declarator. Variable names are
separated by commas. There should be at least one space between type declarator and
variable names.
2. The last variable should end up with “;”.
3. Variables should be declared before being used. The declarations are usually put at the
begining of one function.
As we had mentioned, the definition of variables in C not only distinguish the scope but also
the types that have different length, this has bring a lot of convenience to the programmers.
Compared with mathematic calculating computers, the choice of the variable types and data
types in singlechip is very important. The processor for SN8 series singlechip is 8-bit, and only
the data of BYTE type is supported directly by processor. For advanced programming language
like C, no matter what type the data is, literally, the operation for a single statement seems simple.
Whereas, the C compiler needs a series of machine instructions, to handle with the complicated
variable types and data types. The process is distinct even if only the variable types are different in
the statements, and the code generated is distinct too. Especially when the float type is used, the
SONiX TECHNOLOGY CO., LTD
Page91
SN8 C Studio
User’s Manual
operation time and the code length are increased obviously. When the program requires precision
in calculation, C compiler will call corresponding subroutines and add them into the present
program. Many inexperience programmers use a lot of unnecessary variable types, which means
the C compiler will call more functions in the library to handle with the increasing number of
variable types. This will cause the program become too huge and slow down the processing speed.
What’s worse, the program may become too large to be loaded into ROM while linking. Thus the
variable and data type should be chosen carefully.
As for the signed and unsigned variable types, if both of them are used while coding, then both
types of the library functions will be involved. Doing this will cause the allocated memory
increase to double size. Therefore, if the operation speed is emphasized and the program dose not
need negative data operations, the “unsigned” type is preferred.
Note:
1.Please choose the data types which need less memory if they can accomplish
the functions all right.This will bring us profit when we use the RAM
memory and improve the efficiency of code generating.
2.The unsigned types are preferred, and this can avoid some errors, as the data
inside the chip is handled as unsigned type.
3.Attention!C language is case-sensitive, a rule for naming the variables
should be followed at the beginning. Hump-notation is a good choice, but
assembler programmers may not be accustomed to it at the beginning.
In standard C, the data types are usually abbreviated to bring convenience while writing code,
and this is also allowed in SN8 C.
#define uchar unsigned char
#define uint unsigned int
“uchar” can be used instead of “unsigned char” , and “uint” can be used instead of “unsigned
int” while defining variables.
8.2.2 Data Storage Type and Structures
We had mentioned the storage of data in singlechip is devided into two parts: ROM and RAM,
they are called program memory (ROM) and data memory (RAM). They are declared by
SONiX TECHNOLOGY CO., LTD
Page92
SN8 C Studio
User’s Manual
keywords “.code” and “.data” in assembler program.
SN8 series singlechips do not use extended memory, they offer various chip types, and you can
choose the chip as your requirements. Therefore, the data is stored inside the chip, and there is no
need to distinguish inside or outside the chip while addressing.
The data memory (RAM) structure for SN8P singlechip is shown below:
Bank0
0000H
General Memory
007FH
0080H
System Registers
00FFH
Bank1
00100
General Memory
01FFh
128Byte
User
Memory
80H~FFH
is
for
system registers
More User Memory
Figure 3-2 RAM structure
The size of general RAM in SN8P series singlechips differ from chips, RAM is divided by
BANKs, the address in a BANK is 00H~FFH. All the memories of 80H~ FFH in Bank0 are
reserved for system registers.
The variables we mentioned above are data structures that stored in RAM. Keywords
“__RAM” and “__ROM” can be used to specify the location of variables, as the definition of
variables usually locates in RAM, so the keyword “__RAM” is default. Let’s take a look at those
examples:
unsigned int temp1;
unsigned int __RAM temp2;
__RAM unsigned int temp3;
unsigned long job_mode;
unsigned long __RAM job_mode2;
__RAM unsigned long job_mode3;
float powerValue;
float __RAM powerValue;
__RAM float powerValue;
SONiX TECHNOLOGY CO., LTD
Page93
SN8 C Studio
User’s Manual
int temp1_1;
//signed int
int __RAM temp1-2;
__RAM temp1-3;
long temp2_2;
The definitions above have the same effect—define variables and put them into RAM. The
default value brought us convenience.
In RAM, 80H~FFH is for system registers.
The content of registers will differ from different chips, but their definitions locations are the
same. Those registers are corresponding with the system resource of the chips. SN8 C defines
those registers according to the system resource.The definitions are as below:
#define
L
(*((__RAM unsigned int*)0x80))
#define
H
(*((__RAM unsigned int*)0x81))
#define
R
(*((__RAM unsigned int*)0x82))
#define
Z
(*((__RAM unsigned int*)0x83))
#define
Y
(*((__RAM unsigned int*)0x84))
#define
X
(*((__RAM unsigned int*)0x85))
#define
PFLAG (*((__RAM unsigned int*)0x86))
These definitions are included in the corresponding header files (.h), so users do not have to
define the register names, they can just include the header files at the beginning of the program.
#include <sn8p2708a.h>
Note:
Those system registers are defined with capitals, please pay attention to this
while coding.
8.2.3 Bank Configuration
SN8P supports the RAM BANK configuration which can address the exact bank for variables.
RAMBANK n Model
This model enables users to address a global variable or a static variable in the appointed RAM
BANK. For example:
SONiX TECHNOLOGY CO., LTD
Page94
SN8 C Studio
User’s Manual
//following variables are all static or global.
//where the “n” is the bank number (0~255)
//“default” means decided by linker.
#pragma rambank 3
int X = 123; //X is in bank 3
#pragma rambank 27
static int Y = 123; //Y is in bank 27
#pragma rambank off
//from now on,all new defined static or global variables will be
//located by linker.
SN8 C Compiler sets bank switch instruction every time before accessing variable in the
specified bank number. The assembler has the function doing optimization in order to delete some
bank switch instructions un-necessary.
8.3 Basic Operators and Expressions
There are a lot of operators and expressions in C, and this is unusual in advanced languages.
These operators and expressions make the functions of C language completed. This is one of the
main features of C.
The operations in C have different priorities, and they have another feature—associativity. In
expressions, the order of the operands been evaluated is decided not only according to the
operators’ priorities, but also according to their associativities. Associativities are used for
deciding whether the operands should be evaluated from left to right or the opposite. This kind of
associativity for operators dose not exsit in other advanced languages, it increase the complication
of C language too.
The operations in C language are classified into those categories:
8.3.1 Arithmetic Operators and Expressions
Arithmetic operators are used for calculating values. There are seven of them: addition (+),
substraction (-), multiplication (*), division (/), remainder (also called modular arithmetic, %),
increment (++) and decrement (--).
Arithmetic expressions are formulas connected by arithmetic operators and brackets, and
here are some examples:
SONiX TECHNOLOGY CO., LTD
Page95
SN8 C Studio
User’s Manual
a+b
(a*2)/c
(x+r)*8-(a+b)/7
++i
sin(x)+sin(y)
(++i)-(j++)+(k--)
8.3.2 Relational Operators and Expressions
Relational operators are used for compare. There are six of them: greater than (>), less than
(<), equality (==), greater than or equal (>=), less than or equal (<=) and inequality (!=).
The format of realational expression is: expr Realational-operator expr.
For example: a+b>c-d,x>3/2,'a'+1(b>c),a!=(c==d). The value of the realational expression is
“true” and “false”, which are indicated by “1” and “0”.
For example, the value of “5>0” is “true”, that is promoted to “1”. The value of
“(a=3)>(b=5)” is “false” because “3>5” evaluates to “false”, that is promoted to “0”.
Character variables are evaluated by their corresponding ASCII codes. As to the expressions
which have more than one relational operators, such as “k==j==i+5”. According to the
left-associative feature of operators, the “k==j” expression which evaluates to “false” will be
evaluated firstly, and the value of it is “0”; then the expression “0==i+5” will be evaluated, it
evaluates to “false” either, so the whole expression is evaluates to “0”.
8.3.3 Logical Operators and Expressions
There are three logical operators in C language: logical AND (&&), logical OR (||), logical
NOT (!).
Logical AND (&&) and logical OR (||) have two operands and they are left-associative.
Logical NOT (!) has one operand and it is right- associative.
Values of logical expressions
The values of logical expressions are “true” and “false”, and they are indicated by “1” and “0”.
The evaluating rules are shown below:
1. The logical ADD (&&) operator evaluates to “true” only if both its operands evaluate to
“true”, For example, “5>0 && 4>2”, the value is “true” because both values of “5>0” and
“4>2” are “true”.
2. The logical OR (||) operator evaluates to “true” if either of its operands evaluates to “ture”.
It evaluates to “false” if both of its operands evaluate to “false”. For example, “5>0||5>8”
evaluates to “ture” because the value of “5>0” is “true”.
3. The logical NOT operator (!) evaluates to “true” if its operand has a value of false or zero;
otherwise, it evaluates to “false”.
SONiX TECHNOLOGY CO., LTD
Page96
SN8 C Studio
User’s Manual
For example: the value of “!(5>0)” is “false”.
When evaluates logical expressions, C compiler considers “1” as “true”, “0” as “false”. On the
other side, when evaluates whether a value is “true” or “false”, “0” indicates “false”, and the
non-zero value indicates “true”. For example, “5” and “3” are both non-zero values, so the value
of “5&&3” is “true”, that is “1”.
Another example, the value of “5||0” is “true”, that is “1”.
The format of logical expression:
expr logical-operator expr
The “expr” above can be logical expression, this is a kind of nested situation. For example:
“(a&&b)&&c”, as the operands are evaluated from left to right, this expression can be write as
“a&&b&&c”. The value of a logical expression is the final evaluation of all the logical operations,
“1” indicates “true” and “0” indicates “false”.
8.3.4 Bitwise Operators
The operands are evaluated as binary digit. There are six bitwise operators: bitwise AND (&),
bitwise OR (|),bitwise NOT (~), bitwise XOR (^), left shift (<<), right shift (>>).
8.3.5 Assignment Operators
Assignments are used for assigning values. There are three kinds of them: simple assignment
(=),
compound
assignment
(+=,-=,*=,
/=,%=)
and
compound
bitwise
assignment
(&=,|=,^=,>>=,<<=). There are eleven bitwise operators in total.
Simple assignment operators and expressions
The operator is “=”, the expression connected by “=” is called assignment expression. The
format of it is: variable = expression, for example:
x=a+b
w=sin(a)+sin(b)
y=i+++--j
The function of assignment expression is to assign the value of the right-hand expression to
the left-hand variable.
Assignment operator is right- associative, so:
a=b=c=5
Can be considered as:
SONiX TECHNOLOGY CO., LTD
Page97
SN8 C Studio
User’s Manual
a=(b=(c=5))
In other advanced languages, assignment is considered as a statement, it is called assignment
statement. Whereas, the “=” is defined as an operator in C, and it is an assignment expression.
Anywhere an expression can locate, an assignment expression can locate. For example, “x=
(a=5)+(b=8)” is legal, it means assign 5 to “a” and assign 8 to “b”, then assign the sum of “a” and
“b” to “x”, so the value of “x” is 13.
Assignment statements can exsit in C too. As C language prescribes, any expression with a
semicolon after it is considered as a statement. For example, “x=8;a=b=c=5;” are all considered as
assignment statements.
If the right-hand expression’s type is not the same as the type of the object being assigned to,
an automatic type convert will be executed by compiler, the compiler will implicaitly convert the
type of the right operand to the type of the object being assigned to.The rules are as below:
1. Assign real type to integer type. The decimals are abandoned. The example 2.9 has shown
this situation.
2. Assign integer type to real type. The value will not be modified, but it will be stored as
float type, which means the decimal fraction will be added (the decimal fraction is 0).
3. Assign character type to integer type. One character occupies one byte, but one integer
occupies two bytes. Then the ASCII code of the character is put in the lower 8 bits of the integer,
higher 8 bits of the integer are all padded by 0.
4. Assign integer type to character type. Assign the lower 8 bits of the integer to the
character.
Compound assignment operators and expressions
Add two-operand operators in front of the assignment “=” compose a compound assignment
operator.
+=,-=,*=,/=,%=,<<=,>>=,&=,^=,|=. The format of a compound assignment operator is:
“variable two-operand-operator= expr” , this equals “variable= variable operator expr”, for
example:
a+=5 equals a=a+5
x*=y+7 equals x=x*(y+7)
r%=p equals r=r%p
SONiX TECHNOLOGY CO., LTD
Page98
SN8 C Studio
User’s Manual
Beginners may not be used to the format of compound assignment operator, but this can
improve the efficiency of the compiling process and generate quality object code.
8.3.6 Conditional Operator
The conditional operator provides a conveninent notational alternative to simple “if-else”
statements.
Conditional operator are “?” and “:”, it has the following synatatic form:
expr1 ? expr2 : expr3;
“expr1” is always evaluated and results in either “true” or “false”. If it evaluates to “true”,
expr2 is evaluated, otherwise, expr3 is evaluated.
For example, rather than write simple if-else statement:
if(a>b) max=a;
else max=b;
One can write
max=(a>b)?a:b;
The meaning of this statement is: if “a>b” is “true”, then assign “a” to “max”, else assign “b”to
“max”.
Here are some notes when use conditional expressions:
1. The precedence of conditional operators is lower than relational operators and arithmetic
operators ,but it’s higher than assignment operators. Thus, “max=(a>b)?a:b” can be written
as “max=a>b?a:b”.
2. The “?” and “:” in conditional operator is a couple, and they can not be used separately.
3. The evaluation of conditional operators is right-to-left.
8.3.7 Comma Operator
In C, comma (,) is an operator, it is called comma operator. A comma expression is a series of
expressions separated by commas.
The synatatic form is: expr1, expr2
The result of a comma expression is the value of the expr2.
For example:
SONiX TECHNOLOGY CO., LTD
Page99
SN8 C Studio
User’s Manual
void main(){
int a=2,b=4,c=6,x,y;
y=(x=a+b),(b+c);
printf("y=%d,x=%d",y,x);
}
a<--2,b<--4,c<--6,x<--0,y<--0
x<--a+b,y<---b+c
In this instance, “y” is the result of this comma expression, its value is the value of (b+c), and
the value of “x” is the result of (a+ b). Heres are some notes when the comma expression is
used:
1. The “expr1” and “expr2” in a comma expression can be comma expressions too. For
example,
“expr1, (expr2, expr3)”;
This is a nested situation. So the comma expression can be extended as:
“expr1, expr2, …expr n”;
The result of the comma expression is the value of “expr n”.
2. When we write a comma expression, generally, what we want is not the result of the whole
expression, but the value of the expressions in the comma expression.
3. Not all the commas in the program compose comma expressions. For instance, in the
variable declaration statements, the commas in parameter list are intervals between variables.
8.3.8 Pointer Operators
They are used for fetching content (*) and fetching address (&).
8.3.9 The Sizeof Operator
The “sizeof” operator returns the size, in bytes, of an object or type name.
8.3.10 Special Operators
Parentheses(), subscript [], member (→,.) ,etc.
SONiX TECHNOLOGY CO., LTD
Page100
SN8 C Studio
User’s Manual
8.3.11 Precedence and Associativity
There are 15 different priorities for operators in C language. Level 1 is the highest, and level
15 is the lowest. The operators with higher priorities are evaluated before the lower-priority
operators in expressions. If the operators beside the same operand have the same priority, they are
evaluated according to the associativity. There are two associativities in C language:
left-associative (from left ro right) and right-associative (from right to left). Say, the arithmetic
operator is left-associative, the expression “x-y+z”, “y” should associate with “-” first, the “x-y”
will be evaluated, then the result +z, this left-to-right association is called left-associative, and the
right-to-left association is right-associative. The typical right-associative operator is assignment
operator. The expression “x=y=z”, first assign “z” to “y”, then the result of that to “x”. There are a
lot of right-associative operators in C language, we should pay attention to them to avoid the
understanding confusion.
Precedence
Operators
( )
!
~
++
[ ]
--
From
+
High
<
-=
|=
left to right
(type) sizeof
right to left
*
&
%
left to right
+
-
left to right
<<
>>
left to right
<=
>
==
!=
low
+=
->
/
to
=
.
*
Association
*=
>=
left to right
left to right
&
left to right
^
left to right
|
left to right
&&
left to right
||
right to left
?:
right to left
/=
<<=
%=
&=
left to right
^=
>>=
Table 4-1 Precedence and Associativity of Operators
SONiX TECHNOLOGY CO., LTD
Page101
SN8 C Studio
User’s Manual
8.4 Program Flow Control
Program flow control is the soul of a program, only with a correct program flow control can
a program be executed all right. A well designed proceduce of program can make the program
work effectively. The flow control of a program is the part which desires most considerations in
both C and assembler programming.
8.4.1 Sequential Structure
Sequential execution is the most basic flow in a program, statements are executed in the
sequential order in which they occur. This is the initial mode for programming.
Sequential Program Flow:
A Operation
B Operation
Figure 4-1 Sequential Program Flow Chart
This is a flow which has a clear direction and timing. The evolution of “A” operation has
only one direction, that is “B” operation, there is no repeat or jump, “B” operation will be
executed after “A” operation to a certainty.
We can see some instance executed by c language: (the initialization of a micro-wave oven)
key_bibi_f = 1;
menu_disp_h = 0xf0U;
// beep once when electrified
//display 0:00 when electrified
menu_disp_l = 0;
SONiX TECHNOLOGY CO., LTD
Page102
SN8 C Studio
User’s Manual
disp5 = 0xffU;
Those statements are initializations for different purpose. The statements are executed in the
sequential order in which they occur.
SN8 Assembler implementation:
b0bset key_bibi_f
mov
a,#0f0h
mov
menu_disp_h,a
mov
a,#00h
mov
menu_disp_l,a
mov
a,#11111111b
mov
disp5,a
; beep once when electrified
; display 0:00 when electrified
This is the assembler program for the former C program, and the two programs’ functions
are all the same. There is no jump or judgement in the sequential assembler language, it is
corresponding with the original program.
The logical relationship of them can be found out easily by this compare.
8.4.2 Conditional Structure
Except in the simplest programs, sequential program is inadequate to the problem we must
solve. Special flow-of-control program statements allow for the conditional or repeated execution
of a simple or compound statement, which is based on the true or false evaluation of an
expression.
The “if” Statement
An “if” statement provides for the conditional execution of either a statement or statement
block based on whether a specified expression is true.
1. Basic syntactic form
SONiX TECHNOLOGY CO., LTD
Page103
SN8 C Studio
User’s Manual
if (condition)
statement;
If the condition is “true”, the statement followed will be executed, otherwise, do nothing.
2. The if-else form
if (condition)
Statement1;
Else
Statement2;
If the condition is “true”, statement1 will be executed, otherwise, execute statement2.
Conditional Program Flow:
Is P true?
A Operation
B Operation
Figure4-2 Conditional Program Flow
Simple conditional structure judges one condition to decide the following operation, this is
a simplest jugdement.
C implementation: ( BCD code adjust)
SONiX TECHNOLOGY CO., LTD
Page104
SN8 C Studio
User’s Manual
if(result_buf > 0x0a)
{
result_buf = input + 6;
}
else
{
result_buf = input;
}
In C, we use condition statement to implement this judging logic, no matter what condition
it is, we just evaluate the “true” or “false” of its value. “If…else” is an excellent judge couple, we
can use them to accomplish these functions implemented by assembler.
SN8 assembler:
cmprs
a,#0ah
nop
b0bts0 fc
jmp $+3
b0mov a,y
ret
b0mov a,y
add a,#6h
;
put the adjusted value into a
In fact, we have some conditional choices in assembler too:
When the condition is a bit variable, it can be judged by instruction “b0bts”.
We can use instruction CMPRS to judge whether a condition satisfies a pre-set value. It can
be judged by converted to flags too, like using the SUB instruction to convert it to FC or FZ.
What’s more:
A. Serial multiplied branches flow:
Most of the time, one single condition is insufficient to analyse complicated problems. One
result may require the combination of many conditions, and every single condition results
different outcome. This is a serial of judgment.
The first two “if” statements are used for the condition which has two branches. When the
multiple branches are needed, we can use if-else-if statement. The syntactic form is:
SONiX TECHNOLOGY CO., LTD
Page105
SN8 C Studio
User’s Manual
if(condition1)
statement1;
else if(condition 2)
statement 2;
else if(condition 3)
statement 3;
…
else if(condition m)
statement m;
else
statement n;
The meaning is: evaluate the conditions in order, when one condition is “true”, the
corresponding statement is executed, then jump out of the “if” statement. If all the conditions are
“false”, “statement n” will be executed. Then go on executing the following programs. The flow is
as below:
Y
N
Is P1 true?
Y
N
Is P2 true?
Y
N
Is Pn true?
C1
C2
C3
C4
Figure 4-3 Serial multiplied branches flow chart
Nested “if” statement and “else if” statement in C:
SONiX TECHNOLOGY CO., LTD
Page106
SN8 C Studio
User’s Manual
if(key_bibi_f)
{
buzzer_time = d_buzzer_time1;
buzzer_not = d_buzzer_not3;
// length of beeps,200ms
// beep times,#1
}
else if(end_bibi_f)
//buzzer10
{
buzzer_time = d_buzzer_time2;
buzzer_not = d_buzzer_not1;
// length of beeps,500ms
// beep times,#10
}
else if(segment_bibi_f)
//buzzer20
{
buzzer_time = d_buzzer_time2;
buzzer_not = d_buzzer_not1;
// length of beeps,500ms
// beep times,#4
}
Explanation:
key_bibi_f
; key-press beep request flag
end_bibi_f
; cook-finished beep request flag
sgment_bibi_f
; segment shift beep request flag
key-press beeps:200ms/once
cook-finished beeps:500ms/5 times
segment shift beeps:500ms/twice
Question: How’s the implementation of SN8 ASM?
The implementation of SN8 ASM is as following:
Buzzer00:
b0bts1
key_bibi_f
jmp buzzer10
mov
a,@buzzer_time1
;200ms
mov
buzzer_time,a
; length of beeps
mov
a,@buzzer_not3
;#1
mov
buzzer_not,a
; beep times
SONiX TECHNOLOGY CO., LTD
Page107
SN8 C Studio
User’s Manual
jmp buzzer40
buzzer10:
b0bts1
end_bibi_f
jmp buzzer20
mov
a,@buzzer_time2
;500ms
mov
buzzer_time,a
; length of beeps
mov
a,@buzzer_not1
;#10
mov
buzzer_not,a
; sign-reverse times
jmp buzzer40
buzzer20:
b0bts1
segment_bibi_f
jmp buzzer30
mov
a,@buzzer_time2
;500ms
mov
buzzer_time,a
; length of beeps
mov
a,@buzzer_not2
;#4
mov
buzzer_not,a
; sign-reverse times
jmp buzzer40
Here are some notes for the “if”statement:
(1) The conditions after keyword “if” are expressions in these three if-statement forms, and the
expressions are usually logical or relational. Other kinds of expressions like assignment are also
allowed, it can be a variable too. For example, statements “if(a=5)”; “if(b)” are all allowed. As
long as the value of the expression is non-zero, “true” it is, the following statements will be
executed as well. For instance, the expression in statement “if(a=5)…” is always “true”, and the
following statements will be executed all the time. This is allowed by C syntax.
Another instance:
if(a=b)
printf("%d",a);
else
printf("a=0");
SONiX TECHNOLOGY CO., LTD
Page108
SN8 C Studio
User’s Manual
“b” is assigned to “a”, if the result is not 0, then print the value of “a”, else print string “a=0”.
This is the common use of if-statement.
(2) The condition should be involved by parentheses, and statements should terminate with
semicolon.
(3) The statements are all single in the examples above. If multiple statements should be
executed when certain condition is evlued as “true”, these statements should be involved in “{ }”
to be a compound statement. Please note that a semicolon is not allowed after “}”.
For example:
if(a>b){
a++;
b++;
}
else{ a=0;
b=10;
}
Nested if-statement
When the executive statement in an if-statement is another if-statement, this is a situation of
nested if-statement. The syntactic form is as following:
if(condition)
If-statement
or
if(condition)
if-statement
else
if-statement
SONiX TECHNOLOGY CO., LTD
Page109
SN8 C Studio
User’s Manual
The if-statement been nested may be if-else style too, then there will be multiple “if” and “else”
in the program.
if(condition1)
if(contition2)
statement1;
else
statement2;
Here introduces a source of potential ambiguity referred to as the dangling-else problem,
which “if” dose the “else” clause properly match up?
Is it:
or:
if(condition1)
if(condition1)
if(condition2)
if(condition 2)
statement1;
statement1;
else
else
statement2;
statement2;
In C, however, the dangling-else ambiguity is resolved by matching the “else” with the last
occurring unmatched “if”.
So the above example is comprehended as the first one.
B. Parallel multiplied branches flow
C provides the switch-statement for choosing among a set of mutually exclusive choices.
SONiX TECHNOLOGY CO., LTD
Page110
SN8 C Studio
User’s Manual
P=?
P=1
P=2
A1
A2
P=3
A3
P=n
An
Figure 4-4 Parallel multiplied branches flow
The usage of “swith…case” in C is as follows:
switch(expression){
case constant expression1: statement1;
case constant expression 2: statement2;
…
case constant expression n: statement n;
default : statement n+1;
}
Evaluate the switch expression and compare the result with the constant-expressions, when
the switch expression matches one of those constant-expressions, the statement follows the
corresponding constant expression will be executed, then jump out of switch clause and execute
the next statement; when none of those constant expressions are matched, the statement following
the default label is evaluated. For example:
switch(step)
{
case 0:
//press button once to set time
SONiX TECHNOLOGY CO., LTD
Page111
SN8 C Studio
User’s Manual
ks81();break;
case ONE_PRESS_CLOCK_KEY_C:
//press twice to set the minutes
ks82();break;
case TWO_PRESS_CLOCK_KEY_C :
//press for the third time to
end time setting
ks83();break;
case BESPOKE_ING_C :
// press button to query pre-set time
ks84();break;
case SELECT_TIME_C :
//set flag bespoke_f=1
if(job_mode1== DEFROST_MODE_C) break;
else ks85();break;
case START_ING_C:
//query for the running time
if(job_mode1 == DEFROST_MODE_C) ks86();break;
}
Here are some notes for switch-statement:
1. The constant expressions should be different, or errors may occur.
2. Multiple statements are allowed after “case” label, the “{ }” is not must.
3. The sequence of the “case” and default clauses is alterable, and the result of the program
will not be affected.
4. “default” label is an option.
The assembler:
mov
a,step
b0bts1 fz
;=0 press button once to set time
jmp ks82
cmprs
a,ONE_PRESS_CLOCK_KEY_C
jmp ks83
cmprs
a,TWO_PRESS_CLOCK_KEY_C
jmp ks84
cmprs
; end time setting
a,BESPOKE_ING_C
; query time
jmp ks85
SONiX TECHNOLOGY CO., LTD
Page112
SN8 C Studio
User’s Manual
cmprs
a,SELECT_TIME_C
;press button to reserve
jmp ks86
key81:
jmp
key89
jmp
key89
jmp
key89
jmp
key89
jmp
key89
jmp
key89
key82:
key83:
key84:
key85:
key86:
key89: ret
8.4.3 Loop Structure
Loop structure is very important for a program. Loop control statements support the
repeated execution of a single statement or statement block while a specified condition holds true.
The condition is called “loop condition”, the repeated statement or statement block are called
“loop body”. C provides different loop control statements to compose different loops.
SONiX TECHNOLOGY CO., LTD
Page113
SN8 C Studio
User’s Manual
N
Is P true?
Y
A
Figure4-5 “While” loop flow chart
The while Statement
The syntactic form of “while” statement:
while (condition)
statement;
For as much iteration as the condition evaluates as true, the statement or statement
block is executed.
“While” loops in C:
tempbuf = 0;
while(tempbuf==15){++tempbuf;} //delay
While loops in assembler:
Clr y
Loop:
SONiX TECHNOLOGY CO., LTD
Page114
SN8 C Studio
User’s Manual
B0mov a,y
Cmprs a,#15
Jmp
$+2
Jmp
loop90
decms y
jmp
;delay
loop
loop90:
RET
Here are notes for while-statement:
1. The condition in while-statement is usually relational or logical expressions, the while loop
will loop until the expression is evaluated to “false” (0).
2. More than one statements in loop body should be involved by “{}” to form compound
statement.
3. The condition should be chosen carefully to avoid dead loops.
void main(){
int a,n=0;
while(a=5)
{
printf("%d ",n++);
}
}
The condition here is the assignment expression “a=5”, which is always evalued to be
“true”, and there is no other means to terminate this loop in loop body, so this loop will
execute forever to be a dead loop.
4. Another while statement is allowed in the repeated statement in a while statement, which
forms a double loop situation.
The do-while Statement
The syntactic form of do-while statement:
do
statement;
while(condition);
SONiX TECHNOLOGY CO., LTD
Page115
SN8 C Studio
User’s Manual
The statement is loop body, condition is the loop condition.
The meaning of do-while statement is:
Statement is executed before condition is evaluated. If condition evaluates as false, the loop
terminates.
A
Y
Is P true?
N
Figure 4-6 “Do…while” flow chart
“Do…while” in C:
unsigned int * pyz = (unsigned int *)0x7f;
do{
*pyz =
0x00;
--i;
}while(i);
“Do…while” in assembler:
ClrRAM:
clr Y
;Select bank 0
b0mov Z,#0x7f
;Set @YZ address from 7fh
SONiX TECHNOLOGY CO., LTD
Page116
SN8 C Studio
User’s Manual
ClrRAM10:
clr @YZ
;Clear @YZ content
decms Z
;z = z - 1 , skip next if z=0
jmp ClrRAM10
clr @YZ
mov
;Clear address 0x00
a,#00H
Here are notes for do-while statement:
1. In if-statement and while-statement, the expressions could not terminate with semicolon,
but a semicolon is required after the while-condition of do-while statement.
2. do-while statements can compose multiple loops, and it can nest with while-statements
too.
3. More than one statements in loop body should be involved by “{}” to form compound
statement too.
4. When swap do-while and while-statements, the loop control should be altered too.
The difference between do-while and while-statement is that the do-while loop guarantees
that its statement is always executed at least once; but for while loop, unless the loop control
evaluates to true, the loop body is never executed.
Generally, do-while and while-statements are interchangeable.
The for Loop Statement
“For” loop statement is another widely used loop statement provided by C. Its syntactic form is:
for(init-statement; condition; expression)
statement
“Init-statement” is usually used to initialize or assign a starting value that is incremented over
SONiX TECHNOLOGY CO., LTD
Page117
SN8 C Studio
User’s Manual
the course of the loop. If an initialization is unnecessary or occurs elsewhere, the init-statement
can be left off.
“Condition” serves as the loop control, usually conditional or logical expressions.
“Expression” is generally used to modify the variables initialized in init-statement and tested
in condition.
All of them can be comma expressions, which mean that they can be composed by multiple
expressions. They are all optional and can be left off.
The statement is loop body.
The order of evaluation is as follows:
1. Init-statement is executed once at the start of the loop.
2. Condition is executed. If it evaluates to true, the compound statement is executed, a false
condition terminates the loop. An initial false condition results in the compound statement never
being executed
3. Expression is executed. Typically, this modifies the variable(s) initialized in init-statement
and tested in “condition”.
These three steps represent one complete iteration of the for loop. Step 2 is now repeated,
followed by step 3, until the condition evaluates to false.
Here are notes for for-statement:
1. All the expressions in for-statement can be omitted, but the interval semicolon can not be
omitted. For example, for (init-statement;; expression) , the “condition” has been omitted.
“for (init-statement; condition;)”, the expression is omitted, all the expressions in “for(;;)”
have been ommited.
2. When the loop variable has been initialized, init-statement can be omitted; if “condition”
and “expression” are omitted, the loop should be terminate inside the loop body.
3. Loop body can be null.
4. for-statement can nest with “while” and “do-while” statements to form multiple loops. All
the following nested statements are legal:
(1)for(){…
SONiX TECHNOLOGY CO., LTD
Page118
SN8 C Studio
User’s Manual
while()
{…}
…
}
(2)do{
…
for()
{…}
…
}while();
(3)while(){
…
for()
{…}
…
}
(4)for(){
…
for(){
…
}
}
Transfer Statements
The statements in a program are executed by the sequence of order or the sequence decided by
the statements. If the regular program flow needs to be altered, the transfer statement can be used.
C provides 4 transfer statements:
goto,break, continue and return。
The “return” statement can only exists in the function been called, it is used to return to the
main function.
SONiX TECHNOLOGY CO., LTD
Page119
SN8 C Studio
User’s Manual
1. The goto Statement
The goto Statement is called unconditional transfer statement, its syntactic form is:
goto label;
where “label” is a user-supplied identifier, a label-statement can be used only as the target of
a “goto” and must be terminated by a colon.
C does not restrict the number of labels, but label names could not be the same. The
goto-statement provides unconditional branching within a function from the goto-statement to a
label-statement somewhere within the same function.
Generally, the gotostatement is used with conditional statements, it is used to transfer from a
certain condition or jump out of a loop, etc.
The gotostatement is the most deprecated feature of modern programming languages. Use of
the goto-statement often renders a program's control flow difficult to understand or modify. Most
uses can be replaced with a conditional or loop statement. If you do find yourself using a
goto-statement, we recommend that it not span a wide program sequence.
2. The break Statement
A break-statement terminates the nearest enclosing “while”, “do while”, “for”, or “switch”
statement. Execution resumes at the statement immediately following the terminated statement.
The transfer direction of break-statement is clear, so no labels are needed. The syntactic form of
break statement is:
break;
Some previous examples use break statement to jump out of for-loop and switch-statement, the
usage of break make the loop or switch statememt have multiple exits, this can make
programming more flexible and convenient.
3.
The continue Statement
A continue-statement causes the current iteration of the nearest enclosing loop-statement to
SONiX TECHNOLOGY CO., LTD
Page120
SN8 C Studio
User’s Manual
terminate. Execution resumes with the evaluation of the condition. Unlike the break-statement,
which terminates of the loop, the continue-statement terminates only the current iteration.
Its syntactic form is:
continue;
8.5 Array
An array is a collection of objects of a single data type. The individual objects are not named;
rather, each one is accessed by its position in the array.
8.5.1 Array Types
In C, arries should be type defined before using, the syntactic form of array definition:
type arrayName [constant-expression],…;
“Type” is one of basic data or structure data type, “arrayName” is a user-define label for array,
the constant-expression is the number of the data elements in an array, it is also called “array
length”.
For instance:
int a[10]; the integer array “a” with 10 elements
float b[10],c[20]; the float array “b” with 10 elements and the float array “c” with 20 elements
char ch[20]; the character array “ch” with 20 elements
Here are some notes for the type definition of arrays:
1.The type of an array is actually the type of the elements in that array, the type of elements is
the same in one array.
2.Name an array should follow the prescription of naming an identifier.
3.The name of arrays can not be the same with other variables.
The codes:
void main()
{
SONiX TECHNOLOGY CO., LTD
Page121
SN8 C Studio
User’s Manual
int a;
float a[10];
……
}
will cause an error.
4.
Constant-expression in the square brackets denotes the number of elements in an array. For
example, a[5] means there are 5 elements in array a, and its subscript is begin with 0, so the 5
elements in array “a” are: a[0],a[1],a[2],a[3] and a[4].
5. The expression in the square brackets can not be a variable, but it can be constant or
constant-expression, for example:
#define FD 5
void main()
{
int a[3+2],b[7+FD];
……
}
is legal, but the following statements is wrong:
void main()
{
int n=5;
int a[n];
……
}
6.
Multiple arrays and variables are allowed in one type define statement.
For example,
int a,b,c,d,k1[10],k2[20];
SONiX TECHNOLOGY CO., LTD
Page122
SN8 C Studio
User’s Manual
8.5.2 The Form of Arrays
The basic cell in an array is the elements. Element is a kind of variable, it is denoted by
array name and a subscript. The subscript is the sequence of the element in the array. The form of
array is:
arrayName [subscript]
The subscript can only be integer constant or expression. When the subscript is decimal
fraction, C compiler will get integer part of the decimal automatically, for example, “a[5]”,
“a[i+j]”, “a[i++]” are legal array elements. Array elements are also called subscript variables. In
order to use subscript variables, an array should be defined firstly. In C, subscript variables should
be used one by one instead of using the whole array in a time.
The Assignment of Arrays
The way to assign values to arrays including assign values to elements one by one, the
initialization and the dynamic assignment. Initialization is to assign the initial values to elements
while declaring an array, which is handled while compiling. By this means, the running time will
be reduced and efficiency will be improved.
The form of initialization is:
static type arrayName[constant expression] = {value1, value2, value3,…};
static declares the type is static. In C, only static array and external arrays can be initialized,
and the values separated by comma in “{}” is the initial value for elements. For example,
static int a[10]={ 0,1,2,3,4,5,6,7,8,9 }
indicates
a[0]=0;
a[1]=1;
...
a[9]=9;
Here are some notes for the array initialization in C:
SONiX TECHNOLOGY CO., LTD
Page123
SN8 C Studio
User’s Manual
1. The elements can be partly initialized. If the number of values in “{}” is less than the
number of elements, only the anterior part of the elements are initialized.
For example,
static int a[10]={0,1,2,3,4};
means only a[0]~a[4] are initialized, and the posterior 5 elements are initialized to be 0
automatically.
2. The elements can only be initialized one by one, and the array can not be initialized as a
whole. For example, to assign 1 to all the 10 elements, the form can only be:
static int a[10]={1,1,1,1,1,1,1,1,1,1};
but can not be:
static int a[10]=1;
3.
If an initialize-able array is not initialized, the values will be 0 by default.
4.
If all the elements are assigned in an array declaration, then the number of the array
elements dose not have to be specified while declaring. For example,
static int a[5]={1,2,3,4,5};
can be written as:
static int a[]={1,2,3,4,5};
Dynamic assignment can be used while run-time, it will assign values to the array dynamically.
Two-dimension Arrays
The arrays indroduced previously have only one subscription, they are called one-dimension
arrays. The elements are called single subscript variables. However, many of the values in our
actual life is two-dimension or multidimensional, and these multidimensional arrays are allowed
in C. Multidimensional arrays have more than one subscription to indicate the position of the
element, they are also called multi-subscription variables. We indroduce two-dimension arrays
SONiX TECHNOLOGY CO., LTD
Page124
SN8 C Studio
User’s Manual
here, and multidimensional arrays have an analogy to two-dimension arrays. The form of the
declaration of two-dimension arrays is as follws:
Type arrayName[constant-expression 1] [constant-expression 2];
The constant-expression 1 indicates length of the first-dimension, and constant-expression 2
indicates length of the second-dimension. For example, int a[3][4] is allowed.
8.6 Pointer
8.6.1 RAM/ROM Pointer
The variable of pointer type(there are two leading underscore characters) points not only to
the pointer variable itself ,but also to the variable it points to. In the opinion of the location it was
set in is ROM or RAM, there are four types of pointer variables available in SN8 C Compiler as
list in table 8-5:
Table 7-5
pointer Variable pointed
declaration syntax of pointer
to
__RAM __RAM
TypeObject __RAM * __RAM PtrInRamToObjInRam;
__RAM __ROM
TypeObject __ROM * __RAM PtrInRamToObjInRom;
__ROM __RAM
TypeObject __RAM * __ROM PtrInRomToObjInRam;
__ROM __ROM
TypeObject __ROM * __ROM PtrInRomToObjInRom;
(where :TypeObject specifies the type that been pointed to, it can be basic type ,for instance
structure, typedef, pointer, or more complex structure)
The qualifier _RAM or _ROM on the right side of the ‘*’ specifies whether the variable is
located in a ROM space or a RAM space; while the qualifier _RAM or _ROM on the left side of
the ‘*’ specifies whether the variable been pointed to is located in a ROM space or a RAM space;
All the qualifier _RAM are omissible.
To better illustrate the behavior of the pointers, the _RAM pointer denotes the pointer to
SONiX TECHNOLOGY CO., LTD
Page125
SN8 C Studio
User’s Manual
object in RAM space; _ROM pointer denotes the pointer to object in ROM space; _GENERIC
pointer denotes the pointer to object in RAM or ROM. The pointers generally address RAM and
are changeable, unless those pre-specified. The pointers address ROM are un-changeable.
Because the _RAM pointer and _ROM pointer address different memory space.
int data;
int __ROM * romptr;
int __RAM * ramptr;
data = *romptr;
// O.K. get data from ROM memory。
data = *ramptr;
// O.K. get data from RAM memory。
ramptr = romptr;
// error。Ram pointer can’t address ROM。
romptr = ramptr;
// error。Rom pointer can’t address RAM。
*romptr = data;
// error,can’t write data into ROM。
*ramptr = data;
// O.K. RAM memory is un-changeable。
*ramptr = *romptr;
// O.K. passing data from ROM to RAM via pointer。
8.6.2 Generic Pointer
Generic pointer is applied to access data regardless of the memory it is stored. For example:
typedef struct { int x; int y; } TypeObject;
static TypeObject __RAM RamData = { 1,2 };
static TypeObject __ROM RomData = { 3,4 };
TypeObject value;
TypeObject __RAM * ramptr = &RamData;
TypeObject __ROM * romptr = &RomData;
TypeObject * ptr;
ptr = &RamData;
value = *ptr;
// access RAM Data
ptr = &RomData;
value = *ptr;
// O.K.
// O.K.
// access ROM data
SONiX TECHNOLOGY CO., LTD
Page126
SN8 C Studio
User’s Manual
ptr = ramptr;
// O.K.
value = *ptr;
// get the value of *ramptr (i.e. RomData)
ptr = romptr;
// O.K.
value = *ptr;
// get the value of *romptr (i.e. RomData)
8.7 Functions
Functions are the basic elements of programes, and they play important roles in C
programming language. The main structure of C programe consists of the function definitions and
functions callings. There are some differences between SCM (Single Chip Micyoco) based
programming and general C programming. There are two main differences. The first one is
between the selection of global variable and parameters, the other is the differences between the
selection of parameter types.
8.7.1 Function Definition
Functions are the code segments which can implement special works.The significance of
function occurrence: they can implement the recycle of codes, decrease the code generation
amount. However, almost every function is related with the parameter transmition, so there will
occure code redundancy if we don’t use them properly. Besides, all the callings of functions are
related with the pop action and push action of stacks. The pop action and the push action always
occupy the resource of CPU and affect the real time ability of programmes. If the callings of
functions are too frequently, the efficiency of program execution will be affected. Therefore, to
avoid the function range exaggeration and reducement, users must control the scope of the
functions when we use them. The scope should be suitable for each function.
All the function definitions are parallel including main function definition. That is to say,
there can not be other function definitions in a function body, or one function definition can not be
nested in another one. However, the callings between functions are allowed, and also can be
nested. The callers are named main functions. The main function can call other functions but it
can’t be called by other functions. Hence the executions of C programmes always start from the
main function. The C programmes always call the main function firstly and return to the main
function when the callings of other functions are ended. Then, the execution of C programmes is
ended. Please pay attention to the fact that there must be and can only have one main function in a
SONiX TECHNOLOGY CO., LTD
Page127
SN8 C Studio
User’s Manual
C source programme.
The function definition form
1. The general Non Parameter Function definition:
Function-Type
Function-Name()
{
Type-Declarations;
Language-Statements;
}
The “Function-Type” and the “Function-Name” is the head of functions. The
“Function-Type” indicates the type of the return value. “Type” is the same with the type
declarations in chapter 2. The “Function-Name” is one identifier followed by parenthesis which
has no parameters in. The parenthesis is required and it can’t be omitted. The content in the “{}”
is function body. There are also type declarations in the function body, and they are the
declarations of all the variables inside the function body. Non parameter functions are usually
required to return certain values and then the “Function-Type” can be “void”.
2.The general form for the definition of functions which have parameters
Function-Type
Function-Name ( Formal-Parameter-List)
Formal-Parameter-Declarations
{
Type-Declarations;
Statements;
}
There are two differences between the “Non Parameter Functions” and the functions wich
have
parameters.
Firstly,
there
“Formal-Parameter-Declarations”.
is
The
a
“Formal-Parameter-List”.
parameters
which
are
Secondly,
declared
there
are
in
the
“Formal-Parameter-List” are called “Formal-Parameters”. They are the variables which can be
any type of C programming language. There should be a comma between each
SONiX TECHNOLOGY CO., LTD
Page128
SN8 C Studio
User’s Manual
“Formal-Parameter”. The main function will give each “Formal-Parameter” an actual value when
the main function calls subroutines. The “Formal-Parameters” are variables, so users must declare
them in the function body.
Function should be declared before being called, and this is similar to variabe declarations.
The aim of this action is to inform compiling system the returne-value-type of the called functions,
so that the compiling system can cope with the corresponding type.
There are also two formats for the declaration of the called functions. One is in the
conventional style:
Fuction-Type
Function-Name()
It only indicates the type of return value, the name of the called function, and a parenthesis.
As there is no information provided about parameters, this style is not convenient for compiler to
check for errors.
The other format is the morden style:
Fuction-Type
Function-Name(Type parameter, Type parameter, …);
Or:
Fuction-Type
Function-Name(Type, Type, …);
There are parameter types and parameter names in the parenthesis, or the parameter types
only. This can prevent frequently occur errors as they can be checked by the compiler easily, this
is a better style.
SN8 C supports the morden style.
Note:
Functions without return value should be declared as “void” to
prevent memory reservation.
In C, functions should be declared before being called. Functions will be used are
declared in the beginning of the program in standard C. Then, define them in the programme.
An example is shown below.
SONiX TECHNOLOGY CO., LTD
Page129
SN8 C Studio
User’s Manual
unsigned int bcd(unsigned int);
..
clock_min = bcd(clock_min);
..
unsigned int bcd(unsigned int input)
{
unsigned int result_buf;
result_buf = input & 0x0f;
if(result_buf > 0x0a)
{
result_buf = input + 6;
}
else
{
result_buf = input;
}
return(result_buf);
}
The function which is shown above implements a fixed function and can be called
anywhere in the programme. In C, we give the functions different parameters to get what we need.
In this way, the codes amount can be decrease and the program can be reused.
In the following cases, you can omit the declaration of the callec functions.
(1)When the return value type is “int” or “char”. C compiler will handle return value as “int”
by default.
(2)When a function has been defined before the main function, the function does not have to
be declared in main function.
(3)If functions had been declared before function definiation, then the declarations for them
SONiX TECHNOLOGY CO., LTD
Page130
SN8 C Studio
User’s Manual
can be omitted inside caller functions.
An example is shown below.
char str(int a);
float f(float b);
main()
{
……
}
char str(int a)
{
……
}
float f(float b)
{
……
}
You can see that in the first and second line, the functions “str” and “f” are declared
previously. Therefore, they can be called in functions without being declared again.
(4). When using the library function, just include header files at the beginning of source file
by “include” command, and then the available library function declaration can be omitted.
In fact, you can write function in assembly language as in C programming language.
An example is shown below.
The codes of the calling point:
mov
a,clock_min
b0mov y,a
call
mov
bcd
clock_min,a
SONiX TECHNOLOGY CO., LTD
Page131
SN8 C Studio
User’s Manual
The codes of the function:
bcd:
b0mov a,y
and
a,#0fh
cmprs
a,#0ah
; Move the initial number to “Y”.
nop
b0bts0 fc
jmp
$+3
b0mov a,y
ret
b0mov a,y
add
a,#6h
; Move the changed number to “a”.
ret
From the above example, we can see that parameters in assembly lauguage are passed by the
user defined registers. By the same means, the result can be abtained from A after the function had
been returned. Please refer to the following codes.
mov
clock_min,a
cmprs a,#60h
8.7.2 Argument Passing
In assembly language, users should define registers to store the data of parameters and the
return values of functions. In C, parameters are passed between corresponding arguments and
formal parameters. We can pass arguments to functions by calling them. When the function has
been executed, the return values will be passed back to the calling point.
The procedure of argument passing:
SONiX TECHNOLOGY CO., LTD
Page132
SN8 C Studio
User’s Manual
clock_min = bcd(clock_min);
unsigned int bcd(unsigned int input)
{
………
return(result_buf);
}
Figure5-1: The Argument passing and returning
The features of formal parameters and arguments in functions:
(1). When the formal parameters are called, system allocates memory for them. When the
calling action is finished, system will release the allocated memory. Therefore, the formal
parameters are only available inside the functions , they are invalid when the function had
returned.
(2). The arguments can be constants, variables, expressions, and functions etc. When the
functions use the arguments, there must be a certain value for each argument to pass to the formal
parameters.Therefore, an argument should be granted a value by assigning or inputing value.
(3). Formal parameters and arguments must accord with each other in amounts, types and
orders. Otherwise, there will be a “Not Matched” error.
(4)The functions calling action is unidirectional. That is to say, only the argument value
can be passed to the formal parameter, and the reverse is not right. Therefore, the formal
parameter values will be changed but an argument will not be changed during a function call.
The function value is the return value of the caller function.
(1). The function value can only be gained by “return” expression. The form of “return”
expression:
SONiX TECHNOLOGY CO., LTD
Page133
SN8 C Studio
User’s Manual
return expression;
or:
return (expression);
The function of this statement is to calculate the value of the expression. After calculation,
it passes the value to the caller function. There can be more than one “return” expression in one
function. However, there should be only one return-statement been executed, so there is only one
return value.
(2). The function value type should accord with the declaration type, else the value will be
the function value. The system will transform the type to the function value if there is dissaccord.
(3). You can omit the type declaration in the function definition when the function value
is int”.
(4). When the function has no return value, you can declare it as void type, the declaration
type is “void”.
void s(int n)
{ ……
}
Once a function is defined as “void”, its return value can’t be used by the caller function. For
example, after defining “s” as “void” type, it will cause an error to write the expression
“sum=s(n)” in main function. To make the programmes readable and reduce errors, users should
define the functions, which have no return value, as “void” type
However, we all know that all the C programmes can be implemented by converting to
assembly language. How can SN8 C carry out the function transference? Though it is an inner
problem in compilers, but if you want to get better programmes, it will be helpful to get familiar
with the SCM principle while coding with SCM.
Now, let’s discuss the codes which are generated by the compiler in C function calling
actions. Assume that the “caller” function call the “callee” function. The name of “callee” function
is
SONiX TECHNOLOGY CO., LTD
Page134
SN8 C Studio
User’s Manual
_callee_arg?
; The interrogation “?” is the number of the parameters.
For example:
int foo(int a, int b, long c)
will generate:
_foo_data SEGMENT DATA INBANK ;OVERLAYABLE
_foo_arg0 DS 1
; int a
_foo_arg1 DS 1
; int b
_foo_arg2 DS 2
; long c
The calling of previous “bcd”function:
MOV
A, (_clock_min)
__SelectBANK _bcd_arg0
MOV
_bcd_arg0, A
;End push arg....
call
_bcd
__SelectBANK (_clock_min)
MOV
_clock_min, A
You can get the process of argument passing by comparing C programme examples and
assembler language examples easily: user transfers the value of argument “clock_min” to the
formal parameter “_bcd_arg0”, and it will be evaluated in the called function. We can see that the
latest return value can be gotten from “A”. Thus, the return value is generated by the compiling
system, are there any regularities? Or it is discretionary? Of course there is some regularity.
How does compiling system works?
Generally, the return values of basic data types can be put into fixed registers or virtual
registers, as shown in the following table.
SONiX TECHNOLOGY CO., LTD
Page135
SN8 C Studio
User’s Manual
return value types
registers
unsigned/signed char
A
unsigned/signed short
A
unsigned/signed int
A
unsigned/signed long
float
A,R
A,R,Y,Z
Figure 5-1 List table of differt registers for different return values
We can see from the table that:
Firstly, for different values types, compiler will locate them to the corresponding registers.
Secondly, when the programme returns from the functions, the return values are stored in
these registers.
From the two regulations which are shown above, you can see the transference result of the
“bcd”function.
When the return values are data structures, a connotative address for the parameter which
will be passed to the called function is added by compiler. The called function will locate the
result to the specified location after executing, return values can be gotten from that address when
program returns from functions.
Though the argument passing seems the same between C programming language and
assembly language, the compiler will generate some redundant codes when generating the normal
codes. Hence, for the SCM hardware oriented programming, excessive argument passing and the
complicated return values will lead to the low efficiency of code coverting. Users should pay
attention to it.
8.7.3 The Variable Scope
In the formal parameter introduction part, we know that system allocates memory units for
the formal parameters when they are called. And the allocated memory units will be released at
SONiX TECHNOLOGY CO., LTD
Page136
SN8 C Studio
User’s Manual
the end of calling action. That is to say, the formal parameters are active inside functions, and can
not be used outside the functions. This valid region of variables are called variable scopes. In C
programming language, all objects have their own scopes. Variables defined in different styles
have different scopes. Variables in C programming language are devided into two types according
to their scopes, they are “local variables” and “global variables”.
1.The Local Variables
The local variables also called internal variables. The local variables are declared inside the
functions. Its scope is inside the functions. The variable calling is invalid outside functions.
For example:
int f1(int a) /*Function “f1” */
{
int b,c;
……
}a,b,c
/*The scope of variables: “a”, “ b”, and “c” inside function “f1” */
int f2(int x) /*Function f2*/
{
int y,z;
}
/*The scope of variables: “x”, “y”, and “z” inside function “f2” */
main()
{
int m,n;
}
The scope of variables “m’ and “n”.
There are three variables inside function “f1”: formal parameter “a”, variables “b” and “c”.
SONiX TECHNOLOGY CO., LTD
Page137
SN8 C Studio
User’s Manual
Variables “a”, “b”, and “c” will be available in function “f1”. The variables “x”, “y” and “z” are
also available inside the function “f2”. The variables “m” and “n” are only available inside the
“main” function. There are some notes about the variable scope as following:
(1). The variables, which are defined inside the main function, can be used only inside the
main function. They can’t be used in other functions. At the same time, the main function can’t
call the variables which are declared inside other functions. The reason is that the main function is
also a normal function and it is parallel with other functions. This is different from other
programming languages.
(2).The formal parameters are the local variables of the called functions, and the
arguments are the local variables of the caller functions.
(3). The variables in different functions can have the same name. They represent different
objects and system allocates different memory units to them. Such variables will not cause
confusion.In the example 5.3, it is allowed that both of the two variables are named “n”,
(4). You can define the variables in the compound statements. These variables can only be
called in the compound statement.
main()
{
int s,a;
……
{
int b;
s=a+b;
……b /*The scope of variable “b”. */
}
……s,a /*The scope of variables “s” and “a”. */
}
2.Global Variables
The global variables also can be called external variables, and they are defined out of
functions. The global variables belong to no function but belong to a source programme file. The
SONiX TECHNOLOGY CO., LTD
Page138
SN8 C Studio
User’s Manual
scope of the global variables is the whole source programme file. Global variables should be
declared before calling them in the functions. Only declared global variables can be used. The
declarator for global variables is “extern”. When one global variable is declared ahead of the
caller function, the declaration of the variable can be omitted inside the caller function.
int a,b; /*The external variables “a” and “b”. */
void f1()/*The function “f1”. */
{
……
}
float x,y; /*The external variables “x” and “y”. * /
int fz()/* The function “fz”. */
{
……
}
main()/*The main function. */
{
……
} /*The scope of global variables “a”, “b”, “x”, and “y”. */
Obviously, the variables “a”, “b”, “x”, and “y” are all external variables. You can see that the
variables “x”and “y” are defined after the definition of function “f1”. There is no declaration of
either variable “x” or variable “y” in function “f1”, so variable “x” and variable “y” are not
available in function “f1”. Variables “x” and variable “y” are defined in the beginning of the
source programme file, so they can be used in functions “f1” and “f2”. Variables “x” and variable
“y” also can be called by the main function without declarations. Global variables provide an
effective way for data communication between functions.
There are some notes for the global variables:
(1) The declarations of external variables must be located inside the caller functions. Through the
SONiX TECHNOLOGY CO., LTD
Page139
SN8 C Studio
User’s Manual
whole programme, there can be more than one declarations of the same external variable. The
general form of external variable declaration:
extern
variable type variable name, variable name, …
System will allocate memory units for external variables when they are defined. You can initialize
external variables when defining them. When the external variables have been defined, then they
can’t be initialized while declaring. At this moment, the declaration only indicates that one
external variable will be called in the function.
For example:
int a, b;
equals:
extern int a, b;
(2). The external variables can enhance the connection among functions. However, the use
of external variables will lead to the function dependency which is adverse to modularized
program design. Therefore, please don’t use global variables unless they are necessary.
(3). In a source programme file, it is allowed that you can give the same name to a global
variable and a local variable. And in the scope of the local variable, the global variable is not
available.
int vs(int l,int w)
{
extern int h;
int v;
v=l*w*h;
return v;
}
SONiX TECHNOLOGY CO., LTD
Page140
SN8 C Studio
User’s Manual
main()
{
extern int w,h;
int l=5;
printf("v=%d",vs(l,w));
}
int l=3,w=4,h=5;
In the example which is shown above, external variables are defined at the end of the program.
Hence, you should declare them in the preceding functions. External variables “l”, “w” have the
some name with the formal variables “l”, “w” of function “vs”. The external variables are all be
initialized. In the “main” function, variable “l” is also initialized. When implementing the
programme, “printf” statemente calls the function “vs”. The argument “l” is assigned value 5 in
the “main” function. The external variable “l” is not available inside the main function. The value
of argument “w” is the value 4 which is of the external variable “w”. When the programme enter
the function “vs”, the variable “h”,which is used in the function “wvs”, is an external variable, and
its value is 5. Therefore, the result of “v” is 100, and system output it when turn back to the
“main” function.
The Storage Type of Variables
Different there are different scopes for different variables. The reason is that the storage
type is different. What is the storage type? It is the way that how memories are allocated to
variables. We also call it “storage mode”.
There are two types of variable storage mode: static storage and dynamic storage.
When you use the static storage variables, system allocates memory to them when they are
defined, and the allocated memory units will not be changed until the programme ends. Global
variables are one of the static storage types. For dynamic storage variables, system allocates
memory while the variables are called in an executing programme, these allocated memory units
will be released immediately after the calling action, system. A typical example for dynamic
storage is the calling of formal parameters. When you define the formal parameters, system
doesn’t allocate memory for them. However, once a function calls the formal parameters, system
SONiX TECHNOLOGY CO., LTD
Page141
SN8 C Studio
User’s Manual
will allocate memory for them and release the memory at the end of the calling action. If a
function is called more than once, system will repeat the allocation action and release action.
From the description, we can see that static storage variables are existed constantly, but dynamic
storage variables don’t. We call this kind of character, that been generated by different variable
storage types, “variable lifetime”. “Lifetime” indicates the time during which the variables exist.
Lifetime and scope are two attributes of variables, and they describe variables in different ways.
The two attributes are associated and also different with each other. To judge the storage mode of
a variable, both the scope and the storage type should be considered.
There are four types of variable storage declaration:
auto
register
The automatical variables
The register variables
extern
static
The external variables
The static variables
The automatical variables and register variables are dynamic storage variables, and the
external variables and static variables are static storage variables. After the introduction of storage
types, you should not only declare the data type, but also declare the storage type when you
decalare a variable.
Therefore, the integral form of variable declaration is:
Storage-type
data-type
variable-name, variable-name, … ;
static int a,b;
Declare “a”and “b” to be static variables.
auto char c1,c2;
Declare “c1”and “c2” to be automatical variables.
static int a[5]={1,2,3,4,5};
Declare “a” to be a static array.
SONiX TECHNOLOGY CO., LTD
Page142
SN8 C Studio
User’s Manual
extern int x,y;
Declares “x”and “y” to be external integer variables
To introduce these four storage types as follows.
1.Declare the automatical variables using “auto” before them.
The automatical variable storage is used broadly in C programming lauguage. In C
programming language, if there is no storage type for a variable, system will treat it as an
automatical variable. That is to say, you can omit the key word “auto” in C programming
language.
There are four attributes of the automatical variables.
(1). The auto-variable scope is only in the object which defines them. If a function defines
them, they can be used only in the function. If a compound statement defines them, they can be
used only in the compound statement.
(2). All the auto-variables are dynamic storage type, so system allocates memory units for
them when the functions which include auto-variables are called. Then, the lifetime of
auto-variable begins. When the calling action ends, system releases memory units, and the
auto-variable lifetime terminates. Therefore, the auto-variable value can’t be saved after the
calling action. The auto-variable, which are defined in the compound statements, can’t be used
when they are out of their scope either. Otherwise, there will be errors.
(3).The auto-variable scope and auto-variable lifetime are both related with the objects
(functions or compound statements) in which they are defined. Hence, it is allowed to give the
different auto-variables the same name in different objects. For example, there are one function
and one compound statement in the function. When an auto-variable which named as “a” is
defined in the function, an auto-variable which names “a” can also be defined in the statement.
(4). For the auto-variables with construction types such as arrarys, you can’t initialize them.
2. Declare the external variables using “extern” before them.
SONiX TECHNOLOGY CO., LTD
Page143
SN8 C Studio
User’s Manual
External variables have been mentioned when introduced the global variables. The
following items are the additional explanations for the external variables (extern-variables).
(1).The external variables and global variables are the different names for the same variable
in two points of view. Global variable is in the view of its scope, and external variable is in the
view of its storage type which indicates its lifetime.
(2). When a source programme consists of more than one source files, the external variables,
which you defined in one source file, can be used in other source files. For example, a source
programme consists of the source file “F1.C” and the source file “F2.C”:
F1.C
int a,b; /*Definations of extern-variables*/
char c; /*Declarations of extern-variables*/
main()
{
……
}
F2.C
extern int a,b; /*Declarations of extern-variables*/
extern char c; /* Declarations of extern-variables*/
func (int x,y)
{
……
}
The external variables “a”, “b” and “c” are used both in the source file “F1.C” and “F2.C”.
In the source file “F1.C”, variables “a”, “b” and “c” are defined as external variables. In the
source file “F2.C”, variables “a”, “b” and “c” are declared as external variables. The declaration in
SONiX TECHNOLOGY CO., LTD
Page144
SN8 C Studio
User’s Manual
“F2.C” indicates that the external variables are defined in other source files. Then, the compiling
system won’t allocate memory for the external variables “a”, “b” and “c”. For the external
variables of construction type such as arrays, you should initialize them when declaring them, else
the compiling system will give them the initial value “0” automatically.
3.Static Variables
Declare the static variables using “extern” before them. Of course, static variables belong to
static storage type, but the variables which are static-store types are not all static variables. For
example, the external variables belong to static storage type, but not all of them are static
variables. You can define them to be static auto-variables by using keyword “static”, and they can
also be called “static external variables” or “static gobal variables”.
Therefore, you can change a variable storage type by adding a “static” before the variable
name.
Static Local Variables
You can add a “static” before the local variable declaration, and the local variable will
change into static local variable.
For example:
static int a,b;
static float array[5]={1,2,3,4,5};
Static local variables are static storage type, and there are four features of them:
(1) Static local variables should be defined inside functions. This is different from the
auto-variables. The auto-variables exist during the calling time, and they will be invalid when the
calling action ends. However, static local variables exist all the time, and their lifetime is during
the whole process of source programme.
(2) Though the lifetime of static local variable is during the whole process of source
programme, its scope is the same with auto-variables. That is to say, you can only use the static
local variables inside the definition function. When it is outside the definition function, the static
SONiX TECHNOLOGY CO., LTD
Page145
SN8 C Studio
User’s Manual
local variables are exist but can’t be used.
(3) It is allowed to initialize a static local variable. If not, the compiling system will
initialize it as “0” by default.
(4) When variables of basic types are not initialized while declaring, the compiling system
will give them “0” as their initial values. However, the compiling system won’t initialize the
auto-variables, because their values are indefinite.
According to the characteristics of the static local variables, you can see that their lifetime
is through the whole source programme. Although they are invalid when they are out of the
functions where they are defined, once you call the definition function, static local variables can
be used and they reserved the value from the former calling. Hence, you can use the static local
variables when you call a function repeatly and you want to reserve the value of the variables.
Though the global variables also can implement this function, but there will be some unexpected
side-effect. In a word, the static local variables are preferred.
Static Global Variables
Declare the global variables using “extern” before them, and then you can get the static
global variables. Global variables are static storage type, so the static global variables are also
static storage type. The differences between static global variables and global variables: (a) The
scope of non-static global variables is the whole source programme. When there are more than
one source files in a source programme, the non-static global variables are valid in all the source
files. (b) The scope of static global variables is restricted, the static global variables are valid only
in definition source file. When there are more than one source files in a source programme, the
static global variables in other source files are invalid.
4.The Register Variables
It is the same usage for the register variables and auto-variables for SN8 SCM.
SONiX TECHNOLOGY CO., LTD
Page146
SN8 C Studio
User’s Manual
8.7.4 The parameters and Global Variables
When you codes on a general computer system, to modularize the programmes and reduce
the coupling degree, computer system communicate with other works by parameter transferences.
Then, you can functionalize the functions, and the functions can be reused for another time. This
is the advantage of C programming language. Because of this advantage, there is better
encapsulation ability in C programming language. The functions can be encapsulated into libraries,
and they can be called in the progammes easily. Because of such advantages, we choose C
programming language.
SN8 C is 8-bit SCM core oriented. The arithmetic capability 8-bit SCM core can not satisfy
us. While focus on the modularity, the maintenance, and the encapsulaion, we must pay attention
to the conversion efficiency and the running efficiency.
Because of the encapsulation of C programming language, the programmes can be
understood easily. There will be many statements in for one adding operation in assembly
language.However, for C programming language, one statement in enough, which makes C
language more convenient to use. However, the C programme omits the characteristic of SCM can
not be called a good programme.
For the structure characteristic of C programme, you must define proper numbers of
functions. That is consilient with the C programming method, and also consilient with the whole
programming method. We must consider both the C advantages and the SCM characteristics. How
to carry it out? You should be familiar with the hardware and the SN8 ASM.
We know how the parameter transference is implemented in assembly language. In fact, the
parameter transference in assembly language is that the usage of the globalization characteristic.
The global parameters value is not changed when the programme calls different functions. When
the programme is implementing the sub-functions, you can also get the required parameter value.
When the sub-functions change the parameter values, you can get the original value of the
paramter when return to the caller function.
The parameter transference mechanism is similar in SN8 C. The compiler defines
corresponding numbers of global parameters for the function parameters. These global parameters
will be used for transferring. Doing this is a better scheme, but when compared with the global
parameters in the assembly language, it is not efficient. When passing the defined arguments to
the parameters, the problem occurs. There are also plenty of codes waiting for converting.
SONiX TECHNOLOGY CO., LTD
Page147
SN8 C Studio
User’s Manual
Firstly, let’s see it from the return value aspect. An example on the return value conversion
is as follws.
keyPress = keyConvert(keyPress);
In the statement “keyFinishCHK”, it calls the function “keyConvert()”, and save the return
value to the formal parameter “keyPress”. The conversion codes:
;push arg....
__SelectBANK _keyFinishCHK_arg0
MOV A, (_keyFinishCHK_arg0)
__SelectBANK _keyConvert_arg0
MOV _keyConvert_arg0, A
;End push arg....
call _keyConvert
__SelectBANK (_keyFinishCHK_arg0)
MOV _keyFinishCHK_arg0, A
;end of function call
From the codes which are shown above, we can see that there is a media register (A in the
example). When the return value is only one byte, the media register is A, but we can’t find the
gap. There will be more obvious code consume when using other registers.
Because there are the global parameters and local parameters in C programming language,
we can reuse the finite RAM to save other resources. At the same time, it is separated from the
bottom address, and you can name the parameters as you like. This is convenient for users.
However, when we use the local parameters, we must consider the occupy room of the excessive
codes. Then, the rule “decrease using global parameters ” in general computer programming, is
being challenged. We must consider that either use the global parameters or the parameters in
function definition. For the SCM hardware oriented programming, it is better to use the global
parameters to transfer values. This will lead to the high efficiency of generating codes. The
generation codes are similar with the assembly language.
SONiX TECHNOLOGY CO., LTD
Page148
SN8 C Studio
User’s Manual
Of course, it is exceptive when necessary!
8.8 The application of Structures and Unions in SN8 C Programming
Structures and unions play important roles in general C programming, and they are the data
encapsulation type of C programming language. In C programming language, it is convenient for
you to use the data encapsulation types when you are facing to the hardware oriented
programming.
8.8.1 Structures
“Structure” is a construction type, and it consists of several “members”. Every member
can be a base data type or a construction type at the same time. Structure is a “constructed” data
type, so you should define (construct) them before using. That is similar to using of the functions.
When you want to call a function, you should define them before calling action.
Structure Definition
To define a “structure”:
struct
structure-name
{
Member-list
};
There will be several members in the “member list”, members are the necessary elements of
structures. You should declare the type of each member in a structure. To declare a member:
Member-type
member-name;
SONiX TECHNOLOGY CO., LTD
Page149
SN8 C Studio
User’s Manual
When you name a member, member name should follow the naming rule of identifiers.
For example:
struct stu
{
int num;
char name[20];
char sex;
float score;
};
In the structure definition, the structure name is “stu” and it consists of four data members. The
first member is “num”. The second is “name” which is character array. The third member is “sex”
which is a character variable. The last one is “score” which is a float variable. The semicolon “;”
which is next to the right curly brace “}” is necessary. When a structure definition ends, you can
declare variables. Once you declare a structures using “stu” type, they all will be consisted of the
four members. Therefore, you can see that a structure is a complicated data type. The member
number is fixed in a structure, and a member type can be different from another member type in
the same structure.
Structure Variable Declaration
There are three ways to declare structure variables. We explain them using “stu” we defined
above.
1. Define a structure variable after defining a structure. For example:
struct stu
SONiX TECHNOLOGY CO., LTD
Page150
SN8 C Studio
User’s Manual
{
int num;
char name[20];
char sex;
float score;
};
struct stu boy1,boy2;
There are two structure variables “boy1” and “boy2”. You can also define a structure using
macro, then there will be a symbol constant which indicates a structure.
#define STU struct stu
STU
{
int num;
char name[20];
char sex;
float score;
};
STU boy1,boy2;
2. While you are defining a structure type, you can define a structure variable. Please refer to
the following example.
struct stu
{
int num;
char name[20];
char sex;
float score;
}boy1,boy2;
SONiX TECHNOLOGY CO., LTD
Page151
SN8 C Studio
User’s Manual
3. You can also decalare a structure variable. Refer to the example as follows.
struct
{
int num;
char name[20];
char sex;
float score;
}boy1,boy2;
The difference between the second way and the third way is that: in the third way of defining
a structure variable, you can define a structure variable without the structure name. After declaring
the structure variables “boy1” and boy2” as “stu” type, you can assign values to the data members
of “boy1” and “boy2”. In the definition of structure “stu”, you can see the data members are base
data types or array. The data members also can be structures. Then, there will be a structure
embedded in another structure, and that is allowed.
In ANSI C, structure variables of the same type can assign values to each other. Generally,
assigning value action, input action, output action, and computing action are all implemented
through the structure variable members.
You can express a member of structure variable like this: “structure variable name.member
name”. For example, the expression“boy1.num” indicates the first boy’s number. Another
expression “boy2.sex” indicates the second boy’s sex. If a data member is another structure, you
should find out the lowest level member, and then you can use it. For example,
“boy1.birthday.month” indicates the the first boy’s birth month. The birth month which is a data
member of “boy1”, and it can be used in programmes separately.
Assigning Values to Structure Variables
In the former chapters, we know that assigning values to structure variables is assigning
values to the structure members. Both the input statements and the assignment statements are used
for this.
SONiX TECHNOLOGY CO., LTD
Page152
SN8 C Studio
User’s Manual
Strcture Variable Initialization
When the structure variables are the global variables or the static variables, you can initialize
them and assign values while initializing. However, for the local structure variables and the
automatical structure variables, you can’t assign values while initializing
The system stores the structure data members in the definintion order. Then, the data
members are put into a data block. It is convenient to operate the data blocks of the programmes.
For example, when you want to display “[0, 0, 5], [1, 1,0], [2, 2,5], [3, 5,0]” in the original order,
you can define a structure as follows.
Struct disvalue{
Unsigned int number;
Unsigned int Weight1;
Unsigned int weight2;
};
Disvalue
disarray[] = {{0,0,5},{1,1,0},{2,2,5},{3,5,0}};
We can use the “displayFun” though the parameter “num” to achieve our goal.
Void diplayFun(unsigned int num)
{
Disvalue display;
Unsigned int disbuff[5];
Display = disarray[num];
disbuff[0] = display.number;
disbuff[4] = display.weight1;
disbuff[5] = display.weight2;
}
SONiX TECHNOLOGY CO., LTD
Page153
SN8 C Studio
User’s Manual
Anther usage of structures in the hardware oriented programing, is that to define bit field.
The definition way is like this:
struct
structure-name{
Unsigned bit0:1;
Unsigned bit1:2;
Unsigned bit2:1;
Unsigned bit3:1;
Unsigned num:4;
};
All the data member types are “Unsigned”in this structure, and it is necessary. The member
names also must match the name specification. There is a colon “:” after each data member name,
and next to the “:” there is an integer. This is different from other structures. The integer indicates
the number of the occupied bits. For example, the data member “bit1” occupys two bits, “num”
occupys three bits, and other data members one bits. In total, the structure occupys one byte. The
application of such data type will be introduced in the following.
There are limitations in the SN8 C programming language, compared with general C
programming language, sysetem can only allocate memory for the structure objects in SN8 C
programming language. Add “__RAM” or “__ROM” before the member names to restrict them.
However, we can’t restrict the structure data members, if it is allowed to restrict the storage space,
there will be conflict. The data member definition in the following example is invalid.
struct StuType {
int __ROM data;
//error!
};
For the member variables of a structure, the storage locations depend on the structure itself.
8.8.2 Unions
There are similarities between “structs” and “unions”, but they are different essentially. For
SONiX TECHNOLOGY CO., LTD
Page154
SN8 C Studio
User’s Manual
the structure members, system allocates memory for each of them. The length of a structure
variable is the addition length of the members. However, for the unions, all the members share the
same memory space section. The length of a union is the length of the longest member. The
feature of unions is that the members are stored in the same memory space section. In fact, when
you call the union, you are calling the same memory space by different names. For example, three
types data member :“char”, “int”, “long”, and they compose a union. This means that when you
are modifying one of the three members, the other two members will be affected.
1.Union Definition
The general form for union definition:
union
union-name
{
Union-member-list
};
There can be several members in the “union member list”. You can define the members like
this:
type
member name
The member name should follow the identifier specification.
For example:
union perdata
{
int class;
char office[10];
};
SONiX TECHNOLOGY CO., LTD
Page155
SN8 C Studio
User’s Manual
There is a union “perdata”. There are two members in it: one is “class” which is an integer,
and the other is “office” which is a character array. After the union definition, you can decalare
union variables. If you declare the union variables as “perdata” type, system will allocate memory
for integer “class” or string array “office”.
When using of unions in the hardware based programming, system can control the storage
memory units easily. Please see the following codes.
.DATA
flag7
ds 1
…
micro_on_off_f equ flag7.0
grill_on_off_f
equ flag7.1
motor_on_off_f equ flag7.2
uv_on_off_f equ flag7.3
…
.CODE
…
b0bset motor_on_off_f
; Because it doesn’t return to original location, the motor
continues working
…
b0bts1 motor_on_off_f
b0bclr motor_port
; Turn off the oven light.
b0bts0 motor_on_off_f
b0bset motor_port
b0bts0 grill_on_off_f
jmp $+3
b0bclr grill_port
; Stop roasting.
SONiX TECHNOLOGY CO., LTD
Page156
SN8 C Studio
User’s Manual
…
clr flag7
; Cut off all the loads.
In the example, it define a variable “flag7” which occupy one byte memory space. At the
same time, it defines the four bits in the head of “flag7”. Because of the hardware operating
flexibility in assembly language, we can operate a one-byte variable easily, and it is also easy to
operate each bit in the byte. Using the bit field definition way in structure type, we can also
operate the bits individually. This operation is not associated with the “and” operation and the “or”
operation. We have defined a union as the following codes:
Unsigned int Flag7;
Struct bitFlag{
Unsigned bit0:1;
Unsigned bit1:1;
Unsigned bit2:1;
Unsigned bit3:1;
Unsigned null:4;
}pFlag7;
In the example, I just defined a structure pointer which point to “Flag7”, but doing this is in
vain. How to carry out the functional operation in the assembler language? There are many ways
if you think it over. It is a good idea to define a union. In C programming language, we can carry
out the bit operation directly using the following structure:
Struct bitDefine{
Unsigned bit0:1;
Unsigned bit1:1;
Unsigned bit2:1;
Unsigned bit3:1;
Unsigned bit4:1;
Unsigned bit5:1;
Unsigned bit6:1;
SONiX TECHNOLOGY CO., LTD
Page157
SN8 C Studio
User’s Manual
Unsigned bit7:1;
};
Then, we can declare another structure and locate it to a union. The structure can coexist
with an integer variable. See the following codes to find out more.
union flagWord
{
unsigned int flagByte;
bitdefine flagBit;
};
To define a union to operate the byte and bit which share the same address.
It is the same usage when we programme in C:
FlagWord flag7;
Flag7.flagBit.bit2 = 1;
; Because it doesn’t return to
original location, the motor continues working
…
If(flag7.flagBit.bit2) motor_port =1;
Else motor_port = 0;
; Turn off the oven light.
…
If(!flag7.flagBit.bit1) grill_port = 0;
; Stop roasting.
Else
…
Flag7.flagByte = 0;
; Cut off all the loads.
The codes in C is the can carry out the same operation with assembly codes.
It is allowed to define a union which consists of: a “long” variable, a structure with a “long”
variable and two “int” variables. An example is shown below.
union longtype
SONiX TECHNOLOGY CO., LTD
Page158
SN8 C Studio
User’s Manual
{
unsigned long longV;
struct inttype
{
unsigned int int_l,int_h;
}intV;
};
After the “longType” definition, you can cope with a “long” variable. You can not only
operate the upper byte, but also the lower byte. Then, the “and” operation, “or” operation, and the
“shift” operation are unnecessary. This usage of unions will occur frequently in 8-bit SCM
programming. It is not only having the advantages of C programming language, but also the
assembly flexibility. This is the supreme advantage of using unions.
8.9
Interruptions
In the real time programmes, interruptions play important roles. The interruption
implementation influences the timers and the counters directly, so the function of programmes
will be influenced too. It is valueable to carry out the interruptions. Then, How to implement the
interruptions in SN8 C programming?
8.9.1 The Definition of Interruption Functions
In the SCM based programming, the interruptions are implemented by vector list leapings.
In standard C programming, functions implement all the functional works. When implementing
the functional works, there are some interruption functions such as “int86()”, etc. There are also
interruption vectors in the interruption functions, such as “0x80”, etc.
In the 8-bit SONiX SCMs based programming, there is an interruption vector “0x08”. The
following is an interruption example.
.CODE
SONiX TECHNOLOGY CO., LTD
Page159
SN8 C Studio
User’s Manual
org 00h
jmp Main_ST
org 08H
jmp int_ser
…
int_ser:
int_ser0:
b0xch
a,accbuf
mov
a,pflag
b0mov pflagbuf,a
nop
int_ser10:
b0bts1 fp00ien
jmp int_ser11
b0bts0 fp00irq
jmp int_ser20
; The p00 interruption.
int_ser11:
b0bts1 ft0ien
jmp int_ser19
b0bts0 ft0irq
jmp int_ser40
; The t0 interruption.
int_ser19:
jmp int_ser9
int_ser20:
; The p00 interruption.
b0bclr fp00irq
;activation
jmp int_ser9
int_ser40:
;The t0 interruption.
SONiX TECHNOLOGY CO., LTD
Page160
SN8 C Studio
User’s Manual
b0bclr ft0irq
b0bset t0int
mov_
;activation
t0c,#64h
int_ser9:
b0mov a,pflagbuf
mov
pflag,a
b0xch
a,accbuf
reti
…
The codes implemented jumping from “0x08” to other address unit. It also judged the
interruption type according to the set priority order which is from “int_ser10” to “int_ser19”. Then,
it implemented the interruptions from “int_ser20” to “int_ser40”. At the beginning of the
interruptions, “push” operation was called, and at the ending time of the interruptions, the “pop”
operation was called.
In the SN8 C programming, we can define a specified function to implement the same
functional work. The key word “__interrupt”( begin with two “_” ) indates that it will be a called
function of interruption vector.
There is no parameter or return value for each interruption vector function
The declaration of such functions:
__interrupt MyHandler () { .... }
To see an interruption function in SN8 C programming:
__interrupt ints (void)
//The entrance of the interruption programme; 1ms
{
if(INTRQ&0x10) t0ints();
else if(INTRQ&0x01) p00ints(); //Zeropoint passing interruption.
}
void t0ints(void)
{
SONiX TECHNOLOGY CO., LTD
Page161
SN8 C Studio
User’s Manual
_bCLR(&INTRQ,4);
t_loop_f = 1;
if(int_f) ++cnt11; //Timer starts when the external interruption triggers, and ends
when the relay is off.
T0C+=t0int_val+1;
//To reload the interruption value of “T0”.
_bCLR(&INTRQ,4);
}
void p00ints(void)
//20ms
{
_bCLR(&INTRQ,0);
int_f = 1;
if(cnt11 >= 18)
{
cnt11 = 0;
flag2.flagByte = 0xffU;
++t_ms2;
if(t_ms2 == 50)
{
t_ms2= 0;
flag10.flagByte = 0xffU;
}
}
}
Obviously, the function “__interrupt” is a simple one. It judges the the interruption type
according to the order, and calls the corresponding functions. The difference from assembly
language is: there is no “0x08” leapings, and no “push” and “pop” actions for registers. In the
assembler language, system backups all the registers in the interruption vector entrance point.
Then, it restores all the backup registers when the interruption vector ends. All of these are done
by the compiler.
It is the advantage of C programming language. Because it is not hardware based, it is not
SONiX TECHNOLOGY CO., LTD
Page162
SN8 C Studio
User’s Manual
associated with platforms.
When you have other backup requirements, you should rewrite the function “inline assemble
(__asm(“asmcod”) or __asm{…}). After doing that, you can modify or accomplish the
“__pushInterruptSaveRegs”
and “__popInterruptSaveRegs” in “sn8cc_macro.asm”.
8.9.2 Interruption Analysis
The programmers, who are facing to the SCM based programming, should understand what
the compiler does when interruption occurs. Then, it will be efficient of SCM basad programming.
②
①
④
③
Figure7-1 The interruption procedure.
It shows us an interruption procedure. When the programme runs to “①” of main loop, the
interruption starts. Then, system runs the interruption programme. To return from the interruption
programme normally, system saves the current status (such as ACC, PC, etc.) before the
interruption entry point. Next step: begin to run the interruption programme at point “②”, end at
point “③”. Before returning to the main loop, system restores all the status. After doing that, it
returns to the main looping from the point “④”. One interruption ends.
8.9.3 The Interruption Function Structure
After the instruction of the interruption procedure, you should be acquainted with the
SONiX TECHNOLOGY CO., LTD
Page163
SN8 C Studio
User’s Manual
interruption function structure. The interruptions are not only associated with the timers, but it
also occupys the running time of the main looping. To protect the real-time property of main
looping, the interruption running time should be shorter. Therefore, we should give an interuption
programme fewer works.
At the same time, there is not only one interruption source. Hence, when the interruption
occurs, you must judge the corresponding interruption according to the interruption sources.
We can get it arranged follow the steps of the flowing chart.
Figure7-2 The Structure of Interruption Processing
To avoid the long time occupying of the interruption source, please do not write any long
time occupying programmes in the interruption programmes. How to solve this problem? If there
is long time occupying programmes, you can place it outside the interruption programme. Then,
just tell the main controller to know which interruption is being called.
SONiX TECHNOLOGY CO., LTD
Page164
SN8 C Studio
User’s Manual
__interrupt intserv(void)
{
if(INTRQ&0x10)
{
_bCLR(&INTRQ,4);
T0INT();
}
else if(INTRQ&0x20)
{
_bCLR(&INTRQ,5);
TC0INT();
}
}
…
void TC0INT(void)
{
TC0C=0x64;
intStatusWord1.ftc0int = 1;
}
void INTround(void)
{
unsigned int bitValue = 0;
if(intStatusWord1.ftc0int)
{
intStatusWord1.ftc0int = 0;
//Add
bit which on 10ms
interrupt will affect;
intStatusWord1.fkeyTimer = 1;
intStatusWord1.fflashTimer = 1;
intStatusWord1.ThandDelay = 1;
}
…
}
...
Void main(void)
{
….
INTround();
}
Figure 7-3 The association between main loopin and interruption programme
In the programme, the interruption programme only judge the source interruption, then it
calls the interruption processing programme. The interruption processing programme restore the
interruption status, and define the flag bit as “ 1” for the corresponding interruption. The main
looping programme assigns the task to the “INTround” which tests the interruption flag “ftc0int”.
The main loop programme also calls the “INTround”. Doing this can find out the interruption in
time and cope with it, and also resolves the long time occupying problem.
8.10 Bit Operation
Bits are the base storage units in computer languages, and they are in binary. In fact, in the
hardware based programming, the data processings are all implemented via binary datas.
In the
SN8 SCMs based programming, the RAM spaces processing can be carried out by bit operation.
Therefore, bit operation plays an important role in SCM based programming.
SONiX TECHNOLOGY CO., LTD
Page165
SN8 C Studio
User’s Manual
8.10.1 Bit Definition
Because bit operation is so important in SCM based programming, in many types of SCM
C programming languages, they all provide variable definition in bit type. In SN8 C and ANSIC C,
there aren’t any rules to follow when you want to define a bit type variable. To mark every bit can
make the programmes readable. It can be classifed easily after marking each bit. We are searching
a way to define bits, and give them an easy understandable name such as “keyPress”, “int10ms”
etc.
The bit field definition is referred in the previous chapters. Now, let’s define every bit in a
byte via “struct”. Please refer to the following example to find out more.
Struct bitDefine{
Unsigned bit0:1;
Unsigned bit1:1;
Unsigned bit2:1;
Unsigned bit3:1;
Unsigned bit4:1;
Unsigned bit5:1;
Unsigned bit6:1;
Unsigned bit7:1;
};
To define some objects of the “bitDefine” structure.
Struct bitDefine flag1,flag2,flag3;
To define each bit with corresponding name via macro definition. For example:
#define fkeypress (flag1.bit1)
// The flag to indicate one key is
//pressed.
#define fchatfinish (flag1.bit2)
//The bit which is to judge whether the
key //“Debounce” accomplished..
SONiX TECHNOLOGY CO., LTD
Page166
SN8 C Studio
User’s Manual
#define fkeyProcessing (flag1.bit3)
//When any key is processed, this bit will
be
// enable.
#define FhandDelay (flag1.bit4)
#define FhandDelayRQ (flag1.bit5)
#define FreleaseKey (flag1.bit6)
//When any key has been released, this bit
// will be enable.
#define FfirstAck (flag1.bit7)
//When any key is being processed for the first
time //this bit will be enable.
Via such conversion, we can use the macro names, which are defined above, to process
each bit in the following programmes!
The processing methods referred previously are all used for the bits which are defined by
users.Another important storages are defined by the compiling system. That storage is system
register which is used frequently.
The compiling system has defined the resource register, and also given the names to the registers.
For the registers, system also assigned fixed functions to them. Users can use these functions
when it is necessay.
The instruction of bit field definition:
1. A bit field should be stored in the same byte and can’t cover two bytes. For example,
when the remained space is not big enough to store one bit field, this field must be stored from the
next unit. And, you can store a bit field from the next unit directly. An example for reference:
struct bs
{
unsigned a:4
unsigned :0 /*Whitesace bit field*/
SONiX TECHNOLOGY CO., LTD
Page167
SN8 C Studio
User’s Manual
unsigned b:4 /*Store from the next unit.*/
unsigned c:4
}
In the bit field definition, “a” occupys the front four bits of the first byte, the last four bits
are “0” which indicates that they are unavailable. “b” starts from the second byte and it takes
up four bits. “c” takes up four bits.
2. You can’t use a bit in two bytes, so the width of a bit field can’t be wider than a byte.
That is to say, a bit field should shorter than eight bits.
3. The unnamed bit fields can be existed, these bit fields will be used for padding or
adjusting position. These unnamed bit fields are unavailable. Please refer to the following
example.
struct k
{
int a:1
int :2 /*These two bits are unavailable.*/
int b:3
int c:2
};
From the example, you can see that bit field is a type of structure, and the members of them
are expressed in binary.
Type-Definition-Symbol typedef
In C programming language, there are various data types, and you can also define the type
definition symbol. That is to say, you can give a data type an “alias”. The key word “typedef” can
carry out such function.
For example, there are integers “a” and “b”, and you can declare them like “int aa, b;” .
SONiX TECHNOLOGY CO., LTD
Page168
SN8 C Studio
User’s Manual
The key word “int” is used for defining integer type variables. The integral form of “int” is
“integer”.
To make the programmes more readable, you can declare the integer type declaring symbol
as “typedef int INTEGER”. Then, you can use “INTEGER” instead of “int” to define other integer
variables. For instance, “INTEGER a, b;” equals “int a, b;”. You can use “typedef” to define
arrays, pointers, structures, and other data types. The key word “typedef” makes programmes
simple and easy to read.
typedef struct stu{ char name[20];
int age;
char sex;
} STU;
The “STU” is a “stu” type structure, and you can use “STU” to declare structure type
variables: “STU body1, body2; ”.
The general form of using “typedef”:
typedef original-type-name new-type-name
The “original-type-name” contains the definition part. The “new-type-name” is often in
uppercase letters. Sometimes, you can define macros instead of “typedef”. However, macro
definition is implemented while preprocessing, and “typedef” is implemented while compiling.
Therefore, “typedef” is more flexible.
8.10.2 Bitwise Operators
The bitwise operators: bit setting, bit clearing, bitwise AND operator (&), bitwise OR
operator (|), one’s complement operator (~), bitwise exclusive OR operator (^), left shift operator
(<<), right shift operator (>>).
For the bits which are defined by users, you can use the bitwise operators as follows:
SONiX TECHNOLOGY CO., LTD
Page169
SN8 C Studio
User’s Manual
Fkeypress = 1;
//Bit settings
Fkeypress = 0;
//Bit clearing
The operators: bitwise AND operator (&), bitwise OR operator (|),left shift operator (<<),
and right shift operator (>>) are base data structure bit operations.
keyinbuf <<=2;
tempbuf = P0&0x03;
keyinbuf |= tempbuf;
keyinbuf = ~keyinbuf;
The aim of these operations is to change or get the bit value of the basic data types. You can
also call them logical rulers. The generated ASM files contain the logical operation instructions.
Refer to the following codes which are conversion of the previous codes.
L209:
;_keyinbuf = _keyinbuf << 2
;__SelectBANK _keyinbuf
RLCM (_keyinbuf)
RLCM (_keyinbuf)
MOV A, #0xfc
AND (_keyinbuf), A
L210:
B0MOV A, 0xd0
AND A, #(0xFF & 3)
__SelectBANK _ee_scale_c_keyscan_LOCAL
MOV _ee_scale_c_keyscan_LOCAL+1, A
L211:
; R3 = _keyinbuf | _ee_scale_c_keyscan_LOCAL+1
__SelectBANK _keyinbuf
MOV A, (_keyinbuf+0)
__SelectBANK _ee_scale_c_keyscan_LOCAL
SONiX TECHNOLOGY CO., LTD
Page170
SN8 C Studio
User’s Manual
OR A, (_ee_scale_c_keyscan_LOCAL+1)
B0MOV R3, A
B0MOV A, R3
__SelectBANK _keyinbuf
MOV _keyinbuf, A
L212:
__SelectBANK (_keyinbuf)
MOV A, (_keyinbuf)
B0MOV R3, A
B0MOV A, R3
XOR A, #0xff
B0MOV R3, A
B0MOV A, R3
__SelectBANK _keyinbuf
MOV _keyinbuf, A
The operation objects are the bits in the system registers. System provides users some bit
operation function prototypes:
void _bSET(unsigned long address, unsigned int bitOffset);
void _bCLR(unsigned long address, unsigned int bitOffset);
int _bTest0 (unsigned long address, unsigned int bitOffset);
int _bTest1(unsigned long address, unsigned int bitOffset);
The formal parameters “address” and “bitOffset” should be constants, and they shouldn’t be
variables.
The virtual value of “BitOffset”: 0~7.
The high bit of “address” is “bank number”.
The function “_bSET” is the bit setting function, and “_bCLR” is the bit clearing function.
They are used for the system registers.
When you want to start the “TC0”, you can assign “1” to the flag “TC0ENB (TC0M.bit7)”.
SONiX TECHNOLOGY CO., LTD
Page171
SN8 C Studio
User’s Manual
_bSET(&TC0M,7);
When you want to stop the “TC0”, you can clear the flag “TC0ENB (TC0M.bit7)”.
_bCLR(&TC0M,7);
Both of the “_bSET” function and “_bCLR” function are efficient. The conversion codes
are shown below.
PreB0SET 218 7 0
PreB0CLR 218 7 0
Both of the “_bTest0” function and “_bTest1” function are discrimination functions. They
give the decision bit “1” or “0” and return an “int” type data value.
8.10.3 Bit Comparison Application in the Flowing Control
We often implement the programmes using flowing control mechanism, and they are often
depending on one or more conditions. System will use flags to indicate whether the conditions are
valid or not. Hence, the comparison and estimation of bits are so important. For example:
if(globalSW.tareRQ)
//While processing the zero bits, system doesn’t process the
//following ones.
{
captrueZero(stabledata);
}
In the example, the decision is via the bit “globalSW.tareRQ” which is defined by users. If
this bit is “1”, it will call the function “captrueZero(stabledata)”, else it will omit the calling of
function “captrueZero(stabledata)”. Then, it implements the following statements. The conversion
assembler codes are shown below.
__SelectBANK _globalSW
SONiX TECHNOLOGY CO., LTD
Page172
SN8 C Studio
User’s Manual
BTS1 _globalSW.3
JMP L430
L450:
;push arg....
__SelectBANK _stabledata
MOV A, _stabledata+1
;Select BANK
__SelectBANK _captrueZero_arg0
MOV (_captrueZero_arg0+1), A
__SelectBANK _stabledata
MOV A, _stabledata
__SelectBANK _captrueZero_arg0
MOV _captrueZero_arg0, A
;End push arg....
call _captrueZero
;end of function call
L451:
.stabn 0x44,0,587,L452-_procADC
L452:
jmp L431
There are three ways to judge the system register bits:
Firstly, use the special purpose functions which are referred in the previous paragraphs.
if(_bTest1(&INTRQ,4))
//FT0IRQ)
{
_bCLR(&INTRQ,4);
//FT0IRQ=0;
T0INT();
}
SONiX TECHNOLOGY CO., LTD
Page173
SN8 C Studio
User’s Manual
Secondly, use the bit names which are defined by system.
if(FT0IRQ)
//(_bTest1(&INTRQ,4))
{
_bCLR(&INTRQ,4);
//FT0IRQ=0;
T0INT();
}
Thirdly, the bit operation method.
if(INTRQ&0x10)
//FT0IRQ
{
_bCLR(&INTRQ,4);
//FT0IRQ=0;
T0INT();
}
The efficiency of the three ways is different. However, the implementation results are the
same. They can carry out the branch decision.
8.11 Preprocessors
8.11.1 Overview
We had ever used the preprocessors begin with “#”, such as the include command
“#include”, macro definition instruction “#define”, etc. These commands are located out of the
functions in source code, and they are usually located in front of the source code. They are called
preprocessors.
Pre-process is the work that should be done before the first pass of compiling (scan for label
definition and parsing). Pre-process is an important function of C, it is implemented by
preprocessors. When compile a source file, preprocessors are quoted by system to implement the
pre-process part. When the pre-process part has been done, the compiling will be accessed
automatically.
There are various pre-process functions in C, like macro definition, file including,
SONiX TECHNOLOGY CO., LTD
Page174
SN8 C Studio
User’s Manual
conditional compiling, etc. The program will pre-process reasonable used is easy to read, edit,
transplant and debug. This also makes for modularized program design.
8.11.2 Macro Definition
An identifier is allowed to indicate a character string in C, it is called “macro”. The
identifier which has been defined as “macro” is called “macro name”. The “macro name” is
replaced with the corresponding character string in the macro definition, this is called “macro
expansion”.
Macro definition is implemented by the macro definition command in source code. Macro
expansion is implemented by preprocessor automatically. In C there are two kinds of “macro”,
one is with parameter and the other is non-parameter. Here we will have an introduction of the
difintion and invocation of these two kinds of “macro”.
Non-parameter Macro Definition
There are no parameters behind the macro name of non-parameter macro, the syntactic
form is:
#define identifier character-string
The symbol “#” indicates this is a pre-process command. The commands begin with symbol
“#” are all preprocessors. “define” is a macro definition command, and “identifier ” is the name of
the macro, “character-string” can be constant, expression, and format string, etc.The constant
definition we had mentioned before is a kind of non-parameter macro definition. Besides, the
repeating used expressions are usually defined as macros, for example,
# define M (y*y+3*y)
This definition defines “M” to be “(y*y+3*y)”. While programming, all the “(y*y+3*y)”
expressions can be replaced with “M”. When compile the source code, a macro expansion will be
done by preprocessor: all the macro name “M” will be replaced by (y*y+3*y), and this is done
before compiling. For example,
SONiX TECHNOLOGY CO., LTD
Page175
SN8 C Studio
User’s Manual
s= 3*M+4*M+5*M
A macro expansion will make this statement to be “s=3*(y*y+3*y)+4(y*y+3*y)+5(y*y+3*y)”,
and we should note that the brackets beside the expression “(y*y+3*y)” in marco definition
chould not be omitted, else an error will occur. This should be paid much attention to when we
define a macro, and we should assure that no errors will be generated after macro expansion.
Here are some notes for macro definition:
1. Macro definition is to indicate a character string with a macro name, the macro name will
be replaced by the character-string while macro expansion. This is just a simple replacement, and
the characters in the string can be any, they can be constant or expressions, no check will be done
by the preprocessor. If there are any errors, they will be discovered only during the compile time
of the expanded source code.
2. Macro definition is not comment or statement, the semicolon is not needed to terminate
the definition, or else the semicolon will be considered as part of the character string that need to
be replaced too.
3. Macro definition should locate out of the functions, its scope is from the macro definition
to the end of the source code. To terminate its scope, use the command “# undef”.
4. Macro name that included by quotation marks in source code will not be expanded while
preprocessing.
5. Nesting is allowed in macro definition, the macro names have been defined can be used
in the character string in a macro definition. The macro expansion will be done by preprocessor
layer upon layer.
6. The macro name is indicated by uppercase letters customarily, it is used to distinguish
from variables. However, lowercase letters are allowed to.
7. The data type can be indicated by macros too, this can bring convenience to write.
SONiX TECHNOLOGY CO., LTD
Page176
SN8 C Studio
User’s Manual
Please note the difference between the data type defined in macro and the data declarator in
“typedef”. Macro definition is just a simple replacement of the character string which is done
while pre-processing, and typedef is done while compiling, it’s not a simple replacement but the
rename of typy declarators. The named identifiers can be used as type declarators. Though macro
definition can indicate data type too, it’s just a replacement, macro definition should be used
carefully to avoid errors.
Definition of Macro with Parameters
Macros are allowed to have parameters in C. The parameters in macro definition are in the
parameter-list. The parameters in macro invocation statements are arguments. Parameter-list will
be replaced by arguments when a macro is called.
The syntactic form of definition of macro with parameters:
#define macroName (parameter-list) character-string
Character string involves the parameters in the parameter-list.
The syntactic form for invocation of macro with parameters:
macroName (arguments);
For example:
#define M(y) y*y+3*y /* macro definition*/
k=M(5); /* macro invocation */
Argument “5” will replace parameter “y” when the macro is called, the statement being
expanded is: “k=5*5+3*5”.
SONiX TECHNOLOGY CO., LTD
Page177
SN8 C Studio
User’s Manual
Here are some notes for the definition of macro with parameters:
1. In the definition of macro with parameters, blanks should not exist between macro name
and parameter-list.
2. In the definition of macro with parameters, no memeory will be allocated to the
parameters, so it’s not necessary to specify parameter types. The arguments in macro invocation
are values which should be type defined, this is a different case from functions. In functions,
parameter and argument are two different values which have their own scope. When a function is
called, arguments will replace parameters by “passing argument”. However, in the macro with
parameters, symbol replacement will occur instead of passing argument.
3. The parameters in macro definition are identifiers, but the arguments in macro invocation
can be expressions. This is different from function call, in which an expression should be
evaluated before granting to a parameter. However, in macro invocations the expression
arguments do not have to be evaluated before granting.
4. Parameters in character string are usually included by parentheses to avoid errors in
macro definition. Not only the paramenters but also the whole character string could be included
by parentheses.
5. Macro with parameters is similar to functions with parameters, but they are distinct
indeed. Other than the points mentioned above, the results for a same expression executed by
them may be quite different.
6. Macro definition can define multiple statements which will be replaced in source code
while macro invocation.
8.11.3 Files Include
Files include is another important function in the C preprocessor.;
The syntactic form of files include command is:
#include”fileName”
We had used this command to include the header files of library functions.
The function of files include command is to insert corresponding files into its location and
replace it. This can connect appointed file and current file to be one source file. Files include is
very useful while programming, one large program can be divided into many modules and
SONiX TECHNOLOGY CO., LTD
Page178
SN8 C Studio
User’s Manual
programmed by more than one programmers separately. Some global symbols and macro
definitions can compose one file which will be included by other files. Time will be saved and
errors will be reduced since these global symbols do not have to be defined in every file.
Here are notes for using files include command:
1. File names in files include command can be included by double quotation marks or angle
-brackets. Here is the difference: angle-brackets means to search the file in included file directory
(set while setting system environments) rather than search it in the source file directory. Double
quotation marks indicates to search the file in source file directory firstly, if no match is found,
search in the included file directory. Users can choose either of them according to the directory of
user files.
2. One “include” command can include only one file, if more than one files must be
included, then the corresponding number of include commands are needed.
3. Nest are allowed in files include command, one file been included can include another
file too.
8.11.4 Conditional Compile
Preprocessors provide the function of conditional compiling, different parts of program can
be compiled separately according to different conditions, and generate different object files. This
is of great use to the transplant and debugging for programmes. There are three conditional
compilings:
The first form:
#ifdef identifier
Program 1
#else
Program 2
#endif
It means that if the “identifier” had been defined by “#define” command, then Program 1
will be compiled, else Program 2 will be compiled. If there is no Program 2, then “#else” can be
omitted.
SONiX TECHNOLOGY CO., LTD
Page179
SN8 C Studio
User’s Manual
The second form:
#ifndef identifier
Program 1
#else
Program 2
#endif
The difference from the first form is that “ifdef” is replaced by “ifndef”. It indicates that if
the identifier has not been defined by “#define” command, then Program 1 will be compiled, else
Program 2 will be compiled. This is an opposite situation to the first one.
The third form is:
#if constant-expression
Program 1
#else
Program 2
#endif
It means that if the value of the constant-expression is true (non-zero), then Program 1 will
be compiled, else Program 2 will be compiled. Therefore different functions can be accomplished
according to different conditions.
Conditional compiling introduced above can be implemented by conditional statements too.
However, conditional statements will result in the compiling of the whole source code, and the
object code will be very large; whereas if conditional compiling is used, only Program1 or
Program2 will be compiled according to the conditions, the object code generated is short
relatively. Thus, if the conditional code is long, then the use of conditional compiling is necessary.
8.12 Embedded Assembly
Though there are advantages of C programming language, there also some limitations. There
are some hardware based operations can’t be implemented, and also spending more space and
time when implementing. Therefore, it is more efficient to use assembly language. Assembly can
SONiX TECHNOLOGY CO., LTD
Page180
SN8 C Studio
User’s Manual
cope with the hardware based issues efficiently, and SN8 C programmes can be embedded in C
programmes.
8.12.1 How to embed
It similar to C programming language, to use “__asm(two ‘_’) ” before you want to embed
the programme to C programmes, when using the SN8 C.
__asm(“code\n”)
__asm { asm_text }
Both of he two ways of declaration can be embedded in C programmes. The statements
inside “{}” will be treated as one statement in C programmes. When it is not embedded in other
functions, it can include any types of assembly codes, and output them in assembly language
The preprocessor can’t preprocess the macros which are inside the “asm_text”.
Other C
instruction statements can’t be preprocessed too, unless you select the compilation option
“cpp_noskip_asmblock”. If “cpp_noskip_asmblock” is selected, it will process the “cpp”
instruction statements and the macros. The comments of “asm_text” which are coded in C or C++
style, will be omitted. There can’t be a “)” in the “asm_text”, unless it is attached to strings.
There is an example for reference.
if(step == ONE_PRESS_CLOCK_KEY_C)
{
//While regulating the timer, time symbol flickering.
disp_blink ^= 0x03;
//The flickering hour bit.
disp_blink &=0x03;
__asm
{
mov
a,0x01
mov
_led_dp,a
};
//led_dp = 1;
//The two points which lighted all the time.
}
//The generation assembly codes are shown below. You can see how the embedded assembly
SONiX TECHNOLOGY CO., LTD
Page181
SN8 C Studio
User’s Manual
statements are processed.
L125:
__SelectBANK _step
MOV A, (_step+0)
SUB A, #0x10
JNZ L93
L128:
__SelectBANK _disp_blink
MOV A, #3
XOR _disp_blink, A
L129:
;__SelectBANK _disp_blink
MOV A, #3
AND _disp_blink, A
L130:
mov
a,0x01
L131:
mov
_led_dp,a
L132:
L133:
jmp L94
The embedded assembly statements (L130,L131) are the same as it in the C programme.
Of course, the implementation result will be the right one.
8.12.2 The Transference in Embedded Assembly Code
It is known to all that the variable declaration is different between C programming and
assembly programming.
The C codes:
void func(void)
SONiX TECHNOLOGY CO., LTD
Page182
SN8 C Studio
User’s Manual
{
int x;
__asm {
…
;; //To get the local variable “x”.
…
}
return;
}
The compilation result:
C:\sn8cc>sn8cc +w prog.c
SN8CCWARN@(`prog.c' 3): source_warning: local `int x' is not referenced
prog.c: 0 error(s), 1 warning(s)
In the previous example, because “sn8cc” treats the variable “x” as unused (SN8 C
Compiler doesn’t check the inline assembly code), the option “+w” allows “sn8cc” to report the
warning messages. System also can’t allocate memory space for “x”. Hence, the address, which is
stored in the embedded group codes, is wrong.
To solve the problem, using of preprocessing instruction “#pragma ref id” is suggested.
You can use ““#pragma ref id” to inform SN8 C Compiler that “x” is called in the inline
assembler.
void func(void)
{
int x;
#pragma ref x
__asm {
…
SONiX TECHNOLOGY CO., LTD
Page183
SN8 C Studio
User’s Manual
;; The input and output variable “x”.
…
}
return;
}
Doing this can avoid the warning messages from SN8 C Compiler?
Another problem appears: how to read and write the global variables in embedded assembly
programme?
If we use a name which is defined in C programming language, such as:
Unsigned int Ver1;
Void func(void)
{
…
__asm{
Mov
ver1,#0x5a;
…
};
…
}
The compiling system will inform that there is an error: there is no “Ver1”! We have defined
the variable “Ver1” already. Why system show the error message?
While compiling, compiler converses the embedded assembly codes as it is in C programmes.
This causes the error. To see the conversion of the global variables in the embedded assembly
example.
The global variable definition in C programming:
union flagWord2
{
unsigned int flagByte;
struct bitdefine2
SONiX TECHNOLOGY CO., LTD
Page184
SN8 C Studio
User’s Manual
{
unsigned bit0:1;
unsigned bit1:1;
unsigned bit2:6;
}flagBit;
}led_dp;
unsigned int door_cnt;
unsigned int door_cnt1;
unsigned int door_cnt2;
They are conversed into assembly language as below.
.stabs "led_dp:G43",32,0,0,_led_dp
.stabs "door_cnt2:G14",32,0,0,_door_cnt2
.stabs "door_cnt1:G14",32,0,0,_door_cnt1
.stabs "door_cnt:G14",32,0,0,_door_cnt
There is a “_” before each variable!
Then, we can solve the problem. In the assembly programmes, add a “_” before the variable
when you want to read or write the global variables. We can see that the “led_dp” in the former
example is defined like this:
mov
_led_dp,a
You can see that the variable “led_dp” is global variable, and there is a “_” before it.
The variable conversion syntax is not for programmers, so it is will not introduced here.
Please reduce the using frequency of variable conversion, and then, the errors will be fewer. When
you want to use the variable conversions, you should have a good knowledge of ASM files.
8.13 Other Options
This following section illustrates the restrictions about SN8 C Compiler:
1.
A token can have at most 1022 characters.
2.
A string literal can have up to 4095 characters.
SONiX TECHNOLOGY CO., LTD
Page185
SN8 C Studio
User’s Manual
3.
This compiler will support function pointer by using “call @HL”. If the target does not
support “@HL”,the assembler will report this error,and compiler does not check if the
target is support “@HL”.
4.
The function pointer can not pass any arguments.
¾ Ex.
int (*fptr)(int);
int foo(int);
int main()
{
fptr = foo;
fptr(1); // error,fun pointer can not pass argument
return 0
}
8.14 Customized C Library
Character Class Tests: <ctype.h>
isalnum(c);
isalpha(c);
iscntrl(c);
isdigit(c);
isgraph(c);
islower(c);
isprint(c);
ispunct(c);
isspace(c);
isupper(c);
isxdigit(c);
int tolower(int c);
int toupper(int c);
String Functions: <string.h>
SONiX TECHNOLOGY CO., LTD
Page186
SN8 C Studio
User’s Manual
char *strcpy(char *,const char *);
char *strncpy(char *,const char *,size_t);
char *strcat(char *,const char *);
char *strncat(char *,const char *,size_t);
int strcmp(const char *,const char *);
int strncmp(const char *,const char *,size_t);
char *strchr(const char *,int);
char *strrchr(const char *,int);
size_t strspn(const char *,const char *);
size_t strcspn(const char *,const char *);
char *strpbrk(const char *,const char *);
char *strstr(const char *,const char *);
size_t strlen(const char *);
char *strerror(int);
char *strtok(char *,const char *);
void *memcpy(void *,const void *,size_t);
void *memmove(void *,const void *,size_t);
int memcmp(const void *,const void *,size_t);
void *memchr(const void *,int,size_t);
void *memset(void *,int,size_t);
Mathematical Functions: <math.h>
float sin(float);
float cos(float);
float tan(float);
float asin(float);
float acos(float);
float atan(float);
float atan2(float,float);
float sinh(float);
SONiX TECHNOLOGY CO., LTD
Page187
SN8 C Studio
User’s Manual
float cosh(float);
float tanh(float);
float exp(float);
float log(float);
float log10(float);
float pow(float,float);
float sqrt(float);
float ceil(float);
float floor(float);
float fabs(float);
float ldexp(float,int);
float frexp(float,int *);
float modf(float,float *);
float fmod(float,float);
Utility Functions: <stdlib.h>
int atoi(const char *);
long atol(const char *);
long strtol(const char *,char **,int);
long strtoul(const char *,char **,int);
int rand(void);
void srand(unsigned);
int abs(int);
long labs(long);
div_t div(int,int);
ldiv_t ldiv(long,long);
Variable Argument Lists: <stdarg.h>
Type
: va_list
Macro : va_start(va_list,lastarg)
Macro : type va_arg(va_list,type)
Macro : void va_end(va_list)
SONiX TECHNOLOGY CO., LTD
Page188
SN8 C Studio
User’s Manual
Limits: <limits.h>
CHAR_BIT : 8
CHAR_MAX : 127
CHAR_MIN : -128
INT_MAX : 127
INT_MIN : -128
LONG_MAX : 32767
LONG_MIN : -32768
SCHAR_MAX : 127
SCHAR_MIN : -128
SHRT_MAX : 127
SHRT_MIN : -128
UCHAR_MAX : 255
UINT_MAX : 255
ULONG_MAX : 65535
USHRT_MAX : 255
<float.h>
FLT_RADIX
FLT_ROUNDS
FLT_DIG
FLT_EPSILON
FLT_MANT_DIG
FLT_MAX
FLT_MAX_EXP
FLT_MIN
FLT_MIN_EXP
DBL_DIG
DBL_EPSILON
DBL_MANT_DIG
DBL_MAX
DBL_MAX_EXP
SONiX TECHNOLOGY CO., LTD
Page189
SN8 C Studio
User’s Manual
DBL_MIN
DBL_MIN_EXP
Standard defined types: <stddef.h>
ptrdiff_t : unsigned int
size_t : unsigned int
Input Output data: <stdio.h>
printf(char*,...)
sprintf(char*,const char*,...)
Before calling a printf function, you must write a putchar function to predefine the output type of
the printf function. For example:
void putchar(char ch);
8.15 References
[LCC 1995] : A Retargetable C Compiler: Design and Implementation; Christopher W. Fraser,
David R. Hanson; The Benjamin/Cummings Publishing Company,Inc.; 1995
[Spec 2004] : SONiX SN8P C Compiler Specification;
[C99] : Programming languages — C; ISO/IEC 9899,Second edition 1999-12-01
9 Linker and Debugger
9.1 What the Linker Does
The linker accepts a number of ELF object and archive files and a link file which describes the
location of the segments, and generates executable binary and/or ELF files along with an optional
map file which records the fix-up and relocation information. The linker combines both code and
data in the object files and searches the named libraries to resolve external references to routines
and variables. It also locates the code and data sections at the specified memory address or at the
SONiX TECHNOLOGY CO., LTD
Page190
SN8 C Studio
User’s Manual
default address, if no explicit address is specified. Finally, the linker copies both the program
codes and other information to the task file. It is this task file that is loaded for debugging. The
libraries included by the Cross Linker were generated by the Holtek library manager.
Linking processing:
Linking process
•
Import and search include modules in library by resolving global symbols.
•
Allocate segments.
•
Resolve local and external references.
•
Fix-up relocatable addresses.
•
Generate output file.
•
Generate log file for simulation register dump.
9.2 Linker Options
The options specify and control the tasks performed by Linker. The Project command provides a
dialog box, Linker Options, to specify these options to the Linker. These options are:
Output
This option displays specified location of the executable ELF File.
Map File
This option is to specify whether the map file and it’s relevant location will be generated or not.
The map file should record the following information:
•
Executable file path name the map file is associated to.
SONiX TECHNOLOGY CO., LTD
Page191
SN8 C Studio
User’s Manual
•
Time stamp which records the time and date the map file is generated. Global symbol table
that gives the information of global symbol’s address, type and residing file.
•
Fix-up records.
•
The memory layout of segments and their basic information.
•
Call tree information.
Stack
For the user to specify the level value of the stack.
9.3 Functionality
9.3.1 Linker
slink [options] [files]
Options: (case insensitive)
1. Help - /H or /HELP or /?
2. Target machine - /MACHINE:id
3. Link file - /LINKFILE:”file”
4. Library search path - /PATH:”path”
5. Init file - /INI:”file_name”
SONiX TECHNOLOGY CO., LTD
Page192
SN8 C Studio
User’s Manual
6. Map file - /MAP.
7. Output file - /OUTPUTFILE:filename
8. Stack - /STACK:size
9. Case sensitive - /CASE
10. Standard Library Version – /STDLIB:version
11. Output Path - /OUTPUTPATH:path
12. C Type - /CSource
13. Disable Data Overlaying - /NOOVERLAY
¾ Examples:
slink /MACHINE:SNC745 /PATH:”c:\library” a.o b.o c.o
Files:
1. ELF formatted object file.
2. Archive file.
Link File:
1. The link command file. (Please refer to link file format specification)
2. If there is conflict between command-line options and commands in link file, linker should
select commands in link
file and ignore command-line options.
9.3.2 Librarian
slib [Options] [files]
Options:
1. Help - /H or /HELP or /?
2. Target machine - /MACHINE:id
3. List objects - /LIST
4. Output file name - /OUTPUT:filename
5. Search Path - /PATH:path
SONiX TECHNOLOGY CO., LTD
Page193
SN8 C Studio
User’s Manual
6. Extraction - /EXTRACT:object
7. Insertion - /INSERT:object
8. Deletion - /REMOVE:object
9. Case sensitive - /CASE
10. Init file - /INI:”file_name”
11. Output Path - /OUTPUTPATH:path
Examples:
slib /MACHINE:SN735 /OUTPUT:ar.lib a.o b.o c.o
Files
1. ELF formatted object file.
2. Archive file.
9.3.3 Dump Utility
sdump [Options] [file]
Options:
1. All information - /ALL
2. All Header information - /HEADERS
3. Section - /SECTIOIN:sectionname
4. Symbol table - /SYMBOLS
5. Relocations - /RELOCATIONS
6. Debug information - /DEBUG
7. Ouput file path name - /OUTPUT:filename or
/OUTPUT:"full path name with space in it"
Example :
sdump /all /output:a.out.dmp a.out
sdump /debug /output:”c:\path\project 1\a.out.dmp” a.out
Files:
SONiX TECHNOLOGY CO., LTD
Page194
SN8 C Studio
User’s Manual
1. ELF formatted object and executable file.
2. Archive file.5.4
File Format
9.4 Map File Format
Executable File = .\Output/SonixDemo.out
Timestamp is Mon Jun 14 11:06:57 2004
Start
Length
Type
Name
Module
0X000000 0X0004
Code
zeroaddr
SONIXDEMO.o
0X010000 0X009E
Code
.code1
SONIXDEMO.o
Start
Type
Name
Data
.data
SONIXDEMO.o
Length
0X000000 0X020E
Module
Address
Type
Size
Publics
Module
Address
Type
Size
Locals
Module
0X000000 Section 0X000 .DATA
SONIXDEMO.o
0X010000 Section 0X000 .CODE1
SONIXDEMO.o
0X010036 No type 0X000 @@@test_start SONIXDEMO.o
0X000100 Object 0X001 LAST_KEY0
SONIXDEMO.o
Log Configuration File Format (INI):
The log file is an input for emulator to dump run-time register values on emulation. The log file
records the location and registers or rams to be logged to log file. Linker has the responsibility
to generate the log file with the name “xxx.out.slg”.
[General]
StopAt=0x10000 ; LOG STOP_PROGRAM for ges.exe
[Item0]
DumpAt=0x3f
Register=x0, y0, x1, y1
Ram=0x0-0x10, 0x200
[Item1]
DumpAt=0x4b
Register=ALL_REGISTERS
Ram=0x10, 0x20, 0x30, 0x40
SONiX TECHNOLOGY CO., LTD
Page195
SN8 C Studio
User’s Manual
[Item2]
DumpAt=0x400000
Register=
Ram=0x0-0x10, 0x20
[Item3]
DumpAt=0x4000a4
Register=ALL_REGISTERS
Ram=0x0-0x10
9.5 Error and Warning Messages
1.
Put descriptions of error messages in module’s resource file for future enhancement for
multi-language support.
2.
Please follow the syntax shown below. The IDE will parse the syntax and show
appropriate information on the message window and so the user can double click on the message
line to jump to the source line on the editor.
[Error | Warning] error_number : error message description
For example:
Error 2001: multiply defined global symbol (“symbol”).
Warning 2001: multiply defined global symbol (“symbol”), second definition is
ignored.
9.6 Debugger
During the development process, the repeated modification and testing of source programs is an
inevitable procedure. The SN8 C STUDIO provides a debugging environment which allows single
stepping, symbolic breakpoints, automatic single stepping, trace trigger conditions, etc.
After the application program has been successfully assembled and built, emulation of the
application program can begin by using debug commands. Note that during the emulation of an
application program, the corresponding project should be open.
SONiX TECHNOLOGY CO., LTD
Page196
SN8 C Studio
User’s Manual
Choose the Begin Debug command from the Debug menu or press Begin Debug button on the
toolbar to begin the emulation. The system will automatically stop the emulation if a break
condition is met. Otherwise, it will continue emulating until the end of the application program.
The End Debug button on the toolbar is illuminated while the ICE is in emulation. Pressing this
button will stop the emulation process.
9.7 Single Step
The execution results of some instructions may be viewed and checked. It is also possible to view
the execution results one instruction at a time, i.e., in a step-by-step manner. The SN8 C STUDIO
provides two step modes, namely manual mode and automatic mode. The manual mode executes
exactly one step command each time the single-step command is executed. In the automatic mode,
the system executes single step commands continuously until the stop command is issued. In the
automatic mode, all specified breakpoints are discarded. There are 3 step commands, namely Step
Into, Step Over and Step Out.
The Step Into command executes exactly one instruction at a time, it will enter the procedure and
stop at the first instruction of the procedure when it encounters a CALL procedure instruction.
The Step Over command executes exactly one instruction at a time, however upon encountering a
CALL procedure, will stop at the next instruction after the CALL instruction instead of entering
the procedure. All instructions of this procedure will have been executed and the register contents
and status may have changed.
The Step Out command is only used when inside a procedure. It executes all instructions between
the current point and the RET instruction (including RET), and stops at the next instruction after
the CALL instruction.
9.8 Breakpoints
The SN8 C Studio provides a powerful breakpoint mechanism which accepts various forms of
conditional including program address, source line number and symbolic breakpoint, etc.
When an instruction is set to be an effective breakpoint, the SN8 C Studio will stop at this
instruction without executing it. Although an instruction is an effective breakpoint, the SN8 C
SONiX TECHNOLOGY CO., LTD
Page197
SN8 C Studio
User’s Manual
Studio may not stop at this instruction due to execution flow or conditional skips. If an effective
breakpoint is in the "Data Space (RAM)", the instruction that matches this conditional breakpoint
data will be executed always. The SN8 C Studio will stop at the next instruction.
Choose the Breakpoint command in the "Debug" menu, the "Setting Break Point" dialog box will
be shown for you to "Designate" the descriptive items of the breakpoint. Set the file name you
will set breakpoints at, set the exact line number, and choose the breakpoints type. Press the "OK"
button to confirm.
Breakpoint Setting
SONiX TECHNOLOGY CO., LTD
Page198
SN8 C Studio
User’s Manual
10 Simulator
SONiX ICE is an In-Circuit Emulator designs to support all series of SONiX 8-bit
Microcontroller. It provides a powerful and reliable emulating environment.
And SN8 C Studio also integrates a function-rich software simulator in order to bring convenience
to development. When simulated by the software, hardware connection is not needed, all the
hardware functions are simulated by PC.
10.1 Software Simulation
In order to use software simulation, project setting introduced before should be set, the check
box of “Use simulator” in “Primary Setting” component of “General” page should be checked, as
follows.
Simulator Setting
Click OK to confirm.
SONiX TECHNOLOGY CO., LTD
Page199
SN8 C Studio
User’s Manual
Click Debug button to debug the program, all the hardware operations will be simulated by
software in PC. The way to debug and the files generated are the same with ICE simulation. But
the measure of voltage and electric current is not enabled, and the performance of user hardware
can not be examined, but the rightly execution of the program can be ensured.
FAQs
This chapter lists some questions users may meet with on the course of using the SN8 C
STUDIO, and how to deal with those questions. Make good use of this section can greatly
increase user’s development efficiency.
Q1: For chip SN8P1909, SN8P1908, SN8P1829 why special registers within address
0x90~0x99 show
incorrect value in debug windows?
A1: For those special register within address 0x90~0x99,the SN8 MCU require user use XMOV
macro to get/set value from/in it when using EV chip ( ICE_Mode=1) for chip SN8P1909,
SN9P1908,SN8P1829。 But ICE interface didn’t implement XMOV macro to get/set value from
it. Therefore those values show in debug window (Register, Watch, Memory windows) would be
incorrect.
Q2:Why bit-register operations demand such code size?
A2:SN8 C Compiler provide the following bit-wise function
void _bSET(unsigned long address, unsigned int bitOffset);
SONiX TECHNOLOGY CO., LTD
Page200
SN8 C Studio
User’s Manual
void _bCLR(unsigned long address, unsigned int bitOffset);
int _bTest0(unsigned long address, unsigned int bitOffset);
int _bTest1(unsigned long address, unsigned int bitOffset);
it would generate code-efficient assembler code. However, for the following direct assign of
bit-register FFD1 = 1; It would use structure to generate bit-wise operation,and result in
inefficient code. It is suggest that user use bit-wise function instead of using bit-register directly.
Q3:Does intrinsic function _bSET,_bCLR,_bTest1,_bTest0 support XMOV macro ?
A3:Yes.
Q4:Why using function pointer results in “Instruction 'CALLHL' not defined” error ?
A4:Due to function pointer is implemented by CALLHL instruction , however only chip
SN8P2604,SN8P2606,SN8P2607,SN8P2608 support CALLHL instruction. As for other chips,
the assembler would prompt “Instruction ‘CALLHL’ not defined error”.
Q5:Why calling user defined function within interrupt function would cause compiling error
?
A5: Due to calling function from interrupt might result in multiple function call problems.
Currently SN8 C Compiler limit user by calling user defined function within interrupt function to
avoid multiple call problems. However,user are allowed to use C standard library within interrupt
function.
Q6: Does SN8 C compiler support multiple function call?
A6: Yes. SN8 C Studio supports multiple function call for C standard library.
Q7: Can SN8 C Studio calling user defined function within interrupt function?
A7: Yes. But when calling user defined function within both interrupt & main, SN8 C Studio
would complain multiple function call problem.
SONiX TECHNOLOGY CO., LTD
Page201
SN8 C Studio
User’s Manual
Q8:Why in compiling it show error message “Value 0xE6 was limited in this instruction?
A8: Due to some limitations in B0MOV M, #I instruction,the immediate value #I cannot be 0xE6
or 0xE7 for those chips:SN8P270X、SN8P2604、SN8P2602、SN8P2501.
Q9:Why in compiling it show error message “Value 0x83 was in limited range of 0x80 ~
0xFF”?
A9: Due to some limitations in B0XCH A, M,the memory M can’t be within address 0x80~0xFF
for those chips:SN8P270X、SN8P2604、SN8P2602、SN8P2501.
Q10: Why in compiling it show error message “instruction at 0x08 is not jmp nor nop”?
A10: For chips:SN8P2501、SN8P2602、SN8P2604、SN8P2608、SN8P270X,the rom address
0x8 must be instruction either jmp or nop.
Q11: Why in compiling it show error message “address (with mask 0xFF) must not equal
'0xFE' or '0xFF' “?
A11: For chips:SN8P2501、SN8P2602、SN8P2604、SN8P2608、SN8P270X、SN8P2714、
SN8P2715、SN8P2711,the PCL can’t be written at address (with mask 0xFF) 0xFE、0Xff.
Q12: Why in compiling it show error message “ 'XXX' bank number of the fix-up address
must equal 0?
A12: Due to SN8 instruction B0XXX limits the memory must be within bank 0。SN8 C Compiler
show errors when those instructions use memory that are not in bank 0.
Q13:Why in compiling it show error message “ Register value must and with '0x0'” or
Register value must | with '0x80'?
SONiX TECHNOLOGY CO., LTD
Page202
SN8 C Studio
User’s Manual
A13: Due to some SN8 bit-register was limited & it’s value must be fixed as 0 or 1。 The SN8
Assembler would complains above error if the bit-registers were not properly set
Q14:Why its wrong to specify a pointer point to a character string variable? (i.e.
char*string="SNL320")
A14: Because SN8 C Compiler defines character string variables as constant and they are placed
in ROM space when compiling.SN8 C Compiler usually use RAM pointer and ROM pointer
separately, (these two type variables can access each other by __GENERIC pointer) the default
value is often RAM pointer. The right syntax is:
__ROM char*string=”SNL320”
or
__GENERIC char*string=”SNL320”
Q15:Why it’s wrong shifting an integer and assignment it to a long integer type variable? (i.e.
long temp=0x200<<8)
A15:When the length of an operand is no long than a word, the compiler will default it as integer.
So you should particularly announce it a long integer type. ( It’s same with the dealing in ANSI C).
The correct variable announce should be:
Long
temp+0x200L<<8
Where the symbol L is used to switch 0X200 into long integer type.
Q16: Why it’s not correct to assignment an int/unsigned variable with an integer exceeding
255?
A16: Because the default value of int/unsigned variable length is only one byte.
Q17:Why it’s not correct to assignment an unsigned long type variable with an integer
longer than 65535?
A17: Because the default value of unsigned long variable length is only one byte.
SONiX TECHNOLOGY CO., LTD
Page203
SN8 C Studio
User’s Manual
Q18:Why it’s not correct to assignment a float/double type variable with an integer
exceeding 5 bytes?
A18: Because the default value of float/double variable unit is 4 bytes.
Q19:Why the character string length must be one less than the array length when
assignment the string to this array?
A19: Because the last bit of the string is set as a end mark with “\0”, which is placed together into
the array. For example:
char
string[11] = “abcdefghij”;
Q20: Why the blank should be filled in with value 1 when right shift an negative integer?
A20: Because the compiler process the integer shifting as logical operation, that is the left shift
equal to “×2” and the right shift operation is equal to “÷2”
Q20:Why its wrong assignment a long integer type variable with the result of int type
operands multiplication?
A20: Although the operation result of two integer type variables is placed in a long type variable,
but it must be with constraint conversion. For example:
long
int
LL;
i = 32767,j = 10;
LL = (long) I * j;
Q21: How to embed assembly code in the c code ?
A21:
Apply with the key words __asm can embed the assembly code in the c program. For
example:
1.
__asm("X0=0x12\n");
2.
__asm{
SONiX TECHNOLOGY CO., LTD
Page204
SN8 C Studio
User’s Manual
X0=0x12
Y0=0x12
}
3.
__asm("X0=0x12\nY0=0x12\n");
4.
__asm("X0=0x12\n"
"Y0=0x12\n");
Q22: Why the variables, which is case sensitive but have same name, can not be seen in the
watch window?
A22: Pitch on the “Watch variable case sensitively in Watch Window” option in the “project ->
setting -> general -> Debug Window”menu.
Q23 : What is float data type size, what is it’s precision?
A23. A float data type occupies 32 bits (4 bytes) and gives about 7 digits of precision.
Example:
Float f = 1.23456789
The f would display as 1.2345679 in watch window.
Q24 : What is the value of (0x40-c) when c=0x41 & c is a unsigned char?
A24. Due to c is an unsigned char. The result of (0x40-c) is also a unsigned char, 0xFF.
Example:
unsigned char c, d;
c=0x41;
d = 0x40-c; // d= 0xFF here
if( d<0)
//This would be false due to d is unsigned
return 0;
if( (0x40-c)<0)
//This would be false due to (0x40-c) is a unsigned too.
return 0;
Q25: Why the assignment of a viarable to a pointer will cause an error?
A25.
A pointer is used for pointing , the assignment of an uncertain value to it is illegal, for
example:
when
char c = ‘a’;
SONiX TECHNOLOGY CO., LTD
Page205
SN8 C Studio
User’s Manual
is defined,
char *cp = c;
or
char *cp;
*cp = c;
are all illegal. The right styles are:
char *cp = &c;
or
char *cp;
cp =&c;
please refer to relative reference for more information.
SONiX TECHNOLOGY CO., LTD
Page206
SN8 C Studio
User’s Manual
Main Office:
Address: 9F, NO. 8, Hsien Cheng 5th St, Chupei City, Hsinchu,
Taiwan
R.O.C.
Tel: 886-3-551 0520
Fax: 886-3-551 0523
Taipei Office:
Address: 15F-2, NO. 171, Song Ted Road, Taipei, Taiwan R.O.C.
Tel: 886-2-2759 1980
Fax: 886-2-2759 8180
Hong Kong Office:
Address: Flat 3 9/F Energy Plaza 92 Granville Road, Tsimshatsui
Kowloon.
Tel: 852-2723 8086
Fax: 852-2723 9179
Technical Support by Email:
[email protected]
SONiX TECHNOLOGY CO., LTD
Page207
East