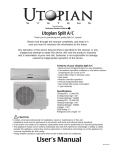
1
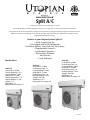
3070293
Split A/C
Thank you for purchasing this quality Split A/C system.
Please read through this manual completely and keep it in case you need to reference the information in the future.
Any operation of this device beyond what is described in this manual or any unapproved attempt to repair this device will void the
product’s warranty and is undertaken at your own risk. Sunleaves Garden Products is not responsible for damage caused by
inappropriate operation of this device.
Features of your Utopian Systems Split A/C
• Quick Connect Line Set •
• Pre-charged with R410A Refrigerant •
• Five Mode Options: Cool, Heat, Dry, Fan & Auto •
• Programmable Features •
• Low Ambient Operation •
• Photocatalyst Filtration •
• Auto Restart •
• 1-year Warranty •
Specifications
USA612K
Cooling BTU: 12,000
Cooling Amperage: 12.4
Cooling Wattage: 1400
Heating BTU: 11,500
Heating Amperage: 11.9
Heating Wattage: 1,340
Voltage: 115
SEER Rating: 15
Refrigerant Line Length: 25’
USA621K
Cooling BTU: 21,000
Cooling Amperage: 11
Cooling Wattage: 2,460
Heating BTU: 21,000
Heating Amperage: 10
Heating Wattage: 2,210
Voltage: 208-230
SEER Rating: 14.5
Refrigerant Line Length: 25’
USA633K
Cooling BTU: 32,000
Cooling Amperage: 18
Cooling Wattage: 4,000
Heating BTU: 33,000
Heating Amperage: 16
Heating Wattage: 3,470
Voltage: 208-230
SEER Rating: 14
Refrigerant Line Length: 25’
REV:12014
Table of Contents
1. Installation Safety Precautions...................................................................... 3
2. Tools/Parts/Features......................................................................................... 4
3. Installation.........................................................................................................5-7
4. Usage Safety Precautions................................................................................ 8
5. System Test........................................................................................................... 8
6. Indoor Unit Displays.......................................................................................... 9
7. Using the Remote Controller................................................................... 9-10
8. Remote Controller Display............................................................................10
9. Remote Controller Operations.............................................................11-13
10. Manual Operation..........................................................................................13
11. Care and Maintenance.................................................................................14
12. Tips and Troubleshooting...........................................................................15
13. Warranty...........................................................................................................16
Installation Safety Precautions
• Read the following safety precautions carefully before installation.
• Electrical work must be performed by a licensed professional. Do not use a defective or underrated circuit breaker. Install unit on a
dedicated circuit.
• Incorrect installation that results from failure to follow the instructions can cause physical harm, property damage or void the warranty.
The danger level is indicated by the following:
CAUTION: indicates the possibility
of injury or damage to property.
WARNING: indicates the possibility
of death or serious injury.
WARNING
• Consult a licensed professional for installation. Defective installation may result in water leakage, electrical shock or fire.
• Install the unit strictly following these installation instructions.
• Use the included accessories and specified parts for installation. Otherwise, the unit may fail, causing water leakage, electrical shock or fire.
• Install the unit in a reinforced, stable, level location that is able to support the unit’s weight. If the location cannot support the unit or the unit is improperly installed, the unit may fall and cause injury.
• Follow all local and national wiring standards and regulations as well as these instructions when performing electrical work. A dedicated circuit and outlet must be used. If the dedicated circuit capacity is insufficient or a defect occurs in electrical work, electrical shock or fire may result.
• Install the connecting cable tightly and clamp it so no external force can act on the terminal. Improper connection or clamping may cause overheating or fire at the connection.
• When wiring the control box, be sure to arrange and route the wiring so the control board cover can be properly secured. If the control board cover is not properly secured, it may c ause overheating at the connection point of the terminal, electrical shock or fire.
• When installing the piping connection, do not let air or substances other than the specified refrigerant into the refrigeration system. Doing so may cause lower capacity, abnormal high pressure in the refrigeration system, explosion or injury.
• Do not use an extension cord, and do not share the dedicated outlet with other electrical appliances. Doing so may cause electrical shock or fire.
CAUTION
• Contact a licensed professional for installation, repair or maintenance of this unit. Installation work must be performed in accordance with local and national wiring standards.
• If the power cord needs to be replaced, replacement work must be performed by a licensed professional.
• This appliance should not be used by individuals who lack the experience, k
nowledge or ability to safely operate this appliance, unless they receive supervision or instruction concerning use of the appliance by a person responsible for their safety.
• This equipment must be properly grounded. Improper grounding may cause electrical shock.
• Do not install the unit where flammable gas leaks may occur. If gas accumulates around the unit, it may cause a fire.
• Set up drainage piping as described in the installation instructions. Inadequate drainage may result in water damage.
• Young children should be supervised when in the vicinity of the air conditioner.
Electrical Safety Regulations for the Initial Installation
• If the power source is inadequate, or there are other concerns, the licensed professional should not install the air conditioner and explain the problem so it can be addressed.
• Power voltage should be in the range of 90 to 110 percent of rated voltage.
• Verify the power source is installed on a circuit breaker with a capacity 1.5 times the maximum current of the unit.
• Ensure that the air conditioner is properly grounded.
• Connect the wiring according to the Electrical Connection Diagram located on the panel of the outdoor unit.
• All wiring must comply with local and national electrical codes and be installed by a licensed professional.
• This air conditioner must be used with a dedicated circuit and outlet.
• Refer to the maximum load current indicated on the nameplate when selecting the cable size and current rating of the circuit breaker. A 20A circuit breaker and 12-gauge wiring are recommended.
3
Tools/Parts/Features
Included Parts list:
Tools Needed for Installation
(not included):
Part Name
• 7/8”, 15/16” and 1” wrenches
• 3-9/16” hole drill bit
• 3/16” Allen wrench
• Electric drill
• Electrical tape
• Fish tape
• Leak detection spray or soap solution
• Level
• Measuring tape
• Multimeter
• Phillips screwdriver
• Thermometer
• User’s manual
Indoor Unit
1
2
Instruction guide
Indoor unit (Part 1 of 3)
Outdoor unit (Part 2 of 3)
Quick connect line set (Part 3 of 3)
Wall-hole sleeve
Wall-hole sleeve lid
Airproof rubber
Wrapping band
Installation plate
Connecting cable
Clip anchor
Self-tapping screw A ST3.9x25
Seal
Drain joint
Sound-proofing pads
Remote Controller
AAA batteries
12K Unit
Qty
1
1
1
1
1
1
1
6
1
1
5
5
1
1
2
1
2
9
6
33K Unit
Qty
1
1
1
1
1
1
1
6
1
1
14
14
1
1
2
1
2
NOTE: Only the parts listed above are provided. Other tools and
parts used during installation must be purchased separately.
3
4
5
21K Unit
Qty
1
1
1
1
1
1
1
6
1
1
5
5
1
1
2
1
2
7
1. Front panel
2. Air inlet
3. Air filter (under front panel)
4. Terminal board cover
5. Air outlet
6. Horizontal airflow louver
7. Vertical airflow louver
8. Remote controller
9. Connecting pipe, drain hose
10. Quick connect line set
11. Connecting cable
12. Air outlet
8
10
Outdoor Unit
12
11
4
Installation
Selecting an Installation Location
Indoor Unit
• Do not expose the indoor unit to heat or steam.
• Select a place where there are no obstacles in front of or around the unit.
• Do not install near a doorway.
• Prevent unnecessary damage to the wall by using a stud finder to locate studs.
• Allow a minimum of 5” of space to the left and right of the indoor unit.
• Install the indoor unit on the wall at a minimum of 6’6” for the 12K, or 7’6” for the 21 and 33K units from the floor and 6” from the ceiling.
• Do not cut or alter the refrigerant pipe. Bend the refrigerant pipe and indoor unit pipe carefully to avoid kinking.
• Do not install in direct sunlight. The sun will fade the plastic cabinet and affect its appearance. If the unit must be installed in direct
sunlight, take measures to protect the unit from exposure.
Outdoor Unit
• The unit requires a minimum of 1’ of space to the left, right and back. The front of the unit requires at least 6’6” of clearance, and the
refrigerant pipe connection side requires at least 2’ of clearance.
• Do not place objects in the path of the air inlet or outlet.
• Select an installation location where noise, vibration and warm air from the air conditioner will not be a disturbance.
• Avoid installation of the outdoor unit in direct sunlight.
Rooftop Installation
•
•
•
•
The outdoor unit must be level.
The roof structure and anchoring method must be adequate for the outdoor unit location.
Consult local codes regarding rooftop mounting.
Installing the outdoor unit on roof structures or external walls may result in excessive noise and vibration, and may be considered a
nonserviceable installation.
6.69”
Installation Plate
1.
2.
3.
Select a place on the wall for the plate that will leave the recommended amount of 10”
clearance space around the indoor unit.
Drill five 3/16” diameter holes in the wall corresponding with the holes on the
installation plate. Insert clip anchors for the appropriate mounting screws.
Install the installation plate on the wall using five type A self-tapping screws.
12K Unit
3.75”
11.54”
10”
40.55”
Line Set Holes
Line Set Holes
1.38”
33K Unit
6.42”
13.39”
13.39”
2.17”
Indoor
12.5”
1.75”
1.75”
30.31”
Wall
Outdoor
6.42”
12.5”
1.75”
1.75”
21K Unit
2.17”
57.09”
Line Set Holes
Line Set Hole Drilling
The line set can be run outdoors on either the left or the right side of the indoor unit. Choose the side that will
allow the lines to avoid obstructions, and determine hole position according to the diagram above. Drill a hole that
will accomodate the wall-hole sleeve, slanting slightly downward to the outdoor side.
Wall
Indoor
Outdoor
Wall-Hole Sleeve Installation
Insert wall-hole sleeve into Line Set Hole from the indoor wall. Sleeve may need to be cut to proper length depending
on wall thickness. Connect wall-hole sleeve lid to sleeve from outdoor wall. Use airproof rubber to create a tight seal.
5
Installation
Connecting the Cable to the Indoor Unit
1. Lift the front panel on the indoor unit and remove the electrical box cover by loosening the screw.
2. Use a fish tape to pull the cable through the hole below the terminal block. It may be helpful to tape the colored wires together using electrical tape.
3. Remove the wire clamp below the terminal board.
4. Loosen the screws on the terminal board and insert the ends of the coded wires into the corresponding terminals. See the wiring diagram on the bottom of the indoor unit’s front cover.
5. Retighten the screws and the wire clamp, and replace the electrical box cover.
Indoor Unit Installation
1. Feed the cable, pipes and drainage hose through the hole in the wall.
2. Hook the indoor unit onto the upper portion of the installation plate. Move the unit left and right to ensure the hooks are properly seated on the installation plate.
3. Press the lower left and right sides of the unit against the installation plate until the hooks enter their slots.
Drainage Installation
1.The drainage hose should run through the wall and slope downward to run condensed water away from the unit.
2.Locate the drain hose at the bottom of the unit. Locating the hose at the top can cause the drain pan to overflow inside the unit.
3.Insulate the connecting part of the extension drain hose with a shield pipe. Do not let the drain hose slack.
Connecting the Quick-Connect Refrigerant Pipes
IMPORTANT:
•Follow the detailed instructions for connecting the refrigerant pipes to the indoor and outdoor units. Failure to follow instructions during
installation will void the warranty.
•Do not remove the sealing caps and stoppers until immediately before installing the lines. Doing so for an extended period of time before installation may result in poor performance.
•To prevent leaks, verify the quick-release screw connections are absolutely free of debris. Moisture or foreign bodies will adversely
affect the function of the quick-release connectors, leading to a risk of refrigerant loss (not covered by the warranty).
•Install refrigerant lines outdoors only in dry weather.
•Do not plaster over the refrigerant lines.
•Never allow refrigerant into the environment.
•Always wear work gloves and goggles when handling refrigerant. Improper handling of refrigerant may be harmful to your health.
•Do not smoke during installation.
•Do not operate the unit without the refrigerant lines connected.
•The screw connections should be tightened using only the appropriate wrench.
•Tightening the screw connections too much may damage them. Tightening the screw connections too little will cause them to leak.
•The EQ valves are designed for a single-use, one-time installation. The valves’ seal cannot be guaranteed if they are installed more than once. Reinstalling them will void the warranty.
Connecting the Quick-Connect Refrigerant Pipe to the Indoor Unit
1.Do not remove the plastic seals from the indoor equipment and the appropriate refrigerant pipe until immediately before
connecting them.
2.The smaller pipe on the indoor unit corresponds to the smaller refrigerant pipe, and the larger pipe corresponds to the larger
refrigerant pipe. Position the screw connector on the refrigerant pipes over the thread on the indoor equipment and tighten the first few threads by hand. Over tightening may result in cross-threading.
3.To secure the connectors, hold the point marked “X” while turning the nut at the point marked “Y.” Use a 7/8” wrench to hold the connector and a 15/16” wrench to turn the nut on the smaller set of connectors, and a 15/16” wrench to hold the connector and a 1” wrench to turn the nut on the larger set.
Indoor unit
Outdoor unit
X
Y
4.Work quickly, taking care not to cross-thread the screw connectors.
5.After finishing the connection, wrap the connectors with the sound-proofing pads.
6. Use the provided wrapping band to wrap the quick connect line set and connecting cable together.
IMPORTANT:
Because the coupling works with tapping rings, the pipes may leak if the coupling is reconnected. Undoing the coupling will void
the warranty.
6
Installation
Outdoor Unit Installation
IMPORTANT:
• If the outdoor unit is higher than the indoor unit, make sure the refrigerant pipe contains a curve that is lower than the bottom edge of the indoor unit.
• If the installation location is exposed to strong winds, place the unit lengthwise along the wall.
• If suspended installation is necessary, the installation bracket should m
eet the technical specifications shown in the installation bracket diagram. Choose an installation wall made of solid brick, concrete or other strong construction, or reinforce the damping support. The connections between the bracket and the w
all and between the bracket and the air conditioner should be firm and stable.
• Do not block radiating air.
• Securely anchor the outdoor unit with a bolt and nut horizontally on a concrete or other solid surface.
• Hardwire the outdoor unit to a 20A disconnect box installed by a licensed professional.
Drain Joint Installation
Fit the seal onto the drain joint, then insert the drain joint into the base pan hole of the outdoor unit. Rotate the drain joint 90° to secure it
in place. A clicking sound indicates the assembly is secure.
Connecting the Cable to the Outdoor Unit
1. Remove the electrical box cover on the outdoor unit by loosening the screw.
2. Remove the wire clamp below the terminal board.
3. Loosen the screws on the terminal board and insert the ends of the coded wires into the corresponding terminals.
4. Retighten the screws and the wire clamp, and replace the electrical box cover.
Connecting the Quick-Connect Refrigerant Pipe to the Outdoor Unit
1.Remove the water tray on the outdoor unit.
2.Do not remove the plastic seals from the outdoor unit and the appropriate refrigerant pipes until immediately before connecting them.
3.Align the refrigerant pipes with the valves on the outdoor unit. The sizes of the pipes correspond to the sizes of the valves. Position the screw connector on the refrigerant line over the thread on the outdoor unit and tighten the first few threads by hand.
NOTE: The pipes must be connected to the valves with as little stress as possible.
4.Tighten the bottom screw connector and then the top screw connector by holding the point marked “X” while turning the nut at the point marked “Y.” Use a 7/8” wrench to hold the connector and a 15/16” wrench to turn the nut on the smaller set of connectors, and a 15/16” wrench to hold the connector and a 1” wrench to turn the nut on the larger set.
Y
X
IMPORTANT:
Because the coupling works with tapping rings, the pipes may leak if the coupling is
reconnected. Undoing the coupling will void the warranty.
After completing steps 1-4, use a leak detection spray or a soap solution to check all the connections are sealed correctly. If any bubbles
form, the system has a leak and the screw connectors must be retightened by repeating step 4.
5.Remove the cover on the top valve using a 7/8” wrench. Using a 3/16” Allen wrench, open the valve by turning it counter-clockwise as far as it will go. The valve is now open. If the valve is not fully opened, the system may malfunction and suffer damage. Screw the cover back onto the top valve and tighten firmly.
6.Repeat step 5 on the bottom valve.
IMPORTANT:
The conical ring on the valve and the sealing seat in the caps have an important sealing function. Do not damage the cone and keep the
cap free of dirt and dust.
7.After completing steps 1-6, use a leak detection spray or a soap solution to check that all connections are sealed correctly. If any bubbles form, the system has a leak and the screw connectors must be retightened.
8.Start the equipment so the operating pressures build up inside. Check all the connectors again for signs of leaks. If any bubbles form, the system has a leak and the screw connectors must be retightened.
7
Usage Safety Precautions
WARNING
• Use caution when unpacking and installing the unit. Sharp edges could cause injury.
• Connect to the power source properly. Excessive heat generation caused by failure to do so may result in electric shock or fire.
• Do not operate or stop the unit by switching the power source on or off.
• Do not use a damaged or unspecified power cord. It may result in electric shock or fire.
• Modifying the power cord length or sharing the outlet with other appliances may result in electric shock or fire.
• Operating the unit with wet hands or in a damp environment may result in electric shock.
• Always ground the unit properly. Improper grounding may result in electric shock.
• Allowing water to contact electric parts may cause failure of unit or electric shock.
• Always have a licensed electrician install a dedicated circuit and breaker if one is not available.
• Turn off the circuit breaker or disconnect the power source if strange sounds, smells or smoke come from the unit.
• Do not drink water drained from the air conditioner.
• Opening the unit during operation may result in electric shock.
• Use the correctly rated circuit breaker.
• Do not place a heater or other appliances near the power cable.
• Do not disassemble or modify unit.
• If flammable gas leaks, turn off the gas and open a window to ventilate the room before turning on the unit.
• Do not store or use flammable gas or combustibles near the unit.
CAUTION
• Ensure that the installation bracket of the outdoor appliance is not damaged by prolonged exposure to the environment.
• Do not place heavy objects on or compress the power cord in any way.
• Placing obstacles around the air inlets or inside the air outlets may result in fire or failure of the appliance.
• Do not place caged animals or house plants where they will be exposed to direct airflow.
• Do not use this unit for special purposes, such as preserving food or works of art. It is a consumer air conditioner, not a precision
refrigeration system.
• Always insert air filters securely. Clean the filter every two weeks. Operating the unit without the filter will cause failure.
• Before cleaning the unit, turn off the unit and the circuit breaker. Cleaning the unit when the power is on may result in electric shock
or injury.
• Do not clean the air conditioner with water. Water may enter the unit and degrade the insulation, resulting in electric shock or injury.
• If water enters the unit, turn the unit off, disconnect the power and contact a licensed professional.
• Use a soft cloth and do not use strong detergents or solvents to clean the unit.
• If the appliance will be inactive for an extended period of time, disconnect the power source by turning off the circuit breaker.
System Test
Perform the following steps after all electric safety regulations have been met.
1.
2.
3.
4.
5.
6.
7.
Ensure the unit is on a dedicated circuit.
Vibrations during transportation may loosen the screws that fasten the wiring in the casings of electrical fittings. Make sure the unit’s screws are all tightly fastened. Loose screws could cause the wires to burn out.
Check the power source’s specifications and confirm that electrical capacity is sufficient.
Starting voltage must be maintained at more than 90 percent of the rated voltage marked on the nameplate.
Confirm that the cable thickness is appropriate for the power source specification.
Voltage drop can cause the vibration of a magnetic switch, damaging the contact point; breaker tripping; or disruption of the normal overload function.
The switch to disconnect the unit from the power supply should be incorporated in the fixed wiring and have an air gap contact
separation of at least 1/8” between active (phase) conductors.
Test Operation
Perform the test operation only after completing a gas leak check at the flare nut connections and an electrical safety check.
• Check that all tubing and wiring have been properly connected.
• Check that the gas and liquid side service valves are fully open.
1.
2.
3.
4.
Connect the power. Press the on/off button on the remote controller to turn the unit on.
Use the mode button to select COOL, HEAT, AUTO and FAN to check that all the functions work properly.
When the ambient temperature is lower than 63°F, the remote controller cannot be used to run the unit in cooling mode and manual operation must be used. See Manual Operatioin section.
The test operation should last about 30 minutes.
8
Indoor Unit Displays
1. Defrost indicator
This indicator illuminates when the air conditioner is defrosting or
producing heat.
1
2A
3
2A. Run indicator (12K & 21K units)
This indicator flashes when the power is turned on and illuminates when the unit is in operation.
12K & 21K UNITS
2B. Operation frequency indicator (33K unit only)
This indicator illuminates to display the performance of the compressor.
3. Timer indicator
This indicator illuminates when the timer is set.
4
5
4. Signal receiver
5. Temperature indicator
Displays the temperature settings in Fahrenheit when the air conditioner
is operating.
1
2B
5
33K UNIT
6. Auto indicator (33K unit only)
This indicator illuminates when the air conditioner is in auto operation.
AUTO
7. Ionizer indicator (33K unit only)
This indicator illuminates when the air conditioner is running and
circulating clean air.
6
7
3
4
NOTE: The operation indicator lights on the display panel flash five times per
second when safety protection features are operating.
Using The Remote Controller
For best results, use the remote controller within 26’ of the indoor unit, pointing the remote controller toward the signal receiver. Signal
reception is confirmed by a beep.
CAUTION
•Ensure a clear path from the remote to the unit. The air conditioner will not respond if the signals from the remote are blocked between the remote and the indoor unit.
•Prevent liquid from getting inside the remote controller.
•Do not expose the remote controller to direct sunlight or heat.
• If the infrared signal receiver on the indoor unit is exposed to direct sunlight, the air conditioner may not function properly.
Battery Replacement
The remote controller is powered by two (AAA) dry cell batteries housed in the back of the remote. To change the batteries:
1. Remove the cover by pressing down on it and sliding it back.
2. Remove the old batteries. Insert the new batteries, placing the (+) and (-) ends correctly.
3. Reattach the cover by sliding it back into position.
NOTE: Removing the batteries erases the remote controller’s programming. Reprogram the remote controller after inserting new batteries.
CAUTION
• Do not mix old and new batteries of different types.
• Do not leave the batteries in the remote controller if it will not be used for 2-3 months.
• Always recycle used batteries.
Remote Controller Specifications
Rated Voltage
3.0V (Dry batteries Lr03 AAA X 2)
Signal Receiving Range
26’
Operating Temperature
23 - 140°F (-5 - 60°C)
9
Using The Remote Controller
1. Temp up
This button increases the indoor temperature setting in 1°F (1°C)
increments up to 86°F (30°C).
2. Temp down
This button decreases the indoor temperature setting in 1°F (1°C)
increments down to 62°F (17°C).
SET TEMPERATURE (ºF)
3. Mode
This button advances the operation mode through the following sequence:
FAN
AUTO
AUTO COOL DRY HEAT FAN
COOL
HIGH
4. Swing
MED
DRY
This button stops or starts the automatic louver movement.
HEAT
LOW
5. Reset
This recessed button cancels all current settings and returns the controller to its factory settings.
TEMP
6. On/off
This button stops and starts operation of the unit.
2
7. Fan speed
This button advances the fan speed through the following sequence: ON/OFF FAN SPEED
MODE
AUTO LOW MED HIGH
8. Timer on
3
This button activates the auto-on timer setting. Press the button to increase the timer setting in 30-minute increments up to 10 hours, then in SWING
TIMER ON
SLEEP
1-hour increments up to 24 hours. To cancel the auto-on timer setting, 4
press the button repeatedly until the timer setting is 0.0.
9. Sleep
RESET LOCK TIMER OFF
9
This button activates an energy-saving function available on cool, heat and auto modes.
Air
LED
10. Timer off
TURBO
DISPLAY
Direction
This button activates the auto-off timer setting. Press the button to 14
increase the timer setting in 30-minute increments up to 10 hours, then in 1-hour increments up to 24 hours. To cancel the auto-off timer setting,
press the button repeatedly until the timer setting is 0.0.
11. Lock
This recessed button locks all current settings and temporarily disables all buttons except the lock button. Press the lock button to prevent settings from being changed accidentally. Press the lock button again to cancel the lock function. A lock symbol will appear on the remote controller display when the lock function is activated.
5 11 13
12. Turbo
This button starts and stops the accelerated cooling or heating function.
13. LED display
This button clears and reactivates the display on the indoor unit.
14. Air direction
This button changes the angle of the horizontal louver in 6º increments to set the up/down airflow direction.
1
6
7
8
10
12
Remote Controller Display
1. Transmission Indicator
This indicator is displayed when the remote controller is sending signals to the unit.
2. Mode Display
Indicates the selected mode.
3. Temp/Timer Display
Displays the temperature or timer setting.
4. Lock Indicator
This icon is displayed when the lock button has
been pressed.
5. Timer Display
“TIMER ON” will display if the auto-on function is set.
“TIMER OFF” will display if the auto-off function is set.
6. Fan speed Display
Indicates the fan speed.
7. On/off Display
This indicator is displayed when the unit is operating.
2
1
7
6
AUTO
FAN
COOL
HIGH
DRY
MED
HEAT
LOW
4
10
3
5
Remote Controller Operations
Auto Operation
• When the air conditioner is in auto mode, it will automatically select between cooling, heating a
nd fan-only operation to meet the set operating temperature.
• Select desired settings manually if the auto mode is uncomfortable.
• When the unit is plugged in and powered on, the operation indicator on the display panel of the indoor
unit illuminates.
SET TEMPERATURE (ºF)
AUTO
COOL
DRY
HEAT
FAN
HIGH
MED
LOW
TEMP
2
1
MODE
ON/OFF
FAN SPEED
SWING
SLEEP
TIMER ON
3
RESET LOCK TIMER OFF
Air
Direction
LED
DISPLAY
TURBO
1. Press the mode button to select AUTO.
2. Press the temp buttons to set the desired temperature. The temperature can be set within a r ange of 62-86°F (17-30°C) in 1°F (1°C) increments.
3. Press the on/off button to start the air conditioner.
NOTE:
• In auto mode, the air conditioner can automatically switch between cooling, heating, fan and d
ehumidifying modes by using the remote controller to sense the difference between the a
ctual room temperature and the set temperature.
• Fan speed cannot be adjusted while the air conditioner operates in auto mode.
SET TEMPERATURE (ºF)
Cooling, Heating and Fan Operation
1. Press the mode button to select COOL, HEAT or FAN.
2. Press the temp buttons to set the desired temperature. The temperature can be set w
ithin a range of 62-86°F (17-30°C) in 1°F (1°C) increments.
3. Press the fan-speed button to select the fan speed from four options:
AUTO, LOW, MED and HIGH.
4. Press the on/off button to start the air conditioner.
AUTO
COOL
DRY
HEAT
FAN
HIGH
MED
LOW
TEMP
2
1
MODE
ON/OFF
FAN SPEED
SWING
SLEEP
TIMER ON
RESET LOCK TIMER OFF
NOTE: In fan mode, the temperature setting is not displayed on the remote
controller and the room temperature cannot be controlled. Do not perform step 2.
FAN
HIGH
MED
LOW
TEMP
2
1
MODE
ON/OFF
FAN SPEED
SWING
SLEEP
TIMER ON
3
RESET LOCK TIMER OFF
Air
Direction
LED
DISPLAY
LED
DISPLAY
TURBO
Dehumidifying Operation
SET TEMPERATURE (ºF)
AUTO
COOL
DRY
HEAT
Air
Direction
The unit regulates temperature while it is dehumidifying by turning cooling or
fan-only operation on and off as necessary. The fan speed is low.
1. Press the mode button to select DRY.
2. Press the temp buttons to set the desired temperature. The temperature can be set within a range of 62-86°F
(17-30°C) in 1°F (1°C) increments.
3. Press the on/off button to start the air conditioner.
NOTE: In dehumidifying mode, the unit automatically controls fan speed.
TURBO
SET TEMPERATURE (ºF)
Louver Operation
AUTO
COOL
DRY
HEAT
Use the swing button to automate the movement of the horizontal louver.
1. Press the swing button to activate the automation. Press the swing button again to d
eactivate automation.
2. Use the air direction button to adjust the stationary angle of the vertical louvers in 6 degree increments.
TEMP
1
CAUTION
• Do not operate the air conditioner for long periods in cooling or dehumidifying mode with the airflow direction set downward, or condensation may form on the surface of the horizontal louver and drop onto the floor or furniture.
• Do not move the horizontal louver manually unless it is necessary. Always use the remote controller.
• When the air conditioner is started immediately after being stopped, the horizontal louver m
ight not move for ap
proximately 10 seconds.
• Setting the horizontal louver so the open angle is too small may overly restrict the airflow and r educe performance.
• Do not operate the unit with the horizontal louver closed.
• When the unit is initially connected to a power source, the horizontal louver may generate a s ound for 10 seconds. This is normal operation.
11
FAN
HIGH
MED
LOW
MODE
ON/OFF
FAN SPEED
SWING
SLEEP
TIMER ON
RESET LOCK TIMER OFF
2
Air
Direction
LED
DISPLAY
TURBO
3
4
Remote Controller Operations
Timer Operation
SET TEMPERATURE (ºF)
Press the timer-on button to set the auto-on timer. Press the timer-off button to set the auto-off timer.
AUTO
COOL
DRY
HEAT
To Set the Auto-On Timer
1.
2.
3.
FAN
HIGH
MED
LOW
TEMP
Press the timer-on button. The LCD display area will show “TIMER ON,” the last auto-on timer
setting and the abbreviation “h.”
Press the timer-on button again to set the desired auto-on time. Each press of the button increases the timer setting in 30-minute increments up to 10 hours, then in 1-hour increments up to
24 hours.
After a few seconds, the LCD display window will show the set temperature a
gain, indicating that the timer-on feature is activated.
MODE
ON/OFF
FAN SPEED
SWING
SLEEP
TIMER ON
RESET LOCK TIMER OFF
Air
Direction
LED
DISPLAY
1,2
TURBO
SET TEMPERATURE (ºF)
AUTO
COOL
DRY
HEAT
FAN
HIGH
MED
LOW
To Set the Auto-Off Timer
TEMP
MODE
ON/OFF
FAN SPEED
SWING
SLEEP
TIMER ON
RESET LOCK TIMER OFF
Air
Direction
LED
DISPLAY
TURBO
1,2
1.
2.
3.
Press the timer-off button. The LCD display area will show “TIMER OFF,” the last auto-off timer setting and the abbreviation “h.”
Press the timer-off button again to set the desired auto-off time. Each press of the button increases the timer setting in 30-minute increments up to 10 hours, then in 1-hour increments up to 24 hours.
After about three seconds, the LCD display window will show the set temperature again, indicating that the timer-off feature is activated.
SET TEMPERATURE (ºF)
AUTO
COOL
DRY
HEAT
Auto-Off Operation
The auto-off feature programs the unit to stop automatically within a 24-hour period.
EXAMPLE:
To stop the air conditioner in 10 hours:
1. Press the timer-off button. The LCD display area will show “TIMER OFF,” the last auto-off timer setting and the abbreviation “h.”
2. Press the timer-off button repeatedly until “10h” is displayed on the timer-off display.
3. After about three seconds, the LCD display window will show the set temperature a
gain, indicating that the timer-off feature is activated.
FAN
HIGH
MED
LOW
TEMP
MODE
ON/OFF
FAN SPEED
SWING
SLEEP
TIMER ON
RESET LOCK TIMER OFF
Air
Direction
LED
DISPLAY
TURBO
1,2
Combined Timer
The timer-on and timer-off features can be set simultaneously to start and stop the unit automatically within a
24-hour period.
SET TEMPERATURE (ºF)
AUTO
COOL
DRY
HEAT
FAN
HIGH
MED
LOW
EXAMPLE:
TEMP
MODE
ON/OFF
FAN SPEED
SWING
SLEEP
TIMER ON
3,4
RESET LOCK TIMER OFF
Air
Direction
LED
DISPLAY
TURBO
1,2
To stop the air conditioner two hours after the timer is set and start it again 10 hours after the timer is set:
1. Press the timer-off button. The LCD display area will show “TIMER OFF,” the last
auto-off timer setting and the abbreviation “h.”
2. Press the timer-off button repeatedly until “2.0h” is displayed on the timer-off display.
3. Press the timer-on button. The LCD display area will show “TIMER ON,” the last auto-on timer setting and the abbreviation “h.”
4. Press the timer-on button repeatedly until “10h” is displayed on the timer-off display.
5. After about three seconds, the LCD display window will show the set temperature a
gain, indicating that the timers are activated.
NOTE: The timer setting (timer on or timer off) that will occur soonest after the current time will be activated first.
12
Remote Controller Operations
SET TEMPERATURE (ºF)
AUTO
COOL
DRY
HEAT
FAN
HIGH
MED
LOW
TEMP
MODE
SWING
ON/OFF
FAN SPEED
SLEEP
TIMER ON
RESET LOCK TIMER OFF
Air
Direction
LED
DISPLAY
Sleep Operation
Press the sleep button to begin economy mode. The air conditioner will automatically
increase (cooling) or decrease (heating) set temperature by 2°F/1°C per hour for the first
two hours, maintain the new temperature for five hours, and then turn off.
The sleep function is available only under cooling, heating and auto operation.
TURBO
SET TEMPERATURE (ºF)
AUTO
COOL
DRY
HEAT
FAN
HIGH
MED
LOW
TEMP
Turbo Function
The turbo function enables the unit to reach the preset temperature more quickly
than under normal operation. On cooling or heating mode, the unit will blow air
using a very high fan speed. Press the turbo button on the remote controller to
activate or deactivate the accelerated cooling or heating operation.
MODE
ON/OFF
FAN SPEED
SWING
SLEEP
TIMER ON
RESET LOCK TIMER OFF
Air
Direction
LED
DISPLAY
TURBO
Low Ambient Operation
This unit features low ambient operation, which means the unit will continue to cool indoors when outside temperatures drop as low as
5°F/-15°C. This capability is ideal for locations that require cooling even during winter.
Note:
1. The unit will perform optimally within the above conditions. If the unit is used outside the above conditions, safety features may begin to operate and the unit may function abnormally.
2. If the unit operates while the room’s relative humidity exceeds 80%, condensation may form on the surface of the unit. To prevent condensation, set the vertical airflow louver to the maximum opening and set fan mode to high.
Temperature/Mode
Cooling Operation
Heating Operation
Dehumidifying Operation
Room temperature
62ºF - 90ºF (17ºC - 32ºC)
32ºF - 86ºF (0ºC - 30ºC)
50ºF - 90ºF (10ºC - 32ºC)
Outdoor temperature
5ºF - 122ºF (-15ºC - 50ºC)
5ºF - 86ºF (-15ºC - 30ºC)
32ºF - 122ºF (0ºC - 50ºC)
Manual Operation
Manual Operation
Manual operation should be used only if the remote controller has been disabled or if maintenance is necessary.
1. Lift the front panel until it remains fixed at an angle with a
clicking sound.
2. Push the manual control button under the electrical box cover. The unit will run in forced auto mode (the default temperature setting is 76°F/24°C). Pressing the manual control button again causes the operation mode to COOL.
3. Close the panel firmly.
4. To restore remote controller operation, use the remote
controller directly.
13
Care and Maintenance
CAUTION
• Verify the power source and circuit breaker are turned off before cleaning the unit.
• If the indoor unit is very dirty, wipe it down with a cool, damp cloth. Dry the unit with another cloth.
• Do not use a chemically treated cloth or duster to clean the unit.
• Do not use benzene, thinner, polishing powder or similar solvents for cleaning. These may cause the plastic surface to crack or deform.
• Never use water hotter than 104°F/40°C to clean the front panel because it could deform or discolor the panel.
• Do not touch the metal parts of the unit when removing the filter. Injuries can occur when handling sharp metal edges.
• Do not use water to clean the inside of the air conditioner. Exposure to water can destroy the insulation, possibly leading to electric shock.
Cleaning the Air Filter
A clogged air filter reduces the efficiency of this unit. Clean the filter every two weeks.
1. Lift the indoor unit panel until it remains fixed at an angle with a clicking sound.
2. Pull up on the air filter’s handle to pull the filter from its holder, then pull the filter down out of the unit.
3. Clean the filter with a vacuum cleaner or water, then dry it in a cool place.
4. Remove the air freshening filters from their supporting frames. Clean these filters at least once a month and replace them every four to five months.
5. Reinstall the air freshening filters in their positions. Insert the upper portion of the air filter back into the unit, taking care that the left and right edges line up correctly, and place the filter into position.
Cleaning the Grille, Case and Remote Controller
Turn the system off before cleaning. To clean, wipe with a soft, dry cloth. Do not use bleach or abrasives.
Maintenance
Before idling the unit for a long time, perform the following:
• Operate the fan for half a day to dry the inside of the unit.
• Turn off the air conditioner and disconnect the power.
• The outdoor unit requires periodic maintenance and cleaning, which should be performed by a licensed professional.
Checks Before Operation
• Verify the wiring is not loose or disconnected.
• Verify the air filter is installed.
• If the air conditioner has not been used for a long time, c heck that the air outlet and inlet are not obstructed.
14
Tips and Troubleshooting
If one of the following malfunctions occurs, stop the air conditioner immediately, disconnect the power and then connect it again. If the problem
persists, disconnect the power and contact a licensed professional.
OPERATION indicator or other indicators flash continuously.
Fuse blows frequently or circuit breaker trips frequently.
Malfunction
Water or an object falls into the air conditioner.
The remote controller doesn’t work or works abnormally.
One of the following codes appears on the display area: E0, E1, E2, E3 or P0, P1, P2 and P3.
Malfunctions
Unit does not start
Unit does not cool or heat properly
while running
Possible Cause
What to do
Power has been cut.
Wait for power to be restored.
Unit has become unplugged.
Plug unit securely into wall outlet.
Fuse has blown.
Replace the fuse.
Battery in remote controller has been exhausted.
Replace the battery.
The timer is set to the incorrect time.
Cancel or reset timer setting.
Temperature setting is outside recommended range.
Set temperature correctly. Refer to Remote
Controller Instructions for details.
Air filter is blocked.
Clean the air filter.
Doors or windows are open.
Close the doors or windows.
Air inlet or outlet of indoor or outdoor unit has
been blocked.
Clear obstructions away and then restart the unit.
Compressor protection has been activated.
Wait 3 - 4 minutes for compressor to restart.
NOTE: Do not attempt to repair the unit. Always consult a licensed professional.
The following events may occur during normal operation.
1. The compressor will not restart immediately after being stopped.
• To protect the compressor, it cannot restart for 3-4 minutes after
it stops.
2. The indoor unit produces a white mist.
• The unit may generate white mist during cool mode if the room has a high relative humidity and there is a large temperature
difference between the air inlet and air outlet.
• The unit may produce white mist during heat mode after defrosting because of the moisture generated.
3. The air conditioner produces a low noise.
• The air conditioner may produce a low hissing sound when the compressor is running or has just stopped running. The sound is caused by the refrigerant flowing or coming to a stop.
• The air conditioner may produce a low squeaking noise when the compressor is running or has just stopped running. The sound is caused by heat expansion and cold contraction of the plastic parts in the unit when the temperature changes.
• The louver may produce a noise as it returns to its original position when the air conditioner is turned on.
4. The indoor unit blows out dust.
• It is normal for the air conditioner to blow out dust when it has not been used for a long time or during first use of the unit.
5. The indoor unit produces an unusual smell.
• The indoor unit may give off smells absorbed from building
material, furniture or smoke.
15
6. The air conditioner switches to fan-only mode from cool or heat mode.
• When the indoor temperature reaches the temperature setting on the air conditioner, the compressor will stop automatically, and the air conditioner will switch to fan-only mode. The compressor will start again when the indoor temperature rises or falls.
7. Condensation forms on the indoor unit.
• Condensation may form on the indoor unit during cool mode if
relative humidity is higher than 80%. To reduce condensation, adjust the horizontal louver to the maximum air outlet position and select high fan speed.
8. A power failure during operation stops the unit completely.
• When the power is restored, the auto-restart function restarts the unit with all the previous settings preserved by the memory function.
9. The unit malfunctions without apparent cause.
• Lightning or a signal from a wireless phone may cause the unit to malfunction. Disconnect the unit from the power source, then
reconnect it. Push the on/off button on the remote controller to
restart operation.
Utopian Systems 1-Year Limited Warranty
Sunleaves Garden Products warrants this product to the original purchaser to be free of defective materials and workmanship under normal
use and servicefor 1 year from the original date of purchase. Sunleaves Garden Products, at its option, will repair or replace components
of this product if they arefound to be defective in material or workmanship within the warranty period. If Sunleaves, at its sole discretion,
determines that the components are defective in material or workmanship, then Sunleaves, at its option, will either repair or replace the
components, provided that (1) a copy of the original proof of purchase for this product by the original purchaser is delivered to the place of
purchase or Sunleaves Garden Products; (2) the components have not been tampered with, disassembled, repaired by unauthorized persons
or altered; and (3) the components have not been damaged as a result of commercial use, lack of reasonable and proper maintenance,
abusive or unreasonable use, or supplemental damage. Furthermore, the warranty will be voided if the following conditions do not apply
(1) the Split A/C unit must be properly installed by a licensed professional, and (2) the proof of installation must be provided to the place
of purchase or Sunleaves Garden Products prior to warranty service/repair. In no event shall the cost of repair or replacement exceed the
original purchase price. SUNLEAVES SHALL NOT BE RESPONSIBLE FOR ANY INCIDENTAL OR CONSEQUENTIAL DAMAGES OF ANY NATURE,
INCLUDING WITHOUT LIMITATION DAMAGE OR INJURY CAUSED TO OTHER PRODUCTS, MACHINERY, BUILDINGS OR PROPERTY; LOSS OF
PROFITS, TIME OR PRODUCT; OR INCONVENIENCE. SUNLEAVES FURTHER DISCLAIMS ANY IMPLIED WARRANTIES, INCLUDING WITHOUT
LIMITATION MERCHANTABILITY AND FITNESS FOR A PARTICULAR PURPOSE.
To obtain warranty service, return the product to the place of purchase in accordance with store policy.
Utopian Systems Split A/C Warranty Is Void If:
• NOT ACCOMPANIED BY THE ORIGINAL PROOF OF PURCHASE.
• UTOPIAN SYSTEMS SPLIT A/C HAS NOT BEEN INSTALLED BY A LICENSED HVAC PROFESSIONAL
• UTOPIAN SYSTEMS SPLIT A/C HAS BEEN DAMAGED AS A RESULT OF ACCIDENT, IMPROPER INSTALLATION, ALTERATION, OR FIRE, FLOOD OR OTHER NATURAL DISASTER.
Sunleaves Product Warranty Claims
To obtain warranty service in the event that your product fails to operate, return the product to the place of purchase. Often the retailer
will be able to examine the product in closer detail, determine the problem and even fix the product on site.
For technical support and warranty information, call our toll-free number at 888-464-9676
or email: [email protected].
7854 North State Road 37
Bloomington, IN 47404
REV:12014
16