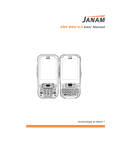
1
XT85 User Guide Version 1 August, 2013 XT85 User Manual Contents 1 2 Introduction Resetting the XT Series Device CH–PG Introduction 1–1 Reset (reboot) the XT Series Device 4–1 Hardware Overview 1–2 Soft Reset (Warm Boot) 4–1 Hard Reset (Cold Boot) 4–1 Master Reset (Clean Boot) 4–2 Getting Started CH–PG Unpack Your XT Series Device 2–1 Recommended Host Computer Requirements 2–1 Entering Information 5–1 Janam XT Series SDK 2–1 Typing 5–1 Update Your Desktop PC Software 2–1 Changing On-Screen Keyboards 5–2 Install the Battery 2–2 Keyboard Shortcuts 5–2 Charging the Battery 2–2 Enabling ClearType Text 5–3 Attach the Handstrap 2–5 Text Size 5–3 Turn the XT Device On 2–5 Freehand Drawing and Writing 5–3 Startup Screen 2–6 Voice Notes 5–4 Fundamental Navigation 2–7 Status Icons and Controls 3 4 CH–PG 2–8 Turning the XT Series Device Off 2–11 Battery Charging & Power Alert Info 2–11 Setting Up the XT Series Device 5 6 Data Entry―Alpha, Numeric and Importing Data Capture – Barcode Scanning Introduction CH–PG 6–2 6–5 ScanCapture Function 6–8 ScanCapture – Single Powering On 3–1 ScanCapture – Intelligent Capture Keyboard-Controlled Screen Navigation 3–1 3–2 3–3 LCD Screen Options and Calibration 3–5 Setting Basic User Preferences 3–5 Getting Started 3–5 Setting a Background 3–6 Device Password 3–7 Changing Passwords 3–8 Screen/Keyboard Locking & Unlocking 3–8 Regional Settings 3–9 Owner Information 3–11 Device Name 3–12 Volume and Alert Adjustments 3–13 Additional Sounds and Notifications 3–14 Battery Power / Battery Conservation 3–15 Opening Applications 3–18 Removing Programs 3–18 Communication Ports 3–19 6–8 6–10 Synchronizations CH–PG Exchange & Update with ActiveSync 7–1 Setting up & Deleting Partnerships 7–1 Partnership Connection Settings 7–3 End a Partnership 7–4 7–x 8 3–10 Screen Orientation Janam Technologies LLC 7 6–1 Imager-based Configurations 3–1 Installing a SIM Card CH–PG Laser-based Configurations Locating Key Controls and Components Installing a microSD Card CH–PG Wireless Connectivity CH–PG Introduction 8-1 Phone 8-1 Volume and Alert Adjustments 8-2 Muting 8-3 Using a Headset 8-4 Making Calls 8-4 Text Messaging 8-7 Contents―1 XT85 User Manual 9 10 Camera CH–PG Introduction 9–1 Activate the Camera 9–1 Adjustments and Options 9–1 Taking Photos 9–3 Recording Video 9–3 View Photos and Video 9–5 Photo and Video Management 9–5 802.11 Wireless Configuration Access Wireless LAN CH–PG 10–1 10-x 11 GPS GPS Function Setup 12 Bluetooth Overview 13 CH–PG 11–1 CH–PG 12–1 Turning Bluetooth On and Off 12–2 Making a Bluetooth Device Visible 12–2 Bluetooth Partnerships 12–2 Bluetooth Beam 12–5 Bluetooth Virtual COM Ports Overview 12–5 Setting up Bluetooth COM Port 12–6 Regulatory and Maintenance Regulatory and Safety Approvals CH–PG 13–1 FCC and Canadian Compliance 13–1 XT Series Batch Terminal 13–2 XT Series RF Terminals with 802.11 WLAN and Bluetooth 13–2 Class B digital apparatus complies with the Canadian ICES-003 13–3 Care and Cleaning of Terminals 13–4 Waste Electrical and Electronic Equipment (WEEE) Information 13-4 Battery Warning 13-4 Battery Safety Guidelines 13-4 Battery Charger Safety Guidelines 13-4 Janam Technologies LLC Contents―2 Introduction XT85 User Manual 1 Introduction Enterprise mobility is fundamentally about data and its use. How, when, why and where missioncritical data is captured, transmitted and processed ultimately determines competitive advantage and business success. And when enterprise mobility extends beyond a business’ four walls, Janam’s XT85 is uniquely qualified to deliver optimum results. Purpose-built to accommodate the realities of work processes and environments, the XT85 brings best-in-class technologies to the point of activity in a sleek, rugged and highly affordable package. It’s Technology at Work®. Uniquely Qualified to Deliver Optimum Results Delivering everything that enterprises require in a tough, multi-environment mobile computer— without compromise—sets the Janam XT Series apart. Combining a small, lightweight form factor with extraordinarily rugged design, the XT Series offers flexible wireless WAN, a motion-sensing accelerometer and real-time GPS, available with either a QWERTY or numeric keypad. Rugged design is essential for mobile computers on the job, indoors or outside in real-world conditions and the XT85 delivers even more. Featuring 802.11a/b/g/n WLAN communication with enterprisegrade security, a 5.0 megapixel camera, high performance laser scanning or imaging data capture technology, lightning-speed processing, brilliant 3.5” VGA or QVGA displays, advanced power management, Bluetooth, High-Speed USB and IrDA interfaces, the XT85’s capabilities are exceptional. Janam engineered the XT Series to survive multiple 5-foot drops to concrete and its industrial-grade construction, meeting rigid IP65 standards, protects internal components from dust and moisture common to demanding work environments. Designed to support challenging enterprise applications in severe conditions, the XT85 is the right tool for mobile businesses that demand superior performance—day in and day out. Key Features ― ― ― ― ― ― ― ― ― 512MB or optional 1GB NAND Flash ROM and 256MB DDR memory High performance barcode scanning (laser or imager) 3G/4G WWAN technology High sensitivity GPS Summit IEEE 802.11a/b/g/n Cisco CCX certified CMOS 5.0 megapixel camera Class I, Division 2, Groups A, B, C, D certified Rugged design: ― Sealed to IP65 standards and withstands multiple 5’/1.5m drops to concrete ― User‐accessible microSD card slot ― 2.5mm headset jack with secure lock receptacle ― Comprehensive system of accessories Janam Technologies LLC 1―1 Introduction XT85 User Manual Hardware Overview Janam Technologies LLC 1―2 Introduction Hardware Overview XT85 User Manual (continued) Janam Technologies LLC 1―3 Getting Started XT85 User Manual 2 Getting Started Unpack Your XT Series Device Make sure you have the following: ― Janam XT Series mobile computer ― Janam-authorized XT Series battery ― Handstrap ― Stylus ― Documentation (Quick Start Guide, License Agreement and Regulatory Guide) ― Charging accessory (one or more of the following power/connection kits ordered/packaged separately): ― Janam micro-USB cable with AC wall mount adapter ― Janam mobile communication cable with AC adapter ― Janam 1-Slot or 4-Slot Cradle with AC adapter ― Janam 4-Slot Battery Charger with AC adapter Recommended Host Computer Requirements ― Windows-compatible host computer ― Microsoft® Windows® 8, Windows 7, Windows XP or Windows 2000 operating system ― 100 MB of available hard disk space ― One available serial or USB port Janam XT Series SDK The Janam XT Series Software Development Kit enables programmers to develop applications for Janam XT Series rugged mobile computers running the Microsoft Windows Embedded Handheld operating system. It contains details and instructions for developing applications that access Janam XT Series libraries, including scanning, imaging and hardware utilities. The development kit, which can be downloaded from Janam’s Partnerzone site (login required), is designed for use with Microsoft Windows Embedded Handheld and Visual Studio 2005/2008 development environment. Update Your Desktop PC Software Confirm that the host computer has the latest version of Microsoft ActiveSync (version 4.5 or higher) or Windows Mobile Device Center (version 6.1 or higher) software intended for use with the host computer’s operating system, e.g. Windows Vista, XP or 2000. For additional ActiveSync information and downloads, please visit the Microsoft website at http://www.microsoft.com. Janam Technologies LLC 2―1 Getting Started XT85 User Manual Install the Battery 1. Slide the battery lock switch to the unlocked position (fully to the right). Top 2. Tilt the bottom of the battery inward (into the battery chamber of the XT Series device body), positioning the tabs at the bottom of the battery into the mating notches at the bottom of the battery chamber. 3. Tilt the top of battery toward the XT Series device body until it snaps securely into place. Tabs Battery 4. Slide the battery lock switch to the locked position (fully to the left)Charging the Battery IMPORTANT BATTERY INFORMATION! **CAUTION** Use only Janam-approved batteries. There is the risk of explosion if battery is replaced by an incorrect type. Always dispose of used batteries according to the instructions. **WARNING** The main (removable) battery charges the XT Series internal backup battery with or without an external power source. A fully charged main battery must remain installed for at least 1.5 hours to charge the internal backup battery. All user data can be lost if the main battery is removed before the internal battery is properly charged, so it is recommended that the internal backup battery capacity be 100% before removing the main battery. To check the condition of the backup battery, tap Settings from the Windows Mobile desktop screen > Power (icon). Suspend device operation with the Red power key before removing the main battery. Janam Technologies LLC 2―2 Getting Started XT85 User Manual Charging the Battery Charging the battery with the Janam USB AC Adapter Kit: 1. Slide the AC plug prong adapter onto the AC adapter housing until it clicks. 2. Insert the USB plug of the cable into the USB port on the AC adapter housing. 3. Insert the micro-USB plug of the USB cable into the micro-USB port on the XT Series device. 4. Plug in the AC adapter. Use only easily accessible wall outlets that are well within reach of the length of supplied power cable. The Indicator LED on the device will illuminate to confirm connection (orange indicates charging, green indicates fully charged and red indicates a fault condition). For charging times and more, refer to Battery Charging and Power Alert Information chart on Page 11 of this chapter. — Alternatively, the USB plug may be inserted into an available USB port on the host PC computer (instead of the AC adapter), providing a connection for charging and data synchronization. Note: micro-USB charging capacity is limited to 500mA when connected to a PC’s USB port. It is recommended that the XT Series device operation be suspended when charging in this manner in order to charge the battery faster. To suspend operation, press the Power Button for approximately one second. Charging the battery with the Janam Mobile Cable: 1. Connect the snap-on end of the sync connector to the sync connector port on the bottom of the XT Series device, making sure the Janam logo on the connector faces up (the front face of the device.) 2. Insert the mini-barrel plug of the power supply into the mini-barrel port on the sync connector plug . 3. Plug the female end of the AC line cord supply. 4. into 2-pin receptacle on the (brick style) power Plug in the AC power supply. Use only easily accessible wall outlets that are well within reach of the length of supplied power cable. The Indicator LED on the device will illuminate to confirm connection (orange indicates charging, green indicates fully charged and red indicates a fault condition). For charging times and more, refer to Battery Charging and Power Alert Information chart on Page 11 of this chapter. Note: While the above illustration depicts a USB plug mobile cable can be used to charge the device. Janam Technologies LLC , any available communication 2―3 Getting Started XT85 User Manual Charging the Battery (continued) Charging the XT Series Device with a Janam Cradle Kit: 1. Insert the mini-barrel plug of the power supply into the cradle’s mating receptacle. 2. Plug the female end of the AC line cord into 2-pin receptacle on the (brick style) power supply. 3. Plug in the power supply. Use only easily accessible wall outlets that are well within reach of the length of supplied power cable. 4. Place the XT Series device in the cradle. The device’s indicator LED will illuminate to confirm that the device has seated properly and charging connection has been made. For charging times and more, refer to Battery Charging and Power Alert Information chart on Page 11 of this chapter. Additional Charging Options To charge a battery in the Cradle’s spare battery well, insert the battery into the well top-down (the battery contacts should face downward into the back of the cradle) and press down gently. The LED light on the cradle will illuminate to confirm the charging connection (yellow indicates charging, green indicates fully charged and red indicates a fault condition). Removing the battery: 1. Slide the battery lock switch to the unlocked position (fully to the right). 2. Use the finger lift groove to lift the battery outward. Slide to right to unlock Finger lift groove Note: To ensure that user data is retained it is recommended that XT Series device have a fully charged backup battery and operation be suspended before removing the main battery. To suspend operation, press and release the red Power button once. With the main battery removed, the internal backup battery can (when fully charged) maintain user data for approximately 15 minutes. Allow 1.5 hours for a fully charged main battery to charge the internal backup battery completely. For charging times and more, refer to XT Series Device Battery Charging and Power Alert Information chart on Page 11 of this chapter. Janam Technologies LLC 2―4 Getting Started XT85 User Manual Attach the Handstrap 1. Insert the plastic fastener on the handstrap facedown into the XT device handstrap retainer clip until it clicks securely into place. 2. Extend the other end of the handstrap toward the base of the XT device (with the rough side of the Velcro facing up). Feed it through the hand strap bar as shown in the diagram . 3. Pull handstrap through handstrap bar and fasten Velcro to secure the strap. Adjust the Velcro as needed to fit and secure the XT device to the user’s hand. Note: Because the handstrap can interfere with the camera lens, be aware of its positioning when capturing images. Turn the XT Series Device On With a fully charged battery installed, press and release (at the bottom right-hand corner the red Power button of the keypad). Pressing the power button again will suspend the XT Series device’s operation. Holding the power button for an extended time will not reboot the device. See Chapter 4 for additional information about On (Resume), Off (Suspend) and Reset functions. Power Note: Power button image shown represents the QWERTY keyboard model. The Numeric keyboard differs, but its power button is identical. IMPORTANT NOTE! Always use the supplied stylus for tapping or making strokes on the screen. DO NOT use a pen, pencil or any other object on the touch screen. Note: If your XT Series device came pre-loaded with a custom software application, a welcome utility may not appear. If this happens, follow the on-screen instructions. Janam Technologies LLC 2―5 Getting Started XT85 User Manual Screen Alignment Initial startup of the XT Series device and/or after a clean boot, the device will launch the on-screen align screen instructions. Aligning the screen calibrates the device’s internal circuitry with its touch-sensitive screen, optimizing stylus-to-screen detection. To align the screen: 1. Tap the screen when automatically instructed to do so during initial setup or after a clean boot. 2. Follow the on-screen instructions, tapping the screen where indicated by the crosshair symbol. Follow the on-screen instructions. Continue to tap each changing crosshair position with the stylus until the screen exits the align screen function and returns automatically to the Screen Orientation screen. If, during use, there is a noticeable decrease in stylus response accuracy, the unit may be easily recalibrated. See Chapter 3 for more information about manually initiating the screen alignment procedure. Janam Technologies LLC 2―6 Getting Started XT85 User Manual Startup Screen The XT Series mobile computer displays the Home screen at startup, providing quick access to key functions, device setup tools and easy navigation to additional functions and applications. Start Screen Home Screen When enabled, calendar reminders will be displayed on the Home screen at startup. Status Toolbar Main Screen Tile Toolbar Getting Started Begin by tapping getting started which will present the Clock menu. From the Clock menu you can take the minimally required action of setting the date and time or tap View All to review all Getting Started options, including: ― ― ― ― ― ― ― ― ― ― Make a call Set date and time Set up a device password Set up a Bluetooth headset Setup PC synchronization Set background Set ring tone Transfer music Online Help & how-to Add/remove Getting Started Once these XT Series device options are set as desired, the Add/remove Getting Started function allows the removal of the Getting Started tab from the home screen menu. Refer to Chapter 3 for more on Setting Basic User Preferences. Janam Technologies LLC 2―7 Getting Started XT85 User Manual Fundamental Navigation Start Screen Home Screen Basics ― Tap the Windows icon from the Home screen to access the Start screen of the Windows Mobile Desktop. The default setting of the left App (ESC) key also performs this function. ― Tap the Home icon on the Windows Mobile Desktop to access the Home screen. ― Tapping the Windows icon from the Windows Mobile Desktop provides alternative access to the Getting Started menu. Windows Icon IMPORTANT NOTE! Always use the supplied stylus for tapping or making strokes on the screen. DO NOT use a pen, pencil or any other object on the touch screen. Connectivity Key Status Icons and Controls Signal Audio Battery Notifications Windows Mobile Desktop Time Stop, Home Screen Toggle, Windows Mobile Desktop /Home Screen Lock Janam Technologies LLC 2―8 Getting Started XT85 User Manual Key Status Icons Guide Notifications Icon This indicates… Icon This indicates… More notifications are available Speakerphone is on A new text message has arrived Roaming is on A new e-mail message has arrived An alarm is set A new instant message has arrived An Internet call is in progress A call was missed Battery Status Icon This indicates… Icon This indicates… Your battery has a full charge Your battery has a low charge Your battery has a high charge Your battery has a very low charge Your battery has a medium charge Your battery is charging WiFi, Bluetooth, GPS and ActiveSync Icon This indicates… Click to see information about a new network available Wi-Fi is on but you aren’t connected and no networks are detected Your phone isn’t connected to a network and other networks are detected Other wireless networks are detected You’re connected to a wireless network You’re synchronizing through a Wi-Fi connection ActiveSync Notification Icon This indicates… Bluetooth is on A Bluetooth stereo headset is detected A Bluetooth headset is detected You’re currently connected to a network, and other networks are detected You’re currently connected to a network, and other networks are detected A connection is active A connection is inactive There was a problem with synchronization Synchronization is in progress GPS (Global Positioning System) locator is off GPS locator is on Janam Technologies LLC 2―9 Getting Started Network Types Icon This indicates… Icon This indicates… A UMTS network is available A GPRS network is available You’re connecting to a UMTS network You’re connecting to a GPRS network A UMTS connection is active A GPRS connection is active A 3G+ network is available An HSDPA network is available An analog network is available You’re connecting to a HSDPA network An EDGE network is available A HSDPA connection is active You’re connecting to an EDGE network An EDGE connection is active Cellular Connection Icon XT85 User Manual This indicates… Icon This indicates… Your phone has maximum signal strength A voice call is in progress Your phone has no signal A voice call is on hold Your phone’s cellular capability is off Line 1 is selected Your phone has no service Line 2 is selected Your phone is searching for service There’s no SIM card present Data is being transferred Cellular Settings and Status Icon This indicates… Icon This indicates… Your phone’s sound is set to vibrate only Call forwarding is on Your phone’s sound is on Call forwarding is on for line 1 Your phone’s sound is off Call forwarding is on for line 2 Voice mail is on for line 1 Call forwarding is on for lines 1 and 2 Voice mail is on for line 2 Voice mail is on for lines 1 and 2 Janam Technologies LLC 2―10 Getting Started XT85 User Manual Turning the XT Series Device Off — Suspending Operation To suspend operation: ― Press and release the red Power button (at the bottom right-hand corner of the keypad). XT Series Device Battery Charging and Power Alert Information Battery Charging and Power Alert Information Question Battery / Power Supply Main Battery: Alert Threshold / Charge Time “Main Battery Low” appears with approx. 20% of battery power remaining. “Main Battery Very Low” appears with approx. 10% of battery power remaining. Backup Battery: “Backup Battery Very Low” appears with approx. 20% of backup battery power remaining. One additional warning “Main Battery Very Low” appears before a critically low condition forces suspension of XT Series device operation. A critically low condition forces suspension of XT Series device operation when battery’s capacity reaches approx. 5%. When will Low Battery Warnings first appear? (Without external power source connected) How often will the Low Battery Warning reappear when first alert is dismissed by the user? Main Battery: At what Main Battery capacity will the XT Series device force itself to suspend? Main Battery: How long does it take to charge the Main Battery? Cradle Accessories 1 2400mAh Std. battery Approx. 3 hours from a fully discharged state. 3600mAh extended life battery Approx. 4 hours from a fully discharged state. Micro-USB Connector to PC Port: 2400mAh Std. battery Approx. 5 hours from a fully discharged state. 3600mAh battery Approx. 7.5 hours from a fully discharged state. 1 With 1-Slot or 4-Slot Cradle or Mobile Cable (via the bottom Sync Connector). Backup Battery: How long does it take to charge the Backup Battery? How long will a fully charged Backup Battery supply power to retain user data with the Main Battery discharged or properly removed? Backup Battery: When discharged, the Backup battery requires approx. 1.5 hours to recharge with (and from) a fully charged Main battery. An external power source is not required to charge the Backup battery. Approx. 15 minutes. Note: When swapping out batteries, the Phone radio should be turned off in order to retain data on the terminal. Note: All times reflect suspension of terminal operation while charging. Janam Technologies LLC 2―11 Setting Up the XT Series Device XT85 User Manual 3 Setting Up the XT Series Device Locating Key Controls and Components Syncing/Charging Connector Located on the bottom of the XT Series device, this connects the XT Series device to a PC via separately sold/packaged syncing/charging cable or Janam cradles. Powering On With a fully charged battery installed, press and release the red power button (at the bottom right-hand corner of the keypad). Pressing the power button again will suspend the XT Series device’s operation. See Chapter 4 for additional information related to power and reset functions. Power Note: Power button image shown represents the QWERTY keyboard model. The Numeric keyboard differs, but its power button is identical. Keyboard-Controlled Screen Navigation Screen Scroll Up / Left Screen Scroll Down / Right The keyboard offers additional navigational controls, including the Screen Scroll Up/Left and Screen Scroll Down/Right buttons. ― To scroll up or down, press the Up or Down arrow button. ― To scroll left or right, first press the Yellow Function button, then press the Up or Down arrow button. Tip: Pressing the Yellow Function button once activates its function for one-time only use. Pressing the Yellow Function button twice in quick succession locks the function for use in a series of actions. Janam Technologies LLC 3―1 Setting Up the XT Series Device XT85 User Manual Notes: The Keyboard-Controlled reference image represents the QWERTY keyboard model. The Numeric keyboard differs, but its navigation keys are identical. Changing the display orientation to either of the landscape options will automatically alter the keyboard’s Screen Scroll Up/Left and Screen Scroll Down/Right buttons, reversing their functions to meet the requirements of the display’s landscape setting. Locating Key Controls and Components (continued) microSD and SIM Card Slots (located beneath removable battery) IMPORTANT NOTE! To avoid possible damage to microSD and/or SIM cards or the XT Series device, ESD (electrostatic discharge) precautions are recommended when installing or removing microSD and/or SIM cards. At a minimum before handling, discharge any personal static electric buildup to a point of discharge other than the device. To access the microSD and SIM card Slots: 1. Loosen the handstrap to provide sufficient clearance. 2. Remove the battery to expose the microSD/SIM card cover. 3. Using the microSD /SIM card cover release notch, gently pull the hinged microSD/SIM card cover open. microSD/SIM card cover release notch Note: Additional pictorial references supporting microSD card installation are provided on page 3 of this chapter. SIM card slot microSD Removable Memory microSD card slot XT Series devices are compatible with microSD memory cards with a capacity of up to (and not more than) 32 GB. microSD /SIM card cover To install a microSD card: 1. Unlock the metal microSD card cover by sliding it approximately 1/32” to the left. 2. Lift the hinged microSD card cover, exposing the slot contacts. 3. Carefully lay the microSD card (with its contacts facing down) onto the microSD card slot contacts, being sure to align the mating slot and microSD card notches. Janam Technologies LLC Slide SIM card cover left to open, right to close Slide microSD card cover left to open, right to close 3―2 Setting Up the XT Series Device XT85 User Manual 4. Close the hinged microSD card cover, slide the cover to the right to lock it. 5. Close the hinged microSD/SIM card cover and replace the battery. SIM Card XT Series devices feature a removable SIM (Subscriber Identity Module) card slot. The XT Series device Phone function will not cannot operate without a SIM card installed. Contact your wireless telephone service provider for additional SIM card information and refer to Chapter 8 for more about the XT Series device phone function. Installing a SIM card: 1. Unlock the metal SIM card cover by sliding it approximately 1/32” to the left. 2. Lift the hinged SIM card cover, exposing the slot contacts. 3. Carefully lay the SIM card (with its contacts facing down) onto the SIM card slot contacts. 4. Close the hinged SIM card cover and slide the cover to the right to lock it. 5. Close the hinged microSD/SIM card cover and replace the battery. Janam Technologies LLC 3―3 Setting Up the XT Series Device XT85 User Manual Pictorial Reference—microSD and SIM Card Installation The following provides additional photographic views supporting the installation of the microSD card described on page 2 of this chapter. The mechanics of the SIM card holder function in the same manner as the microSD card holder shown. microSD and SIM card holders empty and closed. microSD card holder opened for microSD card insertion. microSD card holder open with microSD card inserted. microSD card inserted with holder closed and ready for use. Janam Technologies LLC 3―4 Setting Up the XT Series Device XT85 User Manual LCD Screen Options and Calibration IMPORTANT NOTE! Always use the supplied stylus for tapping or making strokes on screen. DO NOT use a pen, pencil or any other object on the touch screen. The XT Series Device provides a utility that enables users to customize LCD screen orientation and to recalibrate the screen’s tapping function accuracy. Accessing the Screen Menu: 1. From the Windows Mobile Start Desktop, tap Settings. 2. From the Settings screen, tap System. 3. From the System Screen, scroll down and tap Align Screen. 4. From the Align Screen screen, select the preferred display orientation (Portrait (the default setting), Landscape (right-handed) or Landscape (left-handed). 5. If you notice a decrease in accuracy or responsiveness when using the stylus, repeat steps 1 through 3 and tap Align Screen. Follow the on-screen instructions. Continue to tap each changing crosshair position with the stylus until the screen exits the align screen function and returns automatically to the Screen Orientation screen. Janam Technologies LLC 3―5 Setting Up the XT Series Device XT85 User Manual Setting Basic User Preferences Janam XT Series devices can be customized in many ways to suit task requirements, security and/or individual user preferences. The following is an overview of a selection of key XT Series device settings with instructions on how to make changes. The general navigations and actions used to affect these changes are instructive to other similarly controlled settings. Key XT Series Device Option Settings Getting Started Open the getting started menu: 1. Tap getting started. 2. Tap View All to access the Getting Started menu options. Setting a Background: 1. Tap Set background on the Getting Started menu screen. 2. Tap the arrow to the right of Change the background in Settings > Home. 3. Select a graphic theme or picture as the screen background and tap OK. Janam Technologies LLC 3―6 Setting Up the XT Series Device XT85 User Manual Key XT Series Device Option Settings (continued) Note: Picture backgrounds can affect the readability of text within some applications. Tip: Tapping the Getting Started icon on the Windows Mobile Start screen is an equally effective means of navigating to the Getting Started menu. Device Password Setting up a device password: 1. Tap Set up a device password on the Getting Started menu screen. 2. Tap the arrow to the right of Set up a password in Settings > Lock. 3. Check the Prompt if phone (device) unused for box and select a delay from 0 minutes to 24 hours. Checking this box enables the password setup process to continue. Note: Leaving the “Prompt if phone (i.e. device) unused for” box unchecked leaves the device without password protection. It is recommended that the “Prompt if device unused” time strike a practical balance between security and convenience. Selecting a delay of 0 minutes will result in a condition requiring password input every time the device is used. Janam Technologies LLC 3―7 Setting Up the XT Series Device XT85 User Manual Key XT Series Device Option Settings—Device Password (continued) 4. Tap the down arrow in the Password type box. 5. From the pull-down menu, select the type of password you would like to use – Simple PIN (Personal Identification Number) or Strong alphanumeric. Enter the password and enter in the same password again for confirmation. Simple PIN passwords contain only numeric characters and must be at least 4 characters in length. Overly simplistic sequences such as “1234, “1111”, etc. will be rejected as unsafe. Strong alphanumeric passwords must include at least 7 characters, 3 of which must be a combination of UPPERCASE and lowercase letters, numerals or punctuation. Examples: Upc4003 UPC?4003 To remove password protection: 1. Tap Start menu > Settings > Personal tab > Lock. 2. Enter your current password. 3. Un-check the Prompt if device unused for check box. 4. Tap OK. Changing Passwords Passwords may be changed by following the same procedure used to set the initial password. However, the process will be interrupted with the password entry screen. Entering the current password will enable continuation of the password change process. Screen/Keyboard Locking & Unlocking Note: When the device is locked, neither the on-screen keyboard nor the physical keypad will accept user input, preventing unintentional input. This level of locking does not take the place of the added security of password protection. To lock the device: ― Tap the Lock (icon) on the Tile Toolbar. To unlock the device: ― Slide the Unlock (bar) left or right. Janam Technologies LLC 3―8 Setting Up the XT Series Device XT85 User Manual Key XT Series Device Option Settings (continued) Regional Settings The style in which numbers, currency, dates and times are displayed is controlled by Regional Settings. XT Series devices are shipped with regional, language and input settings pre-set to English (United States). To change Regional settings: 1. From the Windows Mobile desktop Start screen; Tap Settings (icon) > System > (folder) > Regional Settings (icon). 2. Select the desired setting from the Regional Settings pulldown menu. Janam Technologies LLC 3―9 Setting Up the XT Series Device XT85 User Manual Key XT Series Device Option Settings (continued) Owner Information Entering owner information: 1. From the Windows Mobile Start menu, tap Settings > Personal folder > Owner Information. 2. Select the Identification tab and enter Owner Information. 3. Select the Notes tab to enter additional owner information-related text such as “Reward if Found." To display owner information: From the Windows Mobile Start menu, tap Settings > Personal folder > Owner Information. Janam Technologies LLC 3―10 Setting Up the XT Series Device XT85 User Manual Key XT Series Device Option Settings (continued) Screen Orientation The default Screen Orientation is Portrait. If preferable, orientation can be changed to Landscape (right-handed or left-handed). Changing screen orientation: 1. From the Windows Mobile Start Screen, Tap Settings (icon) > System (folder) > Screen (icon). 2. Select the preferred screen orientation and tap OK. Landscape Screen Example 3. To auto rotate the screen orientation using the XT85 Accelerometer sensor go to Start > Settings > System > XT85 Panel (Icon) > Accelerometer (tab). Select the check box for Enable Auto Rotation. Janam Technologies LLC 3―11 Setting Up the XT Series Device XT85 User Manual Key XT Series Device Option Settings (continued) Device Name The XT Series Device name (which may already be assigned) is used to identify the device in the following situations: ― Synchronizing with a PC ― Connecting to a network ― Restoring information from a backup Assigning or changing the device name and/or description: 1. From the Start menu tap Settings (icon)> System (folder) > About (icon). 2. Tap the Device ID tab. 3. Enter a Device name. The Device name cannot exceed 15 characters. It must begin with a letter, consist of letters from A to Z, numbers from 0 to 9 and cannot contain spaces. Use the underscore character to separate words. 4. Enter a Description. The Description cannot exceed 50 characters. It must begin with a letter, consist of letters from A to Z, numbers from 0 to 9 and cannot contain spaces. Use the underscore character to separate words. IMPORTANT NOTE! To synchronize multiple XT Series devices with the same PC, each device must have a unique name. Janam Technologies LLC 3―12 Setting Up the XT Series Device XT85 User Manual Key XT Series Device Option Settings (continued) Volume and Alert Adjustments The Volume Up and Volume Down button controls each perform multiple functions for device volume and phone volume. Volume Up Volume Down To adjust device volume: 1. Press either the Volume Up or Volume Down button to open the Volume control screen. 2. Select Device (figure 1) or Phone (figure 2) by tapping the corresponding slider on the screen. 3. Pressing the Volume Up or Volume Down button increases or decreases the selected volume in preset increments. Figure 2 ― Pressing the Volume Down button from its lowest position toggles the control to the On, Vibrate and Off buttons. enabling the choice of these functions for the Device and the Phone. ― Pressing the Volume Down button from this position toggles down through the On, Vibrate and Off selections. Pressing the Volume Up button up through the On, Vibrate and Off selections. Janam Technologies LLC Figure 2 To mute the microphone: — QWERTY key pad: Press Yellow function button, then press — Numeric key pad: Press Yellow function button, then press 3―13 Setting Up the XT Series Device XT85 User Manual Key XT Series Device Option Settings (continued) Additional Sounds and Notifications Additional sound-related settings are available, making it possible to adjust select device functions to suit the user’s preference. 1. Tap Settings > Sounds & Notifications. 2. From the resulting Sounds & Notifications <Sounds> screen, choose device functions by tapping the corresponding checkbox(s). 3. For Screen taps and Hardware buttons, tap the preferred setting (Soft or Loud.) 4. Select the Notifications tab to assign notifications to specific events such as Incoming calls and ActiveSync activity. 5. From each Events options screen, select the preferred settings. 6. Tap OK. Janam Technologies LLC 3―14 Setting Up the XT Series Device XT85 User Manual Battery Power Main and backup battery status 1. Tap Settings (icon) from the Windows Mobile Start desktop. 2. Tap Power (icon). Main Battery and Backup Battery status are displayed in bar charts from 0% to 100%. Power Management Conserving Battery Power XT Series devices feature multiple power conservation options, some of which employ timers that can be set to strike a balance between user preference and optimal battery life. On battery power timers control the selected action only when the device is being operated on battery power. On external power timers control the selected action only when the device is being used with an external power supply. Tip: Whenever practical, you can conserve battery life by: 1. Using the AC adapter to plug the XT Series device into an external power source. 2. Manually or auto-suspend device operation as often as is practical 3. Reduce the backlight brightness setting 4. Turn off any wireless functionality (phone, Wi-Fi, Bluetooth or GPS) when not in use Janam Technologies LLC 3―15 Setting Up the XT Series Device XT85 User Manual Battery Power- Conserving Battery Power (continued) Screen Off Function To adjust Screen Off function (device suspend mode): 1. Tap Settings on the Windows Mobile Start desktop. 2. Tap Power on the Windows Mobile Settings desktop. 3. Tap Advanced on the Power menu. 4. Check On battery power. 5. Select the preferred length of inactivity before activation of the screen off power saving function from the pull-down menu. Shorter off delays will increase battery power conservation. 6. Check On external power. 7. Repeat Step 5. 8. Tap OK. Battery Power- Conserving Battery Power (continued) Backlight Off Delay Function To adjust backlight off delay function: 1. Tap Settings (icon) on the Windows Mobile Start desktop. 2. Tap System (folder) on the Windows Mobile Settings desktop. 3. Tap Backlight (icon) on the Windows Mobile System desktop. Janam Technologies LLC 3―16 Setting Up the XT Series Device XT85 User Manual 4. Check the “Turn off the backlight if device not used for” box and select the preferred length of inactivity before activation of the screen off power saving function from the pull‐down menu. Shorter off delays will increase battery power conservation. Backlight Brightness Adjustment Function To adjust backlight brightness function: 1. Tap Settings (icon) on the Windows Mobile Start desktop. 2. Tap System > XT85 Panel > Backlight (tab) 3. Adjust the brightness level using the sliding bar in 20% increments with the Enable Backlight check box enabled and the Light Sensor check box disabled. 4. The Backlight will be turned off when the Enable Backlight check box is disabled 5. If the Enable Light Sensor check box is selected, then the backlight brightness will auto adjust based on the ambient light Keylight Enable and Duration Function To adjust keylight duration function: 1. Tap Settings (icon) on the Windows Mobile Start desktop. 2. Tap System > XT85 Panel > Keylight (tab) 3. Enable the keylight function by selecting the check box. 4. Using the drop down box, select either 30 seconds or Always On Janam Technologies LLC 3―17 Setting Up the XT Series Device XT85 User Manual Disabling Connectivity In conditions where it is not necessary to maintain Phone, Bluetooth or wireless connectivity, battery power can be conserved and battery life extended by disabling any or all of these connectivity functions. To disable connectivity functions: 1. Tap Settings (icon) on the Windows Mobile Start desktop. 2. Tap Connections (folder) on the Windows Mobile Settings desktop. 3. Tap Wireless Manager (icon) on the Windows Mobile Connections desktop. — Tap ALL to disable Wi-Fi, Bluetooth and Phone connectivity for maximum battery power conservation. — Alternatively, tap only the connectivity function or functions you prefer to disable. — Tapping a connectivity function again will re-enable it. Opening Applications To open an application: Tap the desired application from the Windows Mobile desktop. Removing Programs (applies only to user-installed programs) To remove a program: 1. From the Start screen, tap Settings (icon)> System (folder) > Remove Programs (icon). 2. From the Remove Programs screen, select (tap) the program to be removed. 3. Tap the Remove button. Janam Technologies LLC 3―18 Setting Up the XT Series Device XT85 User Manual Communication Ports The table below identifies the XT85 Comm Ports that are currently allocated. When selecting a Virtual Comm Port the Comm Ports below will not be available for use if the XT85 is configured with that function. COM2 Physical COM for Bluetooth Will be occupied when the Bluetooth function is turned on COM4 Physical COM for IrDA Will be occupied when the IrDA function is turned on COM5 Physical COM for bottom connector Fully accessible by user application (Non multiplex) COM6 Physical COM for SE965 laser scan engine COM7 Physical COM for u-blox GPS module COM9 Virtual COM for GPS applications Janam Technologies LLC Will be occupied when the Laser Scan Engine is in use By default, COM9 will occupy and control COM7. If an application uses COM7 directly, then other applications will not be able to access the GPS data In order for multiple applications to simultaneously acquire GPS data, the applications need to configure GPS communication with COM9 3―19 Resetting the XT Series Device XT85 User Manual 4 Resetting the XT Series Device Resetting In addition to On (Resume) and Off (Suspend) functions, XT Series devices provide a range of device reset (boot) procedures whose functions may be called upon when required. IMPORTANT NOTE! Some device reset options irretrievably delete stored user data! Always read and understand the parameters of selected reset procedures before execution. On (Resume) / Off (Suspend) and Reset Functions On (Resume) / Off (Suspend) To Suspend or Resume XT Series device operation: ― Press the Red Power key once to suspend operation and press again to resume. Note: Holding the Power key down for an extended period of time will not reboot the device. Warm Boot (or Soft Reset) Escape Key During a Warm Boot, registries will be retained, SDRAM will NOT be reset and Program memory used by applications will be reset. To initiate the warm boot (restart) process: ― Press the Yellow Function key and red Power key simultaneously to immediately initiate a Warm Boot. Cold Boot (or Hard Reset) After a Cold Boot, all settings and registries will be retained. SDRAM will be reset and the program memory used by applications will be reset. ― Yellow Function Key Enter (return) Key Red Power Key Press and hold Yellow Function key TOGETHER with Enter key AND red Power keys for 5 approximately seconds to initiate a Cold Boot process. Janam Technologies LLC 4―1 Resetting the XT Series Device XT85 User Manual On (Resume) / Off (Suspend) and Reset Functions (continued) Clean Boot (or Master Reset) Be sure that all user data is backed up before performing a Clean Boot! A Clean Boot returns the device to its original (default) factory settings. ALL user-installed applications and data are removed from the device during a Clean Boot. Escape Key 1. Press Yellow Function key TOGETHER with Enter key AND red Power keys and HOLD for approximately 5 seconds. 2. Release the Yellow Function, Enter AND red Power keys after 5 seconds but BEFORE the Janam logo appears on the screen. Note: If the Janam logo appears before the escape key can be pressed and held, the Clean Boot initiation can be restarted without waiting for the device to re-boot, by beginning again at step one. 3. Immediately upon releasing the Yellow Function, Enter AND red Power keys, press and HOLD the Escape key until the Boot Menu appears. 4. Using the Escape key, toggle through the Boot Menu options and select (overlaying the red outline box) 01 RETURN FACTORY DEFAULT. 5. Press the Yellow Function Key to begin resetting the device to its original factory default state. Yellow Function Key Enter (return) Key Red Power Key JANAM CORPORATION BOOT MENU REV. 01 00 DIAGNOSTIC 01 RETURN FACTORY DEFAULT 02 03 04 05 06 UPGRADE BOOT IMAGE UPGRADE OS IMAGE UPGRADE BOOT + OS IMAGE UPGRADE LOGO UPGRADE CPLD A Clean Boot, returning the device to Factory Default Settings is first confirmed by the appearance of the Windows Embedded Handled Screen, followed later by a distinctive audible signal. It may take a few minutes after the audible signal for the Clean Boot process to progress to the final step of being instructed to tap the screen to set up the handheld device. Simulated Boot Menu 6. Tapping the screen initiates the Screen Alignment procedure. Completing the alignment finalizes the Clean Boot, returning the device to its factory default state. — See Chapters 2 and 3 for more on Screen Alignment. Janam Technologies LLC 4―2 Data Entry―Alpha, Numeric and Importing XT85 User Manual 5 Data Entry―Alpha, Numeric and Importing Entering Information on the XT Series Device Information can be entered into the Janam XT Series device handheld computer in a variety of ways: Barcode scanning Scan barcodes to automatically capture data. See Chapter 6 for information about barcode scanning. Typing Use the physical keypad or the on-screen keyboard to input text, numbers and other characters. Drawing and Writing Freehand drawing and/or handwriting can be entered using the stylus within the Notes application. Audio The Notes application provides the ability to record voice notes. Photography The integrated digital camera provides the ability to capture photographic images. See Chapter 10 for information about the camera function. Synchronizing Import or exchange data between a PC and the device using ActiveSync and the Windows Mobile Device Center. See Chapter 7 for more on synchronization. Note: Janam XT Series devices feature either a QWERTY physical keypad suited for frequent input of alphabetic data or a 10-key numeric physical keypad, for users focused on numeric data input. Both versions provide an on-screen keyboard for entering alpha, numeric and special character data. Typing XT Series devices are capable of running a variety of applications, many of which rely upon or require the input of alpha, numeric or special character data. In addition to either a QWERTY or numeric physical keypad (depending on the model configuration) XT Series devices feature the ability to key in data with the supplied stylus on an integrated On-Screen Keyboard. To use the On-Screen Keyboard: 1. Tap the On-Screen Keyboard (icon) in the Tile Toolbar at the bottom of the screen. 2. Use the supplied stylus to tap keys on the keyboard displayed on the screen. This function is available only in modes when text entry is possible. Janam Technologies LLC 5―1 Data Entry―Alpha, Numeric and Importing XT85 User Manual Entering Information on the XT Series Device—Typing (continued) Changing on-screen keyboards: The default on-screen keyboard is a standard lowercase QWERTY keyboard. ― To switch to the UPPERCASE (all CAPS) keyboard, tap the CAP key above the Shift key. ― To switch to the expanded Numeric keyboard, tap the 123 key in the upper left corner. ― To select the International keyboard, tap on áü key at the lower left of the keyboard. Lowercase Keyboard Uppercase Keyboard Numeric Keyboard International Keyboard Keyboard Shortcuts To Copy the selected text Tap CTRL+C To Undo the last action Tap CTRL+Z Cut the selected text CTRL+X Redo the last action CTRL+Y Paste the text CTRL+V Make the selected text bold CTRL+B Close a program CTRL+Q Make the selected text italic CTRL+I Open a new file CTRL+N Make the selected text underlined CTRL+U Custom Key Programming A selection of XT Series device keypad function keys can be reprogrammed as shortcuts to a reset assortment of actions. The selection of reprogrammable keys varies, depending on the XT Series configuration (QWERTY or Numeric.) To reprogram function keys: 1 Tap Settings from the Windows Mobile desktop. 2. Tap Personal (folder) > Buttons (icon). 3. Select the reprogrammable button. 4. Select the action to be assigned to the selected button from the drop-down menu. Janam Technologies LLC 5―2 Data Entry―Alpha, Numeric and Importing XT85 User Manual Entering Information on the XT Series Device—Options Enabling ClearType Text Clear Type softens the edges of the screen fonts for many applications. To use ClearType for screen text: 1. Tap the Settings (icon) from the Windows Mobile Start menu > System (folder) > Screen (icon) > ClearType (tab). 2. Select the Enable ClearType check box. Text Size To increase or decrease screen text size: 1. Tap the Settings (icon) from the Windows Mobile Start menu > System (folder) > Screen (icon) > Text Size (tab). 2. Using the supplied stylus, move the slider left to decrease text size or to the right to increase text size. Drawing and Writing The Notes application accepts input from the physical keypad, the on-screen keyboard and accepts handwriting and drawing using the supplied stylus. To draw or write freehand: ― Tap the Notes (icon) from the Windows Mobile Start menu. Janam Technologies LLC 5―3 Data Entry―Alpha, Numeric and Importing XT85 User Manual Audio—Voice Note Recording The Notes application provides an audio recording function to capture voice notes. To record voice notes: 1. Tap the Notes (icon) from the Windows Mobile Start menu. 2. The Menu (icon) on the Tile Toolbar. 3. Select the Review Recording Toolbar option from the pull down menu. 4. Tap the red recording dot to begin voice notes capture. 5. Tap The square stop icon to stop voice notes capture. 6. Tap the speaker icon in the main screen area to select a voice note for playback. Janam Technologies LLC 5―4 Data Capture—Barcode Scanning XT85 User Manual 6 Data Capture—Barcode Scanning Introduction Janam XT Series devices are available with two barcode scanning technology options, each of which is suited for varying end-user requirements, preferences and workspace environments. This chapter covers each of the available XT Series barcode scanning technologies. Therefore, some of the barcode functions described in this chapter may not apply to the XT Series device(s) you are using. For that reason, and depending on the configuration of your XT Series device(s), some information in this chapter may not apply. If you have questions about the scanning technology utilized by specific XT Series device(s), please contact your Janam dealer or Janam Technical Support at: +1.866.915.5311 Key Barcode Scanning Systems The two key data capture technologies offered are: Laser: Motorola SE965HP Laser Scan Engine Provides close-range and distance 1D barcode scanning and reads damaged or hard-toread barcodes. Imager: Honeywell Adaptus® Imager Provides omnidirectional 1D barcode scanning and is 2D scanning-ready (requires firmware upgrade). IMPORTANT NOTE! The following Barcode Scanning Demonstration and Setup material provides Janam XT Series device users with fundamental barcode scanning information to familiarize users with general scan functions. However, your devices’ barcode scanning functions will likely be governed and/or managed by a third-party application not covered in this manual. Janam Technologies LLC 6―1 Data Capture—Barcode Scanning XT85 User Manual A. Laser-Based Configurations This section is specific to XT Series configurations equipped with Motorola SE965HP laser scanning technology. Please see Section B for barcode scanning with XT Series configurations with Adaptus Imager scanning technology. Scanning Demonstration Note: The ScanWedge function must be enabled for the Scan Demo function to operate. The ScanWedge function will be disabled if manual scanning is initiated either by a command API or by using the Janam Barcode Test Program. When the ScanWedge feature is enabled, data can be entered into the specified application by opening the application on the handheld and scanning a barcode. To enable ScanWedge and set Symbology Configurations: 1. From the Windows Mobile Start screen scroll down and tap Utilities (folder) > ScanWedge (icon). 2. Set preferences using pull-down menus for ScanWedge, Beep Sound and Light Mode. 3. Enter Prefix to send before barcode and Suffix to send after barcode or leave blank. 4. Check or clear box options. 5. Tap Menu > Setup > Symbology Config. 6. Tap Enable All to enable all barcode types or manually select the barcode type(s) to enable. 7. Tap OK to save. Janam Technologies LLC 6―2 Data Capture—Barcode Scanning 8. Tap Menu (Taskbar) > Setup > Hardware Test to confirm that all scanner functions are working properly. 9. Select (check) each Hardware Test item individually to verify proper functioning. XT85 User Manual 10. Tap Apply to enable ScanWedge. To run the Scanning Demonstration: 1. Return to Windows Mobile Start screen. 2. From Utilities (folder), tap Scan Demo. 3. Aim device Scan Window at a sample barcode. 4. Tap Scan or press Scan Trigger. Janam Technologies LLC Primary Scan Trigger 6―3 Data Capture—Barcode Scanning XT85 User Manual Scanning Demonstration (laser-based configurations continued) 5. Confirm display of the scanned sample barcode. A successful scan is confirmed with scan results appearing in the Data window. 6. Tap OK to return to the main demo. Tip: Scan Trigger buttons are also located on either side of the device. While holding any of the three barcode Scan Trigger buttons , the aiming beam emitted from the scan window will automatically switch to the elongated scan beam. Janam Technologies LLC 6―4 Data Capture—Barcode Scanning XT85 User Manual B. Imager-based Configurations This section is specific to XT Series configurations equipped with Adaptus Imager Technology. Please see Section A for barcode scanning with XT Series configurations with Motorola SE965HP laser scanning technology. Barcode Examples IMPORTANT NOTE! A firmware upgrade is required to enable 2D barcode scanning. Contact your authorized Janam dealer to acquire the 2D unlock code for your device(s). 1D 2D Unlock 2D Scanning XT Series devices with Adaptus Imaging Technology can be upgraded in the field to read 1D and 2D barcodes with a simple firmware upgrade (Part Number 2D-XP-1). With each upgrade, a key code is provided than unlocks 2D scanning capability on the device. You will need to provide the product imager ID number so the appropriate six-digit key code sequence can be assigned. To access the imager ID number, follow these steps: To get your Imager ID number: 1. From the Windows Mobile Start screen, tap Settings (icon) > System (icon) > XT85 Panel (icon) > Scanner (tab). The displayed Imager ID information (Serial Number, S/N) is unique to each device. 2. Record the Imager ID. After receipt of your six-digit key code, follow these steps to enable 2D scanning: 1. Go to the Start Menu, tap Settings (icon) > System (icon) > scroll down to XT85 Panel (icon) > Scanner (tab) 2. Enter your key code in the Password field then press the Unlock button. 4. Tap OK. Janam Technologies LLC 6―5 Data Capture—Barcode Scanning XT85 User Manual Scanning Demonstration Note: The ScanWedge function must be enabled for the Scan Demo function to operate. The ScanWedge function will be disabled if manual scanning is initiated either by a command API or by using the Janam Barcode Test Program. To configure ScanWedge and enable Symbologies: 1. From the Windows Mobile Start screen scroll down and tap Utilities (folder) > ScanWedge (icon). 2. Set preferences with individual pulldown menus for ScanWedge, Beep Sound and Light Mode. 3. Enter Prefix to send before barcode and Suffix to send after barcode or leave blank. 4. Check or clear box options. 5. Tap Menu > Setup > Symbology Config. 6. Tap Enable All to enable all barcode types or manually select the barcode type(s) to enable. 7. Tap OK to save. 8. Tap Menu (Taskbar) > Setup > Hardware Test to confirm that all scanner functions are working properly. 9. Select (check) each Hardware Test item individually to verify proper functioning. 10. Tap OK. 11. Tap Apply to enable ScanWedge. Janam Technologies LLC 6―6 Data Capture—Barcode Scanning XT85 User Manual Scanning Demonstration (Imager-based configurations continued) To run the Scanning Demonstration: 1. Return to Windows Mobile Start screen. 2. From Utilities (folder), tap Scan Demo. 3. Aim device Scan Window at a barcode. 4. Tap Scan or press Scan Trigger. Primary Scan Trigger Tip: For best results hold the XT device at a slight angle in relation to the barcode. Scanning straight on is not recommended because light reflected from the material the barcode is printed on can interfere with scanning. 9. Confirm display of the scanned sample barcode. A successful scan is confirmed with scan results appearing in the Data window. Another means of confirming a successful, decoded scan is provided by the top-facing LED, located at the upper edge of the device. This LED will turn red when a scan trigger is depressed and turned green after a successfully decoded scan. Note: The top facing LED cannot provide scan status information when the device is connected to an external power supply. When connected to an external power supply, the top facing LED functions only to indicate charging status. 10. Tap OK to return to the main demo. Janam Technologies LLC 6―7 Data Capture—Barcode Scanning XT85 User Manual ScanCapture Function ScanCapture enables the capture of data images in three ways: Single Captures a single data image Cont Captures multiple images in a manner similar to video recording Intel Intelligent signature capture To activate ScanCapture: — From the Windows Mobile Start screen scroll down and tap Utilities (folder) > ScanCapture (icon). To use ScanCapture—Single: 1. Navigate to the ScanCapture screen. 2. Aim the Scan Window at the ScanCapture target. 3. From the ScanCapture screen, tap Single. — The preview of the scanned target image will appear on the ScanCapture screen. 4. Tap Save to retain the displayed target image or Single to replace it with a newly captured image. 5. If saving the image, apply a file Name, specify (enter) the Folder, file Type and Location. 6. When File Saved confirmation appears, tap ok. Janam Technologies LLC 6―8 Data Capture—Barcode Scanning XT85 User Manual ScanCapture Function (continued) ScanCapture—Continuous As its name suggests, ScanCapture—Continuous provides a continuous view of the area being captured by the scan window. To use ScanCapture Continuous: 1. Aim the scan window at the general area of the target subject. 2. Tap the Cont button to begin continuous target viewing. 3. When the desired target is displayed and while keeping the device as steady as possible, Tap the Cont button again to capture a single image of the view being displayed. 4. Tap Save to retain the displayed target image or Single to replace it with a newly captured image. 5. If saving the image, apply a file Name, specify the Folder, file Type and Location. 6. When File Saved confirmation appears, tap ok. Janam Technologies LLC 6―9 Data Capture—Barcode Scanning XT85 User Manual ScanCapture Function (continued) ScanCapture—Intelligent Capture This function is designed to work with a custom barcode for Intelligent Signature Capture. A code 128 barcode is used to inform the device that a signature is to be captured. The Intelligent Signature feature will find the barcode in the image, scale it, remove the extra information, and display the signature on the screen. When using the Intel Imaging function, there are a number of settings available. The main settings include the Region of Interest (ROI) Width and Height. This is the subset of the complete image that will be extracted. Another field is Image Bit Depth, which can be Gray or Binary. If Binary is selected, the returned image will be black and white. This results in the smallest image size, but the lowest image quality. If Gray is selected, the image will be in 256 levels of gray. This provides higher image quality and a larger image size. To use intelligent capture: 1. From the ScanCapture menu, tap Intel. 2 Tap Menu. 2. Make changes to Settings as preferred or necessary for the application. 3. Tap (select) Address or Signature > OK. 4. Tap Intel and aim at any support barcode. 5. Tap Save. Janam Technologies LLC 6―10 Synchronization XT85 User Manual 7 Synchronization Microsoft® Windows Mobile Device Center and ActiveSync allow you to synchronize data between and XT Series device and a PC. ActiveSync and Windows Mobile Device Center share many similarities. This User Guide includes screenshots and setup for Windows Mobile Device Center. The user experience should be virtually the same with ActiveSync. If you need additional assistance, please contact the JanamCare Service and Support Center. Synchronization—Exchange and Update Data Using ActiveSync Create a User Profile 1.Tap Start menu > Settings > Personal tab. 2.Select Owner Information. 3. Enter Identification, Notes and display Options information. ― Check the Identification information check box only if you prefer Owner Information to be the first screen to appear at start up. 4.Tap ok to save changes. Setting Up and Deleting Partnerships A partnership enables you to automatically synchronize selected XT Series device files at startup when all synchronization conditions are met (see Note below). Alternatively, you can run synchronization manually (on command); copying only the files you want to sync. To set up a partnership to automatically sync files: 1. Connect your XT Series device to your PC and power the XT Series device on. Synchronization requires any one of the following: ▪ A USB cable connected to a Janam USB Cradle with the XT Series device docked in the cradle. ▪ An Ethernet cable connected to a Janam Ethernet Cradle with the XT Series device docked in the cradle. ▪ A direct connection between the XT Series device and the host PC, using a Janam USB or RS232 Serial Syncing/Charging Cable. 2. On your PC, select Start > Programs > Windows Mobile Device Center. 3. At the Microsoft Mobile Device Center Home screen (on your PC), click Set up your device. Janam Technologies LLC 7-1 Synchronization XT85 User Manual 4. The Set Up Windows Mobile Partnership window appears. Select the data types that you want to synchronize and tap Next. Note: The Files checkbox must be selected to synchronize files which were created on the XT Series device. 5. The Set Up Windows Mobile Partnership (Device name) window appears. Use the default name or enter a new name. XT85 6.Tap Set Up to proceed. Set Up will start, followed by synchronization between the PC and the XT Series device. The Windows Mobile Device Center screen on your PC will indicate synchronization progress. XT85 Janam Technologies LLC 7-2 Synchronization XT85 User Manual To add/remove files to/from the device: 1. Select (mouse over) Mobile Device Settings > Change content sync settings on the PC’s Windows Mobile screen. XT85 2. The Change content sync settings window appears. Click the checkboxes of the desired file categories and click Save. Clicking Save will initiate file synchronization automatically. Sync verification is provided as the time of the last sync, displayed at the bottom-left of the host PC’s Windows Mobile screen. XT85 Partnership (Connection) Settings Note: Automatic synchronization will then take place whenever all of the following conditions are met: ― The XT Series device is connected to the host PC. ― Data selected for synchronization has been changed. ― The Windows Mobile Device Center application is started. To change partnership (connection) settings: 1. Open the Windows Mobile Device Center control panel. 2. Move the mouse icon over the Mobile Device Settings option, revealing the sub-menu of options. XT85 3. Click Connection Settings. Janam Technologies LLC 7-3 Synchronization XT85 User Manual 4. Apply your preferences and click OK. To 1. 2. 3. end a partnership: Unplug the USB cable from the PC to break the ActiveSync connection. Open the Windows Mobile screen on the PC. Click Mobile Device Settings and click End a partnership from the pop-up screen. 4. From the resulting End a partnership screen, select the partnership to be deleted click the End partnership button. XT85 XT85 5. Click Yes on the resulting confirmation screen. 6. If there is a Synchronized Files folder, a Confirm Folder Deletion screen will appear. Tap Yes to proceed. Janam Technologies LLC 7-4 Wireless Connectivity XT85 User Manual 8 Wireless Connectivity Introduction Wireless connectivity is a cornerstone of XT Series device functionality, providing users with the ability to make and take wireless telephone calls, send and receive text (SMS) messages, send and receive email along with easy access to the Internet. Phone Fundamental to XT Series connectivity is the integrated wireless telephone function and a removable SIM (Subscriber Identity Module) card slot which enables the exchange of SIM cards between different compatible mobile devices. Refer to Chapter 3 for more about SIM card installation. With a SIM card installed and wireless subscription service activated, the XT Series device is ready to make and receive phone calls, keep track of calls and to send or receive text messages. Depending on the features offered by your wireless service provider and/or opted for, the XT Series device may also provide additional services such as voice mail, call forwarding, caller ID and more. Note: The XT Series phone feature cannot function without a SIM card installed. Your wireless pservice provider can provide additional information about the SIM card and subscription to wireless services. Tip: Should “Phone off” appear in the upper left corner of the Phone screen, the master ON / Off toggle control of the Phone function may be set to Off. To change this setting: From Windows Mobile Start, tap > Settings > Connections > Wireless Manager > Phone. Phone Function To activate Phone function: ―From the Windows Mobile desktop Start menu, tap the Phone (icon) or press the green phone icon button on the device keypad. IMPORTANT NOTE! Always use the supplied stylus for tapping or making strokes on the screen. DO NOT use a pen, pencil or any other object on the touch screen. Janam Technologies LLC 8-1 Wireless Connectivity XT85 User Manual To set Phone options: 1. Tap the Menu (icon) on the Phone screen. 2. Select Options from the resulting menu. 3. From each of the top Tabs (Internet, Sounds and Security), select the preferred Options from the pull-down menus. Selectable Options Tabs include: Sounds • Ring type • Ring tone • Keypad Sound options may be sampled by tapping the screen’s Play () and Stop () buttons. Internet • Internet Calling Security • PIN Security Services • Call Barring • Caller ID • Call Forwarding • Wall Waiting • Voice Mail and Text Messages • Fixed Dialing Volume and Alert Adjustments The Volume Up and Volume Down button controls each perform multiple functions for device volume and phone volume. Volume Up Volume Down Janam Technologies LLC 8-2 Wireless Connectivity XT85 User Manual To adjust device volume: 1. Press either the Volume Up or Volume Down button to open the Volume control screen. 2. Select Device or Phone by tapping the corresponding slider on the screen. 3. Pressing the Volume Up or Volume Down button increases or decreases the selected volume in preset increments. — — Pressing the Volume Down button from its lowest position toggles the control to the On, Vibrate and Off buttons, enabling the choice of these functions for the Device and the Phone. Pressing the Volume Down button from this position toggles down through the On, Vibrate and Off selections. Pressing the Volume Up button up through the On, Vibrate and Off selections. Muting To mute device microphone: — QWERTY key pad: First press the Yellow function key, then press — Numeric key pad: First press the Yellow function key, then press Janam Technologies LLC 8-3 Wireless Connectivity XT85 User Manual Using a Headset For workplace efficiency, privacy and/or hands-free safety and convenience, a wired or Bluetooth headset with microphone can be used in lieu of conventional integrated voice input/output functionality. Wired headsets must be equipped with a 2.5mm plug. To 1. 2. use a wired headset: Locate the wired headset with microphone receptacle cover on the right-hand side of the device. Lift the cover and insert the headset’s 2.5mm plug into the uppermost (black) receptacle. Headset Jack Note: The lower (silver) threaded receptacle located adjacent to the headset plug receptacle accepts Janam’s optional headset secure lock accessory. With the secure lock attached, the headset’s connection to the handheld is mechanically reinforced, eliminating accidental headset cord disconnects. To use a Bluetooth Headset: To use a Bluetooth headset, refer to the instructions included with the headset to be used and to Chapter 12 for more on Bluetooth device pairing. Making Calls Wireless telephone calls may be initiated on the XT series device in a variety of ways, including manually dialing the telephone number, using the on-screen dial pad, selecting a number from stored Contact information or selecting a number from the automatically stored list of recently placed and answered calls. To 1. 2. manually dial a telephone number: Using the supplied stylus, navigate to the Main Phone Dial Pad by tapping the Phone (icon) on the Windows Mobile Start screen. Tap the number keys of the desired telephone number. Use the left-facing arrow button to correct dialing errors. — If the keyed number matches a number associated to a stored Contact, the Contact will be displayed. Otherwise, the “No Matches: [dialed number]” message will appear. 3. Initiate dialing by tapping the green on-screen Talk button or press the green handset button on the physical keypad. 4. End the call by tapping the red on-screen End button or by pressing the red handset button on the physical keypad. Janam Technologies LLC 8-4 Wireless Connectivity XT85 User Manual Calling Stored Contacts The XT Series device stores and organizes Contact information efficiently, making it easy and convenient to initiate telephone dialing from that stored information. To call a Contact stored on the device: 1. Tap the Contacts (icon) on the Windows Mobile Start screen. 2. The Contact to be dialed can be found and selected in two ways. a. Scroll through the alphabetically-ordered Contact list and select a Contact by tapping it. b. Activate the on-screen keyboard, tap the window labeled Enter a name… and begin typing the desired Contact name. Contacts containing a string of information matching the letters you enter will instantly populate the screen. The selection of matching Contacts displayed will shrink quickly as your entered string of letters becomes longer and more complete and as such, more accurate. 3. Tap the desired Contact name when it appears. 4. Tap Call. Note: Contact data can also be stored and/or retrieved from the removable SIM card, making it easy to quickly clone the telephone function and contact information to another compatible mobile device. Janam Technologies LLC 8-5 Wireless Connectivity XT85 User Manual Calling Recently Dialed or Call-Received Numbers Re-dialing a recently made call or returning a recently received call is common practice and is simplified by the XT series device. To call a number associated to a recently placed or answered call: The two most recent calls made or received will appear in the window above the phone dial pad. Use the supplied stylus along with the right-hand scroll slider to display additional recent calls. 1. Tap the desired call from the list of recent calls. If the number exists in the device’s stored contacts, the contact will be displayed. Otherwise, a number information screen titled “Unknown” will appear. In either instance, the default, highlighted action displayed will be “Call”. 2. Tap Call to dial the displayed number. Alternatively, tap Send text message to communicate with the selected number via text. — Refer to Text Messaging section of this Chapter for more information on text messaging. Tip: An “Unknown” number is easily converted to a New Contact or appended to an already-stored Contact. 1. Tap the Menu (icon). 2. Tap Save to Contacts. 3. Select an existing Contact to append or tap New Contact to create a new record. 3. Select Contact Type and enter Contact information. 5. Tap OK to Save new Contact. Janam Technologies LLC 8-6 Wireless Connectivity XT85 User Manual Speed Dialing Up to 99 stored Contacts can be assigned a Speed Dial number, after which, calls can be initiated to the contact with just two stylus taps. Assigning a Speed Dial number to a Contact: 1. Using the supplied stylus, tap the Speed Dial button on the telephone dial pad to display the Speed Dial number list. 2. Tap the Menu (icon). 3. Tap New. 4. Locate and Select (tap) a stored Contact for assignment to a Speed Dial number which will bring up the Speed Dial information screen. 5. If the default Speed Dial list Location is acceptable, tap OK. Otherwise, select preferred Speed Dial list Location number from the Location pull-down menu. a Text (SMS) Messaging Text (SMS, Short Messaging System) Messaging is a fast convenient a means of sending and receiving brief (up to 160 characters) character-based messages, using the XT Series device’s wireless telephone number as the message portal. Text messaging is functional only between text message-enabled wireless telephone devices. Text messages may not be sent to or received from conventional landline telephone numbers. Typically, Text Messaging is provided by your wireless telephone service provider as an integral or optional part of a service subscription. Check with your provider for details about text service, including text message limitations, fees, etc. The following applies only if text messaging is part of your wireless telephone subscription service. Launching text messaging: — Tap the Text (icon) from the Windows Mobile Start screen to open the default Text Messages Home/ Inbox screen, first displaying stored text messages with a message preview. Janam Technologies LLC 8-7 Wireless Connectivity XT85 User Manual To view an existing (stored) message: 1. Tap the message to be viewed. When opened, the message and the related Conversation (message thread) will appear. 2. Tap OK to return to Text Message Inbox. To create, save and/or send a new text message: 1. Tap the Menu (icon) Text Messages Home/Inbox screen. 2. Tap New from the menu. 3. 4. 5. Tap the highlighted To: box to select a recipient from the device’s stored Contacts or enter the recipient manually by keying in the Contact name or mobile telephone number. Tap the text Message content area and enter message. — With content entered, the message can be saved as a Draft by tapping OK and Yes. Tap the Send (icon) to send the text message. Send button Janam Technologies LLC 8-8 Camera XT85 User Manual 9 Camera Introduction Some XT Series devices feature an integrated camera for capturing still photographic pictures and video which is useful for documentation of inventory locations, product damage or work procedure and more. Camera Function To activate the Camera: 1. From the Windows Mobile desktop Start menu, tap the Pictures & Videos (icon). 2. Tap the Camera (icon) or the Camera button to enter the default still picture Camera Viewfinder mode. Tip: It is from the Pictures & Videos screen that all still and video camera functions, adjustments and options are set. The Pictures & Videos screen is also the portal from which pictures and videos can be selected for viewing, editing, sharing. Camera Adjustments and Options Still pictures (default setting) Resolution (still mode) – 320x240, 640x480, 1280x960 1MP – 1600x1200 2MP – 2048x1536 3MP – 2592x1944 5MP Modes – Normal (single shot still pictures) – Burst (continues shooting of still pictures – Timer (delayed shutter release) Video recording – QVGA 320x280 or – VGA 640x480 Janam Technologies LLC – – – Brightness (+- 3 f-stops) Flash (Auto, On, Off) Picture quality/compression High Normal Low Full Screen (viewfinder) File Options – File name prefix – Save-to location 9―1 Camera XT85 User Manual Camera Function (Adjustments and Options continued) To make camera Adjustments and set Options: 1. From the Pictures & Videos screen, tap the Camera (icon) or the Camera button to enter the default still picture Camera Viewfinder mode. 2. Tap Menu (button). 3. From the menu, tap the Adjustment/ Option to change. 4. Tap the desired setting from the resulting menu. Tip: The film icon indicates that you are in the still picture mode. To activate the Camera: 1. From the Windows Mobile desktop Start menu, tap the Pictures & Videos (icon). 2. Tap the Camera (icon) or the Camera button to enter the default still picture Camera Viewfinder mode. Janam Technologies LLC 9―2 Camera XT85 User Manual Camera Function Taking Pictures and Recording Video To take a still picture: 1. With the Camera function activated and in the default still picture Camera Viewfinder mode, compose the picture on the device screen. 2. To capture the picture, press the Shutter Release button on the left side of the device. — Camera Shutter Release and Video Start/End button The device screen will become the picture monitor and the captured picture will appear on the screen. 3. Tap the OK or Camera button to return the device to the picture capture mode. Note: Because the handstrap can block the camera lens, be aware of its positioning when capturing pictures or recording video. To record video clips: 1. With the Camera function activated and in the default still picture Camera Viewfinder mode, tap Menu > Video. 2. Press the Shutter Release and Video Start button to begin video recording . 3. Press the Shutter Release and Video Start button again to end video recording. Janam Technologies LLC Tip: The video icon indicates that you are in the video recording mode. 9―3 Camera XT85 User Manual Note: The default duration of individual video clips is limited to 30 Seconds. Optionally, clip duration can be set to either 15 Seconds or No Limit. The selected clip duration limit, counting down, is displayed in the lower right-hand corner of the video viewfinder frame. The clip recording time, counting up, is displayed in the lower left-hand corner of the video viewfinder frame when each recording segment begins. Janam Technologies LLC 9―4 Camera XT85 User Manual Camera Function To view camera pictures or video clips: 1. From the Windows Mobile desktop Start menu, tap the Pictures & Videos (icon). or From the Camera menu, tap Thumbnails. 2. Tap a picture thumbnail or video icon to view it. 3. Tap OK to return to the Thumbnail menu. Picture and Video Management The Menu buttons located on the Thumbnails and Picture Viewing screens provide a variety of picture and video controls. They include: Zoom Play Slideshow Set As Home Background Beam Picture Send Save Janam Technologies LLC Edit – Crop Properties Options – Email Size – Rotate Picture Direction 9―5 802.11 Wireless Configuration XT85 User Manual 10 802.11 Wireless Configuration The following section details the basic 802.11 wireless configuration for Janam’s XT Series devices. To access wireless local area network: 1. Using the supplied stylus, tap Settings (icon) from the Windows Mobile Start desktop screen and tap the Connections (icon). 2. Tap SCU (icon) to access the Summit Client Utility. - Active Profile is set to Default. 3. Tap Admin Login. IMPORTANT NOTE! Always use the supplied stylus for tapping or making strokes on the screen. DO NOT use a pen, pencil or any other object on the touch screen. Janam Technologies LLC 10-1 802.11 Wireless Configuration XT85 User Manual 4. Enter the default password SUMMIT (all uppercase letters) and tap OK. 5. Select Profile tab and tap Scan for available networks. 6. Choose your network SSID 7. Tap the Yes button to complete the new profile configuration. Janam Technologies LLC 10-2 802.11 Wireless Configuration XT85 User Manual 8. Enter Pre-Shared key 9. Tap Commit. 10.On the Main tab select your profile from the Active Profile drop down menu. 11.Your Active Profile should now show Status as Associated. Janam Technologies LLC 10-3 802.11 Wireless Configuration XT85 User Manual 12.If using DHCP you can view the IP address assigned and various wireless characteristics on the Status tab. Janam Technologies LLC 10-4 GPS XT85 User Manual 11 GPS XT Series Device GPS Functionality Janam XT Series devices provide integrated GPS functionality featuring u-blox 6 AMY-6M GPS receiver technology, engineered to meet the needs of mobile handheld applications. Fast satellite acquisition and excellent tracking performance combine to offer accurate navigation information. In order to acquire the GPS data, third party navigation software is required. For Demo purposes, the XT Series device has an application from u-blox installed in the Start Folder, called u-CenterMobile. For additional information from u-blox visit http://www.u-blox.com It may take a few minutes to acquire satellite signals and the best results will be obtained when the XT Series device is positioned outside with a clear and unobstructed view of the sky. When indoors or without a clear view of the sky, the acquisition time to get a fixed position will take much longer or the GPS signal may be completely unavailable. GPS performance can also be negatively affected if your vehicle has thermal glass windows, so position your XT85 where there is a clear view of the sky. In addition, Janam’s XT Series supports Assisted GPS (A-GPS) modes, which significantly increases the time to acquire a fixed position, also called Time To First Fix (TTFF). Visit http://www.u-blox.com for more information. Also the power to the GPS module will turn off when the XT Series device suspends, so after resuming there could be a delay in receiving the GPS data depending on where the unit is located upon resuming. To set up the GPS function: The XT85 Operating System manages access to the GPS module and can allow multiple programs to simultaneously access GPS data. The default settings are as described below: 1. From the Windows Mobile Start screen, tap the Settings (icon) > System (folder) > External GPS (icon). 2. Under the Programs Tap, the GPS program port (or virtual port) will be set to COM9 3. Under the Hardware Tab, the GPS hardware port will be set to COM7 and Baud rate of 9600. 4. In order to have multiple programs access the GPS data simultaneously, then each program should acquire the GPS data through the virtual port (COM9). If one program uses COM7 to access the GPS data then that program will have control over the GPS module and block other programs from acquiring data. Janam Technologies LLC 11-1 Bluetooth XT85 User Manual 12 Bluetooth Overview Bluetooth is an effective short-range wireless communications technology. Devices with Bluetooth capabilities can send and/or receive information over distances of approximately 10 meters (30 feet). Unlike infrared technology, Bluetooth does not rely upon uninterrupted line-of-sight positioning of the devices between which information is being exchanged. Thus, you can send information to or receive information from another Bluetooth-capable device, even if the two devices are located in different rooms, as long as they are within range. Bluetooth can be used to: ― Enjoy the convenience and productivity of a wireless headset. ― Send or receive information such as files, appointments, tasks and contact cards between Bluetoothcapable devices. ― Bluetooth connectivity provides XT Series device users with the ability to print from the handled device to Bluetooth-enabled printers. ― Use a Bluetooth service. Once you connect to another device or computer using Bluetooth, you can locate and use any of the services available on that device. There are several ways to set up your computer for wireless access and the following section details the general instructions needed to set up Bluetooth on your Janam XT Series device. Please note that complex or custom installations may require additional expertise from Janam’s technical support team and/or the manufacturer of the device to be paired. Bluetooth Partnerships A Bluetooth partnership (sometimes referred to as a pairing) is, as it relates to this chapter, a relationship created between the XT Series device and another Bluetooth-capable device to securely exchange information or provide a Bluetooth function. Creating a partnership involves (A) one Bluetooth device being instructed to discover other Bluetooth devices that have been authorized to be visible and within its range and (B) entering the same Bluetooth Passcode on both devices. Once a partnership is created, the then partnered (or paired) devices need only have Bluetooth turned on and be within range to function. Already partnered Bluetooth devices do not need to be made visible. Once partnered, the devices can exchange information without re-entering the Passcode. Janam Technologies LLC 12-1 Bluetooth XT85 User Manual Bluetooth Settings Turning Bluetooth On/Off: 1. Using the supplied stylus, tap Settings (icon) from the Windows Mobile Start desktop screen and tap the Bluetooth (icon). 2.Tap Mode (tab) and check Turn on Bluetooth box and tap Bluetooth Devices (tab). To make the XT-Series device visible to other Bluetooth devices: — Selecting or clearing the Make this device visible to other devices checkbox determines whether or not the XT Series device is made visible to other Bluetooth-capable devices for the purpose of establishing a Bluetooth partnership. Note: By default, Bluetooth is turned off. Once Bluetooth is activated, as directed in the steps above, Bluetooth will be automatically powered on and off whenever the XT Series device is powered on or off. Bluetooth Partnerships Creating a Bluetooth partnership: 1. Ensure that the two Bluetooth devices to be partnered (paired) are turned on, made visible and within Bluetooth range. 2. From the Bluetooth Mode screen, tap Devices (tab). 3.Tap Add new device… (option) to initiate a search for visible Bluetooth devices within range. — Visible Bluetooth devices found will be displayed. Janam Technologies LLC 12-2 Bluetooth XT85 User Manual Bluetooth Partnerships (continued) 4. Tap (highlight) the found device to be paired. 5.Tap Next. 6. Enter optional Passcode (recommended for enhanced security) and tap Next. If no Passcode is wanted, tap Next without entering a Passcode. — If a Passcode is entered, the device to which the XT Series device is being paired may present a prompt requiring that the same Passcode be entered on the device being paired. —A Device Added confirmation will be displayed. 7.Tap Done. Note: The device to which the XT Series device is being paired may present additional prompts the during the pairing process. Follow the instructions provided by the device to which the XT Series device is being paired. To rename a Bluetooth partnership: 1.Tap Settings (icon) from the Windows Mobile Start desktop screen and tap the Bluetooth (icon). 2. Tap the displayed partnership to be renamed. Janam Technologies LLC 12-3 Bluetooth XT85 User Manual Bluetooth Partnerships (continued) 3. From the Bluetooth Partnership Settings screen, tap on and hold the existing Display Name from within the Display Name box to call up the pop-up menu. 4.Tap Clear to delete the existing Display Name. 5. Enter the new Display Name. 4.Tap Save. To delete a Bluetooth partnership: 1.Tap Settings (icon) from the Windows Mobile Start desktop screen and tap the Bluetooth (icon). 2. Tap and hold the displayed partnership to be deleted call up the pop-up menu. 3.Tap Delete. 4. From the resulting confirmation screen, tap Yes to delete or No to cancel. Janam Technologies LLC 12-4 Bluetooth XT85 User Manual Bluetooth Beam To send files via Bluetooth: 1. Tap on and hold the file to be beamed to another device. 2. From the pop-up menu that appears, select Beam File. — A search for Bluetooth devices within range will begin and those found are displayed. 4. Tap on the target device to which the beamed the file will be sent. IMPORTANT NOTE! The XT Series device will not detect and notify you of incoming Bluetooth beams unless you set it up as follows: To receive a Bluetooth beam: 1.Tap Start menu > Settings > Connections tab > Beam. 2. Select the Receive all incoming beams check box. 3. Ensure that your device is turned on, visible and within close range of the device that is beaming the information. 4. When prompted with “You are receiving data. To stop receiving, press Cancel”, tap Hide to continue or no action to continue. If you want to reject the beamed information, then tap Cancel. 5. A message will ask “Do you want to save “filename” to your device?” Tap Yes to receive the information and store it in the XT Series device \My Documents folder. Bluetooth Virtual COM Ports Overview Some programs can connect only through a serial (COM) port. This can be true even if the device itself is Bluetooth-enabled. To make it possible for such programs to use a Bluetooth connection, you must set up a virtual COM port. Once created, this virtual port can be used like any other COM port. You can use a virtual COM port for programs that, for example, connect to a GPS receiver or to connect to a Bluetooth enabled printer. Here are some examples of how to use incoming and outgoing virtual COM ports: Outgoing COM port: You have a program on your device that cannot use Bluetooth directly but can print to a serial (COM) port. You can create a Bluetooth partnership with a Bluetooth-enabled printer and then set up an outgoing COM port (for example, COM 1). The program can then send print data to COM 1, which reaches the Bluetooth-enabled printer. Incoming COM port: You have a Bluetooth-enabled GPS receiver and your device has a GPS tracking program that expects to receive GPS data over a serial (COM) port. You can create a Bluetooth partnership with the Bluetooth-enabled GPS receiver and then set up an incoming COM port (for example, COM 2). The GPS program can then send data to COM 2, which reaches the GPS receiver. Even if both your device and another Bluetooth-enabled device contain programs that need to use serial ports to communicate, you can set up the appropriate virtual incoming and outgoing COM ports on each device so that the programs can use a Bluetooth connection to communicate. Janam Technologies LLC 12-5 Bluetooth XT85 User Manual Setting up an incoming Bluetooth COM port: 1. Make sure that your device is currently connected to the other device via Bluetooth. 2.Tap Start menu > Settings > Connections tab. 3.Tap Bluetooth > COM ports tab. 4.Tap New Incoming Port. 5. Select a numbered COM port from the list. If the port cannot be created, it is in use. Select a different numbered port. 6. To use this COM port to communicate only with devices with which your device has a Bluetooth partnership, select the Secure Connection check box. 7.Tap Finish. Setting up an outgoing Bluetooth COM port: The list item new outgoing port will be available only if one or more Bluetooth-connected devices support serial (COM) connections. 1. Make sure that your device is currently connected to the other device via Bluetooth. 2.Tap Start menu > Settings > Connections tab. 3.Tap Bluetooth > COM ports tab. 4.Tap New Outgoing Port. 5. Select a numbered COM port from the list. If the port cannot be created, it is in use. Select a different numbered port. 6. To use this COM port to communicate only with devices with which your device has a Bluetooth partnership, select the Secure Connection check box. 7.Tap Finish. Janam Technologies LLC 12-6 Regulatory and Maintenance XT85 User Manual 13 Regulatory and Maintenance Regulatory Information © Copyright 2013 Janam Technologies LLC. All rights reserved. XT Series, XT85, Janam and the Janam logo are trademarks of Janam Technologies LLC. Other product and brand names may be trademarked or registered trademarks of their respective owners. Janam Technologies LLC assumes no responsibility for any damage or loss resulting from the use of this guide. Janam Technologies LLC assumes no responsibility for any loss or claims by third parties which may arise through the use of this product. Janam Technologies LLC assumes no responsibility for any damage or loss caused by deletion of data as a result of malfunction, dead battery or repairs. Be sure to make backup copies of all important data on other media to protect against data loss. IMPORTANT NOTE! Please read the end-user software license agreement with this product before using the accompanying software program(s). Using any part of the software indicates that you accept the terms of the end-user software license agreement. For additional information, visit www.janam.com or call +1.877.JANAM.99. The CE Mark on the product indicates that the system has been tested to and conforms with the provisions noted within the 2004/108/EEC Electromagnetic Compatibility Directive. For further information, please contact: Janam Technologies LLC, 100 Crossways Park West, Suite 105, Woodbury, NY 11797 Janam Technologies shall not be liable for use of our product with equipment (i.e., power supplies, personal computers, etc.) that is not CE marked and does not comply with the Low Voltage Directive. Only use Janam approved and UL listed batteries and charging accessories. FCC and Canadian Compliance XT Series mobile computers meet or exceed all applicable standards and have been manufactured to the highest level of quality. To see the specific labels associated with RF terminals configurations, visit www.janam.com. Warning: Changes or modifications to this unit not expressly approved by the party responsible for compliance could void the user authority to operate the equipment. Janam Technologies LLC 13-1 Regulatory and Maintenance XT85 User Manual XT85 Series Batch Terminal Regulatory and Safety Approvals Parameter Specification U.S.A. Europe Australia FCC Part 15 Subpart B: 2011 UL 60950/UL 1604 FOR CLASS I, DIV 2, Groups A, B, C & D EN55022:2010 / EN55024:2010 AS/NZS CISPR 22:2009+A1:2010 XT85 Series RF Terminals with WLAN and Bluetooth RF, Regulatory and Safety Approvals Parameter Specification U.S.A. Canada Europe Australia FCC Part 15B, 15C and 15E:2011;TCBReview, OET65 SAR & DFS/TPC UL 60950/UL 1604 FOR CLASS I, DIV 2, Groups A, B, C & D RSS-210:2010 ISSUE 8 (2010-12), ICES-003: 2012 ISSUE 5(2012-08) EN300328 V1.7.1:2006, EN301893 V1.6.1 (2011-11), EN 300 440-2 V1.4.1, EN301489-1/-17, EN60950: 2006/A12:2011, EN62311 SAR: 2008 AS/NZS 4268:2012, AS/NZS CISPR 22:2009+A1:2010 XT85 Series RF Terminals with WWAN (Phone) RF, Regulatory and Safety Approvals Parameter Specification U.S.A. Canada Europe FCC Part 22:2011/24:2011;TCBReview, OET65 SAR & DFS/TPC UL 60950/UL 1604 FOR CLASS I, DIV 2, Groups A, B, C & D RSS-210:2010 ISSUE 8 (2010-12), RSS-132:2006 ISSUE (2005-09), RSS-133:2009 ISSUE 5(2009-02), ICES-003: 2012 ISSUE 5(2012-08) EN301 511:V9.0.2:2003, EN301908-1:V5.2.1(2011-05),EN 300 440-2 V1.4.1, EN301489-1 (V1.9.2 (2011-09)/-7(V1.3.1(2005-11))/-24 (V1.5.1:2010)/-3 (V1.4.1:2002), EN60950:2006/A12:2011, EN62311 SAR: 2008, EN50360:2001+A1:2012, EN62209:2010 XT85 Series RF Terminals with WWAN, WLAN and Bluetooth RF, Regulatory and Safety Approvals Parameter Specification U.S.A. Canada Europe FCC Part 15B, 15C and 15E:2011, FCC Part 22:2011/24:2011; TCBReview, OET65 SAR & DFS/TPC UL 60950/UL 1604 FOR CLASS I, DIV 2, Groups A, B, C & D RSS-210:2010 ISSUE 8 (2010-12), RSS-132:2006 ISSUE (2005-09), RSS-133:2009 ISSUE 5(2009-02), ICES-003: 2012 ISSUE 5(2012-08) EN300328 V1.7.1:2006,EN301893 V1.6.1 (2011-11),EN301908-1:V5.2.1(2011-05) EN301893 V1.6.1(2011-11),EN 300 440-2 V1.4.1,EN301 489-1(V1.9.2(2011-09))/-7 (V1.3.1(2005-11))/-17(V2.2.1(2012-09))/-24(V1.5.1:2010), EN62209:2010, EN60950: 2006/A12:2011, EN62311 SAR: 2008, EN50360:2001+A1:2012, AS/NZS 4268:2012 Australia This device complies with Part 15 of the FCC Rules. Operation is subject to the following two conditions: (1) this device may not cause harmful interference, and (2) this device must accept any interference received, including interference that may cause undesired operation. Janam Technologies LLC 13-2 Regulatory and Maintenance XT85 User Manual This equipment has been tested and found to comply with the limits for a Class B digital device, pursuant to Part 15 of the FCC Rules. These limits are designed to provide reasonable protection against harmful interference in a residential installation. This equipment generates, uses and can radiate radio frequency energy and, if not installed and used in accordance with the instructions, may cause harmful interference to radio communications. However, there is no guarantee that interference will not occur in a particular installation. If this equipment does cause harmful interference to radio or television reception, which can be determined by turning the equipment off and on, the user is encouraged to try to correct the interference by one or more of the following measures: • Reorient or relocate the receiving antenna. • Increase the separation between the equipment and receiver. • Connect the equipment into an outlet on a circuit different from that to which the receiver is connected. • Consult the dealer or an experienced radio/TV technician for help. If necessary, the user should consult the dealer or an experienced radio/television technician for additional suggestions. The user may find the following booklet helpful: “Something about Interference.” This is available at FCC local regional offices. Our company is not responsible for any radio or television interference caused by unauthorized modifications of this equipment or the substitution or attachment of connective cables and equipment other than those specified by our company. The correction is the responsibility of the user. Use only shielded data cables with this system. This device and its antenna must not be co-located or operating in conjunction with any other antenna or transmitter. To maintain compliance with the FCC RF exposure guidelines for body-worn operation, do not use accessories that contain metallic components other than specified by the manufacturer. This Class B digital apparatus complies with the Canadian ICES-003. Cet appareil numerique de la Class B est conforme a la norm NMB-003 du Canada. Operation is subject to the following two conditions: (1) this device may not cause interference, and (2) this device must accept any interference, including interference that may cause undesired operation of the device. L’utilisation de ce dispositif est autorisée seulement aux deux conditions suivantes : (1) il ne doit pas produire de brouillage, et (2) l’utilisateur du dispositif doit être prêt à accepter tout brouillage radioélectrique reçu, même si ce brouillage est susceptible de compromettre le fonctionnement du dispositif. To prevent radio interference to the licensed service, this device is intended to be operated indoors and away from windows to provide maximum shielding. Equipment (or its transmit antenna) that is installed outdoors is subject to licensing. Hereby, Janam Technologies LLC declares that this product is in compliance with the essential requirements and other relevant provisions of Directive, 1999/5/EC. The equipment is intended for use throughout the European Community. Janam Technologies LLC 13-3 Regulatory and Maintenance XT85 User Manual Care and Cleaning of Terminals When needed, clean the image engine window and the LCD display with a clean, non-abrasive, lint-free cloth. The terminal can be cleaned with a damp cloth. Waste Electrical and Electronic Equipment Information This product has required the extraction and use of natural resources for its production. It may contain hazardous substances that could impact health and the environment, if not properly disposed. In order to avoid the dissemination of those substances in our environment and to diminish the pressure on the natural resources, we encourage you to use the appropriate take-back systems for product disposal. Those systems will reuse or recycle most of the materials of the product in a sound way. The crossed-out wheeled bin symbol informs you that the product should not be disposed of along with municipal waste and indicates that you should use the appropriate separate take-back systems for product disposal. If you need more information on the collection, reuse and recycling systems, please contact your local region waste administration. You may also contact your supplier for more information on the environmental performances of this product. Battery Warning CAUTION: RISK OF EXPLOSION IF BATTERY IS REPLACED BY AN INCORRECT TYPE. DISPOSE OF USED BATTERIES ACCORDING TO THE INSTRUCTIONS. Battery Safety Guidelines Use only Janam batteries and recharge batteries using only Janam approved charging accessories. Observe the following guidelines for safe use of Li-Ion batteries: Do not expose the battery to excessive heat or cold. Do not short-circuit. It may explode. To avoid risk of fire, burn or damage to your battery, do not allow a metal object to touch battery contacts. Do not disassemble the battery. There are no user serviceable parts inside. If battery leakage is observed, avoid any contact with affected area and properly dispose of the battery. If you come in contact with battery leakage, rinse exposed area with soap and water. If it contacts the eye, flush the eye with water for 15 minutes and seek medical attention. 6. When discarding a battery, contact your local waste disposal provider to understand local restrictions for disposal or recycling of batteries. Do not discard into a fire. 7. When charging the battery, the ambient temperature should be between 0°C - 40°C. 1. 2. 3. 4. 5. Battery Charger Safety Guidelines 1. Do not use the equipment in or near areas in which sparks are likely or possible. 2. Do not let equipment’s metal contacts and electrical sockets come in contact with metal objects. 3. For indoor use only. Do not expose the charging equipment to rain or any liquids. 4. Do not use or store the charging equipment in direct sunlight or in areas that are prone to get hot such as in a parked vehicle, near a heat duct or close to other heat sources. 5. Keep equipment’s metal contacts and electrical sockets free from debris that could obstruct charging or could cause a short circuit. Janam Technologies LLC 13-4