1
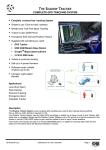
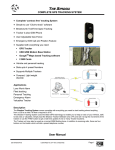
HANOVER
DISPLAYS LIMITED
Keylo Operating
Manual
Hanover Displays Ltd,
Unit 24, Cliffe Industrial Estate, Lewes, East Sussex, BN8 6JL.
Tel: +44 (0) 1273 477528 Fax: +44 (0) 1273 407766
0020/54/0039/F
GUIDE TO KEYLO
PRELIMINARY 24 June 2004
Updated – 21 September 2005
Pg 9- IMPORTANT: Ensure the controller is powered up before
inserting the Keylo.
© COPYRIGHT HANOVER DISPLAYS LTD 2005
The copyright of this document is vested in Hanover Displays Ltd and the
document is issued in confidence for the purpose only for which it is
supplied. It must not be reproduced in whole or in part or used for
tendering or manufacturing purposes except under an agreement or with the consent in
writing of Hanover Displays Ltd and then only on the condition that this notice is included
in any such reproduction.
All trademarks are recognised.
Page 2 of 19
Contents
Introduction ....................................................................... 4
Operating Conditions ........................................................ 4
Supported Features .......................................................... 5
Compatible Sign Controllers ............................................. 5
Non-Compatible Sign Controllers...................................... 5
Installation of Key-lo Base Station onto PC ...................... 6
Transferring destination list to Keylo ................................. 7
Connecting to a Sign Controller ........................................ 9
Keylo LED flashing – Data Transfer................................ 11
Keylo LED flashing – Errors ............................................ 12
Troubleshooting – Plugging into PC................................ 16
Troubleshooting – Plugging into Controller ..................... 18
Page 3 of 19
Introduction
The Keylo has been developed to make the process of transferring destination
lists and firmware upgrades to DERIC+, ERIC+ and ERIC++ vehicle based
Sign Controllers more convenient.
Previously, an ERIC or DERIC, configured as a Data Loader, was used to
transfer the data from the PC to the Sign Controller. The Keylo offers the
additional advantages that it is small, portable, and robust and fits easily into
the user’s pocket. In addition no transfer cable is required.
In conjunction with its partner Base Station and the HELEN destination list
software, data can be quickly and easily loaded into the Keylo. The Keylo
features a 4 MB memory capacity.
The Keylo can then be taken to the desired sign controller(s), once plugged in
the transfer of data to the Sign Controller is handled automatically.
Operating Conditions
PC Hardware
The Keylo is designed to work with IBM-PC compatible computers.
A USB port (either USB 1.1 or USB 2.0) must be present on the computer.
Note: If you are using a USB hub it must be a self powered type.
PC Software
The PC must be running one of the following versions of the Windows
operating system:
English\Arabic Windows XP
Windows 2000
English\Arabic Windows 98SE
(Note that Windows 95 is not supported.)
HELEN software version 2.0.L or later must be installed. Please contact
Hanover Displays if you do not already have the correct version of HELEN.
Page 4 of 19
Sign Controller Configuration
In order for the Keylo to work correctly, the ERIC+ or DERIC+ controller must
have two parameters within the “system” section set to the correct values
shown below. Note that The Sign Controller is usually shipped with these
settings already set to these values.
Please consult the DERIC+ or ERIC+ manual if you require further information
on how to change these system settings.
•
•
The Auto load transfer Speed (AS) must be set to 104167.
The Auto load transfer Format (AF) must be set to BIN.
Supported Features
•
•
•
Timed Updates
Container files and profiling using the profile (PF) parameter in the Sign
Controller
Firmware upgrades to the Sign Controller.
Compatible Sign Controllers
The Keylo will operate with all versions of the ERIC++ controllers and DERIC+
V3_0b or later and ERIC+ V3_0A or later.
If controller firmware upgrades are necessary then some older versions of
ERIC+ and DERIC+ may require a newer firmware chip to be fitted internally
before firmware upgrades can be carried out via connection to their front
panel 9way D-type connector, firmware downloading via the front panel will
then be possible.
Non-Compatible Sign Controllers
Older ERIC and DERIC controllers will not work with the Keylo since their
hardware is incompatible with the Keylo system.
The Keylo is designed to work only with Hanover Displays’ Sign Controllers.
Page 5 of 19
Installation of Key-lo Base Station onto PC
Ensure that the HELEN Software V2.0L or later is already installed on the PC.
Refer to the HELEN User Manual for installation information.
This User Manual assumes that the user already has some familiarity with the
HELEN software and the windows user interface.
1. Plug the USB cable into any one of the USB ports on the PC, and then
into the socket on the rear of the Keylo Base Station. Plug the Keylo
into the Base Station.
2. Windows will detect the connected Base station and will then display
the Add/Found New Hardware Wizard. The drivers are located on the
Hanover Resource CD which should now be inserted into your CDROM drive.
3. Select the ‘Search for a suitable driver or Install the software
automatically (Recommended)’ option and click Next. If windows asks
you where to search for the drivers, check the CD-ROM tick box only.
4. Windows will now search for the driver. When found windows may
inform you that it has found them and prompt you to click on the next
button. At the following window click the finish button.
5. If you are using Windows XP windows may inform you that the Keylo
Base station drivers “have not passed Windows logo testing…” Click on
the Continue Anyway button. The following window will inform you that
“The wizard has finished installing the software” Click on finish.
The Base Station has now been correctly installed.
The Base Station may be left permanently plugged into the PC.
Note: It is possible to have more than 1 keylo base station connected to a
single PC; however the installation procedure above must be repeated for
each base station. In this scenario and when using the send output file
function of HELEN, each base station will have a unique identifier within the
ports drop down list e.g. KEYLO 1, KEYLO 2 etc.
If you are using a laptop with battery power only, you may wish to unplug the
Base Station when it is not in use to conserve battery power. Close the SEND
OUTPUT FILE dialog window first, before unplugging the Base Station.
Page 6 of 19
Transferring destination list to Keylo
To transfer data to the Keylo, it must be programmed using the HELEN
software, via the Keylo Base Station. This is plugged into any one of the USB
ports on the PC.
1. Start the HELEN program and load the Destination List you wish to
transfer.
2. Plug the Base Station into the USB port on your PC, if it is not already
connected. The Orange LED on the Base Station will light to indicate
the base station is powered up.
3. Plug the Keylo fully into the Base Station. The Keylo LED will not light
at this stage.
4. In HELEN, Select FILE > SEND OUTPUT FILE. You will see the
windows shown below. If this option is disabled then first select FILE>
SAVE OUTPUT FILE or load another Destination List. See the HELEN
User Manual for further information.
5. In the “Port” drop down list box on the window shown below, select the
USB port that the Keylo base station is connected to, in this case
KEYLO 1. Once selected the message in the bottom left hand corner of
the window will change to that shown in the example below.
6. On first connection the base station may take approximately 10
seconds before this connection message is displayed, thereafter
connection time is reduced to approximately 3-5 seconds
At this stage the Keylo LED should be lit.
Note: If you connect the Base Station to the PC after Send Output File
has been selected in HELEN then it will not be detected and you will be
unable to select the “KEYLO” option from the “Port” drop down list box.
Page 7 of 19
7. Wait for the HELEN software to detect the Keylo. When this has
occurred the message at the bottom left of the dialogue box will change
to ‘KEYLO x.xx is ready for loading’ as shown below.
8. Click on the OK button within 60 seconds to start the transfer.
9. The Keylo LED will begin a sequence of flashes, when the Keylo LED
eventually becomes a steady green colour, the transfer has completed
successfully. You may remove the Keylo from its base station and use
it to transfer the Destination list to the desired Sign Controller(s).
10. If the Keylo LED does not eventually change to a steady green colour,
but continues to flash then an error has occurred. The number of
flashes defines the type of error. See section Keylo LED flashing –
Errors for further information.
*NB. The Key-lo must be disconnected from the base station before
another data file can be downloaded.
Once the download is successful, to close the above window you can
either click on Cancel or X. Do not click OK.
Page 8 of 19
Connecting to a Sign Controller
If there is a valid file stored in the Keylo the file transfer will begin
automatically as soon as it is plugged into the sign controller.
IMPORTANT: Ensure the controller is powered before inserting the Keylo.
1. Plug the Keylo into the 9 Way D connector on the front panel of the
Sign Controller
The Keylo LED will flash green briefly and then become a steady red colour.
Once the communication starts, the Keylo LED will begin a sequence of
flashes
The screen of the Sign Controller will indicate that a data transfer is taking
place. The following screens will appear on the Sign Controller:
Sign Controller
2. Once the LED on the Keylo stays green, the Keylo has successfully
completed communication with sign controller and should be removed.
3. The sign controller will reset and depending on the size of the file
transferred, the Sign Controller may take some time to process the file
it has received. Wait until the controller has finished processing the file,
to ensure that the transfer was successful.
Depending on the controller type & software, if the file transfer was successful
the controller will either display “idle” or revert to the last selected destination.
Page 9 of 19
(If the previous & newly downloaded database both contain the same
destination number).
Sign Controller
Sign Controller
If the file transfer was not successful the follow screen will appear:
Sign Controller
If this occurs then either the file transfer did not complete successfully or the
file transferred was not suitable for the Sign Controller. The Keylo LED should
also flash to indicate an error has occurred.
A download should be attempted again. If this fails then see sections Keylo
LED flashing - Errors & Troubleshooting.
Page 10 of 19
Keylo LED flashing – Data Transfer
Action
LED Status
HELEN - Keylo is plugged into the
Base station. Send Output File &
Keylo is selected….
LED flashes GREEN
briefly and then
steady RED.
DERIC+/ERIC+/++ - Keylo is
plugged into the front panel
connector.
(This is a test to show the
individual portion of the
keylo LED are working)
Communication with the Keylo
starts….
LED flashes GREEN.
File transfer is about to start…
LED flashes
ORANGE.
(If the keylo is being used in HELEN The OK
button must now be clicked within 60
seconds or the Keylo will time out)
File transfer in progress….
LED flashes
ORANGE quickly.
Checking checksum….
LED flashes
ORANGE slowly.
File Transfer completed
successfully!
LED steady GREEN.
Keylo may now be removed from
the Base Station or Controller.
Error occurred during transfer.
LED flashes GREEN
once followed by a
number of RED
flashes.
(See section: Keylo LED
flashing – Errors for more
information)
Page 11 of 19
Keylo LED flashing – Errors
Errors in downloading are indicated by the LED flashing at approximately two
second intervals. The LED will first flash green and then flash red a number
of times. This flashing sequence will be repeated until the Keylo is removed
from the base station or sign controller.
The number of red LED flashes indicates the error number and the table
below can be used to determine the problem.
If the error occurs while the Keylo is plugged into a Sign Controller, the Sign
Controller may also give an error code, on its LCD screen, which can also
help to further pin-point the cause of the error.
Number
of red
flashes
1
2
3
4
5
ERROR:
Error / Description
Invalid file or Profile
number
Communication Error
Protocol Error
Communication
Timeout
Undefined Error
1 - Invalid File or Profile Error
DESCRIPTION:
No file is loaded into the Keylo or the file is invalid
-or- the profile requested by the controller doesn’t exist in the Keylo
-or- the file in the Keylo is incompatible with the Sign Controller
-or- the file from the PC has not been successfully stored in the Keylo
-or- if you are using a DERIC+ controller the file stored in the Keylo is too
large and will not fit into the available memory of the DERIC+
SOLUTION:
•
•
•
Transfer a valid file from the PC to the Keylo.
If the file is a container file ensure that the profile number specified in
the System menu of the sign Controller matches one of the profiles
stored in the container file.
Reduce the size of your destination list so it will fit into the controller’s
memory.
Page 12 of 19
ERROR:
2 - Communication Error
DESCRIPTION:
An error has occurred during the communication process.
SOLUTION:
If this occurs when the Keylo is plugged into the Sign Controller, confirm
That the Sign Controller is configured as outlined in Operating Conditions.
Restart the communication by unplugging the Keylo, waiting for the Sign
Controller to reset and then plugging the Keylo back in.
If this occurs when the Keylo is plugged into the Base Station, close the
HELEN send output file window by clicking CANCEL. Then re-select FILE >
SEND OUTPUT FILE in HELEN.
If this doesn’t resolve the problem, close the download window by clicking
CANCEL, unplug the USB cable from the Base Station, wait a few seconds,
plug it in again, and re-select FILE > SEND OUTPUT FILE in HELEN as per
usual.
ERROR:
3 – Protocol Error
DESCRIPTION:
Information exchanged during the transfer indicates an error has occurred.
DETAILS and SOLUTION:
If this occurs when the Keylo is plugged into the Sign Controller, it may be due
to one of the following reasons:
•
The file to be transferred is larger than the available memory in the
Sign Controller (check that the size of the file you wish to transfer
does not exceed the available memory in the Sign Controller).
•
The input voltage from the vehicle to the Sign Controller is too low.
Verify that the voltage being supplied to the sign controller is at
least 19 Volts.
If this occurs when the Keylo is plugged into the PC, it may be because the
file to be transferred is bigger than the available memory in the Keylo, the
HELEN software will also warn you if this occurs.
The error occurred because of a glitch during communication. Retry the data
transfer again.
Page 13 of 19
ERROR:
4 – Communication Timeout
DESCRIPTION:
Either the PC or Sign Controller has taken too long to respond. The most
common cause is during transfer of data from HELEN to the Keylo.
When send output file is selected in HELEN and the user has selected the
appropriate Keylo from the ports drop down list, HELEN will then display the
message “KEYLO x.xx is ready for loading’
The USER must then click the OK button within 60 second of this message
being displayed. If the OK button is not clicked within this time, a timeout will
occur.
It is possible that the baud rates of the Keylo and Sign Controller don’t match
and therefore the two devices are unable to communicate. See Error 2 Communication Error.
The Keylo and PC or Sign Controller have gone ‘out of sync’ with one another
in their communication.
SOLUTION:
If this occurs when the Keylo is plugged into the Sign Controller, restart the
Communication by unplugging the Keylo, waiting for the Sign Controller to
Reset and then plugging the Keylo back in.
If this occurs when the Keylo is plugged into the Base Station, close the send
output file window by clicking CANCEL, and re-select FILE > SEND OUTPUT
FILE in HELEN.
Page 14 of 19
ERROR:
5 - Undefined Error
DESCRIPTION:
An undefined error has disrupted the communication.
SOLUTION:
Re-start the data transfer in the prescribed manner. If this error re-occurs,
while plugged into a Sign Controller, a new file may have to be loaded into the
Keylo from the PC.
If the problem persists after trying these solutions, refer to Troubleshooting
section.
Page 15 of 19
Troubleshooting – Plugging into PC
PROBLEM
DESCRIPTION
Keylo Base Station
LED does not light
up when plugged
into PC.
The Base Station LED should
always be lit when correctly
plugged into a PC that is
running and not in a Power
Down mode e.g. SLEEP,
STANDBY or HIBERNATE.
SOLUTION
Check that the PC is on.
Check that the PC is not in a
SLEEP or HIBERNATE state.
Check the USB cable is
correctly plugged into a USB
port on the PC and the Keylo
base station. Unplug and plug
USB cable back in at both
ends.
Remove the Keylo and see if
problem persists. If so the
Keylo may be damaged and
be the cause of the problem
In the Helen send
output file window
there is no USB
option listed.
The Base Station drivers
must be installed and the
base station must be plugged
into the PC before selecting
FILE > SEND OUTPUT FILE
in HELEN.
Plug the Base Station into the
PC, close the send output file
window and re-open it by
selecting FILE > SEND
OUTPUT FILE.
Check the version of HELEN
you are using is greater than
version 2.0.L. If it is an earlier
version then install the
required version.
The USB driver was not
installed correctly. Un-plug
the Base Station from the PC,
un-install the USB driver
using the Windows remove
hardware option from the
control panel.
Page 16 of 19
Then plug the Base Station in
again, you should be
prompted to install the base
station drivers as detailed in
chapter 3 of this manual.
The message
‘ERIC / DERIC
detected – waiting
for a response…’
does not appear in
the HELEN send
output file window.
The message
‘KEYLO x.xx is
ready for loading’
appears in the
window, but the
Keylo LED is not
flashing orange.
Only 1 download can be
attempted (and/or completed)
for each time the Keylo is
plugged into the Base Station.
If the Keylo’s previous
download was un-successful,
the Keylo must be un-plugged
from the Base Station and
then plugged in again, to
reset it.
The baud rates on the Keylo
and PC don’t match, and
therefore the two devices are
unable to communicate.
The Keylo’s default baud rate
has been changed. Contact
Hanover Displays to find out
how to reset the Keylo back
to its default settings.
The user has not clicked the
OK button of the HELEN send
output file dialogue within 60
seconds and this has caused
the Keylo to time out.
Un-plug the Keylo from the
Base Station. Cancel the
send output file dialogue in
HELEN.
Plug the Keylo back into the
base station and then select
FILE>SEND OUTPUT FILE in
HELEN.
Page 17 of 19
Troubleshooting – Plugging into Controller
PROBLEM
The Sign Controller
constantly displays
‘POLLING’.
DESCRIPTION
SOLUTION
The baud rates on the
Keylo and Sign Controller
don’t match meaning the
two devices are unable to
establish communication
with each other.
The standard baud rate of the
Keylo is 104167. Confirm that
the Sign Controller is also
configured to the same baud
rate as outlined in Chapter 2,
Operating Conditions
The Keylo’s default baud rate
has been changed. Contact
Hanover Displays to find out
how to reset the Keylo to its
default settings.
The Sign Controller
displays ‘LOAD
ABORTED’ with the
number 1005
If the Keylo is also
showing an error number
1. then no valid file exists
in the Keylo
Download a valid file to the
Keylo from HELEN. Retry and
confirm that the download
was successful.
The data held by the
Keylo is too large for the
sign controller’s memory.
Decrease the size of the
destination list or increase the
memory in the sign controller.
The input power from the
vehicle to the Sign
Controller is too low.
See ERROR 3 in Chapter
Error! Reference source not
found. Error! Reference
source not found.
Flash memory chips in the
Sign Controller may be
damaged.
The flash chips in the Sign
Controller may be damaged.
Please contact Hanover
Displays.
Page 18 of 19
The Sign Controller
displays ‘LOAD
ABORTED’ with the
number 1222
The Profile Number
selected in the Sign
Controller doesn’t match
any of the profile container
files transferred to the
Keylo
Change the Sign Controller’s
Profile Number.
Load a new Destination List
into the Keylo without profiles
(i.e. not a container file) or
ensure the correct container
file is present.
The error number displayed
by the controller may also be
number 1005.
The Sign Controller
displays ‘LOAD
ABORTED’ with the
number 12F2 or 12F4
The Sign Controller has
encountered a
Communication Error.
Unplug the Keylo, wait for the
Sign Controller to restart, and
plug the Keylo in again.
The (error) number displayed
by the controller may also be
number 1005.
The Sign Controller
displays ‘LOAD
ABORTED’ with the
number 1209
The data held by the
Keylo is too large for the
sign controller’s memory.
Decrease the size of the
destination list or increase the
memory in the sign controller.
Page 19 of 19