1
Bluemove User Manual
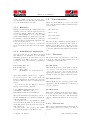
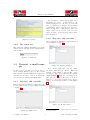
Figure 1.1: Menu
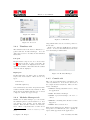
Figure 1.3: Timelines
Figure 1.2: Tool bar
1.2.3
range which will be used to send the position to
the module.
Please notice that the YaMoR servo name is
”Servo1”. You must use this name for the actuator when using a YaMoR unit.
Timelines tab
The timelines tab is the heart of Bluemove together with the modules manager. You can
draw trajectories for modules in the timelines
listed there.
Left part
Each module is composed of one or more actuators2 . Sensors can also be part of a module. At
the moment, sensors are displayed but no management is available. The name and the address
of the module is displayed.
Right part
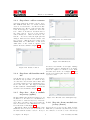
Figure 1.4: Modules Manager
In this right part, you will be able to draw the
trajectories of an actuator. There are two key
1.2.5
types:
Console tab
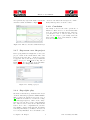
The console tab displays the log messages generated by Bluemove. You can set the level of
the output and the refresh rate. There are five
levels of messages:
• Linear key
• Hermite spline key
You can mix these two kind of keys in the same
actuator timeline without any restriction. The
interpolation algorithm will take care of curves
composed of these two types of keys.
• DEBUG: messages useful in order to debug
the application
1.2.4
• WARN: a problem leading to an error occurred
• INFO: information messages
Modules Manager tab
Within the modules manager you can declare
• ERROR: something that should not have
the different parts of your modular robot. You
happened
can describe every module, set its name and
• FATAL: unrecoverable error
address. Each module can have several actuators. These components have a name and a Each level is displayed in a distinct colour with
2 A YaMoR module contains one actuator (a ”S-71”
its specific icon. This allows you to quickly diservo)
agnose what appended in the application.
C. Jaquier - K. Drapel
4
v1.0 - February 14, 2005