1
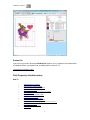
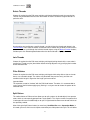
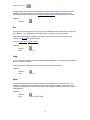
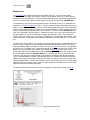
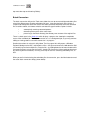
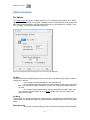
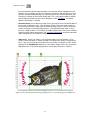
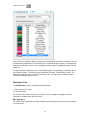
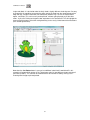
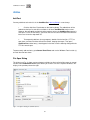
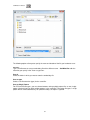
SewWhat-Pro Manual
Resize Pattern
Use this Tools menu item to accurately resize the active (selected) pattern. You may enter the new
pattern dimensions in either mm or in units, depending on the units settings in the Options menu.
To avoid distorting the image, check the Lock Aspect Ratio box. If, after resizing, you want the stitch
density to be automatically adjusted, check the Auto-adjust stitch density box.
You can also graphically resize (and reposition) the selected pattern with the mouse. Turning on
grid lines can be helpful during such operations. The first step is to select the pattern by clicking
anywhere in the pattern with the left mouse button. A resizing rectangle will appear around the
pattern, and the cursor will change to a four-headed arrow. Resize handles (solid squares) will
appear at the corners and midpoints of the resize rectangle.
To resize the pattern:
1.
Position the mouse at one of the resize handles of the selection rectangle. The
cursor changes to a diagonal two-headed resizing arrow.
2.
Move one of the corners (or sides) with the mouse, dragging the pattern in or out to
its final desired size. Use the corners to preserve the pattern aspect ratio (relative height to
width ratio). Use the side buttons to stretch or shrink the pattern either horizontally or
vertically.
3.
To accurately preserve the aspect ratio (relative width-to-height) during resizing,
hold down the Ctrl key while dragging the resize handle.
To move the pattern within the hoop:
Hold down the left mouse button and drag it to a new position or use the keypad arrow
keys.
Observations:
Both these operations affect the size and position of the pattern as it is stitched out. This is
in contrast to zooming , which simply changes the apparent size of the pattern on the
screen without affecting the actual stitch-out size.
Resizing a design with the mouse does not automatically preserve the stitch density of the
design.
Hint: holding down the Ctrl-key when resizing with the mouse will preserve the aspect ratio of the
design. For size changes of more than 10%, it is therefore advisable to either resize from this
toolbar button or to select the adjust density toolbar item after graphically resizing.
Shortcuts
Toolbar:
Write D1 Floppy
This item allows you to create a Designer 1 (D1) compatible floppy diskette, for use with the
Husqvarna-Viking Designer 1© embroidery machine. The files can also be saved in a compressed
26