1
GE Healthcare
DYEnamic ET Terminator
Cycle Sequencing Kit
Product Booklet
Codes:
US81050
US81060
US81070
Page finder
1. Legal
3
2. Handling
2.1. Safety warnings and precautions
2.2. Storage
2.3. Quality control
6
6
6
6
3. Components of the kit
7
4. Materials not supplied
8
5. Introduction
9
6. Protocols
6.1. Preliminary preperation and general handling instructions
6.2. Preparation of sequencing reactions
6.3. Resuspension of samples and electrophoresis
11
11
12
15
7. Appendixes
7.1. Setting up the instrument to run and analyze DYEnamic
ET Terminators
7.2. Template DNA–general considerations
7.3. Primers–general considerations
7.4. Dilution and reduced reaction volumes
7.5. Cycling conditions
7.6. Optimal solutions for sample resuspension and injection
for the ABI 3730, ABI 3730XL, ABI 3700 and ABI 3100
7.7. Sequencing BACs and other large templates
7.8. Considerations for post-reaction cleanup
19
19
46
49
50
52
54
54
56
8. Troubleshooting (all instruments)
59
9. References
64
2
1. Legal
GE and GE monogram are trademarks of General Electric Company.
DYEnamic, MegaBACE, Sequenase, AutoSeq, Sephadex and Thermo
Sequenase are trademarks of GE Healthcare companies.
NOTICE TO PURCHASER; LIMITED LICENSE
This kit is sold pursuant to Authorization from PE Applied Biosystems
under one or more of the following US Patent numbers: 4,849,513;
5,015,733; 5,118,800; 5,118,802; 5,151,507; 5,171,534; 5,332,666;
5,242,796; 5,306,618; 5,366,860; 4,855,225 and corresponding
foreign patents and patent applications. The purchase of this kit
includes limited non-transferable rights (without the right to resell,
repackage, or further sublicense) under such patent rights to use
this kit for DNA sequencing or fragment analysis, solely when used
in conjunction with an automated instrument for DNA sequencing
or fragment analysis which has been authorized for such use by
PE Applied Biosystems, or for manual sequencing. Purchase of this
product does not itself convey to the purchaser a complete license
or right to perform automated DNA sequence and fragment analysis
under the subject patents. No other license is hereby granted for use
of this kit in any other automated sequence analysis instrument. The
rights granted hereunder are solely for research and other uses that
are not unlawful. No other license is granted expressly, impliedly, or
by estoppel.
Further information on purchasing licenses to perform DNA
sequence and fragment analysis may be obtained by contacting the
Director of Licensing at PE Applied Biosystems, 850 Lincoln Centre
Drive, Foster City, California 94404.
GE HEALTHCARE IS LICENSED AS A VENDOR FOR AUTHORIZED
SEQUENCING AND FRAGMENT ANALYSIS INSTRUMENTS.
3
NOTICE TO PURCHASER ABOUT LIMITED LICENSE
The purchase of this kit (reagent) includes a limited non-exclusive
sublicense under certain patents* to use the kit (reagent) to
perform one or more patented DNA sequencing methods in those
patents solely for use with Thermo Sequenase II DNA polymerase
purchased from GE Healthcare for research activities. No other
license is granted expressly, impliedly or by estoppel. For information
concerning availability of additional licenses to practice the patented
methodologies, contact GE Healthcare Bio-Sciences Corp., Director,
Business Development, 800 Centennial Avenue, PO Box 1327,
Piscataway, NJ 08855 USA.
* US Patent numbers 4,962,020, 5,173,411, 5,409,811, 5,498,523,
5,614,365 and 5,674,716. Patents pending
†This product is sold under licensing arrangements with Roche
Molecular Systems, F Hoffmann-La Roche Ltd and the Perkin-Elmer
Corporation. Purchase of this product is accompanied by a limited
license to use it in the Polymerase Chain Reaction (PCR) process
for research in conjunction with a thermal cycler whose use in the
automated performance of the PCR process is covered by the upfront license fee, either by payment to Perkin-Elmer or as purchased,
i.e. an authorized thermal cycler.
Energy Transfer dyes and primers—US Patent numbers: 5,654,419,
5,688,648, and 5,707,804.
Thermo Sequenase is a heat-stable DNA polymerase producing even
band intensities in DNA sequencing.
ABI, Prism, Hi-Di, and POP are trademarks of Applied Biosystems, Inc.,
a Division of the Perkin-Elmer Corporation.
Windows NT is a trademark of Microsoft Corp.
© 2006 General Electric Company – All rights reserved.
4
GE Healthcare reserves the right, subject to any regulatory and
contractual approval, if required, to make changes in specification
and features shown herein, or discontinue the product described at
any time without notice or obligation.
Contact your GE Healthcare representative for the most current
information and a copy of the terms and conditions.
http//www.gehealthcare.com/lifesciences
GE Healthcare UK Limited.
Amersham Place, Little Chalfont,
Buckinghamshire, HP7 9NA UK
5
2. Handling
2.1. Safety warnings
and precautions
Warning: This kit contains
formamide. The protocol also
requires the use of ethanol,
a flammable liquid. Gel
reagents may contain
acrylamide, a neurotoxin and
suspected carcinogen. Please
follow the manufacturer’s
Material Safety Data Sheet
regarding safe handling and
use of these materials.
Warning: For research use
only. Not recommended
or intended for diagnosis
of disease in humans or
animals. Do not use internally
or externally in humans or
animals.
All chemicals should be
considered as potentially
hazardous. We therefore
recommend that this product is
handled only by those persons
who have been trained in
laboratory techniques and
that it is used in accordance
with the principles of good
laboratory practice. Wear
suitable protective clothing
such as laboratory overalls,
safety glasses and gloves.
Care should be taken to avoid
contact with skin or eyes. In
the case of contact with skin
or eyes wash immediately
with water. See material safety
data sheet(s) and/or safety
statement(s) for specific advice.
2.2. Storage
Store at -15°C to -30°C.
2.3. Quality control
All batches of DYEnamic ET
Terminator Cycle Sequencing
Kit are assayed according to
the recommended starting
point protocol described in
this booklet. Reactions are
analyzed on ABI™ Prism™
377 fluorescent sequencing
instrument. Specifications
for release are based on
assessment of sequence by
length of read (> 500 bases),
accuracy, and signal quality.
6
3. Components of the kit
Solutions included in DYEnamic™ ET Terminator Cycle Sequencing
Kit have been carefully formulated for optimal sequencing results.
Each reagent has been tested extensively and its concentration
adjusted to meet high standards set by GE Healthcare. It is strongly
recommended to use all reagents supplied in the kit exactly as
described in this protocol.
The following components are included in the kits:
Kit
components
US81050
(100 rxns)
US81060
(1000 rxns)
US81070
(5000 rxns)
Sequencing
reagent premix
1 x 800 µl
1 x 8 ml
1 x 40 ml
Control
M13mp18
DNA (0.2 µg/µl)
1 x 50 µl
1 x 50 µl
Not included
Control primer
(Universal
cycle primer)
(0.5 pmol/µl)
1 x 100 µl
1 x 100 µl
Not included
Sodium
acetate/EDTA
buffer
1 x 400 µl
1 x 4 ml
1 x 20 ml
Formamide
loading dye
1 x 1200 µl
5 x 1200 µl
Not included
Store these kits and their components at -15°C to -30°C (not in a
frost-free freezer). When the reagent is not in a freezer, keep it on ice
prior to use. For convenience, the kit can be stored at 2–4°C for up to
three months with no loss of performance; however, avoid this if the
reagents will not be consumed completely within three months.
7
4. Materials not supplied
Reagents
• Water—Use only deionized, distilled water for the sequencing
reactions.
• Sequencing primers—Use primers appropriate for the template
being sequenced. For most applications, 5 pmol of primer is
sufficient. Dissolve each primer in water and determine its
optical density at 260 nm (OD260). For primers containing N bases
(measured in a cuvette with a 1 cm path length), the approximate
concentration (pmol/µl) is given by the formula:
Concentration (pmol/µl) = OD260/ (0.01 x N) where N is the
number of bases.
• Ethanol (95% and 70%)—For post-reaction cleanup.
Note: Do not use denatured alcohol.
• Gel reagents—Prepare sequencing gels according to instructions
provided by the manufacturer of the sequencing instrument. Use
electrophoresisgrade reagents.
Equipment
• Liquid handling supplies—Vials, pipettes, microcentrifuge, and
vacuum centrifuge. Perform all sequencing reactions in plastic
microcentrifuge tubes (typically 0.5 ml), or in 96-well or 384-well
plates suitable for thermal cycling.
• Instrument—This kit is designed for use with the ABI 373 DNA
Sequencer and the ABI Prism 377, ABI Prism 310, ABI 3100, ABI
Prism 3700 and ABI 3730, ABI 3730XL DNA Analyzer instruments.
• Thermal cycler—For thermally cycled incubations between 50°C
and 95°C (1–100 cycles).
8
5. Introduction
DYEnamic ET Terminator Cycle Sequencing Kit is designed for
sensitive and robust sequencing using novel energy transfer dyelabelled terminators (1) and Thermo Sequenase™ II DNA polymerase.
For sequencing with this product, a sequencing reagent premix
is combined with template DNA and primer and thermally cycled.
The reaction products are then precipitated with ethanol to remove
unincorporated dye-labelled terminators. Samples are finally
dissolved in an appropriate loading solution for separation and
detection using the ABI 373, ABI 377, ABI 310, ABI 3100, ABI 3700 or
the ABI 3730, ABI 3730XL sequencing instruments.
Dye terminator-based sequencing
DYEnamic ET Terminator Cycle Sequencing Kits are based on a
modification of traditional dideoxynucleotide chain termination
chemistry (2) in which terminators are labelled with fluorescent dyes
for automated detection (3, 4). In this case, however, each of the four
dideoxy terminators—ddG, ddA, ddT and ddC—is labelled with two
dyes—fluorescein and one of four different rhodamine dyes—rather
than a single dye. Fluorescein has a large extinction coefficient
at the wavelength (488 nm) of the argon ion laser used in the
sequencing instrument. Acting as the donor dye, fluorescein absorbs
energy from incident laser light and transfers it to the rhodamine
acceptor dye on the same terminator molecule. Each acceptor dye
then emits light at its characteristic wavelength for detection that
identifies the nucleotide that terminates extension of the DNA chain.
This energy transfer format (1) is more efficient than direct excitation
of the acceptor dye by the laser, and produces a sequencing method
that is very sensitive and robust.
The acceptor dyes used in the kits are the same standard rhodamine
dyes—rhodamine 110, rhodamine-6-G, tetramethyl rhodamine, and
rhodamine X—used in earlier Taq DNA polymerase dye terminator
9
methodologies, so the DYEnamic ET reaction products can be
detected on any instrument that can monitor the original Taq dye
terminator chemistry.
The kit also features dITP, as well as Thermo Sequenase II DNA
polymerase, a thermostable enzyme that efficiently incorporates
dITP. By replacing dGTP with dITP, even very strong compression
artifacts common to high GC-content DNA are resolved for more
accurate data interpretation.
Thermo Sequenase II DNA polymerase
Thermo Sequenase II DNA polymerase is a thermostable DNA
polymerase engineered by GE Healthcare specifically for cycle
sequencing. The enzyme readily accepts dideoxynucleotide
terminators (5) and generates bands of uniform intensity, much like
T7 Sequenase™ DNA polymerase (6, 7). Its tolerance to high salt
conditions, efficient utilization of dITP, high processivity, and excellent
performance on GC-rich templates make it an efficient and robust
sequencing enzyme.
Cycle sequencing
Thermostable DNA polymerases allow sequencing reactions to be
cycled through alternating periods of thermal denaturation, primer
annealing, and extension/termination, which increases the signal
levels generated from template DNA (8–13). This amplification
process employs a single primer so the amount of product increases
linearly with the number of cycles. By using a thermostable enzyme,
such as Thermo Sequenase II DNA polymerase, programmed cycling
can proceed without multiple additions of enzyme. A cycling protocol
is especially useful when the amount of template is limiting or the
sensitivity of the detection system is low.
10
6. Protocols
6.1. Preliminary preparation and general
handling instructions (Important)
Researchers who work with DYEnamic ET terminators for the first
time should carefully read Appendix 7.1: “Setting up the instrument
to run and analyze DYEnamic ET terminators” (page 19). A mobility
file must be installed and a color correction matrix must to be
created prior to their use on ABI sequencing instruments.
Thaw and maintain all kit reagents on ice prior to use. Whenever
possible, cap the tubes to minimize evaporation of the small
volumes of reagents used. Dispense reagents using disposable-tip
micropipettes, and exercise caution to avoid contamination of stock
solutions. Thoroughly mix reaction mixtures after each addition,
typically by “pumping” the solution two or three times with a
micropipettor without creating air bubbles. Centrifuge briefly tubes/
plates to collect the reaction mixtures at the bottoms of the vessel.
With care and experience, reactions can be completed in 15–20 min.
The protocol described below provides high-quality sequencing
results using the control DNA and primer provided in the kit.
However, regard this protocol only as a starting point. Optimization
of protocols might be necessary to obtain best sequencing results
for specific templates. For additional information on optimization
and some important precautions, please refer to Appendixes 7.2–7.7
and the troubleshooting section.
For general information concerning templates, primers, and cycling
conditions, see Appendixes 7.2–7.5 and 7.7.
11
6.2. Preparation of sequencing reactions
This section describes the procedure and important parameters for
performing the sequencing reaction. The protocols in this section
are the same for all current ABI and MegaBACE™ sequencing
instruments.
1. Assemble each sequencing reaction as follows:
Template DNA (0.1–0.2 pmol)
Primer (5 pmol)
Water
Sequencing reagent premix
__
__
__
8
µl
µl
µl
µl
Total volume
20 µl
Note: 0.1–0.2 pmol of DNA and 5 pmol of primer are recommended
for routine sequencing. The volumes of DNA and primer added
to each reaction will depend on their concentrations. Adjust the
amount of distilled water added so that the total volume of DNA,
primer, and water is 12 µl. When combined with 8 µl of sequencing
reagent premix, the total volume of the reaction mix should be 20 µl.
For additional information concerning the amount of template and
primer to use in the reaction, see Appendixes 7.2 and 7.3.
Note: The most consistent results are obtained with 8 µl of
sequencing reagent premix in a reaction volume of 20 µl. However,
some researchers might choose to economize by diluting the premix.
GE Healthcare provides DYEnamic ET Terminator Dilution Buffer
(US84002) for this purpose. Please see Appendix 7.4 for additional
information concerning the use of dilution buffer.
12
2. Assemble the control reaction exactly as follows:
M13mp18 Control template (200 ng)
Primer (2 pmol)
Sequencing reagent premix
Water
Total volume
1
4
8
7
µl
µl
µl
µl
20 µl
Note: The sole purpose of the control reaction is to confirm the
performance of the sequencing premix under specified and
tested conditions. The reaction should therefore be assembled
and performed exactly as described above. Customer data can
then be compared with GE Healthcare quality control data should
questionable performance of the sequencing
premix occur.
3. Mix the contents of each tube thoroughly by gentle pipetting. Cap
the tubes or seal the plates. Centrifuge briefly to bring contents to
the bottom of the tubes or wells.
4. Place the tubes or plate into the thermal cycler. Run the following
cycling program for 25 cycles:
95°C, 20 seconds
50°C, 15 seconds
60°C, 60 seconds
(Cycling is completed in approximatley 1 hour.)
Note: For additional information concerning cycling conditions, see
Appendix 7.5.
5. When cycling is complete, add 2 µl (1/10 volume) of sodium
acetate/EDTA buffer to each tube or well.
6. Add 80 µl of 95% ethanol to each reaction and mix well using a
vortex mixer.
Note: When working with 384-well plates, scientists at GE
Healthcare routinely use 30 µl of 95% ethanol. Please refer to
13
Appendix 7.8. for additional information regarding 384-well plates
and small volume reactions.
Note: Post-reaction cleanup is most easily and inexpensively
achieved by ethanol precipitation using the sodium acetate/EDTA
buffer provided with the kit. This buffer contains 1.5 M sodium
acetate (pH > 8.0) and 250 mM EDTA. EDTA dramatically reduces
the amount of unincorporated terminators that precipitate with the
DNA, virtually eliminating dye blobs that distort sequence data near
the primer and in adjacent lanes.
Note: Do not combine the sodium acetate/EDTA buffer and ethanol
prior to addition to the sequencing reaction. EDTA has very low
solubility in ethanol and will precipitate.
7. Centrifuge the tubes at room temperature in a microcentrifuge for
15 minutes at ~ 12 000 rpm. Centrifuge 96-well or 384-well plates
for at least 30 minutes at 2 500 x g or greater.
8. Remove the supernatant by aspiration from each microcentrifuge
tube. For plates, a brief inverted spin (< 1 minute at 300 x g) is
sufficient for supernatant removal. Remove as much liquid as
possible at this step to prevent dye blobs.
9. Wash the DNA pellets with 70% ethanol. Use as large a volume
of 70% ethanol as the tube or well can safely accommodate.
Centrifuge briefly.
Note: Scientists at GE Healthcare routinely use 250–500 µl for 0.5 ml
microcentrifuge tubes, 100 µl for 96-well plates, and 50 µl for 384well plates.
10. Remove the supernatants by aspiration or by an inverted spin.
Air-dry (preferably) or vacuum-dry (in a vacuum centrifuge) the
pellets for 2–5 minutes. Do not overdry.
14
6.3. Resuspension of samples and
electrophoresis
Protocols from this point on vary with the instrument being used. Be
sure to follow the specific recommendations described below for the
instrument that will be used to analyze the sequencing reactions.
General recommendations for resuspension of samples
a. The DNA pellet must be completely dissolved at this step for
optimal sequencing results. If a fixed-angle rotor was used
for centrifugation, the DNA pellet will be on the side of the
microcentrifuge tube. This material must be washed to the
bottom of the tube to ensure that the entire reaction product is
loaded onto the gel.
b. It is not necessary to heat samples prior to injection. In fact,
heating samples may cause excessive evaporation of the
resuspension buffer and speed the breakdown of the dyelabelled sequencing products.
c. Two buffers are recommended for resuspension of the samples
prior to electrophoresis. The pink formamide loading dye
(US79448) supplied with the kit is recommended only for use
on slab-gel instruments (ABI 373, ABI 377). MegaBACE loading
solution (US79916) is recommended for capillary instruments
(ABI 310, ABI 3100, ABI 3700, ABI 3730, ABI 3730XL).
If the same samples are to be analyzed on both slab-gel and
capillary instruments, dissolve the samples in a small volume
(4 µl) of MegaBACE loading solution. Remove enough volume of
the samples for slab-gel analysis, then add MegaBACE loading
solution (up to a final volume of 10 µl) to the remainder of the
sample and mix well prior to injection on the capillary instrument.
15
ABI 3730/3730XL
1. Dissolve each pellet in 10–20 µl of MegaBACE loading solution
and vortex vigorously for 10–20 seconds to ensure complete
resuspension. Centrifuge briefly to collect the sample at the
bottom of the tube/well.
2. Inject and electrophorese the samples according to the
instructions provided with the ABI 3730/3730XL instrument. Use
the appropriate run settings for DYEnamic ET terminators.
Note: For information on setting up the instrument to run and
analyze DYEnamic ET terminators, see Appendix 7.1.
Note: Recommended injection parameters for MegaBACE loading
solution with the control DNA is 1 kV for 20 seconds. Injection
time and voltage parameters may require some adjustment
for optimal results according to the instrument manufacturer’s
recommendations.
ABI 3700
1. Dissolve each pellet in 10–20 µl of MegaBACE loading solution
and vortex vigorously for 10–20 seconds to ensure complete
resuspension. Centrifuge briefly to collect the sample at the
bottom of the tube/well.
Note: For additional information on the use of MegaBACE loading
solution for samples analyzed on the ABI 3700, see Appendix 7.6.
2. Inject and electrophorese the samples according to the
instructions provided with the ABI 3700 instrument. Use the
appropriate run settings for DYEnamic ET terminators.
Note: For information on setting up the instrument to run and
analyze DYEnamic ET terminators, see Appendix 7.1.
Note: Recommended injection parameters for MegaBACE loading
solution with the control DNA is 1 kV for 30 seconds. Injection
time and voltage parameters may require some adjustment
16
for optimal results according to the instrument manufacturer’s
recommendations.
ABI 3100
1. Dissolve each pellet in 20–30 µl of MegaBACE loading solution
and vortex vigorously for 10–20 seconds to ensure complete
resuspension. Briefly centrifuge to collect the sample at the bottom
of the tube/well.
2. Inject and electrophorese the samples according to the
instructions provided with the ABI 3100 instrument. Use the
appropriate run settings for DYEnamic ET terminators.
Note: For information on setting up the instrument to run and
analyze DYEnamic ET terminators, see Appendix 7.1.
Note: Recommended injection parameters for MegaBACE loading
solution with the control DNA is 1.5 kV for 20 seconds. Injection
time and voltage parameters may require some adjustment
for optimal results according to the instrument manufacturer’s
recommendations.
ABI 310
1. Dissolve each pellet in 10 µl of MegaBACE loading solution
(preferably) or in 10 µl of formamide loading dye and vortex
vigorously for 10–20 seconds to ensure complete resuspension.
Briefly centrifuge to collect the sample at the bottom of the tube/
well.
2. Carry out injection and electrophoresis according to the
instructions provided with the ABI 310 instrument.
Note: For information on setting up the instrument to run and
analyze DYEnamic ET terminators, see Appendix 7.1.
17
ABI 377/373
1. Dissolve each pellet in 4 µl of formamide loading dye and vortex
vigorously for 10–20 seconds to ensure complete resuspension.
Briefly centrifuge to collect the sample at the bottom of the tube/
well.
2. For the ABI 373, load as much sample as feasible into a single
well. For the ABI 377, load half of the sample (2 µl) into a single
well.
3. Perform electrophoresis according to the instructions provided
with the sequencing instrument.
Note: For information on setting up the instruments to run and
analyze DYEnamic ET terminators, see Appendix 7.1.
MegaBACE DNA Analysis System
1. Resuspend each pellet in 10–20 µl of MegaBACE loading
solution. Vortex vigorously (10–20 seconds) to ensure complete
resuspension. Briefly centrifuge to collect the sample at the
bottom of the tube or plate and to remove bubbles.
2. The analysis of DYEnamic ET terminator sequences on MegaBACE
DNA Analysis Systems does not require the installation of
a mobility file or the creation of a color correction file. The
MegaBACE analysis software automatically performs both of
these functions.
18
7. Appendixes
7.1. Setting up the instrument to run and
analyze DYEnamic ET Terminators
The analysis of DYEnamic ET terminator sequences on ABI
instruments requires a mobility file and a color correction file (also
known as a spectral separation file, matrix file, or instrument file). The
procedures are different for each ABI instrument. Please proceed to
the section below that pertains to the instrument being used.
Mobility file installation
• General comments for all instruments
Two functions are performed by the mobility file: 1) to correlate the
specific dye with its corresponding base-call designation, and 2) to
correct for differences in the electrophoretic mobility of sequencing
products terminated with the four different terminators. The correct
mobility file is supplied by GE Healthcare and need only be installed
once on the computer used for analysis.
Note: The mobility file must be installed before analysis, but not
necessarily before the run.
A compact disk containing the DYEnamic ET terminator mobility
files for the ABI 373, ABI 377, ABI 310, ABI 3100, ABI 3700, ABI 3730
and ABI 3730XL instruments can be ordered separately (US84003).
Mobility files are also available on the GE Healthcare web site. The
DYEnamic ET terminator mobility files for the ABI 373, ABI 377,
and ABI 310 are unchanged from those previously provided with
DYEnamic ET Terminator Mobility Disk (US80872).
Note: The sequencing analysis software must be restarted after the
mobility files are installed to properly recognize them.
• ABI 3730
The filename DT3730POP-7{ET}.mob refer to the mobility files
19
necessary to analyze runs accomplished on the ABI 3730 with POP7™ polymer.
1. Quit the Sequencing Analysis software.
2. Copy the file from the disk to the folder:
Copy the mobility files from the disk to the
E:\Applied Biosystems\SeqA 5.0\Shared\Analysis\Basecaller\
Mobility folder prior to launching the analysis program.
ET Terminator Data Analysis
Automatic data analysis is not yet available for DYEnamic ET
Terminators on the ABI 3730. Therefore, one must load the
completed sequencing run into the ABI Sequence Analysis software
and select the correct DYEnamic ET Terminator mobility file prior to
sequence analysis. The following protocol describes the necessary
steps:
1. Select Start>Programs>Applied Biosystems>Sequencing
Analysis 5.0>Sequencing Analysis 5.0.
2. With the Sample Manager window active, click either the Add
Samples button or select File > Add Sample(s).
3. In the Add Samples dialog box, locate and open the folder that
contains the files you want to add to the Sample Manager
window.
4. Click on Add Selected Samples.
5. Click OK.
The selected files are then loaded into the Sample Manager.
6. Click on the Dye Set/Primer File cell for the first sample in the
Sample Manager.
7. From the drop-down menu, select the
DT3730POP7{ET}36cm.mob file.
20
8. Fill down the Dye Set/Primer File cells so that the
DT3730POP7{ET}36cm.mob file is applied to all samples.
9. Be sure that the Analysis check box (A) is checked for all samples.
10. Click on the Start Analysis icon in the Toolbar.
11. Click on the Save All Samples icon on the Toolbar.
12. The samples are now ready for viewing and further data
analysis.
• ABI 3700
The filenames DT3700POP-5{ET}.mob, DT3700POP-6{ET}.mob
and DT3700POP37{ET}.mob refer to the mobility files necessary to
analyze runs accomplished on the ABI 3700 with POP-5 polymer,
POP-6 polymer and POP-37 polymer, respectively.
1. Quit the Data Collection and the Sequencing Analysis software.
2. Copy the appropriate files from the disk to the folder:
Copy the mobility files from the disk to the
Perkin-Elmer\Abi\Shared\Analysis\Basecaller\Mobility folder
prior to launching the analysis program. For newer version
instruments, the folder path is: appliedbio\Shared\Analysis\
Basecaller\Mobility.
3. Restart the Data Collection and the Sequencing Analysis software.
• ABI 3100
The filenames DT3100POP-6{ET}36cm.mob, DT3100POP6{ET}50cm.mob and DT3100POP4{ET}80cm.mob refer to the
mobility files necessary for analysis of runs accomplished on the
ABI 3100 with POP-6 polymer and POP-4 polymer.
1. Quit the Data Collection and the Sequencing Analysis software.
*
A Windows NT™ version of this mobility file can be downloaded from www.
gehealthcare.com/sequencing_downloads
21
2. Copy the appropriate files from the disk to the folder:
Copy the mobility files from the disk to the
Perkin-Elmer\Abi\Shared\Analysis\Basecaller\Mobility folder
prior to launching the analysis program. For newer version
instruments, the folder path is:
appliedbio\ Shared\Analysis\Basecaller\Mobility.
3. Restart the Data Collection and the Sequencing Analysis software.
• ABI 310
The filename DYEnamic ET Term. POP-6* refers to the mobility file
necessary for analysis of runs accomplished on the ABI 310 with
POP-6 polymer.
1. Quit the Sequencing Analysis software.
2. Copy the appropriate file from the disk to the ABI folder in the
system folder.
3. Restart the Sequencing Analysis software.
• ABI 377 and ABI 373
The filename DYEnamic ET Term. {US80872}* refers to the
mobility file necessary to analyze runs accomplished on the ABI 373
or ABI 377.
1. Quit the Sequencing Analysis software.
2. Copy the appropriate file from the disk to the ABI folder in the
System folder.
3. Restart the Sequencing Analysis software.
Making a color-correction file
• General comments for all instruments
The color correction file allows the computer to identify a unique
spectral signature for each of the four different dye terminators. A
unique color correction file must be generated on each sequencing
instrument that analyzes DYEnamic ET
22
terminator sequences. The color correction file is specific to the
performance of each individual instrument so these files should
not be copied from one instrument to another. A color correction
matrix only need to be created once for the ABI 377 or 373 slab gel
instruments. For the ABI 3100, ABI 3700, ABI 3730 and ABI 3730XL
capillary instruments, preform a spectral calibration whenever a new
capillary array is installed, or when switching from one separation
medium to another.
GE Healthcare supplies matrix standards to produce color correction
files for each type of ABI instrument as described below.
If a matrix file has been generated previously with any DYEnamic ET
terminator kit, it is not necessary to generate a new one. Otherwise,
prepare a new matrix specific for DYEnamic ET terminator chemistry
for each instrument that will use the kit for each instrument.
• ABI 310, ABI 377, and ABI 373
Two methods are available to create a matrix on ABI 310, ABI
377, and ABI 373 instruments. The preferred method is to use the
DYEnamic ET matrix standards, but the DYEnamic ET terminators
can also be used.
DYEnamic ET terminators can be used on either the run module A
setting or the run module E setting with equivalent performance.
However, the module used to generate the matrix file must match
the module used for sample files. If both types of runs are routinely
performed, it is convenient to make a matrix for each run module, A
and E, and use the corresponding matrix to analyze files.
a) Making a matrix from sequence data
A matrix can be created after DYEnamic ET terminator sequences
have been electrophoresed, but it must be done prior to
data analysis.
23
1. Copy the matrix file DYEnamic ET Terminator from the mobility
file disk into the ABI folder found in the system folder. This is
a template must be modified because it is not optimal for the
instrument; it is simpler to modify an existing file than to create a
new one.
2. Select a sequence run that appears successful based on the raw
data view (i.e. good signal, well-resolved peaks throughout the
run). Locate this file on the computer’s hard drive. Make three
copies of the file using the Duplicate command on the computer’s
file menu. This will produce four copies of the file with four distinct
names.
3. Open the DataUtility program that is located within the ABI
software folder.
4. Choose the menu function Make Matrix... under the Utilities
menu. This function will display the window in Figure 1:
Select
Select
Fig 1. Make matrix window
5. Select the button T7 Terminator Matrix, and then select Update
File.... Choose the DYEnamic ET Terminator file that was copied
into the ABI folder in step 1.
6. The software must now be told the names of the original
sequence file and the copies of the files. To do this,
24
Click on C... then locate and open the original sequence file.
Click on A... then locate and open one of the copies generated in
step 2 above.
Click on G... then locate and open a different copy.
Click on T... then locate and open the remaining copy.
Note: There must be four different copies of the same file.
7. Click OK. This generates the DYEnamic ET terminator matrix file.
After a few seconds, the alert in Figure 2 is displayed:
Select
Fig 2.
8. Choose Yes to enter the new matrix data into the file.
Note: To avoid confusion, rename the matrix file to clearly identify
the instrument, such as “ET terminator 377 serial
number xxxx”.
9. Steps 1–8 create a matrix file suitable for a specific instrument.
This procedure must be repeated for each instrument that runs
DYEnamic ET terminator sequences. A matrix only needs to be
created once for each instrument, but this must be done before
analysis.
Note: If any error messages are generated, check the raw data
to confirm that the region set by the Start at and Points settings
contains well-defined peaks.
b) Making a matrix from matrix standard data
The analysis of matrix standards is the preferred method to
25
create a matrix. DYEnamic ET Terminator Matrix Standard
(US80860) is specifically formulated for creating a colorcorrection matrix file on the ABI 373, ABI 377, and ABI 310
instruments. Four matrix standards, consisting of purified singlecolor reaction products in 4 µl of TE buffer, are supplied in this
product.
Important! The following instructions apply to DYEnamic ET
Terminator Matrix Standards (US80860) with lot numbers 9614 and
greater. If the lot number of your matrix standard preparation is less
than 9614, please contact your local GE Healthcare office for an
alternate procedure.
Note: You cannot use the DYEnamic ET Terminator Matrix Standard
for the ABI 3700 (US84001) to make a matrix on the
ABI 310, ABI 373, or ABI 377.
• ABI 373 and ABI 377
1. Add 4 µl of formamide loading dye to each matrix standard and
mix well.
2. For ABI 373 instruments, load 2 µl of each matrix standard
mixture into separate lanes of the gel and run the gel. For ABI 377
instruments, load 1 µl of each mixture into separate lanes and run
the gel. These matrix standards can analyzed on the same gel as
the sequencing reations.
Note: Be sure to record the lane order and file name of the
standards because the colors displayed in the gel file will not be
those commonly observed for these bases.
3. Follow steps 1–5 in the previous section “Making a matrix from
sequence data.”
4. The software must now be told the names of the four sample files
created by the four standard lanes that were run in steps 1 and 2
above. Because the association of the dyes with bases
26
for the DYEnamic ET terminators is different from that for T7
terminators, different standard sample lanes from those called for in
the software must be used.
As is illustrated in Figure 3:
Click on C... then locate and open the file containing the T matrix
standard data.
Click on A... then locate and open the file containing the A matrix
standard data.
Click on G... then locate and open the file containing the C matrix
standard data.
Click on T... then locate and open the file containing the G matrix
standard data.
T standard
A standard
C standard
G standard
Fig 3.
5. Continue with steps 7–9 in the previous section “Making a matrix
from sequence data” (page 23).
Note: If any error messages are generated, check the raw data to be
sure that the region set by the Start at and Points settings contains
well-defined peaks. More importantly, make absolutely sure that the
order of the matrix standard data files is correct as shown above.
Do not use the order suggested by the DataUtility software because
errors will result, and no matrix will be created.
27
• ABI 310
1. Add 6 µl of MegaBACE loading solution to each of the four matrix
standards and mix well.
2. For each of the four matrix standards, inject the entire 10 µl
volume using standard conditions for injection.
Note: Each standard will require a separate run for the ABI 310
instrument.
Note: Be sure to record the lane order and file name of the
standards because the colors displayed in the gel file will not be
those commonly observed for these bases.
3. Follow steps 1–5 in the previous section “Making a matrix from
sequence data” (page 23).
4. The software must now be told the names of the four sample files
created by the four standard lanes that were run in steps 1 and
2 immediately above. Because the association of the dyes with
bases for the DYEnamic ET terminators is different from that for T7
terminators, standard sample lanes different from those called for
in the software must be selected.
Click on C... then locate and open the file containing the T matrix
standard data.
Click on A... then locate and open the file containing the A matrix
standard data.
Click on G... then locate and open the file containing the C matrix
standard data.
Click on T... then locate and open the file containing the G matrix
standard data.
5. Continue with steps 7–9 in the previous section “Making a matrix
from sequence data” (page 23).
Note: If any error messages are generated, check the raw data to be
sure that the region set by the Start at and Points settings contains
28
well-defined peaks. More importantly, make certain that the order of
the matrix standard data files is correct as shown above. Do not use
the order suggested by the DataUtility software because errors will
result, and no matrix will be created.
• ABI 3730
DYEnamic ET Terminator Matrix Standard for the ABI 3730 (US84001)
is formulated for performing a spectral
calibration and creating a spectral matrix for the ABI 3730
sequencing instrument.
Preparing the matrix standard
1. Briefly centrifuge the tube containing the DYEnamic ET Terminator
Matrix Standard to bring the contents (40 µl) to the bottom of the
tube (2 tubes for 3730XL).
2. Add 460 µl of distilled water to the tube containing the matrix
standard. Mix the contents of the tube thoroughly by vigorous
vortexing. Briefly centrifuge the tube.
Note: Combine 2 tubes for 3730XL.
3. Dispense 10 µl of the DYEnamic ET terminator matrix standard
into every other column of a 96 well plate (all wells for 3730XL): It
is essential to centrifuge the plate to position the samples at the
bottom of each well.
Creation of Spectral Protocol
1. Expand the view in the tree pane.
a. Click the + box next to the GA Instruments icon.
b. Click the + box next to the ga3730 icon.
2. Click the Protocol Manager icon.
3. In the Instrument Protocols section, click New.
The Protocol Editor dialog box opens.
4. Create a spectral protocol.
29
a. Type ET_Spectral or a similar name in the Name field.
b. Select Spectral from the Type drop-down list.
c. Select the appropriate run module from the drop-down list:
i. Spect36_SeqStd_POP7_ET for 36-cm array with POP-7
Note: Prior to this step the Spect36_SeqStd_POP7 module must be
edited to include a run time of 2000 seconds. The module can be
edited in the Protocol Manager by creating a new module based on
the Spect36_SeqStd_POP7 module.
ii. Spect50_SeqStd_POP7 for 50-cm array with POP-7
5. Select E-BigDyeV1 or Z-BigDyeV3 from the Dye Set drop-down list.
Note: Select a Dye Set not in use. An ET spectral calibration will
overwrite any previous spectral calibrations performed on the Dye
Set selected.
6. Select SeqStd(Any4DyeSet).par from the Params drop-down list.
Note: If the SeqStd(Any4DyeSet).par is not available an existing
parameter file must be edited to be compatible with the DYEnamic
ET terminators. See Editing Spectral Calibration Section at the end
of this protocol.
7. Click OK.
The module is saved and displayed in the Instrument Protocols
section of the Protocol Manager view.
Creating a Plate Record
1. Expand the view in the tree pane.
a. Click the + box next to the GA Instruments icon.
b. Click the + box next to the ga3730 icon.
2. Click the Plate Manager icon.
The Plate Manager view opens.
Terminator Matrix Standard to bring the contents (40 µl) to the
bottom of the tube.
30
3. Click NEW.
The New Plate Dialog opens.
4. Complete the plate information
a. Type a name for the plate ID in the ID (barcode) field.
b. Type a name for the plate in the Name field.
c. Select Spectral Calibration from the application drop-down
list.
d. Select 96-Well from the Plate Type drop-down list.
e. Select Heat Sealing or Septa from the Plate Sealing dropdown list.
f. Type a name for the owner and operator in the
appropriate fields.
5. Click OK.
A blank plate record opens.
6. Complete the plate record:
a. In the sample name column, type a name.
b. In the Instrument Protocol column, select the protocol
created in the ‘Creation of Spectral Protocol’ section.
c. Select the Sample Name and Instrument Protocol columns
and fill down.
7. Click OK.
Adding a Plate to the Run Scheduler
1. Click the Run Scheduler icon.
The Run scheduler view opens.
2. In the Input Stack section, click Search.
A search dialog box opens.
3. Search for the spectral calibration record.
4. Add a plate record.
a. Select the plate you want to use in the name column.
b. Click Add.
31
c. Click Done.
The plate is added to the Run Scheduler view.
5. Click on the Run Instrument button.
Evaluating Spectral Calibration results
To view pass/fail status of each capillary:
1. Locate the log file at the following location:.
E:\AppliedBiosystems\UDC\Data
Collection\Data\ga3730\instrument name\SpectralCalMclFiles\
E-BigDyeV1
2. Open the file in Notepad.
3. View the results.
The condition number (c) is a measure of the spectral overlap of
the dyes. As the spectral overlap of the dye decreases, so does the
condition number. a condition number of 1.0 would indicate no
spectral overlap for a particular dye set. The expected condition
number for ET dyes on the ABI 3730 is 6.7 ± 0.5. The Q-value is a
measure of how well the spectralcalibration fits the data it was
created from. A Q-value (q) of 1.0 represents a perfect fit. Any
spectral calibration with a Q-value less than 0.92 will automatically
fail the calibration and be replaced with spectral calibration data
from an adjacent capillary.
Editing Spectral Calibration Files
If the SeqStd{Any4DyeSet}.par is not available when setting up the
ET terminator spectral calibration protocol on the insrument, an
existing parameter file must be edited to be compatible with the
DYEnamic ET teminators.
1. Locate the Spectral Calibration ParamFiles folder in the following
file path: E:/Appliedbiosystems/UDC/ga3730/CalibrationData/
SupportFiles/ SpectralCalibration/ParamFiles
32
Note: Search for files with a ‘.par’ extension if the ParamFiles folder
cannot be located.
2. Edit the SeqStd{E}.par if you are performing the ET spectral
calibration on Dye Set E, and edit the SeqStd{Z}.par if the
callibration is to be performed on Dye Set Z.
3. Rename the existing SeqStd{E or Z}.par file OrgSeqStd{E or Z}.par
4. Make a copy of the file to be edited by copying and pasting the
file into the ParamFiles folder.
5. Edit the copied parameter file to include the following:
minQ = 0.92
conditionBounds = [1.0, 10.0]
maxScansAnalyzed = 5000
6. Save the file.
7. Rename the edited file, SeqStd{E}.par or SeqStd{Z}.par as
appropriate.
Note: The instrument will only recognize the files if named exactly as
described above.
8. Proceed with the ET spectral calibration protocol.
9. If at a later date a calibration must be performed with a
sequencing chemistry other than the DYEnamic ET terminators, the
edited parameter file must be renamed and the OrgSeqStd
{E or Z}.par file must be renamed to its original file name.
• ABI 3700
DYEnamic ET Terminator Matrix Standard for the ABI 3700 (US84001)
is specifically formulated for performing a spectral
calibration and creating a spectral matrix for the ABI 3700
sequencing instrument.
Preparing the matrix standard
1. Briefly centrifuge the tube containing the DYEnamic ET
33
2. Add 360 µl of distilled water to the tube containing the matrix
standard. Mix the contents of the tube thoroughly by vigorous
vortexing. Briefly centrifuge the tube.
3. Transfer 200 µl of the matrix solution to each of two 200 µl
microtubes as recommended by the instrument manufacturer.
Performing a spectral calibration run for POP™-5
For general guidelines on performing a default calibration, see page
6–25 of the ABI 3700 user’s manual. To create a spectral matrix for
DYEnamic ET terminator chemistry, follow the protocol below.
1. Firmly place the two tubes containing the DYEnamic ET
Terminator Matrix Standard into the right bar in slot positions 9
and 10 as shown in the Figure 4 below and on page 6–25 in the
ABI 3700 user’s manual.
2. Open the ABI 3700 Data Collection software. Initiate a spectral
calibration run by selecting the Spectral Run command under the
Run Setup page. This opens up the Calibration Module and Dye
Left Bar
Right Bar
Fig 4.
Set dialog window. From here, the appropriate type of calibration
module, dye set and parameter files are selected.
Note: For a schematic of the procedure, see page 6–26 in the
ABI 3700 user’s manual.
3. Using the pull-down menu under Calibration Module, choose the
SpecSQ1_1POP-5DefaultModule file for spectral calibration for
POP-5.
34
Note: For a schematic of the procedure, see page 6–26 in the
ABI 3700 user’s manual.
4. (Important) Under Dye Set, choose F from the pull-down menu.
5. (Important) Under Parameter File, choose SeqStd(AnyDyeSet).
par from the pull-down menu.
6. Click OK to accept these chosen fields.
7. The spectral run will be displayed in the run queue. This action will
simultaneously engage the Start Run button. Activate the run by
clicking on Start Run.
8. After electrophoresis is completed (< 3 hours), a dialog window
will display Spectral Calibration Result as shown on page 6–29 in
the ABI 3700 user’s manual. This display indicates the number of
capillaries (caps) that passed spectral calibration. For a schematic,
see page 6–29 in the user’s manual. Accept the result by clicking
OK. The software will automatically assign proper calibration
values to failed caps from adjoining successful caps. The capillary
status bar will indicate the passed caps in black and questionable
caps in yellow.
Note: For further information on the significance of colorcoding in the capillary status bar, see pages 6–29 and 5–68 in
the ABI 3700 user’s manual.
9. Upon completion of the spectral run and data processing, the
quality of the spectral profile (the emission spectra for all four
dyes) for each capillary must be examined. The condition number
is a measure of the spectral overlap of the dyes. As the spectral
overlap of the dyes decreases, so does the condition number. A
condition number of 1.0 would indicate no spectral overlap for a
particular dye set. The expected condition number for ET dyes on
the ABI 3700 is 7.3 ± 0.5. The Q-value is a measure of how well the
spectral calibration fits the data it was created from. A Q-value
35
of 1.0 represents a perfect fit. Any spectral calibration with a Qvalue less than 0.92 will automatically fail the calibration and be
replaced with spectral calibration data from an adjacent capillary.
Those caps that have a questionable matrix should be replaced
with data from a successful matrix.
Note: For further information and a schematic, see “Reviewing and
overriding the spectral calibration profiles” on page 6–34 of the ABI
3700 user’s manual.
To review the calibration profile, open the Data Collection software.
Go to the Data Acquisition menu and open the Override Spectral
Calibration function. A dialog window titled Select the dye set to
display will appear.
10. Select F from the pull-down menu (Important). Click OK. This
action opens a dialog window title Spectral Calibration Profile
for F. The fluorescence emission spectra for all four dyes in a
particular capillary will be displayed as shown in Figure 1.
11. Examine the results for each cap and verify that the profile is
similar to that shown in Figure 5.
Note: For additional schematic illustrations, see page 6–35 of the
user’s manual.
12. Although, the software assigns values from successful caps to
failed caps, in some instances the profile may not be similar to
the one shown in the illustration. When this occurs, replace the
values manually by using the values from a successful adjacent
matrix. At the bottom left of the dialog box, under Override
matrix from another source, click on the button From capillary.
This allows the selection of a value from any capillary. Choose
any acceptable capillary.
36
Fig 5. Spectral calibration profile for F using POP-5.
Performing a spectral calibration run for POP-37
For general guidelines on performing a default calibration, see
page 6–25 of the ABI 3700 user’s manual. To create a spectral
matrix for DYEnamic ET terminator chemistry, follow the protocol on
page 38.
Left Bar
Right Bar
Fig 6.
37
1. Firmly place the two tubes containing the DYEnamic ET Terminator
Matrix Standard into the right bar in slot positions 9 and 10 as
shown in Figure 6 below and on page 6–25 in the ABI 3700 user’s
manual.
2. Open the ABI 3700 Data Collection software. Initiate a spectral
calibration run by selecting the Spectral Run command under the
Run Setup page. This command opens the Calibration Module
and Dye Set dialog window from which the appropriate calibration
module, dye set, and parameter files are selected.
Note: For a schematic of the procedure, see page 6–26 in the
ABI 3700 user’s manual.
3. Use the pull-down menu under Calibration Module and choose
the SpecSQ1_2POP37DefaultModule file for spectral calibration
for POP™-37.
Note: For a schematic of the procedure, see page 6-26 in the
ABI 3700 user’s manual.
4. (Important) Under Dye Set, choose F from the pull-down menu.
5. (Important) Under Parameter File, choose SeqStd(AnyDyeSet).par
from the pull-down menu.
6. Click OK to accept these chosen fields.
7. The spectral run will be displayed in the run queue. This action will
simultaneously engage the Start Run button. Activate the run by
clicking on Start Run.
8. After electrophoresis is complete (< 3 hours), a dialog window,
Spectral Calibration Result, appears as shown on page 6–29 in
the ABI 3700 user’s manual. This display indicates the number of
capillaries (caps) that passed spectral calibration. For a schematic,
see page 6–29 in the user’s manual. Accept the result by clicking
OK. The software will automatically assign proper calibration
values to failed caps from adjoining successful caps. The capillary
38
status bar will indicate passed caps in black and questionable
caps in yellow.
Note: For further information on the significance of color coding in
the capillary status bar, see pages 6–29 and 5–68 in the ABI 3700
user’s manual.
9. Upon completion of the spectral run and data processing, the
quality of the spectral profile (the emission spectra for all four
dyes) for each capillary must be examined. The condition number
is a measure of the spectral overlap of the dyes. As the spectral
overlap of a dye set decreases, so does the condition number.
A condition number of 1.0 indicates no spectral overlap for a
particular dye set. The expected condition number for ET dyes
analyzed on the ABI 3700 is 7.3 ± 0.5. The Q-value is a measure of
how well the spectral calibration fits the data it was created from.
A Q-value of 1.0 represents a perfect fit. Any spectral calibration
with a Q-value less than 0.92 will automatically fail the calibration
and be replaced with spectral calibration data from an adjacent
capillary. Those caps that have a questionable matrix should be
replaced with data from a successful matrix.
Note: For further information and a schematic, see “Reviewing and
Overriding the Spectral Calibration Profiles” on page 6–34 of the ABI
3700 user’s manual.
10. To review the calibration profile, open the Data Collection
software. Go to the Data Acquisition menu and open the
Override Spectral Calibration function. A dialog window Select
the dye set to display will appear.
11. Select F from the pull-down menu (Important). Click OK. This
action opens the dialog window Spectral Calibration Profile
for F. The fluorescence emission spectra for all four dyes in a
particular capillary will be displayed as shown in Figure 5.
39
12. Examine the results for each cap and verify that the profile is
similar to that shown in Figure 5.
Note: For additional schematic illustrations, see page 6–35 of the ABI
3700 user’s manual.
Although the software assigns values from successful caps to
failed caps, in some instances the profile may not be similar to
the one shown in the illustration. When this occurs, replace the
values manually by using the values from a successful adjacent
matrix. At the bottom left of the dialog box, under Override
matrix from another source, click on the button From capillary,
which allows the choice of values from any capillary. Choose any
acceptable capillary.
Performing a spectral calibration run for POP-6
For general guidelines on performing a default calibration, see page
6–25 of the ABI 3700 user’s manual. To create a spectral matrix for
DYEnamic ET terminator chemistry, follow the protocol below.
Left Bar
Right Bar
Fig 7. Loading the matrix standard
1. Firmly place the two tubes containing the DYEnamic ET
Terminator Matrix Standard into the right bar in slot positions 9
and 10 as shown in Figure 7 and on page 6–25 in the ABI 3700
user’s manual.
2. Within the ABI 3700 Data Collection software, open the Module
Editor listed under the Instrument Utilities menu. Select the
Others tab under modules menu within the Module Editor. Load
40
the SpectSQ1_1POP-6DefaultModule parameters into the Module
Editor by clicking on its listing in the Others tab.
3. Scroll down to the Run Time parameter (number 15) listed in the
Module Parameters window. Edit the Run Time by clicking on
the default value of 2 700 seconds, and replace that with 4 000
seconds.
4. Click the Save As button and enter SpecSQ1_1POP-6Extended as
the new module file name. Click OK to save the new parameters.
Click Done to exit the Module Editor.
5. In the Data Collection software, initiate a spectral calibration run
by selecting the Spectral Run command within the Run Setup
page. This opens up the Calibration Module and Dye Set dialog
window. From here, the appropriate type of calibration module,
dye set, and parameter files are selected.
Note: For a schematic of the procedure, see page 6–26 in the
ABI 3700 user’s manual.
6. Using the pull-down menu under Calibration Module, choose the
SpecSQ1_1POP-6Extended File for spectral calibration for POP-6.
Note: For a schematic of the procedure, see page 6–26 in the
user’s manual.
7. Continue the spectral calibration run by following steps 4–12
in the previous section, “Performing a spectral calibration run for
POP-5” (page 34).
• ABI 3100
DYEnamic ET Terminator Matrix Standard for the ABI 3700 (US84001)
is formulated for performing a spectral calibration and creating a
spectral matrix for the ABI 3100 sequencing instrument.
Preparation of DYEnamic ET Terminator Matrix Standard
1. Briefly centrifuge the tube containing the DYEnamic ET Terminator
41
Matrix Standard to bring the contents (40 µl) to the bottom of the
tube.
2. Transfer 5 ml of the DYEnamic ET terminator matrix standard to a
tube containing 195 ml of distilled water.
3. Mix the contents of the tube thoroughly by vortexing vigorously.
4. Briefly centrifuge the tube and dispense 10 ml of the DYEnamic ET
Terminator Matrix Standard into a 96 well plate as shown in Figure
8. It is essential to centrifuge the plate to position the samples at
the bottom of each well.
5. Assemble the plate for loading on the ABI 3100 (See diagram on
page 3–9 of the ABI 3100 user’s manual).
Fig 8.
Performing a spectral calibration
For general guidelines on performing a default calibration, see
page 4–17 of the ABI 3100 user’s manual. To create a spectral
matrix for DYEnamic ET terminator chemistry, follow the protocol
below.
42
1. Place the plate on the autosampler.
Note: For a schematic of the procedure, see page 4–24 in the
ABI 3100 user’s manual.
2. Open the ABI 3100 Data Collection software and initiate a spectral
calibration run by selecting New within the Plate View page.
This opens up the Plate Editor dialog box. Name the plate, select
Spectral Calibration, and select 96-Well plate type. Click Finish.
This opens the Plate Editor spreadsheet.
3. Within the Plate Editor spreadsheet, complete the following for
the 16 samples in the sample plate:
• Name the samples.
• Select Dye Set F. (Important)
• Select the run module appropriate for you capillary array size:
36-cm: Spect36_POP-6DefaultModule
50-cm: Spect50_POP-6DefaultModule
80-cm: Spect80_POP-4DefaultModule
4. Select the spectral calibration parameters, SeqStd{AnyDyeSet}.
par. (Important)
5. Click OK.
6. The newly created plate record then appears in the Pending
Plate Records table of the Plate Setup page. In the Plate Setup
page, select the plate you just created from the Pending Plate
Records table.
7.
Click on the graphic that corresponds to the plate on the
autosampler. The plate then moves from the Pending Plate
Records table to the Linked Plate Records table. For a pictorial
representation see page 3–39 in the ABI 3100 user’s manual.
8.
Click the Run Instrument button on the toolbar to begin the run.
9.
After the run is completed (40–150 minutes) a dialog window
displays “Spectral Calibration Result” as shown on page 4–23
43
in ABI 3100 User’s Manual, indicating the number of caps that
passed spectral calibration. Accept the result by clicking OK. The
software then assigns proper calibration values to failed caps
automatically from the adjoining successful caps.
10. Upon completion of the spectral run and data processing, the
quality of the spectral profile (the emission spectra for all 4
dyes) for each capillary must be examined. Any capillary that
generated a questionable matrix should be carefully examined
and replaced with data from a successful matrix. Instructions for
matrix replacement are provided in the ABI 3100 user’s manual
on page 4–27, “Overriding a Spectral Calibration Profile.”
11. The condition number is a measure of the spectral overlap of
the dyes. As the spectral overlap of the dyes decreases, so does
the condition number. A condition number of 1.0 would indicate
no spectral overlap for a particular dye set. The expected
condition number for ET dyes on the ABI 3100 is 7.3 ± 0.5. The
Q-value is a measure of how well the spectral calibration fits the
data it was created from. A Q-value of 1.0 represents a perfect
fit. Any spectral calibration with a Q-value less than 0.92 will
automatically fail the calibration and be replaced with spectral
calibration data from an adjacent capability.
44
Fig 9. Spectral calibration profile for F using POP-6 with the ABI 3100.
12. Review the calibration profile using the following steps. Open the
Data Collection software; select Override Spectral Calibration
from the File menu. A dialog window titled “Select the dye set to
display” appears. Select F from the pull down menu (Important).
Click OK. This action opens the dialog window Spectral Calibration
Profile for F. The fluorescence emission spectra for all four dyes in
a particular capillary is displayed as shown in Figure 9. Examine the
results for each cap and verify that it is similar to the one shown in
this example and as illustrated on page 4–29 of the ABI 3100 user’s
manual. Although, the software assigns values from successful
caps to failed caps in some instances, the profile may not be similar
to the one shown in the illustration. When this happens, manually
replace the values with the data from a successful adjacent matrix.
45
At the bottom left of the dialog box, under Override matrix from
another source, click on the button From capillary. This will allow
you to choose values from any capillary. Choose any acceptable
capillary.
13. Examine the results for each cap and verify that the profile is
similar to that shown in Figure 9.
Note: For additional schematic illustrations, see page 4–29 of the ABI
3100 user’s manual.
7.2. Template DNA—general considerations
Template amount
This protocol usually produces optimal results using 0.1–0.2 pmol
of template DNA but these numbers should be considered as
guidelines. In some cases, more or less template can be used due
to the sensitivity and robustness of DYEnamic ET terminators. For
example, scientists at GE Healthcare have obtained good results on
an ABI 377 using 10–10 000 ng (4 fmol/4 pmol) of pure M13mp18
DNA. For routine sequencing, however, follow the guidelines
described above.
The following formula is useful for calculating the optimal mass
(0.15 pmol) of double-stranded template to include in the sequencing
reaction:
Mass of template (ng) = Total length of DNA (in base pairs) x 0.1
For example, a typical plasmid that is 3 800 base pairs in length
(vector plus insert) should produce optimal data using ~ 380 ng in
these protocols. The recommended range for template amount is
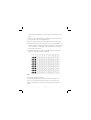
250–500 ng (0.1–0.2 pmol).
These relationships are shown graphically in the figures 10 and 11:
46
These relationships are shown graphically in the figures 10 and 11:
Short PCR products
Mass of DNA (in ng)
140
120
100
80
60
40
20
0
0
200
400
600
800
1000
Length of template (in base pairs)
Fig 10. The recommended amount of template DNA to use in a
sequencing reaction (PCR products)
Plasmids and large PCR products
1400
Mass of DNA (in ng)
1200
1000
800
600
400
200
0
0
1000
2000
3000
4000
5000
6000
7000
8000
9000
Length of template (in base pairs)
Fig 11. The recommended amount of template DNA to use in a
sequencing reaction (Plasmids)
47
10 000
Insufficient template DNA in the sequencing reaction can produce
low signal strengths (< 50) that can cause poor basecalling and
short reads. In contrast, too much template can yield very high
signal strengths (> 1500), that might mask software miscalls.
Excessive template DNA can also deplete the supply of nucleotides
in the sequencing premix and lead to short sequence reads. This
is especially problematic with Polymerase Chain Reaction (PCR)
products where small mass amounts of DNA are required to provide
the optimal picomole amount of template.
Recommended buffer for dilution of DNA template
Dilute the DNA template in water (preferably) or in a weakly buffered
solution containing no more than 0.1 mM EDTA. A suitable buffer is
10 mM Tris-HCl (pH 8.5), 0.1 mM EDTA. This concentration of EDTA is
lower than in typical TE buffers because excess EDTA in the template
or primer resuspension buffercan inhibit sequencing reactions by
reducing the effective magnesium concentration.
Preparation of template DNA
Template of suitable quality for use with the DYEnamic ET Terminator
Cycle Sequencing Kit can be prepared using a variety of procedures
and commercially available products.
Single-stranded plasmid DNA
Several published methods are available for preparing singlestranded DNA from clones generated in M13 vectors and hybrid
plasmid-phage (phagemid) vectors (14, 15).
Preparation of double-stranded plasmid DNA
Sequencing double-stranded templates with the DYEnamic ET
Terminator Cycle Sequencing Kit requires no changes in the protocol.
Alkaline denaturation is not required for these templates. For optimal
results, use plasmid DNA purified by cesium chloride gradients,
polyethylene glycol (PEG) precipitation, adsorption to glass, columns,
and other common DNA purification methods. However, because
48
such small quantities of DNA are used in the reactions, even impure
DNA samples can yield acceptable sequence data. Although there
are many popular protocols for purifying plasmid DNA from 2 ml
to 10 ml cultures, scientists at GE Healthcare achieve consistent
success using boiling (16, 17) and alkaline (18) miniprep methods.
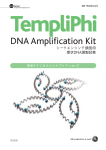
Templates for sequencing can also be prepared using TempliPhi
DNA sequencing template amplification kits manufactured by GE
Healthcare (for more details contact your local GE Healthcare office
or visit us at www.gehealthcare.com/lifesciences and search with
the keyword, “TempliPhi”). A variety of templates can be amplified
by rolling circle amplification using Phi29 DNA polymerase and
sequencing-quality DNA can be prepared within 4–6 hours directly
from bacterial colonies (19). Microgram quantities of template DNA
can be prepared at isothermal conditions from picogram amounts
of starting material. Amplified DNA can be used directly for cycle
sequencing without purification.
7.3. Primers—general considerations
Primer amount
The optimal amount of primer for sequencing with these protocols is
5 pmol. If not enough primer is used, signals may be weak. If too
much primer is present, nonspecific priming can occur, resulting
in “noisy” sequences characterized by high background or double
(superimposed) sequences. Excess primer also can contribute to an
artifact known as the “cliff effect” that typically appears as a short
region (50–200 bases) of strong sequence abruptly followed by
weak sequence. The likely cause of this artifact is the inadvertent
generation of PCR products during cycle sequencing that accumulate
rapidly and deplete the nucleotide supply in the sequencing premix.
Determine the concentration of primer and use 5 pmol for each
sequencing reaction (2 pmol for the control primer in the kit).
49
The following method is useful for measuring the concentration of
sequencing primer:
Dissolve the primer in water (preferably) or in buffer containing no
more than 0.1 mM EDTA, and determine its optical density at 260 nm
(OD260). For primers containing N bases (measured in a cuvette with
a 1 cm path lingth), the approximate concentration (pmol/µl) is given
by the formula:
Concentration (pmol/µl) =
OD260/(0.01 x N) where N is the number of bases.
Designing a sequencing primer
The length and sequence of a primer determines its melting
temperature and specificity. For cycling temperatures recommended
in this protocol, the primer should be ~ 18–25 bases in length. Check
the sequence of the primer for potential self-annealing or hairpin
formation, especially at its 3’-end. Possible sites of false priming in
the vector or other known sequences should also be identified, again
stressing matches involving the 3’-end of the primer.
7.4. Dilution and reduced reaction volumes
DYEnamic ET terminator sequencing products are designed to
provide robust performance over a wide range of conditions. The
DYEnamic ET terminator sequencing reagent premix is carefully
formulated for use with Thermo Sequenase II DNA polymerase, and
the conditions that yield the best sequencing results have been
determined empirically during product development. Optimal results
are achieved when the following conditions are observed: 1) the
concentration of the buffer components is maintained to protect
the stability and activity of the DNA polymerase; 2) the enzyme,
cofactors, and substrates are present in excess such that the
reaction is efficient; and 3) the volume of the sequencing reaction is
sufficient to withstand evaporation. For the DYEnamic ET terminator
50
sequencing products, the most consistent results are obtained using
8 µl of sequencing reagent premix in a reaction volume of 20 µl, as
described previously in the protocols. These are the recommended
conditions for routine use and should be the starting point for any
optimization experiments.
Some researchers might prefer to dilute the sequencing reaction
mix to achieve greater economy, albeit at the expense of data
consistency. The DYEnamic ET Terminator Dilution Buffer (US84002)
provides the appropriate buffer conditions, salts, metal cofactors,
and stabilizing agents necessary for optimal enzyme activity. In any
case, the level of dilution that produces acceptable data must be
determined empirically by the researcher.
DYEnamic ET Terminator Dilution Buffer is not included with this kit,
but can be ordered separately (US84002). Dilution buffers provided
by other manufacturers should not be used with DYEnamic ET
terminator products.
Note: GE Healthcare makes every effort to develop products that are
consistent in performance over a broad range of conditions. Dilution
of this kit’s components is not recommended or supported, and no
guarantee is provided concerning the extent to which a product can
be diluted. DYEnamic ET Terminator Dilution Buffer is provided as a
courtesy for those researchers who choose to economize, with the
understanding that the researcher must accept the risk of reduced
performance.
How to use the dilution buffer
For optimal sequencing results, it is important to maintain the
appropriate concentration of buffer components in the sequencing
reaction. To achieve this, use 8 µl of DYEnamic ET Terminator
sequencing reagent premix in a 20 µl reaction volume such that
40% of the final reaction mixture is sequencing premix. If the total
51
volume of the sequencing reaction mixture changes, then scale all of
the components of the reaction appropriately. For example, if
10 µl reactions are assembled in a 384-well microplate, then 4 µl of
sequencing premix would be required in each reaction to achieve a
40% concentration of premix in the final reaction volume.
If the researcher chooses to use less sequencing premix, then
DYEnamic ET Terminator Dilution Buffer can be used to maintain the
appropriate concentration of buffer components. Use the dilution
buffer according to the following formula:
Volume of sequencing premix + dilution buffer =
40% of total reaction volume
For example, a 20 µl reaction (total volume) could be assembled
using 8 µl of sequencing premix and no dilution buffer according to
the recommended protocol. Alternatively, the 20 µl reaction could
be assembled with 6 µl of sequencing premix and 2 µl of dilution
buffer. This ratio maintains the appropriate concentration of buffer
components and could be acceptable depending on the template
being sequenced.
7.5. Cycling conditions
Of the three temperature incubation steps that comprise the cycling
program (denaturation, annealing, and extension), the denaturation
step is the most critical. While Thermo Sequenase II DNA polymerase
has significant advantages over other DNA polymerases used for
cycle sequencing, it is not as stable against thermal inactivation.
The reaction buffer in the sequencing premix has been specially
formulated to protect the stability of the enzyme and, with proper
precautions, Thermo Sequenase II DNA polymerase has ample
stability for robust sequencing.
Denaturation step
(Important) Do not use a denature at temperatures > 95°C or for
52
longer than 30 seconds. The inclusion of a long denaturation step
prior to cycling is a common PCR strategy, but is unnecessary
and not recommended for cycle sequencing reactions. Extended
denaturing can prematurely in-activate Thermo Sequenase II DNA
polymeraseand ultimately produce weak signals.
Annealing step
The appropriate annealing temperature varies with the length and
sequence of the primer. In general, temperatures from 45–55°C
work well. An annealing step is usually required only with primers <
20 bases in length. Optimal annealing temperatures are up to 5°C
higher in DYEnamic ET terminator reactions than with other dye
terminator sequencing products. For primers with sufficiently high
melting temperatures, the annealing step can be omitted, and a
two-step cycling program, alternating between denaturation and
extension temperatures, can be used.
Extension step
Extension at 60°C for 60 seconds is optimal. Because Thermo
Sequenase II DNA polymerase incorporates dITP more rapidly than
other DNA sequencing enzymes, there is no apparent advantage to
increase
the time or temperature of the extension step.
Number of cycles
Twenty five to thirty cycles are sufficient to sequence the
recommended amounts of plasmids or PCR products. More cycles
are usually not necessary and may lead to artifacts. Increasing the
number of cycles might be appropriate when sequencing extremely
large DNAs such as BACs. See appendix 7.7. for more details and
recommendations.
53
7.6. Optimal solutions for sample
resuspension and injection for the ABI 3730,
ABI 3730XL, ABI 3700 and ABI 3100
Several solutions were tested for their ability to protect sequenced
samples from breakdown prior to injection. These solutions included
water, the ABI HiDi™ formamide, and several concentrations of
formamide (deionized and nondeionized) in aqueous solutions at
different pH in the presence and absence of EDTA.
In a comparison experiment, the purified sequencing reaction
products were dissolved in various solutions, placed onto the ABI
3700 loading deck and incubated at ambient temperature for
24 hours. During this period, samples were loaded and run every
3 hours to simulate unattended operation. Each run was analyzed
for the appearance of breakdown products (G blobs appear first
with a concurrent decrease in G signal strength) and for the loss of
resolution in the sequence ladder (C peaks show this first).
The MegaBACE loading solution (low-conductivity 70% formamide
in water, 1 mM EDTA, pH 8) protected the sequenced samples from
decomposition better than formamide solutions without EDTA,
and much better than water. Samples resuspended in MegaBACE
loading solution generated high-quality sequence data with minimal
breakdown after 24 hours. Sequencing products resuspended in
MegaBACE loading solution do not have to be covered with foil.
Other loading solutions might also be appropriate, but must be
tested by the investigator.
7.7. Sequencing BACs and other large
templates
Bacterial Artificial Chromosomes (BACs) and other large templates
> 10 kb in length can be difficult to sequence reliably. A large mass
54
of template DNA is required to provide enough sequencing targets
(picomoles) for efficient sequencing. For example, 10 µg of a BAC
100 kb long would be required to supply the 0.15 pmol
recommended for a sequencing reaction. Additionally, with a large
mass of DNA in the sequencing reaction, specific and efficient
priming becomes difficult.
The following suggestions are recommended for sequencing
large templates:
1. Start with the purest template possible. Clean BAC preparations
yield much more consistent sequencing results than “quick and
dirty” preparations.
2. Include at least 1 µg of template DNA in the reaction. Although
purified BACs are typically difficult to acquire in large amounts,
ap-proximately 1 µg is a good general rule for minimum template
mass.
3. Increase the amount of primer. Greater primer amounts
(20–50 pmol per reaction) can improve priming efficiency.
4. Linearize the template. Linearizing or fragmenting the template
by digestion with restriction enzymes, mechanical shearing, or
sonication can improve sequencing results.
5. Denature the template. Before adding the sequencing premix,
denature the template by heating for 5 minutes at 95–98°C. This
denatures the template more completely and helps priming.
Do not perform this heating step after the sequencing premix
has been added to the reaction, because these temperatures
inactivate the polymerase and result in failed or weak sequences.
6. Increase the number of cycles. Increasing the number of cycles to
50–100 may improve signal strengths.
7. Use full-strength or double-volume reactions. Use the
recommended 20 µl reaction volume, or alternatively, perform
55
double-scale reactions (16 µl of Sequencing reagent premix in
a 40 µl total reaction volume). This increases the final yield of
sequencing products.
7.8. Considerations for post-reaction cleanup
The standard cleanup protocol is designed for 20 ml reactions
carried out in 0.5 ml microcentrifuge tubes or 96-well microplates.
This appendix provides a summary of the considerations for postreaction cleanup. These recommendations are starting points for
optimization. The duration of precipitation, length and speed of
centrifugation, geometry of centrifuge rotor, and other parameters
might need adjusting.
AutoSeq96 plates
Dye terminator is removed efficiently using AutoSeq96 filtration
plates (27-5340-10). AutoSeq™96 is a 96-well spin plate containing
prehydrated G-50 Sephadex™. Follow the instructions that
accompany the plates. The purified sequencing product is recovered
in approximately one reaction volume of water. The sample
should then be dried down in vaccuo and resuspended in loading
buffer for the ABI 310 and ABI 373/377 instruments. The eluate
of the AutoSeq96 plate can be used directly for the ABI 3730, ABI
3730XL, ABI 3100, ABI 3700 instrument, following the instrument
manufacturer’s recommendations for injection from water.
384-well plates and reduced volume reactions
The standard ethanol precipitation protocol requires volumes that
might not fit into all 384-well microplates, and many researchers
choose reaction volumes smaller than 20 µl. In these instances, the
standard ethanol precipitation protocol can be scaled to match the
desired reaction volume. For instance, if total reaction volume is one
quarter the recommended volume (5 µl instead of 20 µl), use 1/4 the
recommended volume of sodium acetate/EDTA (0.5 µl instead of 2 µl)
and 1/4 the recommended volume of 95% ethanol (20 µl instead of
56
80 µl). Success rates may be unacceptable with such small reactions.
Alternately, isopropanol mediated precipitation can be used.
Isopropanol precipitation in 384-well plates
Isopropanol has two advantages over ethanol: 1) Lower
concentrations are required for precipitation, hence smaller total
volumes are involved during cleanup and 2) It is unnecessary to
add salt to the reaction. After cycling, add 1–1.5 volumes of 80%
isopropanol. Spin and wash as outlined in the standard ethanol
precipitation. Good results are obtained using a final concentration
of 40–65% isopropanol in the precipitation mix; 50–60% isopropanol
is optimal. The disadvantage with isopropanol precipitation is that
the pelleted DNA is less firm than with ethanol precipitation, and
may be lost during wash and inverted spins. It is important to add
an isopropanol solution that is less than 100% isopropanol because
addition of pure isopropanol, even to the same final concentration,
causes dye blobs. These blobs are caused by very high local
concentrations of isopropanol before and during mixing.
Alternate salts for ethanol precipitation
The sodium acetate/EDTA buffer included with the kit produces
the most efficient precipitation over the widest range of ethanol
terminators. The disadvantage to this salt is that it cannot be mixed
with ethanol prior to addition to the sequencing reaction. Alternate
salt solutions have been investigated and the results are presented
in Table 1.
To generate this table, control reactions were purified by ethanol
precipitation with various salts and ethanol concentrations. To each
20 µl reaction, 1/10 volume (2 µl) of the given salt was added, the
solution was mixed, and 95% ethanol was added to the tabulated
final ethanol concentration. The mixture was centrifuged and
washed as described in the standard protocol. “Blobs” denotes that
unincorporated terminators were precipitated and not removed by
the 70% ethanol wash. “Good” denotes no terminator blobs observed
57
and the sequence was strong and started at the expected position.
“Delayed” denotes that the precipitation of sequencing fragments
was inefficient and the trace was weak early in the sequence.
Final ethanol concentration
Salt added
80%
75%
70%
1.5M NaOAc/250mM EDTA Blobs
85%
Good
Good
Good
Delayed Delayed
7.5M ammonium acetate
Blobs
Blobs Blobs
Good
Delayed Delayed
7.5M NH40Ac/60mM EDTA Blobs
Blobs Good
Good
Delayed Delayed
1.5M NaOAc
Blobs
Good
No Salt
Blobs
Blobs Blobs
Table 1. Precipitation efficiency
58
65%
60%
Good Delayed Delayed Delayed
Blobs
Blobs
Blobs
8. Troubleshooting (all instruments)
Under ideal conditions, the strengths of the G, A, and T signal values
reported by the analysis software should be roughly equal and
between 200 and 1 000. The C signal will be lower but should be
at least 50% of the G, A, and T values. Signal strengths < 50 or
> 1500 for ABI 373, ABI 377, and ABI 310 or < 10 or > 1500
for ABI 3700, 3100, 3730, 3730XL may indicate problems.
Note: Always run the kit control reagents in parallel with test
samples during optimization.
Problem
Possible causes/solutions
1. Sequence data
have high
background.
1. The matrix was bad.
Confirm that a matrix file has been made
from the standards on each machine on
which the kit will be used.
2. The wrong matrix was used.
Confirm that the matrix file being used
was generated with the same run module
as the samples on the specific instrument
being used.
3. Sequences were run with the wrong run
module.
Confirm that the matrix used for analysis
matches the run module used for collection
of the sequencing data. Either Run Module
A or E can be used, but the module used to
make the matrix must match the module
used for the run.
4. The sequence was not correct, even
though the data looked good.
Verify that the correct mobility file is being
59
Problem
Possible causes/solutions
1. Sequence data
have high
background
continued.
4. Continued.
used. Bases are correlated with dyes via
the mobility file.
2. Sequencing
signals are
weak.
1. The Thermo Sequenase II DNA
polymerase was denatured.
Do not include an initial denaturation step
in the cycling program. Do not incubate
above 95°C.
5. Nonspecific binding of the primer
occurred.
Due to the formulation of the sequencing
reagent premix, primer annealing may be
more efficient with this terminator product.
Increase the annealing temperature or
eliminate the annealing step in the cycling
program.
2. Samples were not centrifuged sufficiently
following salt/ethanol precipitation.
Centrifuge the samples for a longer period
or at a higher speed.
3. The amount of ethanol used for
precipitation was insufficient.
Verify that the final ethanol concentration
is exactly 75% during precipitation of the
DNA.
4. The primer or template contained excess
EDTA.
Resuspend both primer and template in
water or in dilute buffer containing < 0.1 mM
EDTA.
60
Problem
Possible causes/solutions
2. Sequencing
signals
are weak
continued.
5. The DNA preparation was faulty.
Repeat the protocol using the control DNA
supplied in the kit.
6. Either the quantity of template DNA
or the number of cycles used for
amplification was insufficient.
Increase either the amount of DNA used
in the reaction or the number of cycles.
7. The annealing temperature was too
high for the primer being used.
Use a lower annealing temperature for
cycling.
8. Insufficient primer was used.
The recommended amount of primer is
5 pmol per reaction.
9. The primer was faulty.
Some primers form dimers or hairpins
that can interfere with annealing. Use a
different preparation of the primer or a
primer of different sequence.
10. The wrong volume of sequencing
reagent premix was used.
The reagents are carefully formulated to
work optimally with 8 µl of premix in a
20 µl reaction volume. No other
configuration is recommended or supported.
Check the volumes of reagents added.
11. Primer and template DNA were used in
excess. Check the quantities added to the
sequencing reaction mix.
61
Problem
Possible causes/solutions
2. Sequencing
signals
are weak
continued.
12. The sequencing reagent premix was
diluted.
Repeat the experiment using the
recommended amounts of reaction
components.
13. The sequencing reagent premix was
diluted in the wrong dilution buffer.
DYEnamic ET Terminator Dilution Buffer
is specially formulated for use with this
product. Dilution buffers from other
manufacturers are not optimized for use
with DYEnamic ET terminators.
14. For capillary instruments, the sample
contained too much salt.
Salt can interfere with electrokinetic
injection used on capillary instruments.
Perform a 70% ethanol wash of the pellet
after precipitation or use a gel filtration
medium to remove salt.
3. Extensions
appear short
with readlength limited
to < 350 bases.
1. Excess template DNA was present in the
reaction.
In some cases, the use of too much
template, especially PCR product DNA,
can exhaust the supply of ddNTPs in the
reaction. If this occurs, the sequence will
suddenly fade before reaching 350 bases.
This problem is especially prevalent if
excess primer is also used. Use < 1 pmol
of template DNA and 5 pmol of primer for
each reaction. By using less template,
62
Problem
Possible causes/solutions
3. Extensions
appear short
with readlength limited
to < 350 bases.
Continued.
1. Continued.
the concentration of any potential
contaminant is also reduced.
4. Peaks in the
sequence
are broad
and poorly
resolved.
1. The DNA preparation was contaminated.
Repeat the sequencing protocol using the
control DNA supplied in the kit.
2. The extension step incubation was too
brief.
Increase the duration of the extension step
in the cycling program to 2–4 minutes.
2. For the ABI 373 and ABI 377 instruments,
the sequencing gel was faulty.
Repeat the sequencing protocol using a
new gel.
3. Too much template DNA was used in the
sequencing reaction.
Use less template.
5. Localized
broad peaks—
terminator
blobs—are
prevalent in
the sequences
1. Residual terminators were not removed
from the samples.
Carefully follow the protocol for
post-reaction cleanup using a final
concentration of exactly 75% ethanol
and the sodium acetate/EDTA buffer
supplied with the kit. Alternatively, residual
terminators can be removed using spin
columns.
If problems persist, please contact
GE Healthcare Technical Service for
assistance.
63
9. References
1. Ju, J. et al., Proc. Nat. Acad. Sci. USA 92, 4347–4351 (1995).
2. Sanger, F. et al., Proc. Nat. Acad. Sci. USA 74, 5463–5467, (1977).
3. Prober, J. M. et al., Science 238, 336–341 (1987).
4. Lee, L. G. et al., Nucleic Acids Research 20, 2471–2483 (1992).
5. Tabor, S. and Richardson, C. C., Proc. Nat. Acad. Sci. USA 84,
4767–4771 (1987).
6. Tabor, S. and Richardson, C. C., J. Biol. Chem. 264, 6447–6458
(1989).
7. Tabor, S. and Richardson, C. C., Proc. Nat. Acad. Sci. USA 92,
6339–6343 (1995).
8. Huibregtse, J. M. and Engelke, D. R., DNA and Protein Engineering
Techniques 1, 39–41 (1988).
9. McMahon, G. et al., Proc. Nat. Acad. Sci. USA 84, 4974–4978 (1987).
10. Carothers, A. M. et al., Biotechniques 7, 494–496, 498–499 (1989).
11. Murray, V., Nucleic Acids Research 17, 8889 (1989).
12. Levedakou, E. N. et al., Biotechniques 7, 438–442 (1989).
13. Lee, J. S., DNA Cell Biol. 10, 67–73 (1991).
14. Messing, J., Methods in Enzymology 101, 20–78 (1983).
15. Mead, D. A. and Kemper, B. in Vectors: A Survey of Molecular
Cloning Vectors and Their Uses, Butterworth Publishers,
Massachusetts USA (1986).
16. Dente, L. et al., Nucleic Acids Research 11, 1645–1655 (1983).
17. Holmes, D. S. and Quigley, M., Anal Biochem. 114, 193–197 (1981).
18. Carlson, A. and Messing, J., J. Biotechnology 1, 253 (1984).
19. Birnboim, H. C. and Doly, J., Nucleic Acids Research 24, 1513–1523
(1979).
64
65
66
67
GE Healthcare
regional office
contact numbers:
France
Tel: 01 6935 6700
Fax: 01 6941 9677
Asia Pacific
Tel: + 85 65 6 275 1830
Fax: +85 65 6 275 1829
Germany
Tel: 0800 9080 711
Fax: 0800 9080 712
Australasia
Tel: + 61 2 8820 8299
Fax: +61 2 8820 8200
Italy
Tel: 02 26001 320
Fax: 02 26001 399
GE Healthcare UK Limited
Amersham Place
Little Chalfont
Buckinghamshire
HP7 9NA
UK
Austria
Tel: 01 /57606 1613
Fax: 01 /57606 1614
Japan
Tel: +81 3 5331 9336
Fax: +81 3 5331 9370
Belgium
Tel: 0800 73 890
Fax: 02 416 82 06
Korea
GE Healthcare Bio-Sciences
Corp
800 Centennial Avenue
P.O. Box 1327
Piscataway
NJ 08855-1327
USA
Canada
Tel: 1 800 463 5800
Fax: 1 800 567 1008
Latin America
Tel: +55 11 3933 7300
Fax: + 55 11 3933 7304
Central, East, & South
East Europe
Tel: +43 1 972720
Fax: +43 1 97272 2750
Middle East & Africa
Tel: +30 210 9600 687
Fax: +30 210 9600 693
GE Healthcare offices:
GE Healthcare Bio-Sciences AB
Björkgatan 30 751 84
Uppsala
Sweden
GE Healthcare Europe GmbH
Munzinger Strasse 5 D-79111
Freiburg
Germany
GE Healthcare Bio-Sciences KK
Sanken Bldg. 3-25-1
Hyakunincho Shinjuku-ku
Tokyo 169-0073
Japan
Denmark
Tel: 45 70 25 24 50
Fax: 45 16 24 24
Eire
Tel: 1 800 709992
Fax: 0044 1494 542010
Finland & Baltics
Tel: +358-(0)9-512 39 40
Fax: +358 (0)9 512 39 439
Tel: 82 2 6201 3700
Fax: 82 2 6201 3803
Netherlands
Tel: 0800 82 82 82 1
Fax: 0800 82 82 82 4
Russia & other C.I.S.
& N.I.S
Tel: +7 (495) 956 5177
Fax: +7 (495) 956 5176
South East Asia
Tel: 60 3 8024 2080
Fax: 60 3 8024 2090
Spain
Tel: 902 11 72 65
Fax: 935 94 49 65
Sweden
Tel: 018 612 1900
Fax: 018 612 1910
Switzerland
Tel: 0848 8028 10
Fax: 0848 8028 11
UK
Tel: 0800 515 313
Fax: 0800 616 927
USA
Tel: +1 800 526 3593
Fax: +1 877 295 8102
Norway
Tel: +47 815 65 777
Fax: 47 815 65 666
Portugal
Tel: 21 417 7035
Fax: 21 417 3184
http://www.gehealthcare.com/lifesciences
GE Healthcare UK Limited
Amersham Place, Little Chalfont, Buckinghamshire, HP7 9NA
UK
imagination at work
US81050PL Rev C 2006