Transcript
This diagram on the right shows how the ACPL wireless network is
configured. Access Points (AP) are located throughout the main library
and all branches and are setup to advertise their presence.
When a wireless enabled device is turned on it will detect the WiFi signal
automatically and connect to the ACPL_WiFi Network. An icon will
appear in the system tray showing the connection and signal strength.
The icons vary by network card manufacturer and could look like one of
the icons below:
Open up a browser and begin surfing.
If a laptop is not set up to automatically connect a balloon will pop up
stating: Wireless networks detected. (See image on the right) Click
on the message and a list of available networks will appear. Select
ACPL_WiFi and a warning message: You are connecting to the
unsecured ACPL_WiFi will appear. Select Connect Anyway and you
will see one of the connection icons listed above.
Open up a browser and begin surfing.
If the WiFi signal is not detected there are several things to check.
The WiFi antenna on the device may be turned off. Depending on the
manufacturer, turning the wireless antenna on and off of a laptop could
be a physical switch or a keyboard shortcut using the function keys which
could be marked with one of the icons below:
For example, Dell laptops either have a physical switch on the side of the
laptop or you can press Fn + F2. If the antenna is on and still no WiFi
signal is detected check to see if the WiFi device is enabled. From your
laptop click on Start -> Control Panel -> Network Connections. If
the wireless connection shows Disabled, right click on the icon and select
Enable.
If the WiFi device is enabled and still no WiFi signal is detected try
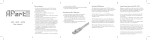
moving closer to an AccessPoint. The AP are located in the
ceiling and look like the image on the left.
If your wireless enabled device is still not working you may want to
check the user manual for further assistance.