1
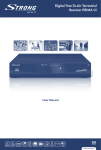
1.
Features and Accessories.........................................................................................2
2.
Connection ................................................................................................................3
3.
Remote Control .........................................................................................................3
4.
First Time Installation ................................................................................................4
5.
Main Functions..........................................................................................................5
5.1
Menu Structure ......................................................................................................5
5.2
Main Menu.............................................................................................................5
5.3
Program List ..........................................................................................................6
5.4
Program Search ....................................................................................................6
5.5
Parental Control.....................................................................................................7
5.6
System setting .......................................................................................................8
5.7
Game................................................................................................................... 11
5.8
Accessory ............................................................................................................ 11
5.9
Personal Style......................................................................................................12
5.10
Timer ...................................................................................................................12
6.
Technical Specifications ..........................................................................................13
A.1
Trouble shooting .....................................................................................................14
A.2
Default PIN-Code ....................................................................................................14
A.3
Environmental Conditions .......................................................................................15
1
ENGLISH
Table of Contents
Thank you for purchasing this STRONG Digital Terrestrial Receiver SRT 51. This SCART
built-in Receiver is one of our latest developments and it is designed to be capable of safely
install to your TV and to achieve its optimum performance. It is advised that first-time and
experienced users read this manual in order to safely install the unit.
1. Features and Accessories
•
For all digital Free-To-Air TV and Radio programmes (with outdoor- or indoor*
antenna)
•
Terrestrial Receiver for direct connection to TV SCART connector
•
Remote Control operates receiver via Infrared Sensor Eye
•
DVB-T compliant, UHF/ VHF Tuner.
•
Set-up support for first time installation
•
Quick and easy installation & user-friendly menu
•
Excellent Audio- and Video quality
•
Support of active antenna by 5 Voltage on antenna connector
•
1.000 channels memory capacity
•
Favourite list for both TV and Radio programmes
•
Parental lock function for menu and selectable per channel
•
Support Teletext via receiver and TV remote control
•
Electronic Programme Guide (EPG) for present / following event information and
up to 7 days for on screen programme information
•
Multi-lingual subtitling and audio track support
•
Multilingual OSD on screen display menu
•
Low power consumption
•
Automatic and manual channel scan options
•
Advanced timer function
•
Mosaic function: 9 TV Channels in overview
•
High speed channel zapping
•
Games (Mine, Tetris, Gomoku)
•
Calendar
*subject to local signal conditions
Accessories:
User Manual
Remote Control
Infrared Eye
Antenna
Power Supply
2
2. Connection
connecting the power adapter to the main power the IR eye LED must light, otherwise the
Remote Control will not react.
Connect the antenna to the SRT 51 and plug it into your TV set, DVD/Video recorder or a
further receiver, which is connected to your TV set.
3. Remote Control
Turns the receiver On/Standby.
MUTE
Mutes audio output of the receiver.
JUMP
Switch between last and current channels.
0~9
Channel selection
VOL+ / VOL- Increase/decrease volume level
CH+ / CH-
Channel up and down
Ÿź
Menu Off: Change the current program to the previous/next program.
Menu On: Moves the cursor up/down
ŻŹ
Menu Off: Increases/decreases the volume level
Menu On: Moves the cursor left/right
OK
Activates the highlighted menu item. Displays a channel list according
to TV /Radio Mode
INFO
Shows information on current channel
MENU
Opens the main menu
EXIT
Exits from the menu or sub-menu and cancels the progressing function
FAV
Shows Favourite List
FAV +/-
Up/Down in Favourite List in TV modus
SUB
Shows the list of subtitled languages currently supported by channel
TEXT
Shows current service’s Teletext
AUDIO
Shows the list of available audio languages for the channel you are watching.
In addition it sets the current channel audio to stereo, left-mono or right-mono.
3
ENGLISH
Plug the IR connector into the SRT 51 and make sure it is properly connected. After
EPG
MODE
Shows the EPG (Electronic Program Guide)
Switch between TV or RADIO
MOSAIC shows pictures of 9 channels on the screen simultaneously
PAUSE
Freeze/Resume picture
4. First Time Installation
You need to install the channels when you use the Digital SCART SRT 51 the first time.
1. You will see the “First Time Installation” window when you turn on the receiver.
Please press YES to continue.
2. Please use
/
arrow buttons to select the settings (Country, Language, Time Zone
and Antenna Power). Use
/
arrow buttons to adjust these settings and click “NEXT”
to continue.
Scroll down to “Antenna Power” by pressing Ÿź. If you are using an active antenna,
which needs to be powered by the receiver, select “ON” by pressing
3. Please use
/
/
.
arrow buttons and press “YES” to continue, the system will search
the channel and save the data automatically.
4
5. Main Functions
ENGLISH
5.1 Menu Structure
Diagram 1
5.2
Main Menu
Press “MENU” button and use
/
arrow buttons to select the menu item. Press button
“OK” to enter or press button “EXIT” to quit menu.
Diagram 2
5
5.3
Program List
The program list may appear too complex for you or contains channels you are not
interested in. This function provides an option for editing the program list.
Press “MENU” button and use
/
arrow buttons to choose the “Program List” (see
Diagram 2). Press “OK” button. You will see three submenus which are TV Program List,
Music Program List, and Sort.
Use
/
arrow buttons to select the submenu. Press “OK” button to enter or press button
“EXIT” to go back to previous menu.
Diagram 3
TV Program List / Music Program List:
You will see the “Program edit table” window when you enter TV Program List or
Music Program List submenu (see Diagram 4). You can edit your favourite program
list. Please use these functions: Fav., Mov. and Del. to edit the program table. Please
use
/
arrow buttons to choose the channel, and press “OK” button to confirm
(see Diagram 5).
Diagram 4
Diagram 5
Sort: There are three submenus: By Name, By Service ID, and By Channel No . Please
use
/
arrow buttons for selecting and use “OK” to confirm (see Diagram 6).
Diagram 6
5.4
Program Search
There are two submenus: Automatic Search and Manual Search.
Press “MENU” button and use
/
arrow buttons to choose “Program Search” (see
Diagram 2).
Note: If Channel Lock is set to “YES” in Parental Control, you will be asked for entering the
Parental PIN. The default PIN is “0000”.
Press ”OK” button, you will see the two submenus which are Automatic Search and Manual
Search (see Diagram 7).Please use
/
6
arrow buttons to select submenu then press “OK”
Diagram 7
Automatic Search: You will be asked “Do you want to start search?”. Choose “OK“.
Choose “YES” for “Do you want to erase your previous channel list?” and the system will
search the local program automatically (see Diagram 8-10). Please use
/
arrow buttons
to set this function and press “OK” to confirm. You can cancel the search process by
pressing the “EXIT” button. All found channels will be stored. The receiver will switch
automatically to the first found channel.
Diagram 8
Diagram 9
Diagram 10
Manual Search: You can use “Manual Search” function to search specific channels or
frequency. Use
/
arrow buttons to select channel No. and press “OK” button to confirm.
(see Diagram 11)
Diagram 11
5.5
Parental Control
The parental control gives the possibility to lock channels and access to some menu steps
by using a PIN code. The default PIN is “0000”. Please click “Yes” in “Channel Lock”
submenu before you perform parental setting. Then choose the channels which you want to
lock. (See Diagram 12-15).
7
ENGLISH
button to enter.
Diagram 12
Diagram 13
Diagram 14
Diagram 15
If you want to change the default PIN code (0000) enter Change PIN menu.
Enter first old PIN and 2 x times the new PIN code. (See Diagram 16-17).
Please, note here new PIN : …………………………………………
Diagram 16
Diagram 17
5.6
System setting
There are eight submenus: TV Standard, Display Type, TV Radio, Video Output, Antenna
Power, Regional Setting, Language and Time Setting.
Press “MENU” button and use
/
arrow buttons to choose “System Setting” (see
Diagram 2). You will see the following submenus: TV Standard, Display Type, TV Radio,
Video Output, Antenna Power, Regional Setting, Language and Time Setting (see Diagram
18). Please use
/
arrow buttons to select submenu then press “OK” to enter.
8
ENGLISH
Diagram 18
/
TV Standard: Please use
arrow buttons to choose “PAL”, “NTSC” or “AUTO”, and
press “OK” to confirm.
Diagram 19
Display Type: Use
/
arrow buttons to select the desired screen format, and press “OK”
to confirm.
Diagram 20
TV Radio: Please use
/
arrow buttons to choose “TV” or “RADIO”, and press “OK” to
confirm.
Diagram 21
Video Output: Please use
/
arrow buttons to choose “CVBS” or “RGB”, and press “OK”
to confirm.
Diagram 22
Antenna Power: Please use
/
arrow buttons to choose “ON” or “OFF” (the factory
default = OFF), and press “OK” to confirm. If you use active antenna, please choose “ON”.
Diagram 23
Regional Setting: Please use
/
arrow buttons to choose the setting you want to change:
Country, OSD Language (on-screen display), and Time Zone. Please use
buttons to adjust, then press “OK” to confirm.
9
/
arrow
Diagram 24
Language: Use
/
arrow buttons to choose the setting you want to change: OSD
st
Language, 1 Audio Lang., 2nd Audio Lang., DVB Subtitle. Please use
/
arrow buttons
to adjust and press “OK” to confirm.
Diagram 25
Time Setting: Use
/
arrow buttons to choose the time you want to change: GMT usage
or Time Zone. Please use
/
arrow buttons to adjust and press “OK” to confirm. You can
set the date and time when the GMT usage is OFF, please use
and press “OK” button confirm (see Diagram 27)
Diagram 26
Diagram 27
10
/
arrow buttons to adjust
5.7
Game
Press “MENU” button and use
/
arrow buttons to choose “Game”. (see Diagram 28).
You will see the four submenus: Mine, Tetris, Gomoku and Calendar. Please use
/
arrow buttons to select submenus and press “OK” to enter.
Diagram 28
Tetris key function:
LEFT / RIGHT key to move the block to left or right.
DOWN to drop the block.
UP to Rotate the block.
5.8
Accessory
There are three submenus: System Information, Factory Default and System Update.
Press “MENU” button and use
/
arrow buttons to choose “Accessory” (see Diagram 2).
You will see three submenus: System Information, Factory Default and System Update.
Please use
/
arrow buttons to select submenus and press “OK” to enter.
Diagram 29
System Information: it displays the version of this system.
Diagram 30
Factory Default:
Note: If you use this function all channels and settings will be deleted. The receiver will
return to basic factory default settings.
Use
/
arrow buttons to select “Factory Default” and press “OK” to enter (see Diagram
31-32).
Note: If Channel Lock is set to “YES” in Parental Control, you will be asked for entering the
Parental PIN. The default PIN is “0000”.
11
ENGLISH
There are four submenus: Mine, Tetris, Gomoku and Calendar.
Diagram 31
Diagram 32
System Update:
Here you can install a new Software Version if available. Use
/
arrow buttons to select
“System Update” and press “OK” to enter.
Diagram 33
NOTE: Do NOT power off or disconnect the receiver from the main during the update
process!
5.9
Personal Style
In this function, you can change Menu Colour, Transparency, and Border Pattern.
Please use
/
arrow buttons to adjust your personal style and press “OK” to confirm.
Diagram 34
5.10 Timer
/
System Schedule: Use
confirm. Use
/
/
/
arrow buttons to select a task and press ”OK” button to
arrow buttons to adjust these settings. Please press” OK” to
confirm and the task will switch to “Active”.
Diagram 35
12
6. Technical Specifications
Frequency Range: VHF 174 ~ 230 MHz / UHF 470 ~ 862 MHz
Input Signal Level: -80dBm ~ -25dBm
IF Bandwidth: 6MHz, 7MHz and 8MHz
Demodulation: QPSK, 16QAM, 64QAM
Video Decoder:
MPEG-2 Main Profile @ Main Level
Format : 720*576(PAL) / 720*480 (NTSC)
Aspect Ratio : 4:3 Letter Box, 4:3 Pan & Scan, 16:9
Audio Decoder:
MPEG/MusiCam Layer I-II
Audio mode: Stereo/Dual Channel, Joint Stereo, Mono
Connectors:
ANT IN (IEC Female)
DC IN (5V)
IR sensor
SCART
General Data:
Pluggable power supply: 100-240 VAC, 50-60Hz, 0.5A to 5 VDC, 2.5A
Power Consumption (max):
3.5 W
Standby Power Consumption:
3.35 W
Operating Temperature: 0 ~ 50° C
Storage Temperature: -20 ~ 70° C
Operating Humidity Range: 0 ~ 90%
Size (W x D xH) in mm: 135 x 55 x 18
Weight: 120 g
13
ENGLISH
Tuner, Demodulator:
A.1 Trouble shooting
In some region, the digital terrestrial signal may be weak. So you'd better use the antenna in
which the booster was built, for watching the weak signal channels.
Problem
Possible cause
Mains lead unplugged
Mains fuse blown
Terrestrial is disconnected
Terrestrial is damaged/misaligned
Out of digital signal area
What to do
Check mains lead
Check fuse
Check terrestrial lead
Check terrestrial
Check with dealer
Scrambled channel
message
Channel is scrambled
Select alternative channel
No response
to remote control
Receiver off
Handset not aimed correctly
Front panel obstructed
Hand set batteries exhausted
Plug in and turn on plug
Aim handset at front panel
Check for obstructions
Replace handset batteries
Look at your notice below.
If you didn’t notice it, please
contact help line
(1) Replace the batteries
(2) Check that there is
nothing in the way of the path
between
the remote
control and the receiver
Standby light not lit
No signal found
Forgotten channel lock
code
(1) The batteries in your remote
The remote control will control need replacing
not operate your
(2) There is an obstruction
blocking the signal path between
receiver
the remote control and the box.
After moving the
The terrestrial feed former new
receiver to another
point may come through a
room you find you are
distribution system which may
no longer able to
reduce the digital signal now
receive digital
received by the box.
reception
A.2 Default PIN-Code
The default Pin code is 0000
If you change it, please note the new Pin Code here:
…………………………………………
14
Try a direct feed from the
antenna
Environmental Issues
STRONG is committed to reducing the impact of its products on the environment.
To maximise the benefits of our design enhancements, your co-operation is required.
Electronic product recycling
Do not dispose of this product with
your domestic rubbish.
Packaging
When disposing of this
product packaging, please
ensure that it is recycled.
Packaging material is to be
depolluted in waste
separation.
At the end of its useful life, this
product contains materials which
when processed correctly can be
recovered and recycled. By
participating in the responsible
recycling of this product you will be
reducing the requirement for new raw
materials and reducing the amount of
material that would otherwise end up
in landfill.
When you purchase a new, similar
product your retailer may offer to take
this old one off you. Alternatively, you
can take it to your local recycling
centre. Your retailer or local municipal
authority will advise you of the
collection facilities available for waste
electronically products in your area.
User of this service will be free to you.
Power Saving
To save power and money,
please put the product into
standby mode when not in
use. We also recommend
disconnection from mains
supply when not in use for
longer periods of time.
Batteries
Do not dispose of the batteries
from your handset with your
domestic waste.
Within the scope of the European
legislation on Waste Electrical and
Electronic Equipment (Directive
2002/96/EC valid as of August 2005)
STRONG provides a recycling system
free of charge for consumers to
returning products after end of life. For
more information about STRONG’s
environmental policy to you:
Where they are available,
participate in your local
municipal or retailer collection
schemes for spent batteries.
Batteries discarded in landfill
sites or incinerated increases
the chances of pollutants
being dispersed into the
atmosphere.
Alternations reserved 01/2008
www.strong.tv - select “About us”
and “Environmental Policy“ from the
submenu.
15
ENGLISH
A.3 Environmental Conditions