
1
SAIO
Automatic device for electrophoretic analysis
User Manual
Version
Date
01.00.00
03/09/2013
P.S. Elettronica, Via Nolana II trav. 20 – Pompei (NA) Tel 081 8639760
www.pselettronica.com
email: [email protected]
1
Table of contents
Version 1 18/01/ 2014
1 SAIO: PREAMBLE....................................................................................................................................................... 5
1.1
1.2
1.3
1.4
1.5
1.6
1.7
1.8
1.9
2
INTRODUCTION TO SOFTWARE .................................................................................................................. 19
2.1
3
TUTORIAL....................................................................................................................................................... 20
METHODS ............................................................................................................................................................ 32
3.1
3.2
3.3
4
USER MANUAL AND MAINTENANCE ................................................................................................................ 6
SAFETY NOTES ................................................................................................................................................. 7
UNPACKING ...................................................................................................................................................... 8
INSTALLATION .................................................................................................................................................. 9
OPERATING PROCEDURES............................................................................................................................... 11
DRAINING, CLEANING AND MAINTENANCE OF THE MACHINE.......................................................................... 16
WARRANTY CONDITIONS ................................................................................................................................ 16
PROCEDURES FOR THE DISPOSAL OF THE MACHINE......................................................................................... 17
TECHNICAL SPECIFICATIONS .......................................................................................................................... 17
CONFIGURATION PARAMETER ........................................................................................................................ 32
DEFINITION FRACTIONS .................................................................................................................................. 35
DEFINITION COMMENTS .................................................................................................................................. 38
TODAY’S DATA .................................................................................................................................................. 40
4.1
4.2
4.2.1
4.3
4.3.1
MANAGMENT SERUM HOLDER ....................................................................................................................... 41
CHANGE TRACKS ........................................................................................................................................... 44
GRAPH ...................................................................................................................................................... 48
PRINT ............................................................................................................................................................. 52
PRINT PREVIEW ............................................................................................................................................. 54
5
CONTROL MACHINE........................................................................................................................................ 56
6
CANCELLATION ................................................................................................................................................ 59
6.1
6.2
7
CANCELLA ESAMI .............................................................................................................................................. 60
DELETE SERUM HOLDER .................................................................................................................................... 62
ARCHIVE.............................................................................................................................................................. 63
7.1
ADVANCED SEARCH .......................................................................................................................................... 63
7.2 EXAM ARCHIVE PRINT ....................................................................................................................................... 64
7.2.1
REGISTRIES .................................................................................................................................................... 65
7.2.2
QUALITY CONTROL ...................................................................................................................................... 65
8
REGISTRIES ........................................................................................................................................................ 67
8.1
8.2
8.3
8.4
9
LABORATORY ................................................................................................................................................. 67
DISEASES ........................................................................................................................................................ 70
DOCTOR ......................................................................................................................................................... 71
SECTOR .......................................................................................................................................................... 72
QUALITY CONTROL ......................................................................................................................................... 74
9.1
CONFIGURATION ............................................................................................................................................ 74
9.2
RESULTS ......................................................................................................................................................... 76
9.2.1
Print Preview ............................................................................................................................................ 77
2
9.3
GRAPHS .......................................................................................................................................................... 78
9.3.1
Print Preview ............................................................................................................................................ 79
10
DATA EXCHANGE WITH THIRD-PARTY APPLICATION ....................................................................... 80
10.1
IMPORT PATIENT ............................................................................................................................................ 80
10.2
EXPORT PATIENT ............................................................................................................................................ 81
INCLUDE PER IMPORT/EXPORT DATA ............................................................................................................................ 83
NOTES .......................................................................................................................................................................... 86
Table of the Pictures
Picture 1.1 - Unpacking .......................................................................................................................9
Picture 1. 2 – Connections of probes on the external level...............................................................10
Picture 1. 3 – Saio Complete Plan......................................................................................................12
Picture 1. 4 – Insert samples ..............................................................................................................15
Picture 1. 5 - Insert serum holder......................................................................................................15
Picture 2. 1 – Splash page ..................................................................................................................20
Picture 2. 2 – Today’s Data................................................................................................................21
Picture 2. 3 – Dropdown menu ..........................................................................................................22
Picture 2. 4 – First Level Menu (Macro Functioning) .......................................................................22
Picture 2. 5 – Second Level Menu (subdivisions Macro Functioning ).............................................22
Picture 2. 6 - Status Bar ....................................................................................................................22
Picture 2. 7 – Insert number Patient...................................................................................................23
Picture 2. 8 - Managment serum holder............................................................................................24
Picture 2. 9 – Save Data .....................................................................................................................25
Picture 2. 10 – Start Electrophoresis Process.....................................................................................26
Picture 2. 11 – Control Machine ........................................................................................................27
Picture 2. 12 – Change Tracks ...........................................................................................................28
Picture 2. 13 - enlarge image ............................................................................................................29
3
Pictrure 2. 14 – Print Reports.............................................................................................................30
Picture 2. 15 – Print all selected samples..........................................................................................30
Picture 2. 16 – Print Preview .............................................................................................................31
Picture 3. 1 – List Method..................................................................................................................33
Picture 3. 2 – Applied Time ...............................................................................................................34
Picture 3. 3 – Visualizing option of the trace in print ........................................................................34
Picture 3. 4 –Definition Fraction........................................................................................................35
Picture 3. 5 – Group of Fraction ........................................................................................................36
Picture 3. 6 – Normal Values Modification .......................................................................................36
Picture 3. 7 – Save the updated fraction.............................................................................................37
Picture 3. 8 – Sample Category..........................................................................................................37
Picture 3. 9 – Fractions Color ............................................................................................................38
Picture 3. 10 –Definition Comments..................................................................................................39
Picture 4. 1 – Today’s Data Window.................................................................................................40
Picture 4. 2 – Serum Holder 16 samples ...........................................................................................41
Picture 4. 3 - Number Patient...........................................................................................................42
Picture 4. 4 – Change Tracks Window ..............................................................................................45
Picture 4. 5 – Factor Parameter..........................................................................................................45
Picture 4. 6 - Modify Pattern Factor .................................................................................................46
Picture 4. 8 - Export Insert name machine IP address ....................................................................46
Picture 4. 9 – Graph ...........................................................................................................................48
Picture 4. 10 – Drop Down Menu Graph ...........................................................................................49
Picture 4. 11 – Color Pattern..............................................................................................................49
Picture 4. 12 – Zoom Sider ................................................................................................................50
Picture 4. 13 – Insert Legend .............................................................................................................51
Picture 4. 14 – Zooming Of the Image...............................................................................................51
Picture 4. 15 – Print Window.............................................................................................................52
Picture 4. 16 – Printing Mode ............................................................................................................52
Picture 4. 17 - Export – Insert name of machine and IP address .....................................................53
Picture 4. 18- Print Preview ..............................................................................................................54
Picture 5. 1 – Control Machine ..........................................................................................................57
Picture 5. 2 – service Maintenance ....................................................................................................58
Picture 5. 3 – User services...............................................................................................................58
Picture 5. 4 – Password Maintenance ................................................................................................58
Picture 6. 1 – Delete Exams ...............................................................................................................59
Picture 6. 2 – Setting Filters...............................................................................................................60
Picture 6. 3 – Filters Delete Patients .................................................................................................61
Picture 6. 4 – Delete Serum Holder ...................................................................................................62
Picture 6. 5 – Delete Serum Holder in the Archive ...........................................................................62
Picture 7. 1- Advanced Search ...........................................................................................................63
Picture 7. 2 – Setting Filters...............................................................................................................64
Picture 7. 3 – Print Patient ................................................................................................................65
4
Picture 8. 1 – Changing the header ....................................................................................................68
Picture 8. 2 – Disease.........................................................................................................................70
Picture 8. 3 – Doctor Windows..........................................................................................................71
Picture 8. 4 - Sector..........................................................................................................................72
Picture 9. 1 - Configuration...............................................................................................................75
Picture 9. 2 - Results .........................................................................................................................76
Picture 9. 3 - Print Preview ...............................................................................................................77
Picture 9. 4 - Graphs ..........................................................................................................................78
Picture 9. 5 - Print Preview Graphs...................................................................................................79
1 SAIO: Preamble
SAIO performs the automatic electrophoresis of Serum Proteins, Hemoglobins, Lipoproteins,
Isoenzymes,not concentrated Urine protein etc., and other methods that require incubation step,
which will be performed in a semi-automatic way. Additional specific instructions for the
methodologies will be describe in the provided kits.
The equipment of the machine consists of:
5
•
A robotic unit that performs in a fully automated way all the phases of the process: the
buffering of strips from 1 to 2, which can be made of cellulose acetate or other kind of supports,
the drying of the strip, the samples deposit, migration, staining, destaining, reading with
incorporated densitometer;
•
A built-in Computer runs the robotic controllers ;
•
A software for the machine functioning and management of the program.
1.1
User Manual and Maintenance
SAIO was designed and developed in full compliance with all requirements of safety and
healthy requirements. Please READ CAREFULLY every part of this guide before installing
and use the machine. Here you will find all the information on how to use the machine and
how to keep it efficient. Keep this booklet with care, in case you lose it, ask for another copy
to the manufacturer. If you sell or give the machine to another person, do not forget to hand
this booklet to the new user.
The manufacturer disclaims any liability for any damage that may be directly or indirectly
resulting to persons, things and animals occurred as consequence of a wrong observance of
the procedures given and explained in this user guide, especially the instructions regarding
the installation, the right use and the maintenance of the machine.
Index
1. Safety Notes
2. Unpacking and Installation.
3. Operating modes.
4. Reagents and samples loading.
5. Placement of the membranes of cellulose acetate.
6. Running of Machine.
a) Serumprotein
b) Hemglobin
6
7. Unloading, cleaning and maintenance.
8. Guarantee Conditions.
1.2
Safety Notes
The chief of the laboratory must run all the working procedures in the correct way and he must
adopt collective and individual protective measures from exposure: all the workplaces, where
biological agents are handled, must be marked with the appropriate risk signal, and they should be
provided adequate sanitation measures in case of accidental propagation and emergency procedures.
During SAIO use the following measures have to be adopted:
• SAIO must be used strictly in accordance with the purpose for which it was designed and as
specified in this guide. The machine must be used only by qualified persons, any other type
of use is considered improper and therefore dangerous. The manufacturer will not assume
any responsibility for damages arising out of misuse.
• Always remove the plug from the power outlet before cleaning or doing any maintenance.
• Any modification to the machine is extremely dangerous and it implies the end of the
guarantee.
• In case you need an intervention to the electrical system, please contact only those persons
who are qualified and authorized.
• To ensure the efficiency of the machine and its proper functioning is essential to follow the
manufacturer instructions and call only qualified and authorized persons for the
maintenance. It should be checked at least twice a year.
• Switch it off incase of failure and/or malfunctioning, do not touch it and contact the
manufacturer and /or an authorized service center.
• When using the electrical equipment the following safety measures must be complied:
Do not touch the appliance with wet or damp hands or feet; do not unplug by pulling on
power cord. To unplug, grasp the plug not the power cord; do not expose the appliance to
the weather (rain, sun, etc.); when replacing the power cord use only another one with the
identical technical characteristics.
• When the machine is not used anymore, it is recommended to unplug the power cord with
the hands.
7
• To ensure safe operations, such as the analysis, it is important to have an adequate lighting
at a workstation.
• Eating, drinking, smoking, handling contact lenses, applying cosmetics, and storing food for
human consumption must not be permitted in laboratory areas.
• Never pipet by mouth. Use of the automatic pipet.
• Do not forget to use DPI, which is any equipment that must be worn and kept on in order to
protect the body from risks of security (laboratory clothing, disposable sterile gloves, and
goggles).
• Decontaminate work surfaces before and after use, and immediately after spills (see point
"1.6 Draining, cleaning and maintenance procedures");
Avoid unnecessary proximity to high EMF sources (e.g. radiology equipment and CT scanners),
that may cause interference with the machine, thereby affecting its proper functioning.
1.3
Unpacking
Make sure the package is intact and has no obvious signs of damages, otherwise do not install the
machine, but complaint to the carrier and inform our agent or the distributor. Open the box from the
top, according instructions, and pay attention to take out the machine upright. (Picture 1.1)
8
Picture 1.1 - Unpacking
Check the following contents of the box:
•
Electrophoresis machine
•
User Manual;
•
Power Cord;
•
External Sensor Cable;
•
Reagent containers;
•
Starter kit containing absorbent cardboards, buffer, staining, destaining, dry or wet
acetate strips, smart card. This kit allows you to carry out electrophoresis tests;
1.4
Installation
Put the machine on a table or on a work bench perfectly level.
Open the Plexiglas cover of the machine, remove any sponges or tape.
Unlock the cart by removing the lock located on the steel frame on the left side, it is sufficient to
unscrew anticlockwise the pommel on the PVC. That lock must be stored; it can be useful in case of
relocation of the machine it must be reapplied in order to prevent any movement of the cart.
9
The instrument contains from 1 to 2 strips holder and 1 sample holder base, but the sera applicator
will be in another provided container. On the left side it is clearly visible an opening with all
computer connectors to be linked to external devices.
On the same panel there is also the master power switch, the electric switch and two and 1.6 A
fuses. A smart card reader is placed vertically on the left side of the optical reader, that is located
on the worktable of the machine.
On the front side of the machine,on the right, there is the switch button that becomes illuminated
when the machine is on.
The machine equipment includes also some tanks containing reagent which load it the reagent in the
both chambers (Imbibition and staining / Destaining) Migration Chamber.
There are 6 tanks of reagents: Staining, Destaining, Serumprotein Buffer, Hemoglobin Buffer,
Distilled Water, Waste.
The kit will contain the reagents required for SAIO processes of electrophoresis with all the
concerned methods. All machines are supplied with sensor cable, which connect the machine with
the external tanks. Pay attention when filling the tanks with the appropriate reagents, as indicated on
the caps and on the tanks, and pay attention when cleaning them.
In Picture 1.2 there are junctions of tubes connected to the pipes that go to the reagent tanks and
liquid discharge. On each socket it is indicated the predisposed liquid.
Picture 1. 2 – Connections of probes on the external level
On the same plate there is also a black female connector which must be connected to the male
connector, which is linked to the sensors of the tanks. The male connector can be inserted snugly
into the receptacle, the female connector, then turn it clockwise to ensure a reliable physical and
electrical connection.
10
Before going on with the electrical connections, it is necessary to verify that the main voltage of the
network corresponds to the values shown on the rating plate located on the lateral side of the
machine. Moreover it is important to check sure that the residential electrical system is adequate for
the maximum power absorbed by the unit, which is indicated on the rating plate.
The electrical safety of the machine is ensured only if it is properly connected to an efficient
grounding system in compliance with all electrical safety standards.
The manufacturer cannot be held responsible for any damage caused by the absence of the
grounding system. Also make sure the connection is made at a plant and outlets of adequate
capacity to power absorption.
In general, the use of adapters, multiple sockets and/or extensions is not recommended. If they must
be used, utilise only those single or multiple adapters and extensions which comply with the current
safety regulations. However, make sure not to exceed the current rating marked on the single
adapters and extensions, or the maximum power marked on the multiple adapters.
Plug the power cord into the socket with switch and with fuse tubes and connect it to 220V outlet.
At this point SAIO machine can be switched on using the switch located on the socket group, and
then pushing the power button on the front side of the machine. Once the machine is switched on, it
will not move till the start command will be issued. After the first switching on,it is recommended
to run the RESET command following the instructions of the software.
(Control Machine
users service)
The delicate software manages every movements of the machine and all its sensors. At the end of
the electrophoretic process the software acquires the reading data from the densitometer, than it
analyses them and creates a densitometric report with all the data related to the examined sample.
1.5
Operating Procedures
Loading of Reagent
11
This user guide contains instructions about the loading related to the electrophoresis of serum
proteins. Other analysis procedures can be found described in the kits, with everything needed to
run them .
Picture 1. 3 – Saio Complete Plan
The interior of the unit is accessed by opening the cover (the power to the electrical circuits and the
motors will be consequently automatically interrupted).
1.
Robotic arm (pliers)
2.
SmartCard reader
3.
Positioning of the lid of the migration chamber
4.
Densitometer reader
5.
Applicator with an automatic wash distilled water
6.
Serum holder with 16 basin where inject serum ( 25-30 micro liters )
7.
Migration chamber with bridges (papers holder) with bibulous paper 70x20mm
12
that the absorbing the buffer become electrically conductive and keep adequately wet the
strip during migration.
8.
Cover of the migration chamber
9.
Positioning of strip drying
10.
Imbibition strip tank
11.
Tank for staining and destaining of the
Necessary content to run 400 serum proteins tests
2 x 25
pieces of strips supported on Dry Plates
1 x 100 ml
buffer Tris hippurate
1 x 200 ml
Staining Ponceau S ready to use
2 x 250 ml
Destaining Concentrate 20 X
20
Applicator papers (70 x 13) mm
6
Strip drying papers (92 x 47) mm
4
Migration chamber floaters (70 x 20) mm
Product identification and intended use
The reagents and accessories for the clinical electrophoresis diagnosis of serum proteins are
intended to be used to research of disproteinemie and to quantify albumin, alpha-1, alpha2, Beta and
gamma globulins. The reagents should be used only for the purpose that has been defined above and
by a qualified laboratory.
Use fresh serum, as specified in laboratory procedures and in conformity with the guidelines. Avoid
the use of plasma, because the fraction of fibrinogen may disturb the interpretation of the gamma
area. Do not use samples hemolyzed or containing cells.
.
Reagents preparation
Concentrate buffer: Pour about 80 ml of distilled water in the bottle
13
Ponceau S destaining ready to use
Concentrate destaining 20 X Pour about 5 liters of distilled water in the bottle
Keep strip and reagents to a ambient temperature +15°/+30°C.
The best-before dates are indicated on the labels.
Once opened the reagents are stable and can be used until expiration date, if closed immediately
after use and protected from direct sunlight avoiding the evaporation.
Warning:
If black spots or mold inside the bottle will occur it will be necessary to remove the buffer
If black spots or mold inside the bottle will occur it will be necessary to remove the destaining
The products are intended for professional use in laboratories. The left over products, the waste
resulting from their use and the containers must be removed in accordance with current legislation
Protocol
Insert the absorbing paper (floating) in the migration chamber.
Insert the paper for the drying of the strip, that is located on ton one side of the migration chamber.
Supported strips on Mylar, that can be found in the kit, can be applied on special strips holder
frames. It is necessary to hook these strips matching the holes with the pins present on the strips
holder, after having lifted the safety lock, making a slight pressure on the central part of strip
holder. Place the strips holder provided with strips in the chamber containing the electrophoresis
buffer. If you have to run more than 8 electrophoresis, load also other strips on the additional strips
holder.
Serum holder
Remove the serum holder frame by sliding outward.
Pipette from 25 to 30 ml of each sample, starting from the basin with number 1 (first row and the
first basin on the operator side), and put the serum in the order indicated (see Picture 1. 3)
Insert the 70 x 14 mm paper buffer into the proper strips holder. (See Picture 1.4)
14
Picture 1. 4 – Insert samples
Picture 1. 5 - Insert serum holder
Close the lid of the machine.
Choose the method and start the electrophoretic process.
Scanning of the electrophoretic traces.
At the end of the process of staining and drying, the strips take automatically into the reading
position in the scanning compartment.
Afterwards it is possible to proceed with the analysis of the performed readings and make any
corrections. To include any demographic data and other actions on the charts and on the
printers, consult the user guide in the section "2. Introduction to Software”
After turning off the machine it is necessary to empty the serum holder and clean all other
components
15
1.6
Draining, cleaning and maintenance of the machine
Follow these guidelines to perform the unloading and cleaning operations.
•
Turn Off the instrument
•
Open the cover of the Instrument
•
Remove the strips holder frame, release the membranes,
•
Wash the frames with running water and let them dry.
•
Remove the absorbing buffers from the strips holder and from the dripping support of the
frame. Throw them into the special waste.
•
Extract the serum Holder and remove the serum from the wells and wash it with distilled
water
•
Put all components in the proper places in the machine.
•
Close the lid of the machine.
Maintenance operation
The Maintenance must be performed only by qualified personnel, during repairs remove the plug
from the socket.
Disassemble the back panel by unscrewing the fixing screws. At this stage pay attention when
unplugging the cable used for grounding system.
The manufacturer will provide appropriate instructions and wiring diagrams to the authorized
personnel for the maintenance and/or repairs. The customer should always contact authorized
service centres, or, when possible, send the machine to the head office.
1.7 Warranty Conditions
SAIO is guaranteed for 12 months from the purchase date, which is shown on a valid receipt given
by the seller.
The warranty includes free repair or replacement of component parts of the machine that are
16
imperfect because of manufacturing defects.
Warranty does not cover damage or defects due to:
- Negligence or careless use (failure to follow the safety instructions),
- Improper installation or maintenance operated by non-qualified personnel,
- Damage caused by transportation or any circumstances which cannot clearly be traced back to
defects resulting from errors in the manufacturing process.
The warranty does not cover any rubber tubing / silicone , neither the non-return valves, the filters
for the reagents or for washing water, because they can be subject to natural wear or natural
contamination during normal operations of the machine.
The warranty does not cover improper installation with not in conformance with the maintenance
procedures as specified in this user guide.
The warranty does not cover any damages caused to the unit by improper use, customer neglect, or
repairs performed by an unauthorized technician.
In case of repair at an Authorized Service Center, all transport risks and any costs will be borne by
the purchaser. It is in any case excluding the extension of the guarantee as a result of any failure.
1.8
Procedures for the disposal of the machine.
To dispose the machine SAIO is necessary to contact specialized companies as permitted or
required by applicable law, they will be responsible to recycle and dispose the machine.
1.9
Technical Specifications
Analysis
Electrophoresis of Serum Protein, Hemoglobin, (Urine Protein,
17
Lipoprotein)
Electrophoretic Media
Dry cellulose acetate plates (available in 2 sizes)
Analytical Capacity of
Up to 16 samples per cycle on 2 plates
standard plate
Analytical Capacity of mini
Up to 8 samples per cycle on 2 plates
plate
Analytical Throughput -
8 micro samples in about 30 minutes
standard plate
16 micro samples in about 50 minutes
Analytical Throughput -
4 micro samples in about 30 minutes
mini plate
8 micro samples in about 50 minutes
Sample Plate
Removable, with 16 wells
Robotic Arm
Electronic check integrated for presence of objects
Applicator Washing
Automatic by circulation of deionized water
Migration Chamber
Automatic loading of buffer solution
Staining and Destaining
Automatic loading of solutions
Trays
Liquid Control
Interface
Power Supply
Dimensions
Weight
Operative System
User Interface
Monitor (not included)
Computer
Reading System
Bright Source
Densitometer Linearity
Software
By infrared sensor and by time control
USB, LAN
220 – 240 V ac 50 – 60 Hz
50x45x45 cm
25 Kg
Windows 7
Keyboard and mouse (not included) by USB or PS/2
VGA connection
Integrated into the instrument
8 indipendent channel
8 Led ultrabright
0 to 2.8 D.O.
Dedicated for instrument and densitometer management
18
2
Introduction to Software
SAIO has a program that exploits all the possibilities that are offered by the intuitive Windows lite.
In addition to a quantitative, reliable and fast electrophoretic analysis, SAIO can record all the data
in a standard database, which is easily and rapidly reachable.
The program is structured with windows that help the user in the sequence of operations to be
performed.
On the first screen you can start clicking with the mouse on the menu, choosing the type of
operation.
The program is very flexible, both during the performing of the electrophoretic process, and after
reading the samples.
During the execution electrophoresis, in order to speed up the operations, it is possible to modify
the traces of an earlier scanning and to keep the data archive.
The scan results are automatically presented on the video, and it is possible to correct them and
include any comments. Within the program there is an interactive curves editor, which can also
modify the trace.
The editor shows the image of migration, the resulting curve and the numerical results with the
identification of normality and with the personal data of the patient. It is possible to change the
position of the minimum, the names of the fractions and to add comments by simply clicking the
mouse on the corresponding button that is present on the window. Using the 'Previous' and 'Next'
key, you can scroll through the results of the various patients.
An interesting feature of SAIO is the printing: it produces a report that, apart from the graph of the
curve and the numerical results, also contains the image of migration, the personal data and
comments. The resulting printing can then be delivered directly to the patient, with no need to
attach other documents such as reports or images of migration
19
2.1
Tutorial
Before the detailed description of the operations offered by SAIO, the user may consult the
following tutorial for an overview of the operational program.
a) Start the machine double clicking on SAIO icon at the center of the Desktop.
b) When initializing SAIO a splash page will appear (see Picture 2.1).
Picture 2. 1 – Splash page
20
a)
After initialising stage the “Today’s Data” will appear as first page. (see Picture 2.2).
Picture 2. 2 – Today’s Data
SAIO utilises a programme with two menus, the first one appears on the top of the application
and is a dropdown menu (see Picture 2.3);
In the dropdown menu you can select some useful features:
• From the "File" menu you can select the "Select language" command to access to the multilanguage program;
• From the menu "Features" you can select the commands:
"Reset Layout File" to restore size and positions of objects on the screen;
"Turning off the alarm" to turn off the alarm after the completion of an electrophoretic
process.
"Loading Kit" to load the kit providing the serial number, the unlock code, the serial
machine inventories.
21
"Alarm Kit Remainder" to indicate the minimum threshold number of strips.
Picture 2. 3 – Dropdown menu
The second menu is composed of two levels:
The first level (see Picture 2. 4), below the application, shows all the functions exported by SAIO.
The second level (see Picture 2.5), up to the application, shows the subdivisions of feature selected
on the first level.
The program also includes a status Bar (see Picture2.6) that provides the user with further
information. In particular the bar, starting from the left, is divided into three fields:
• State, to indicate a process running on the machine
• Selected Method, to indicate the reference method during the electrophoretic process of the
samples.
• Date and time, date and hour of the day.
Picture 2. 4 – First Level Menu (Macro Functioning)
Picture 2. 5 – Second Level Menu (subdivisions Macro Functioning )
Picture 2. 6 - Status Bar
22
b) Before
starting the electrophoretic process, please ensure that you have selected the
appropriate method:
•
If you have selected the appropriate method with the correct setting of the parameters go
to step e).
•
In the case the method has not been correctly selected or it is the first use of the
software or any need to modify the parameters, see Chapter 3 - Methods and then go to
step e)
c)
In "Current data" click on the yellow icon
d) Digit
to add a new sample holder
the number of patients that must be added to serum holder and click OK (see
Picture 2.7).
Picture 2. 7 – Insert number Patient
e)
When inserting the number of patients (from a minimum of 1 to a maximum of 16) on
the image of the serum holder, on the left, you will see the same number of wells
23
becoming red. The green well indicates that it is possible to insert the data of the patient
by writing in the tab highlighted in yellow. (see Picture 2.8).
Picture 2. 8 - Managment serum holder
f)
UAfter the insertion of all the data of the first patient, (see Picture 2.9) click the yellow
icon with a floppy disk symbol to save data and confirm by pressing OK
24
Picture 2. 9 – Save Data
g) Once the data of the patients have been entered and saved, the SAIO automatic process
can be started by clicking on the key that lights up with yellow icon
(see Picture
2.10).
NOTE: it is possible to insert the data after the start of the automatic process of
electrophoresis
25
Picture 2. 10 – Start Electrophoresis Process
h) When running the machine for the samples reading, on the screen will appear "Machine
Control" (see Picture 2.11), which illustrates the operational functions.
The image shows the correct placement of objects inside the machine.
The left column shows the status of the liquid levels.
At the center of the field called "Migration", check the values of voltage, the current
migration and the remaining time for migration.
The "Machine Status" indicates the status of the machine.
The "List of services" allows the user to perform routine maintenance of the machine.
26
Picture 2. 11 – Control Machine
i)
At the end of the electrophoretic process after the densitometric reading of the strip, you
can see the traces going back to: "Current data"
"Edit traces" (see Picture 2.12)
27
Picture 2. 12 – Change Tracks
On the “Edit Traces” screen both the graph and the relative values of the fractions for each
sample are illustrated. At the top left there is also the list of the analyzed samples.
On the same screen, as in the previous one, you can enter or edit data of each sample.
On the graph window it is possible to insert any necessary changes, such as: inserting, moving
and deleting minimum, changing the base line, and zooming by clicking on the squared button
on top right of the graph window (see Picture 2.13)
28
Picture 2. 13 - enlarge image
NOTE: For more details on the changes effectively the tracks, you can refer to Section 4.2
"Edit Traces".
j)
Once made final changes of the histograms can be traced to the press of selecting the
"Print" window at the top, next to the "Change Tracks" (see Picture 2.14)
29
Pictrure 2. 14 – Print Reports
You can print the report by clicking the right mouse button on the row and you will see a check
mark appearing on the left of the numbered line, otherwise you can choose to select all the read
samples by clicking on the symbol with a tick (see Picture 2.15)
Picture 2. 15 – Print all selected samples
30
k) Selected the samples to be printed by clicking on the yellow Printing icon
, than a
Print Preview window will appear.
Picture 2. 16 – Print Preview
l)
Print the report clicking on the report icon
31
3
Methods
In this section of the program the user can choose the method for the analysis of samples.
Clicking on the menu "Methods" to access to "Configuration Parameters", "Definition
Fractions" and "Definition Comments" these windows allow the following operations:
•
Choosing a method from the default ones by selecting it with the mouse, in the window
"List of methods" section on the left side of the screen and setting it as current method
for analysis of samples using the yellow button "Set the current method of work"
.
This operation updates the second field of the status bar with the current descriptions of
the methodology. It is also possible to set Configuration Parameters for each method in
the default system on the right part of the screen.
•
Defining a group of fractions for the current method, both concentration value and
absolute value, for predefined patients in the system.
•
3.1
Managing comments for the current method.
Configuration Parameter
32
In the column “List methods” on the left side, you can see the different types of methods that
can be performed (Picture 3.1).
Picture 3. 1 – List Method
To select a method, just clicking on it and a yellow check mark icon will light up
. Clicking on
this icon it will display a message saying that the method was successfully selected and that the
program will restart according to the chosen method.
On the “Configuration Parameters” screen, on the right in front of blue window you can make all
the possible changes of parameters:
• Voltage: you can vary the tension moving the vertical arrows, or you can vary the current
deselecting first in the indicator box next to "volts"
33
•
Applied Time (sec-min): you can vary the migration times, drying times of the strip, times
of imbibition, staining and destaining (see Picture 3.2)
Picture 3. 2 – Applied Time
•
Outside normality Symbol: in the printing reports you can decide whether to highlight in red
any abnormal results or to use symbols that indicate out of range.
•
Unit of measure concentration: you can choose the unit of the desired concentration unit.
•
Representation: you can choose to put in the report the average absolute values , normal values
of concentration, concentration, reference of concentration by selecting the respective check box
with the mouse.
•
Viewing and Intensity color (1-255) Migration: it includes the ability to put together the
histogram and the real electrophoretic trace of the patient. You can change the width and the
position of the trace (see Picture 3.3)
Picture 3. 3 – Visualizing option of the trace in print
•
Areas ratio: Shows the areas relation and allows the inclusion of any comments.
•
Print: it allows you to insert the name of the method on the report before printing.
34
3.2Definition Fractions
Create fractions group connected to the method, in particular choose the sample category
between human and veterinary ( Picture 3.4 )
Picture 3. 4 –Definition Fraction
In the Picture 3.4 two buttons are highlighted in yellow
, they allow you to delete or add
a group of fractions. SAIO machine usually is delivered and installed with all the parameters of
35
the methods already set correctly, but in case you want to make any changes to the methods,
please follow the below procedure.
To add a group of fractions click the icon
and enter a new group of fractions from a
minimum of 1 to a maximum of 12 and confirm with OK. A message will appear asking to enter
the name of the new group of fractions (see Picture 3.5).
Picture 3. 5 – Group of Fraction
To change the normal minimum and maximum values of the fractions, select with the mouse the
fraction and on the left will appear a checkmark and simultaneously also the values of fraction
in the fields above (see Picture 3.6)
Picture 3. 6 – Normal Values Modification
Change the value of the fraction in the appropriate field, a checkmark will appear in yellow.
Clicking this button the value will update. Save the changes by clicking on the saving
button.(see Figure 3.7)
36
Picture 3. 7 – Save the updated
fraction
An important parameter is the factor, placed in the first right column containing the names of
the fractions. The factor can increase or decrease the numeric read value for each fraction. This
operation is performed essentially in the calibration phase of the machine by using a known
sample or a control sample.
Fractions Values: values can be expressed in percentage or in g/dL
Samples Category: the types of patients can be chosen in the adjacent field (human or animal),
or it is possible to choose the group fractions (see Picture 3.8)
Picture 3. 8 – Sample Category
Sum of Fractions: it determines the fractions on the basis of the calculation of the ratio A /G, in
particular to the dividend is assigned the fraction Albumin and to the divisor the Globulin.
You can color the area of fractions of report by clicking on the button
which allows two
operations (see Figure 3.9):
• choose a color for the selected fraction on the list;
37
• select a grid for the selected fraction on the list;
Picture 3. 9 – Fractions Color
3.3Definition Comments
In Definition Comments is possible to insert default comments that can be used in case of
pathologies reported by densitometric reading of the traces.
To enter a new comment, select the blank field at the top side and then add to it to the comment list
by clicking on the icon
. A confirmation message will appear in order to validate the successful
saving the list of comments of the current method.
To remove comments select the comment line in the list and click the icon
. A confirmation
message will appear to validate the operation.
38
Picture 3. 10 –Definition Comments
39
4
Today’s Data
Picture 4. 1 – Today’s Data Window
The Today’s Data section contains all the information related to the samples acquired during the
day. It is possible to start the process of electrophoresis, to access and to modify the results, to print
out reports.
Click on the menu "Today’s data" to access the "Management Serum holder” window, "Change
Traces" and "Print" that allow you to perform, respectively, the following operations:
If needed, insert a new serum holder using the “Add” new serum holder to the current
method key and enter patient data in each empty slot of serum holder. The "Previous serum
holder details" and "Next serum holder details" keys allow scrolling among the patients of
the day. If no additional sample has to be inserted in serum holder, you can start the
electrophoretic process pressing the button
"Start machine the samples reading"
It offers a general overview of the samples collected during the day by visualizing the
patient data, which are modifiable by the user; the image of migration and the graph of the
curve, which can be changed by the user with interaction of the mouse with the graph; the
numerical data of the fractions, which can be automatically updated according to the curve
changes. In this screen there is also a small window, underneath the fractions, dedicated to
comments where it is possible to enter a new comment, or edit an existing one. To access
the details of a new sample, use "Previous patient details" and "Next patient details" keys
or click directly on a control sample from the "Archive” on the left side of the window.
Print one or more samples reports selecting them from the list with the right button of the
mouse or selecting all of them pressing the "Select Patient" and "Print patient" keys.
40
4.1
Managment Serum Holder
The operations that can be made in this screen are: inserting a new serum holder of the day; refilling
each slot with patient data and starting the process of reading samples. The application can be
configured with a 16 slots serum holder (See Figure 4.2).
Picture 4. 2 – Serum Holder 16 samples
Please find below description for each particular field on this screen:
Field Name
Description
The "Previous serum holder details" and "Next serum holder
details" are used to scroll the list of serum holder in the "Archive".
The “Add” key used to insert a new serum holder of the day. It is
possible to insert only one serum holder before starting the reading
process
41
The “Sava patient and note serum holder” key to save any changes
of the patient data or to add a note to the serum holder.
The “Clean” button reset the parameters of the screen.
The “Start machine for the sample reading” button runs the
electrophoresis process and the sample reading.
Archive
This is the tree control on the left that collect the serum holders of
the day.
Serum Holder
This control is located in the central part on the left side of the
screen, it gathers 24/48 slots for the patient samples.
Each slot of the serum holder can assume one of the following
status:
•
WHITE: empty slot. Select with the mouse an empty slot
to clear it and to disable the data of the patient. Then
new data can be entered.
Picture 4. 3 - Number Patient
•
YELLOW: free slot. It is possible to start inserting one or
more patients in the serum holder. By double-clicking on
the slot a new screen will appear with the data of the
42
patients that can be added.
The right side of the screen relating to patient data is
enabled for entering patient data.
•
GREEN: indicates the slot selected by the mouse with
the corresponding data of patients included (or to be
included).
•
RED: slot occupied by a patient. Selecting a slot with the
left button of the mouse it is possible to update patient
data in the slot. Selecting an occupied slot with the right
button of the mouse, a drop-down menu will appear and
it will be possible to remove patient from the slot
clicking "Delete Patient".
•
BLACK: Invalid slot. Selecting a non-valid slot with the
left button of the mouse it is possible to clear and disable
the data of the patient to the right of the screen. Selecting
a non-valid slot with the right button of the mouse it is
possible open a drop-down menu with which you can
select the "Restore Patient" to restore the patient in the
deleted slot.
The serum holder contains also the following labels:
• Status: indicates the status of current serum holder.
The possible values: EMPTYING , PREPARATION, READING,
PROCESSED and CANCELLED
• N. serum holder: indicates the number of serum holders.
• Note: additional note that can be associated to the serum holder.
• Number of Slots: The number of selected slots.
• Remainder: indicates the number of strips still present in the
Smart Card
43
To facilitate the scrolling of the serum holder and consequently the
patient detail linked to the selected slot.
Patient Data
It is situated on the right side of the screen and it is used to insert, to
modify the data of the patient.
Table 1: Management Serum Holder
4.2
Change Tracks
In the window below it is possible to run the following operations: changing the patient, attaching a
comment to the patient, changing the image of migration, changing the factor, changing the graph
of the curve and the numerical data of the fractions with the interaction of the mouse with graph
(see Picture 4.4).
44
Picture 4. 4 – Change Tracks Window
Factor: The factor is a parameter located in the first column to the right side of the names of the
fractions, it is used to increase or decrease the numerical read value of each fraction ( Picture 4.5)
Picture 4. 5 – Factor Parameter
To modify the Factor of the desired fraction it is necessary to click on it with the left button of the
mouse and the following window will display asking to insert the number between 0.7 and 1.5(see
Picture 4.6)
45
Picture 4. 6 - Modify Pattern Factor
Please find below description for each particular field on this screen:
Field Name
Description
The “Previous patient details” and the “Following patient details”
buttons scroll the list of patient in the “Archive”.
Picture 4. 7 - Export Insert name machine IP address
The “Export patient result” key exports to an external database the
results of the reading of a selected patient in the tree-control on the
left side of the screen.
By clicking on the button a screen will display to show the machine
where to export the selected patient data. Usually it is necessary
insert the name and the IP address.
46
The “Add a new fraction group to the current method” button will
add a new fraction group to the current method of work accordingly
to data inserted in “Fraction Values”
The “Save patient and graph” save a data modification.
The “Clean” button reset the screen parameters.
The “Associate a comment to a patient” associate a comment to the
“comments” list of the patient.
The “Disassociate patient comment” disassociates a comment from
a patient.
The “Print patient report” key visualizes the print preview of the
report.
The “Changeable patient data” key can modify the patient data.
Once pressing this button, it will not be possible to change the detail
anymore.
The “No changeable patient data” key indicates that it is not possible
to change the data, since the report has been already delivered. It is
only possible to read the data.
Archive
This is the tree-command the collect all the patient of the day.
Fraction Values
This command, located in the middle left part of the screen, collects
the fraction values into a numerical format. It will be automatically
entered when you modify the graphs of the reading.
The fraction list becomes more editable with the “Factor” column
that can change the fraction value.
The list of the fractions will be editable for the “Fractions,
47
“Int.Rif.%”, “Int.Rif. ...”, “Ratio A/G” and “Total Proteins” only
when the number of the fractions of the graph will be different from
the default number of the current method for the selected patient.
Otherwise you can add a new fraction group for the current method
clicking the button: “Add a new fraction group to the current
method”.
It is not possible to edit the fraction list and it is fully completed in
all its fields. The combination of the fraction groups will have the
name of the default fraction groups with the current methodology.
Patient Data
To insert, modify the patient data.
Table 2: Change Tracks
4.2.1
Graph
Picture 4. 8 – Graph
The chart associated with the patient is the result of the reading performed by the scanning process
of the samples. The graph displays the minimum values through the vertical lines.
48
These minimum levels can be moved using the mouse with a drag-and-drop operation on the graph.
The minimum lines can be deleted or added on the graph by double clicking the mouse.
It is possible to open a drop down menu with the right mouse button on the graph, in order to make
relevant changes. (see Picture 4.9):
Picture 4. 9 – Drop Down Menu Graph
•
Color Patterns: the patterns of the graph can have the color set up in the definition of the
fractions for the current method of work and can take the dotted curve, or be transparent (see
Picture 4.10)
Picture 4. 10 – Color Pattern
•
Subtract Baseline: to modify the baseline of the graph
•
Minimum Compute : it allows automatic setting of the minimum value on the graph
•
Export: to export the fractions values of the graph to a file. CSV or. TXT
49
•
Gamma Correction: it is confidential and may only be changed by the expert staff.
•
Zoom slider: zoom the graph for a better consultation; enlarges the area in which you placed
the mouse on the graph. (See Picture 4.11)
Picture 4. 11 – Zoom Sider
•
Displaying the grid of the fraction values: a banner allows the flow of comments related to
the graph.
•
List: the possibility to enter a legend inside the chart (see Picture 4.12)
50
Picture 4. 12 – Insert Legend
•
Zooming of the Image: enlarge the entire image of the graph clicking on "zoom" on the
right of the graph window
Picture 4. 13 – Zooming Of the Image
51
4.3
Print
Picture 4. 14 – Print Window
In this screen you can select and print one or more patients of the day or export or capture patient
data.
Picture 4. 15 – Printing Mode
Please find below description for each particular field on this screen.
Field Name
Description
52
“Previous patient details” and “Following patient details” keys
scroll the patient list.
“Select patient” key in order to select the patients. Clicking twice
you deselect all the patients of the list.
“Export patient results” key exports to an external database the
reading results of the selected patients. Clicking the key you will see
the following screen:
Picture 4. 16 - Export – Insert name of machine and IP address
In order to show where to export the patient data, usually you need
to enter the name and the IP address of the machine..
“Clean” key to reseat the screen parameters.
.
The “Print patient” button displays the print preview with the
selected reports.
“Changeable patient data" to put in read only the selected patient
data.
Patient List
The list contains all the patient of the day. To print one of the patient
of the list click with the right button of the mouse on it.
Table 3: Print
53
4.3.1 Print Preview
With this operation it is possible to print reports of patients.
On the header of the report there is the name of the laboratory where the tests have been performed
"Personal Data/Laboratory", in the central part of the report appear some patient data, the graph and
the image of the migration, on the footer the comments and the signature of the analyst.
Please find below description for each particular field on this screen (See Picture 4.17)
Picture 4. 17- Print Preview
Please find below description for each particular field on this screen.
54
Field Name
Description
“Close” key to close the “¨Print preview”
“Print” key to start the print of the patient reports.
These keys scroll the pages of the report print previews.
.
“Goto...” key to access to a specific print preview page.
The combo is used to set the zoom percentage of the page before
printing. Any modification will appear only on the monitor.
Table 4: Print Preview
55
5
Control Machine
This section of the program allows you to connect SAIO (electronics and software) to the physical
machine (the robotics, sensors) and to the electrophoresis operations. Clicking on the menu "
Control Machine" to access the "Dashboard Control" that allows you to: turn on and off the
machine; to modify the voltage of the chamber during a migration; to run a selected process from
the list of the services, to pause and resume a process already running. If an error occurs it is
possible to go to a next step or stop the process permanently. The error of the process will be
outlined in a separate control at the bottom of the screen.
The window also has status indicators (full or empty) for the levels of the machine that are
classified as external levels such as Staining, Destaining, H2O, buffer, buffer HB and waste and as
internal levels such as staining, destaining, Imbibition, buffer in Migration Chamber.
“Turn on ” and “Turn off ” keys to switch on/off the machine for the
electrophoretic process or to perform other operations selected by the
user.
“Process Pause” and “Restart Process” keys to pause or to restart the
process.
“Start Process” key to start a process selected by the command
“Process List”
“Continue Process” key can be clicked when the process stops
because an error occurred. Pressing this button the error is deleted
and the process goes on.
“Stop the process” key can be clicked when a blocking error occurs.
In this case the button stops the process.
56
“Alarm” key lights when the process ends correctly or in case of
error. Clicking on this button the alarm turns off.
The Control Machine window appears as shown in the Picture 5.1. On the top there is a power off
button
that means the machine is turned off because the mechanics is not supplied. Click on
button to switch on the machine.(see Picture 5.1).
Picture 5. 1 – Control Machine
•
The picture shows the correct placement of objects inside the machine.
•
The left column shows the status of the inside and outside liquid levels. The liquid levels are
highlighted in red or in green on the basis on their status
•
In the center of the field called "Migration" you can find the values of voltage, the current
migration and the remaining time of the migration.
•
The "State Machine" is the status of the machine.
•
The "Services list” in order toper form routine maintenance of the machine.
57
Maintenance service button
The “Service Maintenance” button opens a drop-down menu (see Picture 5.2)
Picture 5. 2 – service Maintenance
Two options can be selected: the first allows the final user to load the cleaning process list (see
Picture 5.3)
Picture 5. 3 – User services
The second option allows you to perform maintenance tasks that are intended only for qualified.
A password is required in order to proceed the operation and as displayed in the following window:
Picture 5. 4 – Password Maintenance
58
6
Cancellation
SAIO keeps stored the database and authorize the cancellation of samples or whole serum holders
from the archive. Clicking on the menu "Cancellation" you access the windows of "Delete Exams"
and "Delete Serum holder" and proceed the following operations:
Clicking on the "Search patient in the archive” new window will display where the user can
enter the time interval for the research and he decide the type of desired search, for example
by last name, first name, doctor, sector, patient type, sex or method. After selecting the
desired type, the research will start by clicking with the mouse on the key "Search Start".
The result appears in the list. Delete one or more samples from the list by selecting them
using the right button of the mouse or selecting them all clicking "Select Patient" and then
the "Delete Patients".
Clicking on the key "Search serum holder in the archive" the last entered serum holder will
be searched. The result will be displayed in the "Cancellation" in the top left part of the
screen. In order to delete the serum holder press the "Delete serum holder".
Picture 6. 1 – Delete Exams
59
6.1
Cancella Esami
Clicking the yellow key (“Search patient in the archive”)
you can find the patients in the
database and then delete them. During the search the “Search Filter” window is displayed (see
Picture 6.2). The search result is displayed in the list. Delete one or more samples from the list by
selecting them using the right button of the mouse or selecting them all clicking "Select Patient" and
then the "Delete Patients". (see Picture 6.3).
Picture 6. 2 – Setting Filters
60
Picture 6. 3 – Filters Delete Patients
“Select Patient” key allows selecting all the patient of the list.
Double clicking deselects them all.
“Delete Patients” key deletes the patient from the database.
The “Clean” key resets the screen parameters.
“Search patient in the archive” key displays the window for the
search of the patient in the archive.
Lista Pazienti
The list contains the patients of the day. To print a patient from the
list click on it with the right button of the mouse. The selected
patient will be marked with the check, click again to deselect it.
Table – delete Exams Patient
61
6.2
Delete Serum Holder
Picture 6. 4 – Delete Serum Holder
Clicking on the “Search serum holder in the archive” button the last entered serum holder will be
searched and then you can delete it. (See Picture 6.4).
Picture 6. 5 – Delete Serum Holder in the Archive
62
7
Archive
SAIO machine allows searching in the database both the samples that must be tested and the ones
already tested
7.1
Advanced Search
Picture 7. 1- Advanced Search
If clicking “Search patient in the archive” button a new window will display where the user can
enter the time interval for the research and he decide the type of desired search, for example by
last name, first name, doctor, sector, patient type, sex or method. (See Picture 7.2)
63
Picture 7. 2 – Setting Filters
After selecting the desired type, the research will start by clicking with the mouse on the button
"Start Search". The result will be displayed in the "Archive".
For more information about curves and patients, it is necessary select an item from the
“Archive”.
7.2
Exam Archive Print
Print one or more reports clicking on the right button of the mouse or selecting them through
“Select Patient” button and press the “Print Patient” (see Picture 7.3). In this screen it is
possible to print, export and block one or more samples selecting them from the list with the
mouse clicking or select them with the “Select Patient” button.
64
Picture 7. 3 – Print Patient
7.2.1
Registries
It is possible to create a database with information regarding doctors, sectors, diseases and
laboratories. Clicking on the “Registries” button you access the windows of “Laboratory”,
“Doctors”, “Sectors”, “Diseases” that allow the following operations:
- Management of headers for the report printings of the laboratories;
- Management of the patient’s pathology;
- Management of the doctor’s data;
- Management of the sectors.
7.2.2
Quality Control
It is possible to create a database with information regarding the quality control of the examined
samples. Clicking on the “Quality Control” key you access the windows of “Configuration”,
65
“Results” and “Graphs” that allow the following operations:
-Management of the quality control of the examined samples;
- Report of Quality Control in tabular format.
- Report of the quality control in a graphical format
66
8
Registries
It is possible to create a database with all the information related to doctors, sectors, disease and
laboratories.
8.1
Laboratory
In this screen it is possible enter all the information about the report.
The field concerning the description of the “Electrophoresis of serum proteins” is available only for
the reading, and it is set up with the method name displayed on the Method/Parameters
configuration screen. (see Picture 8.1)
67
Picture 8. 1 – Changing the header
Please find below description for each particular field on this screen.
Field Name
Description
“Previous laboratory detail” and “Following laboratory detail” keys
scroll the list of the laboratories names
“Set the laboratory as printing heading” key sets the selected header
as a referential one.
“Add new laboratory” key adds a new heading into the list.
“Remove laboratory” keys deletes the selected heading of the
laboratory.
“Save the laboratory” key saves the selected heading of the
laboratory.
68
“Clean” key resets the screen parameters.
“Printer Properties” displays a drop-down menu:
This
menu
manages
the
type
of
font,
of
character
(italics/bolt/underlined), of color and the print preview.
Table 5: Laboratory
69
8.2
Diseases
Picture 8. 2 – Disease
Please find below description for each particular field on this screen:
Field Name
Description
“Previous diseases detail” and “Following diseases detail” keys
scroll the list of diseases.
“Add new disease” key enters a new disease in the list.
“Remove Disease” key deletes the selected disease.
“Save disease” key saves the selected disease in the list.
“Clean” key resets the parameters of the screen.
Table 6: Diseases
70
8.3
Doctor
In this screen it is possible to manage the doctors’ data:
Picture 8. 3 – Doctor Windows
Please find below description for each particular field on this screen
Field Name
Description
“Previous doctor detail” and “Following doctor detail” keys scroll
the list of the doctors.
“Add new doctor” keys enters a new doctor in the list.
“Remove doctor” key deletes the selected doctor from the list.
“Save doctor” key saves the doctor selected in the list.
“Clean” key resets the parameters of the screen.
71
Table 7: Doctor
8.4
Sector
In the screen it is possible to manage the sector data.
Picture 8. 4 - Sector
Please find below description for each particular field on this screen
Field Name
Description
“Previous sector detail” and “Following sector detail” keys scroll the
sector list.
“Add new sector” key enters a new sector in the list
“Remove sector” key deletes the selected sector from the list.
“Save sector” key saves the sector selected in the list
72
“Clean” key resets the parameters of the screen.
Table 8: Sector
73
9
Quality Control
In the following screen it is possible to create a database with information regarding the quality
control of the examined samples.
9.1
Configuration
In the following screen it is possible to insert, modify and delete references for the quality control of
the samples
74
Picture 9. 1 - Configuration
Please find below description for each particular field on this screen
Field Name
Description
“Previous control detail” and “Following control detail” keys scroll
the sector list.
“Add new control” key enters a new sector in the list
“Remove control” key deletes the selected sector from the list.
“Save control” key saves the sector selected in the list.
“Clean” key resets the parameters of the screen.
75
Table 9: Configuration
9.2
Results
In the following screen it is possible to: manage quality control reports in tabular format.
Picture 9. 2 - Results
Please find below description for each particular field on this screen.
Field Name
Description
“Previous control detail” and “Following control detail” keys scroll
76
the list of the doctors.
The “Print” key displays the print preview with the results of the
quality control reports in tabular format.
Table 10: Results
9.2.1 Print Preview
In this screen it is possible to print the tabulate with the details of the control and the heading of the
laboratory, which displays in the “Personal Data/Laboratory” screen.
Picture 9. 3 - Print Preview
77
9.3
Graphs
In the following screen it is possible to: manage quality control reports in graphical format.
Picture 9. 4 - Graphs
Please find below description for each particular field on this screen.
Field Name
Description
“Previous control detail” and “Following control detail” keys scroll
the list of the doctors. “Previous control detail” and “Following
control detail” keys scroll the list of the doctors.
The “Print” button displays the print preview with the results of the
quality control reports in tabular format
Table 11: Graphs
78
9.3.1 Print Preview
In this screen it is possible to print the graph with the details of the control and the heading of the
laboratory, which displays in the “Personal Data/Laboratory” screen
Picture 9. 5 - Print Preview Graphs
79
10
Data exchange with third-party application
The import/export operations of the data include information exchange between SAIO applications
and third-party. This exchange happen thorough the protocol TCP/IP with the communication
channel SOCKET_IMP_EXP_PORT (3300).
10.1 Import Patient
The import of patient data from an external database is performed in the feature "Current Data /
Serumholder management". The start of this feature requires the following steps:
1) Enter the IP address or the name of the machine which contains the needed patient data.
2) Insert the number of patients which data are required. It is possible to import data for 24/48
patients, because the serum holder provides these number of locations for the samples to be tested.
3)
The
connection
with
the
machine
will
start
via
the
communication
channel
SOCKET_IMP_EXP_PORT (3300).
4) The request is sent through the composition of the following buffer data:
unsigned char cRequest[2];
cRequest[0] = IMPORT_PATIENTS;
//codice di identificazione per l'operazione di import dati
cRequest[1] = NUM_PAZIENTI;
//numero pazienti da importare;
unsigned char cSize[4];
cSize[0..3] = sizeof(cRequest);
The buffer of request that will be sent on the communication channelwill be the result of the
connections of the buffers CSize + cRequest. On top of the buffer will be copied the actual number
of bytes that identifies the data import request.
80
If the machine specified in the paragraph 1 receives a buffer data with a length different from sizeof
(CSizecRequest +) or if it receives a buffer data with the same length and with identification code
different from IMPORT_PATIENTS, it must discard the communication.
1) In the positive case, the machine specified in paragraph 1, will dial a buffer data with the
following format/
unsigned char cResponse[sizeof(unsigned char) + (NUM_PAZIENTI*SIZE_DATAPATIENT)];
[0] = NUM_PAZIENTI;
//numero pazienti da inviare;
[1..n] = DATAPATIENT[NUM_PAZIENTI];
//strutture dati dei pazienti da inviare;
in the 0 position will be insert the number of sent patients and from position1 will be insert the data
structure, such as DATAPATIENT in a sequence similar to the number of patients
unsigned char cSize[4];
cSize[0..3] = sizeof(cResponse);
The buffer response that will be sent to the SAIO communication channel and it will be the result of the
connections of the buffers CSize + cResponse. On top of the buffer will be copied the actual
number of bytes that identifies the data import response.
Use the file specified in Appendix "A" to implement the communication buffer between the SAIO and
the third parties.
10.2 Export Patient
The export of patient data to an external database is performed in the feature "Current data / Change
Trace", "Current data / Print", "Search test / Advanced Search" and "Search Test / Print".
The start of this feature requires the following steps:
1. Enter the IP address or the machine name to which send patient data.
2.
The
connection
with
the
machine
will
start
via
the
communication
channel
SOCKET_IMP_EXP_PORT (3300)
81
3. The request is sent through the composition of the following buffer data:
unsigned char cSend[2 + (NUM_PAZIENTI * SIZE_RESULTPATIENT)];
cSend[0] = EXPORT_PATIENTS;
cSend[1] = NUM_PAZIENTI;
//codice di identificazione per l'operazione di export dati
//numero pazienti da esportare;
cSend[2..n] = RESULTPATIENT[NUM_PAZIENTI];
//strutture dati dei pazienti da esportare;
unsigned char cSize[4];
cSize[0..3] = sizeof(cSend);
The export data buffer that will be sent on the communication channel to the third-party
applications will be the result of the connections of the buffers CSize + cSend.
On top of the buffer will be copied the actual number of bytes that identifies the data import
request.
In the case in which the machine specified in point 1 receives a data buffer with length different
from sizeof (CSizecSend +) or on the same length receives an identification code different from
EXPORT_PATIENTS must discard the communication.
If the machine specified in the paragraph 1 receives a buffer data with a length different from
sizeof (CSizecRequest +) or if it receives a buffer data with the same length and with identification
code different from IMPORT_PATIENTS, it must discard the communication.
In the case in which the machine specified in point 1 receives correctly the results from SAIO, then
it must respond to the sender with a buffer that indicates the result of the export operation. It will
respond with the following buffer:
unsigned char cResult[sizeof(unsigned long)];
cResult[0..3] = 1; //1 in caso di successo; 0 in caso di errore
unsigned char cSize[4];
cSize[0..3] = sizeof(cResult);
The data response buffer that will be sent to the SAIO communication channel and it will be the result
of the connections of the buffers cSize + cResult.
Use the file specified in Appendix "A" to implement the communication buffer between the SAIO and
the third parties.
82
“A” Appendix
Include per import/export data
#if !defined(DScanSocketData_h)
#define DScanSocketData_h
//numero porta del socket per la comunicazione con enti esterni
#define SOCKET_IMP_EXP_PORT
3300
//codice per identificare un'operazione di import dei dati
#define IMPORT_PATIENTS
0xBE
//codice per identificare un'operazione di export dei dati
#define EXPORT_PATIENTS
0xCE
//struttura dati del paziente
typedef struct
{
unsigned long
m_ImportID;
long
m_PatientType_Id;
//ID external – assigned to the patient
/Tipo paziente: 0=indefinito, 1=umano, 2=cane, 3= gatto,
//4=cavallo, 5=mucca.
char
m_LastName[64];
/Cognome
char
m_Name[64];
//Nome
char
m_AcceptanceCode[64];
//Codice Accettazione
double
m_TotProtein;
//ProteineTotali
byte
m_Age;
//Eta
byte
m_Sex;
//Sesso
unsigned long
m_AcceptanceDate; //Data Accettazione
unsigned long
m_BirthDate;
//Data Nascita
} DATAPATIENT, *LPDATAPATIENT;
#define SIZE_DATAPATIENT sizeof(DATAPATIENT)
83
//single fraction structure
typedefstruct
{
byte
m_FractionPos;
//Fraction numeration (1, 2, ..., n)
char
m_FractionName[32];
//Name
unsigned long
m_FractionStart;
/start position on the graph
unsigned long
m_FractionEnd;
//End position on the graph
double
m_FractionRatio;
/ Relation value A/G
double
m_RatioNormMin;
/Relation Value A/G min
double
m_RatioNormMax;
/ Relation Value A/G max
double
m_FractionVal;
// Relation Value
double
m_ValueNormMin;
/absolute value Min
double
m_ValueNormMax;
/absolute value Max}
DATAFRACTION, *LPDATAFRACTION;
#define SIZE_DATAFRACTION
sizeof(DATAFRACTION)
//struttura dati bitmap grafico
typedef struct
{
Int
m_Size;
//size file bitmap of the graph
char
m_FileData[12288];
//data file (max 12 KB)
} DATAGRAPH, *LPDATAGRAPH;
#define SIZE_DATAGRAPH
sizeof(DATAGRAPH)
//struttura dati bitmap strip
typedef struct
{
int
m_Size;
//size file bitmap of the graph
char
m_FileData[3072];
//data file (max 3 KB)}
DATASTRIP, *LPDATASTRIP;
#define SIZE_DATASTRIP
sizeof(DATASTRIP)
84
//struttura dati del risultato del paziente
typedef struct
{
DATAPATIENT
m_Patient;
//dati paziente
unsigned long
m_AcquisitionID;
/Id lettura
unsigned long
m_StripPos;
//position number of slot in the serum holder
char
m_Comment[256];
/comment on the paragraph
double
m_NormValRifAG;
/Relation Value A/G
double
m_NormValRifAG_Min;
//Relation Value A/G Min
double
m_NormValRifAG_Max;
//Relation Value A/G Max
char
m_UnitOfMeasureAG[32];
//unit of measure of the relation A/G
double
m_NormValProtTot_Min;
//Proteins value total min
double
m_NormValProtTot_Max;
//Proteins value total max
unsigned long
m_StripLen;
//length of the graph
unsigned char
m_MinTags;
//minimum on the graph
DATAFRACTION
m_Fractions[12];
/fraction of the graph
DATAGRAPH
m_GraphBitmap;
//bitmap of the graph
DATASTRIP
m_StripBitmap;
//bitmap of the strip
} RESULTPATIENT, *LPRESULTPATIENT;
#define SIZE_RESULTPATIENT
sizeof(RESULTPATIENT)
#endif //DScanSocketData_h
85
Notes
..............................................................................................................................................................................................
..............................................................................................................................................................................................
..............................................................................................................................................................................................
..............................................................................................................................................................................................
..............................................................................................................................................................................................
..............................................................................................................................................................................................
..............................................................................................................................................................................................
..............................................................................................................................................................................................
..............................................................................................................................................................................................
..............................................................................................................................................................................................
..............................................................................................................................................................................................
..............................................................................................................................................................................................
..............................................................................................................................................................................................
..............................................................................................................................................................................................
..............................................................................................................................................................................................
..............................................................................................................................................................................................
..............................................................................................................................................................................................
..............................................................................................................................................................................................
..............................................................................................................................................................................................
..............................................................................................................................................................................................
..............................................................................................................................................................................................
..............................................................................................................................................................................................
..............................................................................................................................................................................................
..............................................................................................................................................................................................
..............................................................................................................................................................................................
..............................................................................................................................................................................................
..............................................................................................................................................................................................
..............................................................................................................................................................................................
..............................................................................................................................................................................................
..............................................................................................................................................................................................
..............................................................................................................................................................................................
..............................................................................................................................................................................................
..............................................................................................................................................................................................
..............................................................................................................................................................................................
..............................................................................................................................................................................................
..............................................................................................................................................................................................
..............................................................................................................................................................................................
..............................................................................................................................................................................................
86


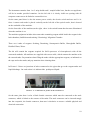
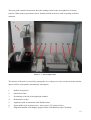
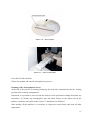


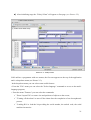
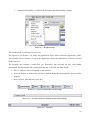
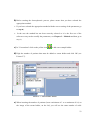
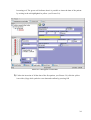
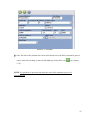
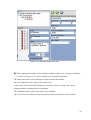
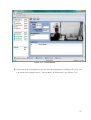
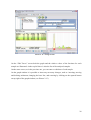

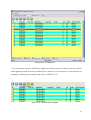
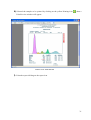

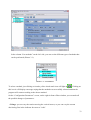
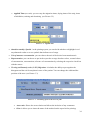
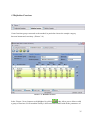
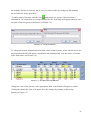
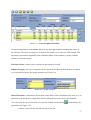
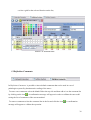

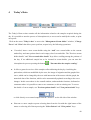
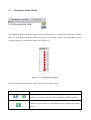
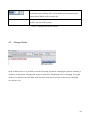
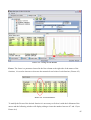
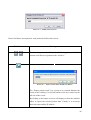
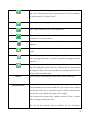
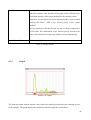
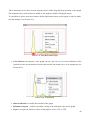
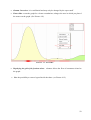
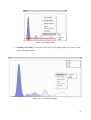
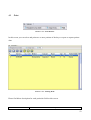
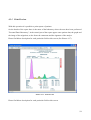
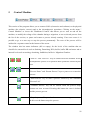
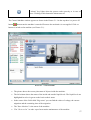
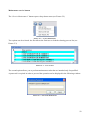


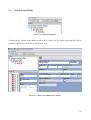
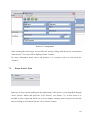
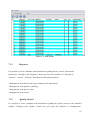

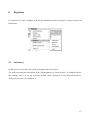
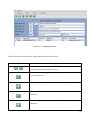
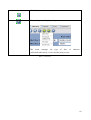
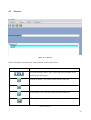
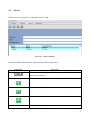
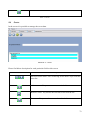

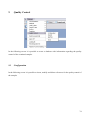
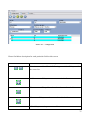
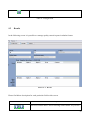
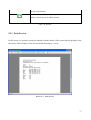


![HL-2-1436P_2007-06(5) [Titan III acetate].qxp](http://vs1.manualzilla.com/store/data/006198024_1-3755b6b3fcb71fbd9e81263f511c5484-150x150.png)