1
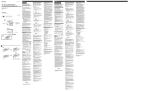
User's Manual
Digital Camera
Fuji FinePix E550
Document ID: PUB-111
Revision B
User's Manual
Digital Camera
Fuji FinePix E550
The names of any providers and patients used in
illustrations in this document fictitious. Any medical
information shown was created for the sake of
illustrating the capabilities of the software.
Every effort has been made to ensure this manual is
accurate, complete, and useful. Please notify us of any
errors, omissions, or suggestions for improvement
using any method of contact listed below:
AFHCAN
Training Department
4000 Ambassador Drive
Anchorage, AK 99508
Phone: 907 729-2260
Fax: 907 729-2269
Email: [email protected]
Copyright © 2006 Alaska Native Tribal Health Consortium. All rights reserved. No part of this publication
may be reproduced, stored in a retrieval system, or transmitted, in any form, or by any means, including
photocopying, electronic, mechanical, recording or otherwise, without the prior written permission of Alaska
Native Tribal Health Consortium.
PUB-111 Rev B.doc
ii
User's Manual
Digital Camera
Fuji FinePix E550
Table of Contents
Section
Title
Page
Preface ............................................................................................................................................ v
About this Document .................................................................................................................. v
Related Documents ..................................................................................................................... v
For More Information ................................................................................................................. v
Section 1 – Introduction ................................................................................................................ 1
1.1 Becoming Familiar with the Camera ................................................................................... 1
1.1.1 Digital Photography and the AFHCAN Cart ................................................................ 1
1.1.2 Main Parts of the Digital Camera ................................................................................. 1
1.1.3 Camera and Cradle ....................................................................................................... 7
1.2 Introduction to Menus .......................................................................................................... 8
1.3 Standard Settings of the Camera .......................................................................................... 9
1.4 Particulars of the AFHCAN Installation ............................................................................ 10
1.4.1 Advantages ................................................................................................................. 10
1.4.2 Precautions .................................................................................................................. 10
Section 2 – Operation .................................................................................................................. 11
2.1 Basic Procedure for Taking a Picture................................................................................. 11
2.2 Basic Procedure for Downloading an Image ..................................................................... 12
2.2.1 Saving Multiple Images .............................................................................................. 14
2.3 Procedures for Using Other Camera Features .................................................................... 15
2.3.1 Setting Date and Time ................................................................................................ 15
2.3.2 Viewing Images on Camera ........................................................................................ 16
2.3.3 Taking Close-Ups with the Macro Function............................................................... 17
2.3.4 Using the Flash ........................................................................................................... 17
2.3.5 Special Features .......................................................................................................... 17
2.3.6 Shooting Video Clips .................................................................................................. 18
2.4 Erasing Images from Camera's Memory ............................................................................ 18
Section 3 – Clinical Considerations............................................................................................ 21
3.1 Characteristics of a Good Clinical Photograph .................................................................. 21
3.2 Common Mistakes ............................................................................................................. 22
3.3 Tips and Tricks .................................................................................................................. 22
Section 4 – Routine Maintenance ............................................................................................... 23
4.1 Changing the Batteries ....................................................................................................... 23
4.2 Replacing the xD Memory Card ........................................................................................ 23
PUB-111 Rev B.doc
iii
User's Manual
Digital Camera
Fuji FinePix E550
List of Illustrations
Figure
1
2
3
4
5
6
7
8
9
10
11
Title
Page
User controls on the top of the camera ................................................................................ 1
User controls on the back of the camera ............................................................................. 2
Features on the front of the camera ..................................................................................... 2
Features on the viewfinder side of the camera .................................................................... 3
Features on the wrist strap side of the camera ..................................................................... 3
Features on the bottom of the camera.................................................................................. 3
Flash up and lens extended .................................................................................................. 4
Battery / media card compartment ...................................................................................... 4
Camera and cradle installed on Cart.................................................................................... 7
Menu features ...................................................................................................................... 8
Controls governing menu availability ................................................................................. 9
List of Tables
Table
1
2
3
4
Title
Page
Functions of key controls .................................................................................................... 5
Standard settings.................................................................................................................. 9
Maximum and minimum focus distances for normal and macro modes ........................... 17
Attributes of a poor, good, and best quality photograph ................................................... 21
PUB-111 Rev B.doc
iv
User's Manual
Digital Camera
Fuji FinePix E550
Preface
About this Document
This document is part of the set of user manuals provided with an AFHCAN Cart. These user
manuals, covering various topics, are normally assembled into a binder delivered with each Cart.
This modular design has the following advantages:
• the set of manuals provided with your cart includes documents for the specific peripheral
devices installed
• separate documents for specific makes and models of peripheral devices can be developed
• each document is a stand-alone publication, so as new devices or features are added to the
Cart, new manuals can be added to the existing binder
• user information that is common to all items of equipment does not need to be repeated in
each module, but can be covered in separate modules and referenced as needed
Related Documents
This document assumes you have read the introductory hardware and software manuals included
in this binder.
The original Fuji manuals provided with the camera were included in a set of materials delivered
with the AFHCAN Cart. Consult those manuals for details of operation not covered in this
document.
For More Information
This document describes the Fuji FinePix E550 camera to a level of detail that will meet most
user's needs in the context of clinical use of the AFHCAN Cart. For descriptions of the advanced
features of the camera, refer to the original Fuji user documentation supplied with the cart.
Information can also be found at Fuji's website:
http://home.fujifilm.com/products/digital/
PUB-111 Rev B.doc
v
User's Manual
PUB-111 Rev B.doc
Digital Camera
vi
Fuji FinePix E550
Section 1 – Introduction
1.1 Becoming Familiar with the Digital Camera
1.1.1 Digital Photography and the AFHCAN Cart
When communicating with another healthcare provider about a patient, it is often helpful to send
one or more pictures of an injury, rash, or other visible condition. The Fuji FinePix E550 digital
camera produces a high-resolution image with good color quality. Many automated features
make the camera easy to use. Direct installation on the AFHCAN Cart makes the process of
downloading digital images very straightforward. The AFHCAN Software works directly with
the camera to incorporate digital images into a case.
Unlike other medical peripherals on the AFHCAN cart, which produce specialized medical
images (such as the video otoscope), the digital camera is a general purpose device. Anything
visible to the naked eye can be photographed and brought into the patient's case.
Clinical photography is practical, whereas other types of photography may be artistic. In both
types, the goal of photography is to benefit the audience. In clinical photography, think about
how the image tells the story of the patient's condition. Will the receiving provider have the
information he or she needs to understand the symptoms? Section 3 gives pointers on how to
obtain a good clinical photograph.
1.1.2 Main Parts of the Digital Camera
Figures 1 through 8 illustrate the main items on the camera.
Figure 1
User controls on the top of the camera
PUB-111 Rev B.doc
1
User's Manual
Digital Camera
Figure 2
User controls on the back of the camera
Figure 3
Features on the front of the camera
PUB-111 Rev B.doc
2
Fuji FinePix E550
User's Manual
Digital Camera
Figure 4
Features on the viewfinder side of the camera
Figure 5
Features on the wrist strap side of the camera
Figure 6
Features on the bottom of the camera
PUB-111 Rev B.doc
3
Fuji FinePix E550
User's Manual
Digital Camera
Figure 7
Flash up and lens extended
Figure 8
Battery / media card compartment
PUB-111 Rev B.doc
4
Fuji FinePix E550
User's Manual
Digital Camera
Fuji FinePix E550
Table 1 briefly introduces the function of most controls. Emphasis is placed on items that are
more likely to apply to clinical photography and using the camera in conjunction with the
AFHCAN Cart. More information on controls and other features can be found in the Fuji
Owner's Manual.
Table 1
Functions of key controls
Graphic
PUB-111 Rev B.doc
Name
Function
Figure
Power On/Off
Button
Turns camera on and off. Out of cradle, lens
extends when camera turned on. In cradle,
lens does not extend, but LCD screen indicates
USB, and cradle light shows green.
1
Mode Switch
When up, camera is in photography mode and
is ready to take pictures. When down, camera
is in viewing mode, and images in camera's
memory can be viewed in the LCD display.
2
Mode Dial
Selects how the camera will control shutter
speed, focus, and other factors affecting image
quality under different situations. Settings
include close-ups, distance shots, action shots,
night shots. Video can be selected. Some
selections allow manual control of shutter
speed, etc. AUTO works for most situations.
(Refer to Fuji Owner's Manual for details.)
1
Viewfinder and
Viewfinder
Lamp
Window in viewfinder can be used for aiming
the camera. (The LCD display can also be
used for aiming.)
The viewfinder lamp indicates whether the
camera is ready to take a photo.
Shutter Button
Activates the shutter to take a picture. When
pressed halfway down, activates automatic
focusing.
1
Flash Pop-Up
Button
Allows the flash to pop up. To turn off the flash,
push the flash back down into the camera body.
2
Wide Angle /
Telephoto
T zooms in for close-ups. W zooms out to
include a wider view of the scenery.
2
Photo Mode
In photography mode (Mode Switch up), selects
the image quality (resolution).
2
5
User's Manual
Graphic
Digital Camera
Name
Function
Figure
Menu Control
Buttons
Provides menu access, menu navigation, image
navigation, and other functions depending on
the situation.
The MENU/OK and the BACK buttons are
separate buttons. In addition, the MENU/OK
button is surrounded by a floating ring that tips
when you press the top, bottom, left, or right.
The floating ring is used to activate functions,
navigate through menu selections, or sequence
through images.
Details on the parts of the Menu Control Buttons
are provided below (names in italics).
2
Macro
In photography mode, activates macro focusing
for close-ups. Focuses from 3 inches to 2.6
feet.
2
When the flash is up, toggles through various
flash modes, including auto flash control, redeye reduction, and forced flash.
2
Push to bring up menus in the LCD display.
If a menu is displayed, push to accept the
current selection.
2
BACK
Exits the menu screens without making
changes to the settings, or steps backward in a
sequence.
2
Left / Right
In viewing mode, sequentially moves forward or
back through the photographs in memory.
When a menu is displayed, moves to different
menu pages.
2
Up / Down
Moves up or down through menu items.
2
Flash Options
MENU / OK
PUB-111 Rev B.doc
Fuji FinePix E550
6
User's Manual
Digital Camera
Fuji FinePix E550
1.1.3 Camera and Cradle
The camera is normally placed in a cradle mounted just above the media reader on the right side
of the keyboard shelf (Figure 9). (On the V3 cart, the cradle is mounted in the lower drawer.)
The cradle serves four purposes:
• secures the camera to the cart
• provides a convenient location for accessing the camera
• delivers power to the camera for recharging the batteries (use rechargeable-type batteries
only)
• provides a USB connection to the computer so images can be downloaded
Figure 9
Camera and cradle installed on V1 Cart
Setting the camera in the cradle involves aligning the connection tab in the cradle with the USB
connector port on the camera. Once the tab and port are aligned correctly, it is easy to seat the
camera in the cradle.
There are two cables connecting into the cradle: a power cable, and a USB signal cable.
Although not used on the AFHCAN Cart, the camera also has connection
points for power and a USB cable. These are located on the viewfinder side,
as previously shown in Figure 4. The cables used with these two connection
points are not the same as the power and USB cables used with the cradle.
When the AFHCAN Cart is powered up, power will be supplied to the cradle. If the camera is
seated in the cradle and the battery is charging, the cradle's indicator light will be red. To
download images from the camera to the computer, it is necessary to turn the camera on while it
is in the cradle. When the camera is on, the cradle indicator light shows green, indicating that the
camera is communicating with the computer.
PUB-111 Rev B.doc
7
User's Manual
Digital Camera
Fuji FinePix E550
1.2 Introduction to Menus
The menu system on a modern digital camera can seem complex. Learning how to navigate
through the menus and menu items is important. You can explore the menus without making
changes to the settings by using the arrow buttons and the BACK button.
Figure 10 introduces some of the basic features of the menus.
Figure 10
Menu features
PUB-111 Rev B.doc
8
User's Manual
Digital Camera
Fuji FinePix E550
There are numerous menus available in the camera. At any given time only a subset of the menus
can be accessed depending on how various controls are set. Figure 11 shows the controls that
work in combination with each other to determine which menus will appear. It is worthwhile to
experiment and see which menus come up with different combinations of control settings.
Figure 11
Controls governing menu availability
1.3 Standard Settings of the Camera
Table 2 shows the switch positions and menu settings that are standard for the AFHCAN
application. These settings will work for a wide range of clinical situations. Unless otherwise
noted, all instructions in this document assume these settings as a starting point.
Table 2
Standard settings
Item
Date and Time
Mode Dial
Flash
Mode Switch
Graphic
Setting
Set to current date and time.
Auto.
Down unless lighting conditions are poor.
Up (photo mode).
Image Quality
PUB-111 Rev B.doc
9
User's Manual
Digital Camera
Fuji FinePix E550
1.4 Particulars of the AFHCAN Installation
By incorporating the camera directly onto the AFHCAN Cart, the camera becomes part of an
integrated system. Any significant differences between the operation of the camera as installed
and an off-the-shelf version of the same product will be described as needed.
1.4.1 Advantages
Mounting the camera and cradle directly onto the AFHCAN Cart provides many conveniences
for the user:
• When the camera is in the cradle and the cart is on, the camera is automatically being
recharged.
• The cradle is permanently connected to the computer for easy downloading of images.
• AFHCAN Software has been designed to work directly with the camera making it easy to
add digital images to a case.
1.4.2 Precautions
Please observe the following precautions:
• Lock the camera in the AFHCAN Cart drawer when the Cart is not in use.
• Never open the battery compartment while the camera is turned on.
• Use only the rechargeable batteries that come with the camera. Normal alkaline batteries
are not rechargeable. If you install alkaline batteries in the camera and place the camera in
the cradle, a charging current will be applied to the batteries and the camera will be
damaged.
• There is no need to open the battery/card compartment to access the media card in the
camera. Images can be downloaded directly to the computer when the camera is in its
cradle. The media card in the camera does not fit in any of the available slots in the Cart's
media reader.
• For patient confidentiality, be sure to erase all images from the camera as soon as they have
been downloaded and saved into your case. If some of the images are left from a prior
case, for example, then these images could accidentally be included in the current case.
PUB-111 Rev B.doc
10
Section 2 – Operation
2.1 Basic Procedure for Taking a Picture
The following is a basic sequence for taking a picture. This procedure assumes the camera
batteries have been charged and the initial setup (e.g., date, time) has been performed.
1. Lift camera out of cradle.
2. Push the Power On/Off button. Lens will extend.
3. Set the Mode Dial to AUTO.
4. Set the Mode Switch to photography mode.
5. Using the viewfinder or the LCD display, aim the camera at the
subject. For proper focusing, make sure the most important part of
the image is centered in the viewfinder or LCD display.
6. Use the W/T buttons to zoom in or out so the subject is correctly
framed, as needed.
7. Push the shutter button halfway down to obtain automatic focus and
lighting adjustment.
8. If the viewfinder lamp shows steady green, press the shutter button
fully to take the picture.
9. If the viewfinder lamp flashes green, it means one of the automatic
adjustments (such as focus or shutter speed) may not be at an
optimum setting. Proceed with taking the picture and see how it
turns out.
PUB-111 Rev B.doc
11
User's Manual
Digital Camera
Fuji FinePix E550
2.2 Basic Procedure for Downloading an Image
The following is a basic sequence for downloading an image from the digital camera to the
AFHCAN Cart. (Refer to the Software User's Manual for general information about the
software.)
1. Ensure the camera power is off (press the Power On/Off
button, if necessary).
2. Set the camera in the cradle. The indicator light on the cradle
will turn to red, indicating the camera is charging.
3. On the touchscreen monitor, go to the Add To Case screen and
press the Digital Camera button.
4. The following message will appear:
5. While still in the cradle, turn the camera on. The indicator
light on the front of the cradle will turn to green, and a doublebeep will sound.
6. Press the green OK button at the bottom of the message shown
in step 4 above. A message similar to the following will
briefly appear as any images on the camera download to the
computer:
PUB-111 Rev B.doc
12
User's Manual
Digital Camera
7. On completion of the download, the Digital Camera screen
will appear. The Digital Camera screen is very similar to the
Case screen. At the left will be thumbnails of all the images
that were downloaded.
8. Click on the thumbnail to view the image in the central area,
and to open a text entry box for naming the image (as shown
below).
PUB-111 Rev B.doc
13
Fuji FinePix E550
User's Manual
Digital Camera
Fuji FinePix E550
9. All saved images must have a name. Type a useful name in
the space provided.
10. On the touchscreen, press the Save button. All images with
checks and names will be saved to the case, and the Case
screen will be displayed.
11. Delete the images from the camera for patient confidentiality
(see Section 2.4, Erasing Images from the Camera's Memory).
2.2.1 Saving Multiple Images
The Save button on the Digital Camera screen is the marker between downloading images and
adding them to the case. Pressing the Save button takes you to the Case screen. If you are
saving more than one image, use the following procedure:
1. Click on the first thumbnail to bring up the image and open the Image Name data entry
field. The selected thumbnail will have a yellow border.
2. Enter a useful name for the image.
3. Click on the next thumbnail. (Do NOT press Save yet.∗)
Clicking on the next thumbnail does the following:
-
saves the name of the first image with its thumbnail
-
opens the clicked thumbnail in the viewing area
-
clears the Image Name data entry field
4. Repeat until all images have names.
5. Review the images. If any are to be discarded, click on a green checkmark to deselect the
image.
6. Press the Save button. All images with names and checkmarks will be added to the case,
and the others will be discarded.
∗
If you do press the Save button before you have named all the images for a case, you can download them
from the camera again and add them to the case.
PUB-111 Rev B.doc
14
User's Manual
Digital Camera
Fuji FinePix E550
2.3 Procedures for Using Other Camera Features
2.3.1 Setting Date and Time
Because a digital image is part of the patient's record, it is a good practice to make sure the
camera's date and time are correct. The following is the procedure for setting the date and time.
1. Remove camera from cradle and turn
it on.
2. Push the MENU / OK button to
activate the menu screens. (The
exact menu you will see depends on
the camera's settings.)
3. Press the right arrow as needed to get
to the Option menu.
4. Press the up arrow to get to SET-UP.
5. Press MENU / OK to access the setup
tabs.
PUB-111 Rev B.doc
15
User's Manual
Digital Camera
6. Click the right arrow to get to the
second page of setup menus.
7. Click the down arrow as needed to
get to the DATE/TIME selection.
8. Click MENU / OK to select
DATE/TIME.
9. The current settable value will be
shaded like a button. Push the up
and down arrows to change the
value.
10. To move to a different item, push the
left and right arrows.
11. When all the settings are correct,
press MENU / OK. The camera will
return to photography or viewing
mode, depending on the setting of
the Mode Switch.
2.3.2 Viewing Images on Camera
You can view the images stored on the camera on the LCD
screen by placing the Mode Switch in viewing mode (down).
To move from one image to the next, use the left and right
arrow buttons.
PUB-111 Rev B.doc
16
Fuji FinePix E550
User's Manual
Digital Camera
Fuji FinePix E550
2.3.3 Taking Close-Ups with the Macro Function
To photograph something very small, you can move the camera very close to the subject
by using the macro function. Activate the macro function by pressing the macro button
(flower symbol) next to the left arrow button. A similar symbol will appear in the upper left
corner of the LCD display. To deactivate the macro function, press the macro symbol again.
With macro mode, the W / T (wide angle / telephoto) function has limited zooming capability.
Table 3 shows the focusing distances with macro activated and deactivated.
Table 3
Maximum and minimum focus distances for normal and macro modes
Camera Status
Minimum Focusing Distance
Maximum Focusing Distance
Normal
2 feet
infinity
Macro
3 inches
2.6 feet
2.3.4 Using the Flash
To activate the flash, push the flash pop-up button. To deactivate the flash, push
the flash unit back into the camera body.
The flash function has several possible modes, three of which are available when the Mode Dial
is set to AUTO. These three modes are:
• auto flash – camera decides whether flash is required
• forced flash – the camera will flash
• red-eye reduction – flash will be preceded by a series of low intensity flashes to give
subjects' eyes a chance to adjust (when pupils are dilated, the reflected flash will show up
as a red dot instead of a black pupil)
You can step through these modes by pressing the flash symbol located next to the right
arrow. The mode will be indicated on the LCD display.
Using the flash at close range can result in a washed out image. If the subject has a
reflective surface, a reflection of the flash can appear in the image. Try to angle the camera so
the reflective surface is not facing directly towards the camera.
2.3.5 Special Features
The digital camera has many features for controlling the image. The Mode Dial has automatic
settings for emphasizing the subject, for shooting scenery, for sports or action shots, and for night
shots. Icons on the Mode Dial correspond to these features.
The letters on the Mode Dial allow you to control various functions manually. These features are
beyond the scope of this manual, but are covered in the Fuji Owner's Manual. A copy of the Fuji
Owner's Manual can be found at the following website: http://home.fujifilm.com/products/digital/.
PUB-111 Rev B.doc
17
User's Manual
Digital Camera
Fuji FinePix E550
2.3.6 Shooting Video Clips
The Fuji FinePix E550 digital camera can be used to record brief movie clips
(including sound). There is an icon on the Mode Dial which represents a
motion picture camera. Setting the Mode Dial to this icon allows the camera
to shoot video clips. The video clips are saved on the media card as .AVI
files. Video clips consume a lot of memory.
The procedure is as follows:
1. Turn the camera on.
2. Set the Mode Dial to video. The word "Standby" will be
appear on the LCD display.
3. Push the shutter button completely down to start the video. A
flashing red dot will appear on the LCD display to indicate
recording is in progress.
4. To stop filming, push the shutter button completely down
again.
The process for downloading a video clip into the AFHCAN software is virtually the same as
downloading a digital image. There are two differences, however:
• the file size of a video clip may be quite large, which means it may take a few moments for
the file to be downloaded to and from the server
• when the thumbnail for a video clip is selected, the video will play in the main viewing
area, and playback controls will appear at the bottom of the screen
2.4 Erasing Images from Camera's Memory
In clinical photography, it is important for patient confidentiality and accurate medical records to
ensure that images from the digital camera are erased as soon as the images have been safely
downloaded. Once the desired images have been included in a case and the case has been sent,
erase all images in the camera using the following procedure.
1. Turn the camera on.
2. Slide the Mode Switch down to view
mode.
PUB-111 Rev B.doc
18
User's Manual
Digital Camera
3. Press the MENU / OK button. The
screen at the right will appear.
4. Press the up arrow twice to move the
selection bar to ALL FRAMES.
5. Press the MENU / OK button to select
ALL FRAMES.
6. The screen will say "ERASE ALL
OK?" Press MENU / OK to confirm
the decision to erase all images from
the camera's media card.
PUB-111 Rev B.doc
19
Fuji FinePix E550
User's Manual
PUB-111 Rev B.doc
Digital Camera
20
Fuji FinePix E550
Section 3 – Clinical Considerations
3.1 Characteristics of a Good Clinical Photograph
A good photograph tells a story. Table 4 shows various things to look for in a good photograph.
Table 4
Attributes of a poor, good, and best quality photograph
Poor
Good
Best
How Well is the Subject Framed?
• frame (image) includes only
part of the subject
• frame includes all of
the subject
• subject occupies only a
small part of frame
• subject fills most of the frame
• subject is centered in the frame
• camera was parallel to the
subject
Does the Background Enhance the Subject or Compete with It?
• background blends in with
the subject
• background is cluttered or
busy
• background includes
examiner, clothing, jewelry,
or equipment
• it is easy to distinguish
the subject from the
background
• background clutter
does not detract from
subject
• background consists of neutral
colors that provide good contrast
• subject area is adequately
exposed and/or draped
• the examiner, clothing, jewelry,
and equipment are not visible in
the photograph
Does the Image Have Adequate Resolution?
• image appears blurred, and
details are not available
• image is sharp and
clear
• good image quality is maintained
even when enlarged in viewer to
1.5 to 2.0 times normal size
Does the Image Provide Perspective?
• unable to determine the
size or distribution of the
lesions based on the image
• it is hard to tell which part of
the body is in the image
• something in the
photo allows the size
of the lesion to be
determined
• a sufficient amount of
the subject is in view
to identify the area of
the body and extent of
the lesion or injury
• the photo includes a measuring
device so size can be accurately
estimated
• left and right, or normal and
affected parts, are shown
together so they can be
compared
• additional photos are included in
the case to show close-ups as
well as perspective information
• titles of photos add helpful
information
PUB-111 Rev B.doc
21
User's Manual
Digital Camera
Fuji FinePix E550
3.2 Common Mistakes
• be sure mode switch is set to the camera icon (up)
• be sure Mode Dial is set to AUTO for most photography
• be sure there is adequate lighting when not using the flash
• when pressing the shutter button, pause halfway down to allow autofocus
• include both perspective views that include a wide area, and close-ups that show the
problem area in detail
• hold camera steady while focusing and shooting
3.3 Tips and Tricks
• use the macro feature for close-ups (within two feet) of wounds, lesions, rashes, etc.
• use white, neutral gray, or a clear blue background
• use the same background for every shot in a series
• remove distractions in the background
• remove jewelry
• remove clothing and drape patient
• if examiner's hands must be in the picture, consider gloving
• compare right and left
• include something in image to provide perspective and indicate relative size, such as a ruler
or measuring tape
• hold the camera parallel to the subject
• show different views such as
-
whole patient or larger area (to show distribution of a rash, for example)
-
close-up view of same area for details
PUB-111 Rev B.doc
22
Section 4 – Routine Maintenance
4.1 Changing the Batteries
The batteries provided with the camera are rechargeable. Keeping the camera in the cradle with
the Cart powered up ensures the batteries are charged. Normally the batteries do not need to be
changed.
Two important precautions regarding batteries:
• avoid opening the battery compartment unnecessarily
• never attempt to recharge regular (non-rechargeable) batteries
If the rechargeable batteries wear out, they can be replaced as follows:
1. Push down on the battery compartment release button (refer to Figure 6), and
simultaneously push the compartment cover in the direction indicated by the arrows.
2. Open the hinged battery compartment cover (refer to Figure 8).
3. Remove the batteries or the battery pack.
4. Install new batteries ensuring that correct polarity is observed.
5. Lower the hinged battery compartment cover, push down to position the batteries and align
the cover, and slide back into position (opposite the direction of the arrow).
4.2 Replacing the xD Media Card
In a clinical setting with the AFHCAN Cart, it should never be necessary to remove the xD media
card. However, if it becomes necessary to do so, the following is the procedure:
1. Open the battery compartment as described in section 4.1.
2. Push down on the xD media card to unlatch it. It will pop up slightly.
3. Pull the xD media card out of its slot.
4. Insert an xD media card into the slot with the gold tabs down and towards the camera body.
5. Push the xD media card down into its slot until it clicks into place.
6. Close the battery compartment cover.
PUB-111 Rev B.doc
23
User's Manual
PUB-111 Rev B.doc
Digital Camera
24
Fuji FinePix E550
Index
standard control settings, 9
top view (image), 1
Digital Camera button, 12
Digital Camera screen, 13
docking station. See cradle
exposure compensation button
image, 2
F button. See photo mode button
flash control sensor
image, 2
flash mode button
function, 6
image, 2
selecting modes, 17
flash pop-up button
function, 5
image, 2
procedure, 17
flash unit
extended (image), 4
flower symbol. See macro button
focus range
macro mode, 17
normal, 17
functional description. See (device), functional
description
Image Name data entry field, 14
LCD display
aiming camera, 5, 11
flash mode symbol, 17
flashing red dot, 18
image, 2
macro symbol, 17
Standby message, 18
viewing images, 5
viewing menus, 6
viewing pictures, 16
when in cradle, 5
LCD monitor. See LCD display
LCD screen. See LCD display
left/right arrow buttons
function, 6
selecting menu, 8
lens
extended (image), 4
retracted and covered (image), 2
macro button
function, 6
image, 2
macro function
appropriate use, 22
general description, 17
adapter ring
gripping knobs (image), 2
release button (image), 2
Add To Case screen, 12
arrow buttons. See up/down or left/right arrow
buttons
arrow symbol. See flash mode button
BACK button (hw)
function, 6
general reference, 6
image, 2
leaving menu unchanged, 8
battery
general reference, 11
image, 4
recharging, 7, 23
replacement procedure, 23
required type, 10
wrong type, 10
battery compartment
cover open (image), 4
precaution, 10
release button, 23
release button (image), 3
camera. See digital camera
Case screen, 13, 14
characteristics of a good photograph, 21
connector
A/V OUT (image), 3
DC Power Input (image), 3
USB port (image), 3
cradle
advantages, 10
align camera gently, 7
connections provided, 7
function, 7
general reference, 11, 12, 15
maintaining charge on batteries, 23
mounted on V1 cart (image), 7
cradle indicator light
green, 7, 12
image, 7
red, 7, 12
date and time, 9, 11, 15
digital camera
bottom view (image), 3
front view (image), 2
functional description, 1
left side (image), 3
main components, 1
rear view (image), 2
right side (image), 3
PUB-111 Rev B.doc
25
User's Manual
Digital Camera
power distribution, 7
power distribution strategy, 7
Power On/Off button
function, 5
image, 1
procedure, 11, 12
procedure
changing batteries, 23
changing media card, 23
downloading an image, 12
erasing images from camera, 18
saving images to case, 14
setting date and time, 15
shooting video, 18
taking a picture, 11
using macro feature, 17
using the flash, 17
viewing images on LCD display, 16
right/left arrow buttons
procedure, 15, 16
Save button, 14
self-timer lamp
image, 2
shutter button
automatic focus, 11, 22
function, 5
image, 1
starting video capture, 18
stopping video capture, 18
taking picture, 11
speaker
image, 3
telephoto. See zoom
tripod mount
image, 3
up/down arrow buttons
function, 6
image, 2
procedure, 15, 16, 19
selecting menu item, 8
viewfinder
function, 5
image, 2
procedure, 11
viewfinder lamp
function, 5
image, 2
indicating flashing green, 11
indicating steady green, 11
viewfinder window
image, 2
W / T button. See zoom button
wide angle. See zoom
wrist strap attachment bar
image, 3
xD media card. See media card
macro mode
activating and deactivating, 17
focusing range, 17
media card
avoid unnecessary access, 10
compartment open (image), 4
image, 4
replacement procedure, 23
media compartment
release button (image), 3
MENU / OK button
accessing menus, 8
function, 6
functional variaiations, 9
general reference, 6
image, 2
procedure, 15, 16, 19
selecting menu items, 8
menu control buttons
BACK. See BACK button (hw)
flash arrow. See flash mode button
left/right arrows. See left/right arrow buttons
macro flower. See macro button
MENU / OK. See MENU / OK button
up/down arrows. See up/down arrow buttons
menus
controls affecting access, 9
features of (image), 8
general description, 8
microphone
image, 2
mode
flash, 6, 17
overall camera function. See mode switch
shutter control. See mode dial
mode dial
function, 5
general reference, 17, 22
image, 1
procedure, 11
selecting video, 18
special features, 17
standard setting, 9
mode switch
function, 5
general reference, 16
image, 2
procedure, 11, 18
standard setting, 9, 22
viewing images, 16
OK button, 12
patient confidentiality, 10
photo mode button
function, 5
image, 2
standard setting, 9
PUB-111 Rev B.doc
Fuji FinePix E550
26
User's Manual
Digital Camera
Fuji FinePix E550
zoom button
function, 5
image, 2
limits with macro mode, 17
procedure, 11
PUB-111 Rev B.doc
A-27
Date Printed: 8/13/09
User's Manual
PUB-111 Rev B.doc
Digital Camera
28
Fuji FinePix E550