1
Math 290: LATEXSeminar Week 7
Justin A. James
Minnesota State University Moorhead
February 21, 2011
Justin A. James (MSUM)
Math 290: LATEXSeminar Week 7
February 21, 2011
1 / 27
1
Introduction
2
Dressing Things Up
3
Frame Overlay
Justin A. James (MSUM)
Math 290: LATEXSeminar Week 7
February 21, 2011
2 / 27
Table of Contents
1
Introduction
2
Dressing Things Up
3
Frame Overlay
Justin A. James (MSUM)
Math 290: LATEXSeminar Week 7
February 21, 2011
3 / 27
Introduction
Outline
1
Introduction
2
Dressing Things Up
3
Frame Overlay
Justin A. James (MSUM)
Math 290: LATEXSeminar Week 7
February 21, 2011
4 / 27
Introduction
Beamer
Beamer is a document class that allows you to create Presentations using
LATEX.
This presentation was made using beamer.
Beamer documents must be built using the profile LaTex => PS => PDF.
Justin A. James (MSUM)
Math 290: LATEXSeminar Week 7
February 21, 2011
5 / 27
Introduction
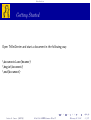
Getting Started
Open TeXniCenter and start a document in the following way:
\documentclass{beamer}
\begin{document}
\end{document}
Justin A. James (MSUM)
Math 290: LATEXSeminar Week 7
February 21, 2011
6 / 27
Introduction
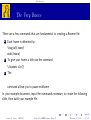
The Very Basics
There are a few commands that are fundamental to creating a Beamer file.
1
2
3
Each frame is delimited by:
\begin{frame}
end{frame}
To give your frame a title use the command
\frametitle{}
The
command allows you to pause midframe.
In your example document, input the commands necessary to create the following
slide, then build your example file.
Justin A. James (MSUM)
Math 290: LATEXSeminar Week 7
February 21, 2011
7 / 27
Introduction
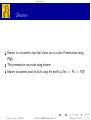
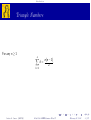
Triangle Numbers
For any n ≥ 1
n
X
k=1
Justin A. James (MSUM)
k=
n(n − 1)
.
2
Math 290: LATEXSeminar Week 7
February 21, 2011
8 / 27
Introduction
Triangle Numbers
Now place a pause between the commands for n ≥ 1 and those for
Pn
n(n−1)
and rebuild your file.
k=1 k =
2
Justin A. James (MSUM)
Math 290: LATEXSeminar Week 7
February 21, 2011
9 / 27
Dressing Things Up
Outline
1
Introduction
2
Dressing Things Up
3
Frame Overlay
Justin A. James (MSUM)
Math 290: LATEXSeminar Week 7
February 21, 2011
10 / 27
Dressing Things Up
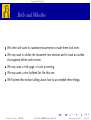
Bells and Whistles
We often will want to customize documents to make them look nicer.
We may want to divide the document into sections and to have an outline
that appears before each section.
We may want a title page, or color accenting.
We may want a nice bulleted list like this one.
We’ll spend this section talking about how to accomplish these things.
Justin A. James (MSUM)
Math 290: LATEXSeminar Week 7
February 21, 2011
11 / 27
Dressing Things Up
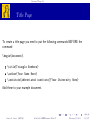
Title Page
To create a title page you need to put the following commands BEFORE the
command
\begin{document}.
\title{Triangle Numbers}
\author{Your Name Here}
\institute[abbreviated institute]{Your University Here}
Add these to your example document.
Justin A. James (MSUM)
Math 290: LATEXSeminar Week 7
February 21, 2011
12 / 27
Dressing Things Up
Title Page
Your first slide should contain ONLY the text:
\begin{frame}
\titlepage
end{frame}
Add these to your document and build to see what happens.
Justin A. James (MSUM)
Math 290: LATEXSeminar Week 7
February 21, 2011
13 / 27
Dressing Things Up
Table of Contents
If you want the table of contents to show up before each section, use the following
command.
\AtBeginSection{\begin{frame}\frametitle{Outline}
\tableofcontents[currentsection]\end{frame}}
This is telling Beamer to put a frame with title “Outline” and the Table of
Contents with the Current Section highlighted.
Add this command to the preamble of your document. We will add section
references that will be part of the outline later.
Justin A. James (MSUM)
Math 290: LATEXSeminar Week 7
February 21, 2011
14 / 27
Dressing Things Up
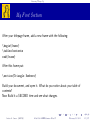
My First Section
After your titlepage frame, add a new frame with the following:
\begin{frame}
\tableofcontents
end{frame}
After this frame put:
\section{Triangle Numbers}
Build your document, and open it. What do you notice about your table of
contents?
Now Build it a SECOND time and see what changes.
Justin A. James (MSUM)
Math 290: LATEXSeminar Week 7
February 21, 2011
15 / 27
Dressing Things Up
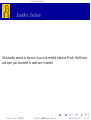
Another Section
Add another section to the end of your talk entitled Inductive Proofs. Build twice
and open your document to make sure it worked.
Justin A. James (MSUM)
Math 290: LATEXSeminar Week 7
February 21, 2011
16 / 27
Dressing Things Up
Using Themes
You’ll notice that your presentation slides look completely different from both
this presentation and those done during previous weeks.
You are using the “no theme” or “base” beamer style.
The style can be changed in many ways. It can be done manually, or you can
choose from many nice prepackaged beamer themes.
We are about to pick a single premade theme and we will just stick with that
for now.
The following link will take you to a website for the Beamer User Manual.
A Link to the Examples from this Lecture
In the preamble of your document type:
\usetheme{<pick a cool theme from the list>}
Justin A. James (MSUM)
Math 290: LATEXSeminar Week 7
February 21, 2011
17 / 27
Dressing Things Up
More Themes
For this talk I didn’t use one of the prepackaged themes. I created my own theme
using the inner, outer and font theme commands.
1
2
3
4
\useinnertheme{rounded}
\useoutertheme{infolines}
\usefonttheme{structureitalicserif}
\usecolortheme{}
Justin A. James (MSUM)
Math 290: LATEXSeminar Week 7
February 21, 2011
18 / 27
Frame Overlay
Outline
1
Introduction
2
Dressing Things Up
3
Frame Overlay
Justin A. James (MSUM)
Math 290: LATEXSeminar Week 7
February 21, 2011
19 / 27
Frame Overlay
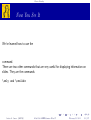
Now You See It
We’ve learned how to use the
command.
There are two other commands that are very useful for displaying information on
slides. They are the commands
\only and \onslide
Justin A. James (MSUM)
Math 290: LATEXSeminar Week 7
February 21, 2011
20 / 27
Frame Overlay
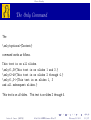
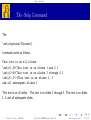
The Only Command
The
\only<options>{Content}
command works as follows.
This text is on all slides.
\only<1,3>{This text is on slides 1 and 3.}
\only<2-4>{This text is on slides 2 through 4.}
\only<1,3->{This text is on slides 1, 3
and all subsequent slides.}
This text is on all slides. This text is on slides 1 and 3. This text is on slides 1, 3
and all subsequent slides.
Justin A. James (MSUM)
Math 290: LATEXSeminar Week 7
February 21, 2011
21 / 27
Frame Overlay
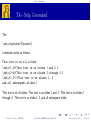
The Only Command
The
\only<options>{Content}
command works as follows.
This text is on all slides.
\only<1,3>{This text is on slides 1 and 3.}
\only<2-4>{This text is on slides 2 through 4.}
\only<1,3->{This text is on slides 1, 3
and all subsequent slides.}
This text is on all slides. This text is on slides 2 through 4.
Justin A. James (MSUM)
Math 290: LATEXSeminar Week 7
February 21, 2011
21 / 27
Frame Overlay
The Only Command
The
\only<options>{Content}
command works as follows.
This text is on all slides.
\only<1,3>{This text is on slides 1 and 3.}
\only<2-4>{This text is on slides 2 through 4.}
\only<1,3->{This text is on slides 1, 3
and all subsequent slides.}
This text is on all slides. This text is on slides 1 and 3. This text is on slides 2
through 4. This text is on slides 1, 3 and all subsequent slides.
Justin A. James (MSUM)
Math 290: LATEXSeminar Week 7
February 21, 2011
21 / 27
Frame Overlay
The Only Command
The
\only<options>{Content}
command works as follows.
This text is on all slides.
\only<1,3>{This text is on slides 1 and 3.}
\only<2-4>{This text is on slides 2 through 4.}
\only<1,3->{This text is on slides 1, 3
and all subsequent slides.}
This text is on all slides. This text is on slides 2 through 4. This text is on slides
1, 3 and all subsequent slides.
Justin A. James (MSUM)
Math 290: LATEXSeminar Week 7
February 21, 2011
21 / 27
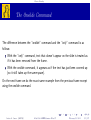
Frame Overlay
The Onslide Command
The difference between the “onslide” command and the “only” command is as
follows:
With the “only” command, text that doesn’t appear on the slide is treated as
if it has been removed from the frame.
With the onslide command, it appears as if the text has just been covered up
(so it still takes up the same space).
On the next frame we do the exact same example from the previous frame except
using the onslide command.
Justin A. James (MSUM)
Math 290: LATEXSeminar Week 7
February 21, 2011
22 / 27
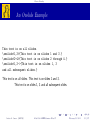
Frame Overlay
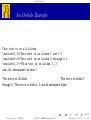
An Onslide Example
This text is on all slides.
\onslide<1,3>{This text is on slides 1 and 3.}
\onslide<2-4>{This text is on slides 2 through 4.}
\onslide<1,3->{This text is on slides 1, 3
and all subsequent slides.}
This text is on all slides. This text is on slides 1 and 3.
This text is on slides 1, 3 and all subsequent slides.
Justin A. James (MSUM)
Math 290: LATEXSeminar Week 7
February 21, 2011
23 / 27
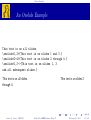
Frame Overlay
An Onslide Example
This text is on all slides.
\onslide<1,3>{This text is on slides 1 and 3.}
\onslide<2-4>{This text is on slides 2 through 4.}
\onslide<1,3->{This text is on slides 1, 3
and all subsequent slides.}
This text is on all slides.
through 4.
Justin A. James (MSUM)
This text is on slides 2
Math 290: LATEXSeminar Week 7
February 21, 2011
23 / 27
Frame Overlay
An Onslide Example
This text is on all slides.
\onslide<1,3>{This text is on slides 1 and 3.}
\onslide<2-4>{This text is on slides 2 through 4.}
\onslide<1,3->{This text is on slides 1, 3
and all subsequent slides.}
This text is on all slides. This text is on slides 1 and 3. This text is on slides 2
through 4. This text is on slides 1, 3 and all subsequent slides.
Justin A. James (MSUM)
Math 290: LATEXSeminar Week 7
February 21, 2011
23 / 27
Frame Overlay
An Onslide Example
This text is on all slides.
\onslide<1,3>{This text is on slides 1 and 3.}
\onslide<2-4>{This text is on slides 2 through 4.}
\onslide<1,3->{This text is on slides 1, 3
and all subsequent slides.}
This text is on all slides.
This text is on slides 2
through 4. This text is on slides 1, 3 and all subsequent slides.
Justin A. James (MSUM)
Math 290: LATEXSeminar Week 7
February 21, 2011
23 / 27
Frame Overlay
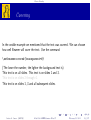
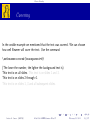
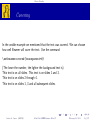
Covering
In the onslide example we mentioned that the text was covered. We can choose
how well Beamer will cover the text. Use the command
\setbeamercovered{transparent=#}
(The lower the number, the lighter the background text is)
This text is on all slides. This text is on slides 1 and 3.
This text is on slides 2 through 4.
This text is on slides 1, 3 and all subsequent slides.
Justin A. James (MSUM)
Math 290: LATEXSeminar Week 7
February 21, 2011
24 / 27
Frame Overlay
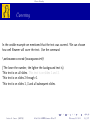
Inductive Proof
Example:
Inductive Proofs Consist of three main steps.
The Base Case
The Inductive Hypothesis
The Inductive Step
Justin A. James (MSUM)
Math 290: LATEXSeminar Week 7
February 21, 2011
25 / 27
Frame Overlay
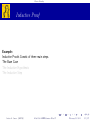
Inductive Proof
Example:
Inductive Proofs Consist of three main steps.
The Base Case
The Inductive Hypothesis
The Inductive Step
Justin A. James (MSUM)
Math 290: LATEXSeminar Week 7
February 21, 2011
25 / 27
Frame Overlay
Inductive Proof
Example:
Inductive Proofs Consist of three main steps.
The Base Case
The Inductive Hypothesis
The Inductive Step
Justin A. James (MSUM)
Math 290: LATEXSeminar Week 7
February 21, 2011
25 / 27
Frame Overlay
Lists and Covering
To make the previous list into an enumerated list we’ll have to do something
different with our overlay arguments. To use overlay arguments in lists use the
commands
\item<slide #s>Content
1
2
3
The Base Case
The Inductive Hypothesis
The Inductive Step
Note: The media incorporated in this presentation was added using the
“multimedia” package.
Justin A. James (MSUM)
Math 290: LATEXSeminar Week 7
February 21, 2011
26 / 27
Frame Overlay
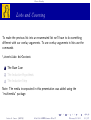
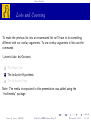
Thank You!
jl
THANK YOU!!
Justin A. James (MSUM)
Math 290: LATEXSeminar Week 7
February 21, 2011
27 / 27