1
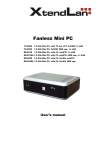
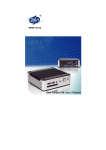
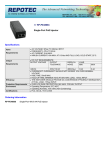
CS-1000 Thin Client User’s Manual & Operating Guide CS-1000 Thin Client Manual 1 Index I. The CS-1000 Hardware Specification ….…….. 3 a. Description of hardware………………………………..…3 b. Hardware Configuration………………………………..…3 c. Mother Board Details……………………..…..………….. 3 d. Power Adapter Specifications…………………………… 4 II. Quick Start Guide…………………….………... 5 III. BIOS Setup…….………………...........………. 7 CS-1000 Thin Client Manual 2 I. The CS-1000 Hardware Specification DETAIL SPECIFICATIONS Hardware Configuration Type CPU Display Monitor Memory Storage Specification VIA Eden ULV 1G Hz Processor SVGA Color, Compatible with CRT Monitor DVI Digital out put, support UXGA 1600x1200 resolution 512Mb DDR-2 400MHz onboard option to 1Gb FIC (Flash IDE Chip) & IDE Connector USB 4 USB Connector or 2 USB + 1 PS2 Connector Audio Ethernet LAN Audio port for Speaker-output and Microphone input Support RJ-45 connector for 10/100 Base-T Ethernet Switching Adapter 24 Watts Power adapter, input 90 to 264 Volts AC 47-63Hz Mother Board Manual Processor: VIA Eden ULV 1G Hz Processor Chipset: VIA CX700M system chip, VIA VT1708 audio chip, Realtek RTL8100C LAN chip. BIOS: 4MB Award BIOS PnP Flash EEPROM Windows 95/98/2000/NT/XP Compliant Ethernet: Chipset: Realtek RTL8100CL 10/100Base-T Fast Ethernet controller Ethernet interface: Onboard 10/100Base-T with RJ-45 connector. Support PXE remote boot. Memory: Onboard 512Mb DDR-2 400 RAM IDE Interface: Supports two IDE devices. Supports Ultra DMA/133 mode with data transfer rate up to 133MB/sec Ultra I/O On Board: 4 x USB ports or 2 USB ports + 1 PS2 Connector On-Board Display: Support 1920x1440x32 bpp CS-1000 Thin Client Manual 3 Support DVI digital out put with 1600x1200x32 bpp Audio Interface: On board Audio controller compatible with Xpress AUDIO, MPU-401 Interface AC97 Version 2.0 compatible. 0.5Watts/channel earphone output. On board Micro phone Input SSD Interface: Support Flash-Ide-Chip (FIC) Support Disk-On-Module (DOM) Power management: I/O peripheral devices support power saving and doze/standby/suspend modes. APM 1.2 compliant Power Adapter Specifications ♦ 24 Watts, Single Output Switching Adapter ♦ Input Requirements: Input Voltage: Typical 115/230V, Min. 90VAC, Max. 264VAC Line Frequency: Typical 50/60Hz, Min. 47Hz, Max 63Hz Out put : +12V, 2Amp. ♦ Environment: Operating: Temperature: 0 to 45 degree Centigrade Relative Humidity - 20 to 90%, non-condensing Shipping and Storage: Temperature: -25 to +85 degree Centigrade Relative Humidity: 20 to 90%, non-condensing ♦ EMI and RFI protected Reliability: MTBF: 35000 hours min. at max. Load for 25 degree centigrade ambient temperature Mechanical Dimension: 5.1(L) x 1.4(W) x 6.8(H) Inch Weight : 0.45Kg. (Power adaptor is not include) CS-1000 Thin Client Manual 4 II. Quick Start Guide Connection Details with Drawing 1. 2. 3. 4. 5. 6. 7. 8. Antennal USB Connector x 2 or PS2 Connector LAN Port DVI Connector Super VGA Connector DC IN Kingston Lock Reset switch 1. Plug the power standard cord into the power socket at the back of the Thin Client. Connect the other end of the power cord to the wall socket for power. Thin client accepts universal power input from 90VAC to 264VAC. 2. Connect a High-resolution VGA monitor and DVI monitor to the socket on the Thin Client Back Plate. 3. Ensure that the server is connected to the same network, and make note of the server IP address. CS-1000 Thin Client Manual 5 4. Connect the monitor to a separate power socket. 5. Connect a USB mouse and a USB keyboard (or PS2 keyboard and mouse through a Y cable) to the back plate of the Thin Client at the sockets marked for USB. 6. Connect the network cable from hub/switch to the Thin Client back plate at the RJ45 socket marked LAN. 7. Now, the Thin Client is ready to power on. Power on the thin client using the Power Button on the front panel. 8. Thin Client will boot up and comes to the standard screen of the Thin Client, which just appears like normal PC screen. CS-1000 Thin Client Manual 6 III. BIOS Setup Most of setup in BIOS is fixed. Some necessary setup as follow: A> Standard CMOS Features Setup Time and Date B> Advanced BIOS Feature Hard Disk Boot Priority [Press Enter] To setup the OS boot up from HDD or USB Disk BIOS will list all storage device in system. Select one device you want to boot from. C> Advanced Chipset Features To Change VGA memory size and monitor type: Select “VGA Share Memory Size [64M] Select a share memory from 8M to 128M. Monitor type setting: Select “Select Display Device” [CRT] Select “CRT” or “DVI” or “CRT+DVI” Setting PXE boot: Select “Onboard Lan Boot ROM” [Disabled] Select Enabled. D> Power Management setting Setting ACPI function AC Loss Auto Restart function Setting the system status after AC power loss and come back again The system keep off, keep on, or follow before AC loss status. CS-1000 Thin Client Manual 7