1
2005
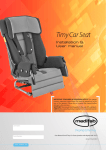
USER MANUAL
MOON BUGGY
LAUNCHER
MOON ROCK
SHUTTLE SEAT
The Seating System that does it all...
Please Read Before Use
MOON BUGGY
INTRODUCTION
Welcome!!
Get ready to explore
the world with your
Shuttle System!!
INDEX
THERAPIST AND USER MANUAL
Page
1���������������������������������������������������������������Shuttle System Introduction
2������������������������������������������������������������������������������������������������� Index
3��������������������������������������������������������������������������������������Safety Notes
4��������������������������������������������������������������������������������������Maintenance
5�������������������������������������������������������������������������� Moon Buggy Set-Up
6������������������������������������������������������������������������������� Using the Brakes
6�������������������������������������������������������Using the front wheel swivel lock
6��������������������������������������������������������������������Folding the Moon Buggy
7������������������������������������������������������������������Installing the Shuttle Seat
8����������������������������������������������������������������Removing the Shuttle Seat
8�������������������������������������������������������������������� Removing the Footplate
8���������������������������������������������������������� Adjusting the Footplate Height
9�������������������������������������������������������������������Adjusting the Seat Depth
9�������������������������������������������������������������������Adjusting the Hip Guides
10�������������������������������������������������������� Adjusting the Thoracic Laterals
10���������������������������������������������������������Adjusting the Backrest Recline
11��������������������������������������������������������������������� Adjusting the Headrest
11������������������������������������������������ Adjusting the Shoulder Strap Height
11��������������������������������������������������������������Adjusting Tray Table Height
12����������������������������������������������������������������������������������� The Launcher
13�������������������������������������������������������������������������������������� Accessories
14�������������������������������������������������������������������������������� The Moon Rock
2
SAFETY NOTES
PLEASE READ THIS INSTRUCTION BOOKLET FULLY PRIOR TO USE
AND KEEP FOR FUTURE REFERENCE
PLEASE PAY PARTICULAR ATTENTION TO INSTRUCTIONS
DESIGNATED BY THE WARNING
TRIANGLE SYMBOL
• Expert medical advice regarding the suitability of this product must be sought before use.
• The attendant should be familiar with the operation of the buggy - if in doubt, stop and read this instruction booklet.
Your Shuttle System distributor will be able to provide advice regarding the safe use of this buggy.
• Take note of how the child wishes to move or be moved, Co-operation between attendant and child will reduce the risk of injury occurring during lifting and
manoeuvering operations.
• Do not allow the child to climb unassisted into the buggy.
• Do not overload this buggy with additional children or goods.
• Bags and other items must not be hung from the handles.
• Maximum loading including luggage; For the Moon Buggy is 25kg�
• Maximum loading for the Shuttle Seat is 20 kg, and maximum loading for the storage Basket is 4 kg or 1 kg in the canopy pocket.
• Before setting off, ensure the child is comfortable and that clothes and rugs etc. are tucked in, so they do not catch in the wheels.
• A responsible adult attendant of adequate strength must propel and supervise the buggy during use.
• Ensure the child always wears correctly fitted and adjusted waist strap and shoulder harness.
• The attendant must know how to fit, adjust and release the buckles and clips.
• Do not stand on the footrests.
• Hold on to your buggy when close to moving road vehicles, trains or strong winds. Even with the parking brake on, the draught from the moving vehicle or
winds may move the buggy. Use the SAFETY WRIST STRAP on the Moon Buggy in all these situations and while going down hills.
• Always apply the parking brake when the buggy is stationary.
• To operate the rear hub brake – press down with your foot on the brake pedal.
• Make sure children are clear of moving parts when folding of erecting the buggy, or while making adjustments.
• Exercise caution when mounting and dismounting kerbs.
• Remove the child when ascending or decending escalators.
• Never tip the buggy forward at a kerb.
• Do not attempt to take the buggy up or down a flight of steps unless you or your helper are sure you have control of the buggy and can take the weight of
it's occupant.
• The Shuttle System must not be used as a seat for a child whilst travelling in a motor vehicle or bus.
• Never leave the chiid unattended in the buggy, even for the shortest time.
• The attendant should take precautions against fire risks. Iri the buildings, check the location of fire exits and ensure procedures are understood. Do not use
the Shuttle System near a fire or exposed flame.
• Do not let children play with or hang on the buggy.
• Do not use your buggy in a manner that it is not designed for.
• Care must be taken to avoid trapping fingers when opening and folding the buggy.
• Exercise caution regarding accessories not designed for this buggy, they may be unsafe.
• This system requires regular maintenance by the user. A regular checkup should be performed monthly. A thourough check of the chair should be
performed by authorised personel twice a year. Only original spare parts should be used for reparation.
• It may be unsafe to use replacement parts other than those supplied or approved by the manufacturer or distributor.
• If you run with this product, always lock the front swivel wheel.
• Do not run with a new born baby.
• Do not lift the stroiler by the bumper bar. It may disengage.
WARNING!
Always make sure that the red seat release knobs are properly engaged at all times when the Shuttle seat
is being used in the Moon Buggy or Launcher.
SAFETY WARNING!!
The sun is very strong. DO NOT LEAVE YOUR CHILD EXPOSED TO THE SUN. The canopy or hood on this
product will not give your child total protection from the harmful rays of the sun.
3
MAINTENANCE
IMPORTANT: An inspection of your Shuttle System should be completed
once every 6 months. If any fault is found that could provide a hazard to
either the occupier of the operator, then the system should not be used
until the fault has been repaired. A competent person who preferably
has experience of this type of product should carry out the service. The
growth and any changes of the occupant since the original assessment
should also be taken into account when servicing this product.
• Regularly inspect and maintain your Shuttle System to ensure all locking devices and moving parts are working properly.
• Ensure that all bolts that attach the seat together are tightened and secure at all times.
• Always keep your Shuttle System clean. If you have been to the beach, completely clean the stroller afterwards to remove the
sand and salt from the mechanisms and wheel assemblies.
• Fabric covers can be wiped clean using warm water and a mild detergent.
• Aluminium and plastic surfaces should be wiped or scrubbed clean.
The table below has been provided for recording relevant data from inspections.
Date
Service Performed
Signature
Print Name
WARNING!
If you discover any bolts missing or parts worn – replace immediately – don't delay!!
WARNING!
Medifab will not be held responsible for incorrect use of this product.
4
MOON BUGGY SET-UP
To Open The Stroller
A Lay the chassis down flat and release the frame lock
catch.
BAdjust the handle to the user upright position by
simultaneously pressing the red buttons on the inside
of the handle. Grasp the handle and lift upwards
allowing the chassis to extend and click into position.
C Check the stroller is ready for use by lifting the handle.
The stroller should not collapse.
To Install The Front Swivel Wheel
A Remove the plastic protector (Where Fitted) from the front forks.
B Push the front wheel axle fully into the wheel forks.
C Place the securing washer on both sides, ensure the tabs in the washers are located
into the circular holes just above.
D Tighten the front wheel axle by turning the quick release hub in a clockwise rotation
and fold lever to lock.
NOTE: Pneumatic front and rear tyres can be inflated with pump (where supplied)
or a bicycle pump or at garage air pump and they have a maximum inflation
pressure of 2.4 bar (35 p.s.i).
To Install The Rear Wheels
A Push each rear wheel into the chassis until
they lock into position.
B Check the wheels are correctly fitted by
trying to pull them out.
NOTE: The rear wheels can be removed
for more compact storage. Do this by
lifting the lock lever on the top of the rear
wheel housing, then pull the wheel out.
5
BRAKES & SWIVEL WHEEL
To use the brakes
A To use the foot (park) brake, push lever down to lock the wheels.
B Lift brake lever up to release the wheels.
NOTE: Always apply the foot brake whenever you park the stroller.
To Release/lock the front swivel wheel
A To release the front swivel wheel allowing
greater mobility, rotate the knob clockwise
until the rivet in the knob faces forward.
B To lock the swivel wheel, rotate the knob
clockwise half-a-turn and move the fork
until it locks into place.
warning: To run with this stroller, the
front wheel must be locked.
folding the moon buggy
A Remove the seat (see page 7).
BPull the folding release sliders on the
handle bar.
C Push the handle bar forward and down.
NOTE: To make the Moon Buggy even
more compact – fold the top of the
handle bar over, and remove the wheels.
6
INSTALLING THE SHUTTLE SEAT
INTO THE MOON BUGGY
Occipital support
headrest
Contoured
Backrest
Padded shoulder straps
(adjustable height)
Contoured thoracic
laterals adjustable in
height & width
Tray
Recievers
Hip / Thigh
Guides
Cushion with
waterproof
upholstery
Seat tilt
adjustment
Seat Release
Knobs
Height adjustable
quick release
footplate
installing the shuttle seat
to the moon buggy
A Angle the rear of the seat into the chassis and
select the choice of tilt required on the rear
mount bar.
B Press the front of the seat down for the locking
pins to latch onto the front mount bar.
A
WARNING: Always check that the
locking pins have engaged and the seat is
secure once installed.
warning: Never install or remove the
seating with the child sitting in the seat.
7
B
REMOVING THE SEATING
AND FOOTPLATE
Removing THE SEATING
A Release the two front locking pins by pulling
the red knobs.
B Tilt the seat back and remove it from the
rear mount bar.
WARNING: Always hold the seat
properly with both hands. Otherwise the
seat could fall and cause damage.
REMOVING THE FOOTPLATE
A Reach underneath the seat and pull push
the spring button.
B Pull the footplate out from seat.
C To insert footplate, simply snap back into
seat.
WARNING: Always XVHIRRWSODWH
Attachment bolts (plate to hanger) must be
properly tighened, and be securely engaged
when fitted�
Adjusting THE FOOTPLATE
Height
ARemove the bolts and reposition the
footplate on the hanger.
B Tighten bolts at correct height.
FORWARD FACING
8
REARWARD FACING
ADJUSTING
SEAT DEPTH & HIP GUIDES
ADJUSTING THE SEAT DEPTH
Tools Needed:
10mm Spanner only.
A Unwind the nuts that secure the backrest to
the base from underneath the seat.
BRe-position the backrest to the correct
measurement and tighten nuts.
WARNING: Ensure the fastenings are
tightened properly.
ADJUSTING THE HIP GUIDES
A Unwind the knobs from underneath.
BRe-position the brackets in the correct
position, ensuring you get the right hip width
measurement from the slots in the bracket.
C Tighten the knobs.
FURTHER ADJUSTMENT ON THE HIP GUIDES
• By
unzipping
the
upholstery cover, there
are three different bracket
mounting positions.
•If you can't manage to
get the hip guides wide
enough for the child, un-zip
the upholstery cover and
remove the foam 'LEAF".
9
ADJUSTING
THORACIC LATERALS & RECLINE
ADJUSTING
THE THORACIC LATERALS
A Unwind the knobs at the rear of the
backrest.
B Re-position the lateral brackets in the
correct position ensuring you get the
right chest width measurement from
the slots in the bracket.
C Tighten the knobs.
FURTHER ADJUSTMENT ON THE
THORACIC LATERALS
There are additional bracket mounting positions avaialble to ensure the best pad
position for the child.
Simply pull back the cover and adjust using a screwdriver.
ADJUSTING THE BACKREST RECLINE (if installed)
A With one hand, support the top
of the backrest.
BPress the locking lever with
your thumb, and gently adjust
to the desired recline angle.
10
ADJUSTING HEADREST,
BACKREST & SHOULDER STRAP
ADJUSTING THE HEADREST
If the headrest pushes the child's head
forward, you can remove the 'LEAF' of
foam from the headrest.
A Un-zip the upholstery cover.
B Remove the foam inner.
C Tear off the leaf.
D Slip the cover back on and zip the cover
closed.
Tray Table
HEIGHT ADJUSTMENT
To get the correct 'arm-propping'
with the tray table, the height can be
adjusted.
Tools Needed:
10mm Spanner
A Un-do the nuts that secure the tray mounts.
B Reposition and secure mounts.
ADJUSTING THE
SHOULDER STRAP HEIGHT
ALift open the camlock to release the
webbing straps.
B Pull through the straps, and re-insert at the
correct shoulder height.
C Feed the straps back through the camlock,
re-tension and engage.
WARNING: Always ensure the straps
are tensioned correctly to the child and the
camlock is engaged properly.
11
LAUNCHER SEATING &
ADJUSTMENTS
using the seating for
long–sitting
The Shuttle can be used on the floor for
long–sitting.
Things the Shuttle Seat must not be used
for:
• As a car safety seat
• At the beach in the sand or water
WARNING: Care must be taken at all
times. Never leave the child unattended. Do
not place the child in the seat near stairways
or ramps or any other places where the
child could be at risk, e.g. where the child
could be vulnerable to animals etc...
the launcher
The Launcher is an indoor seating frame
only. The child should be supervised at
all times when seated in the Launcher.
WARNING: Do not place the Launcher
in an area where it may be at risk of being
bumped into by others. This could cause it
to tip over and cause injury.
ADJUSTING THE HEIGHT
With both hands, release the red latch
buttons and adjust height.
WARNING: Never lower the height of
the Launcher with the child seated.
Care must be taken at all times especially
when the seating is in the raised position
For the carer's safety we recommend the
carer kneel in front of the Launcher and
maintain a straight back whilst adjusting the
seat height
12
Buttons to
fold frame
Buttons to
adjust height
ACCESSORIES
STORM COVER
Protects the child from the windy wet conditions outside.
ARM PROTECTION SHROUD
Provides enclosure around seat to ensure
arms don’t get caught.
RIDE-ALONG TODDLER TRAILER
Designed for the older sibling as a fun and
practical way to come along for the ride.
13
UV SHADE COVER
Protects the child from the harmful U.V. light on those sunny days.
TRAY TABLE
Depth adjustable with black ABS plastic surface.
Sternum Harness
Pad
Provides additional
anterior support.
GRAB RAIL
Quick-release, adjustable system that provides
control and more upright sitting for the child
that requires more security when in the buggy.
SACRAL Pad
Positioned behind
backrest cover to support
the pelvis to provide more
upright sitting.
Padded Arm Rests
Provides forearm support,
and also prevent arms
falling down.
INTRODUCING
THE MOON ROCK
The Moon Rock is an indoor seating frame only.
The child should be supervised at all times when
seated in the Moon Rock.
WARNING:
Do not place the Moon Rock
in an area where it may be at
risk of being bumped into by
others. This could cause it to
tip over and cause injury.
The rocking movement
provides reflex stimulation,
and when not required, the
locking bar is engaged at
the rear.
THE SHUTTLE SYSTEM
We continuously develop new support equipment for children and improve existing equipment.
If you have any requests or opinions, please do not hesitate to contact us!
ABN# 49 828 922 466
M edi f a b M edi ca l Fa bric ation
C al l : +64 3 3 0 7 9 7 9 0
Fa x: +64 3307 2820
E m ai l : e x p or t @ medi f a b. co m Web: w w w.me difab.c om