1
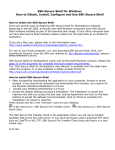
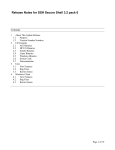
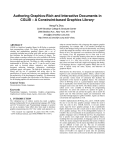
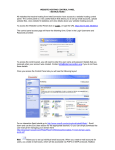
How to obtain the SSH Secure Shell:
1.
There are several ways of obtaining SSH Secure Shell for Workstations software. You
may download the file directly HERE
SSH Secure Shell for Workstations is compatible with all Microsoft Windows operating
systems beginning with Windows 95.
2.
SSH Secure Shell for Workstations User Manual is available from the Help menu within
the program. It is also available in Adobe Acrobat PDF file for download
HERE
How to install SSH Secure Shell:
After you obtain SSH by downloading from the SSH site go to step 1 below.
1.
When the download is complete, go to the location of the file you specified. If you should
not remember the downloaded file’s location, do a search for the filename. Double-click
on the file named: SSHSecureShellClient-3.2.5.exe.
2.
Accept the default settings during the installation. The installation is simple and requires
only that you accept the End User License Agreement and click on the Next buttons to
accept the defaults (recommended). Click on Finish to complete the installation. No
reboot is required.
3.
There should now be 2 new “shortcut” icons on your desktop. One icon
Secure File Transfer Client. The other icon
is named SSH
is named SSH Secure Shell Client.
The SSH Secure File Transfer Client is the application which you will use to transfer files to the
CSI storage server. If you have previously used a graphical FTP client such as CuteFTP or
WS_FTP, SSH Secure File Transfer Client looks and works in a very similar way.
How to Configure SSH Secure File Transfer Client:
1. Open SSH Secure File Transfer Client from the shortcut
on your desktop.
2.
button on the toolbar, or just press the Enter key to open
Click on the "Connect"
the Connect to Remote Host dialog window.
3.
A “Connect to Remote Host” box like the one in Figure 1 below appears.
4. In the Host Name box enter csistorage.csi.cuny.edu
5. In the User Name box enter your username (same as CSI computer lab user name).
6. In the Port Number box enter 22.
7. Select <Profile Settings> in the Authentication Method box.
Verify that your screen matches Figure 1 below (with the exception of the username box,
where your own username should be)
Figure 1:
8. Click on the Connect button.
9. You will receive a message from server. Click OK.
10. An “Enter Password” dialog box like the one shown in Figure 2 should appear. (same as
CSI computer lab password)
Figure 2:
11. The first time you logon from any computer, you will see a “Host Identification” dialog
box similar to Figure 3.
Figure 3:
12. Click on the Yes button.
13. An “SSH Secure File Transfer” window similar, to Figure 4, should appear.
Figure 4: