1
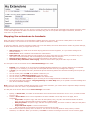
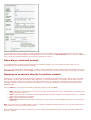
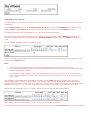
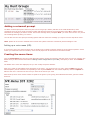
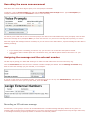
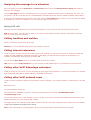
Planning your virtual PBX
You are probably quite keen to get on and set up the system, but you may find that a few minutes planning what you want
to do will repay itself.
If you can list all the people you need to include, the hunt groups and diversions or shortcuts you want to make, you can
more easily assess how many extensions and external numbers you will eventually need. It might help to skim through the
rest of this document before actually doing anything.
If you do make any mistakes, the control panel is very flexible, so you can always go back and start again.
Warning. if you decide to delete an external number, you cannot get it back again, and will have to pay a setup charge to
get a new one.
Introduction to PBX setup
Now that you know the service is set up OK, you can start fine-tuning the system to meet your exact requirements. First,
you'll probably want to set up some users on internal extensions, then you can do more; like assigning hunt groups,
recording a voice menu, and so on.
Everything described in this section is done using the links in the VoIP control panel, which take you to a panel of more
specific information and links:
So, point your browser at https://voip.voipadvantage.co.uk/login/, log in, and you are ready to start.
Setting up extensions for named users
Click the Extensions link to see a summary of the current settings. When you first start, only the default extension (the one
you set up earlier) is set up. Use the input fields to add new extensions for users, then click Save:
•
•
•
•
Extension: select the internal number to use for this person.
Name: type a full name, which will be displayed as the Caller ID when possible.
Email: this address will be used to send any voicemails left for this person.
Password: enter a password to set up the security on the VoIP phone or adaptor.
WW Ltd have just set up the first two extensions for their principals to start with:
However, this won’t get them very far, as they currently only have one VoIP phone connected to the default extension, which
in their case happened to be 3289. To share the workload, they plan to set up sales and support extensions, and then a
voice menu to guide callers.
Mapping the extensions to handsets
Each real person needs to have a real telephone handset (and line!) to answer. This can be a VoIP phone in the same or
another location, or a diversion to an external number (mobile or landline or VoIP).
To get at the settings, click the extension number link to see the details; the screen starts with a number of general settings,
of which these are the ones you might want to set up:
•
•
•
•
•
SIP Password: only needs to be set when buying phones from other suppliers, or if you need to change it for
security reasons.
PSTN Access: allow or disallow calls outside the VoIP network.
PSTN caller ID: select the caller ID (only possible if you have more than one line). When you make a call, your
user name is also transmitted, and will be displayed on handsets that can accept it.
Message before ringing: choose a personalised message to play before ringing.
Hold Music/Play Hold Music while ringing: choose a music track to play if the caller is put on hold.
The next part of the screen allows various Voicemail Settings to be made:
•
•
•
•
•
•
•
Enabled: turn voicemail on or off, and set the Message Waiting Indication on or off (this depends on the handset
supporting it: for example, you may hear an interrupted dial tone when any messages are waiting).
In Delay, you can specify how many seconds the phone should ring before the voicemail recording service picks up
the line.
You can usually leave the PIN at the default created for you.
You can specify an SMS Notify Number to get text alerts.
You can usually leave the Voicemail Account at the default value.
You can opt to have WAV Emails to get a recording of the message attached to notification emails.
The final two fields work together. Outgoing Message and Intro Skip allow you to upload a recorded message and
turn off the standard message.
Note: since you can set both voicemail and diversion on the same extension, you need to set the respective delays carefully:
having both the same can result in unpredictable behaviour.
The last part of the screen allows various Divert Settings to be made:
•
•
•
Specify, in Divert Time, a number of seconds after which the diversion should occur to turn it on, or blank the field
to turn it off.
Choose a Divert Mode. There is a full explanation of these available via the help link on the page, but to
summarise:
o Sequential: the phone rings, and if the call fails (offline, busy, etc) or is not answered within the divert
time, the call is cancelled and the divert number is called instead.
o Delayed parallel: the phone rings, and after the specified delay, the divert number is called, but the phone
keeps ringing.
o Sequential with repeat: a mixture of the above.
We recommend you experiment to find the one that suits you best.
Then select an option to specify where to divert to: this can be an external (PSTN or VoIP) number, another
extension, or a SIP URL. When you are done, click Save to confirm the changes and return to the summary page.
Here's how WW Ltd set up the first extension, with voicemail out-of-hours:
The second extension is set up to divert to Peter's mobile when he's not available:
For now, WW Ltd are saving money by using a softphone for this extension. When the software is set up, the User name,
Authorisation user will be 2053289, and the password is the one entered in the SIP Password field here (which is hidden on
save). The proxy settings needed are in the welcome email for the service.
Recording a voicemail prompt
The VoIP Advantage voicemail system comes with a standard message if you are not around to take a call. You can
personalise this by recording your own message.
Dial *1 on your VoIP handset, and follow the prompts to record a message. You will need to supply the number listed in the
Voicemail PIN field for the extension. Note: you must wait until the very end of the recording before pressing 1 to save it.
Mapping an extension directly to another number
Sometimes, you may always want an extension number to be immediately diverted without any delay. In this case, rather
than setting it up as an internal extension with a diversion, you can forward (alias) it. This facility can be used in various
ways; for example, creating an extension for a mobile number for a service engineer or salesman on the road, creating
three-digit shortcuts to your most-used external numbers, or an internal extension for an associate using another VoIP
Advantage PBX.
Click the Alias link, and use the input fields to add new forwards, then click Save:
•
•
•
•
Alias: select the internal number to use for this forward. This number can then be used just like an extension when
configuring hunt groups etc.
Name: type a full name, which will be displayed as the Caller ID when possible. This might be a person, or a generic
function like Emergencies for example.
Type: select the type of forwarding.
Destination: type an external number or SIP URL (a string, similar to an email address, that lets you call another
VoIP user.)
Hint: if you want to play a message before ringing or choose to forward the original Caller ID, click the alias number link to
see the details, where you can set various items.
WW Ltd might choose to set up an extension for priority clients to be forwarded directly to a special number outside office
hours for example:
Creating a hunt group
Hunt groups allow you to specify more than one person to answer a call on a particular extension; in our example, Sales
and Support.
Click the Hunt Groups link, then the Create New Hunt Group button. Select the Extension that the group will use,
specify a Name, and an Email address to which voicemails will be sent out of hours. Click Create to finish.
The details of the hunt group are displayed, but you can usually accept the defaults.
Now you're ready to start adding some people to the hunt group. Scroll down the page to Members, and select an
extension corresponding to the first person from the Add New Member dropdown, then click Update to add it to the
group.
Here is how WW Ltd started creating the Support group:
Peter is not actually going to take calls all the time, so his days and hours can be edited to more reasonable limits, and
saved using the Update button.
Hints:
•
•
If the times fail to update, make sure you have a colon separating hours and minutes, e.g. 09:00.
If you wish to add a member to the hunt group that spans midnight you will need to add the member twice with
times before and after midnight.
For example you want a member of the hunt group available from 16:00 – 08:00 for an out of hours answer
service using an alias, so you would need to enter this twice; the first from 16:00 – 23:59 and the second from
0:00 – 08:00.
More members can be added using the dropdown as before, and the Order changed if necessary: the value here
determines the order of ringing – a lower number rings before a higher number. So, for parallel groups where all the
phones should ring at once, set the order to the same value. You can also mix types, for example, in a hunt group of four
extensions, set orders of 1, 2, 2, 2 to try the first phone, and if there is no answer, try the other three all at once.
WW Ltd just has two people: Peter is the primary contact for support and Lois does limited backup:
Out of hours, calls are diverted to Peter’s mobile if there’s no answer after 20 seconds.
They set up a similar group for Sales too, which is listed in the summary (click the Hunt Groups link to see the summary):
Adding a voicemail prompt
To add a voicemail prompt for when everyone in the hunt group is offline, dial 185 on the VoIP handset and, when
prompted, enter the hunt group extension number and password listed in the group details. Select 0 for mailbox options
and select the message you wish to record. Record the message when prompted. Note: you must wait until the very end of
the recording before pressing 1 to save it.
You can also use the voice prompt recording system and then select the message you require from the drop down menu.
Note: please do not mix the methods as this causes the system to become confused by which message to use!
Setting up a voice menu (IVR)
A voice menu gives your callers a simple way to decide who to speak to without needing to go through an operator. It also
means you need fewer external numbers, since several people can be contacted on the same number.
Creating the menu items
Click the Voice Menus link then the Create New Menu button. Select the extension that the menu will use (for example, the
default that you discovered as described in Making a basic configuration of your PBX), and specify a name. Click Create to
finish.
The details of the menu are displayed, but you can usually accept the defaults.
Now you're ready to start adding some selections to the menu; you can do this in any order. Select a Digit from the lefthand dropdown, and an extension corresponding to the required Action from the second dropdown, then click Update to
add it to the menu. Continue like this until you have all the entries you need.
WW Ltd set up their menu to allow callers to speak to the generic (hunt group) and individual extensions, plus the instant
diversion:
Recording the menu announcement
New callers won't know which digit to press, so a voice prompt is essential.
To add one, click the Voice Prompts link and click the Record New Voice Prompt button. Type a Description (for
example, IVR Welcome) and click Continue to return to the summary.
You will be given a PIN code to use to record the prompt. Dial 188 on the VoIP handset and, when prompted, enter the PIN.
Record the message when prompted. Note: you must wait until the very end of the recording before pressing 1 to save it.
WW Ltd's regular IVR message has been recorded, as you can see from the status above; a special message for sale offers is
awaiting recording.
Hints:
•
•
If you already have a recording you want to use, you can save it as a .WAV file and upload it instead.
if you want to add a ‘hidden’ option like a conference room, just add the option and don’t announce it in your
recording.
Assigning the message and the external number
The last step in getting your basic PBX working is to make sure that callers hear the menu when they ring.
Click the Voice Menus link then the menu extension number to display the details. Use the Message on answer dropdown to select the message you just recorded; in our example:
If you set up the menu on the default number, you can leave this as it is. If not, click PSTN Numbers, and select the
extension number for which you set up the menu, then click Save:
Recording an IVR welcome message
An extension, a hunt group or a menu can be associated with a recorded message that plays before the ring tone. For
example, WW Ltd might record a message during a very busy period warning that response times may be longer than usual,
or a message mentioning a special promotion or solution to a technical problem.
Assigning the message to an extension
Show the details (in either the Extensions or Hunt Groups panel) and use the Message before ringing drop-down to
select the new message.
Tick the Intro Skip box and the voicemail system will not play the standard "please leave a message after the tone". Use
this option if you have recorded your own unavailable/busy message and do not want the standard message played after it.
If you want the message to play before the voice menu, show the Voice Menu details, where you have the choice of adding
it on answer, or if there is no response or the user selects a digit not on the menu.
Making VoIP calls
Assuming you have managed to set everything up successfully, all you need is to start making and receiving calls.
Hint for Sipura users: you can press the hash (#) key at the end of dialling a number to send it immediately, otherwise
there is a short delay before dialling.
Calling landlines and mobiles
Simple: just dial the number and call as usual.
Warning: you cannot call 999 and premium rate numbers at present.
Calling internal extensions
To talk to anyone on the same internal number range as you (typically, you get ten extensions: for example, the WW Ltd
number of 01297 578089 has extensions 205 3280 to 205 3289), just dial the last three digits of the extension. For
example, Lois Wakeman could call Peter by dialling 288.
You can use the User Status menu in the control panel to check who's online.
Hint: there is a useful popup window link so you can keep a small window open on your desktop to see who’s online.
Calling other VoIP Advantage customers
To talk to anyone on our service, you can dial either the seven-digit internal extension, or the external number. For example,
WW Ltd would be obtainable on 01297 578089, or 205 3282 (voice menu).
Calling other VoIP network users
To talk to anyone on another VoIP service (like Pulver or BT for example), you can dial a number, or alternatively, use a SIP
URL.
SIP URLs are like
sip:[email protected]
Our customers are obtainable using their extension as the username, for example, sip:[email protected].
You normally use the keys on your handset to type in the URL: you'll need to consult the handbook that came with it or the
adaptor to find out how to set up quick dial numbers.
We support “short code” dialling to other VOIP networks so that you can easily call people. There is a full list on this website
at http://www.gradwell.net/support/cross-calling
Note: Some VoIP networks, including Skype and Tesco, are closed, and you cannot call them from outside.
Listening to VoIP voicemails
If voicemail is enabled for an extension or hunt group, callers can leave messages for you. You can choose to pick these up
in four ways:
From the VoIP handset
To listen to any voicemail messages for your extension, dial *1 and enter the voicemail password when prompted (you can
find it from the details for the extension or hunt group in the control panel).
Some handsets alert you with an audible signal when there's a voicemail waiting (for example, this might be an intermittent
dial tone).
(You can also dial 185 on any VoIP Advantage handset, when you need to enter your mailbox number – the seven-digit
extension, and password.)
From an external number
Dial 0870 930 0000. Enter the seven-digit extension number at the mailbox prompt, and then the password (as above).
From the control panel
Use the Voicemail link to view and listen to your voicemail. You can also purge your mailbox or delete the voicemails
individually.
Via email
Any recorded messages are forwarded to your email address as WAV file attachments (unless you disable this), which you
can play on your computer. For this to work, you must have provided a valid email address when you set up the extension or
hunt group.
SMS alerts
If you have signed up to pay by direct debit, you can elect to receive SMS alerts on a mobile number whenever there is a
message to collect. To do this, show the extension details, and enter the number for alerts.
Setting up a VoIP conference call
You can set up a closed conference call (teleconference) for meetings etc.
In the Conference Rooms section of the control panel menu, select an extension Number, choose a Name, and type a
PIN number, then click Save.
You can then notify the attendees, and at the designated time, they can dial in and enter the PIN number when prompted, to
join in the conference.
Transferring VoIP calls between extensions etc.
All the functions described elsewhere in tis section are provided by our VoIP service. There are extra functions that are
supported by the handset and/or adaptor.
For example, most handsets and adaptors have a wide range of inbuilt functions: speed dialling, attended or unattended call
transfer, put caller on hold, initiate three-way calls, notify waiting calls, ring back last caller on call termination, call forward
on no reply, etc. Other systems have equivalent functions, although some (like freeware softphones) are rather limited.
You’ll need to consult the relevant user manual for more information on how to set up and use these features.
Managing the service: credit/postpay/usage
In the lower half of the control panel menu, there are several administrative links:
•
•
•
•
•
Contact Details allows you to edit your address, contact emails etc.
Packages allows you to buy more numbers, hardware, Asterisk services etc.
Credit allows you to top up call credit for your numbers (but unless you are taking the free trial, you’ll find it much
more convenient to set up a direct debit mandate – see below)
Calls Out and Calls In allow you to review your usage of the service
Invoices allows you to inspect and print invoices for all your transactions with VoIP Advantage.
If you'd rather pay by direct debit, login and follow the instructions there to complete a mandate online.
Post-pay is the best option for most users. As well as allowing you to get SMS voicemail alerts, it removes the credit
remaining announcements when you make calls.
As mentioned above, the Credit panel allows you to check on how much prepay credit you have if you aren’t using postpay,
and top up if necessary. It also allows you to:
•
•
•
Check how many inclusive minutes you have left, if your package includes them
Use a voucher to credit your account with free minutes
Set a maximum daily limit (in whole pounds) on call costs for the account.
Handling multiple VoIP calls
Each number you buy from us provides you with the equivalent of two PSTN lines: one incoming and one outgoing; for
example, to allow calls to a particular extension to be diverted. You can make as many simultaneous VoIP calls as you like.
If you regularly expect to make or receive simultaneous calls, you may wish to consider purchasing extra numbers or
extensions to avoid callers getting the engaged tone.
Getting extra numbers
These can be purchased via the Packages link in the control panel - choose to add a Centrex package, and in the Choose
Number panel, you can select the Please allocate me a block of consecutive numbers option. Note that if you want
numbers of different kinds (geographic, free call etc), you need to buy each batch separately.
Once they are paid for, they, and their associated internal extensions, can be assigned using the PSTN numbers and
Extensions / Hunt Groups / Aliases / Queues links in the control panel as for the first number.
Getting extra internal extensions
If you want more than the ten extensions that come as standard with each number, you may need to buy some more
external numbers, as described in Getting extra numbers above, or you can use the Internal Numbers link in the control
panel to review your extension ranges, and request more. (There is no extra cost for internal numbers.)
Transferring in existing numbers
If you already have a range of numbers that you want to use for VoIP, use the CLI Numbers link, where you can specify,
and pay for, one or more existing PSTN numbers to be transferred into your Centrex service. There is a list of area codes
that you can transfer here: http://www.gradwell.com/voip/number_porting.php.
Note: this process involves liaison with BT and will take at least a week to complete.
Managing multiple external numbers
Unless you are a very small business, you may well find that you need more than one line for multiple incoming and
outgoing PSTN calls. In this section, we describe some typical scenarios and how to manage them.
Assigning multiple lines to your voice menu
If you need to take several PSTN calls at once, you can choose to assign several lines to your IVR.
Click the PSTN Numbers link, and for each number required, use the Destination drop-down to select the extension for
your voice menu; then click Save.
Assigning external numbers to extensions
If you want direct dial as well as menu access to certain people, you can map external numbers to specific extensions.
Click the PSTN Numbers link, and use the Destination drop-down next to the appropriate external number to select the
person's extension; then click Save.
Assigning different CLIs to different extensions
Each extension can have a different PSTN Caller ID set (in the extension details panel).
Assigning Caller ID tags to hunt groups
For hunt groups (and queues), you can set a Caller ID tag in the extension details panel so that whoever answers knows
which group the call originated from.
Setting up a fax machine to send and receive calls
VoIP is not recommended for fax use, but if set up correctly, it can be used.
Please contact our support team if you wish to use fax over VoIP for advice on how to do this.
Alternatively we provide dedicated fax services, login for: Email2fax and Fax2email.
Creating a VoIP call queue
For certain call-centre type applications, you may need to set up queues to handle incoming calls sequentially. These offer
more sophisticated call waiting facilities than Hunt Groups, but the basic setup is much the same.
Use the Queues menu and click Create new queue to enter the details, then add members to the queue as described in
Creating a hunt group. In addition, you can specify a number of tailored prompts for your waiting callers in the Queue
options section. (These must be recorded as described in Adding a voicemail prompt.)
You can also specify how many callers should be able to queue before getting a “call back later” message, and the extension
that should take calls if zero is pressed (leave blank to disable this).
Setting music on hold for VoIP calls
You can specify an MP3 file to play while callers are put on hold, waiting for answer, or in a queue. Use the Music on Hold
link to browse for and upload the file.
Then use the Extensions, Hunt Groups or Queues menu, where in the corresponding details panel, you can specify the
file in the Hold Music field, and also (for extensions and groups) specify if it should play instead of the ring tone.
Deleting VoIP PBX items
You will notice that most summary pages in the control panel have a column called Delete or Del. If you tick the box next to
an item and then click the corresponding Delete … button, the item and its associated settings will be removed. Notes on
the page explain the implications of doing this if it is not obvious.
Make sure you really want to do this, as you don’t get a chance to back out!
VoIP troubleshooting basics
Once you have your PBX set up, you will naturally want to test it. In this section, we list the most common problems; if you
find something not covered here, [email protected] for more help.
Most problems that people have are because they haven't mapped external numbers properly to extensions, so that's always
the first thing to check.
There is no dial tone on the handset
Have you checked the cabling of the adapter or VoIP handset? Is the router/hub online and connected? Does the
adapter/phone have an IP address? Does it say it is registered (look for the line 1 or line 2 status) when you view its
web admin page?
I can't make any external calls – I get a “good bye” message.
Have you enough credit? (check in the Credit control panel)?
Or have you forgotten to make your account postpay (check the list in the Extensions control panel and the
Credit/Account Balance panel)?
I can't receive any calls
Have you assigned the external number to an appropriate extension that is configured with a handset or call
forwarding, or to a voice menu?
Is the device registered with gradwell?
I can't make any internal calls
Are the extensions set up (on an adapter, VoIP handset, or softphone) or forwarded to a number?
The sound quality is terrible
If you are on dial-up, you must use the right codec to compress the voice data: G729a or GSM are suitable.
(Selectable in the adapter/phone setup.)
There is silence when someone calls me
Is your firewall allowing traffic on the necessary ports? See our support article about which ports will need to be
open on your firewall. http://www.gradwell.net/support/firewall-nat.php
Have you disabled all but one codec in the adaptor/phone settings? If someone calls you using a disabled codec, you
won’t hear anything.
END