Download User Manual ARvision
Transcript
User Manual
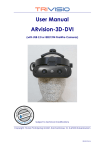
ARvision
(with USB 2.0 Camera)
Subject to technical modifications
Copyright: Trivisio Prototyping GmbH, Robert-Bosch-Str. 30, D-63303 Dreieich
2007/02/31
WARNING
Before using the ARvision HMD please read carefully these
safety instructions.
Read this handbook and use the ARvision device in strict
accordance in order to prevent any damage to your eye,
other injury, loss of visual functions, property damage or
death.
Children under the age of fifteen may not use this product.
We strongly advise you to get familiar with the ARvision
device and its capabilities before you use it for the first
time.
ARvision User Manual
2
Table of Contents
Table of Contents .................................................................... 3
1 Safety instructions............................................................... 4
1.1
1.2
1.3
Health concerns .......................................................... 4
General safety hints .................................................... 5
Warning for electrical products .................................. 5
2 Content of the ARvision Kit................................................. 6
3 Description.......................................................................... 7
3.1
3.2
3.3
Head Mounted Display HMD ...................................... 7
Power unit ................................................................... 8
Charge unit ................................................................10
4 General Operating Instructions .........................................12
4.1
4.2
4.3
4.4
4.5
4.6
4.7
Preparation ................................................................12
Connecting external video sources ...........................15
Using ARvision as a Monitor........................................16
Using different Modes.................................................17
USB-Camera / Software .............................................20
AR setup .....................................................................20
Adjusting the Interpupil Distance ...............................22
5 Maintenance and Cleaning Instructions...........................23
6 Troubleshooting .................................................................24
7 Returning used electronic devices in EU countries............25
8 Technical Data ..................................................................26
8.1
8.2
Head Mounted Display ..............................................26
Power unit ..................................................................27
ARvision User Manual
3
1
Safety instructions
1.1 Health concerns
è
WARNING: Eye Disease, Eye Injury, and Glaucoma
If you have been diagnosed with or are susceptive to eye
disease, eye injury, or glaucoma consult your doctor before
use and do not use without your doctor’s approval.
è
CAUTION: Heart Disease, High Blood Pressure
If you have a history of heart disease or high blood pressure
consult your doctor before use and do not use without his
approval.
è
CAUTION: Seizures
If you have a history of temporary spasm, unconsciousness, or
epileptic seizures from light stimulation, consult your doctor
before use and do not use without his approval.
If any of the following symptoms occur, if using ARvision, stop
using immediately and rest:
Ÿ eye fatigue or irritation,
Ÿ
headaches or dizziness,
Ÿ
aches and pain in the neck or shoulders,
Ÿ
double vision,
Ÿ
nausea or motion sickness,
Ÿ
inability to focus on the displays.
Misuse or overuse of this product may result in eye damage, or
loss of visual functions.
ARvision User Manual
4
1.2 General safety hints
è
Avoid getting the cable entangled around your neck,
body or arms. Use the belt pouch for the power unit and
wear the cable close to your body.
è
To ensure that the device does not fall off during use,
always use the elastic strap, and have it tightened with an
adequate tension.
1.3 Warning for electrical products
è
To avoid any risk of electrocution, do not bring any part of
the ARvision in contact with water when the power unit is
connected to an AC outlet (e.g. when recharging
batteries, using an external TV-, DVD-, Video- or PCsource).
è
Avoid using and storing the ARvision at wet, humid, dusty
and smoky surroundings and extreme temperatures.
è
Do not use ARvision at temperatures below -10°C and
above +40°C. Avoid dropping or mechanical shock, as
frame and displays may be deformed.
è
Always switch off and unplug the ARvision when it will not
be used.
è
In case of damage contact your retailer. There are no user
serviceable parts. Only qualified service personnel should
perform any service required on this product.
ARvision User Manual
5
2
Content of the ARvision Kit
The ARvision kit contains the following elements. Please check
that all of these are included. If any item is not supplied
contact your ARvision dealer.
ARvision HMD with connecting cable (1),
Power unit (2), Battery (3),
AC/DC transformer with power cord (4), Charge unit (5),
Case (6), Cleaning cloth (7),
USB-Cable (8), USB-Driver-CD(9)
6
1
5
9
4
2
3
ARvision User Manual
7
8
6
3
Description
3.1 Head Mounted Display HMD
The HMD contains two microdisplays (2) to show the images.
The cable (1) is permanently attached to the HMD and to the
pocket element (power unit). The built-in color camera (3)
provides the video signal to the power unit for output to a PC.
Without a PC or external video source connected to the
power unit there is no image visible inside the HMD !
3
2
1
ARvision User Manual
7
3.2 Power unit
The plastic casing contains the following elements:
(1)
(2)
(3)
(4)
(5)
(6)
(7)
HMD cable permanently attached
Plug connection for PC (USB and VGA)
Push button for power (illuminated)
Push button for headlight
Connector for power supply (under the battery)
Knob for manual adjustment of brightness
Knob with triple function: for manual adjustment of
contrast, for electronic zoom or phase, depending
upon the mode (see further).
5
7
3
1
2
4
6
The push button (3) on the top of the power unit is used to
switch the ARvision on and off. When the device is switched
on, a light underneath the button lights up. When removing the
battery, an input connector (5) for an external power supply
becomes visible. (see further)
ARvision User Manual
8
The knob on the left (7, page 8) of the cable enables manual
adjustment of brightness. The knob on the right (6, page 8) of
the plug connection has a triple function, it enables manual
adjustment of contrast, of the zoom function or phase
adjustment in VGA-mode.
The power unit also contains:
(1)
Push button for white head light
(2)
Control lamp for headlight
(3)
Socket connector for external video signal
(4)
Socket connector for other external image sources
(SVGA from computer).
(5)
Button for selecting the input signal mode
(6)
Control lamps
(7)
Socket connector for USB camera signal (output)
3
7
ARvision User Manual
1
4
6
2
5
9
3.3 Charge unit
ARvision includes a removable Ni-MH rechargeable battery (2)
and a power supply unit (1) for generating different voltages,
which also includes a charging circuit for a mains adapter (3).
It takes approx. 50 min to charge the battery from empty to full
if you use the mains adapter supplied with the system. During
charging process it is possible to use ARvision parallel.
1
2
3
ARvision User Manual
10
The charge unit has control lights.
è When loading the unit with a battery to be charged, the
red light will turn on, but only for a while. It should turn off
after a certain time (not more than a minute), otherwise it
indicates a defect.
è
If voltage input is incorrect or unstable, the red light lights
up.
è
When charging starts the green light will be on.
è
When charging is completed, the green light will begin to
flash.
è
The yellow light is in relation with the temperature control.
If it turns on, the maximum temperature allowed has been
reached, and loading is temporarily interrupted.
You may leave the battery in the charge unit without any
danger, until charging is complete (= green light flashing).
ARvision User Manual
11
4
General Operating Instructions
4.1 Preparation
Unpacking the Device
è
Please unpack the devices and compare with the list
under paragraph 2 on page 6 to check that all parts are
complete. Please contact your dealer if any parts are
missing.
Checking, charging and changing the Battery
Before you use the HMD for the first time, please check
whether the battery is fully charged:
è
Remove
the
battery
from
the
power
unit.
To do so, pull the tape down carefully with one hand and
push the battery out of the casing with the thumb of your
other hand. For that process do not lay down the power
unit on the table.
ARvision User Manual
12
è
Place the battery in the charger so that the brasscoloured contacts of the battery and charger match.
Press the battery lightly until you feel it locks into place.
The green control lamp on the front of the charger lights
up. When the green control lamp begins to flash, the
charging process is completed (see paragraph 3.3 on
page 10).
è
Replace the battery in the power unit. To begin with, this
may require some practice.
Please make sure that the contacts of the battery and the
power unit match. Holding the battery flat, push it into the
power unit as far as the mark. Press down the battery
lightly with your thumb and at the same time continue
pushing it completely into the power unit until it locks into
place. For that process do not lay down the power unit on
the table.
connector
ARvision User Manual
13
Using the HMD with external power supply
It is possible to have the power supply coming from an external
source. One such source is the AC/DC transformer that comes
with the charge unit. Its output is 12 V DC, available at the special
plug. This plug (see also(Fehler! Verweisquelle konnte nicht
gefunden werden.) page Fehler! Textmarke nicht definiert.) fits in
in the connector at the battery location of the power unit (visible
when the battery is removed).
ARvision User Manual
14
4.2 Connecting external video sources
Choose one of the video adapter cables supplied with the
system and plug into the socket connector on the right hand
side. Turn on the video source and select the appropriate
mode by pushing the select button (1). For further details
about different modes see 4.4 page 17. If video-in function is
used there is no output of camera signal in the same time.
1
ARvision User Manual
15
4.3
Using ARvision as a Monitor
Putting on the HMD
è
Put on the ARvision HMD. Place the headband around the
back of your head and pull it just tight enough to make it
fit safely and comfortably.
è
On the displays inside the HMD, you can now see the
pictures of your video source.
è
Wearing the HMD you will see your surroundings only
constricted. For this reason, please, move only carefully or
not at all.
è
A static image can burn into the microdisplays after an
extended period of time !
Adjusting Brightness and Contrast
è
Adjust brightness (1) and contrast (2) with the knobs
beside the cable. Turn the knobs until the image quality
you find best
2
ARvision User Manual
1
16
4.4
Using different Modes
The electronics of your ARvision device allows different
functions.
The selection of those functions is governed by the push-button
switch (PBS) (1) that is located on the right hand side of the
power unit.
1
2
è
3
4
The basic mode is the one where the ARvision displays the
images as captured by the VGA-adapter. You can apply
a PC VGA signal 800x600@ 60Hz, 75Hz, 85Hz or 100Hz. With
the contrast button (see "Power unit" page 8) you can
adjust the phase of VGA-signal. The right hand side green
LED (page 17, (4)) will be lit on. When no VGA signal is
connected, this LED will be blinking.
ARvision User Manual
17
è
When pushing the push-button switch PBS (page 17, (1))
once: no function
è
Pushing the PBS a second time: no function
è
Pushing the PBS (page 17, (1)) a third time, discerns
between “composite video” or “S-video”, and it will
equally recognise automatically whether it concerns a
NTSC or PAL signal. The middle green LED (page 17, (3))
will be lit on to remind you of this mode. When no video
signal is connected, this LED will be blinking. In this mode
the two knobs beside the cable connection control the
brightness and the contrast.
è
Pushing the PBS (page 17, (1)) a fourth time, the electronic
zoom is activated to magnify the external "composite
video" or "S-video" signal. It can be noticed by the green
frame that appears around the display in the HMD and
the left and middle green LED ((2)+(3) page 17) of power
unit will be on. The adjustment of the electronic zoom is set
by using the contrast knob on the right hand side of the
cable connection.
è
If the PBS is pushed a fifth time, the device goes back into
basic mode.
ARvision User Manual
18
Pushing PBS
(1) page 17
3 green LEDs
(2-4) page
17
0x
[ ] [ ] [x]
1x
[ ] [ ] [b]
[ ] [x] [ ]
[ ] [b] [ ]
2x
[x] [x] [ ]
3x
[b] [b] [ ]
[ ] [ ] [x]
[ ] = LED off
ARvision User Manual
Description
standard mode = external VGA signal
(after turning on device)
no external VGA signal detected
external video/S -video signal
no external video signal detected
external video signal zoomed, green
frame around image
no external video signal detected
back to standard mode
[x] = LED lit
[b] = LED blinking
19
4.5 USB-Camera / Software
Connect the power unit with the PC using the USB-cable (1)
and power on the device. Microsoft Windows® will recognize
new hardware automatic. Install the software from CD-ROM
according instructions. To avoid damage (and to prevent
aging) please unplug the USB-cable between powerunit and
PC during lightning storm and when unused for long periods of
time.
4.6 AR setup
To use the device with AR function (augmented reality) the
camera signal must be sent to a computer using a standard
USB 2.0 cable "male A to male A" (plug into "Video-out" (1)).
Then the overlayed video signal from the PC can be directed
into the power unit using a VGA-cable (2). The PC-resolution
must be set to 800x600@60Hz.
1
2
ARvision User Manual
20
ARvision User Manual
21
4.7 Adjusting the Interpupil Distance
To optimize the position of the two displays, so that both
images are seen as a single visual field, carefully move the
oculars into the right position.
IPD-Adjustment 60-70mm
ARvision User Manual
22
5
Maintenance and Cleaning Instructions
To clean the HMD or goggles and control unit, use a damp
cloth. A light rinsing agent may be added to the water. Do not
use any detergents.
To clean the optical parts of the HMD/goggles (oculars,
camera lens, white LEDs) use a dry, clean cloth. A cleaning
cloth for this purpose is provided with the ARvision kit.
In case of damage contact your retailer. There are no user
serviceable parts. Only qualified service personnel should
perform any service required on this product.
ARvision User Manual
23
6
Troubleshooting
Problem
Only dark,
or only white
image
Completely
white image
No image
No image
No image
Cause
Incorrect brightness.
Brightness knob
and/or contrast
knob are on max. or
min. position.
After having used
electronic zoom,
contrast knob is
“deregulated”, i.e.
at an extreme
In basic mode and
no VGA signal
applied
Appliance switched
off
Remedy
Adjust by using
brightness knob
and/or contrast
knob
re-adjust contrast
connect a video
source (SVGA)
switch on ARvision
with main push
button
Video cable
either connect a
connected, but
video source and
wrong video source select compatible
selected
mode for this
video signal with
PBS
All other problems should be performed by a trained and
authorised service provider !
ARvision User Manual
24
7
Returning used electronic devices in EU countries
This HMD and accessories shall not be
treated as household waste. The separate
collection is a condition for reuse,
recycling and utilisation of used electronic
devices, which ensures the protection of
resources. To comply with german
ElektroG (Rucknahme und Entsorgung von
Elektro- und Elektronikaltgeraten) and
european WEEE (Waste Electrical and
Electronic Equipment) electronic used
devices from private households can be
returned free of charge. For details please
contact your local distributor or directly
Trivisio Prototyping GmbH
(www.trivisio.com).
ARvision User Manual
25
8
Technical Data
8.1 Head Mounted Display
Camera...................................... 640x480 pixels color 8bit,
48 fps, 15 Mbit/sec
1/3"CMOS
Focus .......................................... manually adjustable
Iris................................................ fixed
Camera lens............................... 52° (changeable)
Display........................................ 2x SVGA microdisplays
480,000 pixels colour
equals 1,440,000 pixels
Field of view ............................... approx. 40° diagonal
Eye distance ............................... 60-70 mm adjustable
Operating temperature.............. -10°C to +40°C
Weight ........................................ 150g
Dimensions (W/H/D)................... 155mm/50mm/55mm
ARvision User Manual
26
8.2 Power unit
Brightness.................................... manually adjustable
Kontrast ...................................... manually adjustable
Digital magnifier......................... built-in electronic zoom 8x
Mode switch............................... 5 modes
Basic mode................................. SVGA (from PC)
800 x 600@ 60/75/85/100Hz
Second mode............................. Composite video, S-video
in NTSC or PAL
Third mode ................................. external video zoomed
Weight ........................................ approx. 380 g (incl. battery)
Dimensions (W/H/D)................... 105mm/155mm/25mm
Operating temperature.............. -10°C to +40°C
Battery ........................................ changeable + rechargeable
Ni-MH 6V/2, 1Ah
Charging time............................ approx. 50 min, with
enclosed power supply
Operating time........................... approximately based on
standard batteries:
2 h (external video source)
4 h (external SVGA source)
ARvision User Manual
27


