1
EvSuite – Basic Software Installation Manual
SiCan Commissioning Sequence (SiMon/SiCan Standalone)
(only applies to CAN-enabled Chargers).
The following steps provide the most basic commissioning sequence with a SiMon and SiCan installed and the PC as
“Slave”. Note that this sequence does not apply to enable on/off or voltage controlled chargers without a SiCan. Do not
use this sequence for PacMon installations.
1) Ensure that the basic software commissioning sequence
has been completed (see above).
2) Ensure that the SiMon commissioning sequence has been
completed (see above).
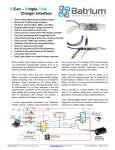
3) Connect SiCan to SiLed PCB or wire it manually to the blue
LEDs etc…
4) Place SiCan in-between UMon and CMon (connected to
the CAN enabled charger). See SiMon Datasheet for
diagrams.
5) Do not apply +12V to SiMon (it is powered off USB +5V) to
allow configuration.
6) For non-SiLed installations (with manual wiring), connect the green SigOut wire from SiMon to the white wire
SigIn at SiCan (see SiCan Datasheet application diagrams). The green SigOut wire from SiCan is not
connected.
7) Allocate the SiCan UMon to Ch 2 in the Commissioning - Find Ports screen.
Remember to press Send.
There is no need to allocate any cell numbers (First and Last) for SiCan.
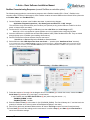
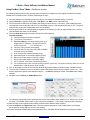
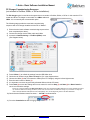
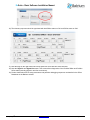
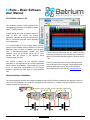
8) Check that the PC is set to PcSlave under Commissioning => System Mode
(see diagram on the right).
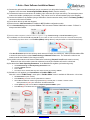
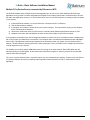
9) Choose Commissioning - SiCan Setup (see diagram below).
10) Check that the Channel ID = 2 is selected (item 1 above).
11) Press Default (2). The target voltages (3) should be set automatically. The default targets are 3.75V per cell.
Note this is approximately 0.1V above the end (bypass) threshold voltage of 3.65V (default).
If they are not set automatically then check the Node Renumbering. Also check the Find Port (UMon) => First and
Last cell number allocations and set them manually. See details at steps in the Basic Commissioning Sequence
in the section above.
12) Press Send.
13) Apply +12V Charge to SiLed and GND (or directly to SiMon and SiCan if manually wired) to begin the charge
sequence.
14) Observe the node chart bargraph.
15) Navigate to the Telemetry => SiMon/SiCan Menu.
BatteryAngelTM is an international trade mark
www.batrium.com © 2010-20134
Ver 1.4
Jan 2014,
Page 14 of 16