1
EvSuite – Basic Software Installation Manual
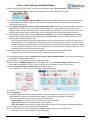
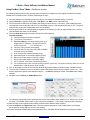
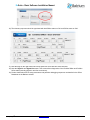
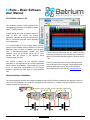
13) Then follow the sequence 1 through 6 in the diagram above. First Collect(1) to refresh the screen, choose the
UMon Serial Name(2) with the left (<) and right (>) arrows, enter the First and Last(3) cell for that channel,.
If there are no items available under UMon Serial Name choices, then check that the UMon USB device is correctly installed (red LED is on).
Check the USB Host is running (see above). There must not be more than one USB host running on your network. You may also need to
install the Windows 64bit patch from the install website. Also see the diagnostic guides in the UMon Datasheet.
14) It is important to remove any previously allocated UMons with the “X” button.
15) Press Send(4) to store the settings, and in most cases it is useful to Stop(5) and Start(6) the Host Control to
cause it to refresh the settings
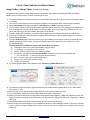
16) Select “Previous” for the Commissioning Menu Options and change the System Mode to PcMaster.
17) Check that the top menu bar indicates "Ch1:OK" - EvSuite xxxxxxxx Ch1:OK xxxxxxxx
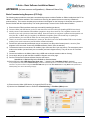
18) Allocate numbers for your batteries (Commissioning => Node Renumbering).
19) Press Send, and observe First ID and Last ID for the number of cells. Note that this step also automatically populates
values in the FindPort (UMon) settings above. Set “1” for the first and the number of cells for the last.
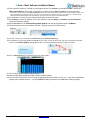
20) Go to the Node Chart page and observe the blue bar chart updating.
21) Click on the graph to reveal the Axis and Key.
22) Note the high speed updating Cell Min Voltage, Cell Max Voltage.
23) Go to the User Preferences menu to select the graphing options (auto hide, colours, etc…) and also the Application
Options (auto start/auto stop etc…) or simply Reset all settings to default. Prese Save after making changes.
BatteryAngelTM is an international trade mark
www.batrium.com © 2010-20134
Ver 1.4
Jan 2014,
Page 9 of 16