1
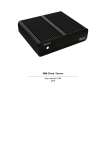
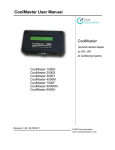
Connection server
User manual 3.164
2015
Table of Contents
Connection server - User manual 3.164 ...................................................................................................1
Connection server EN ...............................................................................................................................4
Get started .................................................................................................................................................5
3.0 Settings iMM Control Center iMM Server ...........................................................................................6
Bookmark Server .................................................................................................................................7
iMM servers management .............................................................................................................8
Bookmark Configuration ......................................................................................................................9
Settings ........................................................................................................................................10
Upload or edit export.pub ............................................................................................................11
Bookmark System ..............................................................................................................................12
Network settings ..........................................................................................................................13
Shutdown server ..........................................................................................................................14
Restart server ..............................................................................................................................15
Restart server regulary ................................................................................................................16
NFS Server configuration ............................................................................................................17
Bookmark HA-BUS ............................................................................................................................18
iNELS3 .........................................................................................................................................20
KNX ..............................................................................................................................................21
KNX add actor to rooms .............................................................................................................22
KNX export group address ..........................................................................................................23
Bookmark RF Configuration ..............................................................................................................25
Settings ........................................................................................................................................26
Bookmark Zones ................................................................................................................................27
New zone .....................................................................................................................................28
Defined zones ........................................................................................................................29
No zone defined ..........................................................................................................................30
Bookmark Houses .............................................................................................................................31
Scene ...........................................................................................................................................32
Edit enterHouse or exitHouse ...............................................................................................33
Bookmark Security Scan ...................................................................................................................34
Trigger ralays ...............................................................................................................................35
Notify me if device obtains folowing state...................................................................................36
Bookmark EventScript .......................................................................................................................37
Trigger Rules ...............................................................................................................................38
Bookmark A/C ....................................................................................................................................39
LG Clims ......................................................................................................................................41
CoolMaster ...................................................................................................................................42
Air Pohoda ...................................................................................................................................44
Atrea .............................................................................................................................................45
Universal 0-10V ...........................................................................................................................46
Bookmark Rooms ..............................................................................................................................47
New room ....................................................................................................................................48
List Rooms ...................................................................................................................................49
Edit .........................................................................................................................................50
Rename ..................................................................................................................................52
Bookmark Cameras ...........................................................................................................................53
New camera .................................................................................................................................55
Select the stream ..................................................................................................................57
No camera defined ......................................................................................................................58
List of cameras ............................................................................................................................59
Bookmark Miele .................................................................................................................................60
Miele .............................................................................................................................................61
Bookmark Intercoms ..........................................................................................................................62
2N settings ...................................................................................................................................64
New intercom account .................................................................................................................65
Update of asterisk settings ..........................................................................................................66
Intercom accounts .......................................................................................................................67
Bookmark Energy ..............................................................................................................................68
Energy management ...................................................................................................................73
Create counter IDM3 .............................................................................................................75
Bookmark Giom .................................................................................................................................78
Giom scene ..................................................................................................................................80
Edit .........................................................................................................................................81
Bookmark Manual ..............................................................................................................................82
Manual .........................................................................................................................................83
Bookmark Default Settings ................................................................................................................84
Reset all server settings to default .............................................................................................85
Reset all devices dependencies to default .................................................................................86
Bookmark Audit .................................................................................................................................87
Logged events .............................................................................................................................88
Connection server
Connection server EN
Connection between iNELS BUS system units and another devices.
Connection Server - It serves as a connection between iNELS BUS system units and another devices because
it allows communication between devices with different protocols. All devices can be then controlled through just
one application. Besides common controlling of electro-installation, you can also control e.g. air condition, home
appliances.
Connection server uses small but powerful computer Raspberry Pi with really low consumption with Linux operating
system.
In comparison with iMM Server, multimedia is not implemented here.
Protocols
RPC
- communication with application smartphones and tablets
Elkonet
- communication with central unit iNELS BUS
Miele
- communication with home appliances Miele
Camcontrol
- communication with IP cams
Artea
- communication with air handling unit Atrea
Coolmaster
- communication with gateway for air conditioning
Airpohoda
- communication with air handling Airpohoda
eLAN-RF
- communication with wireless components iNELS RF Control
Get started
Commands are given in purple, e.g.:
sudo reboot
Notice are given in orange:
Connection server support set only one door
intercom.
Tips and tricks are given in green:
In list we can add and remove elements manually
Important application configuration commands in Linux (are entered in terminal):
ifconfig
- finding IP address of station/server, similar to ipconfig in Windows
mount
- command for connection of certain device (CD-ROM, network drive, etc.)
umount
- command for disconnection of certain device
man
- command is used to format and display the man page for example. man mount
sudo shutdown now - command shut down device Connection server from teminal
sudo reboot
- command reboot device Connection server from teminal
Putting Connection Server in run
a) Once you unpack Connection server, let the device stabilize at room temperature.
b) Insert attached SD card in the slot.
c) Connect the cabling (do not connect the supply yet):
Display HDMI device
LAN cable for ethernet port
Keyboard to USB port
d) After connecting power suply (adapter with micro USB connector) Connection Server will start
automatically.
e) When starting the system you can watch opening of individual services on the screen. Some services
do not open, and display FAILD in red; in majority of cases it is not a problem; and has no influence
whats over on the run of Connection Server.
f) When start of services is completed, only one line requiring login name will appear on the screen.
Login:
Password:
imm
imm123
No characters display when writing a password in terminal
g) To find IP address after signup use command ifconfig
h) Further settings are performed via web interface iMM Control Center. And display device or keyboard
need not be connected for the rest of time. Power supply, micro SD card with system and application
and connection to network is sufficient to run Connection Server.
Never insert or remove the micro SD card for running Server Connection
3.0 Settings iMM Control Center iMM Server
<TOD
3.0 Configuration in iMM Control Center - Connection Server
IMM Control Center (the "iMM CC" hereinafter ) is web interface serving for settings iMM clients and iMM
servers. iMM CC is activated upon entering the address http://IPADDRESS:8080 in your internet browser.
Login by your password in factory installation is default: "admin", password "imm123"
If iMM CC does not open, connect via ssh to Connection server and enter type folowing in
command: sudo /etc/init.d/imm-web admin restart .
SSH authorization Login:
Password:
imm
imm123
If you can change Default password in terminal: passwd imm
n't
Putty is free software whitch can be used to make an SSH connection to iMM CC in windows platform
Website iMM CC will be automatic logout for inactivity after 15 minutes.
Bookmark Server
Bookmark Server
In bookmark Server you can control virtual servers (services), which are necessary for comunication with
third party. For software diagnostic is possible each virtual server check status, stop or enforce run service.
All virtual servers you can control via Supervisor service link http://IPADDRESS:9001
iMM servers management
iMM servers management
In menu iMM servers management we can control the virtual servers running on the server via a web
interface. For software diagnostic is possible each virtual server check status, stop or enforce run service.
All virtual servers you can control via Supervisor service link http://IPADDRESS:9001
Bookmark Configuration
Bookmark Configuration
In bookmark Configuration is main settings impotrant for propertly function device Connection server.
Machine ID and Licence key are preset in factory default.
IP address format:
If central unit is behind the NAT or in the other network and routers is possible use port forwarding. You can set port
forwarded (on router) to comunication port central unit (CU2 port 61682 ,CU3 port 9999).
Version CU
Format
Example:
CU2
[IPADDRESS]:[COMUNICATION_PORT]
10.5.15.12:8454
CU3
[IPADDRESS]:[HTTP_PORT]:[COMUNICATION_PORT]
10.5.15.12:8080:4562
Communication port - Elkonet for iMM server, Connection server, App iHC
HTTP port
- is webserver CU3 with save file export.imm usually http://IPADDRESS/immfiles/export.imm
ASCI port
- port for comunication CU3 using third-party protocol (telnet) for proper function you must
set first port in IDM software (optional)
Password
- password for acces and control central unit set in IDM software (optional)
Example setup menu settings:
Settings
Settings
In the section Settings is main settings for setup Connection server whitch are IP address Central unit,
server, password and ASCII port. Machine ID and Licence key are preset in factory default.
IP address format:
If central unit is behind the NAT or in the other network and routers is possible use port forwarding. You can set
port forwarded (on router) to comunication port central unit (CU2 port 61682 ,CU3 port 9999).
Version CU
Format
Example:
CU2
[IPADDRESS]:[COMUNICATION_PORT]
10.5.15.12:8454
CU3
[IPADDRESS]:[HTTP_PORT]:[COMUNICATION_PORT]
10.5.15.12:8080:4562
Communication port - Elkonet for iMM server, Connection server, App iHC
HTTP port
- is webserver CU3 with save file export.imm usually http://IPADDRESS/immfiles/export.imm
ASCI port
- port for comunication CU3 using third-party protocol (telnet) for proper function you must
set first port in IDM software (optional)
Password
- password for acces and control central unit set in IDM software (optional)
Example setup menu settings:
Upload or edit export.pub
Upload or edit export.pub
In the section Upload or edit export.pub you can upload export.pub file from softare IDM to Connection
server and manual edit elements in web browser.
Function for upload export.pub is only for central unit iNELS 2
In the central unit iNELS3 will dowload export automatically when you press Load iNELS 3 export button.
In list we can add and remove elements manually
Bookmark System
Bookmark System
In bookmark System you can configure additional, network settings which will be stored on static
IP address. We recommend setting a static IP address for Connection server.
Shutdown
- turn off Connection server
Restart server
- reboot Connection server
Restart server regulary
- schedule restart server at a specified time in a week
NFS Server Configuration - update share settings for Connection server
Network settings
Network settings
In the section Network settings you can set IP address manualy as static or dynamically allocate
by DHCP server.
Example setup static IP addres:
Set static IP address is recommended for stable use. Information about network settings IP address, link
If you are using a dynamic IP address from DHCP server set the router to allocate always the same IP addresses
based on MAC addresses.
Shutdown server
Shutdown server
Press down Shutdown button to power off Connection server from a web interface.
For another turn on plug in power connector to Connection server
Restart server
Restart server
Press down the Reset button to restart Connection server from a web interface.
Restart server regulary
Restart server regulary
a week.
In the section Restart server regulary we can setup scheduled restart the server at a specified time in
Example settings restart server in monday six minut after the midnight.
NFS Server configuration
NFS Server configuration
Press down Update button to refresh NFS sharing settings in the file /etc/fstab. from a web interface.
Bookmark HA-BUS
Bookmark HA-BUS
In bookmark HA-BUS we can used for interconnection iNELS3 BUS and decentralized control system
KNX/EIB, which allows control from iHC app.
Second function to add more iNELS3 central unit.
Requirements for connect with KNX/EIB: Central unit iNELS or more
Router KNX
Export group address from program ETS3 - 5
Example connection with iNELS3 CU:
First, enter the IP address of the central unit iNELS3 next fill password (optional) and note to finish press down button
Add. After saving the settings will download export from central unit and elements will be added prefix "inels3" last
letter (A-H) identify rank.
Fill IP address KNX router and Save button. After save settings was performed put export file group address
(see. KNX export group address) and load export to system. Now you can check bookmark Configuration whether
the excerpt elements KNX, If yes you go to the tab Rooms and put in a selected room features KNX.
Example add device KNX to rooms in bookmark Rooms:
This manual does not describe the setting elements KNX only link two systems among themselves.
iNELS3
iNELS3
First, enter the IP address of the central unit iNELS3 and Add. After saving the settings will
download export from central unit and elements will be added prefix "inels3" last letter (A-H) identify rank.
The prefix consists of two parts first one is "inels3" and second "A" (last char A-H) distinguishes, letter central unit
between themselves.
For correct function with KNX/EIB would have filled a part of the KNX.
If the central unit does not have a password set, Password field will be empty.
Names without prefix in rooms will be converted automatically.
For last hardware revision Raspberry Pi 2 is possible add up to 8 pcs INELS3 central unit.
KNX
KNX
Enter the IP address of the router KNX and press Save button. After saving the configuration file we find
export group addresses from the program ETS3 and upload KNX exports.
Check Configurations in the bookmark that contains a list of export elements KNX, if so go to bookmarks rooms and
put in a selected room features KNX.
KNX add actor to rooms
Add KNX element to the Rooms
KNX elements put into a room in the same way as the elements iNELS, KNX recognise by prefixing "knx_".
Example add KNX device to rooms:
KNX export group address
KNX export group address
Export group addresses to format: 1/1 (Name/Add.) separate semicolon (;) the ETS 3 or higher.
Example export group addresses from ETS:
Before inserting the export it need to be more adapted behind the semicolon refill data type according element
values (True, False, 0-255, 0-100) see. KNX DPT link
Example of data in a file supplemented Test_group.cvs:
"Group name";"Address"
Dimming;0/-/New Middle Group;0/0/Dim A;0/0/1;5
Dim B;0/0/2;5
Switching;1/-/New Middle Group;1/0/D;1/0/0;1
switch A;1/0/1;1
switch BCD;1/0/2;1
Shutters;2/-/New Middle Group;2/0/Shutters1;2/0/1
Shutters2;2/0/2
Sensors;3/-/New Middle Group;3/0/Temperature;3/0/0;9
A switch in example; 1/0/1; 1 has value as shown in Table 1 behind a semicon (True, False) means that a switch.
Data type Data
Type Value
1
1 bit
bool True | False
5
8 bit
num 0-255
5.001
8 bit
num 0-100
6
8 bit
num -128 +127
232
3 byte num RGB [0,0,0] - [255,255,255]
Bookmark RF Configuration
Bookmark RF Configuration
Communication between wireless RF devices and Connection server is required smart box eLAN-RF.
To configure the RF devices:
a) The list of supported INELS RF devices
b) Insert elements into Elan RF using a Web interface or application iHC-MARF see. Manual eLAN-RF.
For control RF elements enable in the settings iHC-MA, iHC-TA.
Settings
Settings
For control RF devices in menu Settings insert IP address device eLAN-RF, which must already be configured
from the web interface or applications IHC-MARF see. manual eLAN-RF.
Example settings:
Bookmark Zones
Bookmark Zones
Bookmark Zones is used to configure the zones for Connection server.
Zone:
Giom
Meteostation: Giom 3000
To insert a fill zone name, IP address and choose type of zone change switch to yes.
Connection Server allows only insert zone meteostation Giom 3000.
New zone
New zone
In the section New Zone, configure the Connection Server allows you to add only one type of zone.
Giom
Meteostation: Giom 3000
Example of a zone Giom:
View already stored zone:
Defined zones
Defined zone
In menu Defined zone are displayed saved zone.
Example of the stored zone Giom:
No zone defined
No zone defined
You do not have any saved zone to create a zone, go to create New zone.
Bookmark Houses
Bookmark Houses
Bookmark Houses is used to configures the scenes when entering or leaving the house. In app iHC-MA
is function call "Monitoring arriving home", which recognizes the different technologies that the user is coming to
your home and starts the scene enterHouse more datail about this function in manual app iHC-MA.
Example create a scene enterHouse:
Saved relays with state in the scene enterHouse:
For proper function must be enabled on your mobile GPS, and Google Location, mobile data and active
connection to Connection server.
Scene
Scene
In the section Scene configure scene for entering or leaving the house. In app iHC-MA is function call
"Monitoring arriving home", which recognizes the different technologies that the user is coming to your home
and starts the scene enterHouse more datail about this function in manual app iHC-MA.
For proper function must be enabled on your mobile GPS, and Google Location, mobile data and active
connection to Connection server.
Edit enterHouse or exitHouse
Edit enterHouse or exitHouse
Edit scene enterHouse or Exit House.
Example add elemets to scene enterHouse:
Example add elemets to scene exitHouse:
Bookmark Security Scan
Security Scan
Security Scan is a security feature that checks the status of Miele appliances if you are running
is displayed in the table Security scan report to all run iHC app. Security scan can be set to monitor the
status of selected elements in the house.
Security function - Security scan not finish in all iHC app.
Trigger ralays
Trigger ralays
In the section Trigger relays is main configuration for security relay for notify about preset states devices
and Miele appliances.
Notify me if device obtains folowing state
Notify me if device obtains folowing state
In the section Notify me if device obtains folowing state you can set condition monitoring
states selected relay.
Example Security Scan:
Bookmark EventScript
EventScript
In bookmark EventScript creted events based on which the preset start script. The event is performed
if the element reaches the set value of the event. You can use different kinds of elements relay, DAC. etc..
EventScript use ASCII protocol, whitch must be turn on in IDM program to free port and in bookmark
Configuration in iMM CC insert ASCII port for comunication.
Trigger Rules
Trigger Rules
In the section Tringer Rules you can create event based on which the run script.
Example created event :
Depending on the setting ASCI protocol set value in hex or DEC example.
50 in (HEX) is 80 (DEC)
EventScript run with all device modes (HEX , HEX with prefix and DECIMAL)
Bookmark A/C
Bookmark A/C is used to define the air-conditioning or heat recovery by third parties and their control through
the application iHC.
Supported are:
LG Clims
CoolMaster, CoolMasterNet
Air Pohoda
Atrea
Universal 0-10V
LG Clims over the modul PI-485 over Advantech Adam 4571
CoolMaster series 1000D, 2000S, 3000T, 4000M, 6000L, 7000F, 8000HM, 9000M, CoolMasterNet over Advantech
Adam 4571
CoolMasterNet
Daikin
Fujitsu
Gree
Hitachi
Intensity
Kentatsu
LG
Midea
Other:
Atrea Duplex 180 EC4 P (0-10), Duplex 180 EC4 P (0-100)
AiRPohoda by Adam 4571
Universal 0-10V by DAC 0-10V
DK)
(FJ)
(GR)
(HT)
(MD)
(KT)
(LG)
(MD)
Mitsubishi Electric
Mitsubishi Heavy
Panasonic
Samsung
Sanyo
Toshiba
Trane
Compatibility: indoor,
outdoor unit link
(ME)
(MH)
(PN)
(SM)
(SA)
(TO)
(TR)
LG Clims
LG Clims
In the section LG Clims is used to define air conditiong LG corporation. Supported are units with
communications board PI485. LG air conditioning must be installed via RS485 - LAN, for example through
device Advantech Adam 4571.
Example stored LG air condition:
CoolMaster
CoolMaster
Is used to define air conditiong by universal control unit Coolmaster and control through the application iHC.
Firs step:
First, set the control unit Coolmaster according to the manufacturer's manual. (usually via DIP switches
inside the unit) Setup converter LAN-serial485 (Recommended converter: Adam 4571) according to
Coolmaster
manual and connectconverter with control unit Coolmaster.
Test comunication:
If the air conditioner control unit is properly connected to Coolmaster the display alternately displays
the temperature and mode.
Second step:
Moving on to set the air conditioner in the web interface, http://localhost:8080/clims and fill name and
IP address convertor and press button Save the settings wait for load UID air condition in system.
Now you can select the number of units and save CoolMaster unit.
If unsuccessful use reload button and check the air conditioning load UID communication converter with
CoolMaster according to the manual.
Example stored Coomaster unit :
For older Coolmasters version is necessary to set convertor to appropriate port.
Coolmaster type: 1000D, 2000S, 3000T, 4000M, 6000L, 7000F, 8000I(HM),
9000M
Convertor:
Adam 4571 nebo Gnome 485
Port: 10001
CoolMasterNet (default setup)
Port: 10102
Perform the function check via utility ncat command format:
ncat IPADDRESS PORT
Example ncat in terminal:
Command
Significance
Command
ncat 10.10.10.111 10102
Connection to Cooler Master / Convertor
Answer
>
Returns the character command line
Command
stat2
List states Air conditions
Answer
000 OFF 25C 27,80C High Heat OK 0
Return state Air condition
For windows you can use SPU (Serial port utility)
Commands and pin setup for cable connection air condition can be found in the reference manual for example:
CoolMasterNet
Maximal number of simultaneous connections for CoolMasterNet is 4 for convertor Adam 4571 only 2.
Air Pohoda
Air Pohoda
Is used to define Air recovery call Air pohoda and control through app iHC. AirPohoda
air recovery must be connected via RS485 - LAN, for example through device Advantech Adam 4571.
Example stored Air recovery:
Atrea
Atrea
Is used to define Air recovery call Atrea and control through app iHC. Atrea Air recovery
must be installed via RS485 - LAN, for example through device Advantech Adam 4571.
Example stored Air recovery:
Universal 0-10V
Universal 0-10V
Is used to define universal air conditiong using DAC 0-10V and control through app iHC.
Example stored Air condition:
Bookmark Rooms
Bookmark Rooms
Bookmark Rooms is used to configuration souboru rooms.cfg, for loading applications iHC..
More information in the manual iHC. Rooms are actually "virtual rooms" (groups), which have the option
to group the icons and zones for one or more screens.
Name of room allows the use only characters A-Z, a-z, 0-9, -_.
New room
New room
Used to define rooms for applications iHC.
Example imposed rooms:
Name of room allows the use only characters A-Z, a-z, 0-9, -_.
List of rooms
List Rooms
Listing stored rooms on the server for applications iHC.
Edit
Devices of rooms
In menu Devices of room is used for editing rooms for application iHC.
Example add device to room House:
Example create scene:
For scene control can be programmed to use a script that can execute various functions defined in it. It is necessary
to keep an absolute path starting with "/" and ending with the suffix script ".py" (python).Example: /home/imm/
skript_lights.py
Type device (icon filter devices) example. type Lamp filtred devices to dimmed devices.
Read only is a feature that change icon fuction "no" control device or "yes"icon can't control only information
obout device state.
Rename
Rename
In the section Rename you can change name of room for app iHC.
Example rename "Room" to na Living room:
Bookmark Cameras
Bookmark Cameras
Bookmark Cameras is used for define IP cameras, which you want monitor and control by application iHC.
HTTP and RTSP port are filled only if you have an IP camera configured to access from outside local network. If the
camera remotely connect via HTTP port, so you get to the web interface and you can fully control the camera.
If via RTSP, then you will get only a stream cameras. More about setting and ports see. instruction manual
for the camera.More about setting and ports see. manual for the camera.
If you do not fill HTTP or RTSP ports remain in default, HTTP port 80, RTSP port 554
New camera
Supported cameras are:
iNELS cam
AXIS protokolu VAPIX2 od verze firmwaru kamery 4.0.X.X a VAPIX3 od firmwaru 5.0.X.X
Kamery with Onvif protocol profile S. s certifikací Onvif link
Example integration cam Axis supported Onvif:
Connect the camera according to camera manual and create a user for protocol ONVIF might be different according
to manufacturer.Setup a profile S video stream: for applications iHC to MJPEG, jpeg, rtsp and second stream rtsp
for Connection server
New camera
In the section New camera is used for define IP cameras.
Example integration cam Axis supported Onvif:
Connect the camera according to camera manual and create a user for protocol ONVIF might be different
according to
manufacturer.Setup a profile S video stream: for applications iHC to mjpeg/jpeg and a second stream rtsp for
Connection server.
Add video profile for mobile app iHC.
List saved cameras:
Select the stream
Select the stream
In the section Select the stream you can choose specific camera streams assign to mobile app iHC.
Example:
No camera defined
No camera defined
You have no defined cameras at Connection server.
List of cameras
List of cameras
Menu List of cameras show saved cameras Connection server and options for remove selected camera.
Bookmark Miele
Bookmark Miele
In bookmark Miele set IP address device Miele gateway, that serves remote control of appliances
over powerline, or ZigBee protocol.
Supported are: XGW 2000, XGW 3000 (Firmware 1.1,1.2)
Set IP address MieleGateWay is stored in the file /etc/imm/miele
Miele
Miele
In the section Miele set IP adresu device Miele gateway, that serves remote control of appliances
over powerline, or ZigBee protocol.
Supported are: XGW 2000, XGW 3000 (Firmware 1.1, 1.2)
Set IP address MieleGateWay is stored in the file. /etc/imm/miele
Relay for restart GW is used for power off /on if gateway lost network connection and sended
notification on user email.
Bookmark Intercoms
Bookmark Intercoms
Bookmark Intercoms is used for define 2N settings and VOIP accounts for applications iHC.
In the section 2N settings set access (username, password) and lock code for open door (2N IP intercoms).
Setting the following Username and Password access data on the web interface 2N and Lock code set value
to relay 2N intercom.
Connection server support set only one door intercom for open via DTMF.
Supported IP intercoms are :
2N
Helios Verso
Helios Force
Helios Safety
Helios Vario
Unitech
Tashi MT 200L
2N settings
In the menu 2N settings set access (username, password) and lock code for open door (2N IP intercoms).
New intercom account
In the menu New intercom account creating VOIP accounts on server side for applications iHC.
Update asterisk settings
Butoon Apply settings activated VOIP newly created accounts.
Intercom accounts
In the menu Intercom accounts are shown VOIP account for Connection server.
Example of an embedded account intercom 2N:
Intercom from the company 2N are inserted so that the Contact name contained the word "intercom"
for example: intercom2, Intercom_Entry etc. capitalization does not matter.
According to the phrase "intercom" in the name of the application will recognize that this is a sound and allow
the door opening preset Lock code, if we choose a different name for intercom will behave like an ordinary contact
and opening function must be set manually in the mobile app.
For open switch intercom 2N setup signal DTMF first in web interface Connection server
Intercoms > 2N settings or in app iHC.
Stream for camera 2N add in format rtsp://IPADDRESS
Manual link for video intercom app iHC add in contact intercom to field IP address in this format:
http://IPADDRESS/enu/camera640x480.jpg
In the case of multiple IP intercom 2N must be set all intercoms for open relay identically (User name,
Password, Lock code)
2N settings
2N settings
In the section 2N settings set access (username, password) and lock code for open door 2N IP intercoms.
Setting Username and Password are access datail on the web interface 2N and Lock code set value for switch to
relay 2N intercom.
Connection server support set only one door intercom for open via DTMF.
Supported are IP intercoms :
2N
Helios Verso
Helios Force
Helios Safety
Helios Vario
Unitech
Tashi MT 200L
In the case of multiple IP intercom 2N must be set all intercoms for open relay identically (User name,
Password, Lock code)
New intercom account
New intercom account
In the menu New intercom account creating VOIP accounts on server side for applications iHC.
Stream for cam 2N add in format rtsp://IPADDRESS
For view in application iHC must be stream format mjpeg
Update of asterisk settings
Update asterisk settings
Button Apply settings activate the newly created accounts VOIP and restart asterisk PBX .
Intercom accounts
Intercom accounts
In the menu Intercom accounts are shown VOIP account for Connection server.
Example of an embedded account intercom 2N:
Intercom from the company 2N are inserted so that the Contact name contained the word "intercom"
for example: intercom2, Intercom_Entry etc. capitalization does not matter.
According to the phrase "intercom" in the name of the application will recognize that this is a sound and allow
the door opening preset Lock code, if we choose a different name for intercom will behave like an ordinary contact
and opening function must be set manually in the mobile app.
For open switch intercom 2N setup signal DTMF first in web interface Connection server
Intercoms
2N settings or in app iHC.
Stream for camera 2N add in format rtsp://IPADDRESS
Manual link for video intercom app iHC add in contact intercom to field IP address in this format:
http://IPADDRESS/enu/camera640x480.jpg
In the case of multiple IP intercom 2N must be set all intercoms for open relay identically (User name,
Password, Lock code)
Bookmark Energy
Bookmark Energy
Directly in iHC aplication the amount of energy consumption can be clearly displayed.
Energy is recounted based on the amount of impulses that provide outputs from meters (gasmeters, electrometers, water-meters). Impulses are further processed in an optional input unit of
system iNELS (IM2-140M, IM2-20/40/80B) in form of a counter. This value is by means of export.pub
transferred to Connection Server where variable is in iMMCC on bookmark Energy assigned to
Watter/Gas/Electrical. The setting of pulse conversion to unit of measure, selection of currency
and setting the currency/unit is performed in iMMCC application in activated Energy module. The
Energy module allows recording of consumed energy for a day, week, month and year. Data are
saved in Connection server – the data do not get lost even in case of power shutdown or power cut.
Consumption can be displayed in a table or graph.
The absorbed energy is shown in quantity but also in financial value.
The list of supported measuring devices, which have a pulse output, can be found here:
1.
Click on the System Configuration button (icon of hammer and screwdriver – F11)
2.
Select bookmark System -> counters
3.
Add counter that you name by energy you want to measure
4.
Create a new action that you name e.g. upload electricity
5.
Add a command in the action which will be user action -> commands for counters -> increment counter
6.
Select counter that corresponds with given action (e.g. for upload electricity you put counter electricity)
7.
Add the action created as described above in system configuration to relevant binary input in action line when
the input closes
8.
Once the file export-pub is created and uploaded to iMM server, in bookmark Energy you can assign in the
counter value line (electricity_VALUE). It must be VALUE in the line.
Connection of energy meter
Energy meter connects by means of a binary output unit. Output from supported energy meter is
distinguished to + a -, that’s why polarity has to be maintained by bringing – minus to GND terminal
and + plus to IN terminal.
Creation of counter in iDM:
Creation of action “Counter incrementing":
Action assignment to binary input where output from measuring instrument is connected.
Assign counter value in iMM Control Center
Example:
1 kWh = 100,- Kč = 100 pulzů
Base Unit – kWh
Impulses – 100 per 1 kWh
Price – 1 per 1 impulse
Create counter in sowftware IDM3 see. Create counter IDM3
Energy management
Energy management
In the section Energy management select binary inputs for WATER, GAS, ELECTRICITY and adding them
to unit, impulse, currency.
Example Energy management:
Create counter see. bookmark Energy
Create counter IDM3
Create counter IDM3
Create counter in software IDM3
In bookmark Managers, select the System Manager and go to the tab Counters where we create
a counter name.
Creating functions for counter
In the Functions tab, select the Function Manager and create a function called Energy Increment
Move the switch and central units to the desktop and double click on switch icon edit and select IN Digital input
M3-80B.
In the Function tab, select ADD connections, make the connection by pulling the wire from the switch icon
on the icon and select Central Unit Energy.
In the tab, Function select Wire Manager, select the input (IN) Energy through button the Edit function
to adjust to Action: Short down User function: Energy Increment.
Add the created counter to iMMCC Energy management
Bookmark Giom
Bookmark Giom
Scene
In the tab Giom creating scenes based on data from weather stations Giom and their reactions
electro installations iNELS.
In the bookmark Giom creating a scene according to data from the weather station call Giom
Scene will be activated if selected value is higher or lower then set and assigned to units.
Edit scene
Connect Giom station as zone:
IMM connection with the server is defined in iMMControl Center in the "Zones" where it is
necessary to state "Is it Giom?" switch from "no" to "yes".
To integrate Meteo Station you need to change its IP address to an address of the given range.
Settings can be performed via web interface. Meteo station IP address can be found out
using the "Mlocator" software whitch can be downloaded in the manafacture's website: link
For proper function you must first set up Giom such a zone.
Information from meteo station can by displayed in applications iHC
Giom scene
Giom Scene
In the bookmark Giom creating a scene according to data from the weather station call Giom
Scene will be activated if selected value is higher or lower then set and assigned to units.
Edit scene:
For proper function you must first set up Giom such a zone.
Information from meteo station can by displayed in applications iHC
Edit
Edit
Edit is used to create or edit scenes. In the selected scene type is possible add or remove relay units.
Example Edit selected scene:
Bookmark Manual
Bookmark Manual
In bookmark Manual is available for download the latest version of the manual in PDF format.
Download manual
Manual
In the section Download manual you can download the current version manual for Conncetion server
in PDF format.
Bookmark Default Settings
Bookmark Default settings
Bookmark Defualt settings is used for reset settings to default state. The first option
offers is Reset all clients settings to default to reset Connection server to factory default
ie. remove all users settings.
The second option is Reset all devices dependencies to default, whitch only remove users
settings related dependencies to other functions Connection server.
Reset all server settings to default
Reset all server settings to default
Reset all server settings to defalt is used to reset Connection server to factory default i.e.that all
user settings will be erased.
Reset all devices dependencies to default
Reset all devices dependencies to default
Menu Reset all devices dependencies to default, remove settings which are depending on other
functions Connection server for example relay,air conditiong etc.
Bookmark Audit
Bookmark Audit
Bookmark Audit is used to show and download LOG file option events for diagnostic purposes developer.
Logged events
Logged events
Menu Logged events is used to show a download LOG option events for diagnostic purposes developer.