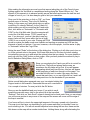
1
Remember that each unit is always either in "fire" mode or "move" mode. Right now we want
to move. You can do that in two ways. You can highlight the unit (double clicking on it) or
units in a hex then right click in an adjacent hex. The highlighted unit(s) will move there. You
can keep doing that until your unit runs out of movement points (MP). The other way is to
highlight the units in the hex and then while holding down the left mouse key, go to the
desired hex and release the key (Drag-and-drop).
Try it. Look for the unit in hex 29,10 mentioned previously. That would be a rifle
squad inside a vehicle. We are going to move them. Highlight the unit by double
clicking with the left mouse key on the hex. Notice how the background lights up
at the bottom of the screen. Now right click on hex 28,10 (to the left from where
your units are). Remember you can left click on any hex and nothing will happen.
Doing that will help you find hex 28,10. If you do that, however, you’ll have to go
back to 29,10 and highlight the units again. Okay, with the units highlighted,
simply right click on hex 28,10. Notice that the arrow appears behind the units so you see
where you have moved from and your direction.
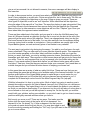
Let’s move again, this time using the second method. Double click on the
unit in hex 28,13. This time hold down the left mouse key after the second
click. Now move your mouse over hex 26,15 (shallow water hex) and
release the key. Your unit will move into the hex. This is the “drag and drop”
method of movement. In most cases you will want to move along the roads
so you expend the least amount of movement points possible for each hex
moved. Obviously that isn’t always possible, as in our current situation – but do keep in mind
that each action, be it movement, changing facing location, or firing will cost you movement
points on your unit. Be cautious in your movements…if your forces get caught marching
down the road they can be decimated in a few short minutes. Use scouting elements and
cover as much as possible when moving from point to point.
One element that is vital to your success is your leaders. The unit at hex 26,8 contains a
leader (when he is unloaded from his vehicle you will note the star on his counter image). He
has special qualities. His purpose is to keep the men in good order during combat. Do not
risk your leaders by putting them too far up front. Place them instead in positions of less
danger but readily available to aid the men. For example, this leader is stacked with the 1st
squad of 1/9 infantry. Should it be fired upon and become "pinned" or "demoralized," it will be
his responsibility to rally those troops. Without the presence in the hex of a leader, rallying
troops is more difficult and takes much longer.
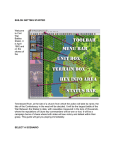
As you move about, remember that you have a number of handy helps represented by the
icons at the top of the map. If you prefer using the menus, they are also readily available at
the top of the screen. Let’s mention two of them before you move more of
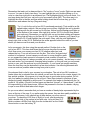
your men. To check the LOS (Line of Sight) of a unit, start by selecting
(with a double click of the mouse) a hex with units. Let’s pick hex 16,5,
which contains a M-29c Crab. Now from the toolbar click on the Visible
Hexes button or use the hotkey "S."