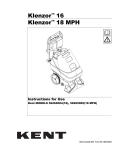
1
User’s Manual RL78/G1C Group USB Charger Solution Kit R0K578G1CD010BR R01AN1911EJ0101_RL78G1C Rev.1.01 Apr 10, 2014 Summary This document is a User's Manual for USB Charger Solution Kit R0K578G1CD010BR, which adopts Renesas Electronics Corporation 16-bit Microcomputer R78/G1C. R0K578G1CD010BR is a board product which compactly includes USB communication function, mobile battery function based on USB Battery Charging Specification Revision 1.2 (USB 1.2), temperature and illuminance logger function, mouse function and others. Contents 1. Important ........................................................................................................................................... 3 2. 2.1 2.2 2.3 Precautions for Safety ....................................................................................................................... 5 Definitions of symbols ....................................................................................................................... 5 Warnings ........................................................................................................................................... 6 Cautions ............................................................................................................................................ 7 3. Specification ...................................................................................................................................... 8 4. Features ............................................................................................................................................ 9 5. Components Names and Functions ................................................................................................ 10 6. Operations ....................................................................................................................................... 11 6.1 Setup ............................................................................................................................................... 11 6.1.1 How to install battery .................................................................................................................. 11 6.1.2 Unlock HOLD Switch ................................................................................................................. 13 6.1.3 Check LCD Displays .................................................................................................................. 13 6.2 Menu Functions ............................................................................................................................... 14 6.2.1 Software Version Display ........................................................................................................... 15 6.2.2 Time Settings ............................................................................................................................. 15 6.2.3 Formatting EEPROM ................................................................................................................. 16 6.3 Charging Battery ............................................................................................................................. 17 6.4 Supplying Power ............................................................................................................................. 18 6.5 USB Composite Devices (USB mouse + USB memory) ................................................................ 19 6.6 Android Open Accessory ................................................................................................................ 21 6.6.1 Starting the Demokit Application ................................................................................................ 21 6.6.2 Demokit Application Operations................................................................................................. 21 6.7 Power-saving Function .................................................................................................................... 22 R01AN1911EJ0101_RL78G1C Rev.1.01 Apr 10, 2014 Page 1 of 23 RL78/G1C Group USB Charger Solution Kit R0K578G1CD010BR Preface All components of USB Charger Solution Kit R0K578G1CD010BR (hereinafter referred to as “this product”) are listed under “Contents of Package” in release note of this product. If you have any questions about this product, contact your local distributor. The manuals relevant to usage of this product are listed below. You can download the latest manuals from the Renesas Electronics homepage. RL78/G1C User's Manual: Hardware http://www.renesas.com/products/mpumcu/rl78/rl78g1x/rl78g1c/Documentation.jsp Renesas USB Basic Mini Firmware (R01AN0326EJ) http://www.renesas.com/products/tools/middleware_and_drivers/c_driver/usb_driver/app_notes.jsp R01AN1911EJ0101_RL78G1C Rev.1.01 Apr 10, 2014 Page 2 of 23 RL78/G1C Group 1. USB Charger Solution Kit R0K578G1CD010BR Important Before using this product, be sure to read this user’s manual carefully. This Product: "This product" in this document collectively refers to the following product manufactured by Renesas Electronics Corporation. "This product" herein encompasses neither the customer's user system nor the host machine. (a) RL78/G1C USB Charger Solution Kit R0K578G1CD010BR Purpose of use of this product: This product is a solution kit which adopts Renesas Electronics Corporation 16-bit Microcomputer R78/G1C, has USB communication and charging/supplying power functions. Be sure to use this product correctly according to said purpose of use. Please avoid using this product other than for its intended purpose of use. For those who use this product: This product can only be used by those who have carefully read the user’s manual and know how to use it. Use of this product requires basic knowledge of electric circuits, logical circuits, and MCUs. When using this product: (1)This product is a development-support unit for use in your program development and evaluation stages. When a program you have finished developing is to be incorporated in a mass-produced product, the judgment as to whether it can be put to practical use is entirely your own responsibility, and should be based on evaluation of the device on which it is installed and other experiments. (2)In no event shall Renesas Electronics Corporation be liable for any consequence arising from the use of this product. (3)Renesas Electronics Corporation strives to provide workarounds for and correct trouble with products malfunctions, with some free and some incurring charges. However, this does not necessarily mean that Renesas Electronics Corporation guarantees the provision of a workaround or correction under any circumstances. (4)This product covered by this document has been developed on the assumption that it will be used for program development and evaluation in laboratories. Therefore, it does not fall within the scope of applicability of the Electrical Appliance and Material Safety Law and protection against electromagnetic interference when used in Japan. (5)Renesas Electronics Corporation cannot predict all possible situations and possible cases of misuse that carry a potential for danger. Therefore, the warnings in this user's manual and the warning labels attached to this product do not necessarily cover all such possible situations and cases. The customer is responsible for correctly and safely using this product. (6)This product covered by this document has not been through the process of checking conformance with UL or other safety standards and IEC or other industry standards. This fact must be taken into account when this product is taken from Japan to some other country. (7)Renesas Electronics Corporation will not assume responsibility of direct or indirect damage caused by an accidental failure or malfunction in this product. (8)The all operation of the USB device connected to this product is not guaranteed. (9)All of the application note and sample program provided about this product are reference data, and they do not guarantee the operation. Please use as technical reference data for software development. R01AN1911EJ0101_RL78G1C Rev.1.01 Apr 10, 2014 Page 3 of 23 RL78/G1C Group USB Charger Solution Kit R0K578G1CD010BR When disposing of this product: Penalties may be applicable for incorrect disposal of this waste, in accordance with your national legislation. Usage restrictions: This product has been developed as evaluation system for RL78/G1C. Therefore, do not use it as an embedded device in other equipment. Also, do not use it to develop systems or equipment for use in the following fields. (1) Transportation and vehicular (2) Medical (equipment that has an involvement in human life) (3) Aerospace (4) Nuclear power control (5) Undersea repeaters If you are considering the use of this product for one of the above purposes, please be sure to consult your local distributor. About product changes: We are constantly making efforts to improve the design and performance of our product. Therefore, the specification or design of this product, or this user's manual, may be changed without prior notice. About rights: (1) We assume no responsibility for any damage or infringement on patent rights or any other rights arising from the use of any information, products or circuits presented in this user’s manual. (2) The information or data in this user’s manual does not implicitly or otherwise grant a license to patent rights or any other rights belonging to Renesas or to a third party. (3) This user’s manual and this product (R0K578G1CD010BR) are copyrighted, with all rights reserved by Renesas. This user’s manual may not be copied, duplicated or reproduced, in whole or part, without prior written consent from Renesas. About diagrams: Some diagrams in this user’s manual may differ from the objects they represent. About warranty: Exchange free only in the case of initial failure within one month after purchase. This product is provided "as is" and no repair, analysis, etc. are supported. R01AN1911EJ0101_RL78G1C Rev.1.01 Apr 10, 2014 Page 4 of 23 RL78/G1C Group 2. 2.1 USB Charger Solution Kit R0K578G1CD010BR Precautions for Safety Definitions of symbols This chapter describes the precautions which should be taken in order to use this product safely and properly. Be sure to read and understand this chapter before using this product. Contact us if you have any questions about the precautions described here. This chapter describes the precautions which should be taken in order to use this product safely and properly. Be sure to read this chapter before using this product. WARNING WARNING indicates a potentially dangerous situation that will cause death or heavy wound unless it is avoided. CAUTION CAUTION indicates a potentially dangerous situation that will cause a slight injury or a medium-degree injury or property damage unless it is avoided. In addition to the two above, the following are also used as appropriate. means WARNING or CAUTION. Example: CAUTION AGAINST AN ELECTRIC SHOCK means PROHIBITION. Example: DISASSEMBLY PROHIBITED R01AN1911EJ0101_RL78G1C Rev.1.01 Apr 10, 2014 Page 5 of 23 RL78/G1C Group 2.2 USB Charger Solution Kit R0K578G1CD010BR Warnings WARNING Warnings for Battery: Do not store and use battery at hot environment, such as near a stove and near fire. Do not disassemble and modify battery. Do not solder directly to contacts of battery. May cause battery to ignite, burst, heat or leak. Check the orientation of battery to install it to the product, and do not try to force the battery onto the product if you having trouble installing it. May cause battery to ignite, burst, heat or leak. Do not throw battery into fire or do not heat it. Do not nail battery, hit with a hammer or step on it. May cause battery to ignite, burst, heat or leak. Do not connect a wire or other metal object to +/- contacts of battery. Do not store metal object with battery together. May cause battery to ignite, burst, heat or leak. If battery’s fluid etc. contacts eyes, skin or cloth, immediately flush the eyes, skin or cloth with clean water and see a doctor right away. Do not rub the eyes. May cause loss of sight. Do not use or charge a wet battery. May cause battery to ignite, burst, heat or leak. If battery leaks or gives off a strange smell, immediately remove it from the vicinity of open flames. May cause battery to ignite, burst, heat or leak. If battery charging is not finished even the charging time is longer than 7 hours, please unplug USB cable and stop battery charging. May cause battery to ignite, burst, heat or leak. The status of charging can be confirmed by “Charging LED”. Warnings to Be Taken for Handling: Do not disassemble this product. Personal injury due to electric shock may occur if this product is disassembled. Disassembling this product will void your warranty. If this product gives off a strange smell, sound or smoke when it is used, immediately unplug USB cable. Because it may cause battery to ignite, burst, heat and leak, stop to use and please be sure to consult your local distributor. Warning for Installation: Do not set this product in water or areas of high humidity. Make sure that the product does not get wet. Spilling water or some other liquid into the product may cause un-repairable damage. Warning for Use temperature: This equipment is to be used in an environment with a maximum ambient temperature of 35°C. Care should be taken that this temperature is not exceeded. R01AN1911EJ0101_RL78G1C Rev.1.01 Apr 10, 2014 Page 6 of 23 RL78/G1C Group 2.3 USB Charger Solution Kit R0K578G1CD010BR Cautions CAUTION Cautions to Be Taken for Handling This Product: Use caution when handling the product. Be careful not to apply a mechanical shock. Do not touch the connector pins of this product and the target MCU connector pins directly. Static electricity may damage the internal circuits. When attaching and removing the cable, hold the plug of the cable and do not touch the cable. Do not pull this product by the communications interface cable or the flexible cable. And, excessive flexing or force may break conductors. If the product is converted, it will become the outside for a guarantee. If battery gives off a strange smell, sound or smoke when it is used, immediately remove battery and stop to use. May cause battery to ignite, burst, heat and leak. Do not touch this product in wet hand. May cause this product to failure. Uninstall batteries when do not use this product over a prolonged period. May cause battery to over discharge. Note on Transporting the Product: When sending your product for repair, use the packing box and cushioning material supplied with the product when it was delivered to you and specify caution in handling (handling as precision equipment). If packing of your product is not complete, it may be damaged during transportation. When you pack your product in a bag, make sure to use the conductive plastic bag supplied with the product (usually a blue bag). If you use a different bag, it may lead to further trouble with your product due to static electricity. Caution to Be Taken for System Malfunctions: If this product malfunctions because of interference like external noise, do the following to remedy the trouble. (1) Exit this product debugger, and shut OFF this product and the user system. (2) After a lapse of 10 seconds, turn ON the power of this product and the user system again, then launch this product debugger. Caution to Be Taken for Disposal: Penalties may be applicable for incorrect disposal of this waste, in accordance with your national legislation. European Union regulatory notices: The WEEE (Waste Electrical and Electronic Equipment) regulations put responsibilities on producers for the collection and recycling or disposal of electrical and electronic waste. Return of WEEE under these regulations is applicable in the European Union only. This equipment (including all accessories) is not intended for household use. After use the equipment cannot be disposed of as household waste, and the WEEE must be treated, recycled and disposed of in an environmentally sound manner. Renesas Electronics Europe GmbH can take back end of life equipment, register for this service at “http://www.renesas.eu/weee”. R01AN1911EJ0101_RL78G1C Rev.1.01 Apr 10, 2014 Page 7 of 23 RL78/G1C Group 3. USB Charger Solution Kit R0K578G1CD010BR Specification Items Type Name Power Supply Input Output Battery Low Voltage for Operation Dimension Charging Feeding Environment Condition Features of PC connection Contents R0K578G1CD010BR USB (input via micro-B connector) USB (output via standard-A connector) Ni-MH battery AAA (HR03) x 6 Charging time: about 7 hours ≥ 3V (Start to charge when no load) ≤ 2.9V (End to feed) 90 X 55 X 24 [mm] Operation: 10 ~ 35 ̊C Storage: -10 ~ 50 ̊C USB mouse Logs recorder (Illuminance, Temperature, Battery voltage, Charging and feeding current) for confirming and deleting Battery charging Supply power to smartphone Features of smartphone connection Features of stand alone Data communication with smartphone 1) Display illuminance and temperature value on smartphone 2) Control LCD brightness by operating smartphone Measure illuminance and temperature, display the value on LCD Record illuminance and temperature value to log file Clock, remaining battery level, sleep mode Display Feature Illuminace measurement Temperature measurement Remaining battery level Clock Charging current Supply current Other features Remarks Separately-sold item Note 1 Note 2 Note 3 Dew condensation prevention USB Full-Speed CSV format log file Charging current: Max. 500mA Charging current: Max. 1500mA Note 4 The Demokit Application of AndroidTM Open Accessory is needed. Refer to Section 6.6. Note 5 Recording time: 24 hours Recording interval: every 1 minute Enter to sleep mode after 30 seconds. Note 6 0-65535 lux, 1lux unit 0-99 ̊C, 1 ̊C unit Depending on the environment condition 0-5000mV, 1mV unit 24 hour display, 1 minutes unit 1-500mA, 1mA unit 1-1500mA, 1mA unit Display USB BC1.2 Specification Display VID, PID (in 3 seconds) When USB BC1.2 devices is connected When USB devices connected Note 1: The charging time depends on the environment temperature and the USB specification. Do not use any other batteries different from Ni-MH battery. Note 2: The battery voltage may drop to low voltage impossible to charge after this product is not used over a prolonged period. Uninstall and charge the batteries by dedicated charger. Note 3: The voltage of battery may drop sharply while the feeding current is large. This is because of the internal impedance of battery and this depends on specification of battery. Use batteries with large capacity when feeding current is large. Change batteries when battery performance becomes low because batteries are expendable supplies. Note 4: The current of charging or feeding depend on the specification of the devices connected. (e.g. USB Battery Charging Specification corresponding. etc.) This product detects if the device connected is correspond to USB Battery Charging Specification or not, and controls the charging current according to USB specification. Note 5: Android is a trademark of Google Inc. Note 6: This product will enter to sleep mode when the un-used period is long than 30 seconds in standalone operation. Please confirm the “HOLD” switch if this product set does not wakeup even if the left/right buttons are pushed. R01AN1911EJ0101_RL78G1C Rev.1.01 Apr 10, 2014 Page 8 of 23 RL78/G1C Group 4. USB Charger Solution Kit R0K578G1CD010BR Features USB BC1.2 support MCU RL78/G1C is used in this product. This product is available for boost USB power charge and USB power supply. RL78/G1C controls all peripheral devices. • The Renesas peripheral devices controlled by RL78/G1C: EEPROM: R1EX25512ATA00I *Note 1: Do not connect both USB device via USB A connector and USB micro-B connector in same time, because this product does not correspond to this usage. *Note 2: This product is compliant with “AndroidTM Open Accessory”. It is able to be recognized as an Android accessory when an Android mobile terminal device (Android 4.0 above) is connected. Android is a trademark of Google Inc. R01AN1911EJ0101_RL78G1C Rev.1.01 Apr 10, 2014 Page 9 of 23 RL78/G1C Group 5. USB Charger Solution Kit R0K578G1CD010BR Components Names and Functions The following shows the top layer component layout and key parts functions. Temperature Sensor (backside of PCB) Senses surrounding temperature. When warmed by a hand, it senses a change in temperature. USB Micro-B Connector USB interface to connect with PC and other devices via the USB cable included in this product. HOLD Switch Used to avoid miss operations. When set to right side, the board will not react to any key operation. Ambient Light Sensor Measures surrounding iluminance. When covered by a hand, it displays the changes of illuminance. Joystick Operating this part will move the cursor. Use this to select target items when setting configurations in the menu. Left Button Operate as the left click of mouse functions. It is also used as Enter (OK) key in configuration settings. Right Button Operates as the right click of mouse functions. It is also used as “Cancel” key in configuration settings. RL78/G1C Microcomputer [R5F10JGCAFB] EEPROM [R1EX25512ATA001] Stores sensor data and is used as temporary memory for the USB interface. This microcontroller controls all the functions in this product, and also embeds USB functions. Charge Control IC (back side of PCB) Controls charging of Ni-MH battery. LCD Display Displays various statuses including temperature, illuminance, battery level, time, charging/supplying power. It comes with a white LED backlight. When display is off, device is in sleep mode. Press either right or left button to return to normal mode. Charge LED Turns ON when charging battery. Charge Level LED Indicates the charge level with six orange-colored LEDs. It blinks faster when higher current is charged in the battery. Reset Button (backside of PCB) Press to clear all settings and reset to default setting. R01AN1911EJ0101_RL78G1C Rev.1.01 Apr 10, 2014 USB Standard-A Connector USB interface to connect with Smartphone and other devices via the USB cable included in this product. Supply Level LED Indicates the supplying level with six greencolored LEDs. It blinks faster when higher current is supplied to the module. Page 10 of 23 RL78/G1C Group 6. USB Charger Solution Kit R0K578G1CD010BR Operations This section describes how to use this product. 6.1 6.1.1 Setup How to install battery * Batteries are not included in this product. Prepare 6 AAA Ni-MH batteries for this product. This product has battery charging function. Use chargeable battery for this product. 1. Remove the four screws (red circled in the picture) at the four corners of the bottom plate using a Phillips head screw driver. 2. Detach the bottom plate from the main body. Do not lose the screws. R01AN1911EJ0101_RL78G1C Rev.1.01 Apr 10, 2014 Page 11 of 23 RL78/G1C Group USB Charger Solution Kit R0K578G1CD010BR 3. Install batteries to battery socket. Do not mistake the battery electrodes. 4. Tighten the four screws at the four corners of the bottom plate. Both the bottom plate and the screws are made of plastic. Please be careful when tightening the screws; tightening the screws too hard can cause the bottom plate to split or the screws to break. R01AN1911EJ0101_RL78G1C Rev.1.01 Apr 10, 2014 Page 12 of 23 RL78/G1C Group USB Charger Solution Kit R0K578G1CD010BR 6.1.2 Unlock HOLD Switch 1. Unlock the HOLD switch by sliding it to the left. 6.1.3 Check LCD Displays 1. Make sure the LCD displays the following items in the correct format. - Temperature The LCD displays measured real-time temperature readings of the built-in temperature sensor from 0 to 99 (˚C). - Illuminance The LCD displays measured real-time illuminance readings of the built-in ambient light sensor from 0 to 65535 (lx). - Battery Voltage Level The LCD displays the real-time battery voltage level in 1mV unit. - Time The LCD displays the current time in the format of hh:mm. The colon blinks every 0.5 seconds. [Default Display] 25 ℃ 1000 lx Illuminance R01AN1911EJ0101_RL78G1C Rev.1.01 Apr 10, 2014 Battery Voltage Level Temperature 3752 mV 0:00 Time Page 13 of 23 RL78/G1C Group 6.2 USB Charger Solution Kit R0K578G1CD010BR Menu Functions 1. When the USB is not connected, display the menu in the LCD by pressing both Left and Right buttons simultaneously. * The menu will not be displayed when battery voltage level is 0mV. [Default Display] 25 ℃ 1000 lx 3752 mV 0:00 Press the Right and Left buttons at the same time. [Menu Display 1] > [MENU] S/W Version 2. Select the desired function by moving the joystick up and down. [Menu Display 1] > [MENU] S/W Version Move the joystick up. Move the joystick down. [Menu Display 2] > S/W Set Version Time Move the joystick up. Move the joystick down. [Menu Display 3] > Set Time Format 3. Select the desired item by pressing the Left button. To return to the initial screen, press the Right button. After selecting an item in [Menu Display 1], follow the rest of instructions in section 6.2.1. After selecting an item in [Menu Display 2], follow the rest of instructions in section 6.2.2. After selecting an item in [Menu Display 3], follow the rest of instructions in section 6.2.3. R01AN1911EJ0101_RL78G1C Rev.1.01 Apr 10, 2014 Page 14 of 23 RL78/G1C Group USB Charger Solution Kit R0K578G1CD010BR 6.2.1 Software Version Display 1. The LCD displays the software version as follows. [Software Version Display] (C) ルネサスエレクトロニクス Version 1.00N * Number depends on the software version 6.2.2 Time Settings 1. Select the year by moving the joystick up and down (00 to 99). 2. Press the Left button to enter setting. 3. Select the month by moving the joystick up and down (01 to 12). 4. Press the Left button to enter setting. 5. Select the date by moving the joystick up and down (01 to 31). 6. Press the Left Button to enter setting. 7. Select the hour by moving the joystick up and down (00 to 23). 8. Press the Left button to enter setting. 9. Select the minutes by moving the joystick up and down (00 to 59). 10. Press the Left button to enter setting. (Once you have started these settings, you cannot return to a previous step in the process. If you make a mistake, complete that setting and then go back to step 1 and start over.) [Time Setting Display] 12/11/01 R01AN1911EJ0101_RL78G1C Rev.1.01 Apr 10, 2014 00:00 Page 15 of 23 RL78/G1C Group USB Charger Solution Kit R0K578G1CD010BR 6.2.3 Formatting EEPROM 1. Select "YES" or "NO" by moving the joystick up and down. [Format Display 1] Format YES EEPROM? >NO Move the joystick up. Move the joystick down. [Format Display 2] Format >YES EEPROM? NO 2. To format the built-in EEPROM, press the Left button to select "YES". This will clear the data log and delete all the written files. * Please format very carefully since this function will format the EEPROM by clearing the data log and deleting all the written files. * Carry out this formatting operation only after attaching the battery to the main body and setting time. If the EEPROM is not formatted, log data may be inconsistent with the actual time. * After the EEPROM is formatted, the YYYYMMDD.csv file is generated automatically. R01AN1911EJ0101_RL78G1C Rev.1.01 Apr 10, 2014 Page 16 of 23 RL78/G1C Group 6.3 USB Charger Solution Kit R0K578G1CD010BR Charging Battery 1. Connect the USB Micro-B connector to a PC or USB charger via the USB cable included in this product. The battery starts charging after Battery Charging mode (Note 1) and amount of charging current are displayed in the LCD. The blinking speed of the LEDs (orange) changes based on amount of current when charging. [Default Display] 25 ℃ 1000 lx 3752 mV 0:00 USB Micro-B connection [Charge Display] 496 mA SDP 3752 mV 0:00 Note 1 SDP: Standard Downstream Port CDP: Charging Downstream Port DCP: Dedicated Charging Port The maximum charging current of this product in all above cases is 500mA. 2. The charge automatically stops when the USB cable is disconnected or the battery is charged to 100%. Caution when battery voltage level becomes low: Battery charging will be stopped when battery voltage is lower than 3V. Uninstall and charge batteries by dedicated charger when battery charging is not started even though the above procedures have been done. Change batteries when battery performance becomes low because batteries are expendable supplies. R01AN1911EJ0101_RL78G1C Rev.1.01 Apr 10, 2014 Page 17 of 23 RL78/G1C Group 6.4 USB Charger Solution Kit R0K578G1CD010BR Supplying Power 1. Connect the USB Standard-A connector to a USB device via the USB cable included in this product. The device starts charging after Power Supply mode (Note 1) and amount of power supply current are displayed in the LCD. The blinking speed of the LEDs (green) changes based on amount of power supply current. [Default Display] 25 ℃ 1000 lx 3752 mV 0:00 USB Standard-A connection [VID, PID Display] VID=045B PID=8122 3752 mV 0:00 After 3 seconds [Power Supply Display] 1230 mA BC 3752 mV 0:00 Note 1 BC: Devices supporting Battery Charging NON-BC: Devices not supporting Battery Charging 2. This product automatically stops supplying power when the USB cable is disconnected or the battery voltage level is too low (2900mV). R01AN1911EJ0101_RL78G1C Rev.1.01 Apr 10, 2014 Page 18 of 23 RL78/G1C Group 6.5 USB Charger Solution Kit R0K578G1CD010BR USB Composite Devices (USB mouse + USB memory) 1. Start up the PC. 2. Connect the USB Micro-B connector to a PC via the USB cable included in this product. The device driver for this USB device is automatically installed as it uses a generic driver standard in Windows PC. Use the Left button, Right button and joystick as USB pointing devices to move the cursor around the PC screen and click. This product is also recognized as USB memory. The data stored in this product’s EEPROM can be read/written from/to the PC. File storing sensor data (in CSV format) * Do not format the USB memory from your PC. * File name must be within 8 alphanumeric characters (double-byte characters not supported). * File name extension must be within 3 capital alphanumeric characters. * Writable area size of this product is 1 KB. * Do not change the file name of the CSV file storing the sensor data. * To change the CSV file storing the sensor data, format the EEPROM according to the instructions described above. R01AN1911EJ0101_RL78G1C Rev.1.01 Apr 10, 2014 Page 19 of 23 RL78/G1C Group USB Charger Solution Kit R0K578G1CD010BR 3. Open the CSV file storing the sponsor data with a PC application. R01AN1911EJ0101_RL78G1C Rev.1.01 Apr 10, 2014 Page 20 of 23 RL78/G1C Group 6.6 USB Charger Solution Kit R0K578G1CD010BR Android Open Accessory To use the functions described in this chapter, you need to install the Demokit Application in your Android device. For more information about the Demokit Application, see the following: http://developer.android.com/tools/adk/index.html Starting the Demokit Application 6.6.1 1. Start up the Android device that has been installed with the Demokit Application. 2. Connect the USB Standard-A connector to the USB Micro-B connector of the Android device via the USB cable included this product. 3. This product will be recognized as an Android accessory and the Demokit Application will start automatically. * In the Demokit Application, the default temperature display setting is configured in Fahrenheit. To change the display mode to Celsius (°C), it is necessary to configure the Demokit Application. Demokit Application Operations 6.6.2 1. Data transmission from this product to the Android device (1) Using the joystick on this product - The cursor of the Demokit Application moves accordingly. Before operations During operations R01AN1911EJ0101_RL78G1C Rev.1.01 Apr 10, 2014 Page 21 of 23 RL78/G1C Group (2) USB Charger Solution Kit R0K578G1CD010BR Pressing buttons on this product - B1 and B2 button icons in the Demokit Application start blinking. Before pressing (3) After pressing The temperature and illuminance data measured by this product are displayed in the Demokit Application. [Temperature] [Illuminance] * The illuminace value is displayed based on the results of the following calculation. Demokit Application Ambient Light Sensor Value [%] = Measured Value / 1024 2. Receiving data from Android device (1) (2) Switch Android device setting to output mode by touching [OUT] icon on the Demokit Application. Use one of the LED slide bars in the Demokit Application. - This product’s LCD backlight turns ON/OFF. [LCD Backlight OFF] [OFF] [ON] 1230 mA BC 3752 mV 0:00 [LCD Backlight ON] 1230 mA BC 3752 mV 0:00 LED Slide Bar 6.7 Power-saving Function This product goes into power-saving mode when it is not connected via USB and there is no operation for over 30 seconds LCD does not display during the power-saving mode. The following operations return this product from the power-saving mode. Pressing the Left button Pressing the Right button Connecting the USB micro-B connector to a USB charger or PC. R01AN1911EJ0101_RL78G1C Rev.1.01 Apr 10, 2014 Page 22 of 23 RL78/G1C Group USB Charger Solution Kit R0K578G1CD010BR Website and Support Renesas Electronics Website http://www.renesas.com/index.jsp USB Device Page http://www.renesas.com/en/usb Inquiries http://www.renesas.com/contact/ All trademarks and registered trademarks are the property of their respective owners. R01AN1911EJ0101_RL78G1C Rev.1.01 Apr 10, 2014 Page 23 of 23 Revision Record Rev. 1.00 1.01 Date Mar 31, 2014 Apr 10, 2014 Description Page 8,10 Summary First edition issued Correction of the clerical error of "3. Specification". Renewal of the photograph of “5. Components Names and Functions”. A-1 General Precautions in the Handling of MPU/MCU Products The following usage notes are applicable to all MPU/MCU products from Renesas. For detailed usage notes on this products covered by this manual, refer to the relevant sections of the manual. If the descriptions under General Precautions in the Handling of MPU/MCU Products and in the body of the manual differ from each other, the description in the body of the manual takes precedence. 1. Handling of Unused Pins Handle unused pins in accord with the directions given under Handling of Unused Pins in the manual. The input pins of CMOS products are generally in the high-impedance state. In operation with an unused pin in the open-circuit state, extra electromagnetic noise is induced in the vicinity of LSI, an associated shoot-through current flows internally, and malfunctions occur due to the false recognition of the pin state as an input signal become possible. Unused pins should be handled as described under Handling of Unused Pins in the manual. 2. Processing at Power-on The state of this product is undefined at the moment when power is supplied. The states of internal circuits in the LSI are indeterminate and the states of register settings and pins are undefined at the moment when power is supplied. In a finished product where the reset signal is applied to the external reset pin, the states of pins are not guaranteed from the moment when power is supplied until the reset process is completed. In a similar way, the states of pins in a product that is reset by an on-chip power-on reset function are not guaranteed from the moment when power is supplied until the power reaches the level at which resetting has been specified. 3. Prohibition of Access to Reserved Addresses Access to reserved addresses is prohibited. The reserved addresses are provided for the possible future expansion of functions. Do not access these addresses; the correct operation of LSI is not guaranteed if they are accessed. 4. Clock Signals After applying a reset, only release the reset line after the operating clock signal has become stable. When switching the clock signal during program execution, wait until the target clock signal has stabilized. When the clock signal is generated with an external resonator (or from an external oscillator) during a reset, ensure that the reset line is only released after full stabilization of the clock signal. Moreover, when switching to a clock signal produced with an external resonator (or by an external oscillator) while program execution is in progress, wait until the target clock signal is stable. 5. Differences between Products Before changing from one product to another, i.e. to one with a different type number, confirm that the change will not lead to problems. The characteristics of MPU/MCU in the same group but having different type numbers may differ because of the differences in internal memory capacity and layout pattern. When changing to products of different type numbers, implement a system-evaluation test for each of the products. Notice 1. Descriptions of circuits, software and other related information in this document are provided only to illustrate the operation of semiconductor products and application examples. You are fully responsible for the incorporation of these circuits, software, and information in the design of your equipment. Renesas Electronics assumes no responsibility for any losses incurred by you or third parties arising from the use of these circuits, software, or information. 2. Renesas Electronics has used reasonable care in preparing the information included in this document, but Renesas Electronics does not warrant that such information is error free. Renesas Electronics assumes no liability whatsoever for any damages incurred by you resulting from errors in or omissions from the information included herein. 3. Renesas Electronics does not assume any liability for infringement of patents, copyrights, or other intellectual property rights of third parties by or arising from the use of Renesas Electronics products or technical information described in this document. No license, express, implied or otherwise, is granted hereby under any patents, copyrights or other intellectual property rights of Renesas Electronics or others. 4. You should not alter, modify, copy, or otherwise misappropriate any Renesas Electronics product, whether in whole or in part. Renesas Electronics assumes no responsibility for any losses incurred by you or 5. Renesas Electronics products are classified according to the following two quality grades: "Standard" and "High Quality". The recommended applications for each Renesas Electronics product depends on third parties arising from such alteration, modification, copy or otherwise misappropriation of Renesas Electronics product. the product's quality grade, as indicated below. "Standard": Computers; office equipment; communications equipment; test and measurement equipment; audio and visual equipment; home electronic appliances; machine tools; personal electronic equipment; and industrial robots etc. "High Quality": Transportation equipment (automobiles, trains, ships, etc.); traffic control systems; anti-disaster systems; anti-crime systems; and safety equipment etc. Renesas Electronics products are neither intended nor authorized for use in products or systems that may pose a direct threat to human life or bodily injury (artificial life support devices or systems, surgical implantations etc.), or may cause serious property damages (nuclear reactor control systems, military equipment etc.). You must check the quality grade of each Renesas Electronics product before using it in a particular application. You may not use any Renesas Electronics product for any application for which it is not intended. Renesas Electronics shall not be in any way liable for any damages or losses incurred by you or third parties arising from the use of any Renesas Electronics product for which the product is not intended by Renesas Electronics. 6. You should use the Renesas Electronics products described in this document within the range specified by Renesas Electronics, especially with respect to the maximum rating, operating supply voltage range, movement power voltage range, heat radiation characteristics, installation and other product characteristics. Renesas Electronics shall have no liability for malfunctions or damages arising out of the use of Renesas Electronics products beyond such specified ranges. 7. Although Renesas Electronics endeavors to improve the quality and reliability of its products, semiconductor products have specific characteristics such as the occurrence of failure at a certain rate and malfunctions under certain use conditions. Further, Renesas Electronics products are not subject to radiation resistance design. Please be sure to implement safety measures to guard them against the possibility of physical injury, and injury or damage caused by fire in the event of the failure of a Renesas Electronics product, such as safety design for hardware and software including but not limited to redundancy, fire control and malfunction prevention, appropriate treatment for aging degradation or any other appropriate measures. Because the evaluation of microcomputer software alone is very difficult, please evaluate the safety of the final products or systems manufactured by you. 8. Please contact a Renesas Electronics sales office for details as to environmental matters such as the environmental compatibility of each Renesas Electronics product. Please use Renesas Electronics products in compliance with all applicable laws and regulations that regulate the inclusion or use of controlled substances, including without limitation, the EU RoHS Directive. Renesas Electronics assumes no liability for damages or losses occurring as a result of your noncompliance with applicable laws and regulations. 9. Renesas Electronics products and technology may not be used for or incorporated into any products or systems whose manufacture, use, or sale is prohibited under any applicable domestic or foreign laws or regulations. You should not use Renesas Electronics products or technology described in this document for any purpose relating to military applications or use by the military, including but not limited to the development of weapons of mass destruction. When exporting the Renesas Electronics products or technology described in this document, you should comply with the applicable export control laws and regulations and follow the procedures required by such laws and regulations. 10. It is the responsibility of the buyer or distributor of Renesas Electronics products, who distributes, disposes of, or otherwise places the product with a third party, to notify such third party in advance of the contents and conditions set forth in this document, Renesas Electronics assumes no responsibility for any losses incurred by you or third parties as a result of unauthorized use of Renesas Electronics products. 11. This document may not be reproduced or duplicated in any form, in whole or in part, without prior written consent of Renesas Electronics. 12. Please contact a Renesas Electronics sales office if you have any questions regarding the information contained in this document or Renesas Electronics products, or if you have any other inquiries. (Note 1) "Renesas Electronics" as used in this document means Renesas Electronics Corporation and also includes its majority-owned subsidiaries. (Note 2) "Renesas Electronics product(s)" means any product developed or manufactured by or for Renesas Electronics. SALES OFFICES http://www.renesas.com Refer to "http://www.renesas.com/" for the latest and detailed information. Renesas Electronics America Inc. 2801 Scott Boulevard Santa Clara, CA 95050-2549, U.S.A. Tel: +1-408-588-6000, Fax: +1-408-588-6130 Renesas Electronics Canada Limited 1101 Nicholson Road, Newmarket, Ontario L3Y 9C3, Canada Tel: +1-905-898-5441, Fax: +1-905-898-3220 Renesas Electronics Europe Limited Dukes Meadow, Millboard Road, Bourne End, Buckinghamshire, SL8 5FH, U.K Tel: +44-1628-585-100, Fax: +44-1628-585-900 Renesas Electronics Europe GmbH Arcadiastrasse 10, 40472 Düsseldorf, Germany Tel: +49-211-6503-0, Fax: +49-211-6503-1327 Renesas Electronics (China) Co., Ltd. Room 1709, Quantum Plaza, No.27 ZhiChunLu Haidian District, Beijing 100191, P.R.China Tel: +86-10-8235-1155, Fax: +86-10-8235-7679 Renesas Electronics (Shanghai) Co., Ltd. Unit 301, Tower A, Central Towers, 555 Langao Road, Putuo District, Shanghai, P. R. China 200333 Tel: +86-21-2226-0888, Fax: +86-21-2226-0999 Renesas Electronics Hong Kong Limited Unit 1601-1613, 16/F., Tower 2, Grand Century Place, 193 Prince Edward Road West, Mongkok, Kowloon, Hong Kong Tel: +852-2265-6688, Fax: +852 2886-9022/9044 Renesas Electronics Taiwan Co., Ltd. 13F, No. 363, Fu Shing North Road, Taipei 10543, Taiwan Tel: +886-2-8175-9600, Fax: +886 2-8175-9670 Renesas Electronics Singapore Pte. Ltd. 80 Bendemeer Road, Unit #06-02 Hyflux Innovation Centre, Singapore 339949 Tel: +65-6213-0200, Fax: +65-6213-0300 Renesas Electronics Malaysia Sdn.Bhd. Unit 906, Block B, Menara Amcorp, Amcorp Trade Centre, No. 18, Jln Persiaran Barat, 46050 Petaling Jaya, Selangor Darul Ehsan, Malaysia Tel: +60-3-7955-9390, Fax: +60-3-7955-9510 Renesas Electronics Korea Co., Ltd. 12F., 234 Teheran-ro, Gangnam-Ku, Seoul, 135-920, Korea Tel: +82-2-558-3737, Fax: +82-2-558-5141 © 2014 Renesas Electronics Corporation. All rights reserved. Colophon 4.0