1
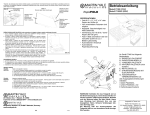
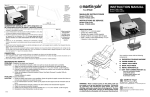
R
RapidFOLD
INSTRUCTION MANUAL
Model P7200 (110V)
Model P720022 (220V)
SPECIFICATIONS
• Folds 8.5” x 11” or A4 size paper
• Creates four different folds
• Operates at a speed of 4000 sheets/hr
• Accepts 16-28 lb. bond paper (60-105 gsm)
• Folds 1 sheet at a time automatically, or up to
3 sheets at a time manually
B
Your machine comes with the following
components:
A. RAPIDFOLD FOLDING MACHINE
D
C
B. PAPER GUIDES (2)
C. FRONT FOLD TABLE
D. BACK FOLD TABLE
E. METAL BRACKETS (2)
A
F
F. EXIT TRAY CONNECTOR SET (3)
(exit tray connectors contain
3 top plastic pieces,
3 bottom plastic pieces, and
6 connector screws)
E
WARNING! Never connect power to the folder until you
are ready to set up and operate the machine. During set
up, operation, and maintenance keep hands, hair, loose
clothing, and jewelry away from all moving parts. Serious
bodily injury could result. Service or disassembly of folder should only be attempted with the power disconnected.
Martin Yale industries • Wabash, IN 46992
Phone (260)-563-0641 • Fax (260)-563-4575
www.martinyale.com • Made in Taiwan
5/26/06
ASSEMBLY
1. Insert the Paper Guides into the Paper Tray as shown in Figure 1. You will need to remove the black plastic
nuts and clear spacers from the Guides. Once inserted, install the clear spacers on the Paper Guides and screw
the nuts back onto the Paper Guides and tighten. The Paper Guides should now be attached to the machine
as shown in Figure 2.
2. To assemble the Exit Tray, you will need
a #2 Philips screwdriver, the 2 Metal
Brackets, and the (3) Exit Tray
Connector Sets (each set contains one
top plastic piece, one bottom plastic
piece, and two screws). Assemble each
Exit Tray Connector Set onto the Metal
Brackets as shown in Figure 3. H i n t :
It may be easier to assemble the middle
Figure 1
Figure 2
Connector Set first, as noted below.
3. The assembled Exit Tray should fit underneath the machine (Figure 4). It does not snap into place, the weight
of the machine will hold it in position. Push the Tray so it is against the tabletop. Many users find it easier to
attach the first connector to (1) metal part and screw halfway together. The other metal portion may then be
installed to the plastic connector and screwed together completely.
4. Insert the plug into the back of the machine, and then into an electrical outlet.
Figure 3
Position this set near the
front of the Exit Tray for
better stacking
Assemble this Set first
Figure 4
ALIGNING THE PAPER GUIDES
NOTE: Paper guide placement is a critical and often overlooked factor in machine set-up.
Please follow the instructions below carefully to assure trouble free
paper feeding.
1. Loosen the 4 plastic thumbscrews under the feed table (see figure #1 for thumbscrew location) to loosen paper guides.
2. For standard U.S. 8 1/2” X 11” paper, move both paper guides in so that their
LS
inside edges align with the straight marks on the feed table denoted LS (see fig- LS
ure 5 for mark location). For A4 paper, align the outside edges of the paper
guides with the straight marks denoted A4. Tighten both thumbscrews (Note:
Do not over tighten thumbscrews).
Figure 5
3. Slide a single piece of paper between the paper guides, check for:
Paper Guides Aligned to LS Marks
a. Pinching-the paper should slide
freely between the paper guides with a
small amount of clearance to feed
freely. Loosen thumbscrews and adjust
paper guides if necessary to correct.
Setting the paper guides too tight will
result in feed hesitation.
Silver Tie Rod
b. Skewing-the paper should be exactCutouts in Fold Tables Rest
ly square to the feeding roller. Loosen
on Top of Tie Rods
thumbscrews and adjust paper guides if
necessary to correct.
Fold Table Pin
Front Slots on Fold Tables go
around pins
Figure 6
Bottom view of Installed Fold Table
Fold Tables
The Front and Back Fold Tables should come already inserted in the machine. If you need to remove them for
jam removal, insert them back into the machine as shown in Figures #7 and #8.
• Slots on the ends of both Fold Tables fit onto the 2 silver colored pins inside the machine (figure #6).
• The Fold Tables should rest on top of the silver tie rods (see figure #6).
• The Tables should go into the machine open end first (exception: When doing a half fold, the Back Fold Table
should go in closed end first. See Half Fold section on the next page.) Hint: Many users find it easier to install
the fold tables while looking at them from the bot- Figure 7
FRONT FOLD TABLE
tom (as seen in figure #6).
ADJUSTING THE FOLD TABLES
Note: The RapidFoldTM (110 Volt version)
comes factory preset to fold a 8 1/2” X 11”
sheet of paper to a letter fold appropriate
for a standard business envelope. 230 Volt
machines (UK and Europe) are factory preFigure 8
set to fold an A4 sheet of paper to a letter
BACK FOLD TABLE
fold.
Before attempting to set the P7200 to a fold different than the factory setting, one must understand the different types of folds (see figure 9 for examples of several common folds and their corresponding icons). A half
fold requires that only the first fold table be set and used. All other folds require that both fold tables be set up
and used.
Figure 9
Fold types possible on the P7200
Double Fold Operation
All folding operations apart from the half fold require two
DOUBLE PARALLEL
HALF
Z-FOLD
folds be placed in the stock. This is the case in the typ- LETTER
ical letter fold or Z-fold. The second fold table must be
in the double fold position (position it is in as received) to accomplish this. Use the following steps to create the
different types of folds:
U.S.
Metric
A4 Scale
1. Loosen both locking knobs on both folding tables to loosen the paper 8 1/2” X 11”
stops.
2. Locate the icons on the fold table rulers that are the type of fold that the
operator desires.
3. Move the Paper stops to the corresponding arrows next to the desired
icons. 8 1/2” X 11” (yellow icons) paper uses the inch scale on the
left side of the rulers. A4 (blue icons) paper uses the metric scale on
Figure 10
the right side of the rulers (see figure 10).
Example of a Z-FOLD setting
4. Tighten the paper stop locking knobs down to lock the paper stops into position. for US Letter 8.5” x 11” paper.
Half Fold
To set the machine for half fold, you will need to take out the Back Fold Table, reverse it, and re-insert it (closed
end first) see Figure 11. Adjust the Front Fold Table as described in step 3 above.
2. Reverse Table
Knobs should
be facing up
1. Take out Back Fold Table
Lift up and pull out
from machine
3. Insert back into machine
Closed end first,
knobs still facing up
Figure 11
AUTOMATIC FEEDING OF SINGLE SHEETS
Follow the below steps for clean automatic paper feeding:
1. Square stack of up to 50 sheets of paper by tapping it on all sides on a flat surface such as a table.
2. Load squared stack of paper into the P7200 feed table, the top sheet of paper should be in contact with the
black feed tire. NOTE: In loading the paper, the stack need only be “pushed” into the feed mechanism with a light touch. Jamming the stack of paper into the folder with force will result in feeding
problems. See figures 12 and 13.
3. Turn the folder ‘ON’ by pushing the ‘I’ portion of the ‘I-O-II’ rocker switch. Folding should initiate. *Note:
Use Martin Yale Static Eliminator (model 300) to remove static and improve machine performance. Also use
Martin Yale Rubber Roller Cleaner (model 200) for better folding perforFigure 12
Place stack of
paper here
mance and longer roller life.
Figure 13
Manual feed
slot used for
multiple sheet
sets of paper.
Side view of paper loaded
Note: Paper is
placed in folder
square. Paper
is not fanned
Folder feeds the
top sheet. Only
the top sheet of
paper should be
in contact with
feed wheel
HAND FEEDING OF SETS (Mandatory when folding multiple sheet sets of paper)
1. To prevent jams, remove all paper from the Paper Tray before feeding sets by hand.
2. For feeding sets of up to 3 sheets (stapled or unstapled), first square the paper against a tabletop.
3. Place the paper into the manual feed slot on the top of the machine (as shown in Figures 13 and 14). Do
not install multiple sheet sets in the Feed Table; a jam will result.
4. Use the momentary on, “II” switch position to initiate folding. Hold switch
Figure 14
down until folded paper exits machine.
5. Do not run machine for long periods of time without paper in the Paper Tray, this
could wear down the feed tire. HINT: For multiple sheet sets of paper, creasing of the stock may be encountered due to the thickness of the multiple
sheet set. Correct by moving the 1st fold table stop out approximately 1/8”.
For example, if the 1st fold table were set at 7 3/8” for a letter fold, the user
would reset it to 7 1/2” for the multiple sheet set.
RapidFold
PAPER JAMS
1. Unplug the machine. Check to see if you can clear the jam by removing one of the Fold Tables.
2. If you cannot remove the jam, use a flathead screwdriver to manually turn the folding rollers, using the
access hole in the left side of the machine. The paper should eventually emerge from the machine.
3. You may need to remove the top plastic cover to extract the jammed paper.
TROUBLESHOOTING
PROBLEM: The paper jams in the machine.
SOLUTION: 1. If feeding by hand, make sure that there is no paper in the Paper Tray.
2. Re-align the Paper Guides and check Fold Table settings.
3. Check to see if paper is within specifications (81/2” x 11” or A4, 16-28 lb. bond or 60-105 gsm).
4. Remove top cover and clean rollers with Martin Yale Rubber Roller Cleaner (model 200).
5. Use Martin Yale Static Eliminator (model 300) to remove static in paper.
PROBLEM:
SOLUTION:
Paper will not feed correctly.
1. Paper guides too tight or not parallel to each other, Adjust paper guides as described in
Aligning the Paper Guides section of this instruction manual.
2. If feeding by hand, make sure the paper is properly aligned before placing it in the slot.
3. If feeding by hand, place the set in the slot before turning the machine on.
4. Re-align the Paper Guides.
5. Check to see if paper is within specifications (81/2” x 11” or A4, 16-28 lb. bond or 60-105 gsm).
6. The feed tire could be worn. Replace.