1
3. OPERATIONS
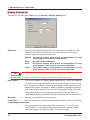
Gray balance ........... The three RGB colors are used to scan the document. The blue and
yellow colors become prominent. This parameter is used for applications
such as scanning the squares on graph paper.
This setting can only be specified for the CSX300 model.
Edge Sharpening .... To sharpen the boundary between the background and the data, enable
this parameter. If you want to perform high resolution scanning or if
background speckles increase, disable this parameter.
Automatic Despeckling
.................. If you enable this option, speckles of the specified size will be removed
from the image while the document is being scanned in.
Automatic Deskew .. If you enable this option, any skewed image will be corrected if the
scanner gets scanned-in image data from a skewed document. The
automatic deskew operates up to ±7.1°.
This setting cannot be specified for the SK200 model.
When Output is 8-bit Color (Standard)
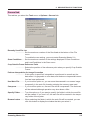
Reduction Method .. Specify the method used to subject the image to eight-bit color depth reduction.
Closest Match ...... Data is scanned in as an eight-bit color image through the scanner.
Error Diffusion ..... Data is scanned in as a 24-bit color image through the scanner. The image
is subjected to color depth reduction so that the color is viewed more naturally.
RGB .......................... Used to change Gamma, Brightness, Contrast, White Point and Black
Point to RGB elements. If RGB is selected, the red, green, and blue
elements change simultaneously.
Gamma .................... Used to adjust the gamma value. If you set a large value here,
intermediate-level areas will be scanned in as bright images.
Brightness ............... Specifies the image brightness. Increasing the specified value results in
scanning as a brighter image.
Contrast ................... Used to adjust the contrast of the image. If you set a large value here,
the image will be scanned in with a high contrast.
White Point .............. The parts of the image that are closer to white than the specified value
will be scanned in as white. The effect that can be expected is to make
the background white. The smaller the setting, the greater the effect.
Tip
When using the Preview button to preview the scanned image, if you click the
button and
then the left mouse button in the ensuing Details window, the color at the cursor position
becomes the White Point setting. At this time, when you drag and then release the mouse, the
darkest color in the enclosed area becomes the White Point setting.
Scanning Master 21+
3-9