1
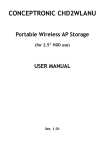
WMU-6000FS Portable Wireless AP Storage User’s Manual 1 Copyright The contents of this publication may not be reproduced in any part or as a whole, stored, transcribed in an information retrieval system, translated into any language, or transmitted in any form or by any means, mechanical, magnetic, electronic, optical, photocopying, manual, or otherwise, without the prior written permission. Trademarks All products, company, brand names are trademarks or registered trademarks of their respective companies. They are used for identification purpose only. Specifications are subject to be changed without prior notice. FCC Interference Statement This equipment has been tested and found to comply with the limits for a Class B digital device pursuant to Part 15 of the FCC Rules. These limits are designed to provide reasonable protection against radio interference in a commercial environment. This equipment can generate, use and radiate radio frequency energy and, if not installed and used in accordance with the instructions in this manual, may cause harmful interference to radio communications. Operation of this equipment in a residential area is likely to cause interference, in which case the user, at his own expense, will be required to take whatever measures are necessary to correct the interference. CE Declaration of Conformity This equipment complies with the requirements relating to electromagnetic compatibility, EN 55022/A1 Class B. Note. The content of user manual will be revised without notice. 2 AirLive WMU-6000FS User’s Manual Table of Contents Chapter 1: Introduction.............................................................................................5 1.1 Overview.....................................................................................................5 1.2 Features .....................................................................................................6 1.3 System Requirements ..............................................................................8 1.4 Package List ..............................................................................................8 1.5 Hardware Ports and Buttons ...................................................................9 1.6 LED Indicators .........................................................................................10 Chapter 2: Getting Started.....................................................................................12 2.1 Hard Disk installation..............................................................................12 2.2 Making Connections ...............................................................................15 2.2.1 Check TCP/IP Settings..............................................................15 2.2.2 Wired Ethernet Connection.......................................................17 2.2.3 Wireless Connection..................................................................22 2.3 File sharing...............................................................................................24 2.3.1 Accessing the network hard drive via my network places....25 2.3.2 Searching the computers ..........................................................26 2.3.3 Search the “Entire Network” Manually ....................................26 2.3.4 Accessing Files via FTP ............................................................27 Chapter 3: Making Configuration ..........................................................................28 3.1 Wizard.......................................................................................................30 3.2 Network Settings .....................................................................................37 3.2.1 DHCP Setting..............................................................................37 3.2.2 Wireless Setting..........................................................................38 3 AirLive WMU-6000FS User’s Manual Chapter 4: Disk Management................................................................................52 4.1 Disk Utility.................................................................................................52 Chapter 5: ADVANCED FUNCTIONS .................................................................55 5.1 Config Backup .........................................................................................55 5.2 Reset to Default.......................................................................................55 5.3 Reboot ......................................................................................................55 5.4 F/W Upgrade ...........................................................................................55 Chapter 6: MISC......................................................................................................56 6.1 Administrator Timeout.............................................................................56 6.2 Change Password...................................................................................57 6.3 System Time ............................................................................................58 Chapter 7: Printer Server Setup............................................................................59 7.1Windows Operating system(NT based) ................................................59 7.2 Configuring on Unix-like based Platforms ...........................................65 7.3 Apple OS ..................................................................................................71 Chapter 8: Trouble Shootings ...............................................................................73 What can I do when I have some trouble in the first time?......................73 How to setup wireless function?..................................................................75 Problems of security level ............................................................................87 4 AirLive WMU-6000FS User’s Manual C Ch haap ptteerr 11:: IIn nttrro od du uccttiio on n Congratulations on your purchase of AirLive WMU-6000FS. This product is specifically designed for Small Office and Home Office needs. It provides a complete SOHO solution for Internet surfing, and is easy to configure and operate even for non-technical users. Instructions for installing and configuring this product can be found in this manual. Before you install and use this product, please read this manual carefully for fully exploiting the functions of this product. 1.1 Overview The AirLive WMU-6000FS is an ultra slim design and compact size of Portable Wireless AP Storage. It is an ideal device for travelers and home users who need to back up and share files more efficiently and easily anytime and anywhere. Additionally, Network storage and fully compliant IEEE 802.11g WLAN device functions let you share files easily. The AirLive WMU-6000FS offers WLAN mobility for home user and business people to maintain continuous network connectivity. Home users can stay connected to the network anywhere through a building without being limited by LAN cables via AirLive WMU-6000FS’s AP functionality. This device also has the additional advantage of providing network storage with its 2.5-inch hard disk drive which allows you to share information and storage capacity via 5 AirLive WMU-6000FS User’s Manual wireless or wired network. The AirLive WMU-6000FS supports the UPnP content directories and users can share the music and video files easily. Besides, the click-and-copying of files from a flash drive to the AirLive WMU-6000FS hard disk make the user backup files efficiently. 1.2 Features Basic functions z Ultra DMA 133 IDE controller to adapt for 2.5-inch hard disk drive. z Network File Storage and File Sharing via the Network Neighborhood (or My Network Places) in Windows or Samba in Linux. z Support FAT, FAT32, Ext2 files system and can read NTFS file system. (Only can copy files from NTFS folder to another FAT, FAT32, or Ext2 folder.) z Built-in FTP server. z Support Security level as guest or Authorization user for file sharing. z UPnP (Universal Plug and Play) feature for Windows XP and Windows Me. z Real time clock to synchronize the computer time setting. z Easy to upgrade: using Web or Windows Application to upgrade new version of firmware. z Browser-based interface configuration and management: OS 6 AirLive WMU-6000FS User’s Manual independent, easy-to-use for consumer installation. USB device z Built-in USB2.0 host to connect to USB mass storage device, like USB flash drive, USB Hard Drive, etc... z Easy to button: Offer the Button to Copy folders and files form USB device to HDD. Wireless functions z Up to 54Mbps data rate by incorporating Orthogonal Frequency Division Multiplexing (OFDM). z IEEE 802.11b compatible (11Mbps): Allowing inter-operation among multiple vendors. z IEEE 802.11g compatible (54Mbps): Allowing inter-operation among multiple vendors. z Wireless data rate supported: 6/12/18/24/36/48/54 Mbps in 802.11g mode; 1/2/5.5/11Mbps in 802.11b mode. z 64/128-bit WEP encryption. z Support 802.1X authentication. z Support WPA with TKIP and AES encryption. z Support AP and WDS wireless modes. 7 AirLive WMU-6000FS User’s Manual 1.3 System Requirements To start to use the AirLive WMU-6000FS, your system must have the following minimum requirements: z Windows 95 / 98 / ME / 2000 / XP. z An Ethernet (10BaseT or 10/100 BaseT) adapter for wired client. z At least one WLAN client adapter of 802.11g(54Mbps) or 802.11b(11Mbps) for wireless connection. z TCP/IP and NetBIOS network protocol installed. z Internet Browser installed. The AirLive WMU-6000FS requires an external 5V, 3A power supply which is included in the AirLive WMU-6000FS package. For safe operation, please use only the power adapter provided by AirLive WMU-6000FS . 1.4 Package List The AirLive WMU-6000FS package contains the following items: z AirLive WMU-6000FS x 1 z 2.4GHz dipole antenna x 1 z Power Adapter (5 Volts DC, 3A) x 1 z RJ-45 Ethernet cable z Quick Setup Guide z CD(utilities and user manual) x 1 z Screws x 2 (Fix hard drive) 8 AirLive WMU-6000FS User’s Manual 1.5 Hardware Ports and Buttons Ports Description Power 5V/3A Power inlet USB1 / USB2 The ports where you can connect to any USB storage. LAN Automatically MDI/MDIX LAN port can sense the cable type when connecting to Ethernet-enabled computer, network of hub, switch or router 9 AirLive WMU-6000FS User’s Manual Buttons Description Shutdown Press the button for 4 seconds to shut down the whole system before power-off. Backup Press the button over 4 seconds to copy data from USB device to HDD. Reset Press the buttons of “Shutdown” and “Backup” simultaneously over 6 seconds to reset the system to the factory default setting. 1.6 LED Indicators 10 AirLive WMU-6000FS User’s Manual LED Off On Blinking PWR Power off Power on LAN No device Linked WLAN No packet On Transmitting HDD Not in use HDD read/write USB1 / USB2 No device USB drive ready In use Backup Backup files from USB to HDD HDD Status No HDD HDD full or error More blinking quickly, fewer available HDD capacity. 11 AirLive WMU-6000FS User’s Manual C Ch haap ptteerr 22:: G Geettttiin ng gS Sttaarrtteed d 2.1 Hard Disk installation Follow the steps below to insert the 2.5-inch hard disk and assemble the device before using the AirLive WMU-6000FS. Warning: The AirLive WMU-6000FS is not hot-swappable. Please make sure that it is turned off and not connected to the power outlet when performing the following assembly procedure. Step 1: Use one hand to hold on the AirLive WMU-6000FS, and the other hand to open the upper cover carefully. 12 AirLive WMU-6000FS User’s Manual Step 2: Remove the upper cover Step 3: Insert the 2.5-inch hard drive into the slot. Make sure the hard drive connecting pins and the connectors are properly aligned. 13 AirLive WMU-6000FS User’s Manual Step 4: Put the upper cover back and assemble the cover tightly. Step 5: Fasten the screw to make sure the hard drive would not loosen. 14 AirLive WMU-6000FS User’s Manual 2.2 Making Connections In order to access the AirLive WMU-6000FS as the network storage drive or as an AP, you may need to configure the TCP/IP settings correctly. Either the “Wired Ethernet settings” or “Wireless Connection” can be used to connect the WMU-6000FS easily. 2.2.1 Check TCP/IP Settings To install the “Client for Microsoft Networks”, “File and Printer Sharing for Microsoft Networks”, and “Internet Protocol (TCP/IP)” as follows: Step 1: Select the “My Network Places” on the Desktop Menu, and click the right button of mouse to choose the “Properties” 15 AirLive WMU-6000FS User’s Manual Step 2: Choose the “Properties” of Local Area Connection. Step 3: Check the “Client for Microsoft Networks”, “File and Printer Sharing for Microsoft Networks”, and “Internet Protocol (TCP/IP)” are installed or not. If not, please install those communication protocols. If you use other operating system, such as Linux X-window or Mac OS, please refer to original manual of your OS to finish the configurations of TCP/IP and other required communication protocols. 16 AirLive WMU-6000FS User’s Manual 2.2.2 Wired Ethernet Connection AirLive WMU-6000FS will detect automatically if the DHCP server is existed, it will get a IP address form DHCP server. If there is no DHCP server, AirLive WMU-6000FS will assign a random IP to client and you can get some information as below shown. Use one Ethernet cable to connect the AP Storage and your computer directly. Then go to the command mode and key “ipconfig”. If the IP address and subnet is 0.0.0.0, please type “ipconfig /renew” to retrieve a IP address: 17 AirLive WMU-6000FS User’s Manual Method 1: Use Configure.exe to Setup Before you can do this, you need to install the configuration tool from installation CD first. After that, please use the configuration tool to “Query” and you will see the status page and input “airlive” to start. NOTE. The default login password is “airlive” If there is a DHCP server in the network, AirLive WMU-6000FS will be as the client and get one IP address from DHCP server. You can also use configuration utility to Query to find the IP address that WMU-6000FS gets. About other operating systems, such as Linux X-window or Mac OS, please use web browser to configure. 18 AirLive WMU-6000FS User’s Manual Method 2: Use “My Network Places” to Search and Setup First, go to My Network Places and search “Computer name”. Input “WMU-6000FS” and start to search and you will find one device. Click “samba server” and you will see two folders. Then click the folder “Configure”. 19 AirLive WMU-6000FS User’s Manual Please click “Configure.html” directly to see configuration page. In addition, the user can allocate the IP by himself as below: 20 AirLive WMU-6000FS User’s Manual Step 1: Find the Internet Protocol (TCP/IP) Properties from the My Network Places and check the Properties of Local Area Network Connection. And click the “General” icon and assign one IP address which can be from 192.168.123.1 to 192.168.123.253. Here we use the 192.168.123.88 as the IP address. The Subnet mask must be 255.255.255.0, and the Default gateway must be 192.168.123.254. Then click “OK” button to complete TCP/IP setup. Step2: Open the DOS command from the Start Menu->Run, and type “cmd” then click OK. 21 AirLive WMU-6000FS User’s Manual Step 3: Type the “ipconfig” and press the “Enter”. Then the following message should be found. Check the IP address, Subnet Mask, and Default Gateway addresses are same as previous setting. If same, you are successful to set up the network configuration. 2.2.3 Wireless Connection Follow the steps below to connect to the AirLive WMU-6000FS in a wireless environment. We assume that there is at least one WLAN card installed on your computer, and AP Storage is powered on Step 1: Enabling the WLAN card first, and check the Wireless Network Connection properties from My Network Places. Step 2: Select the Wireless Networks icon after entering the “Wireless Network Connection Properties”. You will find the WMU_6000FS in the Available networks, then select the WMU_6000FS, and click Configure to connect. 22 AirLive WMU-6000FS User’s Manual Otherwise, if you can’t find WMU_6000FS, please refresh network list again. After clicking the “Configure” icon, the Network name (SSID) is supposed to be AirLive. Step 3: Open the DOS command from the Start Menu->Run. Type “cmd” in the Open folder, then click OK to enter the DOS environment. Step 4: type the “ipconfig” and press the “Enter” in the DOS environment. 23 AirLive WMU-6000FS User’s Manual Then the following message should be found. Check the IP address, Subnet Mask, and Default Gateway address are same as previous settings. If same, you are successful to set up the network configuration. WARNING: We strongly recommended that you enable wireless encryption feature or add ACL rules on WMU-6000FS. Otherwise, everyone can connect to it wirelessly and access data in your hard drive. 2.3 File sharing The AirLive WMU-6000FS can be a shared network hard drive in an existing wireless or wired network environment. The users in the same network area can read or write data from the device as required. The following various steps are for users to start using the network hard drive. 24 AirLive WMU-6000FS User’s Manual 2.3.1 Accessing the network hard drive via my network places Select the “My Network Places” and type the address of “\\Wmu6000fs” and press “Enter”, then you will find the Storage icon. Click the “Storage” icon, and will find the C folder as below. This means you are successfully connected to the AirLive WMU-6000FS storage function. 25 AirLive WMU-6000FS User’s Manual 2.3.2 Searching the computers Open “My Computer” on the desktop menu, and use the “Search” function to search the computer of “wmu6000fs” as below: 2.3.3 Search the “Entire Network” Manually Open Windows Explorer, and then click the My Network Places icon. Double click the Entire Network to view the components of the network. Select and click the Microsoft Windows Network icon, then the various network components showed in the list. 26 AirLive WMU-6000FS User’s Manual 2.3.4 Accessing Files via FTP AirLive WMU-6000FS offers FTP service for the clients which don’t support Microsoft Windows File sharing. You can use any FTP client utility to connect to WMU-6000FS with anonymous username and password (username: ftp, and without password) when the permission setting is set to “Guest Only”. But if you change to “Authorization users” mode, the accessing permission is limited, and then users have to input specified username/password to access any permitted folders. 27 AirLive WMU-6000FS User’s Manual C Ch haap ptteerr 33:: M Maakkiin ng gC Co on nffiig gu urraattiio on n The WMU-6000FS can be configured various settings through the Configuration Tool. Even you don’t know which IP is being used by AirLive WMU-6000FS, the Configuration Tool will help you to find it. All you have to do is click the “Query” button of the Configuration Tool. 28 AirLive WMU-6000FS User’s Manual When you enter the Web configuration page, you are requested to provide the “System Password” to activate the configurations. The default authorization password is “airlive”. After login, you could see these buttons: Press “Wizard” if you want to do basic settings with simpler way. (Please check chapter 3.1) Press “General” if you want to make some advanced settings. (Please check each item from chapter 3.2) Press “Log out” if you don’t want to do anything. 29 AirLive WMU-6000FS User’s Manual 3.1 Wizard With wizard setting steps, you could configure AirLive WMU-6000FS in a very simple way. Press button Next to start configuration. Step 0: Select Language 30 AirLive WMU-6000FS User’s Manual Step 1: You have to choose the DHCP option, default setting is Auto. If you use Server/Auto/Static mode, you need to set some TCP/IP settings for WMU-6000FS. If you are not sure these values, ask your MIS or ISP. 31 AirLive WMU-6000FS User’s Manual Step 2: You have to choose the Wireless mode, default setting is AP Only Mode. If you choose to use AP Only Mode, in next page, you could specify the SSID and the wireless channel number for WMU-6000FS. If you select the Wireless Client Mode, in next page, you would have to specify the AP that you want WMU-6000FS to connect to. 32 AirLive WMU-6000FS User’s Manual You have two ways to do this job. One is searching the AP that WMU-6000FS could get. In this page, you could select the AP you want WMU-6000FS to connect with. 33 AirLive WMU-6000FS User’s Manual The other way to add an AP is adding the SSID manually. Step 3: You have two ways to set time for WMU-6000FS. You could sync time with your PC, or set time manually. Step 4: If you use a whole new hard disk, please select “Yes”. If you already have data in this hard disk, you might want to select “No”. This option would format your hard disk to one partition if you select “Yes”. 34 AirLive WMU-6000FS User’s Manual To confirm your decision, WMU6000FS would ask you one more time. Step 5: Check your settings again before saving. Click “Discard Settings” and you could return the first page. If you want to change any setting, please click “Previous” button. If everything is okay, click “Save Settings”. 35 AirLive WMU-6000FS User’s Manual If you need to format disk, please wait the progressing bar become 100%. After all done, system would reboot automatically. Please wait 30 seconds at least for system restarting. 36 AirLive WMU-6000FS User’s Manual 3.2 Network Settings 3.2.1 DHCP Setting Following sections describe the various DHCP settings. z IP Settings: default machine IP is 192.168.123.254. This IP address must be unique to your network. You can change if necessary. This setting is only used for DHCP server mode, and Static IP mode. z DCHP Mode: The default mode is “Auto” 9 Client: If you have a DHCP server on the network, set this option to receive an automatic IP address and subnet mask assignment. 9 Server: The WMU-6000FS will be a DHCP server on the network. 9 Auto: Select this option to let WMU-6000FS send out a DCHP request during boot up. If you have a DHCP server on the network, the WMU-6000FS will receive an automatic IP address and subnet mask assignment. If no DHCP server on the network, the WMU-6000FS will be a DHCP server on the network. 9 Static: You can manually configure the IP address and subnet mask. z Server Setting: 9 Subnet Mask 37 AirLive WMU-6000FS User’s Manual 9 Low IP and High IP: decide the IP address range that DHCP server could offer. 9 Primary DNS / Secondary DNS: This feature allows you to assign DNS Servers. You could get this information from your ISP. 9 Gateway: The gateway IP address would be the IP address of an alternate Gateway. If you do not know how to set up the Gateway, leave this option blank. 9 Client List: When WMU-6000FS is as a DHCP server, here will show some information of DHCP client. 9 Fixed Mapping: DHCP server can assign the same IP address to a certain “MAC address”. 3.2.2 Wireless Setting Select the Wireless option in the configuration mode. 38 AirLive WMU-6000FS User’s Manual Followings information will let you know the current wireless operation status. z Wireless: you can select “Enable” or “Disable” the wireless function. z Status: to show the current wireless mode you are using. z Wireless mode description: to describe the each wireless mode’s major function. z Wireless modes selection: WMU-6000FS provides four wireless modes to select. Choose the wireless mode you need and click “Go” to set up detail functions. 3.2.2.1 Wireless AP only When you are in the AP only mode, you can set up the basic wireless functions as below: AP setting: z SSID: The SSID identifies a specific wireless LAN. Before associating 39 AirLive WMU-6000FS User’s Manual with a particular wireless LAN, a station must have the same SSID as the access point. The default SSID setting is “airlive”. NOTE: Please DO NOT set the same SSID with your current wireless network. z Channel: The radio channel number. The default channel is “6”. NOTE: Please DO NOT set the same Channel with your current wireless network. z Authentication: Authentication ensures that digital data transmissions are delivered to the intended receiver. This option enables you to set the authentication method for various encryption schemes for the selected AP. z Open or shared WEP Encryption: Select “64” or “128” bits in the pull-down menu for encryption method to protect your data by encrypting it. The WEP key can be 5~13 ASII characters or 10~26 hexadecimal characters based on whether you select 64 bit or 128 bit WEP encryption. 40 AirLive WMU-6000FS User’s Manual z 802.1X: IEEE802.1x authentication can be done by using an external RADIUS server. Please input the IP address of RADIUS server and Shared Secret. Please refer to FAQ in Chapter 7 to get more detailed information. z WPA-PSK: AP and Client need to use identical Pre-shared key (PSK). Please input 64 Hex key (0~F) or 8~63 characters in ASCII Type. Note. This device only supports WPA version 1. z WPA: WPA applies IEEE802.1x and Extensible Authentication Protocol (EAP) to authenticate wireless clients using an external RADIUS server. Please input the IP address of RADIUS and Shared Secret. 41 AirLive WMU-6000FS User’s Manual Please refer to FAQ in Chapter 7 to get more detailed information. Advance Setting: z Wireless mode: 11b/g mixed can let 11g or 11b computers both exist on the network, but the speed will be reduced. Select 11g only for maximum speed, but no 11b users will be allowed on the network. z Beacon interval: This represents the amount of time between beacon transmissions. The interval tells receiving devices on the network how long they can wait in low-power mode before waking up to handle the beacon. Beacons are packets sent by an Access Point to synchronize a wireless network. Specify a Beacon interval value between 1 and 1000. The default value is set to 100 milliseconds. z RTS Threshold: The RTS threshold specifies the packet size of an RTS transmission. This helps control traffic flow through an access point, especially one with many clients. The setting value range is from 1 to 2347, and default value is set to 2347. 42 AirLive WMU-6000FS User’s Manual z Fragmentation: In a network, the maximum size or length of a fragment is determined by the protocol used to transport the data. This value should remain at its default setting of 2346. If you experience a high packet error rate, you may slightly increase your "Fragmentation" value within the value range of 256 to 2346, even number only. Setting the Fragmentation value too low may result in poor performance. z DTM interval: A Delivery Traffic Indication Message (DTIM) is a countdown informing clients of the next window for listening to broadcast and multicast messages. When the Access Point has buffered broadcast or multicast messages for associated clients, it sends the next DTIM with a DTIM Interval value. AP clients hear the beacons and awaken to receive the broadcast and multicast messages. Enter a value from 1 to 255 for DTIM. The default value for DTIM interval is set to 3. z Preamble Type: The Preamble Type defines the length of the CRC (Cyclic Redundancy Check) block for communication between the Access Point and roaming wireless adapters. z SSID Broadcast: Enable or Disable a SSID broadcast. When enabled, the SSID of WMU-6000FS is sent to wireless enabled devices on the LAN. Press “Next” button, you could see the Wireless MAC Filtering setting. 43 AirLive WMU-6000FS User’s Manual The default setting is “Disable Mac filtering”, every wireless client could connect to this AP. When you select “ALL accept”, the wireless clients with the MAC addresses you enter bellow will be accepted to connect to this AP, the others will be rejected. When you select “ALL Reject”, the wireless clients with the MAC addresses you enter bellow will be rejected to connect to this AP, the others will be accepted. After press “Save” button, WMU-6000FS would show you this page about the wireless settings you have done. 44 AirLive WMU-6000FS User’s Manual 3.2.2.2 Wireless client mode Select the “Wireless client mode” and click “Go” to set up under the Wireless client mode. After entering the Wireless client mode setting, click the AP List icon to set up the AP connecting list. 45 AirLive WMU-6000FS User’s Manual Click the “Scan AP” to scan the existing AP list. Select the AP you want to connect and click “Add” to set up the AP list. Select the AP you want to connect and click “Add” to set up the AP list. Click “Mod” to specify the AP information. After clicking the “Mod” button, you 46 AirLive WMU-6000FS User’s Manual will find the following information and modify it depending on your actual wireless environment; this should be done necessarily when you are in the secured wireless network with WEP. Click the “Next” for advanced setting, or click “Save” or “Undo” for your need. 47 AirLive WMU-6000FS User’s Manual The advanced setting items are shown as below: For the meanings of above items, please refer to “Advanced setting”. After saving the values of client mode, you have to go back the “Wireless Client mode Basic Setting” page and click “Save” on the top of the page. Then you could check the settings that you have done. 3.2.2.3 WDS Hybrid mode Select the “WDS Hybrid mode” and click “Go” to set up After entering the WDS Hybrid mode setting, click the AP List icon to set up the AP connecting list. Then click the “AP Setting” icon and set up the AP. 48 AirLive WMU-6000FS User’s Manual NOTE: You MUST use the same channel with the AP you want to bridge. In this example, we set the channel to 6. Click the Advanced Setting icon, and you could set more values. About the meanings of these please refer to 3.2.2.1. Go back to Basic Setting, and click “Save”. 49 AirLive WMU-6000FS User’s Manual If everything goes fine, you could see the confirm page, and let you know configurations have been saved. 3.2.2.4 WDS only mode Select the “WDS only mode” and click “Go” to set up. After entering the WDS only mode setting, click the AP List icon to set up the AP connecting list, or add it manually. 50 AirLive WMU-6000FS User’s Manual NOTE: In WDS only mode, each AP that bridged together MUST use the same channel. After all, click “Save” to make it work. NOTE: Each WDS device MUST set the others’ MAC addresses, or the WDS mode would be failed. 51 AirLive WMU-6000FS User’s Manual C Ch haap ptteerr 44:: D Diisskk M Maan naag geem meen ntt In this section, you will know how to use the “Disk Management” tools to configure the hard disk setting. 4.1 Disk Utility Before using the hard disk, users need to format this hard disk first. Click “Format” button, and the WMU-6000FS will start to format the hard disk automatically. Once finishing the format, the WMU-6000FS will reboot automatically, and please reconnect the network in 30 seconds. The Hard disk will be formatted as “ext2” file system. 52 AirLive WMU-6000FS User’s Manual Advanced Function In the advanced function, two more options will be shown: The first option is used for disk checking. If you power off WMU-6000FS before normally shut down the system, you are recommended to do this. With second option, you could partition your hard disk to the size you want. Total Disk Capacity: to indicate the total capacity of the hard disk. This page shows the partitions of internal hard disk, you could format/check one of them. 53 AirLive WMU-6000FS User’s Manual Change the partition capacity: this tool can make you create up to four partitions. Specify the size of the partitions in megabytes and click the “Apply” to apply the new settings. When you click “Apply”, system would alert this message to confirm if you really want to do the format action. Warnings: Any data in the hard disk will be lost after creating the new partitions. The hard disk is formatted to EXT2 file system. It can not be connected directly to a Microsoft Windows system without reformatting. 54 AirLive WMU-6000FS User’s Manual C Ch haap ptteerr 55:: A AD DV VA AN NC CE ED DF FU UN NC CT TIIO ON NS S Click the Advanced Functions option on the left panel to display its submenus. The Advanced Functions menus enable you to configure the various system settings. Refer to the following sections for more details. 5.1 Config Backup This option enables you to back up your settings. Once you want to restore these settings, please click the F/W Upgrade option and use the bin file you saved. 5.2 Reset to Default This option enables you to reset the WMU-6000FS to its default factory settings. 5.3 Reboot This option enables you to reboot the device. 5.4 F/W Upgrade This option enables you upgrade the new firmware to this product 55 AirLive WMU-6000FS User’s Manual C Ch haap ptteerr 66:: M MIIS SC C 6.1 Administrator Timeout If users login, and idles for a period of time (e.g. 600 seconds), then that user will be logged out automatically. 56 AirLive WMU-6000FS User’s Manual 6.2 Change Password To change the password, you have to enter the old password and confirm the new password twice. 57 AirLive WMU-6000FS User’s Manual 6.3 System Time The System Time provides two options for you to select. Set Date and Time using PC’s Date and Time: synchronize the date and time with the computer. Set Date and Time manually: Manually setting up the date and time. 58 AirLive WMU-6000FS User’s Manual C Ch haap ptteerr 77:: P Prriin ntteerr S Seerrvveerr S Seettu up p 7.1Windows Operating system(NT based) Windows 2000 and XP have built-in LPR client, users could utilize this feature to Print. You have to install your Printer Driver on LPT1 or other ports (Standard TCP/IP port) 1.Open Printers and Faxs. 59 2.Select “Ports” page, Click “Add Port…” 3. Select “Standard TCP/IP Port”, and then click “New Port…” 60 AirLive WMU-6000FS User’s Manual 4.Click Next and then provide the following information: Type address of server providing LPD that is our NAT device: 192.168.123.254 61 AirLive WMU-6000FS User’s Manual 5. Select Custom, then click “Settings…” 62 AirLive WMU-6000FS User’s Manual 6. Select “LPR”, type ” lp“ lowercase letter in “Queue Name:” And enable “LPR Byte Counting Enabled”. 63 AirLive WMU-6000FS User’s Manual 7.Apply your settings 64 AirLive WMU-6000FS User’s Manual 7.2 Configuring on Unix-like based Platforms Please follow the traditional configuration procedure on Unix platforms to setup the print server of this product. The printer name is “lp.” In X-Windows, for example, In Redhat Platforms, Please follow the below steps to configure your printer on Red Hat 9.0.1. Start from the Red Hat---> System Setting---> Printing. 65 AirLive WMU-6000FS User’s Manual 2. Click New---> Forward. 66 AirLive WMU-6000FS User’s Manual 3.Enter the Pinter Name, Comments then forward. 67 AirLive WMU-6000FS User’s Manual 4. Select LPD protocol and then forward. 5. Enter Router LAN IP Address and the queue name "lp". Then forward. 68 AirLive WMU-6000FS User’s Manual 6. Select the Printer Brand and Model Name. Then Forward. 7. Click Apply to finish setup. 8. At last you must click Apply on the toolbox to make the change take effective. 69 AirLive WMU-6000FS User’s Manual In Command Mode: Linux has built-in LPR client ,You can utilize it for printing. You can manual set it or via the tool "printtool" in X-windows. PS: The spool name is "lp"------all lowercase letter. Below is my setting. /etc/printcap -----------------------------------------------------------------------------lp:\ :sd=/var/spool/lpd/lp:\ :mx#0:\ :sh:\ :rm=192.168.123.254:\ :rp=lp:\ -------------->key point :if=/var/spool/lpd/lp/filter: -----------------------------------------------------------------------------Then add the corresponding directory #mkdir /var/spool/lpd/lp Too see the detail ,please refer to the online manual in linux. #man printcap 70 AirLive WMU-6000FS User’s Manual 7.3 Apple OS 1.First, go to Printer center (Printer list) and add printer 71 AirLive WMU-6000FS User’s Manual 2.Choose IP print and setup printer ip address (router Lan ip address). 3.Disable “Default Queue of Server.” And fill in ‘ lp ‘ in Queue name item. 4.Printer Model: Choose “General” or Printer as below. 72 AirLive WMU-6000FS User’s Manual C Ch haap ptteerr 88:: T Trro ou ub bllee S Sh ho oo ottiin ng gss What can I do when I have some trouble in the first time? 1. How do I make the client to connect the WMU-6000FS? A: Please prepare for one RJ45 cable and connect the LAN port directly. WMU-6000FS already supports MDI/MDIX. 2. How to “Reset to default”? A: Press the buttons of “Shutdown” and “Backup” simultaneously over 6 seconds to reset the system to the factory default setting. 3. When I login the storage of WMU-6000FS via my network place, but I can not find any files of Folders even if I have plugged HDD in WMU-6000FS. A: First, check your HD status LED. If the HD is correctly connected, the HD status LED will flash. If the LED didn’t flash, maybe you forget to format the new HD before using it, or maybe the HD is not connected correctly, or maybe the HD is corrupted. ® WMU-6000FS supports FAT/FAT32/EXT2 file systems. If the format of HDD is NTFS, the device just can read files and can not copy any files to NTFS folders. 4. No matter what I do, I can not configure WMU-6000FS even if I setup fixed IP and can search or Ping WMU-6000FS. A: Please check the WLAN Led or HDD LED. If normal, they will be flash. 73 AirLive WMU-6000FS User’s Manual Otherwise Reset to Default and try it again. 5. I can not save the file which size is large than 2GB. A: Please check the file system of your HDD. If it is FAT or FAT32. This problem is existed. Suggestion: To convert to ext2. 6. I can’t access the shared folder with 98/Me. A: If you use Windows 98/Me, and want to access the authorized folder, you MUST have the same account and password in WMU-6000FS and your computer. 7. Why do I see the wrong name of file during the setting or in the my network place? A: Please select the language as you need. Please configure again. 74 AirLive WMU-6000FS User’s Manual How to setup wireless function? 1. How can I use the wireless function? A: Generally speaking, there are four modes to setup in this device. The common function is “AP mode”. The user can make this device as Wireless AP device as follows: First, the wireless client sets up the same SSID with WMU-6000FS and get IP from Router. Then Wireless client can associate the network or roam Internet via Router. 75 AirLive WMU-6000FS User’s Manual Wireless Client Mode: First, please configure the wireless setting of WMU-6000FS via wire. Then use Scan AP of AP-List and join it. Plug up the cable form WMU-6000FS. The client from LAN can use “Configure” utility to Query. 76 AirLive WMU-6000FS User’s Manual WDS only mode: WDSÆWireless Distribution system. This device also supports this function. How to configure this in your circumstance? The below Figure1 is for the reference. First, check which channel you want to use. For example, channel 10. Scan other AP which channel is 10 and supports WDS function. Second, add the wireless MAC address of WMU-6000FS in this Wireless Router # 2. (Figure2). And use Scan AP to find the wireless which SSID is “WR-2” and join it in the list. Third, if it is normal, LAN-Host#1 can find the devices, like Wireless Router #2 and LAN-Host#2. Figure 1: 77 AirLive WMU-6000FS User’s Manual Figure2: WDS Hybrid mode: This device also supports WDS and AP mode at the same time. How to configure this in your circumstance? The below figure is for the reference. 78 AirLive WMU-6000FS User’s Manual For the setting of WDS, please refer to the above WDS only mode. For AP setting, please refer to the AP mode. 2. How to configure 802.1x or WPA with Radius server? 79 AirLive WMU-6000FS User’s Manual Equipment Details PC1: Microsoft Windows XP Professional without Service Pack 1. D-Link DWL-650+ wireless LAN adapter Driver version: 3.0.5.0 (Driver date: 03.05.2003) PC2: Microsoft Windows XP Professional with Service Pack 1a. Z-Com XI-725 wireless LAN USB adapter Driver version: 1.7.29.0 (Driver date: 10.20.2001) Authentication Server: Windows 2000 RADIUS server with Service Pack 3 and HotFix Q313664. Note. Windows 2000 RADIUS server only supports PEAP after upgrade to service pack 3 and HotFix Q313664 (You can get more information from http://support.microsoft.com/default.aspx?scid=kb; en-us;313664) DUT Configuration: 1. Enable DHCP server. 2. WAN setting: static IP address. 3. LAN IP address: 192.168.123.254/24. 4. Set RADIUS server IP. 5. Set RADIUS server shared key. 80 AirLive WMU-6000FS User’s Manual 6. Configure WEP key and 802.1X setting. The following test will use the inbuilt 802.1X authentication method such as EAP_TLS, PEAP_CHAPv2 (Windows XP with SP1 only), and PEAP_TLS (Windows XP with SP1 only) using the Smart Card or other Certificate of the Windows XP Professional. DUT and Windows 2000 RADIUS Server Setup 1. Setup Windows 2000 RADIUS Server. We have to change authentication method to MD5_Challenge or using smart card or other certificate on RADIUS server according to the test condition. 2. Setup DUT 9 Enable the 802.1X (check the “Enable checkbox“). 9 Enter the RADIUS server IP. 9 Enter the shared key. (The key shared by the RADIUS server and DUT). 9 We will change 802.1X encryption key length to fit the variable test condition. 3. Setup Network adapter on PC 9 Choose the IEEE 802.1X as the authentication method. (Figure 2) Note. Figure 2 is a setting picture of Windows XP without service pack 1. If users upgrade to service pack 1, then they can’t see MD5-Challenge from EAP type list any more, but they will get a 81 AirLive WMU-6000FS User’s Manual new Protected EAP (PEAP) option. 9 Choose MD5-Challenge or Smart Card or other Certificate as the EAP type. 9 If choosing use smart card or the certificate as the EAP type, we select to use certificate on this computer. 9 We will change EAP type to fit the variable test condition. 82 AirLive WMU-6000FS User’s Manual Figure 2: Enable IEEE 802.1X access control 83 AirLive WMU-6000FS User’s Manual Windows 2000 RADIUS server Authentication testing: 1. DUT authenticate PC1 using certificate. (PC2 follows the same test procedures.) 2. Download and install the certificate on PC1. (Figure 4) 3. PC1 choose the SSID of DUT as the Access Point. 4. Set authentication type of wireless client and RADIUS server both to EAP_TLS. 5. Disable the wireless connection and enable again. 6. The DUT will send the user's certificate to the RADIUS server, and then send the message of authentication result to PC1. (Figure 5) 7. Windows XP will prompt that the authentication process is success or fail and end the authentication procedure. (Figure 6) 8. Terminate the test steps when PC1 get dynamic IP and PING remote host successfully. 84 AirLive WMU-6000FS User’s Manual Figure 4: Certificate information on PC1 Figure 5: Authenticating 85 AirLive WMU-6000FS User’s Manual Figure 6: Authentication success DUT authenticate PC2 using PEAP-TLS. 1. PC2 choose the SSID of DUT as the Access Point. 2. Set authentication type of wireless client and RADIUS server both to PEAP_TLS. 3. Disable the wireless connection and enable again. 4. The DUT will send the user's certificate to the RADIUS server, and then send the message of authentication result to PC2. 5. Windows XP will prompt that the authentication process is success or fail and end the authentication procedure. 6. Terminate the test steps when PC2 get dynamic IP and PING remote host successfully. 86 AirLive WMU-6000FS User’s Manual Problems of security level 1. Why can’t I access the file from my places after enabling Security Level? A: Sometimes, I can not access the folders via my places after enabling Security Level, like below: If the user sees the warning message, please restart windows and try it again. But there are some situations that the users can not access this folder if even they input correct the account and password as below: 87 AirLive WMU-6000FS User’s Manual Situation 1: The users can access the files or folders before WMU-6000FS is not enabled “security Level”. But when WMU-6000FS is enabled it, the authorization users can not login by inputting the account and password. Please restart your window OS and It can be accessed. Situation 2: Change the account and password of WMU-6000FS. In brief, the users have some Limit authority to access the folders, but if someone changes account and password this time, other authorization users can not access at all. Please restart your window OS. This is because the windows will cache some records so that the settings can not work immediately and the users have no idea to restart the device. 2. How do I configure the authority of file-shared by my places and ftp service? A: Take an example as follows: First, Set account 123 and password 12345. Then Click Configure the shared directory. 88 AirLive WMU-6000FS User’s Manual Create two folders. One is “read”, and the other is “write”. The authority is as follows: Then click the User Access Configuration and save “Security Level”. 89 AirLive WMU-6000FS User’s Manual Use search WMU-6000FS hostname, if you can not access the directory “Storage”. Then you will find the WMU-6000FS and will find some folders, like read, write and Storage. 90 AirLive WMU-6000FS User’s Manual If you are a guest and you just can copy the files in the folder ”read” and copy, move and delete the files or folders in the folder ”write”. ※But if you are an Authorization user. Anyway you directly click the folders “read and write”. However, you just have the same limits of authority with guests. Please login the folder “Storage” to begin. This product also defines two user-level(Guest and Authorization users) to share files by ftp service. The configuration is the same with above. There are two folders to share. If the users use guest to login ftp service, he just accesses read or write folders. Or login as Authorization users, he can access all. 91 AirLive WMU-6000FS User’s Manual