1
VISRAL L.P.
Python Solutions and Operating Environment
Visral® User Manual
Volume 1
13 October 2015
www.visral.com
P.O. Box 646
Rockwall, Texas 75087
Preliminary
2005 - 2015 Visral L.P. All rights reserved
VISRAL is a registered trademark of Visral L.P.
Visral User Manual
Document Revisions
Version
Number
Date
Document Changes
05/02/2014
0.1
Initial Draft
07/05/2015
0.2
Beta release
08/30/2015
0.21
Minor update
09/06/2015
0.22
Inclusion of Python 3 features and controls
10/13/2015
0.23
Minor update
Notes:
Chapter: Visral OE/3 Release Status
1. This guide may describe some features that have not been enabled.
2. The representative images may in some cases appear slightly different from those of
application itself.
3. References to right click or left click means respectively, pushing right mouse button
or pushing left mouse button.
Volume 1
2
Visral User Manual
Contents
VISRAL OE/3 RELEASE STATUS ............................................................................................................................... 5
INTRODUCTION ..................................................................................................................................................... 6
INSTALLING VISRAL AND PYTHON.......................................................................................................................... 8
Python Initialization ............................................................................................................................................10
QUICK START ....................................................................................................................................................... 12
WORKSPACE ........................................................................................................................................................ 13
Adjusting Window Panes - Vistas ........................................................................................................................14
Importing files .....................................................................................................................................................17
System Managers................................................................................................................................................18
PAD EDITORS ....................................................................................................................................................... 21
PYTHON CODE .............................................................................................................................................................27
SQL CODE ..................................................................................................................................................................29
FORMULA EDITOR ........................................................................................................................................................30
Execution History ................................................................................................................................................31
Python Import Aliases .........................................................................................................................................32
VENUES, PANELS, AND OPERATORS ..................................................................................................................... 33
QUICK START TUTORIAL: GETTING STARTED ......................................................................................................................33
VENUES......................................................................................................................................................................33
PANELS ......................................................................................................................................................................35
OPERATORS ................................................................................................................................................................35
SYSTEM VENUES ........................................................................................................................................................36
Tracking Toolbar .................................................................................................................................................37
Input Elements ....................................................................................................................................................40
Argument source .................................................................................................................................................43
Moving spreadsheet content view ......................................................................................................................45
Editing Cell Content .............................................................................................................................................45
Capturing spreadsheet data ...............................................................................................................................47
Selected data as a source for Operators .............................................................................................................47
Manipulating the spreadsheet ............................................................................................................................48
Munge Spreadsheets /Python .............................................................................................................................49
SERIES..................................................................................................................................................................50
DOCUMENTS........................................................................................................................................................ 51
Report and Trace Editing.....................................................................................................................................52
Volume 1
Chapter: Visral OE/3 Release Status
SPREADSHEET ...................................................................................................................................................... 44
3
Visral User Manual
Editing embedded items .....................................................................................................................................57
Guide embedded response ..................................................................................................................................59
Passage Management ........................................................................................................................................61
Encryption ...........................................................................................................................................................62
PYTHON CONTROL OF VISRAL ASSETS.................................................................................................................. 63
VISRAL DIAGRAMS – VENUES/PANELS/OPERATORS ............................................................................................ 68
CREATING APPLICATIONS ...............................................................................................................................................68
Now for Inputs ....................................................................................................................................................71
VENUE CONSTRUCTION DIAGRAMS..................................................................................................................................73
Panel Elements ....................................................................................................................................................75
Placeholders ........................................................................................................................................................80
VISRAL DIAGRAMS - UNIVERSAL .......................................................................................................................... 82
Loading, saving, and selecting files .....................................................................................................................83
Moving about the Diagram .................................................................................................................................84
Selecting an Element Group ................................................................................................................................85
Inserting Elements ..............................................................................................................................................86
Junctions .............................................................................................................................................................87
Editing Element Formulas ...................................................................................................................................88
Wiring Two Port Elements ..................................................................................................................................90
AUTOMATION ..................................................................................................................................................... 93
RESOURCES .................................................................................................................................................................93
Mimic ..................................................................................................................................................................93
Depend (Dependency Trees) ...............................................................................................................................95
INTRODUCTION TO AUTOMATONS ...................................................................................................................................96
Automaton Instantiation ....................................................................................................................................97
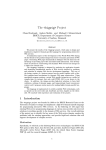
Product Specifications .......................................................................................................................................100
Icons and images by Aha-Soft, Yusuke Kamiyamane, LED24.DE, PC.DE, and Fatcow
Other images are the property of Visral L.P. or in the Public Domain.
Volume 1
Chapter: Visral OE/3 Release Status
APPENDIX .......................................................................................................................................................... 100
4
Visral User Manual
Visral OE/3 Release Status
Notes:
Some features in this release have been disabled or not included, either because
they had insufficient testing or a component they depend on wasn’t available in time.
Unreleased features and Venues covering applications in the likes of econometrics,
statistics, and engineering will be provided or updated as they become available.
For Visral OE users the section on PAD EDITORS is the most relevant.
NOTE: This diagram represents an estimate of the potential Visral Sire features. It does not
constitute a commitment to incorporate them in future releases.
Volume 1
Chapter: Visral OE/3 Release Status
5
Visral User Manual
Introduction
Covers:
Product Description
Visral Package
Hardware and Software Requirements
Product Description
Chapter: Introduction
The Visral platform provides an expansive GUI (graphical user interface) for Python and
other CLI (command line interface) applications, as well as intrinsic connectivity with
spreadsheets, sentient editors, active documents, process diagrams, and a resident
development system.
Volume 1
6
Visral User Manual
The Visral Package
By default, Visral installs its application and bridges in “Program Files (x86)”
under the directory name “Visral Sire” (or “Visral OE”). Included are several
subdirectories where the more permanent content is kept.
Visral installs the directory “Visral 3” in the user’s Document directory
along with several subdirectories for updatable semi-permanent data.
Program and manual references to Integrants are referring to files at
these locations.
The XML files “sqxlset.xml/sqxl_set.xml” (“sqxledt.xml/sqxl_edt.xml” for
Visral OE) contain property settings, syntax information, and icon image
descriptions.
As with Python, This version of Visral is a memory resident application that does not offload
working data structures to disk.
Hardware and Software Requirements
Windows: 7, 8, or 10
2 GB RAM (the more the better)
1024 x 768 or higher
Up to 1 GB free disk
2 button mouse w/ wheel
Extensive testing was done on Windows 7, but final checkout is performed on 8 and 10.
(However, OE has run under: Vista, MAC Bootcamp, and VirtualBox.)
Current release requires one of the following Pythons:
•
•
32 bit Python 2.7 (when available) and/or 3.4, or 3.5
64 bit Python 2.7 (when available) and/or 3.4, or 3.5
And its related modules: matplotlib, numpy, pandas, patsy, Pillow, pyparsing, pythondateutil, pytz, pywin32, scipy, seaborn, six, statsmodels, xlrd
Chapter: Introduction
The modules pyparsing, python-dateutil, pytz, and six are included in the latest version of
matplotlib. Final confirmation testing was performed with 2.7.10 and 3.4.3, however, Visral
has worked with earlier versions of Python 2.7. (Visral will install without Python present.)
Volume 1
7
Visral User Manual
Installing Visral and Python
Visral can be installed without Python but will require Python and various Python modules to
perform many of the functions described in this document. On start-up, Visral checks for
installed and missing Python components.
Visral is compatible with both 32 and 64 bit Windows OSs, but Python and its modules are
not. That means it is necessary to know what the host system is before installing them. If
Visral is installed first and run, it will identify the OS, printing in the Trace, one of the two
lines:
Checking operating system type: 32_bit
Checking operating system type: 64_bit
Visral requires the Python version to match the OS; i.e. 32 bit Python with 32 bit OS and
64 bit Python with 64 bit OS. (It is possible to run 32 bit Python on a 64 bit OS but that
requires prior alteration of a startup file and there is no conformation testing for the
combination.)
The first time Visral Sire is run it needs to be “Run as Administrator”. (This not true for
Visral OE.)
The first time Visral is started (3 or OE) it will display the following menu. Visral allows
connections to a single Python 2 plus a single Python3. If more than one of either is
selected, the first encountered will be chosen. If none is selected, the first available will be
used.
The Load button will start
or restart all selected
bridges and the systems
(Pythons).
If the Developer checkbox
is selected then the bridges
will become visible and
display the actual
instructions sent to the
Python interpreters.
Chapter: Installing Visral and Python
If the Installed Systems
window is empty it means
no Python was located.
Clicking the help button will
display help in installing
Python.
This Bridge Management
menu can be call up any
time from the Managers
dropdown.
Volume 1
8
Visral User Manual
With Python 2 and 3 installed the Trace printout after Load might look as follows:
Registry indicates Python 2 is installed at C:\Python27.
2.7.10 (default, May 23 2015, 09:44:00) [MSC v.1500 64 bit (AMD64)]
Registry indicates Python 3 is installed at C:\Python34.
3.4.3 (v3.4.3:9b73f1c3e601, Feb 24 2015, 22:44:40) [MSC v.1600 64 bit (AMD64)]
Clicking entry Discover Python Modules in the
managers dropdown reveals what modules are
installed and what is needed to support the
advanced features of Visral Sire. (Some of the
demonstration features of Visral OE may require
them.)
Currently
Installed
Installed
Installed
Installed
Installed
Installed
Installed
Installed
Installed
Installed
Installed
Installed
Installed
Installed
Installed
Installed
Installed
installed Python 2 modules:
Python 2 module:gmpy2 2.0.5
Python 2 module:matplotlib 1.4.3
Python 2 module:numpy 1.9.2
Python 2 module:pandas 0.16.1
Python 2 module:patsy 0.3.0
Python 2 module:Pillow 2.9.0
Python 2 module:pip 7.0.1
Python 2 module:pyparsing 2.0.3
Python 2 module:python-dateutil 2.4.2
Python 2 module:pytz 2015.4
Python 2 module:pywin32 219
Python 2 module:scipy 0.16.0b2
Python 2 module:seaborn 0.5.1
Python 2 module:setuptools 16.0
Python 2 module:six 1.9.0
Python 2 module:statsmodels 0.6.1
Python 2 module:xlrd 0.9.3
Currently
Installed
Installed
Installed
installed Python 3 modules:
Python 3 module:numpy 1.10.0b1
Python 3 module:pip 6.0.8
Python 3 module:setuptools 12.0.5
Following modules are required for advanced Visral Sire operations:
Missing Python 3 module:matplotlib
Missing Python 3 module:pandas
Missing Python 3 module:patsy
Missing Python 3 module:Pillow
Missing Python 3 module:pyparsing
Missing Python 3 module:pywin32
Missing Python 3 module:scipy
Missing Python 3 module:statsmodels
Missing Python 3 module:seaborn
Missing Python 3 module:xlrd
Volume 1
Chapter: Installing Visral and Python
The follow illustration is typical of the kind of
printout to be expected.
9
Visral User Manual
Python Initialization
The Venue file _pyprime.vn.xml contains
Operators with Python startup
assignments for each module such as
this one for numpy (init_numpy):
import numpy as np
np.set_printoptions(precision=4,
suppress=True)
np.set_printoptions(linewidth=180)
Each is executed if and only if the
particular module is detected as
installed. The Operators pyinit2 and
pyint3 are also executed for Python 2
and Python 3 respectively.
Chapter: Installing Visral and Python
User initialization code can be added in
_pyprime.py (_pyprime_oe.py for OE)
which can be accessed via the Formula
editor.
Volume 1
10
Visral User Manual
Pre-packaged Python installers
There are a number of sites that offer Python distributions. Continuum Analytics is one of
those with both 32 and 64 bit Python 2 and Python 3. These distributions go under the
name of Anaconda, contain a large assortment of the most common Python scientific and
statistical modules, and are available for personal use at no charge. (Go to:
http://continuum.io/ and follow: download and Anaconda)
If you choose to install Anaconda, do not use the default Anaconda installation directory.
Change the install directory to the conventional C:\Python2X\ or C:\Python3X\. (The default
Anaconda directory may work fine, but conformation testing is not performed using it.)
Installing Python Directly
Source for Python 2 and 3.
https://www.python.org/downloads/windows/
You may install Python 2 or Python 3 or both.
For 32 bit OS download and run Windows x86 MSI installer
For 64 bit OS download and run Windows x86-64 MSI installer
Installing Modules Directly
Source for modules in ‘Python wheel’ format.
http://www.lfd.uci.edu/~gohlke/pythonlibs/
Visral has simplified the process of installing Python modules. After downloading the Python
modules of interest in “wheel format”, simply drag the files to a Visral PAD editor (left
window pane) and they will be installed. (If both Python 2 and 3 are installed, the PAD will
need to be set to the Python type, 2 or 3, to indicate which is the destination.)
The files must be dropped onto the PAD editor (left window pane) to avoid accidentally
embedding them in a document.
For the drag and drop to work properly, the file names should not end in brackets
containing a number, i.e. (1). This extension to the name is automatically appended
when downloading subsequent copies of the same file.
Chapter: Installing Visral and Python
When Installs are Complete
Visral will need to be restarted.
Volume 1
11
Visral User Manual
Public Dataset Sources
http://catalog.data.gov/dataset
http://www.kdnuggets.com/datasets/index.html
http://lib.stat.cmu.edu/datasets/
The dataset used in this manual “Standard and Poor's (S&P) 500 Monthly Market Data
including Price, Dividend, Earnings and P/E Ratio” was prepared and made publically
available by Robert Shiller. http://datahub.io/dataset/standard-and-poors-500-shiller
Quick Start
Visral Sire is provided several tutorials, all of which can be found under HELP of the
program’s main menu.
From the HELP’s submenu ‘Guide’ select the InstallPython entry. This will load and display a
tutorial in the Guide (read only document window). It provides instructions on how to
download and install Python and its modules.
From the HELP’s submenu ‘Guide’ select the GettingStarted. This will load and display a
tutorial in the Guide explaining application use. It is particularly useful for those interested
in using Python's advanced technical and business solutions or for simply learning Python
itself.
The preceding tutorial assumes Python and its modules have already been installed. It is
interactive and uses synthesized voice to help explain the operations of Visral. (This
document was created using Visral and therefore is also an illustration of what users can
themselves produce.)
Chapter: Quick Start
From the HELP’s submenu ‘Guide’ select the VenueBuilding entry. This will load and display
a tutorial in the Guide explaining how to create Venue applications. A copy of this tutorial
can be found in the Volume 1 of the Visral User Manual. This is useful for learning to
produce distributable custom solutions, possibly integrated with dataset spreadsheets,
functional diagrams, and two-way access to Windows resources and menus.
Volume 1
12
Visral User Manual
Workspace
Covers:
Layout
Adjusting Window Panes
Toolbar’s Multiple Faces
Recent Files
System Managers
Layout
Visral has three main window panes. The one with focus will have a white background,
where as the background of the other two will be light grey. To compensate for the dearth
of vertical space that followed HD video to PC screens, the layout is designed around a
single morphing toolbar and the elimination of ornamental and little used widow frames.
Chapter: Workspace
The Trace window by default is displayed in the bottom window but can also be displayed in
the right one, allowing the lower pane to be collapsed.
Volume 1
13
Visral User Manual
The legend to the right highlights the
three panes and lists the various
resources each can displayed and be
interacted with.
The main menu names in capitals (FILE,
EDIT, VENUES, SYSTEM, and HELP) are a
standard part of the Visral system. The
titles between VENUES and SYSTEM are
automatically created from the detection
of installed and selected Venues.
Adjusting Window Panes - Vistas
Window pane sizes can be adjusted through the centrally located toolbar Managers button.
Clicking the button itself will expose four vista buttons to the right. Vistas are views of the
workspace, which can be individually selected.
Window pane sizes for each vista can be adjusted by first selecting a vista, revealing the
four adjustment buttons. Clicking these buttons will cause a percentage change in the panes
in accordance with the button images for that particular vista.
Grayed entries in dropdowns and menus indicate those features are not available either
because they depend upon other conditions or they have not been released.
Volume 1
Chapter: Workspace
More options can be found under the dropdown of the Vista 4 button. Workbench refers to
file and condition assignments of each vista.
14
Visral User Manual
Toolbar’s Multiple Faces
There is a single main toolbar that changes with the particular window that has focus.
The main toolbar is divided into 5 sections of icon buttons.
Section
Description
1
See section 1 table below for details
The first ten icons in the toolbar apply individually
to each window that has focus. The ones that are
not applicable will be grayed.
2
The second two icons allow switching the left
window pane between Pad editors and Panels.
3
This button and its dropdown allow access to
vistas, window size adjustments, the Python
Entities menu, and Visral Bridges.
4
See section 4 table below for details
5
The next four icons are different depending on
which window has focus and the nature of the
window’s content.
The last four icons allow switching the right
window pane between spreadsheets, documents,
diagrams, and automated resources.
Section 4 (Icons change depending on the process/window that has focus.)
Instances
Pad
4
Formula
1
Panel
Multiple
Spreadsheet
Multiple
Report
1
Guide
1
Trace
1
Diagram
Resize
Morphing toobar
Chapter: Workspace
Windows
Yes
4
Volume 1
15
Visral User Manual
Section 1 (Icons may be grayed depending on the process/window that has focus.)
Description
Input File – This button will bring up the load file menu. Depending on
which window has focus, it will be Python, CSV, RTF, XML or other file types.
Save File – This button will bring up the save file menu. Depending on
which window has focus, it will be Python, CSV, RTF, XML or other file type.
(Saving a file does not automatically close it.)
Close Window - This button will close the window in focus without saving
its contents.
Print Window Contents - Pressing the print button will bring up the printer
menu for printing contents from the window that has focus.
Cut - This button will cause the selected content of the window with focus be
copied to the clipboard and removed.
Copy - This button will cause the selected content of the window with focus
be copied to the clipboard without being removed.
Paste - This button will cause the clipboard contents to be inserted at the
location of the cursor, or overlaid if contents had been selected.
Find - Brings up the search menu for windows that have that facility.
Undo – undoes the last operation of window that has focus.
Redo – redoes the last undone operation of window that has focus.
Chapter: Workspace
Button
Volume 1
16
Visral User Manual
Importing files
Depending on which window has focus, the main menu FILE entry provides more options
than through the Input File toolbar button. Visral also supports drag and drop of files, but
they can only be dropped onto the left window pane (PADs, Formula, or Panel). (Do not
drop them in the Report, Guide, or Trace as it will embed them in the document.) XML files
will go to the Diagram, Python to the Pad that has focus, CSV files to the spreadsheet, and
RTF files to the Report.
Venues, Datasets, and other feature are added to Visral Sire through interactive documents.
Certain updates are also implemented by means of interactive documents. Downloading an
extension and dragging the file to Visral title bar will load it into the Guide window where it
will automatically or under user supervision load the appropriate features.
Recent Files
The recent file menu tracks file activity. When a particular file is selected the list box to the
right will show the possible destinations for it. Double clicking an entry in the box will send
the file to that location.
•
Visral processes all XML, CSV, RTF, and ASCII files without reliance on any other
applications. The same is true for all diagram graphics and their compilations,
document operations, automaton implementations, and spreadsheet manipulations.
Volume 1
Chapter: Workspace
Notes:
17
Visral User Manual
System Managers
As the name implies, this dropdown menu provides access to various managers, which
includes window resizing, Python entities (variables, functions, modules, and etc.), and
bridges.
Double clicking on an entry will cause its value (or type) to be printed in the Trace. The
Refresh will update the listing with any new entities that may have been created since the
menu was displayed. (The unassigned buttons are reserved for future features.)
Volume 1
Chapter: Workspace
Python Entities shows available variables (pointers to content) and their type along with the
first part of the content value. Also displayed are code created functions and loaded
modules. Clicking on the column headings will cause alphabetical sorting of rows.
18
Visral User Manual
Bridge Management allows control over bridges that connect to various resources. The first
is the Python systems. Although Visral will scan for the installation of Pythons 2.6 through
2.9, and 3.3 through 3.7, it will only connect to those that have a corresponding bridge.
Shown below is a list of available bridges covering 2.7, 3.4, and 3.5. The trailing s in the
name indicates 32 bit, where as those without the s are 64 bit bridges.
Visral has one socket for a Python 2 bridge and one for a Python3. If more than one of
either is selected, the first encountered will be chosen. It is not necessary to select a
corresponding bridge form the list as that is performed automatically by Visral. (The
Installed Systems list may include other resources beyond Python, along with the Available
Bridges listing additional bridge types.)
Chapter: Workspace
The Load button will start or restart all selected bridges and the systems (Pythons).
Volume 1
19
Visral User Manual
Operation
Description
Re-start
Python
This allows Python to be re-started should it for some reason become
hung. (This type of behavior can occur if Python code formed an infinite
loop.) The Visral’s Python priming file will be reloaded, but any previous
Python data will be lost. Spreadsheets will remain as they are not directly
linked to Python but will require executing the Generate DataFrame from
Spreadsheet Operator to recover its DataFrame image.
Re-start
Python in
Developer
Mode
Checking this entry will allow the re-start of Python but in this case the
bridge program will be visible. It will display all of the transactions
between Python and Visral. The priming file will be reloaded, but any
previous Python data that might have existed will be lost. Spreadsheets
will remain as they are not directly linked to Python but will require
executing the Generate DataFrame from Spreadsheet Operator to recover
its DataFrame image.
This can be useful for debugging freshly created Python code as it shows
any error responses for each individual Python instruction. (Visral itself
tries to interpret and simplify them.)
Depending of the bridge version, a high resolution timestamp for each
instruction will also be displayed.
Other
Closing popup menus: Clicking on the background of the relevant windowpane will cause
a popup menu to close. Other menu types will have a close button.
Chapter: Workspace
Closing a tab: A Panel, Spreadsheet, or Diagram tab and its contents that have focus can
be closed by either clicking the Close Window icon in the toolbar or by right clicking on the
window itself and selecting the Close entry. Both these action will cause a conformation
popup to appear requiring an OK (or cancel).
Volume 1
20
Visral User Manual
PAD Editors
Covers:
Basic PAD Features
Executing Python Code
Executing SQL Code
The PAD editors are selected by first selecting the PAD button on the toolbar and then
choosing the particular editor of interest from the five tabs. Except for the Formula tab, the
name on each tab indicates the language it is configured for.
The number following the name specifies
which Python interpreter, 2 or 3, will
receive the code when it is executed.
If both Python 2 and 3 are installed, the
two interpreter lines in the context menu
to the right will be displayed allowing it
to be changed.
Chapter: PAD Editors
The number also determines where a
module will be installed if one in wheel
format is dragged and dropped in the
PAD window.
In the case of the formula, it indicates
which history will be displayed.
The destination of code can also be
controlled in real-time through the use of
Volume 1
21
Visral User Manual
Chapter: PAD Editors
the vr.gen(2) and vr.gen(3) commands. These override the editor assignments.
Volume 1
22
Visral User Manual
The editors can be configured to process or
communicate with different language systems or
networks. This includes setting syntax coloring,
indentation, auto completion, and execution. This
is done in the Main Menu -> SYSTEM ->
properties -> Properties Panel. The image to the
right illustrates selecting the forth PAD editor to
be configured for Python. (See Installation Notes
for availability and status.)
FILE menu for PAD editors.
Selected code in the editor can be instructed to execute by clicking on one of the buttons.
(The editors must have focus for these particular buttons to appear.) The program language
assigned to the edit dictates which bridge and its associated engine or network service will
receive the selected code.
Morphing Menu Description
Left clicking on the Report icon with the plus symbol will execute the
currently selected code and send results to the Report editor.
Left clicking on the Report icon with the button symbol will embed the
selected code in the Report editor as a button. When the button is clicked in
the Guide a Panel entry with the code will be created. (See document section
for details.)
Left clicking on the Report icon with the gear symbol will embed the selected
code in the Report editor as a button. When the button is clicked in the
Report of Guide the code will be executed. (See document section for
details.)
Left clicking on the blue triangle icon will execute the currently selected code
and send the results to the Trace editor.
Volume 1
Chapter: PAD Editors
Button
23
Visral User Manual
Left click in the PAD editors will produce the following popup.
•
•
•
•
The Paste HTML allows pasting all of the markup information along with the text
copied from a page displayed on a browser.
The Copy Selected to Report is a shortcut, replacing copy here and paste in report.
The Type of Selected returns the type designation of selected word or method
sequence.
Save Selected to Clipboard as HTML is provided to allow colorized copies of code to
be used in the creation of web pages.
Python code can be copied from web pages and PDF files and pasted into the PAD editors. If
Visral detects the three right angle brackets “>>>”, the “In [num]”, or the other artifacts of
various Python interfaces, it will attempt to remove them before pasting. However, it cannot
correct for such things as missing leading spaces within routines or conditional statements,
or a wrapped instruction that shows up as multiple lines in the original text.
Wrapped instructions can be recognized in the PAD editors by the fact that subsequent lines
will indent to the left (« that way), as illustrated below.
Chapter: PAD Editors
plt.text(0.5 * (a + b), 1, r"$\int_a^b f(x)\mathrm{d}x$",
horizontalalignment='center', fontsize=20)
Volume 1
24
Visral User Manual
Single or multiple variable names may be
selected for inserting into editor text by
right clicking and selecting the Choose and
Insert Variable Name entry of the context
menu.
For certain variable types, the value can be
chosen to be inserted as opposed to the
name. Use the Content button to insert a
value. (The dagger followed by a number is
a type designation used internally by Visral.)
The point of insertion is where the cursor
was when the right click occurred to bring
up the context menu.
Chapter: PAD Editors
Of course, simply typing will display potential name choices as illustrated below. It can be
seen that typing the additional period changes the choices which include variable names to
strictly choices of methods.
Volume 1
25
Visral User Manual
For convenience, file locations
can be entered into static
Python code through a
windows files menu. This is
accomplished by the Choose
and Insert File Name in the
right click context menu.
Chapter: PAD Editors
That will lead to the following menu appearing from which an entry can be chosen. The
result is the full path name enclosed in single quotes will be entered into the editor at the
point of the first left click.
Volume 1
26
Visral User Manual
Python Code
Python runs natively on five of the Visral editors; the four Pad editors and the Formula
editor. The results from the four PADs are directed to either the Trace or Report document
editors; the Formula just to the Trace. The built-in Python functions "input" and "raw_input"
are not applicable for this reason. Otherwise, the behavior is as would be expected from its
normal interpreter self, executing the last line of code and sending the result to Trace editor
when its entry has been is completed. (However, if a line of code is typed into the middle of
existing code, it will not be executed. In other words, the following line must be blank or
nonexistent for the preceding line to be executed.)
Unlike command line interpreters, Visral allows copying, pasting, and executing selected
ranges of code. As viewed below, the selected five lines of code can be executed with their
results being sent to either the Trace or Report. Left clicking on the blue (left) triangle icon
on the toolbar will send the results to the Trace editor, the Report icon with the plus symbol
will send it to the Report editor. (The function of the other two icons is described in the
document section.)
All editors are Rich
Text Format based.
The four Pad and
Formula are specially
adapted for displaying
Python source code
with syntax coloring
and auto indentation.
Indentation works in
both directions. A carriage return at the end of a line will return the cursor back to the
previous indent on the next line. Subsequent returns will step back indents without inserting
another line until the left side of the page is reached.
Python keywords
['and', 'as', 'assert', 'break', 'class', 'continue', 'def', 'del', 'elif', 'else', 'except', 'exec',
'finally', 'for', 'from', 'global', 'if', 'import', 'in', 'is', 'lambda', 'not', 'or', 'pass', 'print', 'raise',
'return', 'try', 'while', 'with', 'yield']
abs, all, any, basestring, bin, bool, bytearray, callable, chr, classmethod, cmp, compile,
complex, delattr, dict, dir, divmod, enumerate, eval, execfile, file, filter, float, format,
frozenset, getattr, globals, hasattr, hash, help, hex, id, input, int, isinstance, issubclass,
iter, len, list, locals, long, map, max, memoryview, min, next, object, oct, open, ord, pow,
print, property, range, raw_input, reduce, reload, repr, reversed, round, set, setattr, slice,
sorted, staticmethod, str, sum, super, tuple, type, unichr, unicode, vars, xrange, zip,
__import__, apply, buffer, coerce, intern
Volume 1
Chapter: PAD Editors
Python Built-in Functions
27
Visral User Manual
As illustrated to the right, the editors also
provide command preview and auto completion.
A tab will complete the current word leaving the
popup; at which point a period show the next
set of options. A return will complete the word
and remove the popup. Double clicking an
expression in the popup will cause it to replace
the last uncompleted word. A down cursor key
will cause the focus to enter the popup. A left or
right mouse click outside of the popup will
cause it to close.
Visral communicates with Python through its
standard interpreter interface by sending it code
sequences. Python, or rather Python code,
communicates with Visral by means of the following functions.
visral.pyd
Output
Description
vr.show()
Yes/no
Show Python images in Report or Trace.
vr.gen(…)
Yes/no
These instructions trigger Visral commands and prevent any
further Python instructions from executing until they have
completed the task. For example:
vr.gen.open(C:\Users\sqxl\Documents\;py)
print vr_path
will open a files menu and wait for the user to select a file. When
the menu closes, Python will proceed and execute the following
print statement. (vr_path and vr_file contain the results from the
open menu.)
vr.set(…)
no
These instructions trigger Visral actions that are not Python
dependent; i.e. does not require Python be installed.
vr.ask(…)
yes
Retrieve Visral parameters or settings.
vr.job(…)
yes
Encrypt/Decrypt passages, code, commands and requests.
vr.run
yes
For internal use only.
vr.bitmap
yes
For internal use only.
Detail on the above instructions can be found in the document section of this manual.
1. The above assumes “import visral as vr” in _pyprime.vn.xml.
2. Visral converts plt.show() and fig.show() to vr.show(plt) and vr.show(fig)
respectively.
3. The module visral.pyd is automatically installed by Visral.
4. Pandas plotting functions need to be followed by the plt.show() in order to output a
Python image to the Trace or Report.
Volume 1
Chapter: PAD Editors
Notes:
28
Visral User Manual
SQL Code
Visral utilizes the Python’s embedded sqlite3 module to execute SQL commands. If the
editor language is set to SQL in the Properties Panel then SQL text can be typed in directly
and it will be both highlighted and executed correctly. (Visral performs the necessary
wrapping to permit execution by Python.)
As illustrated below, Python code can also be included. They will be highlighted as usual but
in italics and can be executable along with the SQL statements. (As with Python, sqlite3
keywords should not be used for variable names.)
connect
drop table if exists tbl
create table tbl (one varchar(10), two smallint);
insert into tbl values('SQXL',8);
insert into tbl values('Visral', 16);
commit
select * from tbl;
close
df=pd.read_table('http://www.cpc.ncep.noaa.gov/products/precip/CWlink/daily_ao_
index/monthly.ao.index.b50.current.ascii','\s+',header=0,
names=['Year','Month','Value'])
vr.load(df)
t = np.linspace(1,27,27).reshape(3,3,3)
pan = pd.Panel(t)
print pan
print pan.ix[0,:,:]
Editors set to SQL, load from and save to files with the ‘.sql’ extension. This allows pure SQL
statements to saved and loaded. Python statements within those files appear as they are,
but in italics for discrimination.
SQL code cannot be embedded into the Report as either an Operator or Execute button.
However, results of an execution can be directed to the Report as well as the Trace.
SQLite3 keywords:
connect, commit, close, select, rollback, create, insert, update, delete, drop, alter, table,
into, from, values, where, order, set, count, if, exists, group, by, add, on, inner, join,
column, having
SQLite References
http://www.sqlite.org/
Chapter: PAD Editors
https://docs.python.org/2/library/sqlite3.html
Volume 1
29
Visral User Manual
Formula Editor
Editing an element in the diagram window or the formula of a spreadsheet cell will open up
the formula editor. The following is an example of its content for a document NEXT element.
(The expressions and their number may differ depending on diagram, element, and cell
types.)
§[Description]
Double clicking on the very top of any column will identify it as an X parameter.
Clicking and dragging the cursor vertically along the index column will select
the desired rows.
§[Program]
vr.set(panel,Lag-1,1)
Tag expressions starting with a section symbol § followed by square brackets enclosing an
identifier word are inserted to separate the different fields of an element. These lines are
prevented from being deleted, added to, cut, pasted over or changed in any other way.
§[Description]
The text represents what will be displayed in the Note window and optionally machine
spoken.
§[Program]
This location contains program code that will be executed after the Next button is pressed.
Chapter: PAD Editors
See Spreadsheets and Diagrams for more details concerning the formula editor.
Volume 1
30
Visral User Manual
Execution History
The history of executed code can be shown in the Formula editor by selecting
History
icon from the Morphing menu. It will display up to the last 30,000 characters sent to Python
by the bridge from the code executed from both the PAD editors and Panel Operation. It
does not record errors or results. However, it does display what was actually sent as can be
seen below. This is the code processed by the SQL editor above. It illustrates the wrapping
Visral performed on the SQL statements to have them processed by Python.
Code in the Execution History listing can be re-executed by selecting that portion of interest
and clicking the
icon from the Morphing menu.
Notes:
The display of the Execution History does not automatically update and needs to be
refreshed by clicking the History button causing the latest copy to be fetched from the
currently active bridge.
The history of any code executed from encrypted sources is not recorded.
Chapter: PAD Editors
Volume 1
31
Visral User Manual
Python Import Aliases
The following is a list of aliases assigned to imported modules in the Visral’s Python startup
file _pyprime.vn.xml located in the Program Files (x86)/Visral Sire/Venues directory.
Alias
Module Component
np
numpy
sp
scipy
mpl
matplotlib
mpimg
matplotlib.image
plt
matplotlib.pyplot
cm
matplotlib.cm
pl
matplotlib.pylab
dt
datetime
pd
pandas
web
pandas.io.data
sm
Statsmodels.api
smf
statsmodels.formula.api
sns
seaborn
vr
visral (assigned internally, not in the pyprime file)
These are pretty standard aliases and code supplied with Visral assumes their assignments
exist. It is possible some program examples may be found on the Internet that do not
employ these, in which case it will be necessary to update their codes before running them.
The file can be accessed from the Formula
editor by selecting the entry to the right.
When finished, select the Save Python
priming file entry.
Volume 1
Chapter: PAD Editors
Added Python startup assignments can be
made in the user file _pyprime.py located in
the Documents/Visral 3/Venues directory.
32
Visral User Manual
Venues, Panels, and Operators
Covers:
Quick Start Tutorial
Venues
Panels
Operators
SYSTEM Venues
Tracking Toolbar
Input Elements
Argument Source
Quick Start Tutorial: Getting Started
Under HELP in the main menu select the Guide: Getting Started entry. This will load a
tutorial and display it in the Guide (read only document window).
Clicking the AUTO button in the Guide document will automatically install
Venues, load Datasets, and display Folders within a Panel, while activating
and explaining various operations in a step by step fashion.
The following sections describe how to use existing applications (Venues). To see an
explanation on the creation of Venues, Panels, and Operators see Visral Diagrams in this
document.
A Venue is a solution set composed of one or more Panels, each with one or more
Operators. They are intended to bring together a group of solutions covering a specific topic
or problem area. Venues are automatically loaded from XML files located in one of two
directories:
• C:\Users\...\Documents\Visral 3\Venues
• C:\Program Files (x86)\Visral Sire\Venues
New Venues are installed from RTF file distributions whose creation is described in the
Document section of this manual. This permits one or more of them to be accompanied by
datasets, examples, and explanations; all within a single file.
Volume 1
Chapter: Venues, Panels, and Operators
Venues
33
Visral User Manual
All installed non-system Venues are located under VENUES of the main menu. Those with
checks indicate loaded Venues. To load or unload a Venue simply click the appropriate entry
to toggle its condition. (Venues are created from construction diagrams as described in the
Visral Diagrams section of this manual.)
Loading a Venue will cause the insertion of entries
into the main menu between the VENUES and
SYSTEM titles. Clicking any of those entries will
expose a dropdown listing the available Panels. (The
Venue names come from the name of their
filenames. The names of the inserted entries in the
main menu come from the elements within the file
itself and not from the name of the file.)
There can be multiple folders
within each displayed Panel.
Stat101
Stat101 is a collection of
various statistical solutions
from the Python modules pandas and statsmodels.
Time Series Analysis:
http://www.itl.nist.gov/div898/handbook/pmc/section4/pmc4.htm
http://statsmodels.sourceforge.net/devel/tsa.html
Plotter is a collection of plotting routines based on the seaborn Python module out of
Stanford University.
http://stanford.edu/~mwaskom/software/seaborn/
Note: Panels listed under the main menu’s SYSTEM entry should not be altered as they are
subject to updates and additions. If it is desirable to extend or make alterations to them,
that should be done to a renamed copy. If the copy starts with a tilde (~) it will be added to
those in the SYSTEM dropdown after a restart.
Volume 1
Chapter: Venues, Panels, and Operators
Plotter
34
Visral User Manual
Panels
Panels are enhanced replacements for Microsoft's menus and generally contain a number of
operators. The left window pane will show the Panel view by
selecting the PANEL button in the toolbar. Clicking on a sub-menu
under SYSTEM or any of the other main menu entries between VENUES and SYSTEM will
also bring up the relevant Panel.
Operators
Operators are the specific entries within
a Panel that causes an execution or
activity of some type. Their text is gold
color and they have a gold box or a
green file symbol for its icon.
The image to the right is of a portion of
the Stat101 Panel. The Operator that
the cursor is over has turned red and the top button of the tracking toolbar aligns with it. A
left click on the text or any of the menu buttons will cause the processing to take place.
Right click on an Operator will reveal a menu with two entries. Selecting Verbose Execution
will execute and trace the actual code as it is fed to the bridge. This can be helpful in
developing new solutions or understanding a specific Operator’s requirements and actions.
Auxiliary Operators and Conditions
This provides access to information by sending the default browser to a
previously assigned web page. (Does not cause the Operator to execute.)
Clicking (toggle) this will instruct the Operator to produce a plotted output
when executed.
Clicking this will cause an example to be executed illustrating the functions of
the Operator. The example’s code is stored under the #PAYLOAD entry of the
Operator’s element.
The function of the toggle icon varies with individual Operators. (Does not
cause the Operator to execute.)
This icon is only revealed when the cursor is over the line the element is on
and reveals a popup explanation of the element when passed over.
Volume 1
Chapter: Venues, Panels, and Operators
The following icons may be found to the right of some Operators.
35
Visral User Manual
SYSTEM Venues
Properties
Panel for setting various system components
About
List of Copyrights, Trademarks, Patents, and Credits
Munge
Chapter: Venues, Panels, and Operators
The Munge Panel below is a collection of operations associated with manipulating
DataFrames or creating DataFrames, Series, arrays, matrixes, or lists from Spreadsheets.
Volume 1
36
Visral User Manual
Tracking Toolbar
There is a tracking toolbar that appears to the left as the cursor moves over each Operator
within a Panel.
At the same time the title
turns from gold to red, where
upon clicking it will cause the
process to be executed with
the results going to the
Trace.
Clicking the top button in the
tracking toolbar will cause
the results to go to the
Report.
The cursor must be moved
horizontally to the menu
before choosing a button
further down the column.
See upcoming tracking
toolbar table for more
details. (The toolbar buttons
may vary in type and count,
depending on Operator and
the specific Panel.)
Chapter: Venues, Panels, and Operators
The folder tabs expand to
reveal Operators and collapse
to hide them with left clicks.
Volume 1
37
Visral User Manual
The following table details the actions of the menu buttons that track alongside the
Operators. The number and selection of entries may change depending on application.
Description
Left clicking on the Report icon with the plus symbol will execute the
currently selected operation and send results to the Report editor.
Unlike the Trace, which receives all Python notifications, Visral blocks
those sent to the Report that are not actually part of a result.
Left clicking on the Report icon with the button symbol will embed the
currently selected operation in the Report editor as a button. When the
button is clicked in the Report or Guide an Operate entry with the code
will be created in a temporary Panel. (See document section for details.)
This action is only works for Series results. It displays a scrollable overlay in
the Panel window and records the results in the SERIES spreadsheet. They
entered into the spreadsheet in a
push down fashion and include both
column and index. (Actually, a slide
right fashion.)
The difference here is that the
complete result is available for
viewing, where the normal printout
from Python will ususally just
display the beginning and end of
larger listings.
This button will cause the result of the Operator to be stored in a register
for later use and not sent to either the Trace or Report. The registers
names start with lower case ‘vr’ followed by a sequentially increasing
number. (Registers are Python variables managed by Visral.)
All Operators, where possible, will store their results in a register along
with sending them to the Trace or Report. The difference is the assigned
register number will not be automatically incremented. The Do not reuse
current register entry of the
right click menu can be used to
save the results from any
Operator by allowing it to
increment for the next use.
Volume 1
Chapter: Venues, Panels, and Operators
Button
38
Visral User Manual
The following menu will appear with a right click on any Input Element. Single or multiple
items may be selected for inserting in to the element. For certain variable types, the value
can be chosen to be inserted as opposed to the name, by selecting the Content button.
The vr0, vr1, and vr2 were generated from a Panel and as such include the title of the
Operator. Otherwise, the type will be displayed. The dagger followed by a number is a type
designation used internally by Visral.
The Delete button allows removing the entry and content from Python. Of course, if there
are other items pointing to the same content, it will not be removed.
If the icon associated with the
operator is a folder, it means
there are items that can be
accessed. If the folder is in the
closed attitude, clicking will
display the relevant arguments
and any dependent methods. In
the example below the X, Y and
two selection inputs provide a
means to enter arguments to the
parent Operator.
Chapter: Venues, Panels, and Operators
The child Operators in this
example indicate the parent’s
method programs. The parent
Operator must be executed first to
provide the results the child
programs need.
Volume 1
39
Visral User Manual
Input Elements
The following is a partial list of elements used to provide arguments to an Operator. In
practice they may contain default values.
Element
Description
This element accepts typed text by first left clicking the element.
This element accepts typed text by first left clicking the element.
These elements accept typed text by first left clicking the element. A
right click will bring up a menu of all available DataFrames. Double
clicking on a DataFrame entry will expose all of its columns. A
DataFrame or any combination of columns can be selected by clicking
the insert menu’s button. Menu example below.
This element accepts typed text by first left clicking the element. Left
clicking will bring up a menu of options to choose from. Double clicking
a menu entry item will insert it into the element.
Clicking a check box element toggles it back and forth between
checked and unchecked. If check boxes are children of a Radio
element, it will allow only one check box at a time to be set.
Similar to the Data In element except indicates the input is expected
to be a Patsy formula expression. It accepts column names to form
expressions, such as: “Z ~ X + Y”. See
http://patsy.readthedocs.org/en/latest/formulas.html for more details.
Understands various date formats and converts them to a standard for
processing.
See Venue construction diagrams for more details on available elements.
Volume 1
Chapter: Venues, Panels, and Operators
Expects a numerical value to be entered.
40
Visral User Manual
Options
Moving the cursor over the icon of an Operator will reveal a popup with the program
contents as shown in the example to the right. Passing the cursor over the news icon to the
right will reveal a popup explanation of the element. The news icon is only revealed when
the cursor is over the line the element is on.
The mini traffic light to the left indicates which element has the focus. Operator’s indication
of focus is the red text.
Left clicking on an options input will cause it to go into edit mode, allowing any text
expression to be entered. A right click while in edit mode will display the cut-copy-paste
menu.
Chapter: Venues, Panels, and Operators
Right clicking on an options input will display a
menu of entries to choose from. Left clicking
on an options input will put it into edit mode
where a specific value may be entered.
Volume 1
41
Visral User Manual
ArrayLike
Array-like elements expect the name of arrays, DataFrames, or columns. Left clicking on an
the input will cause it to go into edit mode, allowing any text expression to be entered. A
right click while in edit mode will display the insert-cut-copy-paste menu.
In edit mode the element will accept either:
Standard pandas expressions: DataFrane[‘column’,…] and DataFrame.column or Visral’s
form whose EBNF of is: “@”<DataFrame>{“,” <column>}* .
Volume 1
Chapter: Venues, Panels, and Operators
Double clicking on a DataFrame entry will expand below it to show the available columns. A
second double click will collapse the view. (An entry with a dagger followed by 9 indicates a
DataFrame and therefore it can be expanded and collapsed.)
42
Visral User Manual
Argument source
Information used by operations can be entered in several locations. The following table
explains the rules used to decide which will be the source.
1
Child element of the parent operation overrides all other possible sources
of parameter values.
2
Preceding sibling to the operation. There can be multiple sources for the
same parameter. The issue is resolved with the closest to operation
having the highest priority.
3
Spreadsheet selections for column parameters.
Lowest priority
4
The arguments used at the time an Operator was embedded in a
document are returned as immediate values so the same operation can be
rerun. Any new value entered has higher priority to allow testing different
hypothesis.
Notes:
•
•
Following siblings to an Operator have no claim and do not contribute values to the
operation.
Priorities are based on individual parameters. In other words, the X columns may be
chosen from the spreadsheet and a Y column could be indicated by a child location.
Volume 1
Chapter: Venues, Panels, and Operators
Highest priority
43
Visral User Manual
Spreadsheet
Covers:
Loading
Selecting
Viewing
SERIES
Formulas
Spreadsheets are brought up by first selecting
the SHEET button on the toolbar and then
choosing the particular the appropriate tab
from those that have previously been loaded.
Data Sets files can be accessed via the folder and floppy buttons, and from the File
dropdown menu. When a spreadsheet is loaded, a DataFrame copy is also created.
(Assuming Python and pandas are already installed.) These are two distinct sets of data.
The spreadsheet can be edited randomly cell by cell but the corresponding DataFrame will
need to be updated to reflect those changes.
Description
*.csv
Comma Separated Values (Visral default for datasets)
*.xls
Excel (Uses Python and Pandas and xlrd to load files)
*.sqxl
Visral Spreadsheet (unstructured data/instruction)
*.dta*.sav*.sas*.json*.hdf
Requires Python and Pandas module
Volume 1
Chapter: Spreadsheet
File Extensions
44
Visral User Manual
Moving spreadsheet content view
The page up and page down keys will cause the view of the spreadsheet contents to scroll
up and down.
Using the scroll wheel on the mouse will cause the view of the spreadsheet contents to be
scrolled up or down if the cursor is within the body of the sheet or on the row numbers.
The scroll wheel will cause the view of the contents to be scrolled left or right if the cursor is
on the row of column letters. (The scroll wheel will change the width of individual columns
when on the row of column names.)
The small red square is a replacement for
the two traditional scroll bars and allows
easy two dimensional movements. Pressing
and holding the left button on the small
floating red box while dragging it will cause
the window to move about the spreadsheet
contents. When clicked the size of the box
changes to represent the relative size of
the view to the total contents.
Editing Cell Content
Double clicking on any cell will cause it to enter edit
mode. Once in edit mode other cells can be edited by
a single left click or using the up, down, left, and
right cursor keys. A right click on a cell in edit mode
will bring up the Cut, Copy, and Paste menu. A right
click on any other cell or a carriage return will cause
edit mode to be exited.
Selecting Columns
Double clicking on the column head of the top row of sequential letters will cycle the column
through three different column references; X, Y, and Z, and then no assignment. The color
of the columns will change along with each reference. There are two other methods by
which to select column assignments; through the Column Menu and through the Column
Management Menu. The last is particularly useful when there are a large number of
columns. (Up to 4,000)
Chapter: Spreadsheet
To select more than one column in from spreadsheet simply hold down the left button and
drag the cursor across adjacent columns.
Volume 1
45
Visral User Manual
Column Menu
A Right click on top row of sequential letters will bring
up the column operation menu.
Undo is not enabled for column operations. This is to
avoid over consumption of memory due to column
lengths potentially being up to a million rows. If not sure
use cut; paste will provide one undo.
The Mark Column as X Y or Z is equivalent to double
clicking on the column heads.
Insert Empty Column does just that and is useful for
making room to manually adding a column of data. The
new column is inserted to the left of the column this
menu was activated on.
Insert Column with Ones places a number 1 in each cell
of a new column.
Row Menu
A right click on leftmost column of sequential numbers will bring up the row operation
menu. Holding down the left button and dragging it down the column of row numbers will
select them. If the row was previously selected when the button bushed, then rows will
become unselected. The left upper corner of the spreadsheet has a box with Clear in it. Left
clicking this will unselect all previous selections.
The row menu various operations of which Cut, Copy,
and Delete require rows be selected first. Undo and
redo work on all row modifications; that includes Cut,
Copy, Paste, Insert, and Delete.
The Goto’s and Select Range are particularly useful
when working very large spreadsheets.
A right click on any cell when not in edit mode will
bring up the cell operation menu. The Copy
Spreadsheet to Report and Copy Spreadsheet to
Trace will produce a table of the selected entries. If there are no selections then the entire
spreadsheet will be used.
Volume 1
Chapter: Spreadsheet
Cell Menu
46
Visral User Manual
Capturing spreadsheet data
Unlike conventional spreadsheets, Visral’s can assemble results from any combination of
rows and columns. This is true whether printing a table or generating a DataFrame, array or
list. The image below illustrates creating a table from a combination of columns and rows.
Holding down the left mouse button on a cell and dragging to another cell will select that
range when the button is released. This illustrates the process, following which a
DataFrame, array or list could be generated, or a table produced.
Selected data as a source for Operators
If operations are executed where the spreadsheet is the source of the data (selected), then
it comes from the temporary DataFrame vr_temp.
Volume 1
Chapter: Spreadsheet
Selections are saved individually for each spreadsheet open. Therefore, selections will not
be lost when switching between them.
47
Visral User Manual
Manipulating the spreadsheet
Bring up the column management menu. The Shift Up and Shift Dn buttons allow
rearranging the column of the current spreadsheet. The selected entries will move one
place to the left or right each time the buttons are clicked.
The Set to X, Set to Y, and Set to Z buttons can assign any collection (selected) of columns
to be used as sources for Panel operations. The Clear All clears all selections, both rows and
columns of the current spreadsheet. This provides a more convenient means for selecting
columns when there are a large number of them.
Chapter: Spreadsheet
Row and columns
assignments are not lost
when moving between
spreadsheets.
Volume 1
48
Visral User Manual
Munge Spreadsheets /Python
Beyond files, spreadsheets can be loaded from Python DataFrames, matrixes, and
arrays, but they are copies of the data. If they are edited and it is desired to have the
original source reflect the changes, the DataFrame sources will need to be updated.
New DataFrames, matrixes, arrays, and series can be generated from spreadsheets, either
partially by selecting rows and columns or fully by clearing all selections.
Chapter: Spreadsheet
The Munge Panel
provides operators
for creating
DataFrames, Series,
arrays, matrixes, and
Lists. The Munge
Panel can be found in
the Morphing menu
and in the main
menu’s SYSTEM
dropdown.
Volume 1
49
Visral User Manual
SERIES
The SERIES is a special spreadsheet, which collects all Python pandas Series printouts when
using the
Tracking toolbar button. It acts in a push down fashion with the newest
entering into columns A and B with the rest shifted to the right. Both columns of the Series
are included. This allows examining or extracting subsets from Series results that can be up
to a million rows in length.
The same operations performed all
other spreadsheet can be used in the
SERIES spreadsheet.
Chapter: Spreadsheet
To extract a pandas Series from the
spreadsheet select a column or a
portion of one and click the Generate
Series from Spreadsheet entry of the
Munge Panel. A popup will follow
allowing a name to be assigned to the
new Series.
Volume 1
50
Visral User Manual
Documents
Covers:
Report and Trace Editing
Embedding
Moving and copying embedded items
Report and Guide response
The Report, Guide, and Trace
editors are selected by first
selecting the DOC button on the
toolbar and then choosing from
one of the three tabs. Only a
single file can be opened for each of the RTF based Report, Trace, and Guide editors at
one time.
This is the file menu when the Trace has focus.
Chapter: Documents
These are the file menus when either Report or Guide has the focus.
Volume 1
51
Visral User Manual
The textual and graphical results of Python operations are directed to the Trace (default)
and Report editors where they can be supplemented with the author's own text,
spreadsheet printouts, and the pasting of photos and other images. Beyond that Visral
allows the embedding of datasets, Venues, Operators, and sections of code into the Report.
Report and Trace Editing
Both the Report and Trace editors have search ability and,
paragraph and character formatting, as well as accept the
pasting of images.
A right click on the background brings up this menu for the
Report; in turn access to searching, setting font, formatting,
printing, and the loading of a document. There is duplicate
access to some of these features available under EDIT of the
main menu.
Note: In Windows 8 and later, columns and rows of tables in
RTF documents can be resized.
This table details the actions of the Morphing menu for the Report.
Description
Left clicking on the Report icon with the plus symbol will execute the
selected code from the previously PAD to have focus and send results to the
Report editor.
Left clicking on the Report icon with the button symbol will embed the
selected code from the previously PAD to have focus, into the
Report editor as a button. When the button is clicked in the
Report of Guide a Panel entry with the code will be created.
(See document section for details.)
Left clicking on the Report icon with the gear symbol will embed the selected
code from the previously PAD to have focus, into the Report
editor as a button. When the button is clicked in the Report
of Guide the code will be executed. (See document section
for details.)
Left clicking on this will bring up the passage management menu. See
Visral User Manual, Volume 2 for details of advanced features.
Volume 1
Chapter: Documents
Button
52
Visral User Manual
A right click on the background brings up this menu for the
Trace; in turn access to searching, setting font, formatting,
and printing.
This table details the actions of the Morphing menu for the Guide.
Description
Enables and disable machine voice reading of button descriptions when they
are clicked.
Directs the results of execution by Code buttons to the Trace or Report
documents.
Chapter: Documents
Button
Volume 1
53
Visral User Manual
Embedding Operator
Left clicking on the Report icon with the button symbol located on the tracking toolbar will
embed the Operator into the Report as a button. It will be inserted into the Report
document at the location of the mini-traffic light, the last place of the cursor before focus
was changed. It will appear as a button with the word Operator on it.
Once embedded, clicking on the Operator button will cause a new Panel to be
displayed with the original operator, which if clicked will cause the operation
to be executed.
Embedding Code
Left clicking on the Report icon with the plus symbol will embed the selected code from the
previously PAD to have focus, into the Report document. The code will be inserted into the
Report document at the location of the mini-traffic light. It will appear as a button with the
word Execute on it.
Chapter: Documents
Once embedded, clicking on the Code button will cause original code to be
executed with the results going to the Trace. If the button is clicked from the
Guide, the results can be direct to either the Trace or Report.
Volume 1
54
Visral User Manual
Embedding Venue
The dropdown of the right most Morphing menu icon list the embeddable components.
Venues can be embedded into RTF documents and recalled and installed in other Visral
applications.
Clicking the Venue button will show a file directory set to the default location
and the name of the file that was embedded, both of which can be altered.
Embedding Dataset
Clicking the Venue button will bring up a menu for selecting a DataFrame name
and loading the dataset.
Volume 1
Chapter: Documents
Datasets can be embedded into RTF documents allowing them to be distributed to other
Visral installations.
55
Visral User Manual
Embedding NEXT Button
The NEXT Button can be embedded into RTF documents allowing users to step through a
sequence of .
Clicking the Next button will bring up a menu .
If there were no selection make in the previously focused PAD then the Morphing menu will
have a slightly different appearance from those above as indicated below.
Embedding Folder
Chapter: Documents
Right clicking on a Folder will display the Embed Folder in Report entry. Left clicking this will
embed the folder with all of its contents in the Report at the location of the cursor and
display the Folder button.
Volume 1
56
Visral User Manual
Moving and copying embedded items
A button must not be dragged to a different position or moved by using the normal select,
cut and paste. This is to assure that all of the embedded material associated with the image
is caught and moved together. To move or copy right click on the button. Now the cut,
copy, and paste will work properly. This will select
all relevant material associated with the button and
its embedded function. Now a cut or copied button
can be pasted.
To access the menu to do this, place the cursor on
the button and click the right mouse button. Coping
and deleting a button also requires this procedure
to avoid leaving dangling embedded components
around.
Editing embedded items
Embedded components can be edited in the Report by either of two methods. First they can
be edited by right clicking on a button and selecting the first entry of the context menu.
That will cause a popup menu to appear, allowing editing and simulation. The changes are
kept by selecting the menu’s Update; although the
file will still need to be saved in the end.
Chapter: Documents
The menu’s Next and Previous allows moving
between buttons inserted in the document. Speak
will machine read the description content aloud. Run,
as well as Yes and No, will execute the current
button and advance to the next. Yes and No provides
a Python testable value for conditional control.
Volume 1
57
Visral User Manual
The content of buttons can also be edited in the Formula editor by right clicking on a button
and selecting the second entry of the context menu. The following is an example of how
the editable content might appear in the Formula editor.
§[Description]
Execute
§[Program]
size = 10000
x = sp.arange(size)
y = sp.int_(sp.round_(sp.stats.vonmises.rvs(5,size=size)*31))
h = plt.hist(y, bins=range(32), color='w')
disttypes = ['gamma', 'beta', 'norm']
for disttype in disttypes:
dist = getattr(sp.stats, disttype)
param = dist.fit(y)
pdf_fitted = dist.pdf(x, *param[:-2], loc=param[-2], scale=param[-1]) * size
plt.plot(pdf_fitted, label=disttype)
plt.xlim(0,31)
plt.legend(loc='upper right')
plt.show()
Key:
§[Description]
The text represents what will be displayed in the popup Description window and optionally
machine spoken within the Guide.
§[Program]
Chapter: Documents
This location contains program code that will be executed after the button is pressed.
Volume 1
58
Visral User Manual
Guide embedded response
Once embedded, clicking on the Operate button will cause a new Panel to be
displayed with the original Operator, which if clicked will cause the operation
to be executed.
Once embedded, clicking on the Code button will cause original code to be
executed with the results going to the Trace. If the button is clicked from the
Guide, the results can be direct to either the Trace or Report.
Clicking the Venue button will show a file directory set to the default location
and the name of the file that was embedded, both of which can be altered.
The newly load Venue will not be available until Visral is restarted.
Clicking the Data button
will display a menu for
specifying the name of the
DataFrame to be replaced
or created. It will be
loaded into a spreadsheet
at the same time. The
operation can be aborted
with the cancel button.
Chapter: Documents
Clicking the Folder button will show a previously saved folder and all of its
Operators in a Panel.
Volume 1
59
Visral User Manual
Unlike the NEXT button, these cause whatever code is assigned to them, to
execute immediately when the button is pushed.
Items combined into this passage are executed in sequence when the button
is clicked. It will pause when user inputs are required.
Items combined into this passage are executed in sequence when the button
is clicked. Unlike the Process passage, it uses default values where available
and does not pause for user responses except for the Next commands.
Chapter: Documents
The document editors permit font selection and coloring, while the paragraphs can be
formatted and justified. Microsoft Office word processors accept RTF files and can be used
for further editing, as well as generating HTML code and Adobe Acrobat files.
Volume 1
60
Visral User Manual
Passage Management
The Passage Management
menu allows the combining of
multiple buttons and text into
a single embedded entity
called a passage.
A selection of texts and
buttons are combined
together using the
encapsulate commands
above, and replaced by a
single button from the
following table.
Double clicking on an entry in
the encapsulate list will apply
the appropriate wrap the
selected text and buttons.
Encapsulate Table
Encapsulate Textual Passage; allows program control of the display of
sections of text and any included buttons.
vr.set.textual(<text ID>,<action>) <action>={1:show, 0:hide}
Encapsulate AutoRun Passage; items combined into this passage are
automatically executed in sequence when the document is loaded into the
Guide only. Like the Actuate passage, it uses default values where
necessary; i.e. does not require user responses.
Encapsulate Process Passage; items combined into this passage are
executed in sequence when the button is clicked. It will pause when user
inputs are required.
Encapsulate Actuate Passage; items combined into this passage are
executed in sequence when the button is clicked. Unlike the Process
passage, it uses default values where available and does not pause for user
responses except for the Next commands.
Volume 1
Chapter: Documents
Under
Program
Control
61
Visral User Manual
Textual passages do not produce a button replacement. Their id code is used with the
vr.set.textual(…) instructions to hide, display, or otherwise apply their content. Textual
passages can include buttons, permitting conditional dialog based on the results of
computations.
The following are two examples of how sections of text and buttons appear after
encapsulation. (Except for the blue background which is here simply to highlight the
section.)
Encapsulation merely involves surrounding the selected text, beginning with a section
character followed by a unique identifier in square brackets and ending with a broken
vertical bar character.
The first seven characters of the identifiers for AutoRun, Actuate, and Process are required
to indicate passage type, but if more than one of either exists they will require more
characters concatenated with them to provide uniqueness. As an example, the 2 added to
the Actuate entry below.
The passages are transformed when the Collapse button in the Passage Management menu
is selected. In that case the Textual passage, it disappears and can only be displayed by
running a vr.set command. The Actuate passage appears as below.
Both private-public and symmetrical encryption facilities are available to secure passages
and code components. The Producer refer to is the one who creates encrypt content,
Recipient to those receiving that encrypted content, and Personal refers to encrypted
content received from others.
Volume 1
Chapter: Documents
Encryption
62
Visral User Manual
Python Control of Visral Assets
The following are commands recognized by Python with visral.pyd installed, which happens
automatically during the startup of Visral.
visral.pyd
Output
Description
vr.show()
Yes/no
Show Python images in Report or Trace.
vr.gen(…)
Yes/no
General operations. This instruction triggers a Visral command
and prevents any further Python instructions from executing until
Visral has completed the task.
vr.set(…)
no
These instructions trigger Visral actions that are not Python
dependent; i.e. does not require Python be installed.
vr.ask(…)
yes
Retrieve Visral parameters or settings.
vr.job(…)
yes
Issues job requests to bridges, including such functions as
encrypt/decrypt passages, code, and commands.
vr.run
yes
This instruction triggers a command and stalls Python instructions
from executing until the command has been completed.
vr.bitmap
yes
For internal use only.
1. Visral converts plt.show() and fig.show() to vr.show(plt) and vr.show(fig)
respectively. Pandas plotting functions in particular need to be followed by the
plt.show() in order to output a Python image to the Trace or Report.
2. The vr.set instruction triggers a one-way command from Python to Visral. This
means Python will continue executing instructions even if Visral is still working its
task. However, Visral commands are scheduled through a FIFO so as they are always
performed in order.
3. The commands of vr.set, vr.gen, and vr.run can be expressed in either of two ways;
vr.set(command,…) or vr.set.command(…), vr.gen(command,…) or
vr.gen.command(…), and vr.run(command,…) or vr.run.command(…). They both
execute in the same fashion.
4. Individual arguments need only be wrapped in single or double quotes if they contain
commas or parentheses. Only double quotes may be used internally within an
argument. In no case must the argument end in a backslash, with or without quotes.
Volume 1
Chapter: Python Control of Visral Assets
Notes:
63
Visral User Manual
command
Description
vr.gen.spreadsheet()
Load Spreadsheet from DataFrame. Brings up a menu of
existing DataFrames from which to choose from.
vr.gen.dataframe()
Generate DataFrame from Spreadsheet. Brings up a menu of
existing and new DataFrames from which to choose from.
vr.gen.series()
Generate Series from Spreadsheet. Brings up a menu of
existing and new Series from which to choose from.
vr.gen.array()
Generate Array from Spreadsheet. Brings up a menu of
existing and new Arrays from which to choose from.
vr.gen.matrix()
Generate Matrix from Spreadsheet. Brings up a menu of
existing and new Matrixes from which to choose from.
vr.gen.list()
Generate List from Spreadsheet. Brings up a menu of existing
and new Lists from which to choose from.
vr.gen.load(expr,name)
Fill a new spreadsheet from an arraylike quantity expr. If
name is present it becomes the name of the spreadsheet,
else _df is appended to expr; i.e. expr_df.
vr.gen.open(expr)
Returns the file name plus path in the Python string object
vr_path and the file name alone in the Python string object
vr_file.
expr = default path ; extension ; menu title
Example: vr.gen.open(C:/Python/Libs/;pyc;Open)
vr.gen.df(expr)
Generate DataFrame named expr from top Spreadsheet.
Selected rows and columns apply.
vr.gen.table(expr)
Print table from Spreadsheet expr.
vr.gen (notoolbar)
Do not show the tracking toolbar.
vr.gen (mungebar)
Show the munge tracking toolbar.
vr.gen.sheet(expr,N)
Select spreadsheet, columns N = {9:clear, 1:X, 2:Y, 3:Z} and
rows.
vr.gen.panel(expr,N)
Select Panel, Operator, and action N ={1:run code,
2:collapse, 3:expand, 4:show code, 20:show arrow}.
vr.gen.doc(N)
Select document N = {0:return to last document, 1:go to
Report, 2:go to Guide, 3:go to Trace}
vr.gen.textual(Note1,1)
Show “Note 1”. {1:show, 0:hide}
vr.gen.typepad(text,N)
Type text into PAD N.
Volume 1
Chapter: Python Control of Visral Assets
vr.gen.csv(expr)
64
Visral User Manual
vr.gen.speak(text)
Machine voice will recite text.
vr.gen.comment(Comment)
Display comment beside red arrow pointer.
vr.gen.operator($/key
text,1)
Insert text into element that has matching key.
command
vr.job()
Description
Encrypt/Decrypt passages, code, commands and requests.
vr.ask(flag)
Description
vrplot
A True response to this ask indicates the auxiliary plot button was clicked.
vrlist
A True response to this ask indicates the auxiliary list button was clicked.
vrflip
A True response to this ask indicates the auxiliary flip button was set.
vryes
A True response to this ask indicates the Yes button was clicked.
vrno
A True response to this ask indicates the No button was clicked.
vr.gen
Description
array()
Generate Array from Spreadsheet. Brings up a menu of
existing and new Arrays from which to choose from.
comment(Comment)
Display comment beside red arrow pointer.
csv(expr)
dataframe()
Generate DataFrame from Spreadsheet. Brings up a menu
of existing and new DataFrames from which to choose
from.
df(expr)
Generate DataFrame named expr from top Spreadsheet.
Selected rows and columns apply.
doc(N)
Select document N = {0:return to last document, 1:go to
Report, 2:go to Guide, 3:go to Trace}
Volume 1
Chapter: Python Control of Visral Assets
command
65
Visral User Manual
vr.gen
Description
list()
Generate List from Spreadsheet. Brings up a menu of
existing and new Lists from which to choose from.
load(expr,name)
Fill a new spreadsheet from an arraylike quantity expr. If
name is present it becomes the name of the spreadsheet,
else _df is appended to expr; i.e. expr_df.
matrix()
Generate Matrix from Spreadsheet. Brings up a menu of
existing and new Matrixes from which to choose from.
mungebar()
Show the munge tracking toolbar.
notoolbar()
Do not show the tracking toolbar.
open(expr)
Returns the file name plus path in the Python string
object vr_path and the file name alone in the Python
string object vr_file.
expr = default path ; extension ; menu title
Example: vr.gen.open(C:/Python/Libs/;pyc;Open)
operator($/key text,1)
Insert text into element that has matching key.
panel(expr,N)
Select Panel, Operator, and action N ={1:run code,
2:collapse, 3:expand, 4:show code, 20:show arrow}.
series()
Generate Series from Spreadsheet. Brings up a menu of
existing and new Series from which to choose from.
sheet(expr,N)
Select spreadsheet, columns N = {9:clear, 1:X, 2:Y, 3:Z}
and rows.
speak(text)
Machine voice will recite text.
spreadsheet()
Load Spreadsheet from DataFrame. Brings up a menu of
existing DataFrames from which to choose from.
table(expr)
Print table from Spreadsheet expr.
textual(Note1,1)
Show “Note 1”. {1:show, 0:hide}
typepad(text,N)
Type text into PAD N.
Volume 1
Chapter: Python Control of Visral Assets
pad(num)
66
Visral User Manual
vr.gen Examples:
Command
vr.gen.sheet('@sp500 SP500
[5:10,13]',1)
Description
Assign column SP500 of spreadsheet sp500 to X
parameter. Select rows 5 through 10 and 13.
Note: This command recognizes lists with both range
and individual assignments, but Python lists do not.
vr.gen.sheet(@sp500,9)
Clear all selections. {9:clear, 1:X, 2:Y, 3:Z}
vr.gen.panel(Stat101 Lag-1,1)
Select Operator “Lag-1 …” from Panel Stat101.
{1:run code, 2:collapse, 3:expand, 4:show code,
20:show arrow}
vr.gen.panel(Stat101 Descriptive
Statistics,2)
Select and execute Operator “Descriptive Statistics
…” from Panel Stat101.
vr.gen.doc(0)
{0:return to last document, 1:go to Report, 2:go to
Guide, 3:go to Trace}
vr.gen.textual(Note1,1)
Show “Note 1”. {1:show, 0:hide}
vr.gen.speak(The Actuate button
will step.)
Machine voice will recite content.
vr.gen.pad(1)
Show PAD 1
vr.gen.typepad('Markov = np.array(
[( 21, 22, 23 ), ( 34, 35, 36 ), ( 47,
48, 49 )], float )\n')
Fill PAD 1 with content.
vr.gen (typepad,'vr.', 1)
vr.gen.comment(This operation will
be executed using the X parameter
selection form the spreadsheet.)
Display comment beside red arrow pointer.
vr.gen.operator($/test1 @sp500
SP500 ~ Dividend + Earnings,1)
Set element with $/test1 in Program to “@sp500
SP500 ~ Dividend + Earnings”.
vr.gen.diag(tab)
Volume 1
Chapter: Python Control of Visral Assets
vr.gen (typepad,'print Markov\n')
67
Visral User Manual
Visral Diagrams – Venues/Panels/Operators
Covers diagrams:
Quick Start Tutorial
Venue Construction Diagrams
Creating Applications
Creating a new Venue by first selecting the Diagram window and then selecting the New
Venue Diagram entry from the main menu FILE.
This will cause a popup to appear where the name of the Venue may be entered. A file
whose name is that of the Venue concatenated with “.vn.xml” will be created when the
diagram is finally saved.
The first (left) element holds the name that will appear in the main menu between the
VENUES and SYSTEM entries when this Venue is loaded. The second element holds the
name that will appear as an entry in the dropdown associated the main menu entry and
show up as a tab in the Panel window if it selected.
Clicking on the body of each element put them in edit mode and allows their content to be
changed. The Formula window will appear to the left of the diagram, but that can be ignored
for now. Clicking on the background of the diagram will cause edit mode to be exited.
Now it is time to add an Operator. Operator elements contain the primary programs and
commands.
Volume 1
Chapter: Visral Diagrams – Venues/Panels/Operators
Clicking OK will cause a new diagram to be displayed with two elements in it.
68
Visral User Manual
A monetary left click on the Operator element in the menu to the
right will cause the cursor to change shape and appear as a mini
element.
When the black bar of the cursor touches an edge of an existing
element, its appearance will change; now in red with the
word Attach. A left click will cause the new element to
become attached to that edge. The first Operator must be connected
to the backend of the target element.
Left clicking on the body of the element will put it in edit mode where
its name can be changed and a program can be entered into the
Formula window to the left of the Diagram.
The Formula window will appear as below with five specific comment
fields which are used to represent the various components of an
element. (See construction diagrams for more detail.)
§[Identity]
§[Reference]
§[Presets]
§[Program]
Now code can be entered into the program field, which then will be
executed when the Operator is displayed and clicked in the Panel
window. (The code below can be captured from the PDF file and
pasted into the PROGRAM field.)
§[Program]
frozenRV = sp.stats.norm(5,3)
x = np.linspace(-5, 15, 101)
y = frozenRV.pdf(x)
plt.close()
plt.plot(x, y, label = 'norm pdf')
plt.title('Distribution')
plt.xlabel('X')
plt.ylabel('PofX')
plt.legend()
plt.show()
Left clicking on the background of the diagram will cause edit mode to be exited. New the
Venue can be saved and/or emulated.
Volume 1
Chapter: Visral Diagrams – Venues/Panels/Operators
§[Payload]
69
Visral User Manual
To save the file click the floppy icon on the toolbar
. A directory menu will show itself
already set to the default directory and file name. All that is necessary is to click the save
button, and next time Visral is run the new Venue will be installed under the VENUES main
menu entry.
It is not required to save the Venue to try it. Panels can be emulated right clicking on a
Panel element and then selecting the Emulate in Panel entry.
[<matplotlib.lines.Line2D object at 0x0000000014F46390>]
<matplotlib.text.Text object at 0x0000000014EEE780>
<matplotlib.text.Text object at 0x0000000014D8AB38>
<matplotlib.text.Text object at 0x0000000014EDFA90>
<matplotlib.legend.Legend object at 0x0000000014F46AC8>
<matplotlib.legend.Legend object at 0x0000000014F46AC8>
Volume 1
Chapter: Visral Diagrams – Venues/Panels/Operators
In the current example the Panel will show the following single Operator. Clicking it will
result in the Trace displaying the subsequent plot including the six lines of text. Clicking the
top button to the left will send it to the Report, but with the six lines removed by Visral.
70
Visral User Manual
Now for Inputs
Start by adding another Operator. This time the Operator must be attached to the lower (or
upper) edge of the existing Operator resulting in the following appearance.
Make it a little more interesting by inserting a Folder element. Attach it to the backend of
the Panel element and give it a name.
Name the new Operator OLS and enter the following code into its #PROGRAM field. (Save
time; copy and paste from this PDF file.) Then add a Patsy element to the right of the
Operator.
The Patsy element expects a Patsy formula to be entered, such as: “Z ~ X + Y” (with or
without quotes). See http://patsy.readthedocs.org/en/latest/formulas.html for more details.
It is assumed the DataFrame source is identified by the name of the spreadsheet that has
focus. To select a different source enter @otherdf prior to the expression. The placeholders
$p and $pd will receive the formula expression and the DataFrame name respectively.
Save the file again
. Now right click on the Panel element and then select the Emulate in
Panel entry. The following Panel will appear.
Next step is to enter a Patsy formula composed of columns from the spreadsheet that
currently has focus and then execute the Operator. (The following example is to illustrate
procedure and not necessarily meant to be of statistical significances.)
Volume 1
Chapter: Visral Diagrams – Venues/Panels/Operators
#PROGRAM:
mod = sm.OLS.from_formula($p, $pd)
results = mod.fit()
results.summary()
results.params
results.tvalues
71
Visral User Manual
Enter the edit mode of the Patsy element and right click on it. The following popup will
appear from which the columns can be selected and Patsy operators added. Clicking outside
the popup will close it and exit the edit mode.
If the formula expression is
typed in by hand, it will need to
be preceded by @sp500 to
specify the source of the
columns.
<class 'statsmodels.iolib.summary.Summary'>
"""
OLS Regression Results
==============================================================================
Dep. Variable:
Earnings
R-squared:
0.452
Model:
OLS
Adj. R-squared:
0.451
Method:
Least Squares
F-statistic:
709.2
Date:
Mon, 18 May 2015
Prob (F-statistic):
2.56e-225
Time:
15:33:18
Log-Likelihood:
-18917.
No. Observations:
1722
AIC:
3.784e+04
Df Residuals:
1719
BIC:
3.786e+04
Df Model:
2
Covariance Type:
nonrobust
==============================================================================
coef
std err
t
P>|t|
[95.0% Conf. Int.]
-----------------------------------------------------------------------------Intercept
193.4643
658.572
0.294
0.769
-1098.223 1485.152
CPI
0.2822
0.008
37.439
0.000
0.267
0.297
LIR
1.2152
0.140
8.653
0.000
0.940
1.491
==============================================================================
Omnibus:
799.851
Durbin-Watson:
0.456
Prob(Omnibus):
0.000
Jarque-Bera (JB):
8166.550
Skew:
1.914
Prob(JB):
0.00
Kurtosis:
12.958
Cond. No.
9.34e+04
==============================================================================
Warnings:
[1] Standard Errors assume that the covariance matrix of the errors is correctly
specified.
[2] The condition number is large, 9.34e+04. This might indicate that there are
strong multicollinearity or other numerical problems.
"""
Intercept
193.464290
CPI
0.282212
LIR
1.215161
dtype: float64
Intercept
0.293763
CPI
37.438604
LIR
8.653136
dtype: float64
Volume 1
Chapter: Visral Diagrams – Venues/Panels/Operators
Left clicking on the OLS
Operator will lead to the
following printouts.
72
Visral User Manual
Venue Construction Diagrams
To load an existing Venue construction file, click on
the FILE entry of the main menu, and then on the
Load Diagram from Venue File.
Access: Users\...\Documents\Visral 3\Venues
(To access system Venues, depress the control key
when selecting Load Diagram from Venue File.
Chapter: Visral Diagrams – Venues/Panels/Operators
Access: Program Files (x86)\Visral…\Venues)
Volume 1
73
Visral User Manual
This diagram illustrates how the first four levels of elements are interpreted.
Chapter: Visral Diagrams – Venues/Panels/Operators
If this Venue were loaded, it will be listed as an entry under the main menu’s VENUE. If
selected, the MenuBar element becomes an entry in Visral’s main menu between VENUE and
SYSTEM. The Panel elements then become sub-menu entries and the Folder element
becomes a collapsible grouping of solutions. In other words, the above diagram would result
in the following:
This is the view of the Alpha PANEL.
Volume 1
74
Visral User Manual
Panel Elements
The name of this element becomes a main menu entry if the particular Venue is
installed and loaded.
This becomes a submenu entry to the parent Menu Bar. Required as a child of the
MenuBar element.
Used for grouping Operators within a folder.
These elements expect a DataFrame name or names of one or more DataFrame
columns.
The content of this element will automatically be substituted for placeholder $X, $Y,
$Z, and $T respectively.
This element Is used to provide optional choices by means of a popup. The content is
expected to have the form: $A Name=[ 'option0', 'option1',...] where $A represents
the intended placeholder, optionN represents the choices, and Name is the attribute
to which to assign the choice. To perform a straight substitution without an
assignment use $A [ 'option0', 'option1',...].
Used for grouping Operators within a heading.
Volume 1
Chapter: Visral Diagrams – Venues/Panels/Operators
The Operator: This where the executable code of the function is located. If there are
child elements involved the icon will appear as a green folder when displayed in a
Panel. Folder icons within a Panel have the ability to expand and collapse by clicking
them, exposing or hiding child features.
75
Visral User Manual
This is for grouping Check and Uncheck into a Radio button configuration. Use $A
Name= or just $A.
$A Name=(True appended)
If part of Radio Group then Response assigned to Radio name.
$A Name=(False appended)
If part of Radio Group then no contribution to Radio name.
Used for entering ASCII data.
Used for entering ASCII data that may be separated by commas. The parentheses
are automatically added when content is substituted for the placeholder.
Similar to the Data In element except indicates the input is expected to be a Patsy
formula expression. It accepts column names to form expressions, such as: “Z ~ X +
Y”. See http://patsy.readthedocs.org/en/latest/formulas.html for more details. It is
assumed the DataFrame source is identified by the name of the spreadsheet that has
focus. To select a different source enter @otherdf prior the expression.
Unique placeholders are assigned to Patsy entries. $p will receive the formula
expression and $pd will receive the DataFrame name.
Volume 1
Chapter: Visral Diagrams – Venues/Panels/Operators
$A Name=(entries appended)
76
Visral User Manual
This element recognizes the following formats of date and time, converting them to
the Python dt.datetime() format.
dd : one or two digit day of the month
mm : one or two digit month of the year
yy : two lower digits of year 20XX
yyyy : four digits of year
Month : full name of month name
Mon : abbreviated month name
hh : one or two digit hour of the day
mm : one or two digit minute of the hour
ss : one or two digit second of the minute
AM : AM or PM
All entries are case insensitive. Required number of month characters, only enough
to differentiate.
Volume 1
Chapter: Visral Diagrams – Venues/Panels/Operators
mm/dd/yyyy
Month dd, yyyy
mm/dd/yy
yyyy-mm-dd
yyyy/mm/dd
dd-Mon-yy
mm.dd.yyyy
Mon. dd, yy
dd Month yyyy
Month yy
Mon-yy
mm/dd/yyyy hh:mm AM
Mon-yy
mm/dd/yyyy hh:mm:ss AM
hh:mm:ss AM
hh:mm AM
hh:mm:ss
77
Visral User Manual
Used to enter numeral expressions.
Used to specify the destination the results should be stored in.
Used in combination with image to create a popup panel. The console is where an
Operator and any support elements are connected.
Used to create an image button, which when clicked will pull up a console.
Chapter: Visral Diagrams – Venues/Panels/Operators
Content of this element will be displayed as information in the Panel.
Volume 1
78
Visral User Manual
Diagram Superscript Descriptions
U
URL or other reference
R
Recursive
M
Multiple rule elements have this name
I
Interpret as case insensitive
H
Interpret as hex representation
L
F
Indicates a function name or formula was entered.
T
Indicates a trigger was set. Only affective on elements with assigned states.
$
Only present following a build. Indicates that this element has the possibility of
generating an output term in intermediate postfix results.
Auxiliary Operators
The following icons may be found to the right of some Operators.
This provides access to information by sending the default browser to a
previously assigned web page. (Does not cause the Operator to execute.)
Clicking (toggle) this will instruct the Operator to produce a plotted output
when executed.
The toggle icon whose function varies with individual Operators. vr.ask(vrflip)
will respond with True if blue arrow points up to the right; else it will respond
with False. (Does not cause the Operator to execute.)
The following are used with
elements to assign arguments to
placeholders. They are case
insensitive.
Placeholder
Description
$X
selected X columns
$Y
selected Y columns
$Z
selected Z columns
$T
Target function results
$A-$J
Unassigned user
placeholders
Volume 1
Chapter: Visral Diagrams – Venues/Panels/Operators
Clicking this will cause an example to be executed illustrating the functions of
the Operator. vr.ask(vrlist) will respond with True if set; else it will respond
with False.
79
Visral User Manual
Placeholders
Placeholders are similar to the arguments of a function in that it is not necessary to know
their actual value until the program is running. In Visral they are indicated by a dollar sign
followed by one or more letters.
$X, $Y, and $Z are replaced by the columns selected in the current spreadsheet or the
content of the reference type. $A through $J are user assignable.
Typing a dollar sign ($) while in a Pad or Formula editor will bring up the following menu of
selections. A double click on the appropriate entry or simply typing the letter will enter the
letter and then advance to a second menu of options.
The default form of replacement for $X, $Y, and $Z is DataFrame[‘column’];
When executing an expression, the dollar sign ($) is not interpreted as a placeholder if it is
located inside single or double quotes, preceded by a backslash (escape) or followed by any
character other than a letter or forward slash (/). This permits solutions that use the long
form placeholders ${…} of the Python templates to be implemented in Visral without
conflict. It should also not conflict with the regular expression’s end of string match.
Volume 1
Chapter: Visral Diagrams – Venues/Panels/Operators
The $P is reserved for input from the Patsy module. The $S is reserved for the vr.set
command, which can be processed without Python installed. All placeholders and modifiers
are case insensitive. Certain modifiers are only applicable specific placeholders.
80
Visral User Manual
Right click on an operator element will bring up the
following menu.
Entry
Description
Copy
Element
If this entry is clicked the cursor will take the shape of an empty element.
When
the black bar of the cursor touches the edge of the target element, its appearance will
change.
In this way the highlighted element can then be copied to a new
location. The element being copied will have a hashed appearance until the activity is
completed or canceled.
This operation can be cancelled by right clicking on the background of the graphics
window. The undo button will restore the original connections.
Delete
Branch or
Element
Copy or
Move
Branch
Disconnect the existing join connection on the right side of the element. It will not leave
an element to the right floating; i.e. it will not perform the action.
Delete this element. If the element is the head of the rule, the complete rule will be
deleted. The undo button will restore the element or branch. The undo button will
restore the original connections.
If this entry is clicked the cursor will take the shape of an empty element.
When
the black bar of the cursor touches the edge of the target element, its appearance will
change.
In this way the highlighted path of elements can then be copied or
moved to a new location. The branch being copied will have a hashed appearance until
the activity is completed or canceled.
This operation can be cancelled by right clicking on the background of the graphics
window. The undo button will restore the original connections.
Volume 1
Chapter: Visral Diagrams – Venues/Panels/Operators
Break
Right
Connection
81
Visral User Manual
Visral Diagrams - Universal
Covers diagrams:
Loading, Saving, and selecting files
Moving about a diagram
Selecting an Element Groups
Inserting and Editing Elements
Wiring 2-port Elements
Diagrams are brought into view by first selecting
the DIAG button on the toolbar; following with
reading in a file or choosing a previously loaded or created by clicking its tab.
Description
Visral Diagrams use the tree structure of XML syntax in conjunction with specific XML
semantics to represent hierarchical directed graphs. The structure supports production rule
sets, computational models, and relationships between facts, entities, observables, and
operators.
Not to be confused with plots and charts outputted from Python, Visral Diagrams are
interactive graphics, for conveying information to applications.
The nature of their visual presentation depends upon the particular type of diagram being
displayed and interacted with. The same is true as to whether their elements are 2-port or
multiport, and their processing, which fall into two categories, formulation and compilation.
Chapter: Visral Diagrams - Universal
Formulation is where the diagram is interpreted and converted to a DataFrame or array for
computation by Python or another language. In compilation, diagrams create active models
or automatons, which are subsequently engaged by other operations or applications. This
brings significantly more power to models as it allows the integration of complex and nonlinear elements. (Refer to Automatons for more complete information.)
Volume 1
82
Visral User Manual
Loading, saving, and selecting files
Diagrams can be loaded from files or created from scratch, possibly from portions of other
diagrams or with the aid of diagram generating functions.
Selecting the DIAG button on the toolbar will bring up Tabs of previously loaded diagrams,
as well as associate certain toolbar buttons and the FILE menu with diagram actions.
To create or load a file, click on the FILE entry of
the main menu, which will in turn display a
dropdown similar to that the right.
Default directory. Users\...\Documents\Visral
3\Specimens
File Extensions
Description
Visral diagrams (Others: markup edit only)
*.sqxl
Visral Spreadsheet
*.html, *.htm, php, …
Markup edit only
*.bnf, *.ebnf
Extended Backus–Naur Form (ASCII)
Chapter: Visral Diagrams - Universal
*.xml
Volume 1
83
Visral User Manual
Moving about the Diagram
There are four means by which to move around diagrams:
Double click on the background and a Top/Up/Down/End menu will appear under the cursor.
Clicking the Up or Down will cause a page up or page down. The Top
brings
the view of the top left area of the graphics and the End will bring the
view of
the bottom left. As long as the cursor is on the menu it will remain
visible
and functional. Once the cursor moves off of the menu it will
disappear.
Using the scroll wheel on the mouse will cause the view of the graphics to be scrolled up or
down.
Pressing and holding the left button on the background while dragging it will cause the
graphics to move about the window. This provides fine control over the two dimensional
position of the view.
Chapter: Visral Diagrams - Universal
Pressing and holding the left button on the small floating red box while dragging it will
cause the window to move about the graphics. When clicked the size of the box changes to
represent the relative size of the view to the total graphics. The box replaces traditional
scroll bars and is much more
convenient for two dimensional
movements.
Volume 1
84
Visral User Manual
Selecting an Element Group
The content of each diagram is assessed when loaded, setting its type and selecting the
appropriate element list and available operations. (The selection is determined by the first
rule head encountered.)
Right clicking on the background will bring up the element selection menu. This allows
different element groups and their associated operations to be applied to any diagram.
Chapter: Visral Diagrams - Universal
See Visral User Manual, Volume 2 for details for details
covering other element groups and their associated
diagrams.
Volume 1
85
Visral User Manual
Inserting Elements
The segments below reflect the result of inserting new elements as represented by entries
1-6. To insert an element left click on the desired one. (Do not drag it. Dragging on the
backplane will cause the diagram to move.) After having clicked on an element in the panel,
the cursor will change to the element symbol.
will
When the black bar of the cursor touches the edge of a target
element to which it is to be attached, its appearance
change; now in red with the word Attach.
This means a left mouse button click will cause the new element to be
attached to the top, left, right, or bottom of the target depending on
the particular edge. The autorouter will then make the appropriate
adjustments to the display.
When the cursor is over the center of an element the attachment point will turn
blue with the word Replace.
This indicates a click here will cause the current element to be replaced by the new one.
To abort the action right click on the background and the cursor will revert to the arrow. A
left click will not abort but will allow the diagram to be moved around if held down and
dragged.
1
Right contact leads to the element being attached
to the right side. If there were already elements to
the right, the new one would be inserted between.
2
Top contact leads to the element being connected
to the left side and placed above. Any already
above would
be pushed up.
3
Bottom contact leads to the element being
connected to
the left side
and placed
below. Any
already below
would be pushed down.
Volume 1
Chapter: Visral Diagrams - Universal
Before contacting an element edge or center. When
the attachment point turns red or green, a left
mouse click will cause it to attach or replace at that
point.
86
Visral User Manual
4
Left contact leads to the element being inserted
to the left side, between the current and previous
elements.
5
Center contact leads to the new element
replacing the
current element.
Only the element
type is changed. The content remains the same as
before.
6
Contacting a vertical connection will also cause
the attachment point to turn red. If the mouse is
clicked at this point the new element will be
inserted after the join portion of the vertical and
before any forks.
Junctions
To avoid any confusion, the diagram’s autorouter directs vertical lines behind elements or
around any junction it is not meant to connect to. One case handled differently is with the
rule end or X box ( ).
Here the X box ( ) doubles as a join.
In this case the vertical connection is simply passing behind the stop.
Volume 1
Chapter: Visral Diagrams - Universal
The junction boxes between or at the end of elements will contain one of four different
symbols; a minus ( ), a plus ( ), an X ( ), and a blank ( ). If there is a minus and the
box is click on, it will change to a plus and cause all of the following elements to disappear.
Clicking on a plus will reverse the condition. The boxes with an X indicate a stop. Any
element that is activated will continue to the next element unless the element’s execution
fails or a stop is encountered. Blank boxes as with execution failure cause backtracking to
find an alternate solution. The junction red spheres represent either joins (alternate paths)
or forks.
87
Visral User Manual
Editing Element Formulas
The cursor normally shows as an arrow when in the diagram window. However, when it
touches the body of an element, it changes to a pointing hand. Left clicking on an element
will cause the element to enter the edit mode.
When the content is being edited the background of the element will become light yellow
and a red vertical line will become visible representing the point of entry for new characters.
A single left click will reposition the red insertion pointer. At the same time the Formula
editor will display and make available for editing the greater content of the element. The
following is an example of its content for a Operator element.
§[Identity]
Autoregressive AR(p) model
§[Reference]
statsmodels.tsa.ar_model.AR(endog, dates=None, freq=None, missing='none')
http://statsmodels.sourceforge.net/devel/generated/statsmodels.tsa.ar_model.AR.ht
ml#statsmodels.tsa.ar_model.AR
§[Presets]
§[Program]
VR_54726f24=sm.tsa.AR($x.tolist(),$yo,$q)
§[Payload]
Special comments are inserted to separate the different fields of an element. (The
comments and their number may differ depending on diagram, element, and cell types.)
§[Identity]
The text following the Identity image is the same as that showing in the element in the
diagram and can be edited both places. However, changes in the diagram will have
precedence. (Changes to any other components will still be implemented.)
The reference text includes descriptions of the element’s operation and possibly a URL to
further explanation or perhaps the original author and source of the code.
§[Presets]
The text following the Preset image contains the values of the last run parameters. These
values will be used as a last resort if no others are offered. The primary use is for when a
solution is retrieved from a document by selecting a Folder or Operator button. It contains
all of the information necessary to reproduce the same results as the original computation.
§[Program]
The text following the Program image contains program code.
§[Payload]
Code of the optional example goes here.
Volume 1
Chapter: Visral Diagrams - Universal
§[Reference]
88
Visral User Manual
Editing element text directly in the diagram
While the element background is light yellow (in edit mode), the text can be selected by
holding the left button down while dragging the cursor. Individual words can be selected by
double-clicking on the word. The entire expression from the beginning to the point of the
cursor can be selected by double-clicking at the end of any word.
The selected text can be deleted with the backspace or delete key, or, cut,
copied, or pasted over by right clicking to bring up the options menu.
Depending on the element type, text editing may end with a carriagereturn. To enter a carriage-return into those element types, simply hold
down the shift key while typing the return.
The XML special characters & < > “ ‘ will show as themselves and can be used directly in
the elements. They are automatically converted to and from & < > " '
respectively when files are either inputted or outputted. In edit mode the new line character
is represented by the pi symbol (¶) and certain unprintable characters are represented by a
center dot (●). (Control Z will not back delete but rather be entered as a special character.)
To exit edit mode simply left click on the background to save the edits or right click on the
background to discharge them.
Chapter: Visral Diagrams - Universal
All arguments are interpreted as ASCII. It is up to the particular element’s processor to
understand the actual meaning of the content. This allows the mixing of numerical and
literal expressions. As an example the Timer element understands the difference between
“20 min” and “20 hours”. (It also understands “5/24/2011”, “15:30”, “Tuesday”, “Tues”,
and many other conventional representations of time and timing.)
Volume 1
89
Visral User Manual
Wiring Two Port Elements
Wiring of elements is not required for creating the construction diagrams used to generate
Visral Panels. However, it does become necessary when creating most diagrams that
represent models and rules.
When the cursor passes over an element a blue arrow will appear at the right edge. Clicking
on the arrow will activate the wiring mode. In this mode the cursor changes to a cross-hair
and arrows appear on the original element and each element the cursor passes over. Left
clicking on an arrow will cause the original element and the new element (or original) to be
connected together at the point of matching arrow color. The default connection is a repeat
One-or-more-times. This connection can be converted to a repeat Zero-or-more- times, or
an Else/Option.
After
Chapter: Visral Diagrams - Universal
Before
Volume 1
90
Visral User Manual
When necessary, directional elements representing else/optional or repeat will automatically
be inserted. In the case of Visral diagrams, repeats can be converted from repeat One-ormore-times to repeat Zero or more times or to Else/Option.
Before
After
Right clicking on the left facing arrow will
bring up a menu that will allow selecting
Zero or more times resulting in the element
arrangement below.
Chapter: Visral Diagrams - Universal
Right clicking on the left facing arrow will
bring up a menu that will allow selecting
Else/Option resulting in the element
arrangement below.
Volume 1
91
Visral User Manual
A branch or rule can be copied, moved, or deleted. The illustration below shows a branch of
a rule being selected to be copied.
Chapter: Visral Diagrams - Universal
After left clicking on the entry Copy Branch, those elements to be copied or moved will be
crosshatched until the cursor, which has changed to
has been attached to
another element. Right click on the background will
cancel the operation.
Volume 1
92
Visral User Manual
Automation
Covers:
Automated Resources
Introduction to Automatons
The Automation window is selected by first
selecting the AUTO button on the toolbar and
then choosing the particular process of interest
from the available tabs.
Resources
Resources are built-in automated routines that utilize the Visral Diagram facilities.
Mimic
The clapper icon in the Morphing menu enables and disables the tracking. This icon is
visible when either the Panel or Mimic has focus.
Volume 1
Chapter: Automation
The mimic, which if enabled, operates in background tracking user's execution of Operators,
to allow rerunning previous activity. If the mimic is activated it will display in a Panel one
Operator at a time to allow the user to rerun it, perhaps after making changes to some
arguments. The mimic’s contents may be saved to and reloaded from XML files, as well as
extracted from the button Operators of Reports (RTF files) that have embedded Code.
93
Visral User Manual
The Mimic can be started from the Morphing menu’s dropdown. If clicked it will locate and
start at the first Procedure element and run from there.
The Mimic can be started from any Operator element by right clicking on the element and
the left clicking on the Run Mimic entry.
Element
Level
1
Description
This element can be added to establish a separate listing of
executed Operators.
Chapter: Automation
Elements list in the Mimic can be edited before they are executed.
Volume 1
94
Visral User Manual
Depend (Dependency Trees)
Visral’s Generate Dependency Diagram command analyzes all the functional and parameter
relationships and then creates a dependency tree diagram to highlight potential cyclic
issues. (This process is used by the spreadsheet calculate routine to determine order of
execution and report detected conflicts if any.)
To reach the dependency analyzer: Under
the AUTO button on the toolbar choose the
Depend Tab from those available.
Element
Description
All the elements to the right of this one represent functions that depend on it.
This is a dependent function, which itself has dependencies.
This is a dependent function with NO dependencies.
Note: Function is used here in the broad sense to include parameters, routine, and modules.
Chapter: Automation
Initially only the first level of dependency
is shown. A right click on the source
module element (rule head) will display a
menu with an entry Expand. Selecting
this entry will cause the next levels of
coupling to be filled out.
Volume 1
95
Visral User Manual
Introduction to Automatons
What is an automaton? Most programs are intended to complete their task as speedily as
possible and then return control to the user. That means they expect to have access to
whatever resources are needed to succeed. On the other hand, an automaton tends to go
about its business with little user involvement or disruption except for the occasional
notification that it has completed its task or some portion of it.
As an example, an automaton may constantly assemble rows of disparate data from across
the internet, appending the acquisitions to a data set, and not bothering the user until some
moving analysis breaches specific criteria. This is similar to how Microsoft’s Outlook
operates; quietly checking email servers in background and only issuing a notification when
something new show up.
The Visral automaton compiler produces executable sequences, which respond to local and
remote event collections in accordance with rules represented by Visral Diagrams.
Certain diagrams whose conventional structure relies on multiport components are
converted to an intermediate 2-port representation before compilation.
Element
Group
Panel
Convert
Compile
Interpret
Description
Passive
Markov
Petri Net
Path
Model
Business
Grammar
Internet
Active
Markup
Production
Stat101
Active
Active statistical models
Mimic
Passive
Map
Passive
See Visral User Manual, Volume 2 for details on the creation, compiling, use, and
control of Automatons.
Volume 1
Chapter: Automation
SPICE
96
Visral User Manual
Automaton Instantiation
Chapter: Automation
The following block diagram illustrates the structure of a Visral’s configurable automaton. As
part of the compilations all possible backtracking sequences are pre-computed and merged
with application specific operations. (Super States refer to the likes of Petri Net places and
Business Rule states that require simultaneous updating.)
Volume 1
97
Visral User Manual
Visral Diagrams compile to an image file that is use to configure a universal automaton. The
files are saved in the subdirectory:
• C:\Users\...\Documents\Visral 3\Automatons\AutoImages.
The file name is the lead rule’s name with “$1” appended to it; i.e. leadname$1.c. The
section of memory map below shaded in green represents the image of a specific
automaton. The remainder of the map is space dynamically assigned by the emulator’s
multitasking controller.
Memory Map
Multitask control descriptor
Configuration word
Sequences
Automaton image pointer (Memory Map)
Allocated size of input signature space in bytes
Allocated size of output signature space in bytes
Transition
Allocated size of cell stack space in bytes
Allocated size of microcode space in bytes
Data
Signature size in bytes
Suspended signature pointer
Flags
Suspended results pointer
Sequence Location
Suspended stack pointer
Transition Location
Suspended current function pointer
Total Length
Total trace counter (external trace buffer)
Error code or process id
Input Signature space
Output Signature space
Cell Stack space
Microcode space
Notes:
Chapter: Automation
1. Microcode space is only applicable in the case of semiconductor implementations.
2. An Automaton DLL is available for use with third party applications.
Volume 1
98
Visral User Manual
The listing below is a sample file image from the compilation of a simple three state
automaton. It represents a state machine looking for a coin flip sequence head-tail-head ‘hth’ as
illustrated in the Visral Diagram rule ‘Lead’ and the state diagram below that.
unsigned
0x0039,
0x0000,
0x000d,
0x000f,
0x0000,
0x0000,
short map[ ] = {
0x0000, 0x0022, 0x0000,
0x0000,
0x0000, 0x000c, 0x0068,
0x0000, 0x000e, 0x0074,
0x0000, 0x0010, 0x0068,
0x0000,
0x0027, 0x0000, 0x0000, 0x0000,
0x000d, 0x0069,
0x000f, 0x0075,
0x0000, 0x0069, 0x0011, 0x0074, 0x0000, 0x0075,
0x0008, 0x000a, 0x0010, 0x0016, 0x0020,
0x0083, 0x0020, 0x0001, 0x0004, 0x0009, 0x6461, 0x6c01, 0x6165, 0x0064, 0x656c,
0x6461, 0x0000, 0x0051, 0x0031, 0x0071, 0x0051, 0x0093, 0x0031};
Chapter: Automation
This implementation utilizes precedence to represent the grammar. The ‘RE .’ element at
state 1 will accept any character, but because the ‘h’ element is above it, it has precedence.
The end result is, the ‘RE .’ element will never see an ‘h’ character. The same is true for the
next stage ‘RE.’ in parallel with the ‘t’ element.
Volume 1
99
Visral User Manual
Appendix
Covers:
Product Specifications
SCN
Accepted EBNF Forms (See Visral User Manual, Volume 2)
Product Specifications
item
Approx Max
Description/Comments
Elements
30,000
Per each displayed diagram
Text
30,000 bytes
Maximum length of text within an element
Levels
4,000
Diagram Levels
Rules
4,000
Per each displayed diagram
States
2,000
Per each displayed diagram
Loaded Diags
16
Maximum number of diagrams open at one time
Undo actions
1000
Per diagrams
Columns
4,000
Maximum number of columns
Rows
1,000,000
Maximum number of rows
Row data
30,000 bytes
Maximum bytes per Row
Recent Files
60 files
Definitions
Venue
A group of solutions covering a specific topic.
Panel
Chapter: Appendix
Folder
Operator
Volume 1
100