1
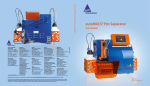
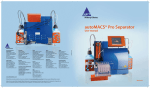
autoMACS® Pro Separator
Germany/Austria/
Switzerland
Miltenyi Biotec GmbH
Friedrich-Ebert-Straße 68
51429 Bergisch Gladbach
Germany
Phone +49 2204 8306-0
Fax +49 2204 85197
[email protected]
Australia
Miltenyi Biotec
Australia Pty. Ltd.
Unit 16A , 2 Eden Park Drive
North Ryde, NSW 2113
Australia
Phone +61 2 8877 7400
Fax +61 2 9889 5044
[email protected]
USA/Canada
Miltenyi Biotec Inc.
2303 Lindbergh Street
Auburn, CA 95602, USA
Phone 800 FOR MACS
Phone +1 530 888 8871
Fax +1 530 888 8925
[email protected]
Benelux
Miltenyi Biotec B.V.
Postbus 85183, 3508 AD Utrecht
The Netherlands
[email protected]
www.miltenyibiotec.com
Customer service Netherlands
Phone 0800 4020120
Fax 0800 4020100
Customer service Belgium
Phone 0800 94016
Fax 0800 99626
Customer service Luxembourg
Phone 800 24971
Fax 800 24984
China
Miltenyi Biotec Trading
(Shanghai) Co., Ltd.
Shanghai Office
Fareast International Plaza A
Rm. 2301, No. 319 Xianxia Rd.
Shanghai 200051, P.R. China
Phone +86 21 62351005
Fax +86 21 62350953
[email protected]
France
Miltenyi Biotec SAS
10 rue Mercoeur
75011 Paris, France
Phone +33 1 56 98 16 16
Fax +33 1 56 98 16 17
[email protected]
Japan
Miltenyi Biotec K.K.
Nittsu-Eitai Building 5F
16-10 Fuyuki, Koto-ku, Tokyo
135-0041, Japan
Phone +81 3 5646 8910
Fax +81 3 5646 8911
[email protected]
Singapore
Miltenyi Biotec
Asia Pacific Pte Ltd.
100 Beach Road
#28-06 to 28-08 Shaw Tower
Singapore 189702
Phone +65 6238 8183
Fax +65 6238 0302
[email protected]
Spain
Miltenyi Biotec S.L.
C/Luis Buñuel 2
Ciudad de la Imagen
28223 Pozuelo de Alarcón
(Madrid), Spain
Phone +34 91 512 12 90
Fax +34 91 512 12 91
[email protected]
140-002-015.04
Short instructions
United Kingdom
Miltenyi Biotec Ltd.
Almac House, Church Lane
Bisley
Surrey GU24 9DR, UK
Phone +44 1483 799 800
Fax +44 1483 799 811
[email protected]
Italy
Miltenyi Biotec S.r.l.
Via Persicetana, 2/D
40012 Calderara di Reno (BO)
Italy
Phone +39 051 6 460 411
Fax +39 051 6 460 499
[email protected]
Miltenyi Biotec provides products and services worldwide. Visit www.miltenyibiotec.com/local to find your nearest Miltenyi Biotec contact.
Unless otherwise specifically indicated, Miltenyi Biotec products and services are for research use only and not for therapeutic or diagnostic use.
autoMACS and MACS are registered trademarks of Miltenyi Biotec GmbH. Copyright © 2010 Miltenyi Biotec GmbH. All rights reserved.
Version 02
Copyright © 2010 Miltenyi Biotec. All rights reserved.
No part of this user manual may be reproduced, stored in a retrieval system, transmitted, published, or distributed in any
form or by any means, electronically, mechanically, by photocopying, microfilming, recording, or otherwise, without the
prior written consent of Miltenyi Biotec; however, notwithstanding the foregoing, the owners of the autoMACS Pro
Separator may make copies solely for purposes of training personnel in the use and servicing of the unit within their
business or organization.
Maximal care has been taken by Miltenyi Biotec in the preparation of this user manual. However, Miltenyi Biotec shall not
be liable for any technical or editorial errors or omissions contained herein or for incidental or consequential damages in
connection with the furnishing, performance, or use of this document. The information in this document is provided “as
is” without warranty of any kind, and is subject to change without notice.
autoMACS, MACS, and the MACS logo are registered trademarks or trademarks of Miltenyi Biotec GmbH or its affiliates in
Germany, the United States and/or other countries. Ficoll and Ficoll-Paque are trademarks of GE Healthcare companies.
BD and BD Falcon are trademarks of Becton, Dickinson and Company. All other trademarks mentioned in this document
are the property of their respective owners and are used for identification purposes only.
Unless otherwise specifically indicated, Miltenyi Biotec products and services are for research use only and not for
therapeutic or diagnostic use.
autoMACS® Pro Separator
Short instructions
Manufacturer
Miltenyi Biotec GmbH
Friedrich-Ebert-Straße 68
D – 51429 Bergisch Gladbach
Germany
Technical Support
Phone +49-2204-8306-830
Fax +49-2204-85197
[email protected]
www.miltenyibiotec.com
Version 02
4
Short instructions
1 Setting up and priming the
autoMACS® Pro Separator
1.1 Check that all bottles are filled with
the appropriate solutions. Empty the
waste bottle.
1.2 Check that the MACS® MiniSampler,
Code Reader, and Fluid Sensor cables
are correctly attached to the back of
the instrument.
Sensor cable plug
Code reader plug
MACS MiniSampler plug
Power socket
Green sensor cable for
Washing Solution
Blue sensor cable for
Running Buffer
Bottle closure
Short instructions
5
1.3 Switch on the autoMACS Pro
Separator—the instrument will
automatically initialize.
Note: To prime the
instrument select
Wash Now from the
Separation menu.
After priming, the instrument will automatically display the Status
menu.
on/off switch
Figure 1.1: Location of the on/off switch.
1.4 Confirm that the instrument status is
ready by viewing the Status menu.
Overview of the Status menu
1 Sample status
2 Fluid container filling status
3 Column status
4 Tube rack status
5 MiniSampler status
1.4.1 Confirm that the fluid container status is ready.
Left: Fluid containers are shown in green indicating ready.
Right: Fluid containers are shown in red and need replaced.
6
Short instructions
Status of fluid containers displayed in the Status menu
Container
Symbol
Symbol color and user action
Running Buffer
Green: no action required
Red: refill container
Gray: connect bottle sensor
Washing Solution
Green: no action required
Red: refill container
Gray: connect bottle sensor
Storage solution
Gray: no liquid detection; visually
check volume
Waste
Green: no action required
Red: empty waste or wrong sensor
cable is connected
Gray: connect bottle sensor
1.4.2 Confirm that the column status is ready.
Status of the columns:
Green: no action required
Red: exchange column
Grey: when no column has been installed
1.4.3 Confirm that the MiniSampler has been detected
and is correctly installed.
Symbol
Features
MACS MiniSampler
detected
No action required
No sampler
detected
Connect MACS MiniSampler
1.5 The instrument is now ready to
perform an experiment.
Short instructions
7
2 Performing
autolabeling and cell
separation
2.1 Choose an appropriate Chill Rack
and ensure is it pre-cooled to 4 °C.
2.1.1 Racks are automatically detected by the autoMACS
Pro Separator. Rack types and their features are
tabulated below.
Rack type
& symbol
Slots
Maximum
number of
samples
Minimum
first
incubation
volume
Maximum
final
labeling
volume
Maximum number of
cells per tube
Chill 5
24×5 mL
6
(5 mL
tubes)
0.2 mL
2.0 mL
2.0–4×10⁸
depends on cell labeling
concentration and
column capacity
0.25 mL
1 mL
Whole blood only
0.2 mL
6.5 mL
6.5×10⁸–1.3×10⁹
depends on cell labeling
concentration and
column capacity
1 mL
4 mL
Whole blood only
4 mL
8 mL
Whole blood only
Chill 15
Chill 50
8
15×15 mL
5×5 mL
6×50 mL
3×15 mL
3×5 mL
5
(15 mL
tubes)
3
(50 mL
tubes)
Short instructions
Note: Dilute cells in the
volume required for the
first labeling step.
2.2 Dilute single-cell suspension
according to recommendations in
the following table.
MACS Product
Strategy
Reagents
Cell
concentration
Minimal
volume*
Minimal
absolute
cell
number
Direct MicroBeads
- human
- rat
- non-human primate
Positive selection
or depletion
1
107 cells per
80 µL
160 µL
2.0×10⁷
Direct MicroBeads
- mouse
Positive selection
or depletion
1
107 cells per
90 µL
180 µL
2.0×10⁷
Whole Blood
MicroBeads
Whole blood or
bone marrow
1
Original
volume
0.25 mL –
8 mL
Cell Isolation Kits
Untouched
selection
2
107 cells per
40 µL
160 µL
4.0×10⁷
Cell Isolation Kits
Untouched
selection
3
107 cells per
30 µL
120 µL
4.0×10⁷
MicroBead Kits
Positive selection
or depletion
2
107 cells per
60 µL
120 µL
2.0×10⁷
* When working with fewer cells than the necessary minimal volume,
resuspend cells in the stipulated minimal volume.
2.3 Place the sample tubes into row A of
a pre-cooled Chill Rack. Load empty
tubes into the corresponding
positions along rows B and C.
R1
A
Ori
R2
B
Neg
R3
C
Pos
R4
Row A is for the original sample fraction i.e. “Ori”.
Row B is for the negative (“untouched“) fraction i.e. “Neg”.
Row C is for the positive (enriched) fraction i.e. “Pos”.
Reagent Rack positions are also shown (R1–R4).
Short instructions
9
2.4 Insert the MACS Reagent Rack 4 onto
the MACS MiniSampler.
The MACS Reagent Rack snaps into position as illustrated above.
2.5 Scan reagent vials.
2.5.1 On the “Reagent” menu, select “Read Reagent”
and present a reagent vial in front of the 2D code
reader. Ensure the 2D code is facing the blinking
code-reader light.
10
Short instructions
The optimal reading distance is 0.5–2.5 cm from the code reader cover, tilt
the vial as shown above.
2.5.2 After successfully scanning a reagent vial,
the software will automatically highlight
the next available reagent rack position.
To view details about the scanned reagent vial, highlight the
appropriate rack position. This is R1 in the example below.
2.5.3 Insert the reagent vial into the correct rack
position.
2.6 (Optional) Manual entry of reagents
This is only recommended if the reagent cannot be identified by the
barcode reader.
Please turn over.
Short instructions
11
2.6.1 Select “Reagent” menu and highlight the position
where the vial will be placed on the reagent rack.
Four positions are available: R1, R2, R3, and R4.
2.6.2 Select “Enter Reagent” from the lower navigation
bar. Enter the reagent-specific product order
number.
The order number is located on the product data sheet. In the event
that the data sheet is misplaced, visit www.miltenyibiotec.com to
download a printable PDF of the document.
2.6.3 If a correct product number is entered the software
will immediately recognize and list the reagent or
kit components.
To confirm your choice, touch the listed reagent ( ).
The reagent will be assigned to a rack position and the next available
reagent rack position will be automatically highlighted. Repeat the
procedure for any remaining reagents or kit components.
Finally, select “OK“ to complete reagent entry.
The NK Cell Isolation Kit, mouse was entered.
12
Short instructions
2.7 Place the sample rack onto the
MACS MiniSampler and click on the
Separation menu.
1
2
3
4
5
Sample rack template
Sample labeling options
Sample processing volume
Separation program
Wash procedure
2.8 Define the sample rack template for
cell separation.
2.8.1 Highlight the desired position(s) on the sample
separation template and assign an autolabeling
protocol from the Labeling menu.
The recommended cell separation and wash program will be
automatically displayed. To change these settings highlight the
desired cell separation and wash options using the Separation and
Wash menus, respectively.
2.8.2 To assign a corresponding sample volume click on
“Volume” and insert the sample volume.
Select “Enter”.
Refer to step 2.2 above for information about using the correct
volume.
Short instructions
13
Tip: It is possible to change the rinse mode between samples or to
instruct the instrument to go into sleep mode after finishing the last
sample:
Qrinse ; Rinse ; Sleep comprehensive explanation.
. Refer to section 3.5.4 for a more
2.9 Select “Run” to start the cell
separation experiment and click
“OK” to confirm that enough buffer
is available for the experiment.
CD4 positive cell separation will be performed on sample positions 1
and 2. Clicking “Run” will start the experiment. The last wash step is
Sleep, thus a full rinse will be performed before the machine goes
into sleep mode.
2.10 Monitor the cell separation
experiment
2.10.1 View the status of the fluid containers (refer to step
1.4.1).
2.10.2 Use the Status menu display to view the overall
instrument status.
Sample processing statuses are shown as color-coded graphics. The
table below shows an example of an autolabeling experiment
performed using CD4 MicroBeads, human.
14
Short instructions
Graphic
Definition
Graphic
Definition
1
Status: Waiting.
Sample processing
has not yet started.
Rinsing.
2
Sample autolabeling
is underway.
Sample processing is
completed.
3
Incubation of cells
with labeling
reagents.
Progress has been
stopped or
cancelled.
4
*
Sample is being
processed, e.g.,
sample uptake.
4
2.10.3 Check bottle illuminations, even from across the
laboratory.
The autoMACS Pro Separator has a bottle illumination that facilitates
monitoring of the instrument’s status.
Code
Status
User action
Green
Ready for separation
No action required.
Blue
Instrument operating
No action required.
Yellow
Not ready for
separation
Run wash program
(Rinse or Qrinse) before
starting a separation.
Red
Error
Check screen for error
detection.
Purple
Program Sleep is
completed
Switch off autoMACS
Pro Separator.
Blinking
Action required
Check screen for
required action.
Short instructions
15
2.11 (Optional) Switch the instrument off
for long-term storage.
Note: To store the
autoMACS Pro Separator
for a period longer than
two weeks run the Store
program.
1.11.1 Select “Option” and “Special”.
1.11.2 Select “Store” and press “Run”.
1.11.3 Replace the columns with column substitutes
(refer to section 3.3.4 of the User Manual).
Note: For daily usage the
instrument should not be
switched-off but placed
into SLEEP mode. See
section 4.
16
1.11.4 Select “Done”.
1.11.5 Switch off the autoMACS Pro Separator using the
main power switch.
Short instructions
3 Performing manual
labeling and cell
separation
3.1 Ensure that the appropriate Chill
Rack is pre-cooled to 4 °C.
3.1.1 Choose an appropriate Chill Rack
Racks are automatically detected by the autoMACS Pro Separator.
Rack types and their features are tabulated below.
3.1.2 Dilute single-cell suspension according to the
recommendations in the respective product data
sheet.
Visit www.miltenyibiotec.com/protocols to download product data
sheets and protocols.
Rack type &
symbol
Slots
Maximum
number of
samples
Maximum
sample
volume
Maximum number
of total cells per tube
Chill 5
24×5 mL
6
(5 mL
tubes)
2.5 mL
5.0×10⁸
Chill 15
15×15 mL
5×5 mL
5
(15 mL
tubes)
12.5 mL
2.5×10⁹
Chill 50
6×50 mL
3×15 mL
3×5 mL
3
(50 mL
tubes)
50 mL
4.0×10⁹
Short instructions
17
3.3 Place the sample tubes into row
A of the pre-cooled Chill Rack.
Place empty tubes in the
corresponding rows B and C;
these are for the negative and
positive cell fractions, respectively.
For example, a Chill 5 Rack has six available positions: A1–A6.
R1
A
Ori
R2
B
Neg
R3
C
Pos
R4
Row A is for the original sample fraction i.e. “Ori”.
Row B is for the negative (“untouched“) fraction i.e. “Neg”.
Row C is for the positive (enriched) fraction i.e. “Pos”.
Reagent Rack positions are also shown.
3.4 Place the sample rack onto the
MACS MiniSampler and click on the
Separation menu.
1
2
3
4
5
18
Short instructions
Sample rack template
Sample labeling options
Sample processing volume
Separation program
Wash procedure
3.5 Define the sample rack template for
cell separation
3.5.1 Select the desired position(s) in the sample
separation template field.
Tip: Select multiple sample positions to program them simultaneously.
3.5.2 Assign a corresponding cell separation program
using the Separation menu.
Positive selection programs:
Possel—Isolation of cells with normal antigen expression and
frequencies higher than 5%; select if purity is the highest priority.
Possel_s—Isolation of cells with low antigen expression and
frequencies higher than 5%; select if yield is the highest priority.
Posseld—For isolation of rare cells in low elution volume.
Posselds—For isolation of rare cells with low antigen expression.
Posseld2—For isolation of rare cells if purity is the highest priority.
Posselwb—For isolation of cell subsets from whole blood. Cell
samples are automatically diluted with Running Buffer.
Depletion programs:
Deplete—For removal of cells with normal to high antigen
expression and results in better target cell yield.
Depletes—Removal of cells with low antigen expression and results
in better target cell purity.
Depl05—Removal of cells with low antigen expression and results in
stringent depletion of cells.
Depl025—Removal of cells with low antigen expression and results
in stringent depletion of cells.
A_Depl07—Removal of cells with normal to high antigen expression
and results in a better target cell yield. This special program is
disabled by default. To enable select “Option“, “User settings“, and
“O_progs“.
A_Depls7—Removal of cells with low antigen expression and results
in a better target cell purity. This special program is disabled by
default. To enable select “Option“, “User settings“, and “O_progs“.
Short instructions
19
3.5.3 (Optional) It is not mandatory to assign a volume
for cell separation with manual labeling. However,
the autoMACS Pro Separator requires this
information to calculate and display the total
sample processing time.
To assign a corresponding sample volume click on “Volume“ and
insert the sample volume. Select “Enter“.
3.5.4 Using the Wash menu assign a wash step between
cell separation steps.
It is possible to change the rinse mode between samples or to
program the instrument to go into sleep mode after finishing the
experiment:
Qrinse Buffer.
: Standard short wash program that only uses Running
Rinse : Extensive rinsing program that uses Washing Solution
and Running Buffer.
Sleep : It is mandatory to use Sleep as the last wash program
before overnight storage. Upon completion of the Sleep program,
the fluidic system contains 70% ethanol.
20
Short instructions
3.6 Select “Run“ to start the cell
separation experiment and click
“OK“ to confirm that enough buffer
is available for the experiment.
Standard positive cell separation (Possel) will be performed on sample
positions 1 and 2. Clicking “Run“ will start the experiment. As the last wash
step is Sleep, a full rinse will be performed before the machine goes into
sleep mode.
3.7 Monitor the cell separation
experiment.
3.7.1 Use the Status menu display to view the overall
instrument status. Refer to section 1.4 for more
details.
3.7.2 Check bottle illuminations, even from across the
laboratory.
The autoMACS Pro Separator has a bottle illumination that facilitates
monitoring of the instrument’s status.
Code
Status
User action
Green
Ready for separation
No action required.
Blue
Instrument operating
No action required.
Yellow
Not ready for
separation
Run wash program
(Rinse or Qrinse) before
starting a separation.
Red
Error
Check screen for error
detection.
Purple
Program Sleep is
completed
Switch off autoMACS
Pro Separator.
Blinking
Action required
Check screen for
required action.
Short instructions
21
Note: To store the
autoMACS Pro Separator
for a period longer than
two weeks run the Store
program.
3.8 (Optional) Switch the instrument off
for long-term storage.
3.8.1 Select “Option“ and “Special“.
3.8.2 Select “Store“ and press “Run“.
Note: For daily usage the
instrument should not be
switched-off but placed
into SLEEP mode. See
section 4.
22
3.8.3 Replace the columns with column substitutes (refer
to section 3.3.4 of the User Manual).
3.8.4 Select “Done“.
3.8.5 Switch off the autoMACS Pro Separator using the
main power switch.
Short instructions
4 Setting the autoMACS
Pro Separator in SLEEP
mode
4.1
- Press the shutdown symbol (upper right-hand
corner of the display).
4.2
- Alternatively, select Sleep program as the last
washing step.
Short instructions
23
5 Maintenance of
the autoMACS Pro
Separator
5.1 Rinsing programs
Program
Description
Recommended
usage
Duration
Qrinse
Standard short rinse of
separation columns and
tubing system with
Running Buffer
Between
separations of
frequent cells
(> 5 %)
1.5 min
Rinse
Rinse of separation
columns and tubing
system with Washing
Solution and Running
Buffer
Between and
before separations
of rare cells
(< 5%)
4 min
5.2 Daily maintenance programs
24
Program
Description
Recommended
usage
Duration
Rinse
Rinse of separation
columns and tubing
system with Washing
Solution and Running
Buffer
Prior to first
separation
4 min
Sleep
Rinse with Washing
Solution followed by
filling with storage
solution
Before switching
OFF the autoMACS
Pro Separator
5 min
Short instructions
5.3 Periodic maintenance
Program
Description
Recommended
usage
Duration
Column
exchange
Replacement of
separation columns
Every two weeks
OR after 100
separations,
whichever comes
first
6 min
Safe
Decontamination
procedure with MACS
Bleach Solution
Every 3–6 months
21 min
Pump
syringe
Cleaning of pump syringe
(refer to user manual)
Every 1–3 months
Store
Rinse with Washing
Solution, followed by
storage solution;
replacement of columns
and substitutes
Before storing the
instrument for a
period longer than
two weeks
5.4 Column exchange
Replace autoMACS Columns every two weeks or after 100
separations, whichever comes first. Select menu Option
5.4.1 Select “Special“ and “Col_ex“.
5.4.2 Press “Run“.
5.4.3 When prompted, exchange the column.
Figure 5.1: “Col_ex” program.
5.4.4 Open front door and note the positions of the
columns (column 1: left; column 2: right).
Exchange one column at a time.
5.4.5 Remove column from slot; unscrew top column
connector followed by the bottom column
connector as shown in figure 5.2.
Short instructions
25
5.4.6 Dispose of the expired column.
5.4.7 Point the bottom of the fresh column towards the
autoMACS Pro Separator.
5.4.8 Insert bottom column connector. Screw in the
column by turning it clockwise. Repeat the
procedure for the top column connector.
1
1 Top Column Connector
2
2 autoMACS Pro Separation Column
3
3 Bottom Column Connector
Figure 5.2: Left: Exchange of the column. Right: Starting the “Col_ex”
program.
5.4.9 Push column into the magnet housing, with the
top column connector sitting on the guide in the
column slot.
5.4.10 Repeat installation for the second autoMACS
Column.
After exchange of separation columns, select “Done“. The autoMACS
Pro Separator system will be automatically primed with Running
Buffer and is then ready for cell separation.
26
Short instructions
autoMACS® Pro Separator
Germany/Austria/
Switzerland
Miltenyi Biotec GmbH
Friedrich-Ebert-Straße 68
51429 Bergisch Gladbach
Germany
Phone +49 2204 8306-0
Fax +49 2204 85197
[email protected]
Australia
Miltenyi Biotec
Australia Pty. Ltd.
Unit 16A , 2 Eden Park Drive
North Ryde, NSW 2113
Australia
Phone +61 2 8877 7400
Fax +61 2 9889 5044
[email protected]
USA/Canada
Miltenyi Biotec Inc.
2303 Lindbergh Street
Auburn, CA 95602, USA
Phone 800 FOR MACS
Phone +1 530 888 8871
Fax +1 530 888 8925
[email protected]
Benelux
Miltenyi Biotec B.V.
Postbus 85183, 3508 AD Utrecht
The Netherlands
[email protected]
www.miltenyibiotec.com
Customer service Netherlands
Phone 0800 4020120
Fax 0800 4020100
Customer service Belgium
Phone 0800 94016
Fax 0800 99626
Customer service Luxembourg
Phone 800 24971
Fax 800 24984
China
Miltenyi Biotec Trading
(Shanghai) Co., Ltd.
Shanghai Office
Fareast International Plaza A
Rm. 2301, No. 319 Xianxia Rd.
Shanghai 200051, P.R. China
Phone +86 21 62351005
Fax +86 21 62350953
[email protected]
France
Miltenyi Biotec SAS
10 rue Mercoeur
75011 Paris, France
Phone +33 1 56 98 16 16
Fax +33 1 56 98 16 17
[email protected]
Japan
Miltenyi Biotec K.K.
Nittsu-Eitai Building 5F
16-10 Fuyuki, Koto-ku, Tokyo
135-0041, Japan
Phone +81 3 5646 8910
Fax +81 3 5646 8911
[email protected]
Singapore
Miltenyi Biotec
Asia Pacific Pte Ltd.
100 Beach Road
#28-06 to 28-08 Shaw Tower
Singapore 189702
Phone +65 6238 8183
Fax +65 6238 0302
[email protected]
Spain
Miltenyi Biotec S.L.
C/Luis Buñuel 2
Ciudad de la Imagen
28223 Pozuelo de Alarcón
(Madrid), Spain
Phone +34 91 512 12 90
Fax +34 91 512 12 91
[email protected]
140-002-015.04
Short instructions
United Kingdom
Miltenyi Biotec Ltd.
Almac House, Church Lane
Bisley
Surrey GU24 9DR, UK
Phone +44 1483 799 800
Fax +44 1483 799 811
[email protected]
Italy
Miltenyi Biotec S.r.l.
Via Persicetana, 2/D
40012 Calderara di Reno (BO)
Italy
Phone +39 051 6 460 411
Fax +39 051 6 460 499
[email protected]
Miltenyi Biotec provides products and services worldwide. Visit www.miltenyibiotec.com/local to find your nearest Miltenyi Biotec contact.
Unless otherwise specifically indicated, Miltenyi Biotec products and services are for research use only and not for therapeutic or diagnostic use.
autoMACS and MACS are registered trademarks of Miltenyi Biotec GmbH. Copyright © 2010 Miltenyi Biotec GmbH. All rights reserved.
Version 02