1
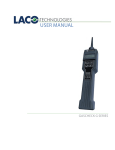
HELIUM SNIFFER PROBES
USER GUIDE
HELIUM SNIFFING TIPS
• When using a helium sniffer probe to test pressurized
components or system, ensure that there are no gross leaks
in the system prior to pressurizing. Gross leaks will allow the
surrounding air (or background) to become contaminated
with helium, which lowers the sensitivity of the leak test.
USE OF PROBE TIPS
The sniffer probe tip
uses vacuum which can
pull oil, grease and other
contaminants into the
line that may be harmful
to the sniffer probe and
leak detector. Make sure
the probe tip does not get
plugged.
• When venting helium from a pressurized test part, do not
vent in the same area where the testing is performed.
This will contaminate the surrounding air with helium.
• When the ambient air is contaminated with helium, a large
fan can be used to exhaust the test area and provide clean air.
• When sniffing a part with multiple potential leak locations,
always begin sniffing near the bottom of the part and work
towards the top. It may be necessary to repair leaks that are
found before proceeding. Helium escaping from the part will
rise and can give a misleading leak location.
CAUTION
Follow precautions to
ensure safe operation.
• Do not allow
moisture to be
drawn into the
probe.
PROCEDURE
1. Connect Sniffer probe to Sniffer or inlet Test Port for the
leak detector you are using. Refer to the leak
detector user manual for instructions.
• Do not inhale helium gas.
Helium is non-toxic, but
may cause suffocation.
Lack of sufficient oxygen
can cause serious injury
or death. Refer to Material
Safety Data Sheet.
2. Sniff leak test per the leak detector user manual
instructions.
3. While testing, do not plug or contaminate the sniffer
probe tip. If the probe becomes plugged or dirty, remove
the clear tube and filter assembly from the tip. Replace
with a spare unit supplied with the sniffer probe. Slide
the clear tube over the stainless steel tube so the filter
rests at the end of the probe tip. If probe is still clogged,
see sniffer tip replacement procedure
SPARE PARTS LIST
PART NUMBER
LMSA92097
LST-60
LST-30
DESCRIPTION
Tip Filter Assembly
Alcatel version sniffer tip
assembly LSP-01A-xx
Non-Alcatel sniffer tip
assembly LSP-01N-xx or
LSP-01HS-xx
SMT-07-1004 revB2
SNIFFER TIP REPLACEMENT PROCEDURE
1.Often, a cloggeded tip can be fixed by running compressed air or
nitrogen through the sniffer in test connection. Blow 10-40 psi
of gas through the probe for 20-30 seconds. Retest probe in leak
detector to see if the clog has cleared.
D
2.If clog is still present, contact LACO for the correct leak tip assembly
for your leak detector, P/N LST-60 for Alcatel leak detector or P/N
LST-30 for all other brands. See Step 3 installation instructions.
3.(A) Remove filter tip assembly and (B) loosen both cord grips
and (C) slide out main sniffing line. (D) While holding tubing
connection, remove SS tip from urethane tubing. Reinstall the
end of the new tip assembly with small pin sticking out into the
urethane tubing. Take care to not damage pin assembly. Reinstall
the sniffing line into the handle assembly and retighten the cord
grips
B
C
A
LACO Sniffer tip exploded view
Installing the filter tip assembly on the LACO Sniffer probe
SMT-07-1004 revB2