1
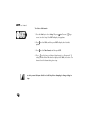
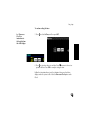
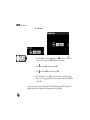
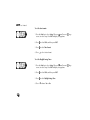
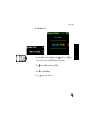
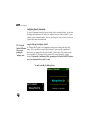
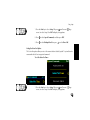
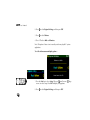
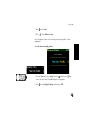
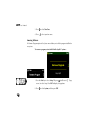
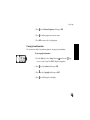
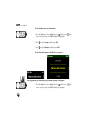
Using Setup
9. Using the Setup Program
The Setup program allows you to view or change system settings, including Clock, Display,
Speech Command, and Computer Response options. You can also set a password, back up and
restore system files, remove programs, choose localization settings, and adjust hardware
settings.
For more information, select a menu option, and then say “Help” or press the Help button.
After setting options in the Setup menu, as described in the sections below, press Back as often
as necessary to return to the Start menu.
Setting Clock and Date Options
The Clock option allows you to set the time, date, time and date source, and on-screen clock.
You may also change the date and time format, time zone, and daylight savings time. If you
have the USB Navigation unit (UDR12) installed, you can set time more accurately using the
Global Positioning System (GPS) clock option. Press the Enter key only when prompted. Press
the Back key at any time to return to the previous screen.
To set the clock—
Set the clock for
either regular or
military time
First, select a clock format to display time as regular 12 hour (hh:mm:ss:tt) or
military 24-hour (HH:MM:SS) time format. Once a setting is configured,
formats, time and date are automatically set.
97
User’s Manual
To select a clock format—
1. Press the Start key to select Setup. OR press
(small screen) /
screen) to select Setup. Press ENT to display Setup options.
(large
2. Press to select Clock, and then press ENT to display clock (or date)
options.
3. Press
to select Time Format, and then press ENT.
4. Press
to select from a selection of time formats (e.g., hh:mm:ss:tt) “tt”
setting includes AM or PM when the display is idle. Next, set the time. The
format selected is shown during time setup.
For safety, ensure that your vehicle is at a full stop before attempting to change settings in
Setup.
98
Using Setup
To continue setting the time—
See “On-screen
Clock” for
instructions for
the length of time
the clock displays
5. Press
to select Set Time, and then press ENT.
6. Press to enter time values in each box. Press
to move to the next or
previous edit box. Press ENT to complete setting the time.
Follow the instructions above to set the duration of time your clock time
displays when the system is idle. Select the On-screen Clock option under
Clock.
99
User’s Manual
To set the date—
1. Press the Start key to select Setup. OR press
(small screen) /
screen) to select Setup. Press ENT to display Setup options.
2. Press
to select Clock, and then press ENT.
3. Press
to select Set Date, and then press ENT.
(large
4. At the Set Date screen, press to enter date values in each box (month,
date, year). Press
to move to the next or previous edit box. Press ENT to
set the date.
For more accurate time, set the date based on Global Positioning System (GPS) signals. This
capability does require the optional USB Navigation unit to be installed.
100
Using Setup
To set the date and time from GPS—
1. Press the Start key to select Setup. OR press
(small screen) /
screen) to select Setup. Press ENT to display Setup options.
2. Press
to select Clock, and then press ENT.
3. Press
to select Set Date/Time from GPS, and then press ENT.
(large
To set the date format—
1. Press the Start key to select Setup. OR press
(small screen) /
screen) to select Setup. Press ENT to display Setup options.
2. Press
to select Clock, and then press ENT.
3. Press
to select Date Format, and then press ENT.
(large
4. Press
to select a format. Note that “d” indicates day, “m” indicates
month, and “y” indicates year.
101
User’s Manual
To set the time format—
1. Press the Start key to select Setup. OR press
(small screen) /
screen) to select Setup. Press ENT to display Setup options.
2. Press
to select Clock, and then press ENT.
3. Press
to select Time Format.
4. Press
(large
to select a time format.
To set the Daylight Savings Time—
1. Press the Start key to select Setup. OR press
(small screen) /
screen) to select Setup. Press ENT to display Setup options.
2. Press
to select Clock, and then press ENT.
3. Press
to select Daylight Savings Time.
4. Press
102
to choose Yes or No.
(large
Using Setup
To set the time zone—
1. Press the Start key to select Setup. OR press
(small screen) /
screen) to select Setup. Press ENT to display Setup options.
2. Press
to select Clock, and then press ENT.
3. Press
to select Time Zone.
4. Press
(large
to select your time zone.
103
User’s Manual
Setting Date and Time from GPS
The Joyride™ system allows you to automatically update the GPS clock when you select that
function.
To set date and time using GPS—
1. Press the Start key to select Setup. OR press
(small screen) /
screen) to select Setup. Press ENT to display Setup options.
2. Press
(large
to select Set Date / Time from GPS, and then press ENT.
3. A “Please Wait” message displays while the system gathers data from the
GPS satellites.
4. A confirmation subsequently displays giving the current date and time.
Press ENT to exit.
If you change the clock manually, Automatic GPS clock updates will be disabled. You will
need to repeat the steps above.
104
Using Setup
Configuring the Clock Display
Setting the On-Screen Clock
From the On-Screen Clock menu, you can set various clock display features, choose an onscreen clock theme, set time out values and configure how much time should elapse before
the Joyride™ system displays the selected clock display options. Press the Back key at any time
to return to the previous screen.
To set a delay time for the clock display—
1. Press the Start key to select Setup. OR press
(small screen) /
screen) to select Setup. Press ENT to display Setup options.
2. Press
(large
to select Display, and then press ENT.
3. On-Screen Clock is displayed. Press ENT.
4. Theme: “None” is displayed. Press
5. Press
to select “Clock.”
and select a delay value (10 sec. - 5 min.).
105
User’s Manual
When your system is idle, the screen displays a clock icon. You can choose whether to display
the clock.
To set the Start Menu timeout value—
1. Press the Start key to select Setup. OR press
(small screen) /
screen) to select Setup. Press ENT to display Setup options.
2. Press
to select Display, and then press ENT.
3. Press
to select Menu Timeouts, and then press ENT.
4. Press
to select Start Menu.
5. Press
106
to select a timeout value.
(large
Using Setup
Getting Help
When you press the Help button for immediate help for a screen you are currently viewing,
you can set the length of time the help text displays.
To set Option Menu timeout values—
1. Press the Start key to select Setup. OR press
(small screen) /
screen) to select Setup. Press ENT to display Setup options.
2. Press
to select Display, and then press ENT.
3. Press
to select Menu Timeouts, and then press ENT.
4. Press
to select Option/Help.
5. Press
(large
to select a time out value: 5, 10, 20 or 30 seconds.
107
User’s Manual
Configuring Speech Commands
The Speech Commands menu allows you to change the voice command settings. You can turn
the wakeup word option on or off, and set the amount of time you want the Joyride™ system
to wait for a voice command response. You may also change the mute level as well as view or
set global and custom word commands.
PTT - Using the
Push-to-Talk button
is the same as
speaking the
“wakeup” word
Setting the Wakeup Word Option (AutoPC)
The “Wakeup Word” option is very important to promote voice training and safety while
driving. This is a word that is recognized by the Joyride™ system speech recognition and
allows you to say commands to activate the Joyride™ system features. This is what turns the
voice recognition ON. This option must be turned ON to secure the Joyride™ system’s
attention. If you turn the “wakeup word” Off, you must press the Push-to-Talk (PTT) button to
issue voice commands to the Joyride™ system.
To enable or disable the Wakeup Word—
108
Using Setup
1. Press the Start key to select Setup. OR press
(small screen) /
screen) to select Setup. Press ENT to display Setup options.
2. Press
to select Speech Commands, and then press ENT.
3. Press
to select Wakeup Word then press
(large
to select On or Off.
Setting the Listen For Option
The Listen For option allows you to set the amount of time that the Joyride™ system listens for
commands after the last recognized command.
To set the Listen For Time—
1. Press the Start key to select Setup. OR press
(small screen) /
screen) to select Setup. Press ENT to display Setup options.
(large
109
User’s Manual
2. Press
to select Speech Commands, and then press ENT.
3. Press
to select Listen For.
4. Press
to select a value (2sec, 5sec, 10sec, 15sec, 20sec, Always.)
Setting the Mute Level Option
The Mute Level option, when enabled, will mute non-speech related audio output when you
issue the wakeup command or press the PTT button.
To set the mute level—
1. Press the Start key to select Setup. OR press
(small screen) /
screen) to select Setup. Press ENT to display Setup options.
PTT - Using the
Push-to-Talk
button is the
same as speaking
the “wakeup”
word
110
2. Press
to select Speech Commands, and then press ENT.
3. Press
to select Mute Level.
(large
4. Press
to select a Mute Level. Your choices are Partial, Full, or None.
(Choose None to disable the Mute Level option.)
Using Setup
Setting Global Command Options
Using speech commands, you can communicate with the Joyride™ system without taking your
eyes off the road or your hands off the wheel.
DVD and CF Player
must be trained
after initial
software
installation, and
must be selected as
Global Commands
via Setup
Global commands are Voice Commands that are available after you “wake up” the Joyride™
system: What can I say?, What time is it?, Help, DVD Player, CF Player, CD Player, Voice
Memo, Address Book, Messages, Volume, Mute, Clock, Setup, Navigation, Radio, End,
Auxiliary and Audio. You must voice train additional command words that are not yet
available. Ten global commands can be active at any one time.
To set a global command—
1. Press the Start key to select Setup. OR press
(small screen) /
screen) to select Setup. Press ENT to display Setup options.
2. Press
(large
to select Speech Commands, and then press ENT.
111
User’s Manual
3. Press
to select Global Commands, and then press ENT.
4. Press
to select the phrase for each of the 10 Global Commands available.
5. For each command, press
unused commands.
6. Press
to replace it with a command from the list of
to go to the next command you want to replace.
See page xxviii for more details on Global Commands and Custom
Commands.
Setting Custom Command Options
The Custom Commands option allows you to substitute speech commands with custom
commands. You can use this feature to tune the Joyride™ system’s response to your voice or to
substitute various speech commands with alternate speech commands.
To set a custom command—
1. Press the Start key to select Setup. OR press
(small screen) /
screen) to select Setup. Press ENT to display Setup options.
2. Press
112
to select Speech Commands, and then press ENT.
(large
Using Setup
3. Press
to select Custom Commands, and then press ENT.
4. In the Custom Command list, select the letter representing the first letter of
the command word you want to replace. Press to select one of the
default speech commands listed for the selected alphabet.
When you locate the command you want to replace, press ENT. An
instruction displays saying “Say Command Word 3 times at the tone
prompt.”
Press ENT to begin recording your command word. Speak your custom
word 3 times. A confirmation message will display.
113
User’s Manual
Configuring Computer Responses
The Computer Responses menu options allow you to change the computer voice volume,
pitch, speed, and sound scheme. After making changes, you can select the Test Voice option to
test your new settings. Other options allow you to change computer feedback responses when
you issue a voice command or select Start.
Setting Computer Voice Options
As described below, you can adjust the Volume, Pitch, and Speed of the computer voice.
To set the Computer Voice Volume—
1. Press the Start key to select Setup. OR press
(small screen) /
screen) to select Setup. Press ENT to display Setup options.
2. Press
to select Computer Responses, and then press ENT.
3. Press
to select Computer Voice, and then press ENT.
4. Press
to select Volume.
5. Press
114
to adjust the Computer Voice volume.
(large
Using Setup
To set the Computer Voice Pitch (the sound of the voice)—
1. Press the Start key to select Setup. OR press
(small screen) /
screen) to select Setup. Press ENT to display Setup options.
2. Press
to select Computer Responses, and then press ENT.
3. Press
to select Computer Voice, and then press ENT.
4. Press
to select Pitch.
5. Press
(large
to set the Pitch (Tone).
To set the Computer Voice Speed—
1. Press the Start key to select Setup. OR press
(small screen) /
screen) to select Setup. Press ENT to display Setup options.
2. Press
to select Computer Responses, and then press ENT.
3. Press
to select Computer Voice, and then press ENT.
(large
115
User’s Manual
4. Press
5. Press
to select Speed.
to adjust the speed.
To test computer voice settings—
1. Press the Start key to select Setup. OR press
(small screen) /
screen) to select Setup. Press ENT to display Setup options.
116
2. Press
to select Computer Responses, and then press ENT.
3. Press
to select Computer Voice, and then press ENT.
4. Press
to select Test Voice, and then press ENT.
(large
Using Setup
Setting the Speech Command Option
When you wake up the Joyride™ system, it responds, by default, with a voice that tells you
which program is active.
To enable or disable Speech Commands—
1. Press the Start key to select Setup. OR press
(small screen) /
screen) to select Setup. Press ENT to display Setup options.
2. Press
to select Computer Responses, and the press ENT.
3. Press
to select Speech Commands.
4. Press
(large
to select Voice or None.
117
User’s Manual
Setting the Start Menu Option
When you open the Start Menu, the Joyride™ system, by default, responds with a voice that
tells you which program is active.
To enable or disable this option—
1. Press
to select Computer Responses, and then press ENT.
2. Press
to select Start Menu, and then press ENT.
3. Press
118
to select Voice or None.
Using Setup
Setting the Sound Scheme Option
The Joyride™ system responds to voice commands and key presses with audible feedback
tones. As you prefer, you can enable or disable the sound scheme associated with these tones.
To set sound scheme—
1. Press the Start key to select Setup. OR press
(small screen) /
screen) to select Setup. Press ENT to display Setup options.
2. Press
3. Press
(large
to select Sound Scheme, and then press ENT.
to select AutoPC or None.
119
User’s Manual
Setting a Password
If you skip voice
training of
password it will not
be saved
The password option allows you to set a password to secure your Joyride™ system. You need
to set both a numeric password and a voice password. To set, change, or clear your password,
press ENT.
To set a Password—
1. Press the Start key to select Setup. OR press
(small screen) /
screen) to select Setup. Press ENT to display Setup options.
2. Press
to select Password, and then press ENT.
3. At Set Password, press ENT.
120
(large
Using Setup
4. Enter up to four numbers using the keypad. Press the “*” key to delete
entries.
5. Press ENT to save your password.
Configuring Regional Settings
The Regional Settings option lets you choose to view distance in miles or kilometers, or fuel
quantity in gallons or liters. You can also specify a time zone.
To set the distance display option—
1. Press the Start key to select Setup. OR press
(small screen) /
screen) to select Setup. Press ENT to display Setup options.
(large
121
User’s Manual
2. Press
to select Regional Settings, and then press ENT.
3. Press
to select Distance.
4. Press
to select Miles or Kilometers.
Note: This option / feature is not currently used on any Joyride™ system
application.
To set the fuel measurement display option—
1. Press the Start key to select Setup. OR press
(small screen) /
screen) to select Setup. Press ENT to display Setup options.
2. Press
122
to select Regional Settings, and then press ENT.
(large
Using Setup
3. Press
4. Press
to select Fuel.
to select Gallons or Liters.
Note: This option / feature is not currently used on any Joyride™ system
application.
To set the time zone display option—
1. Press the Start key to select Setup. OR press
(small screen) /
screen) to select Setup. Press ENT to display Setup options.
2. Press
(large
to select Regional Settings, and then press ENT.
123
User’s Manual
3. Press
4. Press
to select Time Zone.
to select your time zone.
Removing Software
The Remove Program option in the System menu allows you to delete programs installed on
your system.
To remove a program you’ve installed in the Joyride™ system—
1. Press the Start key to select Setup. OR press
(small screen) /
screen) to select Setup. Press ENT to display Setup options.
2. Press
124
to select System, and then press ENT.
(large
Using Setup
3. Press
to select Remove Program, and then press ENT.
4. Press
to find the program you want to remove.
5. Press ENT to remove the selected program.
Viewing System Information
The System menu under Setup contains options for viewing system information.
To view copyright information—
1. Press the Start key to select Setup. OR press
(small screen) /
screen) to select Setup. Press ENT to display Setup options.
2. Press
to select System, and then press ENT.
3. Press
to select Copyright, and then press ENT.
4. Press
to scroll through the text display.
(large
125
User’s Manual
To view hardware processor information—
1. Press the Start key to select Setup. OR press
(small screen) /
screen) to select Setup. Press ENT to display Setup options.
2. Press
to select System, and then press ENT.
3. Press
to select Hardware, and then press ENT.
(large
To view how much memory is installed on your system—
Some programs may not function properly if memory amount is inadequate.
1. Press the Start key to select Setup. OR press
(small screen) /
screen) to select Setup. Press ENT to display Setup options.
126
(large
Using Setup
2. Press
to select System, and then press ENT.
3. Press
to select Memory Information, and then press ENT.
To view Main Battery Power information—
1. Press the Start key to select Setup. OR press
(small screen) /
screen) to select Setup. Press ENT to display Setup options.
2. Press
(large
to select System, and then press ENT.
3. Press to select Power, and then press ENT to view Main Battery Power
and Backup Battery Information. (This is not to be confused with the main
car battery’s status.)
To view system-related version information—
1. Press the Start key to select Setup. OR press
(small screen /
screen) to select Setup. Press ENT to display Setup options.
(large
2. Press
to select System, and then press ENT.
3. Press
to select Version, and then press ENT to view Version Information.
127
User’s Manual
Configuring Memory Settings
The Joyride™ system allows you to adjust how its memory is allocated between the operating
system and storage.
The actual STORAGE capacity, (typical use if for user input data storage) has a 16MB
(16,384 KB) limit. It is possible to adjust the allocation bar to APPEAR to move past the limit.
Increases past the limit will not allow more storage. If you exit, then re-access Memory
Information, the allocation bar resets to 16MB maximum capacity. Avoid adjusting storage
past the limit.
.
To configure memory settings—
128
Using Setup
1. Press the Start key to select Setup. OR press
(small screen) /
screen) to select Setup. Press ENT to display Setup options.
2. Press
to select System, and then press ENT.
3. Press
to select Memory Information, and then press ENT.
(large
4. Press to display either the summary storage reading or the allocation
scale.
5. To increase the amount of memory available for running programs (RAM),
press (Left). The yellow bar widens to indicate additional memory
allocated. To increase the amount of memory for storage, press (Right).
6. Press Back to return to the previous screen.
129
User’s Manual
Configuring the IR Port
The Infrared Transfer Speed option allows you to set the data transfer speed associated with the
built-in IR port.
To set the infrared transfer speed—
1. Press the Start key to select Setup. OR press
(small screen) /
screen) to select Setup. Press ENT to display Setup options.
2. Press
3. Press
130
to select Infrared, and then press ENT.
to select Slow or Fast.
(large
Using Setup
Configuring Backup and Restore
A memory backup or restore can be made to the 32 MB for larger CompactFlash card (CF)
supplied with your Joyride™ system.
A Backup will save all radio presets, audio settings, address book information, navigation, and
telephone applications if installed.
Do not turn your auto ignition switch OFF or pull the CF out during a backup or restore.
Data transfer will not occur. See Troubleshooting & FAQs for more information.
To back up or restore data to the CF card—
1. Press the Start key to select Setup. OR press
(small screen) /
screen) to select Setup. Press ENT to display Setup options.
2. Press
(large
to select Backup / Restore, and then press ENT.
3. Press to select Backup or Restore and follow the prompts to complete the
backup or restore.
131
User’s Manual
132