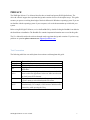
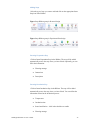
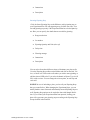
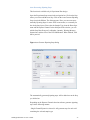
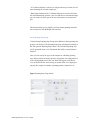
1
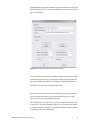
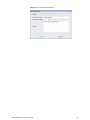
WellLight Software v2 User’s Guide For Windows™ operating systems Version 2.0 – 07/2012 Soft Flow, Inc. Soft Flow Hungary Ltd. 5009 Excelsior Blvd. Suite 154 H-7628 Pécs, Kedves str 20. St. Louis Park, MN 55416 USA Hungary Tel: +1 (952) 681-7960 Tel: +36 72 538-154 Fax: +1 (952) 303-5178 : +36 72 240-065 http://www.softflow.com http://www.softflow.hu TABLE OF CONTENTS Document History ..........................................................................................................4 Technical Support and Warranty ...............................................................................4 Copyright and trademarks ...........................................................................................5 Safety Notices ................................................................................................................5 Package contents ............................................................................................................6 PREFACE .......................................................................................................................7 Text Conventions ....................................................................................................7 Technical Assistance ...............................................................................................8 Limitations ..............................................................................................................9 System Requirements and Installation ......................................................................10 System Requirements ...........................................................................................11 Installation ............................................................................................................12 Software Activation ..............................................................................................12 SOFTWARE STARTUP ......................................................................................13 WellLight Workflows .................................................................................................14 About Workflows .................................................................................................15 Standard WellLight Workflow .............................................................................15 WellLight Protocol Workflow ..............................................................................15 Using WellLight Assay Protocols ..............................................................................16 WellLight Assay Protocol Database .....................................................................17 Downloading and importing protocol ...................................................................17 Creating Experiment Plan .........................................................................................19 WellLight Experiment Plan ..................................................................................20 Creating Plan from Protocol .................................................................................20 Creating Plan without Protocol .............................................................................22 Planning the Experiment ............................................................................................24 Entering Experiment Plan Data ...........................................................................25 Designing the Plate Layout ...................................................................................26 Adding Experiment Steps ........................................................................ 31 Saving Experiment Plan As ..................................................................................38 Closing Experiment Plan ......................................................................................38 Creating and Executing Experiment .........................................................................39 WellLight Experiments .........................................................................................40 Creating Experiment .............................................................................................40 Executing the Experiment .....................................................................................41 Data Management .......................................................................................................43 Data Libraries .......................................................................................................44 Experiments ..........................................................................................................44 Experiment Plans ..................................................................................................45 Protocols ...............................................................................................................46 Reagents ................................................................................................................48 TROUBLESHOOTING ..............................................................................................49 Using Help ............................................................................................................50 User Manual ..........................................................................................................50 Checking WellLight Device Status .......................................................................50 Contacting Support ...............................................................................................51 Document History Version Date Change Description 1.0 08/2011 New Document 2.0 07/2012 Update for Software version 2.0 Technical Support and Warranty A soft copy (PDF) of the User Manual is loaded in your product CD. A printed copy may be requested through our tech support site at www.softflow.com. Should you encounter any problem, please give us an opportunity to address it. Most technical support questions can be answered through our knowledge base or email support service at www.softflow.com. If the answer is not available, or if you prefer, please contact Soft Flow at the information shown above/below. Email support is free for the entire warranty period and our extensive knowledge base is available 24/7. To help us keep you informed of new features and services, remember to register your product online at www.softflow.com. This Warranty does not include: alterations to the product damage to the product caused by inadequate or improper repairs carried out by any person or entity which is not authorized by the manufacturer to perform warranty services on its behalf damage to the product caused by negligence, accidents, modifications, defective installation or misuse and use of inappropriate spare parts damage to the product caused by fire, immersion in water, lightning, earthquake, inadequate ventilation, incorrect application of main voltage or any other cause beyond the control of Soft Flow damage caused to any other goods which can be used with the product, but are not the product itself consumable or wearing items requiring replacement as part of normal service, including (but not limited to) dry cells and rechargeable batteries WellLight Software v2 User’s Guide 4 products from which any or all serial numbers have been removed, modified or defaced This limited 1 year warranty is available to any person, who has legally obtained the product. For full details of the warranty please contact Soft Flow Ltd. Copyright and trademarks The information contained in this manual has been validated at the time of publication. Specifications are subject to change without notice. The manufacturer reserves the right to make any changes and improvements to the products described in this manual at any time and without prior notice. Consequently, the manufacturer assumes no liability for damages incurred directly or indirectly from errors, omissions or discrepancies between the product and the manual. WellLight is a registered trademark of Soft Flow. Other brands and product names are trademarks or registered trademarks of their respective holders. No part of the specifications may be reproduced in any form or by any means or used to make any derivative such as translation, transformation, or adaptation without permission from Soft Flow. Copyright 2012. All rights reserved. www.softflow.com http://welllight.softflow.com Safety Notices Avoid using this product during an electrical storm. There may be a remote risk of electric shock from lightning. Follow all instructions. Install in accordance with the manufacturer’s instructions. Do not install near any heat sources such as radiators, heat registers, stoves, or other apparatus that produce heat. WellLight Software v2 User’s Guide 5 Package contents The following items are included in your box: WellLight Device with cable CD-ROM with Software installer and User Manual Quick Start Guide Note: Make sure that the box contains the above items. If any of the listed items are damaged or missing, please contact your distributor. WellLight Software v2 User’s Guide 6 PREFACE The WellLight Software User Manual describes how to install and operate WellLight Software. The device & software support the experiment design and execution for 96 well microplate assays. This guide assumes you possess a working knowledge of the basic Microsoft® Windows® operating system. If you are not familiar with the operating system of your computer, refer to the documentation provided with your system. Before using WellLight™ Software, review the ReadMe file by double-clicking the ReadMe icon added to the Start Menu at installation. The ReadMe file contains important information not covered in this guide. The User Manual describes the software through usual experiment design and execution. If you have any problems or questions please contact us at: [email protected]. Text Conventions The following table lists text and keyboard conventions used throughout this guide. Table 1.1 Convention NOTICE TIP Italics > Ctrl-X Text and keyboard conventions Use Indicates key information about the software. Highlights features or hints that can save time and prevent difficulties. Italics are used to highlight book titles and new or unfamiliar terms on their first appearance in the text. Italics are also used to clarify some GUI elements. The arrow indicates a menu choice. For example: “Select File > Print” means to select Print from the File menu. When used with key names, a dash means to press two keys simultaneously. For example, Ctrl-P means to hold down the Control key while pressing the P key. WellLight Software v2 User’s Guide 7 Technical Assistance For technical questions or assistance in solving a problem: Read sections of the documentation specific to the operation you are performing. See Troubleshooting. See Knowledge Base and FAQ on website (http://welllight.softflow.com) Send bug report from online Bug Report Form (http://welllight.softflow.com – Technical Support) If additional assistance is required, contact Soft Flow Hungary Ltd. technical support representative or supplier. When contacting Soft Flow, have the following information available: - Operating system and version running on your computer - name and version of the software you are using - any error messages - details of recent system performance WellLight Software support in North America: Soft Flow, Inc., Sales Office 5009 Excelsior Blvd. Suite 154 St. Louis Park MN55416 Tel: +1 (952) 681-7960 Fax: +1 (952) 303-5178 [email protected] In all other countries contact: Soft Flow Hungary Ltd. H-7628 Pécs, Kedves str 20. Hungary Call: +36 72 538-154 [email protected] WellLight Software v2 User’s Guide 8 Limitations For Research Use Only. Not for use in diagnostic or therapeutic procedures. WellLight Software has been written and manufactured by Soft Flow Hungary Ltd. Software is provided as-is and is not warranted to be defect-free. The foregoing is exclusive and in lieu of all other warranties either expressed or implied, including warranty of merchantability, fitness for particular purpose, and non-infringement. Customers who have questions or problems regarding the WellLight Software or the device should contact Soft Flow Hungary Ltd. at [email protected] (see Technical Assistance on page 7). WellLight Software v2 User’s Guide 9 Chapter 1 System Requirements and Installation WellLight Software v2 User’s Guide System Requirements This version of WellLight Software has been validated for use on computers configured with English (United States) regional options running on: · Microsoft Windows XP Professional Edition (32 and 64 bit) with Service Pack 3 · Microsoft Windows 7 Professional, Enterprise, Ultimate Editions (32 and 64 bit) with Service Pack 1 Compatibility with other operating systems or regional options has not been tested. The software should be compatible with computers with MS Windows XP Home Edition, MS Windows Vista Home Basic/Home Premium/Business/ Enterprise/Ultimate Edition and Windows 7 Home Editions operating systems. WellLight Software version 2 requires a PC workstation equipped with the following minimum configuration: · Intel Pentium 4 processor (2 GHz or better recommended) · 512MB RAM or higher for Windows 7 · 50 MB available hard drive space for the installation (additional space is required for the MS .Net Framework 4 and Entity Framework 4.1) · CD-ROM drive (Required for CD media version. Not applicable for download version.) · Video RAM 16MB or higher · Monitor resolution x1024 recommended) · WellLight Software v2 User’s Guide XGA (1024x768 pixels or higher; 1280 Color monitor, 16-bit color (high color) or higher 11 Installation Please complete the following steps to install WellLight Software: 1. Insert your CD-ROM to the computer or download the installer 2. Open the installation folder. 3. Run Setup.exe file. 4. WellLight Software installation dialog appears. 5. Click Next. 6. Read the end-user license agreement and select Accept. 7. Click Next 8. Select the Installation folder and click Install. 9. Click Finish when installation is finished. Software Activation When you first run the WellLight Software, the activation dialog appears. Figure Activation dialog Here you need to register your software with the generated hardware key. Click on the link to follow the instructions. Please make sure you have your WellLight Software Product Key from the Software Installing CD-ROM package. In lack of Internet connection on your computer, please write down the hardware key and open the website http://welllight.softflow.com/activation and follow the instructions. WellLight Software v2 User’s Guide 12 SOFTWARE STARTUP This chapter provides instructions for launching WellLight Software v2. Launching the Software 1. To launch WellLight Software, do either of the following: a. Double-click the WellLight Software shortcut icon on the desktop b. Select Start > Programs > WellLight > The main window appears with the Experiment Library. Figure WellLight Software main window Click on the Main button to find help in the User’s Guide or to Exit the software. WellLight Software v2 User’s Guide 13 Chapter 2 WellLight Workflows WellLight Software v2 User’s Guide About Workflows WellLight Software v2 provides you to work in two different ways. You can either choose to work in accordance with the WellLight assay protocol or without its assistance. The main work phase in both ways is creating an Experiment Plan. If your Experiment Plan is based on a Protocol, you can simply follow the instructions and confirm the steps that are defined automatically. This way your workflow will contain the experiment details and the instructions regarding the operator. And if you choose to work without an Assay protocol, your Experiment Plan will not contain any prior descriptions or instructions, thus you can fill them manually, along with other necessary plate layout details. Standard WellLight Workflow The workflow of the standard process includes these stages: 1. Starting the software 2. Creating an Experiment Plan 3. Working with Experiment >> Execution WellLight Protocol Workflow This process simplifies the experiment design in WellLight and enables you to use predefined Assay Protocol templates. The workflow is streamlined and you are able to view data quickly. 1. Starting the software 2. Downloading/Importing or creating a Protocol 3. Creating an Experiment Plan from Protocol 4. Working with Experiment >> Execution WellLight Software v2 User’s Guide 15 Chapter 3 Using WellLight Assay Protocols WellLight Software v2 User’s Guide WellLight Assay Protocol Database Based on the protocol/technical data sheet that you find attached in your assay kit, you can plan all the details of your experiment in accordance with the manufacturer’s recommendations. A special feature of WellLight is, that you can download a predefined WellLight assay protocol, helping you with the experiment design. The Assay Protocol can be reused whenever you prefer, creating a new Experiment Plan from it, with or even without changes. Starting from version 2.0 you have the ability to create and design your own protocols or modify existing ones. For protocol design please refer to Chapter 5 - Planning the Experiment and Protocol. You can eventually check in the database Soft Flow’s website (www.softflow.com), if there is any available Protocol, already uploaded with the same name, catalog number or product number. You can work with assay protocols that you can select based on the specific properties of your assay kit. Please select the manufacturer and then the protocol from the indicated website. Click on the protocol according to your assay type and download it to your computer so that enables you to import it to your WellLight Protocol Library. In case you don’t find the appropriate assay protocol in the online database, you can ask the vendor to provide the document or optionally you can forward your query to Soft Flow Hungary Ltd. for further assistance. Our technical support and customer service knowledge base provides information and answers at: [email protected], [email protected], or via Telephone +3672538154 and FAX +3672240065. Downloading and importing protocol WellLight Software v2 User’s Guide 17 Downloading Protocol You can download the necessary assay protocol from the website www.softflow.com. Select the brand of your kit and the type of your assay or eventually the specific product group. You can click on the download icon and download it to your computer. Click on the WellLight icon on your desktop to start the software. After starting the software you are able to import the downloaded WellLight Assay Protocol file to the WellLight Software database. Importing Protocol Open the Protocols Library in the navigation bar on the left side. Click on Import and select the file from your computer. Click OK. Figure Protocol Library NOTICE: You can remove unnecessary protocols from the library by deleting them. Select a protocol and click on Delete, to remove it from the software database. In case of problems/complications with Protocols, see Troubleshooting. WellLight Software v2 User’s Guide 18 Chapter 4 Creating Experiment Plan WellLight Software v2 User’s Guide WellLight Experiment Plan To execute your Experiment, first you have to create an Experiment Plan. In the Plan you can design and manage the details of your measurement. The Plan gives you the possibility that Experiment data can always be modified before execution and thus enables you to check out all the information, preventing errors during the Experiment. WellLight Software provides you two ways of making an Experiment Plan. This chapter helps you to create an Experiment Plan with or without an Assay Protocol. Optionally, you can always choose whether to use an Assay Protocol as a predefined surface, or to start your WellLight Experiment by yourself creating individually the basic workflow and defining each part of the Experiment Plan. The standard process is used when working with microplate based assay applications. You design an experiment in WellLight Software that reflects the data contained in the Assay Protocol that you are importing or the data that you determined individually. One of the main steps is creating an Experiment Plan that defines the samples and process steps required for the experiment. Creating Plan from Protocol You can create an Experiment Plan from an existing protocol. Select a protocol from Protocol Library after you imported a WellLight Protocol file. (See previous chapter.) If you use a protocol, your Experiment Plan will contain all the steps to perform the assay. The standards and controls will be predefined on your layout as well as the assay steps. Go to the Protocols menu on the left in the navigation bar. Click on New Plan From Protocol icon in the Ribbon. The New Experiment Plan From Protocol dialog appears. Fill in the Experiment Plan name, and the estimated time. Optionally you can add your comments in the empty field. In the second part of the dialog window, you can enter the Protocol data. Define your plate alignment, and add the number of Test Samples and Other Samples, as well as their Replicates. Please note that the number of WellLight Software v2 User’s Guide 20 Standard Samples and Control Samples cannot be modified here, these are defined in the protocol. To fix the plate alignment, you can select the starting row and column. Figure New Experiment Plan From Protocol dialog In case of using the Assay Protocol without making any changes, the data related to the plate layout of your Experiment Plan will be automatically generated, including Standards, Test Samples, Controls and Replicates. Click OK to save and open your Experiment Plan. When having a project of several measurements, for example repeating series, from the same Protocol you worked with previously, you can always create a new Experiment Plan for each. The Assay Protocol is ready to use, in case you confirm the details, it can be opened as a New Experiment Plan. However you also have the option to modify its details, eventually overwriting the Sample Number or other components of the basic information. WellLight Software v2 User’s Guide 21 Confirming the Assay Protocol means you can open immediately the New Experiment Plan and start working. The Experiment Plan means the design, and the Experiment means the execution of your measurement. All the steps you define in the Experiment Plan, just have to be executed in the Experiment. The New Experiment Plan created from an Assay Protocol contains all detailed steps of the Experiment. The new Experiment Plan can include: Number of Samples, Number of Replicates, Plate alignment, Preparation Steps, Incubation Steps, Pipetting Steps, Notes, Description, Instruction, Warning message. When working with an Experiment Plan created from a Protocol, the user specifies the Number of Test Samples, Other Samples and Replicates. All the details are already generated automatically based on the Assay Protocol. An Experiment Plan can be reproducible many times, for repeating or new Experiments. It is portable to make it easier to work between different computers, through the Export and Import options. Creating Plan without Protocol You can create an Experiment Plan without using a predefined Assay Protocol. In this case you can individually create all the steps of your Experiment Plan. You can also choose to open an existing Experiment Plan and create a new one from that using it as a template. In case of working without an Assay Protocol, you can create a new Experiment Plan according to your assay, specifying each step of it. This way you need to define each part of the Experiment Plan, including Standards, Test Samples, Controls and Replicates as well. Open the WellLight Software and navigate directly to the Experiment Plan library to start working. Click on the New icon in the Ribbon. The New Experiment Plan dialog appears. Fill in the name of your New Experiment Plan and the estimated time, and then write in your comments if necessary. Click OK to save and open your Experiment Plan. WellLight Software v2 User’s Guide 22 Figure New Experiment Plan dialog WellLight Software v2 User’s Guide 23 Chapter 5 Planning the Experiment and Protocol WellLight Software v2 User’s Guide Entering Experiment Plan and Protocol Data By clicking on the Data Sheet menu on the left, you can edit the details of your experiment or protocol Experiment Plan Data Sheet In this section you can find information about your experiment’s data. By clicking on the Data Sheet menu in the Experiment Plan group on the left, you can edit details of your experiment Figure Experiment Plan group Editing Experiment Plan data Check the field name in the first column and click in to edit in the second column in the appropriate box. When finished, press Enter to confirm. You can choose all or each of the following options: Check Experiment Name Add your comment Enter the name of responsible Enter the name of your Institute Enter the operator’s name Enter the conditions Check the creation and last saved date Define the plate layout direction WellLight Software v2 User’s Guide 25 To fill in the information, just click in the appropriate field to make it active. Figure Experiment Plan Data Notes Add your notes and comments to your Experiment Plan. Write in the field in the right pane and your text will be saved automatically. Protocol Data Sheet In this section you can find information about the Protocol’s data. By clicking on the Data Sheet menu in the Protocol group on the left, you can edit details of your Protocol. Editing Protocol data Check the field name in the first column and click in to edit in the second column in the appropriate box. When finished, press Enter to confirm. You can choose all or each of the following options: Check Protocol Name Add your comment WellLight Software v2 User’s Guide 26 Enter the name of responsible Enter the name of your Institute Enter the operator’s name Enter the conditions Check the creation and last saved date Enter the Vendor name Enter or change the number of Standard samples Enter or change the number of Control samples Enter or change the number of replicates for each sample type Define the plate layout direction Define the logical group name of the protocol for sorting or filtering in the library. To fill in the information, just click in the appropriate field to make it active. Figure Protocol Data WellLight Software v2 User’s Guide 27 Defining Sample Names Protocol To define Standard and Control sample names for a Protocol navigate to the Protocol Data Sheet. You can find the sample name definitions right of the Protocol properties. Sample names are generated automatically upon Protocol creation or in case of sample or replicate quantity change. To change a sample name simply click in a row on the Sample Name column enter the new name and press enter. Figure Sample Name definition in Protocol Experiment Plan To define sample names for an Experiment Plan navigate to Sample Definition. Sample names are divided into two section. The top section contains the sample names of Controls and Standards, while the bottom section contains the sample names of Test and Other sample types. Please note that in case an Experiment Plan is created from a Protocol, the Standard and Control sample names will be read only because these are defined in the Protocol. To change a sample name simply click in a row on the Sample Name column enter the new name and press enter. WellLight Software v2 User’s Guide 28 Figure Sample Name definition in Experiment Plan Designing the Plate Layout Click on the Sample Definition menu to open your layout. Select the type of the reagent: Standard, Test Sample, Control or Other. Figure Sample Types Ribbon According to your settings, the sample type icon and the number of replicates appear on the plate (number of replicates x number of samples). NOTICE: Make sure the alignment of your plate is correct. You can change it anytime by clicking on the Vertical or the Horizontal icon in the Ribbon according to your Experiment design. Figure Plate Alignment Ribbon WellLight Software v2 User’s Guide 29 Number of Replicates You can define the number of replicates for the samples in your experiment. Just simply click in the empty field in the Ribbon and choose from the drop-down menu. Number of Samples Before starting to add your samples to your plate layout, you can easily define the number of each sample in one motion. Go to the Ribbon and click in the Number of Samples field, and select from the drop-down list, according to your experiment. Adding Standard Samples Click on the blue icon in the Ribbon and then click into the appropriate well on your plate layout. Adding Test Samples Click on the red icon in the Ribbon and then click in the appropriate well on your plate layout. WellLight Software v2 User’s Guide 30 Adding Control Samples Click on the green icon in the Ribbon and then click in the appropriate well on your plate layout. Adding Other Samples Click on the grey icon in the Ribbon and then click in the appropriate well on your plate layout. Moving a Sample Select the sample you wish to move. Click on its well, and drag and drop with your mouse to where you would like to place it. This function can be used with multiple samples as well. You can also right-click in a plate to open a context menu to perform some of the functions. Removing Sample Select the sample you want to remove. Right-click on its well in the plate and select Remove sample. Clearing plate Click on the Clear Plate icon in the Ribbon. Alternatively you can right-click on the plate and select Clear Plate. All samples are removed from the plate. Changing the plate alignment The alignment direction for the samples on a plate is set to Vertical by default. When selecting alignment, make sure it matches your experiment design. The selected direction determines the order when adding multiple samples. WellLight Software v2 User’s Guide 31 NOTICE: Make sure the alignment of your plate is correct. You can change it anytime by clicking on the Vertical or the Horizontal icon in the Ribbon according to your Experiment. To change the plate alignment, click the Vertical Alignment or Horizontal Alignment icons in the Samples Ribbon group. Figure Samples Ribbon group Finalizing layout In case of using an assay protocol you have all the necessary experiment steps to perform. You can finalize your layout with these predefined steps. Once you confirm the layout, you are enabled to start creating your pipetting steps. Locking Sample Definition Locking your samples enables you to insert pipetting steps. First go to the Sample Definition menu and click on Lock Samples icon in the Ribbon. Once you finished, go to the first step of your plan and start adding your steps. Select Auto Generate Pipetting Steps or Insert Pipetting Step in the Ribbon. Changing finalized layout Optionally you can change your finalized layout and modify its details. To change the layout, unlock it by clicking on Lock Samples icon on the Ribbon. NOTICE: When unlocking the layout, you lose all the pipetting steps and they need to be added and confirmed again. WellLight Software v2 User’s Guide 32 Experiment Steps Open the Experiment steps menu in the Experiment Library on the left. In this menu you can review your Experiment steps: Preparation, Incubation, Pipetting. Check the list of your steps in the Experiment steps window. Here you can sort them by name, type, reagent, lot, quantity, or step tag. You can also arrange them in ascending or descending numeric sequence by clicking on the # sign in the first column. Figure Experiment Steps table Custom Auto Filter Click in the corner in the first column header in the Experiment steps window. Here you can activate the Auto Filter option. You can select All steps, Blanks, Non blanks, or you can individually select a value and customize the Auto Filter to show all rows containing that value. This option can be applicated in each of the columns of the Experiment steps window. WellLight Software v2 User’s Guide 33 Adding Experiment Steps Steps Menu When you click on a step on the left of your WellLight Experiment Plan or Protocol, the Step menu opens. Here you have different options according to the step type. This step specific information can be filled when writing the Protocol, or when making the Experiment Plan. If the step information is provided by the author of the Protocol, you have to specify only the Pipetting steps. Figure Experiment Plan Step list Each step type has different menu options in accordance with the step process. WellLight Software v2 User’s Guide 34 Adding Steps Select the type of step you want to add and click on the appropriate Insert Step icon in the Ribbon. Figure Steps Ribbon group in Protocol design Figure Steps Ribbon group in Experiment Plan design Inserting Preparation Step Click on Insert Preparation Step in the Ribbon. The step will be added automatically next to the step where you last clicked. Optionally you can fill in the information: Warning message Instructions Description Inserting Incubation Step Click on Insert Incubation Step in the Ribbon. The step will be added automatically next to the step where you last clicked. You can define the information related to the incubation process: Temperature Incubation time Sound notification – click in the checkbox to enable Warning message WellLight Software v2 User’s Guide 35 Instructions Description Inserting Pipetting Step Click the Insert Pipetting Step on the Ribbon to add a pipetting step to your Experiment Plan. For each pipetting step, click this icon once. You can add pipetting steps only if the Experiment Plan has a locked plate layout. Here you can specify the details that are needed for pipetting: Reagent selection Lot number Pipetting Quantity and Unit (ml or µl) Delay time Warning message Instructions Description You can select from three different colors to illuminate your plate wells: Go to the Pipetting Step toolbar on the Ribbon and click on the Red, Yellow, or Green icon. Click on the wells where you wish to start pipetting, to add the selected LED color. If you select 8-channel as Pipette Type it will fill 8 wells at a time. You can change the color anytime, at each step and each well. NOTICE In case of unlocking a plate, you lose all your Pipetting Steps that you created before. When changing the Experiment Steps, you can modify both the Auto Generated and manually inserted Pipetting Steps as well. Pipetting Step options can be used after done with Sample Definition. If you created your Experiment Plan from protocol, locking your plate will re-generate your pipetting steps according to the Pipetting Step Groups defined in the Protocol. WellLight Software v2 User’s Guide 36 Auto Generating Pipetting Steps This function is available only in Experiment Plan design. Open the Experiment Steps menu in the navigation bar. Click on the Step where you wish to add the next Step. Click on the Auto Generate Pipetting Steps icon in the Ribbon. The dialog appears. Here you can create automatically Pipetting Steps for more wells in one motion, or eventually for the whole plate layout. First select the Sample Type, then the Plate alignment and the Pipettor Channel. In the third part of the window, you can add the Step Data: Reagent, Lot Number, Quantity, Warning Message, Instructions, and the color of the LED illumination. When finished, click OK to proceed. Figure Auto Generate Pipetting Steps dialog The automatically generated pipetting steps will be added next to the Step you clicked on. Depending on the Pipettor Channel selection software generates pipetting steps in the following manner: - Single Channel Pipettor is selected: it will generate steps for each well containing the selected sample type WellLight Software v2 User’s Guide 37 - 8/12 Channel Pipettor is selected: it will generate steps for each row/column containing the selected sample type - Both Single Channel and 8/12 Channel Pipettors are selected: this function will automatically generate 1 step for each full row/column and single steps for each well where part of the row/column does not contain samples. This function helps you to simplify your Experiment planning and make the work process with WellLight clear and easy. Insert Pipetting Step Group Click the Insert Pipetting Step Group on the Ribbon to add a pipetting step group to your Protocol. The Pipetting Step Group will function similarly to the Auto generate Pipetting Steps feature. The individual Pipetting steps will be generated when a new Experiment Plan will be created from the Protocol. Here you can specify the types of the samples for which the pipetting steps will be created, the layout direction, the pipettor size configuration as well as the highlight color of the well which will appear on the device. You can define also the same setting you would define for a single pipetting step like reagent, lot number, pipetting quantity, instructions etc... Figure Pipetting Step Group details WellLight Software v2 User’s Guide 38 Change Step Name Select the step on the left and click on Change Name button in the Ribbon. The dialog appears. You can modify the step name and then click OK. Copy Step Select a step from the steps list. Press the Copy button in the Ribbon. A new step will be created below the selected step with the same properties as the previously selected step. Please note that after you press the copy button the newly created step will be selected. Deleting Step Choose your step and click on Delete Step icon in the Ribbon. Click OK in the confirmation dialog. Moving Step Select a step. Click on the Move Step Down or on the Move Step Up icon in the Step Ribbon to modify the position of your step. Adding Warning message To each Experiment step, you can add a specific message whenever it is required. Click in the Warning message field and write your comments you wish to add to that step. This Warning message will appear above the Experiment step window when executing the Experiment. Figure Warning Message text field WellLight Software v2 User’s Guide 39 Adding Instructions Select your Experiment step and click on it. The step menu opens. Go to the Instructions in the middle pane, and write in the empty field. When it is done, you can simply go to the next step. The information will be saved automatically. Figure Instructions text field Step Description The Description contains all the important details of the Step. At each step, it appears in the right pane, with all the necessary explanation to perform the step. The Description text can be formatted using the text formatting tools. Figure Description text area WellLight Software v2 User’s Guide 40 Saving Experiment Plan As Click on Save As icon in the Experiment Plan group. The New Experiment Plan dialog appears. Fill in the New Experiment Plan name and the estimated time. Optionally add your comments in the empty field. Click OK. Figure Experiment Plan Ribbon group Using the Save As function, WellLight keeps the original Experiment Plan unmodified and saves your copy with the completed changes as well. When using the Save As function, the original Experiment Plan remains open, where you worked from, and the new one created from that will be saved in the Experiment Plan library. Closing Experiment Plan Click on Close icon in the Experiment Plan group. Your work will be closed automatically. In case of any modification, the software will ask you about saving the changes. The program returns to the main window. WellLight Software v2 User’s Guide 41 Chapter 6 Creating and Executing Experiment WellLight Experiments This chapter describes the method of creating and executing an experiment. You can create Experiments using your Experiment Plans as templates. In the Experiment you only have to fill the experiment data and go through all the defined steps. When creating an Experiment you need to specify a name, select an Experiment Plan and optionally add your comments. The new Experiment will contain the sample definition and all the steps including step details and design of the original Experiment Plan. These data are read only in the Experiment. Creating Experiment To create a new Experiment click on the New icon in the Experiment library. The New Experiment dialog is displayed. Fill the Experiment name, select an Experiment Plan from the pull/down list and optionally add your comments. Click OK. Figure New Experiment dialog The software opens the new Experiment with its Data Sheet. WellLight Software v2 User’s Guide 42 Enter data, add notes. Navigate to the Sample Definition view by clicking Sample Definition menu on the left. Check the plate layout and the samples. NOTICE: This layout is read only, it can be modified only in the original Experiment Plan. WellLight Software v2 User’s Guide 43 Click on the Experiment Steps menu on the left and check the overview table of your experiment steps. In this table you can sort and filter experiment steps. Executing the Experiment To start the execution of your experiment click on Start icon on the Ribbon or click on the first step row in the Experiment Steps list on the left. The details of the first step are displayed. The instructions, description and the plate layout (pipetting step) are read-only. You have the option to add Notes to each step. Click on Next or Previous icon to navigate between steps. Figure Step navigation icons NOTICE: When a WellLight device is connected to your computer you can step forward and backward using the built in optosensors. To step forward hold your finger over the sensor window on the left side on the device, use the right one to step backward. Left handed mode is also available. Open the main menu and select the Left Handed Mode item. A small check mark indicates, when it is selected. Figure Left Handed Mode option WellLight Software v2 User’s Guide 44 When a pipetting step is active and a WellLight device is connected to your computer, the software controls the device and illuminates the corresponding LEDs to guide the pipetting process. Check the device status at the bottom of the window in the status bar. When the WellLight device connection is ready the “Successfully connected to WellLight hardware device” message appears. WellLight Software v2 User’s Guide NOTICE: You can execute an experiment without connecting a device to your computer. When you finish the last step, a message indicates that the experiment execution is finished and navigates back to the Experiment Data Sheet. WellLight Software v2 User’s Guide 46 Chapter 7 Data Management Data Libraries This chapter helps you how to manage the information and details of your WellLight data. The available data from different parts of the application are organized in libraries. The default library in the main window is the Experiment Library. Use the Libraries panel to navigate between the different libraries. In each library, the data appears in tables, and the corresponding management function icons display in the Ribbon. You can navigate through the different libraries and between the library menus to see the available functions. Experiments Working with WellLight Experiments means the execution of your measurement. From an Experiment Plan you are enabled to create an Experiment. Changes can be done in the Experiment Plan but not in the Experiment. From the same Experiment Plan, you can create several new Experiments, with or without modifications, at anytime. Figure Experiments Library WellLight Software v2 User’s Guide 47 Creating New Experiment Go to the Experiments Library in the navigation bar. To create a new experiment, click on New and fill in the dialog. Write in the Experiment name, and select the Experiment Plan you work from, and add your notes then click OK. Opening/Continuing Experiment To open or continue an Experiment, click Open/Continue in the Ribbon. This will open the Data Sheet of your selected Experiment. You can also double-click on the Experiment’s row. Deleting Experiment To remove an Experiment from the Library, select it from the Experiments list and then click Delete. Experiment Plans WellLight provides you the option of creating and defining every single part of your Experiment, before executing it, even at separate times and on separate computers, through the usage of Experiment Plans. This way you can fix the details and make your Plan ready to use, helping the operator to focus only on the execution. Figure Experiment Plans Library WellLight Software v2 User’s Guide 48 Creating New Experiment Plan Go to the Experiment Plans Library in the navigation bar. To create a New Experiment Plan. Click on New and fill in the dialog. Write in the Experiment Plan Name; add your notes then click OK. Creating New Experiment Plan from an Existing Plan Go to the Experiment Plans Library in the navigation bar. To create a New Experiment Plan from the selected Plan, click on New from Existing Plan and fill in the dialog, then click OK. Opening Experiment Plan Go to the Experiment Plans Library in the navigation bar. Select your Plan and click Open in the Ribbon or optionally double-click on the selected row. The selected Experiment Plan will be opened. Deleting Experiment Plan To remove an Experiment Plan from the Library, select it from the Experiment Plans list and then click Delete. Exporting Experiment Plan Go to the Experiment Plans Library in the navigation bar. Select a Plan and click on the Export icon in the Ribbon. Select a destination folder, specify the file name and click OK. Importing Experiment Plan Open the Experiment Plans Library on the left. Click Import in the Ribbon and select the file you want to import then click OK. Protocols Working with Assay Protocols makes it much easier to use WellLight and to accomplish your Experiment. From the same Protocol, you can create several different Experiment Plans, at separate times, even on separate computers. An Assay Protocol can contain all the details of your Experiment. You can use the Protocol with or without modifications, in accordance with your Experiment. Creating Protocol Go to the Protocols Library in the navigation bar. To create a Protocol click on New and fill in the dialog. Enter the Protocol name and Vendor name, provide the layout direction and the number of Standard and Con- WellLight Software v2 User’s Guide 49 trol Samples with their replicate numbers; optionally you can add your notes and the estimated time required for the experiment then click OK. Opening Protocol Go to the Protocol Library in the navigation bar. Select your Protocol and click Open in the Ribbon or optionally double-click on the selected row. The selected Protocol will be opened New Plan from Protocol You can create an Experiment Plan from an existing protocol. Select a protocol or import it from your computer. If you use a protocol, your Experiment Plan will contain all the steps to perform the assay. The standards, samples and controls will be predefined on your layout as well as the assay steps. Go to the Protocols menu on the left in the navigation bar. Select a protocol from the library, click on New Experiment Plan from Protocol in the Ribbon. The dialog appears. Fill in the Experiment Plan name, and the estimated time. Optionally you can add your comments in the empty field.Specify the number of samples and replicates. Click OK to save and open your Experiment Plan. Figure Protocols Library WellLight Software v2 User’s Guide 50 Deleting Protocol Select the Protocol you want to remove and click on its row. Click on the Delete icon in the Ribbon and then click OK. Importing Protocol You can import an Assay Protocol from the online database after downloading the protocol file. Open the main menu and go to the Protocols Library in the navigation bar on the left side. Click on Import and select the file from your computer. Click OK. Exporting Protocol Go to the Experiment Plans Library in the navigation bar. Select a Plan and click on the Export icon in the Ribbon. Select a destination folder, specify the file name and click OK. Download Protocol To download Protocols, on the Ribbon click on Download Protocol. This will open a your browser with the available protocols. Click on a protocol to download it, then import the downloaded file. WellLight Software v2 User’s Guide 51 Reagents Figure Reagent Library Adding Reagent Go to the Reagents Library in the navigation bar. To add a new reagent, click on New, and fill in the Reagent name, Manufacturer, and Catalog number, then click OK. You can eventually add your notes as well. Modifying Reagent To modify the details of a reagent, click on Modify in the Ribbon. Deleting Reagent To remove a reagent from your list, click on the reagent’s row and then on the Delete icon in the Ribbon. WellLight Software v2 User’s Guide 52 Chapter 8 TROUBLESHOOTING The tips in this section are designed to help you troubleshoot problems with WellLight Software. If additional assistance is required, contact Soft Flow technical support representative. See Technical Assistance. Using Help If you have problems with using WellLight, you can find help included in the software. The Help menu is located on the right side of the Ribbon. In the Help menu you can open this user manual or the online support site. Figure Help Menu User Manual To open this document, click on Help menu icon and select User Manual in the menu. Checking WellLight Device Status Open an Experiment from the Experiment Library. Check the device status WellLight Software v2 User’s Guide 53 at the bottom of the window. If the device is connected the “Successfully connected to WellLight hardware device” message appears. If the software was unable to connect, the “WellLight hardware device was not found.” message appears. Try to restart the software to solve the connection problem. Contacting Support Click on Online Support in the Help menu and your default internet browser opens the online support page of WellLight website. Here you can eventually ask your questions and the support team will contact and answer you. WellLight Software v2 User’s Guide 54 WellLight Software v2 User’s Guide 55 WellLight Software v2 User’s Guide 56 WellLight Software v2 User’s Guide 57