1
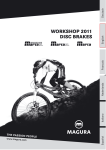
Grounding Instructions
SAFETy
TO pREVENT ELEcTRIc SHOcK AND DEATH FROM INcORREcT
GROUNDING WIRE cONNEcTION READ AND FOLLOW THESE INSTRUcTIONS:
110-120 VAc Grounded Tools: Tools with Three prong plugs
1. In the event of a malfunction or breakdown,
grounding provides a path of least resistance for
electric current to reduce the risk of electric shock.
This tool is equipped with an electric cord having an
equipment-grounding conductor and a grounding
plug. The plug must be plugged into a matching
outlet that is properly installed and grounded in
accordance with all local codes and ordinances.
SETUp
2. Do not modify the plug provided – if it will
not fit the outlet, have the proper outlet
installed by a qualified electrician.
3. Improper connection of the equipment-grounding
conductor can result in a risk of electric shock.
The conductor with insulation having an outer
surface that is green with or without yellow
stripes is the equipment-grounding conductor.
If repair or replacement of the electric cord or
plug is necessary, do not connect the equipmentgrounding conductor to a live terminal.
OpERATION
4. Check with a qualified electrician or service
personnel if the grounding instructions are
not completely understood, or if in doubt as
to whether the tool is properly grounded.
5. Use only 3-wire extension cords that
have 3-prong grounding plugs and 3-pole
receptacles that accept the tool’s plug.
6. Repair or replace damaged or
worn cord immediately.
Grounding
pin
125 VAc 3-prong plug and Outlet
(for up to 125 VAc and up to 15 A)
7. This tool is intended for use on a circuit that has
an outlet that looks like the one illustrated above in
125 VAc 3-prong plug and Outlet. The tool has
a grounding plug that looks like the plug illustrated
above in 125 VAc 3-prong plug and Outlet.
8. The outlet must be properly installed and grounded
in accordance with all codes and ordinances.
9. Do not use an adapter to connect
this tool to a different outlet.
Band Saw Safety Warnings
For your Own Safety Read Instruction
Manual Before Operating Saw
1. Wear eye protection.
2. Do not remove jammed cutoff pieces
until blade has stopped.
MAINTENANcE
3. Maintain proper adjustment of blade tension,
blade guides, and blade guide bearings.
4. Adjust upper guide to just clear workpiece.
5. Hold workpiece firmly against table.
6. Use special care when unpacking or
replacing Band Saw blade. Blade can be
under tension and may suddenly uncoil.
Wear ANSI-approved safety glasses under a
full face shield and heavy-duty work gloves.
Page 4
7. Keep hands away from cutting area and Saw Blade.
8. DO NOT OpERATE WITH ANy GUARD
DISABLED, DAMAGED, OR REMOVED. Moving
guards must move freely and close instantly.
9. Properly adjust the upper blade guide, blade
tension and blade guide bearing before each
use to reduce the risk of injury. See Operating
Instructions for explanation of needed adjustments.
10. Never leave the Band Saw unattended when it is
plugged into an electrical outlet. Turn off the tool,
and unplug it from its electrical outlet before leaving.
11. Make sure the Band Saw is located on a flat,
level, sturdy surface capable of supporting
the weight of the Saw and workpieces.
Always “chock” the Wheels to prevent the
Band Saw from accidentally moving.
For technical questions, please call 1-888-866-5797.
Item 93762