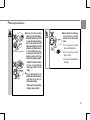
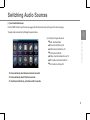
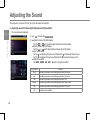
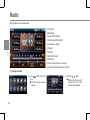
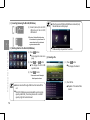
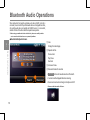
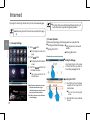
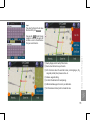
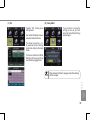
1
HONDA NAVIGATION SYSTEM iPod iPhone Thank you for your purchase of the Honda genuine accessory Contents Introduction 1 Basic Operation 2 3 Audio External Instruments 4 Handsfree 5 Appendix 6 Navigation System 7 Basic Specification 8 2 Contents.................................................................................................................................. 2 Safety Information ................................................................................................................... 5 Notes on Use............................................................................................................................ 7 Before Using This Device.......................................................................................................... 8 Power-On Operation ............................................................................................................... 10 Controls Layout ....................................................................................................................... 11 Basic Operation 15 Adjusting the Display ............................................................................................................... 16 Turnning Off the Audio............................................................................................................. 19 Adjusting the Volume............................................................................................................... 20 Switching Audio Sources.......................................................................................................... 21 Adjust ICON position at main menu screen............................................................................. 23 Adjusting the Sound ................................................................................................................ 24 Using Lists................................................................................................................................. 26 Repeat, Random and Scan Settings........................................................................................ 27 Bluetooth Device Registration and Setting .............................................................................. 29 Wi-Fi Setting.............................................................................................................................. 36 Portable Hotspot Setting........................................................................................................... 37 Other Settings........................................................................................................................... 38 Finger Gesture......................................................................................................................... 40 Introduction Audio Handsfree 1 7 Navigation System 8 Before Using the Handsfree Operation ................................................................................... 89 Making a Call.......................................................................................................................... 93 Receiving a Call...................................................................................................................... 98 Operation During Call Communication................................................................................... 99 Basic Specification Handsfree88 Appendix Using the Steering Wheel Audio Switch.................................................................................... 83 Viewing the Rear Camera Image............................................................................................ 84 Basic Operation 2 3 4 82 6 External Instrument External Instruments Radio....................................................................................................................................... 42 Listening to Music from a Micro SD/USB Memory ......................................................................... 45 Watching Video from a Micro SD/USB Memory ....................................................................... 52 Viewing Photo from a Micro SD/USB Memory ......................................................................... 57 Before using iPod..................................................................................................................... 61 Listening to Music from iPod..................................................................................................... 64 Viewing the Video via iPod ..................................................................................................... 68 Bluetooth Audio Operations..................................................................................................... 72 AUX.......................................................................................................................................... 74 Internet..................................................................................................................................... 76 DLNA........................................................................................................................................ 79 5 Audio41 3 Introduction 1 Basic Operation 2 Appendix102 Troubleshooting........................................................................................................................ 103 Trademarks.............................................................................................................................. 106 Navigation System 107 Audio 3 External Instruments 4 Handsfree 5 Navigation System................................................................................................................... 108 Getting Started With GPS Navigation....................................................................................... 112 User Interface........................................................................................................................... 114 Finding Destinations................................................................................................................. 120 Route....................................................................................................................................... 122 Information.............................................................................................................................. 127 My Data................................................................................................................................... 128 Settings.................................................................................................................................... 129 6 Appendix Map Update 140 Map Update............................................................................................................................ 141 Navigation System 7 Basic Specification 8 Specifications144 4 Specifications.......................................................................................................................... 145 For safe use of this product, the following symbols are used in this manual to indicate the items to be observed. Describes items that will result in death or serious injury unless observed. Describes items that will cause accidents resulting in serious injury unless observed. Describes items that may cause accidents, personal injury or damage to the car unless observed. Describes items that you should be aware of when using the product to ensure safety and comfort. For safety ● The driver should not look at the display nor operate the system while driving. Looking at the display or operating the system will distract the driver and will cause accidents. Always stop the vehicle in a safe location and use the parking brake before looking at 5 Introduction the display or operating the system. ● Always comply with the indicated instruction when installing, removing or wiring the unit. Inappropriate installation or wiring may result in malfunction of the unit and will cause vehicle fire. For safety reasons, please contact your dealer for advice on installation and removal of the unit. ● Keep the micro SD card out of the reach of small children. Swallowing the micro SD card may cause choking. If swallowed, please seek immediate medical attention. ● Use the proper supply. This product is designed or operation with a negative grounded 12 V DC battery system. Never operate this product with other battery systems, especially a 24 V DC battery system. ● Do not disassemble or modify the unit. Do not disassemble, modify the unit or attempt to repair the product yourself. If the product needs to be repaired, consult your dealer. ● Do not use the unit when it is out of order. If the unit is out of order (no power, no sound) or in an abnormal state (has foreign objects in it, is exposed to water, is smoking, or smells is reeking), turn it off immediately and consult your dealer. Safety Information Read this manual carefully before using this product. Keep this manual in the car to avoid losing it. When transferring this product to another party, be sure to include this manual. 1 Safety Information 1 Introduction ● Refer the fuse replacement to the qualified service personnel. Safety Information When the fuse blows out, eliminate the cause and have it replaced with the fuse prescribed for this unit by a qualified service personnel. Incorrect replacement of the fuse may lead to smoke, fire or damage to the product. ● Keep the sound volume at an appropriate level Keep the volume level low enough to be aware of road and traffic conditions while driving. ● This unit is designed for use exclusively in automobiles. ● Do not operate the unit for a prolonged period with the engine turned off. Operating the audio system for a long period of time with the engine turned off will drain the battery. ● Do not expose the unit to direct sunlight or excessive heat Direct sunlight or excessive heat will raise the interior temperature of the unit, and it may lead to smoke, fire, or other damage to the unit. ● Do not use the product where it is exposed to water, moisture, or dust. Exposure of unit to water, moisture, or dust may lead to smoke, fire, or other damage to the unit. Make sure that the unit does not get wet especially in car washes or on rainy 6 days. ● Do not turn off the power until the program has been completed If the connection to the battery is cut or the voltage is reduced, the program being downloaded to this unit will be deleted. If this happens, the program will be downloaded again while the Opening Screen is displayed when restarting the unit. Please wait until the program reading process is completed. If the power is turned off during the program reading process, unexpected damage may occur such as the inability of the audio function to start. FM (Stereo) FM (Monaural ) AM When listening to FM broadcasts in a moving vehicle, the reception conditions constantly changes with buildings, terrain, distance from the transmitter and noise from other vehicles. The following phenomena of FM reception are normal and do not indicate a problem with the radio itself: STATIC MULTIPATH ● Fading and drifting: The range of FM is about 40 km (25 miles), except for the high-power stations. If the vehicle moves away from the transmitter, the signal tends to fade out and/or draft. This is common to FM broadcasting and might be accompanied by distortion. Fading and drifting can be minimized by tuning to a stronger signal. ● Static and flutter: When the line-of –sight link between the transmitter and vehicle is blocked by large building or the like, the broadcast sound may be companied by static or flutter. You may also experience fluttering while driving along a tree-lined road. The effects of static and fluttering on the sound can be reduced by decreasing treble. ● Multipath: Due to the reflection characteristics of FM signals, direct and reflected signals may reach the antenna simultaneously (this is called multipath) and cancel each other. As the vehicle moves through such a spot, a momentary flutter or loss of reception may occur. ● Station swapping: When two FM stations are located close to each other in the frequency spectrum and the current signal is interrupted by an electronic dead spot caused by static or multipath, the stronger signal may automatically be selected until the the original signal returns. Station swapping can also occur as the vehicle moves away form a station and towards another with a stronger signal. 7 Introduction The antenna should be adjusted for best reception. Usually, a shorter antenna length is better in cities, while a fully extended antenna is the best for long distance. Always retract the antenna before using an automatic car wash. Notes on Use RANGE AREA 1 Notes on Use Before Using This Device 1 Introduction ● This precision mechanical device should be handled carefully Before Using This Device Please avoid using this device at extremely high or low temperatures, which can cause malfunction or failure. Metal objects and liquids should not be in contact with the device, and hard shocks can damage the device. Do not insert Touch objects except micro SD or USB into the unit. screen cannot be operated with fingers in glove ● Warnings regarding micro SD card handling When you remove the micro SD card, be careful about the following. • Do not handle the micro SD card with wet or dirty hands. • Do not insert any card or whatsoever other than a micro SD card in the micro SD card slot, doing so may result in malfunction. • Do not affix any labels, paper, stickers, or whatsoever to the micro SD card. • Change in the thickness and outer dimensions of the micro SD card may result in malfunction such as the displacement or the card rendering it unable to be removed from the slot. • Do not use or store the micro SD card in any of the following locations. • Doing so may cause malfunction, and may have a deleterious effect on the unit Locations where static electricity is generated Locations where electrical noise is generated Hot and humid locations Locations where condensations occurs Corrosion-prone locations 8 • Use a commercially available case to store and transport the card. Excessive force applied to a micro SD card may result in breakage. ● This precision mechanical device should be handled carefully <Clean the unit> • Do not use benzene or thinner for cleaning the unit, which can damage the case. • If you use a chemical wiping cloth, follow the instructions carefully. <Clean the display> • To clean the display, wipe it carefully using a soft, dry cloth, such as those used for cleaning plastic eyeglass lenses. • Rubbing the display with a rough cloth can scratch the surface. 9 Introduction 1 Before Using This Device • Micro SD card is a precision electronic device. In respect of the handing thereof, the following items must be observed. Failure to do so may result in malfunction. Do not bend or drop the card, so subject the card to strong impact. Do not insert a dusty or dirty card into the micro SD card slot. When inserting the card into the micro SD card slot, be sure to insert the card firmly and in the correct orientation. Power-On Operation 1 Introduction The audio function in this device is automatically turned on when turning on the car. Turning off the car automatically turns off the power. Power-On Operation [ 1 ] Switch the ignition key to I (ACC) or II (ON). • The audio is turned on. • The Opening screen appears [ 2 ] Read the screen warning message then touch OK 10 • The MAIN MENU screen appears ● Programs stored in the unit will be erased when turning the power off to replace the batteries, or moving it to another car, etc. If this happens, the program will be downloaded again while the Opening Screen is displayed when restarting the unit. Please wait until the program reading process is completed. Controls Layout 1 7 8 9 2 3 4 5 6 ● Operation buttons ( □ long press 2 seconds or more) ① Move on to Main menu ■ PWR Audio On/Off ② AUDIO Move on to current playing source ■ DISP Screen On/Off & Brightness adjustment ③ MAP Move on to Navigation screen ■ DEST Move on to Navi Search screen ④ ▲ Increase volume ⑤ ▼ Decrease volume ⑥ Microphone : this is used when talking with Handsfree. MENU • This is not reset button. Do not push with a thin stick etc. ⑦ AUX jack : The jack enables connection of an iPod or portable audio device. ⑧ Micro SD slot : Insert Micro SD card to use media files • Insert the Micro SD card with the label surface positioned to the left • Press in on the card and pushes the card out to remove Micro SD card. ⑨ USB terminal : This terminal enables connection of an iPod/Phone or USB memory device. • Do not wet the micphone with water 11 Introduction 1 Controls Layout 1 Introduction Controls Layout 12 ● Open the cover to insert and remove the Micro SD card. Do not pull to hard on the cover. ● Do not connect any device other than an iPod or USB memory device to the USB terminal. Devices connected through a USB hub will not work with the unit. ● Do not insert anything other than Micro SD card into the Micro SD slot. ● The unit has a delicate internal structure. Inserting anything other than a Micro SD card may result in damage or breakdown to the unit. ● Do not affix items such as print labels, paper or stickers to the micro SD card. Change in the thickness or external dimensions of the Micro SD card may result in damage or breakdown to the unit due to card misalignment and could not remove from the slot. ● If you disconnect the AUX jack and connect it again while viewing/listening to connected device, noise is generated and may cause speaker damage. Disconnect or connect the AUX cable after turning the unit's power off or switching it to another mode. ● If you switch off the power source of connected device while viewing/listening to connected device, noise is generated and may cause speaker damage. Switch off connected audio after turning the unit's power off or switching it to another mode. ● Each device has a different output level. Be sure that the volume is adjusted to appropriate level. ● If the input volume of the connected device is high, it may result in distortion of the sound. In such case, adjust the volume on the connected device. ● Do SRS airbag compartments Connection cable not place the portable devices, such as mobile phone, Bluetooth audio device, an iPod or connection cable in a location where it will prevent the SRS airbag from deploying. The SRS airbag may not operate correct or the portable device may be captured outward by the deploying airbag, which may result in serious injury or death. ※Refer to the owner's manual for your car regarding the deploying position of SRS airbag. ● Place or temporarily fix the portable device and connection cable where they will not interfere when driving. Otherwise, they may interfere driving or cause a accident. ● Please follow the following instructions to avoid the malfunction of the portable device. • Do not place the portable device on the dashboards. Controls Layout • Do not leave the portable device in the car. • Do not wet the portable device with water. 13 Introduction 1 ● Before Using the Portable Device 1 Introduction Controls Layout Touch Switches These are operated by touching the switches displayed on the screen. ● Touch Switches • Hold the switch on the operation screen until you hear the beep sound. (The beep sound can be set. When set to Off, the beep sound is not made.) • Touch the switches softly to protect the screen from damage. • If the function does not work, release your finger from the screen, and then touch it again. • Disable touch switches are displayed in dishigh-lighted. • Some of the switches are high-lighted when they are touched. • To go back to the previous screen, touch the BACK switch or using finger gesture (refer to page 40). <Notation of touch switches in this manual> The touch switches are shown as follows in this manual. (Example SD AM OK ) 14 Basic Operation Adjusting the Display The display brightness can be adjusted, The video display aspect can be changed between full, 4:3 and 16:9, the photo display can be adjusted by using fingers to zoom in /out. lights (park lights, tail lights and license plate lamp) are turned on or off. 2 Basic Operation ● For easier viewing, the display brightness changes when the Adjusting the Display [ 1 ] Turning Off the Display ( 1 ) To turn off the display, long press the DISP key (over 2 seconds) ( 2 ) Touch Screen Off switch to turn off screen back light. [ 2 ] Adjusting the Brightness ( 1 ) To adjust brightness, long press DISP key (over 2 second) ( 2 ) press + - to adjust brightness ( 3 ) press OK button to complete brightness setting. ● Brightness can be adjusted in the Daytime Display and Nighttime Display independently. ● Touch / / MAP button again to turn the screen on. 16 AUDIO MENU ● When FULL ratio is selected, the video is displayed by stretching evenly in the horizontal and vertical directions on the nearly 16 : 9 (horizontal: vertical) aspect radio screen (standard screen) ● when 16:9 ratio is selected, the video is displayed nearly entire screen. If the video has a 4:3 (horizontal: vertical) aspect ratio, the video is stretched evenly in the horizontal direction. If the video has a 16:9 (horizontal: vertical) aspect ratio, the video is displayed with the original aspect ratio 2 bands appear on both ends. If the video has a 4:3 (horizontal: vertical) aspect ratio, the video is displayed with the original aspect ratio. If the video has a 16:9 (horizontal: vertical) aspect ratio, the video is shrunk in the horizontal direction. Basic Operation ( 1 ) Touch Ratio button on the screen to switch display aspect (full → 16:9 → 4:3) ● When 4:3 ratio is selected, black Adjusting the Display [ 3 ] Switching the Video Screen display ratio Please note that when selecting different mode for the aspect ratio of movies, the images may appear differently from the original. Also, please be alerted that the copyright of authors may be breached if screen size (or split display) is compressed or stretched for the purpose of commercial or public service presentation. 17 [ 4 ] Adjusting the Photo Screen display 2 Basic Operation ( 1 ) slide the photo thumbnail screen or presss List button to select a photo Adjusting the Display ※selected photo will be displayed in full screen 18 ( 2 ) The selected photo can be moved by using finger tap on the photo and drag, or zoom in/out by using finger gesture ( refer to page 40) Turnning Off the Audio 2 [ 1 ] Turning the audio off / on The power of the audio can be turned off or on MENU ■ PWR AUDIO ■ DISP PWR • Hold down audio on. button for 2 seconds to turn the audio off. PWR button for 2 seconds again or touch MENU button and choose a mode to enter to turn the Turnning Off the Audio ( 1 ) Hold down Basic Operation The power of the audio can be turned on or off and the volume can be adjusted. MAP ■ DEST VOL 19 Adjusting the Volume [ 1 ] Adjusting the volume The volume can be adjusted ● Once the volume reaches the maximum (minimum), the volume 2 Basic Operation ( 1 ) adjust the volume using the VOL button Adjusting the Volume ( 2 ) using finger gesture, 2 fingers slide in horizontal direction remains that level. ● The volume setting for Radio, SD , USB, Aux, Bluetooth Audio and Handsfree can be adjusted separately from the volume adjustment in each mode. When you operate the audio while driving, please do careful so that it will not interferes with your ability to drive in a safe manner. Enjoy the audio at the volume level, at which you can still hear exterior sounds sufficiently. ● If a mobile phone is used inside or areas surrounding the vehicle while you are listening to the audio, the speakers may generate noise. This is not a defect in the unit. ( 3 ) To mute the audio, adjust VOL to zero or using finger gesture, 4 fingers swip in horozental direction on the screen 20 Switching Audio Sources ( 1 ) Select by touching an audio source. ● Radio : Switches to Radio ● SD : Switches to SD memory ※1 ● USB : Switches to USB memory ※1 ● iPod : Switches to iPod ※1 ● BT Music : Switches to Bluetooth music ※2 ● WIFI : Switches to Internet or DLNA ※3 ● AUX : Switches to AUX input ※1 Switching Audio Sources 2 The audio mode can be switched by following the operation below. Basic Operation [ 1 ] How to Switch Audio Sources Press the "MENU" button to open the main menu page and switch the audio source by touching icon on the main menu page ※1. Can be selected only when the device is inserted or connected. ※2. Can be selected only when BT function is connected. ※3. Touch Internet or DLNA icon, unit will auto run Wi-Fi connection. 21 [ 2 ] Audio Operation Screen The operation screen for each mode is displayed as below. ● Audio mode operation screens 2 Basic Operation Adjusting the Volume 22 Adjust ICON position at main menu screen 2 Adjust ICON position at main menu screen Basic Operation Icon position on the main menu screen can be moved to desired postion by touching and hold the icon for over 2 seconds then drag to desired position then release 23 Adjusting the Sound The sound quality or the volume of the front, rear, right or left speakers can be adjusted. 2 Basic Operation [ 1 ] Adjusting the volume of Front/Rear and Right/Left Speakers and Setting Sound Effect The volume balance can be adjusted. Adjusting the Sound ( 1 ) go to Setup mode and select Audio Configuration ( 2 ) ■ Adjusting the Volume of Front/Rear Speakers Touch the Front or Rear switch to adjust the balance between front and rear speakers ■ Adjust the Volume of Right/Left Speakers Touch the Right or Left switch to adjust the balance between right and left speakers ■ Adjust the sound quality Touch the + to emphasize high frequency sound (Treble) and the - to decrease high frequency sound Touch the + to emphasize low frequency sound (Bass) and the - to decrease low frequency sound ■ Setting the Sound Effect Touch Classic , Pop , Talk , Jazz , Rock or Off switch to change the sound effect. Touch Switch Rock Recreates a pseudo acoustic field appropriate for Rock music Jazz Recreates a pseudo acoustic field appropriate for Jazz music Talk Recreates a pseudo acoustic field appropriate for Talk Classic 24 Function Recreates a pseudo acoustic field appropriate for Classic music Pop Recreates a pseudo acoustic field appropriate for POP music Off Disable the Sound Effect. 2 Setup mode and select ( 2 ) Touch High , ( 1 ) Go to Beep SVC Medium , Low or Off • starting from High, Medium and Low, each setting makes progressively smaller corrections. Setup mode and press switch to turn on touch sound. ( 2 ) Press again to turn off touch sound. Adjusting the Sound ( 1 ) Go to Basic Operation [ 2 ] Setting the SVC (Speed-Sensitive Volume Compensation) [ 3 ] Setting beep sound The audio characteristics and volume are automatically corrected based on the Touch beep sound can be turned ON or OFF by touching the beep switch on car speed which allows you to enjoy the same audio quality while driving as well setting screen. as when stopped. • No correction is performed when set to Off. ● Some vehicle may not apply this function. 25 Using Lists The micro SD, USB, iPod devices connecting to the unit and portable devices connecting to the unit through DLNA will generate file LIST in the unit and available for user to select and playback files. 2 Basic Operation [ 1 ] Using the folder list and file list Touch and slide up/down on the screen to roll the folder/file list. Using Lists ● List screens ● Music files are categorized in 4 types (Albums/songs/ playlists/Artists), the file structure is different from Video/ Photo list. ● File name display following below rules: • whenever total length of displaying text out of visible area, text will be displayed in scrolling way • Un-defined character will be displayed " □ " or other symbols 26 Repeat, Random and Scan Settings Repeat, Random and Scan playback can be set at media-player screen in SD /USB / iPod modes. [ 1 ] Setting Repeat Playback ● REP OFF ※ iPod: REP OFF ● REP OFF is to turn the repeat function off ● REP ONE is to repeat the current song ● REP ON is to repeat all the songs in the the selected playlist (Albums/ Songs/Artists/Playlists) ● RND OFF is to turn the random function off ● RND ON is to randomly play songs in the selected playlist (Albums/ Songs/Artists/….) 2 ( 1 ) Each time that is touched in the operation screen shown below, the random setting is turned on or off. Repeat, Random and Scan Settings ( 1 ) Each time that is touched in the operation screen shown below, the Repeat setting is turned on or off. Basic Operation [ 2 ] Setting Random Playback 27 [ 3 ] Setting Scan Playback 2 Basic Operation is touched in ( 1 ) Each time that the operation screen shown below, the scan setting is turned on or off. ● SCAN OFF SCAN ON Repeat, Random and Scan Settings SCAN OFF is to turn the scan function off ● SCAN ON is to scan all the songs in the selected playlist (Albums/ Songs/Artists/….) for playing 10 seconds of each. ● Re-start Normal playback Current song song number 1 10 sec 2 10 sec 3 4 5 10 sec 10 sec jump to 4th Start scan 28 6 10 sec ● SCAN function is not available with Apple devices. Bluetooth Device Registration and Setting 2 ※A cable-connected mobile phone cannot be used with this unit. Bluetooth device Unit Wireless connection (Bluetooth) • AVRCP (Audio/Video Remote Control Profile) Ver. 1.4 or higher • HFP (Hands Free Profile) Ver. 1.5 or higher • OPP (Object Push Profile) Ver. 1.0 or higher • PBAP (Phone Book Access Profile) Ver. 1.0 or higher ■ Bluetooth Devices A Bluetooth device is used for wireless (Bluetooth) communication with other devices. Handsfree communication using conventional devices has necessitated the connection of a cable of a separate connection kit. In contrast, Bluetooth mobile phones allow handsfree communication free of ● Do not leave your Bluetooth device in direct sunlight for extended period of time as high temperature may cause deformation, discoloration and damage to the device. The device should be stored out of direct sunlight when not in use. ● Avoid bringing a Bluetooth device into close proximity with the unit as this may lead to a drop in audio quality and a deterioration in the connection state. Basic Operation the need for any connection. Handsfree communication via a Bluetooth mobile phone still kept in the shirt pocket is an example of such communication. Bluetooth Device Registration and Setting [ 1 ] Bluetooth When a Bluetooth compatible portable audio device (A 2 DP profile) is connected, music stored in the portable audio device can be played back (refer to Page 71). Also, when a Bluetooth compatible mobile phone (HFP profile) is connected, handsfree "call making" or "call receiving" is possible (refer to Page 87). (Unless otherwise indicated, denotes a Bluetooth device compatible with a Bluetooth-enabled portable audio device or mobile phone). ※Before using a portable audio device with this unit, be sure to carefully read the mobile phone's user's manual to check that there are no potential problems. ※The Bluetooth device connected to the unit must comply with the following specifications. Please be aware that some functions of some Bluetooth devices may be restricted. ■ Bluetooth specification Bluetooth Specification Ver. 2.1 + EDR or higher ■ Supported profiles • A2DP (Advanced Audio Distribution Profile) Ver. 1.0 or higher 29 ● The 2 Basic Operation Bluetooth Device Registration and Setting 30 frequency bands in which the unit is used are also utilized by chemical/medical equipment and devices such as microwave ovens, in-premises wireless station for identifying mobile equipment used in a plant production line (wireless stations requiring a license), specified low-power wireless station (wireless stations not requiring a license), and amateur wireless stations (wireless stations requiring a license) (the aforementioned 3 types of wireless stations are hereinafter referred to as the "other wireless stations"). Before using the unit, be sure to verify that no "other wireless stations" are being used in the vicinity of the unit. In the event that the unit causes harmful interference to the "other wireless stations', move promptly to a position where this harmful interference is avoid. ● The unit is used at a frequency of 2.4GHz ● The FH-SS modulation technique is adopted ● The interference distance is hypothesize to be not more than 10 meters. ● The unit is able to use all the frequency bands which ensures the bandwidth of mobile equipment identifiers. ● This telecommunication equipment conforms to NTC technical requirement. ● A Bluetooth device used simultaneously with another wireless device may have a detrimental effect on the effectiveness of the communication achieved with both devices. ● Bluetooth connection of a Bluetooth device hastens the depletion of the battery. [ 2 ] Registering Bluetooth Device Use of the Bluetooth device requires that it is registered with this unit. A maximum of 7 Bluetooth devices may be registered. Prior to operation, turn the Bluetooth device power supply ON to establish a state that enables connection with the unit. ( 1 ) Go SETUP page and select Bluetooth ( 3 ) Press Search to find new devices ● this will show the cell phone device list. ( 4 ) Select a device and press Pair to start registration ● Select "Honda AVN" displayed on the screen of Bluetooth device itself, and then enter the Passcode. ● The Bluetooth device registering operation should be performed while the Bluetooth Connection Screen is displayed. ● touching "Cancel" will interrupt registration. ■ When a failure is displayed A message indicating registration failure will be displayed. Repeat the registration operation in accordance with the on-screen instructions. ● Registration of a Bluetooth device compatible with SSP (Simple Secure Pairing) does not require the set of a Passcode ● The Passcode in the password is used to register a Bluetooth device with the unit. The passcode may be arbitrarily changed to any desired number combination. ● If more than one Bluetooth device is registered, the portable audio device/mobile phone being used may be selected. ● Depending on the settings of certain mobile phones, a key lock may occur on the mobile phone subsequent to connection. If this happens, turn off the auto-lock setting of the mobile phone. 2 registration, the mobile phone device name and signal information will be shown on the screen Basic Operation ● upon completion of the Bluetooth Device Registration and Setting ( 2 ) Press Bluetooth PWR button to turn on Bluetooth power ● This will enable the operation buttons on Bluetooth SETUP screen 31 ● Portable audio device incompatible with A2DP cannot be 2 Basic Operation Bluetooth Device Registration and Setting 32 registered with the unit. Furthermore, portable audio devices compatible with only AVRCP can not be used. ● Mobile phone devices incompatible with HFP cannot be registered with the unit. Furthermore, mobile phones compatible only with OPP cannot be used. ● The actuation and volume may differ between connected Bluetooth devices. ● When registering a mobile phone while streaming Bluetooth audio playback, the audio of the Bluetooth audio device may be interrupted. [ 3 ] Connecting/disconnecting Bluetooth Device There are two methods for connecting a Bluetooth device to the unit – an automated method and a manual method. The operation of the Bluetooth device, please refer to the user's manual for the Bluetooth device. ● With certain type of Bluetooth device, the display unit remains illuminated during connection on the unit. If this occurs, set the illumination of the Bluetooth device itself to OFF. (for settings, please refer to the user's manual for the Bluetooth device. ● The following may occur during handsfree use of other Bluetooth-compatible devices (portable audio devices). • Disconnection of the Bluetooth connection of the mobile phone. • Handsfree audio noise interference. • Handafree operation audio delay. ● Some mobile phones having both handsfree connection and audio device connection compatibility may not allow simultaneous handsfree and audio device connection. ● Audio interruption may occur during a connection operation implemented during streaming Bluetooth audio palyback. ( 1 ) Turning the Bluetooth device power supply ON establishes a state that enables connection with the unit. ( 2 ) Activating the unit (refer to Page 10 ) ● Bluetooth device connection is automatically initiated. ● When connection is terminated, a connection termination message is displayed. ● If connection fails, a connection fail message is displayed. Reattempt to get connection in accordance with the onscreen instructions. ● if connection fails or the Bluetooth Power setting is set to "OFF", the connection should be manually performed. 2 Registering the Bluetooth device establishes the connected state automatically. This enables the automatic connection of the Bluetooth device (refer to Page 30) whenever the unit is activated. Basic Operation for streaming Bluetooth audio may be prevented. In addition, if an operation for streaming Bluetooth audio is performed during the mobile phone connection operation, the connection may be interrupted. In either instance, wait a short time before manually performing the operation. ● if a Bluetooth connection once established is lost as a result of the Bluetooth network radio wave conditions, reconnection is prevented. If this occurs, perform the connection operation manually . ● Automatically connecting the Bluetooth device Bluetooth Device Registration and Setting ● Mobile phone connection implemented following an operation 33 ● Instructions for verifying Bluetooth connection 2 Basic Operation When Bluetooth is connected, you can verify the connection status by checking the Bluetooth icon displayed or not on the information bar at upper screen of the unit, or go to the Bluetooth Setup screen to check the connection status. ( 2 ) Select Paired Devices to enter the Paired Mobile Phone List to select the device you wish to connect or disconnect. Bluetooth Device Registration and Setting ● Manually connecting/disconnecting Bluetooth device If Bluetooth device automatic connection fails or the Bluetooth Power setting is set to be "OFF", the connection should be manually performed. The connected Bluetooth device may also be manually disconnected. 34 ( 1 ) Turn the Bluetooth device power supply ON to establish a state that enables connection with the unit. ( 3 ) To u c h t h e s w i t c h o f t h e Bluetooth device you wish to connect or disconnect. Connect/disconnect is repeated whenever the switch is touched. ( 2 ) Select the Bluetooth device you wish to delete, and touch Delete button. ( 3 ) Touch OK to confirm the selected Bluetooth device is deleted. 2 Bluetooth Device Registration and Setting ( 1 ) Select Paired Devices to enter the Paired Mobile Phone List. Basic Operation [ 4 ] Deleting the Bluetooth Device Deleting the registered Bluetooth device. 35 Wi-Fi Setting 2 Basic Operation Wi-Fi function is to let the AVN be able to connect nearby AP (Access Point) through wireless, and surf the internet ( if the connected AP is connecting to internet service) while using the browser on the AVN. ● Select Wi-Fi to enter Wi-Fi setup ● Touch Add Wi-Fi network to enter screen. network setting. Wi-Fi Setting ● Put the check in Wi-Fi Box to ● ● Select an Wi-Fi AP ( access point ) ● Wi-Fi password can be set by enable the Wi-Fi function. Put the check in Network notification Box to enable the notify function when there is a network available. to connect, the AVN will scan and list out available AP nearby when Wi-Fi function is put on. ■ To disable the Wi-Fi function, simply put off the check in the Wi-Fi box. 36 Wi-Fi module name can be changed by filling in device name in Network SSID column. selecting security encryption method and filling in the passcode. Portable Hotspot Setting to enter Portable hotspot setup screen. ● Touch Configure Wi-Fi hotspot ● Put the check in the Portable Wi- ● Wi-Fi hotspot name can be ■ To ● Wi-Fi hotspot password can Fi Hotspot Box to enable the WiFi Hotspot function. disable the Portable Wi-Fi Hotspot function, simply put off the check in the Portable Wi-Fi box. enter configuration setting. to changed by filling in device name in Network SSID column. Portable Hotspot Setting ● Select Portable hotspot 2 [ 1 ] Portable Hotspot Setting Basic Operation Portable Hotspot is to let the AVN to be an access point (AP), so that smartphone devices can connect with it, and AVN can access and playback the media files stored in the smartphone devices. be setby selecting security encryption method and filling in the passcode. 37 Other Settings Time / Reset to Default, these operations can be set. Service Diagnosis is for Dealer reference only. [ 1 ] Time Setting 2 Basic Operation ● Select Time screen. to enter Time setup [ 2 ] Reset to Default Other Settings ● Date, Time and Display Format to enter Reset to Default setup screen. ● Press Yes to set all parameters back to original value; Press No to abort. can be adjusted in this setup. ※ When the "Automatic" time setting is selected, the AVN will display the time information base on time setting configuration and GPS time signal. ● Select Reset to Default When reset to default, below settings will turn back to original. ● Radio pre-set stations ● SVC setting ● Main Menu icon positions ● Time setting ● Audio Configuration setting ● Portable hotspot setting ● Beep setting ※ Navigation setting is not set to default, regarding to navigation factory default pleae refer to page 138. 38 ● Go to main menu and to enter Setup List. 2 Setup ● Select Web Service to enter Honda service website. Basic Operation select Other Settings [ 3 ] Web Service ● Update product information, claim or comment reflection can be obtained or performed on the Honda Service website. 39 Finger Gesture Some operation functions can be quickly accessed through finger gesture applying on the touch screen of the unit. [ 1 ] Finger Gesture Function Table FUNCTION GESTURE 2 Basic Operation track/Radio station 2 fingers swipe up/ change down RADIO SD/USB iPod AUX PHONE BT-AUDIO INTERNET DLNA SETUP NAVI N/A ● ● ● N/A N/A ● N/A ● N/A N/A Finger Gesture volume up 2 fingers swipe to right ● ● ● ● ● ● ● ● ● ● ● volume down 2 fingers swipe to left ● ● ● ● ● ● ● ● ● ● ● Zoom In/Out 2 fingers scale N/A N/A ● N/A N/A N/A N/A ● ● N/A ●※ 1 Menu 3 fingers swipe upward ● ● ● ● ● ● ● ● ● ● ● Back function 3 fingers swipe horozental (right to left) ● ● ● ● ● ● ● ● ● ● ● Mute 4 fingers swipe left/right ● ● ● ● ● ● ● ● ● ● ● Display off 4 fingers swipe up/ down ● ● ● ● ● ● ● ● ● ● ● ※1. Only work in map mode 40 MENU ● For quick reference on the unit, go SETUP page and select "Gesture Guide" Audio Radio AM or FM radio can be received and played. 2 1 3 4 1 5 3 Audio Radio 11 6 10 7 8 9 ① Preset switch ② Band Display ③ Stereo indicator (FM only) ④ Status Display (SCAN / AS/SEEK) ⑤ Tuned frequency display ⑥ FM switch ⑦ AM switch ⑧ AUTO SELECT switch ⑨ SCAN switch ⑩ Tune up / SEEK up (Press over 2 seconds) ⑪ Tune down / SEEK down (Press over 2 seconds) [ 1 ] Listening to the Radio ( 1 ) press Radio button on the main menu ● The radio operation screen appears. 42 ( 2 ) Touch the AM FM switch. ● FM Operation Screen or AM Operation Screen (radio operation screen) appears. [ 3 ] Searching for a Desired Station (SCAN) ( 1 ) Touch the SCAN switch (Scan up) ● Radio stations are searched and played one by one for 10 seconds each. ● If you touch the SCAN switch while the desired station is received. It will remain on that station. ● If you scan up, [SCAN] is displayed on the screen ● The search function may not be able to find weak stations ● The changing antenna position and surrounding obstacles including trains and traffic signals, may make it difficult to receive a stable radio signal. 43 Audio ( 2 ) Touch the < > switch. ● Directly touch or drag on the scale to find the desired station. ● Touch < > switch to search the desired station. ● Long press < > switch over 2 seconds to activate SEEK function. Radio ( 1 ) Touch the Preset switch on the radio operation screen or use finger gesture (slide 2 fingers in vertical direction on the screen), to select a desired preset station. 3 [ 2 ] Selecting a Station (TUNE / SEEK) [ 4 ] Storing the Selected Station in preset switch 3 Audio Radio 44 ( 1 ) After selecting the desired station, hold a Preset switch on the radio operation screen till the frequency is set into switch button. ( Manual Preset) ● the Preset switch enable you to quickly select a desired station. ( 2 ) To automatically store the station in memory, touch AUTO SELECT switch. ●Once the operation is completed, the stations are stored in a Preset switches (Auto Preset) ● The Preset switches enable you to quickly select a desired station Listening to Music from a Micro SD/USB Memory A micro SD/USB memory can be inserted into this unit for listening to MP3 or WMA files saved on the memory. 3 5 4 6 7 12 8 9 10 11 13 ※ Touch and drag track bar to have forward and rewind function. ※※ Music information comes from ID3 tag.( Refer to page 50 ) ● It may take some time for the MP3 music information to be displayed 45 Audio 2 Listening to Music from a Micro SD/USB Memory 1 ① Album art work ② Artist name※※ Album※※ Title※※ ③ Elapsed time ④ Playback INFO Forward/Rewind※ ⑤ Play time ⑥ Random switch ⑦ File down / Fast Rewind switch ⑧ Play / Pause switch ⑨ File up / Fast Forward switch ⑩ Scan switch ⑪ Repeat switch ⑫ File mode change switch ⑬ File list switch 3 ● SD/USB Memory Operation Music Screen ● SD/USB Memory Music List Screen The AVN can displays audio list in Album, Songs, Artist and Playlist sorting way. Simply press the catagory button to display audio file list in desired way. 3 Audio Listening to Music from a Micro SD/USB Memory 46 ● Music files are categorized into 4 types of lists. The unit will sort out all the music files match to the selected list type (Albums, Songs, Playlists, and Artists) ● Music file without ID3 tag information can only be shown in Song list. ● File ( Album/ Songs/Playlist/Artist) display order in the list follows alphanumeric sequence. the selected source will be played. 3 ※ The micro SD slot will lock the micro SD card when it is pushed inward. To remove the micro SD, push inward again to release the lock. ● USB2 availability is depended on the vehicle. [ 1 ] Listening to Music from the Micro SD/USB Memory ( 1 ) Press MENU button ● This displays the Main menu page [ 2 ] Selecting a File ( 2 ) Touch SD or USB button ( 1 ) Press LIST button ● This displays the SD or USB ● This displays the List operation operation screen screen ( 3 ) Touch Music button ※ No need to touch if already in Music Operation Screen ● Devices connected through a USB hub will not work with the unit ● Micro SD / USB devices are recommanded to use the memory capacity under 32 GB ; the memory devices with over 32GB capacity might not be able to be read. ( 2 ) Select a List Category ( 3 ) Touch the file. ● Playback of the selected file is started. 47 Audio ( 1 ) Connect (remove) the Micro SD/ USB memory to the Micro SD/ USB terminal ● When there are both USB1 and USB2 devices connected, only Listening to Music from a Micro SD/USB Memory ● Connecting (Removing) the Micro SD/USB Memory [ 3 ] Fast-Forwarding and Fast-Rewinding [ 6 ] Repeating the same play list (Albums, Songs, Playlists, Artist) [ 7 ] Playing Files in the Current Play list (Albums, Songs, Playlists, Artist) at Random ( 1 ) Touch ( 1 ) Touch switch ● The screen displays while ● The switch turns to blue playback is paused. color ● Touch to return to normal ● Files are selected randomly playback. for playback form the current playlist II ▲ ▲ Listening to Music from a Micro SD/USB Memory [ 4 ] Pausing Playback ( 1 ) Touch switch ● The switch turns blue color ● Repeat playback is performed for the files in the same playlist as the file that that is currently being played. ▲ ▲ ▲ ▲ 3 Audio ( 1 ) Touch on or drag on track bar ● Touch on or drag to the desired playing point and release to fast-forward. ● Touch on or drag to the desired playing point and release to fast-rewind. ( 2 ) Press and hold I / I to perform fast forward / rewind. [ 5 ] Repeating the same file 48 [ 8 ] Playing Files in the Current Play list (Albums, Songs, Playlists, Artist) at Scan ( 1 ) Touch switch ( 1 ) Touch switch ● The switch turns blue ● The switch turns to blue color color ● Repeat playback is performed ● All files in current playlist will for the file that is currently be played 10 second each, being played except currently playing file. ● Corresponding character-code 2 Items File/Folder Name Corresponding Character-code UNICODE ISO8559-1 ISO8559-1 SD Artist name (ID3 Tag) UNICODE (UTF-8) UNICODE (UTF-16) Artist name (WMA Tag) UNICODE (UTF-8) UNICODE (UTF-16) ISO8559-1 File/Folder Name UNICODE (UTF-8) UNICODE (UTF-16) USB Artist name (ID3 Tag ver. 1.x) ISO8559-1 ISO8559-1 Artist name (ID3 Tag ver. 2.x) UNICODE (UTF-8) UNICODE (UTF-16) iPod BT Audio Artist name (WMA Tag) UNICODE (UTF-16) Playlist/Artist/Album UNICODE (UTF-8) Track/Album/Artist name UNICODE (UTF-8) Listening to Music from a Micro SD/USB Memory Funtion ISO8559-1 Handsfree Name/Number Basic Operation This unit corresponds to the following character-code. Character-code other than the following might not be correctly displayed. ISO8559-15 UNICODE (UTF-8) UNICODE (UTF-16) 49 ● MP3/WMA 3 Audio MP 3 (MPEG Audio Layer 3 ) is a standard format for audio compression technique. By using MP3 format, the file size can be compressed to about 1/10 of the original file. WMA (Window Media Audio) is a sound compression format of Microsoft Corporation. By using WMA format, the file size can be compressed smaller than MP3. There are restrictions on the standard, stored media or format of the MP3/ WMA files which can be used. Please note the following items when you encode an MP3/WMA file. Listening to Music from a Micro SD/USB Memory Standard for Playable MP3 Files ● Supported Standard MP3 (MPEG-1 Audio Layer3, MPEG-2 Audio Layer3 LSF, MPEG-2.5 Audio Layer3) ● Supported Sampling Frequencies MPEG-1 Audio Layer3 : 32, 44.1, 48 (KHz) MPEG-2 Audio Layer3 LSF : 16, 22.05, 24 (KHz) MPEG-2.5 Audio Layer3 : 8,11.025, 12 (KHz) ● Supported Bit Rate MPEG-1 Audio Layer3 : 32~320 (Kbps) MPEG-2 Audio Layer3 LSF : 8~160 (Kbps) MPEG-2.5 Audio Layer3 : 8~160 (Kbps) ※ VBR is supported ● Supported Channel Modes: Stereo, Joint Stereo, Dual Channel and Mono 50 Standard for Playable WMA Files ● Supported Standard WMA Ver. 7, 8, 9 ● Supported Sampling Frequencies 8, 11.025, 16, 22.05. 32, 44.1, 48 (KHz) ● Supported Bit Rate Ver. 7: CBR 20~128 (Kbps) Ver. 8: CBR 5~192 (Kbps) Ver. 9: CBR 5~320 (Kbps) ※ VBR is supported ( only for Ver. 9: 44.1 & 48 (KHz)) ID3 Tag/ WMA Tag Auxiliary text data called ID3 tag, which can store data such as song title, artist name, can be entered on an MP3 file. This unit handles the ID3 tags of ID3 Ver. 1.0, 1.1, 2.2, 2.3 and 2.4 ※ Riff SIF is not supported Auxiliary test data called WMA tag, which can store data such as song title, author name (artist name), can be entered in a WMA file as an ID3 tag. File Names Only files with ".mp3" or ".wma" extensions can be recognized as MP3/WMA files and played. Be sure to store the MP3/WMA files with ".mp3" or ".wma" extensions included. When a memory device, which stores MP3 or WMA files, is inserted, all the files in the device will be checked first. When the file check is finished, the first MP3 or WMA file will be played. In order to complete the checking process quickly, it is recommended not to write other files that are not MP3/WMA or include extraneous folders. On the internet, various MP3/WMA music distribution sites are available, such as online shops (where you can download files for a fee), viewing and listening-only sites, and free downloading sites. Be sure to follow the rules and instructions of each site. Depending on how the MP3/WMA files were written, the playing time display may not be accurate. The playing time may not accurate if a file encoded using VBR is fast-forwarded or fast-rewinded. ● If an ".mp3" or ".wma" extension is given to a file, which is not an MP3 or a WMA file, the unit may attempt to play the file, which may result in sounds of volume and frequency that can damage the speakers. Do not give ".mp3" or ".wma" extension t any file that is not an MP3 or a WMA file. ● Creating and Enjoying MP3/WMA Files When creating an MP3 or a WMA file, any recording of broadcast, records, audio recording, video recording or live performance is limited to personal use and cannot be used without the authorization of the party under copyright law. ● To play back the music with consistent sound quality, 128kbps fixed bite rate, 44.1KHz sampling frequency and stereo channel mode are recommended for MP3. ● There are many free encoder software applications available on the market for MP3/WMA. Depending on the encoder or the file format, the sound quality may be inferior, or the files may not be playable. ● If files other than MP3/WMA are in the memory device, it may take longer time to check the device or device may not be playable. ● MPEG Layer-3 audio coding technology licensed from Fraunhofer IIS and Thomson. Listening to Music from a Micro SD/USB Memory Displaying Playing Time for MP3/WMA Files 51 Audio Obtaining Files from MP3/WMA Music Distribution Sites 3 Playing MP3/WMA Files Watching Video from a Micro SD/USB Memory ● SD/USB Memory Operation Video Screen 3 Audio 1 Watching Video from a Micro SD/USB Memory 52 2 3 6 9 4 5 7 8 10 11 ※ Touch and drag track bar to have forward and rewind function ● For safety. Video screen will be displayed blue during driving. To watch video screen is required turning parking brake on. ① Ratio Display ② Title display ③ Elapsed time ④ Playback INFO ※ Forward / Rewind ⑤ Play time ⑥ Random ⑦ File up / Fast Rewind switch File down / Fast Forward switch Play / Pause switch ⑧ Repeat ⑨ File mode change switch ⑩ Ratio switch ⑪ List switch ● SD/USB Memory Video File Layout Example Folder ● File 1 stored directly in the Micro SD/USB memory and not in any folder appear in a virtual folder called "RootFolder" when played back by the media player of this unit. ● Folders not containing any Video files are not displayed by this unit. ※Video will be played in accordance with shown figure order. 1 A Video file support format Video List 2 Format Codec Resolution KBPS FPS Decoder 1 mp4 MPEG-4 320x240~1280x720 256~5000 12~30 HW 2 wmv WMV2 320X240~720X480 256~16000 12~25 SW 3 avi MPEG-4 320X240~720X480 256~1024 12~25 SW rm RV40 320x240~720x480 256~16000 12~25 SW mpeg MPEG-1 320x240~720x480 256~1024 12~25 SW flv FLV1 320x240~720x480 256~16000 12~25 SW 3gp MPEG-4 128x96~352x288 96~384 12~30 HW 320x240 336 12~30 SW 320X240~720X480 256~16000 12~25 SW 12~24 SW Root 3 A 4 B 4 B 5 5 D C C 6 6 7 D 7 8 8 E E divx Level 1 Level 2 Level 3 rmvb RV40 9 9 Level 1 asf Level 4 DivX MPEG-4 Version 5 320x240~720x480 Level 2 53 Audio ※ 3 Video Watching Video from a Micro SD/USB Memory ※ [ 1 ] Connecting (Removing) the Micro SD/USB Memory ( 1 ) Connect (remove) the micro SD/ USB memory to the micro SD/ USB terminal ● When there are both USB1 and USB2 devices connected, only the selected source will be played. 3 Audio ※ The micro SD slot will lock the micro SD card when it is pushed inward. To remove the micro SD, push inward again to release the lock. Watching Video from a Micro SD/USB Memory [ 2 ] Watching Video from the Micro SD/USB Memory ● USB2 availability is depended on the vehicle. ( 1 ) Press MENU button ● This displays the main menu [ 3 ] Selecting a File page ( 2 ) Touch SD or USB button ( 1 ) Press LIST button ● This displays the SD or USB ● This displays the video list operation screen ( 3 ) Touch Video button ※ No need to touch if already in Video Operation Screen ● Devices connected through a USB hub will not work with the unit ● Micro SD / USB devices are recommanded to use the memory capacity under 32 GB ; the memory devices with over 32GB capacity might not be able to be read. 54 ( 2 ) Touch the file. ● Playback of the selected file is started. switch switch turns blue color ● Repeat playback is performed for the files in the same folder as the file that that is currently being played. ▲ [ 8 ] Playing Files in the Folder at Random ● Touch ( 1 ) Touch II switch ● ● The screen displays The switch turns to blue color while playback is paused. ● Files are selected randomly for ● Touch playback form the current folder to return to normal playback. ▲ [ 9 ] Switching the Video Screen display ratio [ 6 ] Repeating the Same File switch ( 1 ) Touch ● The switch turns blue color ● Repeat playback is performed for the file that is currently being played ● To u c h Ratio button on the screen to switch display aspect (FULL → 16:9 → 4:3) 55 Audio 3 ● The Watching Video from a Micro SD/USB Memory ▲ ▲ [ 5 ] Pausing Playback ● Touch ▲ ▲ [ 4 ] Fast-Forwarding and Fast-Rewinding [ 7 ] Repeating the Same Folder ( 1 ) Touch on or drag on track bar ● Touch on or drag to the desired playing point and release to fast-forward ● Touch on or drag to the desired playing point and release to fast-rewind ( 2 ) Press and hold I / I to perform fast forward / rewind. ● Conditions for Operating the Audio The features of this unit can or cannot be operated depending on the following conditions, including wheather the engine is turned on or not. Ignition key 3 Audio Watching Video from a Micro SD/USB Memory 56 II (ON) Audio Media player(Video), Video iPod(Video), A/V O(OFF) Disable Disable I(ACC) Enable Enable (Only Audio when parking brake is off.) parking brake ON Enable Enable parking brake OFF Enable Only Audio (for safety reasons). Be sure that the battery does not run down when the ignition key is turned to I (ACC) Avoid using this unit for long period of time when the engine is not running. The battery will run down and the engine will not start. ● While the vehicle is moving, some touch switches will be deactivated, depicted by inverting the switch icons' color. No operation will be executed even if they are touched. Viewing Photo from a Micro SD/USB Memory 1 3 2 4 5 ● For safety. Photo screen will be displayed blue during driving. To watch Photo screen is required turning parking brake on. Viewing Photo from a Micro SD/USB Memory 57 Audio ① Play / Pause switch ② Display time indicator ③ File mode change switch ④ Displaying time switch ⑤ List switch 3 ● SD/USB Memory Operation Photo Screen ● SD/USB Memory Photo File Layout Example ※ Photo ※ Folder ※Photo will be played in accordance with shown figure order. 1 3 Audio A Photo List 2 Viewing Photo from a Micro SD/USB Memory Root 1 3 A 2 4 3 B 4 B 5 5 D C C 6 6 7 D 7 8 8 E E 9 9 Level 1 Level 1 58 Level 2 Level 3 Level 4 Level 2 ● File 1 stored directly in the SD/USB memory and not in any folder appear in a virtual folder called "RootFolder" when played back by the media player of this unit. ● Folders not containing any Photo files are not displayed by this unit. ( 1 ) Connect (remove) the SD/USB memory to the SD/USB terminal ● When there are both USB1 and USB2 devices connected, only the selected source will be played. ● USB2 availability is depended on the vehicle. [ 2 ] Watching Photo from the micro SD/USB Memory ( 1 ) Press MENU button ● This displays the main menu [ 3 ] Selecting a File page ( 1 ) Press LIST button ( 2 ) Touch SD or USB button ● This displays the Photo list ● This displays the micro SD or USB operation screen ( 3 ) Touch Photo button ※ No need to touch if already in Photo Operation Screen ● Devices connected through a USB hub will not work with the unit ● Micro SD / USB devices are recommanded to use the memory ( 2 ) Touch the file. ● Playback of the selected file is started Viewing Photo from a Micro SD/USB Memory 3 ※ The micro SD slot will lock the micro SD card when it is pushed inward. To remove the micro SD, push inward again to release the lock. capacity under 32 GB ; the memory devices with over 32GB capacity might not be able to be read. 59 Audio [ 1 ] Connecting (Removing) the micro SD/USB Memory 3 Audio [ 4 ] Quick Viewing in Thumbnail Window [ 7 ] Adjust Photo display ratio ( 1 ) Touch and flick to right or left in thumbnail window ● Touch and flick to left to forward quick view ● Touch and flick to right to rewind quick view [ 5 ] Pausing Playback ▲ ▲ Viewing Photo from a Micro SD/USB Memory ( 1 ) Touch photo playback screen to pause ● The screen displays while playback is paused. ● Touch to return to normal playback. [ 6 ] Adjusting displaying time 60 ( 1 ) Touch Period ● this changes the displaying time following timing cycle (2 -> 4 -> 8 seconds) ( 1 ) while photo displaying, use 2 fingers to zoom in/out ● two fingers touch on screen and go outward direction to zoom in ● two fingers touch on screen and go inward direction to zoom out Before using iPod ● iPod Compatibility Chart iPod 5G Battery charging V V Track up V Track down iPod Classic iPod Nano 1G 1G iPod Nano 3G iPod Nano 4G iPod Nano 5G iPod Nano 6G iPod Nano iPod Touch iPod Touch iPod Touch iPod Touch iPod Touch iPod Touch iPod Touch iPod Touch 7G 1G Ver. 1 1G Ver. 2 1G Ver. 3 2G Ver. 2 2G Ver. 3 2G (2009) 3G 4G V V V V V V V V V V V V V V V V V V V V V V V V V V V V V V V V V V V V V V V V V V V V V V V V FF V V V V V V V V V V V V V V V V V FR V V V V V V V V V V V V V V V V V PAUSE V V V V V V V V V V V V V V V V V REPEAT V V V V V V V V V V V V V V V V V SHUFFLE V V V V V V V V V V V V V V V V V SHUFFLE ALL V V V V V V V V V V V V V V V V V AUDIO BOOK V V V V V V V V V V V V V V V V V List browsing V V V V V V V V V V V V V V V V V Alphabetical search x x x x x x x x x x x x x x x x x Video browsing v v v v v v v v x v v v v v v v v Logo display on iPod x x x x x x x x x x x x x x x x x Before using iPod 3 iPod Nano 2G 61 Audio Model Name: 3 Audio Before using iPod Model Name: iPhone iPhone 3G iPhone 3GS iPhone 4 iPhone 4S iPhone 5 Model Name: iPad iPad 2 iPad 3 iPad mini Battery charging v v v v v v Battery charging v v v v Track up v v v v v v Track up v v v v Track down v v v v v v Track down v v v v FF v v v v v v FF v v v v FR v v v v v v FR v v v v PAUSE v v v v v v PAUSE v v v v REPEAT v v v v v v REPEAT v v v v SHUFFLE v v v v v v SHUFFLE v v v v SHUFFLE ALL v v v v v v SHUFFLE ALL v v v v AUDIO BOOK v v v v v v AUDIO BOOK v v v v List browsing v v v v v v List browsing v v v v Alphabetical search x x x x x x Alphabetical search x x x x Video browsing v v v v v x Video browsing v v v x Logo display on iPod x x x x x x Logo display on iPod x x x x ※ Compatibility with models and / or firmware versions other than those listed above is not guaranteedand compatibility issue may exist when using the unit to control the iPod ( i.e. USB control). If a compatibility issue is found to exist, the iPod can alternatively be connected using the Front AUX input (but without any USB control over the iPod). ※ iPod and iTunes are trademarks of Apple Computer Inc., registered in the U.S and other countries. Unauthorized copying of music or other files is strictly prohibited. 62 ● Information pertaining to the iPod version can be verified via the iPod itself. ● For details, please see the user's manual for the iPod. Before using iPod 63 Audio playback of non-copyrighted materials or materials that they are legally permitted to reproduce or playback. ● Copyright infringement is expressly prohibited by law. ● To operate the iPod function on the unit, some Apple devices might require to connect both AUX and USB cord. 3 ● An iPod is licensed to users for the personal reproduction or Listening to Music from iPod An iPod can be inserted into the USB1 slot (front panel) for iPod music listening Selecting song, repeat and random modes switchover operations can be performed via the unit. ● iPod Music Operation Screen 3 Audio 1 2 Listening to Music from iPod 3 4 6 5 7 11 8 9 10 12 ※ Touch and drag track bar to have forward and rewind function. ※※ Music information comres from ID3 tag. ● Only USB 1 is available for iPod. USB 2 ( some vehicles equipped ) is not available for iPod. 64 ① Album art work ② Artist name※※ Album※※ Title※※ ③ Elapsed time ④ Playback INFO Forward/Rewind※ ⑤ Play time ⑥ Random switch ⑦ File down / Fast Rewind switch ⑧ Play / Pause switch ⑨ File up / Fast Forward switch ⑩ Repeat switch ⑪ File mode change switch ⑫ File list switch [ 1 ] Inserting (removing) the iPod ● For reasons of safety, do not use iPod headphones or earphones while driving unit. 3 [ 2 ] Listening to Music from the iPod ● The iPod communication state is dependent on the number of songs stored on the iPod and the iPod software version and the response to operations performed on the operation screen may not be immediate. ● Do not pull out the connection cable while music is being played on the iPod. This may result in iPod malfunction. ● If the iPod is not functioning correctly, remove the iPod from the unit and then reset the iPod main body before reconnecting to the unit. For details of the iPod resetting method, see the user's manual. ● Check that the iPod to be used is a version that is compatible with the unit. For a list of compatible versions, see the "iPod Compatibility Chart" (refer to page 60) ( 1 ) Press MENU button ● This displays the main menu page ( 2 ) Touch iPod button ● This displays the iPod operation screen ( 3 ) Touch Audio button Listening to Music from iPod ● Devices connected through a USB hub will not work with the loss of iPod data, and this data may not be recoverable. ● Do not leave your iPod in direct sunlight for extended period of time as high temperature may deform, discolor or damage the iPod. The iPod should be stored our direct sunlight when not in use. ※ No need to touch if already in Music Operation Screen 65 Audio ● Please be aware that use of an iPod with the unit may result in a [ 3 ] Selecting a File [ 5 ] Pausing Playback ▲ ▲ ▲ ( 1 ) Touch on or drag on track bar ● Touch on or drag to the desired playing point and release to fast-forward ● Touch on or drag to the desired playing point and release to fast-rewind ( 2 ) Press and hold I / I to perform fast forward / rewind. ▲ ▲ Listening to Music from iPod [ 6 ] Repeating the same file switch ( 1 ) Touch ● The switch turns blue color ● Repeat playback is performed for the file that is currently being played [ 4 ] Fast-Forwarding and Fast-Rewinding 66 ( 1 ) Touch II ● The screen displays while playback is paused. ● Touch to return to normal playback. ▲ 3 Audio ( 1 ) Press LIST button ● This displays the List operation screen ( 2 ) Select a List Category ( 3 ) Touch the file. ● Playback of the selected file is started. [ 7 ] Repeating the same play list ● The order in which the songs are to be played conforms to the [ 8 ] Playing Files in the Current Play list at Random ( 1 ) Touch switch ● The switch turns to blue color ● Files are selected randomly for playback form the current playlist operation of the iPod itself. 67 Audio several seconds before playback commences. ● iPhone or iPad devices can install other media player software for media files playback, music files playback through the player other than Apple original one, the music information displayed on AVN might not be correct. 3 ● When there are many songs stored on the iPod, it may take Listening to Music from iPod ( 1 ) Touch switch ● The switch turns blue color ● Repeat playback is performed for the files in the same playlist as the file that that is currently being played. Viewing the Video via iPod By inserting the iPod into the unit, the iPod video can be viewed. ● iPod Video Operation Screen 3 Audio Viewing the Video via iPod 2 1 3 5 6 10 4 7 8 9 11 ※ Touch and drag track bar to have forward and rewind function ● For safety. Video screen will be displayed blue during driving. To watch video screen is required turning parking brake on. 68 ① Title ② Elapsed time ③ Track Bar Forward / Rewind※ ④ Play time ⑤ Random switch ⑥ Previous track / Fast Rewind switch ⑦ Play / Pause switch ⑧ Next track / Fast Forward switch ⑨ Repeat switch ⑩ File mode change switch ⑪ File list switch [ 1 ] Inserting (removing) the iPod iPod audio/video cable ● AUX VIDEO exchange cord is available in kit but iPod audio/ video cable is not included. ● Please use AUX VIDEO exchange cord which is bundled with the unit . 69 Audio unit ● Contact your dealer for information regarding the unit connection method for watching videos on the iPod. ● The iPod communication state is dependent on the number of songs stored on the iPod and the iPod software version and the response to operations performed on the operation screen may not be immediate. ● Do not pull out the connection cable while video is being played on the iPod. This may result in iPod malfunction. ● If the iPod is not functioning correctly, remove the iPod form the unit and then reset the iPod main body before reconnecting to the unit. For details of the iPod resetting method, see the user's manual. ● Check that the iPod to be used is a version that is compatible with the unit. For a list of compatible versions, see the "iPod Compatibility Chart" (refer to page 60) 3 AUX VIDEO exchange cord ● Devices connected through a USB hub will not work with the Viewing the Video via iPod ( 1 ) Connect the USB cable connected to the iPod to the USB terminal Connect the AUX VIDEO exchange cord to the RCA terminal. ● For reasons of safety, do not use iPod headphones or earphones while driving ● Please be aware that use of an iPod with the unit may result in a 3 Audio loss of iPod data, and this data may not be recoverable. ● Do not leave your iPod in direct sunlight for extended period of time as high temperature may deform, discolor or damage the iPod. The iPod should be stored our direct sunlight when not in use. [ 3 ] Selecting a File ( 1 ) Press LIST button ● This displays the video list ( 2 ) Touch the file. ● Playback of the selected file is started. Viewing the Video via iPod [ 2 ] Watching Video from iPod ( 1 ) Press MENU button ● This displays the main menu page ( 2 ) Touch iPod button [ 4 ] Fast-Forwarding and Fast-Rewinding ● This displays the iPod operation screen ( 1 ) Touch on or drag on track bar ( 3 ) Touch Video button ● Touch on or drag to the desired playing point and release to ※ No need to touch if already in Video Operation Screen fast-forward ● Touch on or drag to the desired playing point and release to fast-rewind 70 [ 5 ] Pausing Playback ▲ [ 8 ] Playing Files in the Folder at Random ( 1 ) Touch switch ( 1 ) Touch II ● The switch turns to blue ● The screen displays while color playback is paused. ● Files are selected randomly ● Touch to return to normal for playback form the current playback. folder switch ( 1 ) Touch ● The switch turns blue color ● Repeat playback is performed for the file that is currently being played [ 7 ] Repeating the Same Folder ● Due to Apple communication protocol limitation iPod video mode has no last memory feature, so if AVN was at ipod video mode before AVN was powered off, when it is powered on again, the AVN won't be at iPod video mode but auto-play iPod music instead. Viewing the Video via iPod ( 1 ) Touch switch ● The switch turns blue color ● Repeat playback is performed for the files in the same folder as the file that that is currently being played. 71 Audio 3 ▲ [ 6 ] Repeating the Same File Bluetooth Audio Operations When a Bluetooth compatible portable audio device (A2DP protocol) is connected, music stored in the portable audio device can be played back. Also, if a portable audio device compatible with AVRCP version 1.3 is connected, selection of tracks from albums and other operations are possible. ※ Before using a portable audio device with this unit, be sure to carefully read the user's manual to check that there are no potential problems. ● Bluetooth Audio Operation Screen 3 Audio ① Icons ID3 tag information display ② Operation button : Previous track Play / Pause Next-track ③ Go to search menu ④ Disconnect Bluetooth connection Bluetooth Audio Operations 1 2 • 3 4 Disconnect button will make disconnection of bluetooth. • Caution should be displayed before disconnecting. • Disconnection can be done through mobile phone or AVN*. * Disconnect will show Audio-off Screen. 72 ( 1 ) Press MENU button ● This displays the main menu page ( 2 ) Touch BT Music button ● This displays the BT Audio operation screen [ 4 ] Pausing Playback ● Depending on the number of music files on the portable audio device and the software version, the player may not respond immediately or may malfunction when performing operations on the operation screen. ● From some portable audio device, some operations may be disabled or may perform an entirely different operation. Bluetooth Audio Operations [ 3 ] Listening to Bluetooth Audio ( 1 ) Touch II ● The screen displays while playback is paused. ● Touch to return to normal playback. * Due to Bluetooth communication, operation maybe delay a couple of sceonds. 73 Audio ( 1 ) Press the button ● Press button: Selecting the next track ● Press button: Selecting the previous track 3 [ 1 ] Registering the Portable Audio Device [ 5 ] Selecting a File To use Bluetooth audio, the portable audio device must be registered with the unit. For details on registering a portable audio device, refer to "Registering Bluetooth Device" (refer to page 30) [ 2 ] Connecting the Portable Audio Device To use Bluetooth audio, the portable audio device must be connected with the unit. For details on connecting a portable audio device, refer to "Connecting/ disconnecting Bluetooth Devices" (refer to page 32) AUX 3 Audio AUX By connecting a commercially available portable audio device, this unit can play ● Be sure that your hand does not catch and yank out the minithe music recorded on that device. plug cable. Use a commercially available mini-plug jack cable to connect a portable audio device. ● Do not connect, operate or disconnect the portable audio device while you are driving. ※ When there is no mini-plug jack in your vehicle, AUX2 cannot be used. ※ Before using a portable audio device connected to this unit, read the ● Do not connect the front AUX directly with a speaker/ manual of the device carefully to be sure that the device can be used with headphone output. this unit without any problem. ● Failure to observe this, the sound may not only be distorted, [ 1 ] Connecting (or Disconnecting) the Portable Audio Device but also break the internal amplifier. ● Be sure that the portable audio device is turned off. ● Be sure that an audio mode other than AUX is selected, or the unit's [ 2 ] Listening to the Portable Audio Device power is turned off. ( 1 ) Connect (or disconnect) the mini- For operation of the portable audio device, read the manual included with the plug cable device. ● The location of AUX 2 is different depending on the car. ● A Mini-plug cable with resistance circuitry cannot be used ● For the devices not yet on the market, proper operation is not guaranteed. 74 ( 1 ) Press MENU button ● This displays the main menu page ( 2 ) Touch AUX button ● This displays the AUX selection screen ※ There are two AUX entry on the unit, select the one connected with the device 75 Audio 3 AUX ( 3 ) Touch the AUX1 or AUX2 [ 4 ] Finish Using the Portable Device Playback switch on the audio operation ( 1 ) Hold down PWR button or press MENU and switch to other mode screen PWR button once more or touch AUX switch to ● Hold down ● The screen switches to the resume playing the device AUX Screen. ( 2 ) Discconect portable media devices by unplug AUX cable or switch off ● The sound of the portable power of portable media devices. device is output through the speakers. [ 3 ] Watching to the Portable Video Device For operation of the portable video device, read the manual included with the device. ● For certain video devices, the video connection cord can not be ( 1 ) Press MENU button used. Refer to the user's manual for the respective device. ● This displays the main menu ● page The image is not displayed when there is no video input form the video device. This is not a malfunction. ( 2 ) Touch AUX button ● If the input signal from the video device is large, the sound ● This displays the AUX selection may be distorted. If this happens, adjust the volume at the screen connected device. ( 3 ) Touch the AUX1 or AUX2 ● This unit is compatible with NTSC color TV system. Capability switch on the audio operation of this unit to display video devices other than NTSC color TV screen system (PAL, SECAM) is not guaranteed, ● The screen switches to the ● The video may not displayed properly for some connected AUX Screen. devices. ● The image and sound of the ● For safety while driving, the Video Screen is turned blue, and portable device is output only the audio is played. through the speakers and the screen. Internet By using Wi-Fi connecting to internet service, this unit can browse web pages. ● For safety. Video screen will be displayed blue during driving. To watch video screen is required turning parking brake on. ● Before using internet Wi-Fi connection is required (refer to page 36). 3 Audio [ 1 ] Browsing Web Pages Internet 76 [ 2 ] Browser Operations While browsing the webpage, the following operations can be performed ● Scrolling up and down the webpage ● Going to previous or next viewed ( 1 ) Press MENU button website ● Inputting URL or TEXT ● This displays the main menu ● Setting up My Favorite page ※ Bookmark/ most viewed/ view history ( 2 ) Touch Wi-Fi button ■ Scrolling the Webpage ● This displays the Wi-Fi selection Using finger to touch on the screen screen of the unit and flick up or down to ( 3 ) Touch the Internet switch on the have scrolling webpage function. Wi-Fi selection screen ● The screen switches to the Internet Screen. ■ Inputting URL or TEXT ( 1 ) Touch URL column or the places ※ AVN first time use/cold start, browser available for text input on the will default to Main Menu page internet screen (Default homepage is set to be Honda ● this will show the keypad Automotive Company website) screen ※ ACC off/on, browser screen will be last viewed webpage ( 2 ) Input the URL or text you desired to put in ▲ ▼ ( 1 ) Touch on function bar ● This shows My Favorite screen ( 2 ) Select bookmarks button ● This shows bookmarks screen ( 3 ) Touch bookmarks button ● This shows bookmarks adding screen ( 4 ) Type the name you desired to show on bookmark list ■ Most Viewed Web List ( 1 ) Touch on function bar ● This shows My Favorite screen ( 2 ) Select Most Visited button ● This shows Most Viewed web list ※ Touch button to quick access bookmarks process • "Yellow star" indicates the URL already in bookmarks list • "White star" indicates the URL is not in the bookmarks list ● Only alphabet key input is available. 77 Audio to Previous or Next Viewed Website ( 1 ) Touch or buttons to switch viewed websites ( 2 ) Use gesture, 3 fingers slide right and left, to switch previous or next viewed website. ■ Adding the Website to Bookmarks 3 ■ Going ( 5 ) Press OK to complete bookmark process Internet ( 3 ) Press GO ● browser will link to the URL or the search engine will find the results related to the keywords you put in ■ History Web List ( 1 ) Touch on function bar ● This shows My Favorite screen ( 2 ) Select History button ● This shows History viewed web list 3 Audio Internet ※ Touch button to quick access bookmarks process • "Yellow star" indicates the URL already in bookmarks list • "White star" indicates the URL is not in the bookmarks list 78 DLNA [ 1 ] Activate DLNA function ( 1 ) Download free iMediashare / DMS APP from App Store / Google play in the phone ( 2 ) Press Wi-Fi button on the menu screen to enter Wi-Fi selection screen, then press DLNA button. ( 3 ) Turn on the smart phone WiFi & connect with the head unit (Device name: Honda_AVN) ( 4 ) Once Wi-Fi connected, press the iMediashare / DMS on the phone screen ( 5 ) See the connected phone name on DLNA screen and select the phone then play audio, video or image files in the head unit. ( 2 ) Touch Wi-Fi button ● This displays the Wi-Fi selection screen ( 3 ) Touch the DLNA switch on the Wi-Fi selection screen ● The screen switches to the DLNA Screen. ( 4 ) Touch the device you desired to connect ● The unit would search and list out all the devices having WiFi connection with the unit. ● For safety. Video screen will be displayed blue during driving. To watch video screen is required turning parking brake on. ● For videos in iOS smart phone, only the video files in Camera Roll can be played through DLNA function. ● DLNA video background playback is not available for DMS APP, DLNA video playback will be stopped when leave the video screen. 79 Audio ※ For IOS smart phone download software from APP store. ※ For Android smart phone download software from Google play. ※ For cell app install, please refer to smart phone user manual. ※ The iMediashare / DMS APP might not be able to be downloaded and used on the smart phones with operation system other than iOS and Android. 3 Prior to using DLNA function on the AVN, user has to install the media files sharing application, iMediashare / DMS APP, in their smart phone. [ 2 ] Using DLNA to play songs, videos and photos ( 1 ) Press MENU button ● This displays the main menu page DLNA By using Wi-Fi connecting to smart phone devices, the unit can use the files in the smart phone to play songs, videos and photos. ( 5 ) Select the files type you desired to use from mobile phone device to play on the screen of the unit ■ Playing Video Select the file from the video file list 3 Audio ■ Playing Songs DLNA Select the file from the music file list ■ Playing Photo Select the file from the photo file list 80 Resolution KBPS FPS Decoder MPEG-4 320x240~1280x720 256~5000 12~30 HW wmv WMV2 320X240~720X480 256~16000 12~25 SW avi MPEG-4 320X240~720X480 256~1024 12~25 SW rm RV40 320x240~720x480 256~16000 12~25 SW mpeg MPEG-1 320x240~720x480 256~1024 12~25 SW flv FLV1 320x240~720x480 256~16000 12~25 SW 3gp MPEG-4 128x96~352x288 96~384 12~30 HW 320x240 336 12~30 SW 320X240~720X480 256~16000 12~25 SW 12~24 SW asf rmvb divx RV40 DivX MPEG-4 Version 5 320x240~720x480 81 Audio Codec mp4 DLNA Format 3 Video file support format External Instrument Using the Steering Wheel Audio Switch For vehicle equipped with steering wheel audio controls, the major operations of the AVN can be performed from the controls of the steering wheel. ● Function Name and Summary for Each Part [ 1 ] Common Operations (SOURCE) Source Change Switch • Changes the volume one level at a time as it is pressed. • Change the volume continually as it is pressed and held. • Pressing the switch turns the screen power on if the screen power is off. • FM1 --> FM2 --> FM3 --> AM1 --> AM2--> iPod (*1)--> USB1 (*1) --> USB2 (*1)--> Micro SD (*1)--> BT Music (*1) --> AUX1 (*1) --> AUX2 (*1) (*1 If device connected) • Press and hold the switch establishes either a mute or a pause state. [ 2 ] Operating the Radio ( ( ▼▲ Switch ) ) Name Function • It calls up the stations stored in the preset memory one by one Channel Selection Switch • Press and hold the switch starts selecting a station automatically.(SEEK) [ 3 ] Operating SD/USB Memory/ Bluetooth Audio/DLNA ( ( ▼▲ Switch ) ) Name File Selection Switch Function • Switch the file to the previous or next 4 Volume Switch Function External Instruments (+) (-) Name Using the Steering Wheel Audio Switch Switch 83 Viewing the Rear Camera Image ※ This function can be used only by vehicle with rear camera. If a rear camera is connected and the shift lever is shifted to reverse (R), the view from the rear of the vehicle can be automatically displayed on the monitor screen of this unit. ● This unit (rear camera system) is to be used as an aid to check for any obstacles behind the vehicle. ● The rear camera can only project a limited area. Do not back up your vehicle depending only on the image of the monitor screen. Use it in combination with the rear mirror and side mirrors and be sure to check the safety of the rear and surrounding area of the vehicle. ● If water droplets are on the camera lens, the image projected may not be clear. 4 External Instruments ● Do not use the rear camera under the following conditions. ● On icy, slippery or snowy roads Viewing the Rear Camera Image 84 ● When the tailgate is not closed completely ● If the display is cold, ghosting may occur or the image may be darker than usual, making it harder to view the image. Be sure to check the area surrounding the vehicle before driving. ● If bright light such as sunlight or headlights shines on the camera, there may be white lines at the top and bottom of the image. [This phenomenon (smear phenomenon) is typical of CCD sensors.] ● Do not project sunlight for a long time. The image may be burned into the screen. 4 Viewing the Rear Camera Image characteristic of CCDs. ● Under fluorescent lamps in 50Hz power supply areas, flickering occurs on the display. This does not indicate unit failure. ● The camera has a water and moisture resistant structure to protect the lens from condensation. Do not loosen the screws on the camera or disassemble the camera. It will compromise the water and moisture resistant capability and may cause failure of the camera. ● Do not let the camera hang by the cable or pull on the cable. It will reduce the water and moisture resistant capability or may cause the cable itself to break. ● If the cover on the front of the lens becomes dirty, a clear image cannot be obtained. If water droplets, snow or mud covers the lens, clean it with a soft water damped cloth. If a dry cloth is used on dirt, etc., the lens cover may become scratched. ● When the humidity level is high (e.g. on a rainy day), the camera may become fogged up and the image may not be displayed clearly. ● Do not subject the camera to drastic temperature changes (e.g. using hot water to the camera on a cold day). This may cause a failure on the camera. ● The image of displayed by this unit is a reversed, or mirror image. This image is the same as the image in the rearview mirror and side mirrors. Conversely, the image, which is the same as if you are looking at it directly, is called a normal image. ● At nighttime or in a dark area, you may not be able to see the rear camera image or you may not be able to see it well. ● A wide-angle lens is used for the camera. Therefore, the actual distance may be different from what you see on the display. ● If you hit the camera unit with something, the rear camera may not function properly due to damage. Have it inspected at a local dealer as soon as possible. ● Do not subject the camera unit to shock by hitting it or throwing an object at it. The rear camera may not function properly due to change in camera position or mounting angle. ● When using a high-pressure car wash, avoid aiming the nozzle directly at the rear camera or the region around the rear camera as this may cause the camera to dislodge. External Instruments ● If the camera is used for a long period of time, white marks and/or vertical lines will be displayed due to the rise in temperature. This is a 85 Regarding how to invoke the guide display, please consult your dealer. After this page, operation explanation follows assuming the guide display has been invoked. [ 1 ] Display a Rear View Image 4 External Instruments ( 1 ) Shift the transmission to Reverse (R). ● The rear camera image is displayed ● If the transmission is shifted to a gear other than Reverse (R), the display goes back to the normal screen. Viewing the Rear Camera Image ● Check the surroundings for safety. This display may be difficult to view under the following conditions. This is not a defect. • In a dark area (at nighttime, etc.) • When the air temperature around the lens is high or low • When the camera lens has water droplets or the humidity is high (in the rain, etc.) • When a camera lens has foreign matter (such as dirt) • when a beam of high-intensity light (sun reflected on the vehicle, headlights) is caught by the camera, the smear phenomenon, which is a characteristic of CCD camera, may occur. (Condition of the display) Smear phenomenon: If a beam of high-intensity light (sun reflected on the vehicle) is caught by the camera, (vertical) lines are displayed above or under that point. A beam of high-intensity light check your surroundings 86 [ 2 ] Rear camera brightness adjustment ● On screen caution message display position can be adjusted by pressing Caution ▲ / Caution button 4 External Instruments Viewing the Rear Camera Image mode, press and hold the DISP button for over 2 seconds, the screen will show camera brightness setup screen. Touch - and + buttons to adjust brightness value to desired condition. Press OK to complete brightness setting and back to rear camera screen. ▲ ● When the unit is at rear camera 87 Handsfree Before Using the Handsfree Operation • When bluetooth power of the unit is off. ● Avoid leaving the mobile phone in the vehicle. (The temperature inside the car can rise) ● For safety, hands free operation screen will be forbidden while car is driving. To operate hands free function is required turning parking brake on. ● When handsfree operation not usable The use of handsfree operation precluded by each of the following: • When outside the coverage area • When call restrictions caused by a busy line or similar are being applied • When phonebook data is being transferred from the mobile phone • When a dial lock has been placed on the mobile phone • When the mobile phone is malfunctioning • When the mobile phone is not connected to the unit • When the remaining battery power of the mobile phone is insufficient • When the mobile phone power supply is OFF ● Before using hands free function Bluetooth device needs to be registered ( refer to page 30). ● With certain types of mobile phone, the display unit remains illuminated during connection of the unit. If this occurs, set the illumination of the mobile phone itself to OFF. (For settings, refer to the user's manual for the mobile phone) ● For certain settings of certain mobile phones, a dial-up lock may be placed on the mobile phone following connection. If this happens, turn off the auto-lock setting of the mobile phone. ● The operation and volume of connected mobile phones differ. ● With certain types of mobile phone, turning OFF the power supply to the unit during a phone call may result in disconnection of the call, while for other types the call is able to be continued. Note that the continuation of the call via the mobile phone may necessitate a mobile phone operation. ● If the user is a call-waiting service subscriber, the handsfree operation should be used following the establishment of a state in which the call waiting service is able to be used by the mobile phone. 89 Handsfree • When for other reasons the mobile phone itself cannot be used Before Using the Handsfree Operation • When the mobile phone setting is not set in the handsfree mode 5 [ 1 ] Handsfree operation Phone functions such as "making a call " and "receiving a call" can be utilized by connecting Bluetooth call phone (hereinafter "mobile phone") to the unit and without need for direct operation of the mobile phone. This is referred to as handsfree operation. Before Using the Handsfree Operation ● Microphone • Use the built-in microphone during a call. ● Handsfree Operation • Various handsfree operation functions can be utilized by operating touch switches displayed on the screen of the unit. ● Audio • Subsequent to an outgoing call having been made or/and incoming call having been received, the call may be continued using the microphone and speakers. • The audio output related to incoming call notification and call communication is output from the speakers at either side of the front seat. 5 Handsfree • In handsfree operations, audio and ringtone output etc. mutes the audio sounds. ● There should be two-way conversation between the calling parties during a phone call. If the calling parties speak simultaneously, the voice of one of the calling parties may not be heard by the other. (this does not imply a malfunction) ● Adjust the receiver volume to minimum as this may produce an echo that is heard by the call party. Speak clearly and definitively. ● The voice of one calling party may not be heard by the other in the following instances: • When the vehicle is travelling along a poor road surface • When the vehicle is travelling quickly • When the vehicle windows are open • When the noise of the air condition fan is loud • When the mobile phone is too close to the micphone ● The audio quality may be affected (noise, echo etc.) by the mobile phone and network type being used. ● Simultaneous connection of other Bluetooth-compatible devices (portable audio devices) may generate noise in the handsfree operation audio. 90 • If the Bluetooth mobile phone is disconnected, a warning message is displayed. X X Level No Connect No Service Weak Strong Before Using the Handsfree Operation X 91 Handsfree • The reception level may not match the mobile phone display. Moreover, in certain mobile phones the reception level cannot be displayed. Indication 5 [ 2 ] Various Displays ● Reception level display A radio wave reception level indicator is displayed. This is not displayed during the phonebook data transfer. ● When the display shows "No Service" this implies the mobile phone is either outside the service area or located somewhere that cannot be reached by radio waves. This precludes the mobile phone from being used. Please move to a location at which the display "No Service" is extinguished. ● Please consider the following carefully during handsfree operation. Before Using the Handsfree Operation ● Battery Residual Power Display ● Roaming area indication A mobile phone battery residual power indicator is displayed. This icon is not displayed during phonebook data transfer. ● The battery residual power display indicator may not correspond to the mobile phone display. Moreover, in certain mobile phones, the battery residual power cannot be displayed. ● The unit does not comprise a mobile phone charging function 5 Handsfree Indication Residual Power 92 None Low High The icon "Rm" is displayed when the mobile phone is located within the roaming area. This icon is not displayed during phonebook data transfer Making a Call On this screen, a phone call may be made using any of following methods. ■ Dial pad Inputting phone numbers directly ■ Dialing using phonebook Using the phonebook of the unit ■ Dialing using call history Using the outgoing or incoming call history ■ Dialing using redial function Using redial function • Handsfree operation with Bluetooth mobile phones requires registration of the mobile phone in the unit and Bluetooth connection. For handsfree registration please refer to page 30. • Be sure to establish a state in the mobile phone that allows for the utilization of the Bluetooth functions. For the mobile phone operation, please refer to the user's manual for the mobile phone. ● For reasons of safety, the available operations are restricted and no phone numbers etc. are displayed on the screen while the vehicle is moving. However, the names in the phone book for the phone numbers registered in the phonebook are displayed. ● When an incoming call is received simultaneously with a call being made, the screen display and mobile phone operations may differ. Making a Call ( 1 ) Main menu press Phone button. ● Dial Screen is displayed operation. Other methods for making a call include the following: ■ Outgoing calls from the mobile phone main body Making a call from the mobile phone main body. 93 Handsfree [ 1 ] Displaying Dial Screen ● Please consider the following carefully during handsfree 5 Various methods are available for dialing a phone number using the unit to make a phone call. [ 2 ] Dial Pad A phone call can be made by inputting a phone number. Dial pad is displayed in dis-highlighted color while the car is driving to forbid dial operation. ● The following occurs with certain types of mobile phones. • The mobile phone is muted and neither a dial tone nor a ringback tone is heard. • A call screen is displayed prior to the far-end side answering the call and no screen is displayed while the call is made. Making a Call 5 Handsfree 94 ( 1 ) Individual digits in the Dial Screen are touched to input a phone number. ● Touching deletes the final digit number. Continued touching deletes the digits in sequence from the final digit. ( 2 ) Touch ( 3 ) If an outgoing call is made, an outgoing call screen is displayed. ● A dial tone rings, and then a ringtone is hear. ( 4 ) When the call is answered by the far-end side, a talking screen is displayed. The call can be made on this screen. • Where the communication carrier services requires a tenkey input on an outgoing screen, no tone signal is sent even though a ten-key input has been input ● When an outgoing call is made while streaming Bluetooth audio playback, the outgoing call screen display and dial tone ringing operations may be delayed. ● Some connected devices may need operation to download phonebook, call history or messege data into the unit. 95 Handsfree ( 1 ) Touch Call History in the Dial Screen ( 2 ) Touch Refresh , Missed , Dialed , Answered to switch to the desired call history list. ( 3 ) Touch the displayed contact or phone number to call out. 5 ( 1 ) Touch Phonebook in the Dial Screen ●This will download the phonebook data that stored in the Bluetooth connected mobile phone. ● Contacts of the phonebook data will be listed and displayed in an alphanumeric sequence, touch and flick on the screen to scroll and select the desired contact. ( 2 ) Touch the displayed contact or phone number to call out. Making a Call [ 3 ] Dial Using Phonebook [ 4 ] Dial by Call History A phone call can be made by dialing a registered phone number that the unit Calls may be made by dialing phone numbers listed in the phone call history. download from the Bluetooth connected mobile phone devices. ● If the dialed call is made from a phone number registered in the Making a Call 5 Handsfree 96 phonebook of the unit and name information correspondent to this data is available, the name and number are registered together in the dialed call history. ● If the incoming call is received and answered by a phone number registered in the phonebook of the unit and name information correspondent to this data is available, the name and number are registered together in the Answered call history. ● If no information pertaining to the phone number of the called party is available, this is indicated in the answered call history as a "private call". ● If an incoming call received from a number registered in the phonebook of the unit is missed and name and name information data correspondent to this data is available, the name and number are registered together in the missed incoming call history. ● If no information pertaining to the phone number of the called party is available, this is indicated in the missed incoming call history as a "private call". [ 5 ] Using Redial Function A phone call can be made by pressing Redial button. The last outgoing number will be dialed by the unit. ( 1 ) Touch Redial ● the last outgoing number will be dialed handsfree screen is displayed by operating either of the following. • Press button to end a call. • Perform a call transfer operation to use the other touch switches ● An outgoing call involving the direct operation of the mobile phone is not registered in the dialed call history. ● If the mobile phone from which the call is made is connected to the unit, the phone number of the called party is not registered in either the dialed call history, the answered call history or the missed call history. ● Outgoing call from the mobile phone main body, differs depending on the mobile phone. For the mobile phone operation, please refer to the user's manual for the device you use. Making a Call ● When you call from mobile phone main body connected to this unit, the Outgoing call made from the mobile phone main body differ from handsfree operation calls in respect of the following: 5 For reasons of safety, do not use mobile phone while driving [ 7 ] Interrupting the outgoing call in the outgoing call screen interrupts the outgoing call. Touch ● An outgoing call is also interrupted if a call being made from the mobile phone main body is disconnected. ● The handsfree screen is cancelled when outgoing call is interrupted. 97 Handsfree [ 6 ] Making outgoing call form the mobile phone Outgoing call can be made by the direct operation of a mobile phone main body having Bluetooth connection to the unit. Receiving a Call [ 1 ] Receiving a Call Receiving a Call 5 Handsfree 98 ( 1 ) Irrespective of what screen is displayed, when a phone call is received, notification of the incoming call is provided through ringing of an incoming call ringtone and the display of an Incoming Call Screen. ( 2 ) Touch ● Talking Screen is displayed ● At the end of a phone call, the handsfree screen is deleted. ● When an incoming call is received, audio output other than for handsfree operation is muted. ● Handsfree operation comprise the following: ● For the mobile phone operation, please refer to the user's manual for the mobile phone. ● Certain mobile phone settings including the drive mode preclude an incoming call form being taken. ● Whether or not a call ringtone is (1) audible via the vehicle speakers (2) audible via the mobile phone (3) audible via both vehicle speakers and the mobile phone differs depending on the phone. ● Certain mobile phone types do not display the phone number of the party from whom an incoming call is received. ● When a call is received by the direct operation form the mobile phone main body, the call communication is executed via handsfree or the mobile phone main body differs depending on the mobile phone. ● When an incoming call is received during Bluetooth audio playback, the operation for the display of the Incoming Call Screen and ringing of the incoming call ringtone may be delayed the incoming call ringtone volume Adjustment by any of the following methods during an incoming call. ● press VOL button ● Using finger gesture of 2 fingers sliding right or left on the screen of the unit ● Adjust the volume switch of the steering switch. (For steering switch-mounted vehicles) (refer to page 82) ■ Blocking an Incoming Call ( 1 ) Touch in the Incoming Call Screen blocks an incoming call ●Able to be used only with mobile phones for which there is an incoming call blocking compatibility. Blocking an incoming call cancels the handsfree screen. ● Adjusting the Received Call Volume ● Ending a Call Communication ● Ten-key Inputting ● Muting the Transmission Tone ● Transferring a Call ● Handsfree operation comprises the following: ● For the mobile phone operation, please refer to the user's manual for the mobile phone. ● Connecting the mobile phone from which the call is being made to the unit is displayed on the Talking Screen. Whether or not the call is continued in the same state or using handsfree operation differs depending on the mobile phone. ● Depending on the mobile phone, turning on/ off the power supply of the unit during handsfree call communication results in either interruption to the phone call or continuation of the phone call. 5 ■ Adjusting While making a call, the Talking Screen is displayed and the following Operation can be performed 99 Handsfree [ 2 ] Operation on the Incoming Call Screen [ 1 ] Operation in the Talking Screen Operations which are able to be performed on an Incoming Call Screen other than call receiving are hereinafter described. Operation During Call Communication Operation During Call Communication ■ Adjusting Receiving a Call the Received Call Volume Adjusting during a phone call by any of the following methods. ● press VOL button. ● Using finger gesture of 2 fingers sliding right or left on the screen of the unit ● Adjust the volume switch of the steering switch. (For steering switch-mounted vehicles) (refer to page 82) 5 Handsfree ■ Ending a Call Communication 100 ( 1 ) Touching in the Talking Screen ends call communication. ● A call is ended when the call made via the mobile phone main body is disconnected. Ending the call cancels the handsfree screen. ■ Ten-key Inputting ( 1 ) Touch 0-9 in the Talking Screen. ( 2 ) Input the individual numbers button to dial out . ( 3 ) Touching ● While the vehicle is moving, the color of the ten-key keypad color is inverted and cannot be operated. ■ Muting the Transmission Tone This function precludes the far end side from being able to hear the voice of the near end side (the near end side is still able to hear the voice of the far end side). ( 1 ) Touch Mic Mute in the Talking Screen. ● An indicator flashes in the mute state. ● Touch Mic Mute again to cancel mute. ■ Transferring a Call With Bluetooth mobile phones, calls can be transferred between the unit and the mobile phone. • Switching from a call made from the mobile phone main body to a handsfree call displays a handsfree screen. • Methods of transfer and actuation differ depending on the mobile phone. For the mobile phone operation, please refer to the user's manual for the mobile phone. 101 Handsfree When a call transfer operation is performed on a screen but transfer fails, a voice cannot be heard. 5 Switching to mobile phone main body, touch Transfer Switching to handsfree call communication, touch Transfer • A call cannot be switched from a handsfree call to a call made by main body while the vehicle is moving. ● Operations using the mobile phone main body Receiving a Call ● Operating the screen Appendix Troubleshooting Check the items in the following table first when you encounter problems. If the problem is not solved even after checking the applicable item, contact your dealer. In case that a defect (such as a blown fuse) occurs, be sure to contact your dealer for the repair service. If you try to change or fix the fuse, you may cause more damage. Phenomenon • The light is on but nothing is displayed • The picture is distorted • The colors of the images are not displayed correctly • The unit does not go inito Night mode even the lights are on DISP button ( over 2 seconds ), etc. Is the setting for the image quality correct? Verify the screen settings.(refer to page 16) If this does not solve the problem, turn the power supply for the unit OFF and then ON again. If the problem continues, contact your dealer. Are the display brightness adjusted correctly? Refer to Page 16 to adjust the brightness of the display. 6 When the image is not clear. Press and hold the Troubleshooting • Totally dark and the light does not come on Is the parking brake on? Apply the parking brake. Sound is generated but no image is displayed (while the vehicle is parked). Has the RCA cable connected correctly? Connect the RCA cable correctly. (Make sure correct AUX exchange cord is used which is included in the unit.) 103 Appendix When the display exhibits one of the following conditions: Solution Is the displayed set to "off"? Phenomenon A desired audio image is not displayed. (In spite of playing iPod video, other video device image is displayed.) When the sound is coming out of only one of the speakers. Solution Is not video cable connected except device that you want to play? Connect a video cable to device that you want to play. (Make sure correct AUX exchange cord is used which is included in the unit.) Troubleshooting Is the sound volume adjusted properly? Adjust the volume on the Front/Rear and Right/Left speaker. 6 Appendix Is the power of the portable audio device on? Turn the portable audio device on. Is the music on the portable audio device playing? Be sure that the portable audio device is playing the music. Is a mini-plug calbe having resistance being used? The sound of the portable audio device is not output through the speaker. Use a resistance-less mini-plug cable. (Only vehicle that attached mini-plug jack) Is the volume of portable device on? Make sure portable device volume setting. 104 Phenomenon Disable the pause state or set to the mute-OFF state. There is an electromagnetic-wave generator such as a mobile phone near the unit or its electrical lines. Keep the electromagnetic-wave generator such as a mobile phone away from the unit and the wiring of the unit. If noise cannot be eliminated due to the wiring harness of the car, consult your dealer. Playing VBR(Variable Bit Rate) files may cause sound skipping. Make sure played device data. Some operations are not executable in particular modes. Some operations are not executable. Bluetooth device cannot be connected to the unit. iPod is not being correctly operated. Read the operating instructions carefully and cancel the mode. If the unit is still out of order, consult your dealer. Is the Bluetooth device is able to be used with the unit? Troubleshooting Sound skipping or noise occurs. Consult your dealer. Is it in the pause or the mute-ON state? Be sure to carefully read user's manual of the Bluetooth device to check that there are no potential problems.(refer to page 29) If the Bluetooth device is portable audio equipment, successful connection maybe be achieved by changing the connection method.(refer to page 33) Remove the iPod from the unit and reconnect the iPod after resetting the iPod main body. For the iPod resetting method, refer to the iPod user's manual. 105 Appendix Sound is not generated. Fuse blowed out. 6 No power to the unit. Solution Trademarks ● MicroSD Logo is a trademark of SD-3C, LLC ● About Bluetooth Bluetooth is the registered trademark of Bluetooth SIG, Inc. The Bluetooth wordmark and logo are owned by Bluetooth SIG, and permission has been granted to use the trademark of the licensee “E-lead”. Other trademarks and trade names are owned by various different owners. Trademarks ● About iPod 6 Appendix iPod, iPod classic, iPod nano, and iPod touch are trademarks of Apple Inc., registered in the U.S. and other countries. “Made for iPod” means that an electronic accessory has been designed to connect specifically to iPod respectively, and has been certified by the developers to meet Apple performance standards. Apple is not responsible for the operation of this device or its compliance with safety and regulatory standards. 106 Navigation System Navigation System ● Important Safety and Product Information Read this information carefully before operating the navigation system and follow the instructions in the manual. Provider shall not be liable for problems or accidents resulting from failure to observe the instructions in this manual. To prevent injury or fire, take the following precautions: ● To prevent a short circuit, never out or leave any metallic objects ( such as coins or metal tools) inside the unit. ● Do not catch or fix your eyes on the units display when you are driving for any extended period. ● Mounting and wiring this product requires skills and experience. The mounting and wiring should be done by professionals. Navigation System 7 Navigation System 108 Failure to avoid the following potentially hazardous situations could resualt in an accident or collision resulting in death or serious injury. ● When navigating, carefully compare information displayed on the navigation system to all available navigation source, including information from street signs, visual signs, and maps. For safety, always resolve any discrepancies or questions before continuing the navigation. ● Always operate the vehicle in a safe manner. Do not become distracted by the navigation system while driving, and always be fully aware of all driving conditions. Minimize the amount of time spent viewing the screen of the navigation system while driving, and use voice prompts when possible. ● Do not enter destinations, change settings, or access any functions requiring prolonged use of the navigation system controls while driving. Stop your vehicle in a safe and legal manner before attempting such operations. ● Keep the system volume at a low enough level to be able to hear outside noise while driving. If you can no longer hear ourside noise, you may be unable to react adequately to the traffic situation. This may cause accidents. ● The navigation system will not display the correct current position of the vehicle the first time is used after purchasing, or if the vehicle battery is disconnected. GPS satellite signals will soon be received, however, and the correct position will be displayed. ● Be careful of the ambient temperature. Using the navigation system at extreme temperatures can lead to malfunction or damage . Also note that the unit can be damaged by strong vibration, by metal objects, or by water getting inside the unit. [ 3 ] Under the elevated [ 4 ] Between the trees. road. ● Deviation of the position mark also occurs at the following locations. [ 1 ] When travelling along an expressway. [ 2 ] When travelling along one fork of a forked road of narrow angle. Navigation System not use this system as a medium to generate precise readings of altitude, direction, distance, location or topography. This system must only be used as a navigational aid. Any information generated from this system must only be used as reference. ● Although every attempt has been made to ensure the accuracy of the maps and the data used by this system, the location of points of interest, transportation networks…etc., may change over time without notice and cause the data obsolete. Therefore it is essential that you check the actual surroundings with this system’s maps in order to confirm that you are at the exact destination. ● The electromagnetic waves from GPS satellites are strongly linear and, as a result, there may be times when they cannot be received at the following locations: [ 2 ] Between the high buildings. 7 ● Do [ 1 ] Inside the tunnel. 109 Navigation System Do not operate this system and a vehicle simultaneously as this is very dangerous. The vehicle must be parked prior to operating this system. It is your sole responsibility to operate this system and the vehicle in a prudent manner. Misusing this system may result in accidents and may lead to injuries and/or property damage. Only a passenger should operate this system while the vehicle is in motion. Navigation System 7 Navigation System 110 [ 3 ] W h e n t r a v e l l i n g [ 4 ] When the GPS signal cannot along a grid-pattern be received following road. movement of the vehicle on a ferry or some kind of vehicle transportation carrier. [ 7 ] After taking a left [ 8 ] or right turn after travelling for a long period along a straight road. [ 5 ] W h e n t r a v e l l i n g [ 6 ] When travelling along a along a mountain twisting road. road or similar of steep gradient. [ 9 ] The vehicle being [ 10 ] When turning the vehicle driven in a zigaround or reversing into a zagging pattern vehicle parking bay. along a wide road. When travelling along a slipper road surface such as a snow-covered road or a gravelly road. Failure to avoid the following potentially hazardous situations may result in injury or property damage. This navigation system can be used when turning on the car engine. To preserve the battery, however, it should be used with the engine running whenever possible. Using the navigation system for a long time with the engine switched off can cause the battery to run down. 7 ● Vehicle Battery Preservation 111 Navigation System navigation system is designed to provide you with route suggestions. It does not reflect road closures or road conditions, weather conditions, or other factors that may affect safty or timing while driving. ● Use the navigation system only as a navigational aid. Do not attempt to use the navigatigpon system for any purpose requiring precise measurement of direction, distance, location, or topography. ● The global Positioning System (GPS) is operated by the United States government, which is solely reponsible for its accuracy and maintainance. The government system is subject to changes that could affect the accruracy and performance of all GPS equipment, including the navigation system. Although the navigation system is a precision navigation device, any navigation device can be misused or misinterrupted and , therefore, become unsafe. Navigation System ● The Getting Started With GPS Navigation This tutorial will get you started on using Honda Car Navigator for navigation. Step 1 Start Honda Car Navigator and wait for your GPS receiver to obtain a position fix. Press the center area on the touch screen to obtain the Main Menu screen. Step 2 Getting Started With GPS Navigation 7 Navigation System 112 press Find button on the main menu screen and select prefered destination finding or inputing method. Step 3 Press the Address button. Step 4 Enter City through the on screen keyboard. Step 5 Then enter the Street info and House Number info. Or, click City Center . then press the Go To Button to begin navigation. Honda Car Navigator will calculate a route to the destination from your current location. 5 6 2 3 7 1 113 Navigation System 4 ① Nearby: Displays a list of nearby POIs or streets. ② Save As: Save the location as your Favorite. ③ Info: Information about the selected location, including Region, City, Longitude, Latitude, Street, House number…etc. ④ Advance: waypoints setting. ⑤ Go To: Set the destination for route planning. ⑥ Add intermediate waypoint in route to your destination. ⑦ Set the location as the start point to simulate the route. Getting Started With GPS Navigation 7 User Interface [ 1 ] Main Menu The Main Menu provides access to Honda Car Navigator's many features. You can access the Main Menu by pressing any where in the map screen. The following features can be accessed from the Main Menu. All submenus contain the following features on the top panel at the top of the screen: Back Button: Return to the previous screen. Map Button: Return to the Map Screen or Navigation/ Free run screen. Find: Search for a destination. Map: Return to the map screen or Navigation/Free run screen. User Interface 7 Navigation System 114 Route: Access the current route, itinerary, statistics and map information. Settings: Configure system setting. My Data: Maintain user specific information like Favourite, Itinerary, and Trail …etc. Info: Display GPS, driving information (Statistics) and information about Honda Car Navigator version. Menu Button: Return to the Main Menu. [ 2 ] Map Screen The Map Screen displays a map of your current location, as well as displaying nearby POIs and information. You can also use it as an electronic map. 3 9 14 10 4 11 5 12 13 7 2 8 6 ① Compass (Click to change the Orient of map) ② Volume Adjustment ③ Nearby POI ④ Play Demo ⑤ 2D/3D mode switch ⑥ Information panel about the selected location ⑦ Access to Main Menu ⑧ Return to Car Position ⑨ Zoom in ⑩ Zoom out ⑪ Go Home ⑫ Rotate ⑬ Zoom Level ⑭ Selected location (road or POI) will be Highlighted 115 Navigation System 7 1 User Interface Functions [ 3 ] Browsing the map ※Map Icon Instruction You can browse different areas of the map in the map screen by dragging the Starting Point map. Simply hold your finger down on the screen and drag it in the opposite direction. Waypoint Destination Next Turn Turn Selected Point of Interest Point of Interest (POI) User Interface Selected Location Selected Street Current Location / GPS Fix Location 7 Navigation System 116 2 7 8 3 9 13 12 10 11 4 User Interface 6 7 5 1 ① Showing the current street name or current city name. (Click to switch) ② Guidance symbol: Switch between 2D North-up, 2D Heading-up, 3D Head-up views ③ Showing the Distance to Next Turn, turn direction of Next Turn and serial Turn. (Click on the icon to repeat voice instructions) ④ On the periphery of the Next Turn symbol, there are two dots: the Red Dot showing the direction of destination, and the Yellow Dot showing the My favorites location. ⑤ Showing the current speed or current time. (Click to switch) ⑥ Speed Limit:Showing the Road Speed limit info ⑦ Sub Menu (※1) ⑧ Road Sign ⑨ PIP (Picture in Picture) ⑩ Estimated Time of Arrival / Total Distance Remaining / Total Time Remaining ⑪ Instruction for Next Turn. (Press to Access the Turn List ) ⑫ Lane Marking: Showing the Lane instruction on the road ⑬ Car position:Green (GPS signal good)、Yellow (GPS signal weak)、Red (GPS signal lost)、Gray (Demo) 117 Navigation System [ 4 ] Navigation Screen The Navigation Screen will appear whenever a route has been set. It is basically a Map Screen with additional information about the route, such as distance until next turn, travel time, and estimated time of arrival. The screen will be centred on your current location (when you have a GPS fix, or else simulation will move at a constant velocity). To exit the Guidance Screen, simply touch and drag the map. To return to the Guidance Screen, press the Car Position. ※1 Sub Menu Functions [ 5 ] Junction View Driving on the highway exit or complex intersection, Navigation Screen will show the real view of the intersection in the lower right corner, it is called “Junction View”. When we drive close to the intersection, the junction view will fit all screens. Functions in the Sub Menu Hide the Sub Menu Go Home Zoom in Zoom Out Set Volume User Interface 7 Navigation System 118 Showing the nearby POI Menu Start Simulation ● Not every exit or intersection are shown "Junction view", It depends on Map data. [ 6 ] Highway information (Click to hide/show) Show During driving on the highway, there will shows 3 lines of highway information in the lower right corner of the Navigation Screen. The car and road links will shows on the center left. You can click on the “Highway information” to hide or show. 7 119 Navigation System User Interface Hide Finding Destinations Honda Car Navigator offers many methods to search for a particular destination. This is useful as you can pinpoint the search locations and minimizing your search time. Once a destination has been found, the Location Menu will appear, and Honda Car Navigator will calculate a route to the chosen destination when you press the Go To Button or the Add Via Button. You can also use the Find Menu to set a Starting Point for route simulation, as explained in the Getting Started Tutorial.(Refer to page 111) 6 7 8 9 [ 1 ] Function Introduction Finding Destinations 1 2 4 5 7 Navigation System ▲ Find Menu page1 120 ▲ Find Menu page2 3 ① Address: Enter the city name of postal code using the onscreen keyboard. You can also enter a key word if you are unsure of the location as Honda Car Navigator will list all possible locations with that key word. Once you have found the destination, Honda Car Navigator will load the Location Menu. ② POI: You can search for POIs within a country. Points of Interest are local landmarks or interesting places, and are represented by icons on the Map Screen. To simplify searches, POI has been categorized. Once you have found the destination, Honda Car Navigator will load the Location Menu. ③ Keyword: Honda Car Navigator allows users to find a POI by entering the Keyword. When entering the keyword, user can enter some of the characters of the POI name as well as space, numbers…etc. The sequence of the result list is sorted by the distance. The maximum searching distance is within 2,000 kilometers and maximum POI list is 300. [ 2 ] Entering Information When doing search, you will be prompted with the onscreen keyboard to enter keywords for the search. You can change between alphabetical letters (ABC) and numbers/symbols (123) by pressing the Switch Button. press "ABC" button to switch to alphabet keyboard 7 Finding Destinations press " 123 " button to switch to number/ symbol keyboard 121 Navigation System ④ Favorite: To search through saved any meaningful on your point of interest or position. ⑤ HONDA: To find Honda service through Honda Car Navigator, users can also query through [Category] to find [Honda] POI for the destinations. ⑥ Recent: Honda Car Navigator stores and lists the 50 destinations that were previously in sequential order for your convenience to re-visit the same place in the future. ⑦ Current Position: Easy access to find POI nearby, set current position as my favorite, or get the position information. ⑧ Coordinate: You can enter GPS coordinates of a location if it is known. ⑨ Category: Honda Car Navigator allows user to search a destination by POI Category. Route press "Route" button to enter routing screen [ 1 ] Itinerary The Itinerary List is a list of user defined intermediate waypoints you can set another via point on the way to your destination. Route Menu page 1 [1] [2] [4] [5] [3] 1 Route Menu page 2 [6] [9] Route 7 Navigation System 122 [7] [8] 2 3 4 ① Add: To add way point. ② Go: Back to navigation screen. ③ Save: Save itinrary change. ④ Change: Delete waypoints or adjust the sequence of the waypoints. [ 2 ] Route Options 1 2 5 3 6 4 7 ① Routing Method: Faster/ Shorter can be selected. ② Avoid Highway: Highway won't be considered as route solutions. ③ Avoid Minor Road: Minor roads in communities or paved for walker won't be considered as route solutions. ④ Ask every before planning: enable this function will let user to set the Route Option every time he plan a route. ⑤ Avoid Toll Roads: the route won't take roads with tollbooth as solutions. ⑥ Avoid Ferry: ferry won't be considered as route solutions. Route To select or deselect a parameter, press the relevant panel on the screen. Once selected, The around button will be highlighted in yellow 123 Navigation System Route options take your preferences into counting when calculating the route to your destination. It is affected by the following parameters which you can set. [ 3 ] Turn List [ 4 ] Best Fit The Turn List is a list of all corners and roundabouts (turns) you will pass on the way to your destination. To view a turn, press its panel on the Turn List. This will load a map showing the location of the turn. Route 7 Navigation System 124 To select on this option can display the full route. [ 5 ] Cancel Route [ 6 ] Demo Honda Car Navigator will provide you simulate the route to your destination using , to facilitate your actual navigation of prior knowledge of the official road. This function is used in the GPS fix or not. You also press the Go To Button in the Location Menu to begin navigation. Honda Car Navigator will calculate a route to the destination from your current location. To delete planed route in Honda Car Navigator, press "Cancel Route" button and then press "Yes" button to confirm the route cancelation. [ 7 ] Stop Demo 7 125 Navigation System Route Stop route demonstration. [ 8 ] Bypass Waypoint [ 9 ] Detour The route is recalculated to take bypass waypoint around the location or street. This function is avilable to select when GPS is fixed. The route is recalculated to take a detour around the location or street. This function is avilable to select when GPS is fixed. You can select the distance to detour from your current position Route 7 Navigation System 126 Information 3 7 4 2 127 Navigation System 1 ① GPS: Access information about satellite coverage, current time, longitude, latitude, altitude, quality of the signals received and the status. ② Statistics: Access information about your current location, heading, velocity, time, etc. ③ Map: Access information about the maps your Honda Car Navigator is using, and what maps you have available. Maps are required before you can navigate the area. Note you should have the license key to use the map data. ④ About: Access information about Honda Car Navigator, version number, memory usage, first used day (FUD) etc. Information The Information Menu gives you information of GPS, Statistics, Map and About. My Data 1 4 My Data 7 Navigation System 128 2 3 ① My Favorite: You can edit your Favourite destinations by accessing the My Favorite Menu. You can add the places of Favourites. ② My Itinerary: You can retrieve a planned itinerary by pressing Load Button. After having a loaded itinerary (current itinerary), you can add, edit or save the itinerary. If a route already exists before you retrieve an itinerary, a warning message will be shown. ③ My Trail: You can show a trail on the map screen by pressing Show Button. Show/Hide is toggled. ④ Clear Data: You can clear the data you have saved here. Settings To change the navigation settings, press the Settings button on the Honda [ 1 ] Sound Car Navigator Main Menu. Honda Car Navigator offers a high degree of personalisation settings, as well as normal system settings. You can access these settings from the Honda Car Navigator Main Menu → Settings Menu. [1] [2] [4] [5] You can adjust the volume of the voice prompts and sound effects here, as well as enabling sound/disabling sound. [3] ▲ Setting Menu page1 [6] [7] [9] [10] [8] 7 guidance comes from the unit when Audio Off. 129 Navigation System ● Navigation guidance follows audio volume, therefore NO Settings ▲ Setting Menu page2 [ 2 ] Display The Display Menu allows you to change the display features used by Honda Car Navigator. you can adjust the Day/Night mode to suit your current lighting conditions (The AUTO mode changes the screen back light automatically at sunrise and sunset each day), Map Skin color and Font Size to suit your personal perference. ※Day/ Night mode would be changed corresponding to car small light on/ off My Data 7 Navigation System 3D Landmark 130 [ 3 ] Language 7 My Data ( 1 ) Text In Honda Car Navigator, there are over 20 texts for Menu to be selected. 131 Navigation System The Language Menu allows you to change the Settings of Honda Car Navigator for use in different countries. You can change the Text and Voice prompts used by Honda Car Navigator. To switch dual language map's text, please kindly change the Map language from the following screen. ( 2 ) Voice In Honda Car Navigator, there are over 24 prompt voices to be selected. You could change the language and apply it. ( 3 ) Input Method In Honda Car Navigator, users could choose the input method to be the default keyboard when enter the key words. (English Query Keyboard) (Chinese BPM Keyboard) My Data 7 Navigation System (Arabic Keyboard) 132 (Thai Keyboard) (Russian Keyboard) (Pinyin Keyboard) (Greek Keyboard) (Turkish Keyboard) (Vietnam Keyboard) 7 133 Navigation System My Data (Persian Keyboard) [ 4 ] Unit ( 4 ) Map For dual language map, this selection could be selected to show default map's language.After applying, the map will be loaded when restarting Honda Car Navigator in the next time. My Data 7 Navigation System 134 The Unit Menu allows you to change Unit Settings of Honda Car Navigator for use in different countries. You can change the measuring units (distance) and time (12 hours / 24 hours format) settings. [ 6 ] Safe Mode By enabling “Safe mode”, the touch screen function will be disabled when the vehicle speed is above 40km/ hr. This is to prevent drivers from operation of navigation devices. The touch screen function will be normal once the vehicle speed is below 40km/ hr. My Data Some vehicles may not be available for this function. 7 The Guidance Menu allows you to adjust the Map Orientation, Auto Zoom, Approaching View, Turn PIP 135 Navigation System [ 5 ] Guidance [ 7 ] Speed Alert You can enable speed alerts, which will warn you when you exceed the speed alert velocity. ① Sound: To turn on/off speed alert voice guidance. ② Type: To select over speed alert type includeing belows: • Auto: uses the Default Road Speed Limit value • Disable: tunr off speed limitation. • Auto(+20): use default Road Speed Limit +20 km/h. ※1 ( 1 ) Over Speed settings • Auto(+10): use default Road Speed Limit +10 km/h. ※1 • Auto(+5): use default Road Speed Limit +5 km/h. ※1 1 2 • Fixed: this function enable user to input speed limitation by themself. ※2 ③ Speed: when Fixed type is select, speed colume will be able for user to key in speed limitation. 3 My Data 7 Navigation System 136 This information may not be correct, please obey actual traffic sign. ※1. Other than the Auto and Fixed ※2. Fixed Type allows user to set the ( 2 ) Speed Camera Alert Types: there are also three types. Speed Limit value 1 2 3 4 7 • 1km(0.6mi): announce alert guidance 1km (0.6 mi) before speed camera • 800m(0.5mi): announce alert guidance 800m (0.5 mi) before speed camera • 500m(0.3mi): announce alert guidance 500m (0.3 mi) before speed camera • 300m(0.2mi): announce alert guidance 300m (0.2 mi) before speed camera 137 Navigation System • Auto: uses the Default distance value My Data ① Enable: To turn on/off speed camera setting. ② Sound: To turn on/off speed camera alert voice guidence: ③ Icon: Enable/ disable camera icons shown on map. ④ Distance: To select speed camera alert distance as below: The speed cameras sign will show when there are speed cameras in front of the car. The speed camera alert will warn you when the speed camera is approaching along the road. You will hear“Speed Camera Ahead” sound when it is approaching; then you will hear one “Don” sound when you deviate from the speed camera. If you are over speed limit, you'll read the red speed in the bottom right corner and will keep hearing “Drive Slowly” sound. This function could be enable or disabled. My Data 7 Navigation System 138 [ 8 ] POI Icon You can reveal, hide all or just some POI icons for ease of visibility on the Map Screen. Select the icons you wish to have displayed or hidden on the Map Screen, then press the Done Button. [ 10 ] Factory Default [ 9 ] Trail To enable “Trail” function, user can start log the trail. User could set the filename to save, as well as Interval time and file size. If you would like to change the settings you have set, you could restore the Factory Default Settings and restart again. The Interval time could be 1 , 3, 5, 10 seconds and 1 minute. The longer interval time setting has the smaller file size. The File size could be set to 1M, 5M, 10M. When the file size reach the set size, AVN will stop logging the trail. 7 139 Navigation System My Data When restore Factory Default, Language, Text and Voice setttings will back to original. Map Update Map Update Honda provide 2 times free map update within one year warranty. [ 2 ] Download the latest map from Honda Access website Map data is updated quarter month and released at January, April, July and http://service.e-lead.com.tw/honda October. Follow steps below to complete free map update. ● Select country flag icon to download the latest map of selected country. ● To check AVN is still in warranty or not, simply refer to the Frist Used Day (FUD) in About of Information of Honda Car Navigator ( refer to page 127). This day plus 1 year is in warranty, otherwise the warranty is expired. ● For out of warranty ( over one year after purchasing or out of 2 times free map update in one year), please refer to map update information at below weblink: ǣȀȀ ǤǦǤ ǤȀ [ 1 ] Prepare tools before map update [ 3 ] Unzip the download map to the Micro SD Card / USB. ● The content in the Micro SD Card should be as following: • Empty Micro SD card / USB device (>2G) X1 • PC or laptop with network connection X1 If there is no unzip tool in the PC, please download rar tool from the internet. 141 [ 4 ] Insert the micro SD Card / USB into the Honda Car Navigator to start the map upgrade process. ● After update process started, the new map data will be copied to the unit ● After new map copy process completed, the unit will empty the map data in the micro SD/ USB device ● After insert the map udpate micro SD/USB, the unit will pop up map update screen automatically ● Press the MapUpdate button to start update process /DWHVW0DSGDWDZLOOUHSODFHROGPDSGDWD ※ Select "Delete old setting", NAVI system will remove previous navigation setting after map update 142 ● When update process completed, the screen will show "Map Upate OK" Press Exit or simply remove the micro SD/USB device to finish all the update process [ 5 ] Map version check after update ● Go NAVI main menu and press Information button ● Press Map button to check map version information 143 Specifications Specifications 2 Din Audio Video Navigation System Common parts Dimension 191 mm (W) x 111.5 mm (H) x 162 mm (D) Maximum output 40W x 4 ch Weight 1.8 KG Rated output 20W x 4 ch (10% T.H.D.) Power Supply Voltage DC 13.2V (Test Voltage 14.4V) Suited speakers impedance 4Ω Power Consumption 15A or less Operation Temperature -20 to 65 ℃ FM tuner unit AUX input ※ Stereo mini-pin 12 dB (μV) Signal-to-noise ratio 54 dB (30KHz L.P.F. used) Audio input AM tuner unit Input impedance 10KΩ or more Received frequency range 531 MHz to 1602 MHz Allowable external input 1.0 Vrms Usable sensitivity 35 dB (uV) Signal-to-noise ratio 45 dB (30KHz L.P.F. used) VTR input ※ Connector RCA Audio input Input impedance 10KΩ or more Allowable external input 1.0 Vrms Video input Input impedance 75 Ω Allowable external input 1.0 Vp-p Color TV system NTSC RCA terminals (VTR input) micro SD Memory Reproducing Portion Corresponding Audio Format MP3, WMA, OGG, AMR, WAV Corresponding Video Format MP4, WMV, AVI, RM, MPG, MPEG, FLV, DIVX, 3GP, ASF, RMVB Signal-to-noise ratio 70 dB (IHF-A Usage) Total harmonic distortion ratio 0.3% (IHF-A Usage, 1KHz) Frequency characteristics 20 Hz ~ 20 KHz (-3 dB) Specifications ※ With certain types of vehicle, there are no mini-plug jack (AUX input) or 145 Specifications 3.5 mm 87.50 MHz to 108.00 MHz Usable sensitivity 8 Connector Received frequency range ※ Display section USB Memory Reproducing Portion Liquid crystal panel 7” Color TFT-LCD Module 153.6mm x 86.6mm (Width x Height) Corresponding Audio Format MP3, WMA, OGG, AMR, WAV, AU, RA Display size Corresponding Video Format MP4, WMV, AVI, MKV, DV, RM, MPG, MPEG, FLV, DIVX, SWF, DAT, H.264, 3GP, 3GPP, ASF, MOV, M4V, VOB, RMVB Number of dots 384,000 dots (480 Width 800 Height) Display type Transmissive color filter method Signal-to-noise ratio 70 dB (IHF-A Usage) Drive system Total harmonic distortion ratio 0.3% (IHF-A Usage, 1KHz) TFT (thin-film transistor) Active matrix type Frequency characteristics 20 Hz ~ 20 KHz (-3 dB) Touch panel Capacitive type touch panel Bluetooth Modulation System Spread Spectrum System (Frequency Hopping system) GPS receiver Voltage 4.5±0.5V Power 12mA (Min), 25mA (Max) GPS (L1.C/A Code) 1575.42 MHz 50Ω Specifications Communication frequency 2402 MHz ~ 2480 MHz Frequency Output POWER CLASS2 Impedance Bluetooth version Bluetooth Ver.2.1 + EDR Amplifier Rate 27±5dB Corresponding profile HFP Ver.1.5, HSP Ver.1.2, SPP Ver.1.1,A2DP Ver.1.2, AVRCP Ver. 1.4, PBAP Ver.1.0, MAP Ver.1.0, PAN Ver.1.0 Operating Temperature -30~+85℃ IEEE 802.11 b/g/n Wifi 8 Specifications 146