1
99
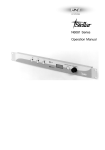
99 Stereo Power Amplifier and
99 Mono Power Amplifier
Instruction Manual
CONTENTS
IMPORTANT NOTES ................................. 2
INTRODUCTION .................................... 3
PACKING LIST AND UNPACKING THE EQUIPMENT .......... 3
GUARANTEE AND PRODUCT REGISTRATION ............... 3
SERVICE ARRANGEMENTS ............................ 4
ACCESSORIES ..................................... 4
CARE & CLEANING.................................. 4
SAFETY AND OPERATION OF ELECTRICAL PRODUCTS ........ 4
INSTALLING THE AMPLIFIER ......................... 6
OPERATING THE AMPLIFIER ......................... 1 0
TROUBLESHOOTING................................ 1 1
SPECIFICATIONS.................................. 1 3
1
IMPORTANT NOTES
European Union Directives
Quad equipment is designed to comply with the legal provisions of EU
Directives 89/336/EC and 72/23/EEC. The standards which have been
applied were those in force at the time of the introduction of the product.
The product bears the CE mark:
Compliance cannot guarantee perfect performance. In the very rare
circumstance that you experience problems you should first try to locate and
remedy the origin of any disturbance. A further option is to relocate the
Quad equipment in order to reduce the interference. Your dealer should be
able to provide assistance if the problem persists.
FCC Rule 15 Class B
This equipment has been tested and complies with the limits for a Class B
device, pursuant to Part 15 of the FCC Rules. These limits are designed to
provide reasonable protection against harmful interference in a residential
installation. This equipment generates, uses and can radiate radio frequency
energy and, if not installed and used in accordance with the instructions,
may cause harmful interference to radio communications. However, there is
no guarantee that interference will not occur in a particular installation. If
this equipment does cause interference to radio or television reception,
which can be determined by turning the equipment off and on, the user is
encouraged to try to correct the interference by one or more of the following
measures:
• Re-orient or relocate the receiving antenna
• Increase the separation between the equipment and the receiver
• Connect the equipment into an outlet on a mains circuit different
to that to which the receiver is attached
• Consult the dealer or an experienced radio/TV technician for help
This Class B apparatus meets all the requirements of the Canadian
Interference Causing Equipment Regulations.
Information to the user
Alteration or modifications carried out without appropriate authorisation
may invalidate the user's right to operate the equipment.
It is always good practice to switch off equipment before connecting or
disconnecting signal leads. This will prevent unpleasant and loud noises
coming from the loudspeakers and avoid the risk of damage to equipment.
This equipment is double insulated and does not need a safety earth. It is
important, though, that any equipment connected to it is earthed according
to the manufacturers’ instructions. This becomes more important as the
number of units which are connected together increases.
Noise Pollution
Please be aware that very high sound pressure levels can cause permanent
damage to your hearing and also severe annoyance to neighbours.
2
INTRODUCTION
The Quad 99 power amplifier has an advanced specification. As this unit is
capable of generating extremely high power outputs it is particularly
important that you read the following instructions with particular care.
Although this amplifier has primarily been designed for use with Quad 99
Series components, it may be connected to any preamplifier with an output
level of .775V (0dBu) or higher.
PACKING LIST AND UNPACKING THE EQUIPMENT
The packaging contains the following items:
• The 99 Stereo Power Amplifier or 99 Mono Power Amplifier
• One 0.5m 2 core IEC male/female mains lead, QU2005A or one
mains lead QUKES2B or QE2P2S2.
• One 160mm long Ampbus terminated link cable, Q37414A
• Instruction Manual
• Warranty Registration Form
• One set of packing materials comprising:
One set of expanded polystyrene end cheeks
One cardboard carton
One polythene protective bag
Consult the dealer from whom you purchased the equipment if any of these
items is not present.
Please retain the packing materials for future use or return them to your
dealer. If you decide not to keep the packing, please dispose of it sensibly.
The paper and plastics components are recoverable and may be taken to an
appropriate recovery service.
Please retain the user manual and the information concerning the date and
place of purchase of this equipment for future reference.
GUARANTEE AND PRODUCT REGISTRATION
Your Quad equipment is guaranteed against any defect in material and
workmanship for one year from the date of purchase (proof of purchase
required). We request that you complete and return the enclosed Warranty
Registration Form. This will also enable us to keep you informed of future
Quad products. Within the guarantee period, Quad will undertake
replacement of defective parts free of charge provided that the failure was
not caused by misuse, accident or negligence. Your statutory rights within
the territory in which you purchased the equipment are not affected by this
guarantee.
Quad carries out a regular review of its products and reserves the right to
adjust the specifications and performance from time to time.
There are no user replaceable or serviceable parts inside this equipment.
Unauthorised attempts to service or modify this product will invalidate the
warranty.
SERVICE ARRANGEMENTS
If your Quad equipment requires servicing you should return it to the dealer
from whom the equipment was purchased.
If you are abroad and there is no suitable dealer in your area, please contact
3
the distributor for the country in which it was purchased or Quad
Electroacoustics Ltd.
Equipment returned for service should use the original packing. You should
enclose a brief note with your name and address and the reason for returning
the equipment.
ACCESSORIES
The following optional accessories are available.
Accessory description
Part No.
IEC mains cable 2m, fitted with UK plug
IEC mains cable 2m, fitted with European plug
QuadLink bus cable 160mm
QuadLink bus cable 1m
Double ended phono cable 500mm
Double ended phono cable 1m
Double ended phono cable 2m
QUKES2B
QE2P2S2
Q37414A
Q37404A
QP2P2SA
QP2P21A
QP2P22A
Note: We do not supply loudspeaker cables terminated with 4mm plugs
nor the 4mm plugs themselves.
CARE AND CLEANING
The surface of the equipment may be cleaned with a damp cloth provided
that the power has been removed first. Solvent based cleaning materials
should not be used as they may damage the paint finish.
SAFETY AND OPERATION OF ELECTRICAL PRODUCTS
All electrical products carry with them the risk of electrical shock if they are
misused. Quad 99 series equipment is intended for use in a domestic
environment.
It is important that all electrical connections are competently and securely
made to the unit before power is applied. Access to the rear of the
equipment should be protected by careful placement of the equipment. Bear
in mind that the voltage from the output of this power amplifier can exceed
50V peak and that metal parts, such as loudspeaker connectors, must not be
touchable while the equipment is powered.
4
Mains working voltage and fuse ratings
The rated voltage for this unit is marked on the rear panel. Please check
with the dealer if you intend to use the equipment in regions which use
different values of mains voltage.
Quad manufactures equipment to the following principal mains voltage
requirements:
• Europe, including the UK, uses 230VAC
• Japan uses 100VAC
• USA, for example, uses 117VAC
• Korea, for example, uses 220VAC
If you are in any doubt what the correct operational voltage is you should
ask a qualified electrician before applying power to the equipment. The
Quad 99 amplifier will work within standard tolerances of this voltage.
The mains supply fuse of the Quad 99 amplifier is accessible on the rear
panel when the IEC mains plug has been removed. In the rare event that it
has broken, you should first check for any obvious cause before replacing
the fuse with one of the correct rating and type. The correct fuse values are:
Country or region
Nominal
mains voltage
Fuse rating
Europe including UK
Japan
Korea, for example
USA, for example
230VAC
100VAC
220VAC
117VAC
T3.15AL slow blow
T6.3AL slow blow
T3.15AL slow blow
T6.3AL slow blow
5x20mm
5x20mm
5x20mm
5x20mm
You should switch off the equipment and remove the connection to the
mains power outlet before changing the fuse.
Mains Connections
Quad equipment supplied is provided with a mains cable fitted with an
appropriate mains plug. With the Stereo amplfier there is a lead to connect
to the back of the Pre Amplifier. The Mono amplifier will have a mains
lead to plug in the wall socket. This plug should not be cut from the cable.
If, for any reason, the plug is removed, it must be safely disposed of. It must
never be plugged into a mains outlet.
Any replacement plug should be wired to the supplied mains cable as
follows:
• the BROWN wire must be taken to the LIVE terminal
• the BLUE wire must be taken to the NEUTRAL terminal
In the UK a fused 13 Amp mains plug should be fitted with a fuse link rated
to 13 Amp which conforms to BS1362. In other countries a value between
10 Amps and 15 Amps should be used at either the wall socket or at the
mains distribution board.
When you are trimming or cutting cables and wires you should be careful to
avoid the waste parts from falling onto or into any electrical equipment. If
you are in any doubt you should consult a qualified electrical engineer.
5
INSTALLING THE QUAD 99 STEREO POWER AMPLIFIER
Stereo amplifier
AC Inlet
& Fuse
Loudspeaker Binding
Input
posts
Selector
Phono Input
15way DType Ampbus
Sockets
Mains switch
Mono amplifier
Before connecting the QUAD amplifier to the AC mains supply check that
the voltage marked on the back matches the voltage of your supply.
Mains On/Off Switch
The Mains On/Off switch is on the rear panel. When the amplifier is
connected to a Quad 99 system with the special AMPBUS cable this switch
should normally be left switched on as the amplifier will be remotely
switched.
Where the amplifier is not part of a Quad 99 system the Mains On/Off
switch should be switched off when the amplifier is not in use.
Signal Input Connections
When the 99 amplifier is used as part of a 99 system, you should use the 99
AMPBUS lead provided to connect to the output of the 99 preamplifier or
the 99AV processor.
Quad 99 units are connected via special multiway cables. The ends are
terminated with a male and female 15 way D type connector. They are
available in lengths of 160mm and 1m.
When used to link control units they are referred to as QUADLINK and
when connecting amplifiers they are referred to as AMPBUS cables.
AMPBUS signal is differential. This offers performance advantages over the
usual unbalanced mode.
6
Channel Selector
The Quad AMPBUS system carries channels for normal stereo signals as
well as the centre, subwoofer and rear channels required for AV
applications.
The rotary switch on the back of the amplifier should be used to select the
appropriate channel. These channels are:
CH1
Stereo Left
CH2 Stereo Right
CH3
Rear Left
CH4 Rear Right
CH5
Centre
CH6 Subwoofer
The INPUT setting selects the RCA phono input. This setting should be
used only when the amplifier is used with non-Quad 99 series equipment.
System connections using AMPBUS and the 99 Stereo Power Amplifier
Each amplifier has two AMPBUS sockets on the rear panel. Plug an
AMPBUS lead into the upper socket of the amplifier. The other end should
be plugged into the AMPBUS socket of the Quad 99 preamplifier or AV
processor which will be sited above the units.
System connections using AMPBUS and the 99 mono Power Amplifier
Under normal circumstances, two 99 mono amplifiers will be used as the
left and right channels respectively of a stereo installation, as part of a Quad
99 system.
Place one amplifier on top of the other.
Each amplifier has two AMPBUS sockets on the rear panel. Plug an
AMPBUS lead into the upper socket of the upper amplifier. The other end
should be plugged into the AMPBUS socket of the Quad 99 preamplifier or
AV processor which will be sited above the units.
The other AMPBUS lead is connected between the lower AMPBUS socket
of the upper amplifier and the upper socket of the lower amplifier so that
you have a daisy chain. AMPBUS sockets are alternately male and female
so this should be relatively straightforward.
Note: Always check that the channel selector has been positioned correctly.
Bi-Amping for Mono or Stereo Amplifier
The AMPBUS system is both simple and versatile. By using the AMPBUS
system, you can add two more 99 mono amplifiers for bi-amping. As all
Quad 99 series amplifiers are gain matched, you can use a pair of 99 mono
amplifiers in combination with a Quad 99 stereo power amplifier. When biamping, remember to have the channel switch set to the correct channel.
7
Bi-amping for stereo power amplifier
Bi-amping for mono power amplifier
Connecting to extenal sources.
When the Quad amplifier is used with equipment other than as part of a 99
system, you should use an appropriate lead to connect to the RCA phono
input and the channel selection switch should be set to INPUT.
Note: The Quad 99 amplifier is capable of high voltage and current
delivery. You should only connect it to a source unit with a variable output
(volume control). On no account must you connect the amplifier to a
source unit with a fixed output.
Connecting Loudspeakers
Loudspeaker cables should be carefully prepared. The following sketches
show the preparation of a speaker cable for use with Quad power amplifiers
and loudspeakers. When stripping the insulation, be careful not to cut into
the wire. Make sure that you collect together all the strands of wire as stray
wires may cause shorting which could result in damage or cause a fire.
7mm
twist the strands to
gather stray wires
25mm
7mm
25mm
Insert the bared ends carefully
into the terminal posts of
the amplifiers or loudspeakers.
Tighten securely.
8
When estimating the length of loudspeaker cable, provide sufficient to
enable access and tidy securing. Some cable, is quite heavy and you should
be careful to place your cables so that they do not cause undue strain on the
binding posts of the amplifier or loudspeaker.
Note: Please ensure that all cables used with Quad equipment are
appropriate to the task and are correctly terminated. For safety reasons
Quad equipment is designed not to accept 4mm connectors.
Phase
Make sure that both channels are connected in phase. The positive (red)
output terminal of each channel should be connected to the positive (red)
terminal of the speaker. Special care should be take when bi-wiring as phase
becomes critical, (see page 12 for further details).
A note concerning placement
When installed in a domestic system at the base of a 99 Series equipment
stack, the amplifier will be perfectly satisfactory provided there is sufficient
ventilation.
If you are likely to use the amplifier for extended periods at extremely high
volume levels, it may be advisable to install the units side by side in free air.
To do this you will need 1 metre long AMPBUS cables which are available
from your dealer or Quad. The method of connection remains unaltered.
Please ask your dealer’s advice.
Connecting the 99 Stereo Amplifier to the Mains Supply
The power supply input is via an IEC mains connector and an appropriate
mains lead is supplied. Connect the mains lead to the amplifier and then to
the wall socket ensuring that the mains switch on both amplifier and wall
socket are switched off. They should stay switched off until the unit is fully
installed. See page 4 for further details.
Final Connections
After checking that all leads are correctly installed and the selector switch is
correctly set, you can switch on the mains supply to the preamplifier and the
amplifier.
9
OPERATING THE QUAD 99 POWER AMPLIFIER
Front Panel Indications
When used as part of a 99 system
When the Quad 99 preamplifier or AV processor is in STANDBY mode, the
front panel indicator will light a steady red. When you activate the system
the indicator will glow green and stay green during normal operation.
If the amplifier detects a fault such as a short circuit on the speaker cables,
or if the amplifier overheats, the power amplifier will power down and the
indicator will flash red. After thirty seconds the amplifier will ‘try again’. If
all is well, the amplifier will go into standby and the indicator light will
glow a steady red. You may now bring the amplifier out of STANDBY.
If there is a persistent fault, when the amplifier ‘tries again’ the light will
still flash red. If this should happen, switch off the unit at the mains and
wait 30 minutes. Carefully check all the connections before switching on
again. The amplifier should now go into STANDBY and the light will glow
a steady red. If the red light still flashes, there is an internal fault and you
should return the unit to your dealer for his attention.
When used with other units
When the amplifier is switched on, the front panel indicator will briefly
light red and then glow steady green. It will stay green during normal
operation.
If there is a fault, the amplifier will power down and flash red. After 30
seconds the amplifier will ‘try again’. If all is well the light will glow green
indicating normal operation. If the light still flashes red, switch off the unit
at the mains and wait 30 minutes. Carefully check all the connections before
switching on. The light should now indicate green indicating normal
operation. If, however, the red light still flashes, there is an internal fault and
you should return the unit to your dealer for his attention.
Running In your amplifier
The performance of the amplifiers tends to stabilise after a period of use.
This is due to a number of factors associated with the physical and chemical
properties of the components used. We recommend that the system be run
with a music signal for several hours when it is first installed. Although the
changes can be quite subtle in nature, we find that after a few days the
10
sound quality becomes smoother and more natural.
TROUBLESHOOTING
If you suspect that your amplifier is not operating properly, here are a few
simple checks you should carry out before returning the unit to your dealer.
Before making any checks on system wiring, in particular AMPBUS cables,
please ensure the amplifier is switched off and the volume control set at
minimum.
If you are in any doubt as to the satisfactory operation of your Quad 99
SYMPTOM
POSSIBLE CAUSE
No front panel indication
when power is applied.
Mains outlet faulty or not switched on.
Mains plug fuse or mains cable faulty.
The IEC plug has not been pushed in firmly enough.
The rear panel fuse has blown.
The amplifier front panel indicator
glows green but there is no
sound from either speaker.
You have selected the wrong input channel on the
power amplifier.
Loudspeaker cables misconnected or faulty.
There is no source connected to your preamplifier or the
source has finished playing.
AMPBUS connections have been poorly made.
The cable between the amplifier RCA phono input and
the preamplifier is faulty (non Quad 99 systems).
You are getting the same
channel on both speakers.
You have selected the wrong input channel on the
power amplifier.
Loudspeaker cables misconnected.
AMPBUS connections have been poorly made.
RCA input cables misconnected (non 99 systems).
The channels are reversed.
Signal cable to the amplifier faulty (non Quad 99
There is a large hum or other
unpleasant noise from the loudspeakers. systems).
Faulty source equipment.
Faulty loudspeakers or loudspeaker cable.
After playing for a while,
the amplifier switches off.
Loudspeaker impedance too low and/or amplifier
playing too loudly and overheating.
Refer the matter to your dealer.
Every time the amplifier is turned on
the fuse blows or the light flashes red.
11
Quad Electrostatic Loudspeakers
The 99 power amplifiers are fully compatible with the Quad ESL-63,
ESL-988 and ESL-989 loudspeakers. It should not be used with the earlier
model ESL which could be damaged by signal peaks unless a protection
circuit is fitted inside each loudspeaker – please contact Quad
Electroacoustics for details.
Loudspeaker Phasing
If there is any doubt about the way the loudspeakers are connected, their
phasing can easily be checked by playing a mono source, when the sound
should appear to emanate from a point midway between the two
loudspeakers. If this is indefinite, then the connections to one of the
loudspeakers should be reversed. When correctly connected, the
loudspeakers will give a definite centre sound source with more full bodied
tenor and bass registers.
Headphones
Headphones will normally be used instead of loudspeakers and there are a
number of suitable switch units available designed to enable the
loudspeakers to be switched off when the headphones are plugged in. Most
of these incorporate a simple attenuator circuit to permit operation at
normal settings of the control unit volume control. Electrostatic or other
types of headphones requiring a high level input should be operated in
accordance with the manufacturer’s instructions.
12
Series hi-fi equipment, please consult your appointed QUAD dealer.
SPECIFICATIONS - 99 STEREO POWER AMPLIFIER
Input Specifications
RCA Phono Input
Input Impedance
Input Sensitivity (for max. output)
Frequency Response (±3 dB)
Signal/Noise (ref 995mV input ‘A’ wtd)
(ref. 100 watts output)
AMPBUS Input
Input Impedance
Input Sensitivity (for max. output)
33kΩ
775mV
3Hz - 50kHz
-110dB (20Hz-20kHz)
10kΩ
2.0V
Output Specifications
Max. Output into 8Ω
Max. Output into 4Ω
Distortion
THD (at 70W Output, 1kHz)
(at 70W Output, 20kHz)
Stability Margin
Amplifier DC Offset
Dimensions (HxWxD)
Weight:
90 watts
120 watts
less than 0.05%
less than 0.05%
Unconditionally stable
less than 10mV
70x321x310mm
6.25Kg
SPECIFICATIONS - 99 MONO POWER AMPLIFIER
Input Specifications
RCA Phono Input
Input Impedance
Input Sensitivity (for max. output)
Frequency Response (±3 dB)
Signal/Noise (ref 995mV input ‘A’ wtd)
(ref. 100 watts output)
AMPBUS Input
Input Impedance
Input Sensitivity (for max. output)
33kΩ
775mV
3Hz - 50kHz
-110dB (20Hz-20kHz)
10kΩ
2.0V
Output Specifications
Max. Output into 8Ω
Max. Output into 4Ω
150 watts
220 watts
Distortion
THD (at 100W Output, 1kHz)
(at 100W Output, 20kHz)
less than 0.05%
less than 0.05%
Stability Margin
Amplifier DC Offset
Dimensions (HxWxD)
Weight:
13
Unconditionally stable
less than 10mV
70x321x310mm
6.5Kg