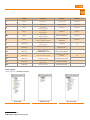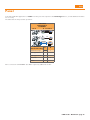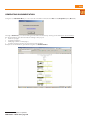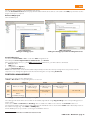
1
Installation setup, software updates, reference libraries and documentation are also available from the Restricted Area of the website www.eliwell.com once you have registered. Eliwell Controls Srl Via dell’ Industria, 15 Z. I. Paludi 32010 Pieve d’ Alpago (BL) - Italy Telephone +39 (0)437 986 111 Facsimile +39 (0)437 989 066 Sales: +39 (0)437 986 100 (Italy) +39 (0)437 986 200 (other countries) [email protected] Technical helpline: +39 (0)437 986 250 [email protected] www.eliwell.it DISCLAIMER Eliwell Controls srl declines all responsibility for injury or damage deriving from the installation or use of this software other than for the purpose and in the manner described in this manual. Every care has been taken in preparing this document; however, Eliwell Controls srl cannot accept liability for any damage resulting from its use. Within the limits established by law, Eliwell Controls srl shall under no circumstances be held responsible for specific, accidental, direct or indirect damage (including but not restricted to damage resulting from loss or absence of earnings, interruption of activity, loss of data or any other economic loss) deriving from use of or failure to use this software product or from the supply of or failure to supply the associated technical support service, even in cases in which Eliwell Controls srl has been previously notified of the risk of such damage. 9MA10043 03/13 © Copyright Eliwell Controls s.r.l. 2010-2013 All rights reserved Studio PROGRAMMABLE CONTROLLERS Development software for FREE The software solution in an integrated Suite for quick, easy programming Quick Start Developer Contents quick start & application notes............... 1 Selecting an interface.............................12 MFK......................................................................1 Selecting optional smart modules...13 File system USB..............................................1 Complex applications...............................14 REMOTE CONNECTION...................................1 FREE Evolution selection criteria......14 MODBUS MASTER.............................................1 WEB SERVER......................................................1 Selecting optional modules and Evolution accessories.........................................15 PROFIBUS DPV0................................................1 FREE panel selection criteria.................16 INTRODUCTION................................................. 2 Connectivity..................................................17 General description..................................2 Applications................................................... 18 Components .................................................2 Evolution applications............................19 FREE Studio software...............................................................2 Evolution documentation....................19 DM Interface (DMI)...................................................................2 Application panel definitions................... 20 Multi Function key (MFK).........................................................2 ICONS........................................................................................21 Connection cables...................................................................2 Project panel.............................................................................22 Converters.................................................................................2 Plug-in (Evolution)....................................................................3 Abbreviations and definitions................................................3 MINIMUM SYSTEM REQUIREMENTS................. 4 Operating Systems......................................4 Minimum Hardware.....................................4 FREE Smart hardware and accessories......... 4 FREE Evolution hardware and accessories.4 Internet........................................................................ 4 Installation.................................................... 5 Installing studio ........................................5 Getting started............................................. 23 First Start-up..................................................23 New Project...............................................................................24 Creating A New Project........................................ 24 Creating a New Program.........................25 Selecting the IEC language....................25 Opening an existing program...............25 Writing a program......................................26 Project PANEL / Project TAB................................. 26 Creating local variables...........................................................26 Creating a function block/function........................................26 Application icons..................................................... 5 Creating global variables........................................................27 TARGET............................................................... 6 Shared global resources ........................................................27 FREE WAY...........................................................6 Associating a program to a task..................... 28 FREE smart.......................................................6 Project PANEL/Resources tab............................. 28 FREE panel........................................................6 Modbus Objects........................................................ 28 FREE evolution..............................................6 EEPROM Parameters................................................................28 Status Variables.........................................................................28 Installing DM interface (DMI).................7 EEPROM Parameters................................................................29 Connecting the DM interface to the PC....... 7 Status Variables.........................................................................29 DM interface setup.................................................. 7 target menu................................................................ 30 Reading the DM interface COM port.....................................8 Prg menu...................................................................................30 Changing the COM port setting............................................8 Set menu...................................................................................30 DM interface setup WIN 7...................................... 9 Visibility of menu resources....................................................30 Defining hardware requirements........... 11 Alarms........................................................................................30 Small Applications......................................11 FREE Smart configuration.......................................................31 FREE Smart selection criteria................11 Continuity with energy flex..................11 FREE Studio - Quick Start Contents Execution time..........................................................................31 I/O mapping.............................................................................31 target menu................................................................ 31 Menus........................................................................................31 Properties PANEL ....................................................... 57 Alarms........................................................................................31 Properties TAB............................................................ 57 FREE Evolution configuration.................................................32 ACTIONS PANEL ............................................................ 57 Execution time..........................................................................32 Template list..............................................................................57 I/O mapping.............................................................................32 Application parameters........................................ 59 FREE Panel configuration........................................................32 Execution time..........................................................................33 I/O mapping.............................................................................33 Managing projects...................................... 34 Saving projects............................................34 File types...................................................................................34 PROPERTIES TAB/VARIABLE......................................... 59 Project PANEL / Resources TAB........................... 61 Bitmaps.......................................................................... 61 String table................................................................................61 Enumeratives............................................................................62 Image Lists................................................................................62 Transferring projects and files.........34 Sets.............................................................................................63 Connection...................................................36 definition of Modelmg.............................................................63 DOWNLOAD IEC application onto TARGET..38 Preliminary operations......................................... 38 COM settings............................................................................38 DM interface connection error...............................................39 Smart TARGET..................................................39 COM settings............................................................................40 Modbus TCP/IP................................................41 EVOLUTION TARGET........................................41 COM settings............................................................................42 TARGET panel..................................................42 Device panel definitions............................. 45 field operation............................................. 47 use of Modelmg.......................................................................63 SetParValCfgA0........................................................................64 CONNECTION panel definitions.................. 65 To start connection.................................... 67 First Start-up..................................................67 CREATING A NEW PROJECT (WORKSPACE).............. 67 Project panel............................................................. 70 PLC project................................................................................70 HMI project...............................................................................70 Remote HMI project.................................................................71 Download project ...................................................................71 SIMULATION panel definitions.................... 72 Edit Workspace.........................................................................73 First Start-up..................................................47 SIMULATION...................................................... 74 Opening the IEC application...................48 First Start-up..................................................74 connecting to the target device.......49 opening simulation from application.......74 Reading parameters ............................................... 49 IO panels...................................................................................75 Writing parameters ................................................ 49 Signal Properties......................................................................76 Parameter values table............................................................50 BIOS Download........................................................................50 HMI Window.............................................................................76 opening simulation from user interface.76 USER INTERFACE PANEL DEFINITIONS.............. 51 Eliwell Support............................................. 77 To start User interface............................... 53 Eliwell Technical Support......................77 UserInterface vs Connection............................ 53 Online Help.....................................................77 First Start-up..................................................53 Online help - LED........................................................ 78 New Project...............................................................................54 TROUBLESHOOTING.......................................... 79 Creating A New Project........................................ 54 Application.....................................................79 Creating pages..............................................55 Creating pages.........................................................................55 General......................................................................................55 Device................................................................79 simulation......................................................79 Message page..........................................................................56 shortcuts....................................................... 80 Initial page................................................................................56 ApplicatioN Shortcuts ............................80 FREE Studio - Quick Start Contents DEVICE Shortcuts.........................................81 USER INTERFACE Shortcuts.......................82 CONNECTION Shortcuts............................82 APPENDIX - project development examples project 1 - counter....................................83 COUNTER program.................................................................83 Local variables..........................................................................83 Variables and global constants..............................................83 Global shared variables...........................................................83 Fundamental state display......................................................84 Menu creation...........................................................................84 Task............................................................................................84 Compilation..............................................................................84 Connecting to FREE Smart and downloading the application......85 Watch and Oscilloscope..........................................................86 Saving the project....................................................................86 Device............................................................................. 86 Reading parameters ...............................................................87 Displaying variables ................................................................87 Writing parameters .................................................................87 project 2 - counter2 FUNCTION block........88 Saving the project....................................................................88 Creating a function block........................................................88 COUNTERST program (function block) ................................88 Local input and output variables............................................88 Exporting to target device......................................................90 FREE Studio - Quick Start Contents 83 QuICk START & AppLICATIon noTES QuICk START IMpoRTAnT: this Quick Start: • is aimed at designers and developers and requires a knowledge of one or more IEC61131-3 standard programming languages. • is designed to provide a first-level overview of the installation, functions and use of FREE Studio • requires a reading of FREE Smart installation manual 9MAx00036 and/or FREE panel manual 9MAx00046 and/or FREE Evolution manual 9MAx00042 (x = 0: It; 1: EN; 2: FR; 3: Es; 5: DE) available in electronic format only (PDF) from www. eliwell.com subject to registration with the restricted area • is available in electronic format only (PDF) from www.eliwell.com subject to registration with the restricted area AppLICATIon noTES Eliwell provides more literature such as the following Application notes An Application notes is a document that gives more specific details on using a component in a specific application, or relating to a particular process, e.g. the physical assembly of a product containing the component. Application notes are especially useful for giving guidance on more unusual uses of a particular component, which would be irrelevant to many readers of the more widely read datasheet. MFk • Smart FILE SYSTEM uSB • Evolution REMoTE ConnECTIon • Evolution MoDBuS MASTER • Smart wEB SERvER • Evolution pRoFIBuS Dpv0 • Evolution FREE Studio - Quick Start page 1 INTRODUCTION General description FREE Studio is a quick, effective development tool for creating and customising new programs for all types of IEC application, which is particularly suited to HVAC/R requirements. The use of several different programming languages in accordance with IEC61131-3 regulations (programming standard for industrial control), makes it possible to develop new algorithms or entire programs totally unassisted, which can then be uploaded to • FREE Smart via PC or Multi Function key • FREE Evolution via PC or USB guaranteeing the utmost confidentiality with appropriate security. IEC 61131-3 development environment Components All basic components, interfaces, converters and accessories are described below[1]. FREE Studio software The FREE Studio[2] software suite and its functions will be illustrated in this document. The FREE Studio software suite consists of 5 development environments for programming the FREE Smart, FREE Panel & FREE Evolution programmable controllers: • FREE Studio Application, dedicated to developers, for creating and managing libraries, IEC applications and diagnostics. • FREE Studio Device, dedicated to users, for managing previously developed IEC applications, downloading them to the target[3] device and modifying device parameters from a serial port. • FREE Studio Simulation, dedicated to software developers, for executing PLC applications and HMI pages (Evolution only) in a simulation environment without the need to have a target[4] The following 2 development environments are only available for FREE Evolution: • FREE Studio Connection[5], dedicated to software developers, for creating networks • FREE Studio User Interface, dedicated to software developers, for personalising the graphical interface on built-in terminals and other terminals. DM Interface (DMI) Component required for FREE Smart only: Component required for connection to PC The USB/TTL-I2C hardware interface to be used in association with the software suite enables you to: • use the software itself. • connect to the target device in order to control it. • connect to the Multi Function Key (MFK) component. Multi Function key (MFK) Component required for FREE Smart only: This is a memory support, which allows you to: 1. update the firmware of the target device. 2. update the IEC application of the target device. 3. update the parameter values of the target device. 4. download the parameter values from the target device. Connection cables Components required for FREE Smart only: • “Yellow” cable with JST – molex terminals, see Connection Modes chapter for use instructions • “Blue” cable with JST – JST terminals, see Connection Modes chapter for use instructions • USB-A/A extension lead, 2 m Converters Components required for FREE Evolution only: • USB/485 adapter • USB/CAN adapter Note: alternatively if there is a RS232 serial port, Evolution can be connected to the PC using an RS485/RS232 adapter 1 2 3 4 5 the interfaces and converters are dedicated to Smart, Panel or Evolution. Software suite or package. See abbreviations and definitions programmable controller. See abbreviations and definitions An IEC application can be downloaded directly onto the Simulator without the need to have a physical Smart or Evolution For Evolution only: Connection is the entry point of the software suite - see Target chapter FREE Studio - Quick Start page 2 Plug-in (Evolution) A wide range of plug-in, 2DIN rail-mounted modules allows integration with industrial systems, BMS and Ethernet networks. Note: not available for FREE Panel, which has 3 on-board RS485, CAN and ETHERNET serials. Abbreviations and definitions Application, Device, Connection, Simulation, UserInterface: abbreviations of FREE (Studio) Application, FREE Device, FREE Connection, FREE Simulation and FREE UserInterface respectively. Software suite • IEC application, PLC Application, PLC: an application made to IEC61131-3 (industrial control programming standards) by means of the Application development environment (tool) to be downloaded to the target using Application or Device • Target device, Target: name given to the FREE Smart, FREE Evolution or FREE Evolution Panel (EVP) programmable controller, or “instrument” • DMI: abbreviation of DM Interface • HMI: acronym of Human Machine Interface. Graphical interface developed with UserInterface • Instance: object of a predefined object class (function block, template, etc) • IEC language: programming language to IEC61131-3 • BIOS menu, BIOS: factory-set BIOS parameters menu. Not modifiable[6] • MFK: abbreviation of Multi Function Key • Quick Start: this document • Smart: abbreviation of FREE Smart; Evolution: abbreviation of FREE Evolution; EVP: abbreviation of FREE Panel • Studio: abbreviation of FREE Studio. The software suite described in this document • Tab. The workspace is divided into sections or panels. Each panel may in turn be subdivided into tabs (e.g. Resources tab) • Template: in this document it denotes a page template created with UserInterface • Panel or section: see Tab (e.g. Project panel) Note: Many definitions and abbreviations are standard information technology and/or PLC terms and are not listed here. For example a Function is a standard term. Other terms, such as Function Block, will be described in the relevant paragraphs. • system resources The developer has the following resources available on the target devices for IEC programming CPU Available memory for Application Available memory for User Interface FLASH memory data RAM Memory* RAM Memory** EEPROM variables * automatic mapping ** Modbus mapping 6 Smart (°) 14.7 MHz Evolution/Panel 72 MHz, 32MB RAM 190KByte 1.5MByte - 1.5MByte 2300Byte 1024Byte 1024Byte (°) Models /C/S msk 412 126MByte 512KByte 5000 word 4000 word The BIOS cannot be modified but can be updated. FREE Studio - Quick Start page 3 MINIMUM SYSTEM REQUIREMENTS Operating Systems • • • • • Windows XP Home SP2 or SP3 Italian, English, Spanish and German. Windows XP Professional SP2 or SP3 Italian, English, Spanish and German. Windows 7 Home Premium Italian, English, Spanish and German. Windows 7 Professional Italian, English, Spanish and German. Windows 7 Ultimate Italian, English, Spanish and German[1]. other software (FREE Smart only) Driver AT90USBxxx CDC USB to UART MGM for use of the DM interface[2] See DM Interface Installation Minimum Hardware • • • • • • • 1024x768 graphic resolution 700MHz CPU 1 GB RAM HD with 5GB of disk space 1 USB port[3] Mouse or other pointing device. 1 CD-RW drive Note: A typical installation (available in English, standard libraries) requires about 500 Mbyte of disk space. Allow a further 1GByte of disk space for installing libraries and dedicated applications. To download the application, you need the following components: FREE Smart hardware and accessories • • • • 1 FREE Smart SMD5500/C/S or a device from the FREE Smart family 1 DMI 100-3 Manufacturer + yellow TTL cable[4] 1 optional MFK + TTL blue cable FREE Smart[5] power cables and transformer FREE Evolution hardware and accessories • • • 1 FREE Evolution EVD7500/U or request the demo case (Demo Case) 1 USB/RS485 or USB/CANOpen or plug-in Ethernet converter 35VA transformer for power supply to FREE Evolution Internet The installation set-up is supplied on CD-RW. The installation set-up, software updates, libraries and documentation are also available from www.eliwell.com subject to registration with the Restricted Area (see Technical Support). Make sure an Internet connection is available for access to software and manual documentation. 1 For all: other languages not explicitly tested 2 available in the installation package 3 For Evolution it is also possible to use a RS232 port by means of a RS232/RS485 converter. For Smart (/S versions only) it is possible to use the RS232 port by means of RS232/RS485 converter with maximum speed 19200 baud. TTL cannot be used in this case. 4 see Connection 5 FREE Smart does not need to be powered separately if it is connected to a PC by means of DMI. Use yellow TTL cable FREE Studio - Quick Start page 4 Installation Installing studio Run EliwellFREEStudio_xxx.exe[1] supplied by Eliwell and then follow the installation wizard as indicated in the following screenshots. 1. Click “Next” 2. Click “I accept the agreement”[2] 3. Click “Next”. When installation is complete, the FREE Studio icon will appear on the desktop. 1 2 3 5 6 4. Click “Install”. 5. Installation in progress 6. Click “Finish”. 4 Application icons Click the FREE Studio icon on the desktop to access a folder containing the following links. icon (link) Smart Panel • Evolution description Panel • Evolution icon (link) description Application development tool for Smart & Evolution Connection development tool for Evolution Device development tool for Smart & Evolution User Interface development tool for Evolution Simulation development tool for Smart & Evolution 1 2 Check the software version in advance with Eliwell Technical Support To continue with installation, you must accept the License Agreement. Carefully read the End User License Agreement (EULA) before continuing The EULA is also available on the website http://www.eliwell.com/content.aspx?id=4533 FREE Studio - Quick Start page 5 TARGET the Studio software suite is designed for use with Smart, panel and Evolution target devices. the selection of the most appropriate target for the needs of the developer is indicated in the chapter Defining hardware Requirements. FREE wAY the Studio software suite is unique for Smart and Evolution. smart Panel Evolution the entire system is named FREE way: the FREE Studio software + FREE Smart, panel & Evolution and panel hardware. FREE SMART the Smart developer will only be able to use the Application and Device workspaces[1] the Smart developer will be able to launch Application to start programming. the Smart user can use Device to download the IEC application previously compiled by the developer. From Application it will always be possible to open Device directly without having to launch the program using the FREE Studio icon. FREE pAnEL the panel developer will be able to use all workspaces[2]. the panel developer will be able to launch Connection to get started. Connection is the entry point for all development activities, from PlC programming to creation of the HMI menu and downloading onto the target[3] using Device. From Connection it will always be possible to directly open user Interface, Application and Device without having to launch the relative program using the FREE Studio icon. FREE EvoLuTIon the Evolution developer will be able to use all workspaces. the Evolution developer will be able to launch Connection to get started. Connection is the entry point for all development activities, from PlC programming to creation of the HMI menu and downloading onto the target using Device. From Connection it will always be possible to directly open user Interface, Application and Device without having to launch the relative program using the FREE Studio icon. 1 2 3 including Simulation not including Simulation the target for panel is Evp. The Evolution menus must be downloaded onto EvD and then “uploaded” from Evp as remote menus FREE Studio - Quick Start page 6 Installing DM interface (DMI)[1] Connecting the DM interface to the PC Connect the DM interface to one of the USB ports on the PC. You are advised to use the supplied USB extension lead for the connection. DM interface setup As soon as the DM interface is connected, the Windows XP®[2] operating system installation wizard will start the installation procedure. The steps to be followed are described below. 1. On the initial page, select the “No, not this time” option and click on “Next”. 2. Set the second option as indicated and click “Next”. The path you need to specify is the path of the program installation directory. 3. Click “Next” and/or search for the indicated path with “Browse”. 1 2 3 4. The operating system will prompt for confirmation to install the drivers. Click on “Continue”[3]. 5. When the operating system recognises the device (driver) as “AT90USBxxx CDC USB to UART MGM[4]”, click on “Finish”. 4 5 1 This operation must be carried out after installing Studio. Installation required exclusively for Smart 2Win 7 installation procedure: read further on. 3 ignore the warning message about compatibility with Windows XP 4 the file at90usbxxx_cdc.inf containing the driver is saved to C:\Program Files\Eliwell\FREE Studio FREE Studio - Quick Start page 7 Reading the DM interface COM port Follow the steps below to check which COM port the operating system has assigned to the DM interface. 1. 2. 3. 4. 5. Click the right mouse button on the “Resources” icon. Select the “Computer Management" option in the contextual menu. Click on “Peripherals Management" in the left window. Open the “Ports (COM & LPT)” options in the right window. Read the port setting at the end of the “AT90USBxxx CDC USB to UART MGM” string or the string giving the DM interface data. 6. In the example shown in the illustration, the setting is: COM 3. Changing the COM port setting If there are contradictions, or for any other reason, another port can be assigned to the interface, as show in the illustration below. • 1. Right-click on the COM port in question. • 2. Click on “Properties”. • 3.Select the Port settings tab. • 4. Click on the Advanced button. • 5. Change the COM port number as desired. FREE Studio - Quick Start page 8 DM interface setup WIN 7 As soon as the DM interface is connected, the Windows 7 operating system recognises the newly connected hardware. The steps to be followed are described below. 1. Once the hardware is connected, the message shown in the figure will appear: Click on the message to start the guided installation procedure 2. The screen shown below will appear: select the second option to identify the driver 3. In the next screen, select the installation path for the FREE Studio programme. Unless changed during installation, the path will be as shown in the figure. 4. Once you have selected the correct path, the screen shown below will appear: select Install this driver software anyway Win 7 32bit: C:\Program Files\Eliwell\free Studio Win 7 64bit: C:\Program Files (x86)\Eliwell\free Studio FREE Studio - Quick Start page 9 5. The screen shown below will appear, indicating that the action has been performed. 6. On completion of the process, the screen shown below will appear. To check correct installation of the driver and the port to which the hardware has been allocated, check the Windows screen shown below. FREE Studio - Quick Start page 10 DEFInInG hARDwARE REQuIREMEnTS Smart SMALL AppLICATIonS FREE Smart was designed for small plants and in particular for Manufacturers of: • A.t.U.s (Air treatment Units) • Chillers & Heat Pumps • Rooftops • Compressor Rooms Installers/integrators of: • Air systems • Hydronic systems • Combi systems (air/water) FREE SMART SELECTIon CRITERIA the FREE Smart models are available in both a DIN rail-mounted version, which significantly reduces wiring times, or in the regular Eliwell 32x74 format for panel mounting. FREE Smart SMp has 2 models, giving you 6 digital inputs, up to 5 relay outputs, a tRIAC output, 2 PWM analogue outputs, 3 configurable 0…10V/0…20mA/4…20mA analogue outputs and an Open Collector digital output for an external relay. the standard Eliwell 32x74mm format ensures versatility and ease of installation. FREE Smart SMD – SMC comes in a variety of models, giving you 6 digital inputs, up to 5 relay outputs, up to 2 tRIAC outputs, up to 2 PWM analogue outputs, up to 3 configurable 0…10V/0…20mA/4…20mA analogue outputs and up to 2 Open Collector digital outputs for an external relay. the 4DIN format guarantees maximum flexibility and easy installation. It runs on 12-24V~ or 12-24V~/24Vc power supplies. For further details, see the FREE Smart installation manual. FREE Smart SMD4500 – SMC4500/Espansione SME4500 have removable connectors both for the low voltage inputs and the relay outputs. Has different models, giving you up to 2 digital inputs, 4 relay outputs, up to 2 PWM Open Collector analogue outputs, up to 2 0…10V/0 analogue outputs, one configurable 20mA/4…20mA output or, as an alternative one 0…10V output on dedicated models. the 4DIN format guarantees maximum flexibility and easy installation. 100-240V~ power supply ConTInuITY wITh EnERGY FLEX [1] FREE Smart inherits from the Energy Flex series the characteristics of the I/O and the electrical connections of the various models, to be combined with the corresponding expansions and keypads. the two platforms also use the same accessories. FREE Smart also inherits from the Flex series the interface with the standard Modbus RtU in serial communication and the possibility of downloading parameter maps and applications via MFk. 1 note that continuity with Energy Flex DoES noT include the applications. The applications (e.g. Air Treatment units) are developed by Eliwell and available for download from the site. visit the site and/or contact Technical Support for further details FREE Studio - Quick Start page 11 Smart SELECTInG An InTERFACE Smart 12-24va/c /24vc is available in 3 versions: sMP for panel mounting and sMD/sMC for DIN rail mounting. SMp 32x74 SMD 4DIn with display SMC 4DIn without display the IEC application created by Application can be loaded on every version. Menu navigation is identical for all models. the sMP and sMD models have a 7-segment, 4-digit lED display. the sMC model has no display so you need a remote terminal for configuration in the field. For a description of the keys, user interface and connections, refer to installation manual 9MAx0036[2] Smart 100-240va is available in 3 versions: sMD/sMC4500 with DIN rail mounting and I/O sME4500 expansion module with DIN rail mounting: SMD4500 4DIn with display SMC4500 4DIn without display SME4500 4DIn expansion without display l’applicativo IEC creato da Application può essere caricato indifferentemente su ciascuna versione. the IEC application created by Application can be loaded on every version. Menu navigation is identical for all models. the sMD models have a 7-segment, 4-digit lED display. the sMC model has no display so you need a remote terminal for configuration in the field. For a description of the keys, user interface and connections, refer to installation manual 9MAx00363 2-3 (x = 0: IT; 1: En; 2: FR; 3: ES; 5: DE) FREE Studio - Quick Start page 12 Smart Selecting optional smart modules Some of the accessories used by Smart are listed below: • • • • SKP 10 terminal 32x74 SKW22 terminal with LCD display without backlighting SKP22 terminal with LCD display without backlighting SKP22L terminal with LCD display with backlighting SKW22L terminal with LCD display with backlighting expansion modules (various models available) SE600 4DIN without display The SKP 10 remote terminal for panel mounting has the same interface as the main Smart module. The SKW22 remote terminal for wall-mounting has a dedicated interface with LCD display with or without backlighting. For further details, see installation manual 8MAx0218[3] The SKP22 remote terminal for panel mounting has a dedicated interface with LCD display with or without backlighting. For further details, see installation manual 8MAx0218[4] The SE600 expansion modules - available in various models - have I/O similar to those of SMD For details of connections and further modules and accessories, see installation manual 9MAx0036[5] 3-4-5 (x = 0: IT; 1: EN; 2: FR; 3: ES; 5: DE) FREE Studio - Quick Start page 13 CoMpLEX AppLICATIonS FREE Evolution was designed for medium and large plants and in particular for Evolution Manufacturers of: • A.t.U.s (Air treatment Units) • Chillers & Heat Pumps • Rooftops • Compressor Rooms Installers/integrators of: • Air systems • Hydronic systems • Combi systems (air/water) FREE EvoLuTIon SELECTIon CRITERIA EvD EvC FREE Evolution models are available in the 8 DIN rail-mounted version, with display (EvD model) or without display (EvC model), both supplied with removable screw terminals for quick and easy installation. FREE Evolution EvD/EvC comes in a variety of models based on which you can mount 9 digital inputs, up to 7 relay outputs, 5 configurable 0…10V/4…20mA analogue outputs the /u models are also equipped as standard with one UsB port and one mini UsB port the 8DIN format guarantees maximum flexibility and easy installation. 24V~/c or 48Vc power supply For further details, see the FREE Evolution installation manual 9MAx0042[6] 6 (x = 0: IT; 1: En; 2: FR; 3: ES; 5: DE) FREE Studio - Quick Start page 14 Selecting optional modules and Evolution accessories Some of the accessories used by Evolution are listed below: EVK1000 terminal FREE Evolution EVE expansion wall mounting EVK1000 EVS plug-in • FREE Evolution EVD comes with a built-in graphics user terminal whilst FREE Evolution EVC has no display and must be connected to a remote EVK1000 graphics terminal for the configuration of BIOS parameters • EVK1000 is available in the panel mounting version: a special backplate, available as an accessory, enables it to be wall mounted • Integration into industrial systems, BMS and Ethernet networks is permitted thanks to the plug-in EVS modules, available in 2DIN format, that connect quickly and intuitively to the main modules The FREE Evolution EVE expansion module, without display, has the same format and the same I/O as the main module. FREE Studio - Quick Start page 15 FREE panel selection criteria EVP3300/C EVP3500/C/RH Panel wall mounting backplate FREE Panel (EVP) modules are available in the panel mounting version: a special backplate, available as an accessory, enables them to be wall mounted There are two FREE Panel (EVP) models 1. FREE Evolution EVP 3300/C is equipped with CANopen, RS485 Modbus RTU and ETHERNET Modbus TCP serial, 3 inputs (1 on-board NTC + 1 remote configurable NTC/DI +1 remote current/voltage configurable input) 2. FREE Evolution EVP 3500/C/R is equipped with CAN, RS485 and ETHERNET serial, 3 inputs (1 on-board humidity module + 1 on-board NTC + 1 remote configurable NTC/DI) EVP comes with a built-in 128x64px graphical user terminal 24V~/c or 48Vc power supply For further details, see the FREE Panel installation manual 9MAx0046[7] 7 (x = 0: IT; 1: EN; 2: FR; 3: ES; 5: DE) FREE Studio - Quick Start page 16 Connectivity The fundamental characteristic of Evolution is its wide connectivity FREE Panel (EVP) can be used as a system controller, with gateway functions; used in combination with the FREE Evolution and FREE Smart or third-party controllers it guarantees high performance in terms of memory, connectivity and user interface as well as straightforward programming, maintenance and servicing. FREE Panel models are all available with CANOpen RS-485 and ETHERNET as standard. EVP can be used to: • manage a local menu created with FREE Studio User Interface • manage up to 10 remote menus, created with FREE Studio User Interface and uploaded from the respective FREE Evolution devices connected to the network • share network variables (binding) EVD/EVC models are all available with CANOpen as standard. Integrated RS485 or MPBUS serials are also available as standard, depending on the model. Each EVC/EVC model can be connected to 12 EVE expansion modules via CANOpen or RS485 serial. Integration into industrial systems, BMS and Ethernet networks is permitted thanks to the plug-in modules, available in 2DIN format, that connect quickly and intuitively to the main modules. Each Evolution can be connected to up to two terminals to view the integrated machine display. Using the RS485 network, a Smart system acting as a slave can be connected in a network in which Evolution acts as master. The EVK1000 terminal is available with CANOpen as standard. The EVK1000 terminal can read menus from EVD/EVC Integrated RS485 or MPBUS are also available as standard, depending on the model. FREE Evolution and FREE Panel are WEB-enabled, giving machine manufacturers and system integrators full remote access. Having a web-based connection in machines significantly reduces support and maintenance costs by minimizing call-out charges. End users also benefit, as they can monitor their own systems both locally and from a distance, using the easy-tounderstand graphics interface browser of a smartphone, tablet or PC. Main WEB functions • Web-based access. • Remote reading and support. • Local and remote system control, including alarm management. • Preventive and predictive maintenance. • Email alarm alerts. • Latest-generation system interface on PC, tablet and smartphone WEB SERVER : Learn more by reading 9IS24252_Web_ApplicationNotes FREE Studio - Quick Start page 17 Applications Applications and object libraries for the FREE Way platform are available on the Eliwell website[1] The applications and object libraries will help to speed up your work even more, making FREE Studio even easier to use. Smart applications You can download, for example, different applications for UTA, that differ in terms of the complexity of the machines that they can control, from simple units with single air channel and single battery to more complex units with dual channel, multiple batteries and recuperator. These applications, in addition to being ready to use, conform to architecture rules and can therefore be modified easily to meet more specific or particular needs. Smart documentation The same section of the website also contains documentation: Architecture or Developer Manual Developer Manual with architecture rules, aimed at developers User Manual User Manual for individual application 1 at the address (visible after registering and/or logging into the restricted area) http://www.eliwell.com/filedownload.aspx?id=20151 FREE Studio - Quick Start page 18 Evolution applications you can download, for example, application AHU03 for UtA, complex units with dual channel, multiple batteries and recuperator. this application, in addition to being ready to use, conform to architecture rules and can therefore be modified easily to meet more specific or particular needs. Evolution documentation the same section of the website also contains documentation: Architecture or Developer Manual Developer Manual with architecture rules, aimed at developers (for both smart & Evolution) user Manual User Manual for individual application AHU03 FREE Studio - Quick Start page 19 Application panel definitions The Application work environment has various sections for developing the IEC application, e.g. programming in IEC 61131-3 compatible language, testing, debugging and IEC application downloading to the target device. N.B.: Application only downloads the IEC application. Parameters (BIOS and PLC) and their default values are downloaded by Device and not by Application. The sections (panels) are listed below: A B E C D F G H Section Panel Name / Section Panel Description Application A / Tool bar B / Variables FREE Studio - Quick Start page 20 This section shows the work tools in the form of icons. To display or hide the toolbars, simply right-click and select or deselect the desired tools. Some tools can be selected by means of key combinations (shortcuts). See relevant chapter for details The global and local variables of the code displayed in section D “Edit” (programs, function blocks and functions) appear in this section Section Panel Name / Section Panel Description Application The Project panel is divided into 3 tabs: • Project - for managing the application code • Definitions - for managing and defining complex variables defined by the developer • Resources - for managing the target device menu C Project Project D / Edit E Watch Display variables with application running This panel enables you to manage variables debugging by displaying their status in numerical format when the application is running and connected to the target device Display variables graph Like the Watch panel, this panel enables you to manage variables debugging by displaying their status in graph format when the application is running and connected to the target device Functions library This tool enables you to manage default functions libraries or functions libraries created by the developer. The panel is divided into various tabs, one for each library. The tabs relating to the following are always available: • Operator and standard blocks: standard operators (AND, OR, etc) • Target variables: specific variables of the target device • Target blocks: specific functions of the target device Any additional tabs are managed by means of the dropdown menu Project > Library manager F Oscilloscope G H Library Output Messages This section enables you to write the program This panel shows the messages relating to the development of the project (file opening, compilation errors, status of connection to target device, etc.) Note: the connection to the target device is also visible in the bottom right of the screen by means of coloured messages (see Application Download) The panels appear or remain hidden (see Shortcuts) and can be organised as the user wants in terms of size and layout. Studio saves the last settings made ICONS The work tools are available via the drop-down menus or shortcuts Panel A shows a series of icons that help the developer to create the application. The toolbars are displayed via the menu View > Toolbars Below are the most frequently used icons in the Main and Project toolbars Main Toolbar Project Toolbar The icons are self-explanatory. Apart from the first few icons, which are very similar to standard icons (Open project, Save project, Copy, Paste etc.) there are icons with letters above them: FREE Studio - Quick Start page 21 Toolbar Function Function Shortcut F Main Full screen Full Screen CTRL+U W Main workspace workspace CTRL+w O Main show/hide messages panel output CTRL+r L Main show/hide library panel library CTRL+l Wa Main show/hide watch window watch window CTRL+t A Main show/hide asynch graphic window asynch graphic window CTRL+k C PROJECT compile selected project only COMPILE F7 Ca PROJECT COMPILE ALL - Yes PROJECT Open “simulator” See Simulation chapter SIMULATION MODE - Co PROJECT connects to the target CONNECTS TO THE TARGET F5 Dc PROJECT Download code Download code - Ins PROJECT Insert record (variable, constant, alarm etc.) INSERT RECORD - Del PROJECT Delete record DELETE RECORD - compile all projects Project panel Detailed display of Panel C / Project[1] Project tab 1 view for Smart FREE Studio - Quick Start page 22 Definitions tab Resources tab Getting started Smart First Start-up [1] 1. Click on the Launch FREE Studio icon on your Desktop 2. Click on the FREE Studio Application icon. 1 2 The program appears as shown in the picture: You can now: • Create a new project “New Project ...” • note that the program suggests selection of the Smart, Evolution or Panel target • in this case select FreeSmart • the numbers at the side indicate the firmware version (screen) • Open an existing project “Open project …” • Open recent projects “Open an existing project ...” by selecting from a list Existing projects have the extension .ppjs The IEC application is made up of one project and one or more programs written in IEC code. 1The word “Smart” at the start of this chapter indicates that the Application tool is available for Smart. All tools (including Application) are available for Evolution. For Evolution you are advised - for First Start-up and Creation of a new program - to always start from the Connection tool (see relevant chapter) FREE Studio - Quick Start page 23 Creating A New Project • • Click New Project ... or select File > New Project from the drop-down menu[2] The dialogue box shown below appears, in which you can create, name and save a new project: New Project The new project appears as shown in the figure: • • • For a description of the icons, see Shortcuts A description of the programming languages is available in the Online Help - see “Support” The panels in the standard development environment are described in the next chapter The pages that follow explain how to create, develop and test a new application, with simple examples of libraries, function blocks and elementary programs. 2 The figure shows an example of a project for Smart. The same procedure applies for Evolution. Exceptions will be pointed out as appropriate. However you are advised in this case to always start from the Connection tool and to follow the procedure described in the relevant chapter FREE Studio - Quick Start page 24 Creating a New Program [3] Project Panel/Programs Folder. Right-click and select New Program. Every project contains by default the program main. Selecting the IEC language The following dialogue box appears: New program in ST language Select the desired programming language and enter a name. The FREE STUDIO platform is compatible with all 5 standard programming languages (IEC 61131-3). ST var2:=var2+1; if (var2=200) then var2: =0; var1: =not var1; counter: =counter+1; if (DI2=TRUE) then out1: =counter and 5; out2: =counter and 7; out3: =counter and 12; else FBD . . . . . . . . . . . . . . . . .N . . . . . . . . . / . . . . . . .En2. . . . . . .En3. . . . . . . . . . . . . . . . . . . . . . . . . .MAX. . . . . . . Main In2 . . . . . . . . . . . . . . . . . . . . . . . . IL . . In1 . . LD . . Start En1 . ld st ld st cal true blinker.run true blinker.run trigger ld true st blinker.run cal trigger . SFC . . . . . . . . . Init. . . . . . . . . . . . . . . . . SW1 . . . . . . . . . . . . . . . . . . . . . . . . . Step0 Each project may consist of several programs. The developer may use one or more languages in the same project. Each new program actually offers the choice of 5 programming languages, 2 text-based and 3 graphics-based: • ST, Structured Text text language text • FBD, Functional Block Diagram language graphical • LD, Ladder language graphical • IL, Instruction List language text • SFC, Sequential Function Chart language graphical Opening an existing program If the developer already has an existing IEC application, simply open a .ppjs project from the menu File > Open Project or select it from the list. 3 Creating a new program FREE Studio - Quick Start page 25 Writing a program In the Edit panel, write the program that you intend to develop. The elements of the development tools are presented generically below. The appendix give some examples of simple programs which you can use to create a basic, functioning project Project PANEL / Project TAB Creating local variables Using the drop-down menu, select Variables > Insert (new record) or click on the respective icon The variable appears in yellow in the central section, and you can define its characteristics by clicking on the respective boxes. Where multiple choices exist, you can choose from a set of options by clicking on the three dots (…). a dialogue window will open • Name • Type, to choose from one of the preset options or variables defined by the user (see picture) • Address: the default setting is automatic • Array: defines whether the variable is array type (if so, define its dimension) or not • Init value: initial value • Description In the navigation tree below the program folder, the local variables will appear, identified by an icon Note: The local variables are NOT static Creating a function block/function In the same way as we create a program, it is possible to create • a function • a function block in the desired programming language. Note: Creating functions is available in 4 programming languages. SFC language is not supported for functions. A function or function block is a (sub)program with inputs and outputs: • a function requires n inputs and a single output (RESULT) with the same name as the function. The function's local memory is initialised each time the function is called • a function block requires n inputs and m outputs. The local memory of each instance of the function block is kept between one call and the next (static memory) Each function or function block can be used within a program simply by dragging and dropping the icon into the Edit section of the program. The function is used within the program by passing the input variables. FREE Studio - Quick Start page 26 The function block is used within the program as an instance in the same way as the declaration of a variable. example in ST language of call to function and function block. Creating global variables The navigation tree contains the folder Global Variables From here you can create new • Global variables • Mapped variables • Constants • Retain variables[4] Shared global resources The shared global resources will appear in this section but will be defined in the Resources panel. 4 not currently supported on Smart and Evolution targets. FREE Studio - Quick Start page 27 Associating a program to a task For a program to run, it must be associated to a task. There are various types of task: • BOOT Task runs once only at system start-up • Init. Task runs each time the application is downloaded • Timed. Task runs at regular intervals which can be set by the developer. The default setting is every 100ms • Background. Task runs with low priority after the Timed tasks (between the end of one Timed task and the start of the next). Note Each new project has the main program associated to the background task (the main program can still be eliminated and/or associated to other tasks). To activate a task, go to the task you want, right-click and select Add program Project PANEL/Resources tab The Resources tab enables you to define the EEPROM parameters and status variables which may then be used in the application code (they will appear in the section Project>Global Shared) and allows you to construct the menu Prg (Programming), the menu Set Status[5] and Alarms of the FREE Smart/Evolution target as well as the interface of the current project, which will be displayed in FREE Studio Device The Resources tab includes the following sections: Modbus Objects This section enables you to define EEPROM parameters and variables, which can be displayed on the target, Device and read using the Modbus® RTU protocol For all sections, it is possible to add or remove parameters/variables in the same way as for variables in the Project tab Smart EEPROM Parameters This section is for creating the variables which the developer intends to save even if the power to the target device is switched off. Note: the user of parameters in the code is read-only; to write, use the appropriate functions of FREE Smart. Status Variables In this section we define the status variables which can be displayed in the menu of the target device. Each variable will have a transcoding on the instrument due to the 4 digit / 7-segment display. In the Display label box, you can select the transcoding and see a preview of how it looks on the display by clicking on the 3 dots (…) Note: some letters will not be displayed (e.g. x and z) so there will be a blank space on the display. If the display label is zzz, nothing will appear on the display. If the display label is SET, SEt will appear on the display. 5 only for Smart. See Installation Manual 9MAx0036 (x = 0: IT; 1: EN; 2: FR; 3: ES; 5: DE) For Evolution the Menu is defined from UserInterface FREE Studio - Quick Start page 28 Panel • Evolution EEPROM Parameters Same as Smart Status Variables In this section we define the status variables which can be displayed in the menu of the target device. Smart • Panel • Evolution In the target column, only columns that are visible from the Smart, Panel or Evolution target are indicated. Refers to both unless indicated target column IPA address Smart resource Modbus® address resource name which may be used by the developer in the IEC application code display label name displayed in the application menu of the target (4-digit) Device Type type of data displayed on target and Device Format Application Type Smart pre-assigned index Name Default Value /Min/Max Panel Evolution Description minimum/maximum default values of the resource displayed on target and Device display format for Default Value /Min/Max e.g. XXX.Y display of whole number with decimal point type of data used in IEC application code Scale/Offset conversion coefficients between Device Type and Application Type Application Type = scale* Device Type + offset Size Significant only in the case of STRING type. Dimension (Length) of the string. Default and max= 31 characters Unit unit of measurement of Device Type displayed on Device and if available with icon on target Access Level Read only Description/Note See Visibility table. This column does not apply to Evolution enables/disables editing of Status variables. free text displayed on Device FREE Studio - Quick Start page 29 Enums In this section we define the types of additional variable which can be used in the Device Type[6] column BIOS parameters In this section we define any variations in the default BIOS parameters map which is factory-set by Eliwell Smart target menu The target menu consists of a BIOS menu + an Application menu. The BIOS menu is factory-set[7]. The table below defines the main functions of the keys / LEDs of the target device. key press Description F5 short switch from BIOS menu to Application menu and vice versa F1 or F3 short navigate folders and edit values F2 short cancel operation (ESC function) F4 short access to set menu F2+F4 short access to Prg menu F1/F2/F3/F4 long managed by developer (by means of target variable sysKeyFunctions[]) The LEDs are managed by the developer by means of target variable sysLocalLeds[]) Prg menu[8] In this section we define the Prg Menu and the folders/variables of which it is composed. The Prg Menu can consist of one or more folders, defined by the developer, into which are inserted • EEPROM parameters • Status variables • BIOS parameters • inputs and outputs Set menu[9] In this section we define the Set Menu and the folders/variables of which it is composed. The set menu is created in the same way as the Prg menu. The set menu contains the AL folder - see below. Visibility of menu resources The visibility of the resources created by the developer is indicated in the following table: Access Level column visibility on Device visibility on target always visible Always visible YES YES Level 1 Level 1 YES Yes level 1 Level 2 Level 2 YES Yes level 2 never visible Never visible YES NO never visible Never visible YES Visible in the folder ALL PARAMETERS NO Notes object assigned to a Prg or set menu object NOT assigned to any Prg or Set menu Alarms It is possible to define alarm variables whose status must be managed by the developer. If the variable assumes a value other than zero, the label will be displayed in the Alarms folder (AL) of the set menu in FREE Smart In the Evolution target it is only a Global type USINT declaration 6 7 8 9 see EEPROM parameters and Status Variables table see installation manual the elements entered in the table in this section will be displayed on Device the elements entered in the table in this section will be displayed on Device FREE Studio - Quick Start page 30 FREE Smart configuration From the Resources tab, click on FREE Smart to access the following panel FREE Smart Configuration. Using the drop-down menu you can set the value of the variable / parameter you intend to show on FREE Smart as the main display (Fundamental state display). If you set no value (none) the message PLC will be displayed. The values available are all the I/O[10] + the values defined by the developer in the Set menu. Execution time From the same panel it is possible to set the execution time of the project in milliseconds (ms). The default setting is 100 ms. The available range is from 20 ms to 100 ms[11]. I/O mapping In this section we define the links between variables and physical I/O of FREE Smart. • Local: local variables of the SMD/SMC base module • Extended: variables of the SE expansion module • Remote: variables on the SKW/SKP terminals Evolution target menu The target menu must be created by means of the UserInterface. The BIOS menu is factory-set[12] and is visible from Device. The main functions of the keys/LEDs of the target device can be programmed by means of the UserInterface[13] Menus In this section we define a “dummy” Menu that does not appear on the display and the folders/variables of which it is composed. The Menu can consist of one or more folders, defined by the developer, into which are entered • EEPROM parameters • Status variables Alarms The alarms for Evolution are only defined to enable the portability of a Smart project. 10 11 12 13 the I/O are all the local and remote inputs and outputs, including those of the terminals. See installation manual for details See also the section on Associating a program to a task see installation manual LEDs also programmable from Application FREE Studio - Quick Start page 31 FREE Evolution configuration From the Resources tab, click on FREE Evolution to access the following panel FREE Evolution Configuration. Execution time From the same panel it is possible to set the execution time of the project in milliseconds (ms). The default setting is 20 ms. The available range is from 20 ms to 100 ms[14]. I/O mapping In this section we define the links between variables and physical I/O of FREE Evolution. • Local: local variables of the EVD/EVC base module • Field: variables and/or binding of third-party controllers Note If correctly defined[15], all the variables defined inResources will automatically be located in the Global Sharedsection. Panel FREE Panel configuration From the Resources tab, click on FREE Evolution EVP to access the following panel FREE Evolution Configuration. 14 15 See also the section on Associating a program to a task the project must be saved without errors for the variables to be visible in the Project tab in Global Shared FREE Studio - Quick Start page 32 Execution time From the same panel it is possible to set the execution time of the project in milliseconds (ms). The default setting is 20 ms. The available range is from 20 ms to 100 ms[16]. I/O mapping In this section we define the links between variables and physical I/O of EVP[17]. • Local: local variables of EVP • Field: variables and/or binding of third-party controllers Analogue Inputs Note that the presence of the inputs depends on the model input probe type EVP3300/C EVP3500/C/RH AIL1 on-board on-board NTC 4 4 AIL2 remote not included configurable NTC 103AT/NTCNK103/DI 4 4 AIL3 remote not included configurable 4...20mA/0-5V/0-10V 4 - AIL4 on-board on-board %RH - 4 Note If correctly defined,[18] all the variables defined in Resources will automatically be located in the Global Shared section. 16 17 18 See also the section on Associating a program to a task in reality EVP has only 4 analogue inputs AIL1...AIL4 and no output the project must be saved without errors for the variables to be visible in the Project tab in Global Shared FREE Studio - Quick Start page 33 Managing projects Saving projects Once you have completed the project you can save it in various forms and send it to third-party Developers or Users. File types Target File type Application Description Smart .PPJS Application Project created with Application to be opened with Application Panel Evolution .PPJS Application Connection Project created with Application that can be added to an Evolution/Panel device with Connection .PLL Application Library created by the developer to be used in Application or Device .RSM Application Compressed .PPJS project Panel Evolution .PAJX User Interface Project created with UserInterface to be opened with UserInterface Panel Evolution .PPJX User Interface Same as .PPJS. Shared projects Smart .CFN Device Project created with Application to be opened with Device Note. The source code is not available but the project can be downloaded to the target device Panel Evolution .CFN Device Project created with Application or Connection to be opened with Device. If the device is created with Connection it will contain both the PLC application and the HMI menu Note. The source code is not available but the project can be downloaded to the target device Transferring projects and files The table below shows several operations involving the transfer of projects from one developer to another or from a developer to a user. The data transfer involves the sending of one or more files defined in the previous section Project The developer wants to transfer a project to another developer. The developer sends a .ppjs file From -->To Application File type Developer Application .PPJS Application Device .PPJS Developer The developer who receives it can open and edit it with Device Application; The developer connects to the target, and compiles and downloads the application. The developer sends a .ppjs file to another developer The developer who receives it can open and edit it with Application; The developer connects to the target device and compiles the application. After compilation, the developer selects the menu heading Developer > Open with FREE Studio Device and configures the target device BIOS (parameterisation of the target device) FREE Studio - Quick Start page 34 Developer Developer Notes Project From -->To Application File type The developer wants to transfer a project to a user The developer sends a .CFN file The user who receives it can open it with Device; The user connects to the target device, downloads the application and configures the target device BIOS (parameterisation) Developer Device .CFN The developer wants to debug an IEC application already present on the target device but does not have the source code. The developer receives the entire project folder (which includes the binary files and debug symbols) used for downloading the IEC application onto the target device. Note: the project has not been modified (no modification to the source and no recompilation and/or download) Developer Application project folder User Notes From Device the user CANNOT compile the application Developer FREE Studio - Quick Start page 35 Connection Smart To download the IEC applications of Studio from the personal computer to the Smart target device, several additional modules are necessary. The tables below show possible operations: Multi Function Key/DMI PC MFK USB Multi Function Key MFK Smart TTL TTL DMI Multi Function Key Direct PC USB TTL DMI Multi Function Key Smart free Smart free Smart use blue TTL cable for DMI - MFK connection direction Data downloading Use yellow TTL cable for MFK - target connection direction Data downloading Data downloading Parameter map - - Parameter map IEC application - IEC application BIOS - BIOS Use yellow TTL cable for DMI - target connection direction Parameter map - IEC application - - BIOS - Note: in “Direct”, Smart must not be connected to earth For a complete description of the use of the MFK, refer to Application Notes MFK code 9IS24233 EN-IT Evolution To download the IEC applications of Studio from the personal computer to the Evolution target device, several additional modules are necessary. The tables below show possible operations: USB USB Host Evolution PC USB device Evolution PC USB-RS485 USB-CANOpen ETHERNET Evolution USB USB RS485 FREE Evolution USB/RS485 FREE Evolution USB CAN FREE Evolution USB/CAN direction direction Parameter map - - IEC application Data downloading Parameter map IEC application Data downloading HMI application HMI application Data files Data files BIOS - BIOS - - Note: connection via ETHERNET requires the specific EVS plugin module FREE Studio - Quick Start page 36 ETHERNET FREE Evolution + Plug-in ETH direction Parameter map IEC application - HMI application - Data files BIOS - Data downloading Panel To download the IEC applications of Studio from the personal computer to the Panel target device, several additional modules are necessary. The tables below show possible operations: USB-RS485 USB-CANOpen ETHERNET PC Evolution USB RS485 FREE Panel USB/RS485 USB CAN FREE Panel USB/CAN ETHERNET FREE Panel direction Parameter map IEC application - HMI application - Data files BIOS - Data downloading Note: connection via ETHERNET does NOT require any additional module FREE Studio - Quick Start page 37 DOWNLOAD IEC application onto TARGET Connection and application downloading operations for Smart and Evolution are different. The connection procedures are illustrated below (see relevant paragraph) • Network for Smart • USB-R85 for Evolution The actual download adopts the same procedure for both targets Smart Preliminary operations In order to download the application correctly, the user must: 1. connect the DM hardware interface to the PC. 2. Make sure that the driver has been installed - see DM interface Set-up. COM settings[1] From the drop-down menu, select Communication > Settings The COM port must previously have been read/set in “Peripherals Management” (see Reading the DM interface COM port) for it to be recognised. If there are errors, refer to the paragraph “DM interface connection error”. For Smart select EWDMI or Modbus[2]. If the protocol is not activated press the Activate button The value selected for the COM port will be saved and will reappear each time the program is accessed, until it is changed. The properties are visible and can be edited from the panel Communication > Settings > Properties[3] 1 2 3 the COM settings must be set on all of the workspaces: Application, Device and UserInterface in the case of Modbus for /S models only with maximum speed 19200 baud. TTL not for use. obviously, the protocol must be activated beforehand FREE Studio - Quick Start page 38 DM interface connection error Error opening serial port If the “Error opening serial port” message appears, proceed as follows: 1. Check that the COM port setting in the program is the same as one read in the COM port reading by the DM interface. 2. If they are the same, physically disconnect and reconnect the DM interface from the USB port. This should make the operating system recognise the interface. 3. Repeat the DMI Detection function. Smart TARGET Smart has certain parameters in the CF folder for managing the connection between the target and Studio If the target is “empty”[4], e.g. there is no IEC application on the device, Smart will display the message FrEE: F2 F1 F2 F1 esc F5 esc F5 F5 set F3 1 2 3 4 5 6 7 set F3 F4 To view the parameter menu, press the Esc and Set keys at the same time. This will open the PAr menu. 1 3 2 4 5 6 set F3 F4 7 The parameters menu PAr contains all controller folders. Press the set key to view folders. F2 F1 3 4 5 6 7 5 6 F4 7 F2 esc F5 set F4 The first parameter shown is CF30. To view the value of the parameter press the set key. 4 F1 F5 set 2 3 2 esc F5 1 1 The first folder shown is the CF configuration folder. Press the set key to view the folder parameters. F2 F1 esc F3 F2 F1 esc F3 1 2 3 4 5 6 set F3 F4 7 Use the UP and DOWN keys to change the value if necessary. To confirm the value press the set key. To exit press Esc 1 2 3 4 5 6 7 F4 Use the UP and DOWN keys to scroll the other parameters and repeat the procedure to view the values and if necessary - edit them. Parameters needed for correct connection between the Smart target and Studio.[5] parameter description CF01* select COM1 (TTL) protocol CF30 Modbus protocol controller address values 0 = Eliwell 1 = Modbus default visibility notes 1 2 Must be set to 1 1...255 1 3 0,1, 2 = not used Check that the set 3 = 9600 baud values correspond to 4 = 19200 baud CF31** Modbus protocol baud rate 3 3 those defined by the 5 = 38400 baud panel 6 = 57600 baud Communication > 7 = 115200 baud Settings > Properties 1= EVEN Modbus protocol controller CF32 2 = NONE 1 3 parity 3 = ODD *COM1 = TTL / RS485 (/S models only): cannot be used simultaneously 5=38400 baud (RS485: not supported) **CF31 6=57600 baud (RS485: non supported) 7=115200 baud (RS485: non supported) 4 5 otherwise (IEC application exists on Smart) the message PLC will appear on the display. Simultaneously press the UP and DOWN keys to view the message FrEE for other parameters and to manage visibility levels see the Smart installation manual FREE Studio - Quick Start page 39 Evolution COM settings[6] The settings are identical to those given for Smart: panel Communication > Settings For Evolution EWDMI must NOT be selected • • • Select CAnOpen in the case of USB/CAN connection Select Modbus in the case of USB/RS485 connection Select Modbus TCP in the case of Ethernet connection using the relevant plug-in If the protocol is not activated press the Activate button Also in this case, the properties are visible and can be edited from the panel Communication > Settings > Properties. Communication > Settings > Properties[7]. The panel displayed depends on which protocol is activated: CANOpen ModBus ModbusTCP/IP Modbus TCP The IP or Hostname field is for entering either an IP address (the default setting for Evolution is 10.0.0.100) or a hostname on a local network if the router (static IP) is configured accordingly The TCP/IP communication Port field is set by default to 502 6 7 the COM settings are valid on both Application and Device obviously, the protocol must be activated beforehand FREE Studio - Quick Start page 40 Modbus TCP/IP • • • • • Connect the PC Ethernet cable to FREE Evolution Double click on the PC icon at the bottom to the right of the application bar. Select TCP protocol and click on Properties Configure the Ethernet port of your PC with the address shown in the picture (10.0.0.101). Note: The default Evolution configuration is 10.0.0.100: the PC Ethernet port will thus be configured with an address different to the default address (e.g. 10.0.0.101, the first 3 fields must be the same, the fourth different) Click on ok: the PC is configured to dialogue with FREE Evolution via the Ethernet port. EVOLUTION TARGET Evolution has a number of BIOS parameters for managing the connection between the target and Studio but, unlike Smart, it does not have a default menu shown on the on-board or remote display[8]. Therefore in order to view the parameters you need to open Device Parameters needed for correct connection between the Evolution target and Studio[9]: The two protocols available on-board are shown. For the protocols available on the plug-in module, see the installation manual. On-board RS485 parameter description Baud_RS485_OB Modbus protocol baud rate On-board Addr_RS485_OB On-board RS485 serial address Proto_RS485_OB Databit_RS485_OB Stopbit_RS485_OB Parity_RS485_OB 8 9 On-board RS485 protocol selection RS485 data bit number On-board On-board RS485 stop bit number On-board RS485 protocol parity values 0=9600 baud 1=19200 baud 2=38400 baud 3=57600 baud 4=76800 baud 5=115200 baud default 2 1...255 1 2 = uNET 3 = Modbus/RTU 3 8 1= 1 stop bit 2= 2 stop bit 0= NULL 1= ODD 2= EVEN notes The actual address is determined by the sum of this value + the value of the DIP switch Fixed at 8 1 2 Eliwell provides examples of HMI menus for configuration of BIOS parameters for other parameters see the Evolution installation manual FREE Studio - Quick Start page 41 On-board Ethernet parameter description Baud_CAN_OB CAN protocol baud rate On-board Addr_CAN_OB On-board CAN serial address values 2=500 Kbaud 3=250 Kbaud 4=125 Kbaud 5=125 Kbaud 6=50 Kbaud default notes 2 1...127 1 The actual address is determined by the sum of this value + the value of the DIP switch PASSIVE ETHERNET PLUGIN For the protocols available on the plug-in module, see the installation manual. Here, we note only the following points: Note: The ETHERNET passive plug-in configuration parameters involve the configuration of the TCP/IP communication port (e.g. 502), the IP address, the gateway and the subnet mask The “Default Gateway” and “Net mask” parameters are of no significance in the local point-to-point network. For connections via a router the “Default Gateway” parameters must match the IP address, as in the following example: parameter Ip_1_ETH_PI Ip_2_ETH_PI Ip_3_ETH_PI Ip_4_ETH_PI description Ethernet passive Plugin IP address (1st part) Ethernet passive PluginIP address (2nd part) Ethernet passive Plugin IP address (3rd part) Ethernet passive Plugin IP address (4th part) default value parameter description 10 192 DefGtwy_1_ ETH_PI Default Gateway (1st part) 0 168 0 0 100 100 DefGtwy_2_ ETH_PI DefGtwy_3_ ETH_PI DefGtwy_4_ ETH_PI Default Gateway (2nd part) Default Gateway (3rd part) Default Gateway (4th part) range (IP & default Gateway) value 0 _ 255 192 192 0 _ 255 168 168 0 _ 255 0 0 0 _ 255 1 1 Panel COM settings The settings are identical to those given for Evolution: • Select Modbus TCP in the case of Ethernet connection[10] TARGET panel Panel has a number of BIOS parameters for managing the connection between the target and Studio The default display menu (DIA menu) A) can be viewed by simultaneously pressing the UP and ESC keys The default display menu only shows the parameters for the CAN protocol Therefore in order to view other parameters you need to open Device The available on-board RS485 and CAN protocols are the same as Evolution. The table below shows the Ethernet protocol parameters On-board Ethernet parameter IP_1_ETH_OB IP_2_ETH_OB IP_3_ETH_OB IP_4_ETH_OB 10 description Ethernet passive On-board IP address (1st part) Ethernet passive On-board IP address (2nd part) Ethernet passive On-board IP address (3rd part) Ethernet passive On-board IP address (4th part) no additional module is necessary FREE Studio - Quick Start page 42 range default notes 0...255 10 default ETH: 010.000.000.100 0...255 0 0...255 0 0...255 100 MAC address (e.g.: 0,1,2,50,60,70 IP address (e.g.: 192,168,0,150) HMI management In addition to the BIOS parameters, Panel manages the HMI menu HMI management parameter Hmi_language HMIList_current description Display language (local or remote) Current HMI values default 0 _ 65535 0 0= Remote HMI 1 1= Remote HMI 2 2= Remote HMI 3 3= Remote HMI 4 4= Remote HMI 5 5= Remote HMI 6 6= Remote HMI 7 7= Remote HMI 8 8= Remote HMI 9 9= Remote HMI 10 10 = not used 11= Local HMI notes Local HMI is identified on the display as Network In Connection as HMI 11 Remote HMI is identified In Connection as Remote HMI Remote HMI Ten remote menus are available. The menu 1 parameters are listed below. The others are the same parameter description values default HmiList_ID_1 Remote HMI 1 navigation ID list 0 _ 254 0 HmiList_Res_1 Remote HMI 1 navigation resource type 1=RTU (RS485 Modbus RTU) 2=TCP (Modbus TCP) 3=CAN (CANopen) 3=CAN 0 _ 255 0 0 _ 255 0 0 _ 255 0 0 _ 255 0 alphanumeric string, 8 characters ******** Remote HMI 1 navigation resource address for CAN, RTU and TCP (IP part 1) Remote HMI 1 navigation resource HmiList_Addr_2 address for TCP (IP part 2) Remote HMI 1 navigation resource HmiList_Addr_3 address for TCP (IP part 3) Remote HMI 1 navigation resource HmiList_Addr_4 address for TCP (IP part 4) HmiList_Addr_1 HmiList_File_1 Remote HMI navigation file 1 (DOS 8.3 uppercase format) notes e.g. CAN: 2. 500000 e.g. 485s: 1. 38400. P81 ETH: 010.000.000.100 typically the default name will be HMIREM.KBD FREE Studio - Quick Start page 43 Connecting to the target Before connecting, the bottom right of the screen displays the message NOT CONNECTED From the drop-down menu select Communication > Connect If connection is successful, the following screen (minimised) appears in the menu bar: This screen will remain present as long as the target device is connected. To interrupt the connection, repeat the Communication > Connect procedure At the bottom right of the panel is a connection palette divided into 3 sections Before connecting to the target the panel shows that there is no connection When connected to the target there are various situations shown below • • CONNECTED (in green): if the connection is established and the target application coincides with the Studio application CONNECTED (in yellow): if the connection is established and the target application does NOT coincide with the Studio application • • CONNECTED (in green): if the connection is established NO CODE (in light blue): if the connection is established and there is no application on the target • • CONNECTED (in green): if the connection is established and the target application coincides with the Studio application SOURCE OK (in green): if the connection is established and the target application coincides with the Studio application • ERROR (in red): if there is a communication error Download To download the application, simply press F5 or select Communication > Download code from the drop-down menu The following dialogue boxes will appear A. If the application is already present, you will be asked for confirmation to overwrite the previous version B. Warning message that the PLC will be reset on the target A B If you confirm with “Yes” the application will be downloaded to the target. The process may take a few seconds: the “Download in progress” window appears to show the status of the download. In the event of a connection error, the following dialogue box appears: FREE Studio - Quick Start page 44 Device panel definitions Smart The Device workspace is shown below with screenshots and descriptions for Smart. Where necessary, the differences compared to Evolution are highlighted. The Device workspace has various sections for managing an IEC application generated by a developer, e.g. FREE Smart parameter configuration, testing, BIOS updating and application downloading to the target device. Note: the source code of the application is NOT visible from Device The sections (panels) are listed below: A B C D E H F Section Panel Name / Application G Panel Description Section A / Configurator bar This section shows the work tools in the form of icons. To display or hide the toolbars, simply right-click and select or deselect the desired tools. Some tools can be selected by means of key combinations (shortcuts). See relevant chapter for details FREE Studio - Quick Start page 45 Section Panel Name / Application Panel Description Section B Project Project C / Edit panel D Catalog Applications catalogue E Connection Status F G H* According to the selection made in the Project panel, the following appear in this section: • BIOS parameters (parameters + I/O values) • parameters and variables defined by the developer in Application associated to the menu This panel shows all the applications available from the catalogue This panel shows the connection status of all the targets in the Project panel Display variables with application running This panel enables you to manage variables debugging by displaying their status in number/letter format when the application is running and connected to the target device Display variables graph Like the Watch panel, this panel enables you to manage variables debugging by displaying their status in graph format when the application is running and connected to the target device Messages This panel shows the messages relating to the development of the project (file opening, reading/writing errors, status of connection to device, etc.) Note: the connection to the target device is also visible in the bottom right of the screen by means of coloured messages (see Application Download) Watch Oscilloscope The Project panel enables you to manage one or more FREE Smart devices. Output *panel not visible at first start-up. To display it, simply check the heading in the drop down menu View > Output The panels appear or remain hidden (see Shortcuts) and can be organised as the user wants in terms of size and layout. Studio saves the last settings made FREE Studio - Quick Start page 46 field operation Smart First Start-up [1] 1. Click on the Launch FREE Studio icon on your Desktop 2. Click on the FREE Studio Application[2] icon. 1 2 The program appears as shown in the picture: You can now: • Create a new project .CFN “New Project ...”[3] • Open an existing project “Open project …” • Open recent projects “Most recent projects ...” by selecting from a list Device projects have the extension .CFN In the same project, you can add more than one drive and associate to each drive an IEC application created with Application 1the Device tool is available for Smart. All tools (including Application) are available for Evolution. For Evolution you are advised - for First Startup - to always start from the Connection tool (see relevant chapter) 2 a project can also be opened with Device from Application from the drop-down menu Developer > Open with FREE Studio Device 3 for a new project, you must add a drive listed in the catalogue by right-clicking and selecting Add. See next screenshot. FREE Studio - Quick Start page 47 A new Untitled project is empty. Simply right-click to add a new drive to the existing project in the catalogue by selecting Add. Opening the IEC application In the same way you can add the respective PLC IEC application present in the catalogue. The catalogue can contain various applications but only one can be associated to a project The IEC application will be added to the drive with name_1 Existing projects can be opened as described previously or directly from Application: the menu Developer > Open with free Device will start the Device containing the project created by the developer with the development environment Application. FREE Studio - Quick Start page 48 connecting to the target device Device requires you to connect to the target device again (click on the respective icon). The central panel shows the protocol references, address, etc. The default name of the target device is FREESmart_1[4]. When the target device is connected, you can read or write parameters. Reading parameters[5] By default, the project contains a list of the BIOS parameters and I/O values[6] with their respective default settings. From the target device, the user can read all or just some of the parameters[7] Suppose we want to read all the parameters. From the drop-down menu Parameters>Read all device parameters it is possible to read all the parameters of the connected target device. The operation takes a few seconds. If there are configuration parameters which have default values other than those present on the target device, they will be highlighted in an appropriate colour (blue[8]) Writing parameters The user can download all or some parameters to the target device, either with their default values or with modified values inserted by the user. Suppose we want to download all the CL parameters (local BIOS) and no others. Select all the parameters - drop-down menu Parameters>Select all (CTRL+A) or using the respective icon. The parameters are all highlighted in yellow. Write drop-down menu Parameters>Write selected (CTRL+SHIFT+W) (or using the icon W). All the CL parameters will be downloaded to the target device[9]. As explained in the notes, you can also download the values of the I/O variables set by the user or their default values. 4by simply using the copy/paste function, you can create a twin project FREESmart_2, change the BIOS parameters and download them to the target device or a second target device 5in reality, in this case, the term “parameter” refers to any resource present on the target device, in other words genuine parameters in their own right, I/O and variables of the application present on the target 6 the default value of the analogue inputs and outputs is 0.0; the digital inputs and outputs are set to FALSE 7 to read a parameter, simply select it with the mouse and click on the icon R. You can make multiple selections (CTRL key for non-adjacent selections, SHIFT for selecting a part of the block) You can select the entire block by clicking on the respective icon. The selection is highlighted with a yellow background 8 see parameter values table 9 see the specific chapter containing project development examples FREE Studio - Quick Start page 49 Downloading all the parameters (drop-down menu Parameters>Write all device parameters[10]) replaces all the values present on the target device with the values listed in the Value column. Note: the inputs are read-only and are shown in grey. See the following table: Parameter values table colour column description cases black value value aligned with default blue default red value grey name read-only parameters I/O values analogue inputs AI digital inputs DI green name parameters not visible on target display See visibility table target already read default column value different target already read from value in value column value NOT aligned with default • Device just opened • value changed by user When declaring the status variables and EEPROM parameters in Application you can also define their level of visibility in the Smart target[11] menu as shown in the figure: BIOS Download The user can also upgrade the Smart BIOS from Device. Select the name of the target and click the right mouse button. Select BIOS download and open the .fwf file that you want to download. The Direct[12] mode is executed via DMI directly on PC whereas the MultiFunctionKey mode requires passing through MFK and then downloading onto Smart. Evolution The default BIOS menu of Evolution is visible from the folder All Parameters. In the All Parameters folder you can also view user parameters defined with Application Downloading the PLC application and the HMI menu is only performed from Device but is described in the Connection chapter Panel The default BIOS menu of EVP is visible from the folder All Parameters. In the HMI management folder you can view the parameters for managing local and remote HMI pages. In the All Parameters folder you can also view user parameters defined with Application. 10 11 12 if you select Parameters>Write all default values, all the default values including I/O will be downloaded to the target device has no effect on Evolution see installation manual. BIOS Download not available via RS485. Do NOT power up Smart externally (only power up via DMI) FREE Studio - Quick Start page 50 USER INTERFACE PANEL DEFINITIONS Evolution The User Interface workspace dedicated to developers features various sections for creating and managing customised pages, e.g. defining the graphical interface of FREE Evolution, using and creating templates and downloading HMI onto the target device. The sections (panels) are listed below: A B C F D E G H Panel The User Interface workspace for EVP requires that page creation and management and local HMI downloading occurs on EVP The characteristic of EVP is that it manages Evolution remote menus created with UserInterface The menus that EVP will use as remote HMIs must be created specifically as such See Creating a new project. FREE Studio - Quick Start page 51 Section Panel Name / Section Panel Description User Interface This section shows the work tools in the form of icons. A B Configurator bar / Project Project Some tools can be selected by means of key combinations (shortcuts). See relevant chapter for details The Project panel is divided into 2 tabs: • Project: for managing the pages that will be shown on the Evolution graphical terminals • Resources: for managing images, lists and strings that may be used in the pages According to the selection made in the tab, the following appear in this section: • Local Actions • Global Actions actions linked to the User Interface keys C Actions D Document bar Edit panel This panel is used to configure the graphics of the pages E Properties View properties This panel is used to define the properties of the pages or of their constituent elements F Output Messages This panel shows messages relating to the development of the project (file opening, compilation errors, etc.) G Target vars & parameters View target variables and parameters The panel is divided into 2 or more tabs: • Target vars contains the variables/BIOS parameters of Evolution • PLC vars contains the variables/parameters defined in the PLC application of Application installed in the Evolution base module where the HMI will be downloaded. • Other tabs display variables/parameters with Modbus address to be shown on the HM interface. Note: these applications have been downloaded using Studio onto other Evolution modules connected in a network to the Evolution onto which the HMI that you intend to develop will be downloaded H Templates View available templates This panel shows all of the pages created as “templates”, e.g. as reusable models available in the catalogue The panels may be visible or hidden at first start-up. To view them, simply check the relative heading in the drop-down menu. For example: View > Templates The panels can be organised as the user wants in terms of size and layout. Studio saves the last settings made FREE Studio - Quick Start page 52 To start User interface Panel • Evolution UserInterface vs Connection As already mentioned in the TARGET chapter and as described in the Connection chapter, UserInterface is typically opened from Connection by clicking on the HMI node. You are therefore advised to read the Connection chapter before developing a menu in UserInterface. To get started and create a simple stand-alone menu[1] follow the outline illustrated below. First Start-up 1. Click on the Launch FREE Studio icon on your Desktop 2. Click on the FREE Studio User Interface icon. 1 2 The program appears as shown in the picture: 1 a menu created in this way is subsequently linked to a Connection project. See corresponding chapter. FREE Studio - Quick Start page 53 You can now: • Create a new project “New Project ...” - CTRL+N • Open an existing project “Open project …” - CTRL+O Existing projects have the extension .pajx Creating A New Project • • Click New Project ... or select File > New Project (CTRL+N) from the drop-down menu The dialogue box shown below appears, in which you can create, name and save a new project: New Project New remote HMI The new project appears as shown in the figure: • A description of the icons is available in the Online Help (in English) - see “Support” • The standard development environment described previously is developed in this chapter The pages that follow explain how to create, develop and test a new menu, with simple examples of pages, templates and elementary programs. FREE Studio - Quick Start page 54 Creating pages All of the created pages that will comprise the menu shown on the instrument display will appear in the Document bar panel. Below is a general description of the elements used for creating pages The Appendix gives a number of simple examples of menus that you can use to define a basic working menu. Project PANEL/Project TAB In this tab the following elements (nodes) can be used: • Pages for managing pages (create, delete, import/export etc.) • Messages for managing message pages • Global variables for managing “variables” common to all pages • Global procedures for managing “procedures” common to all pages. Note: procedures are written in ST language only Pages Properties From the Project tab, Pages node, by right-clicking on Properties you can edit the properties of pages, [1]as indicated: General System options Language selection 1. From the General tab you can select which page to set as the initial page 2. From the System options tab you can select the type of font[2], the text colour and the background colour (choice of black or white) 3. From the Language selection tab you can manage the language settings: • click Select to choose the current language (indicated in the Current language box), • click Add to add a new language • click Delete to delete a language • click Export to export and import the .txt text file to be translated[3] • click Import to import the translated .txt text file[4] 4. from the tab Global On timer the developer can add specially created global “on timer” procedures Creating pages Using the drop-down menu, select Project > Objects (insert page) or click on the respective icon New Page A window will open where you can insert the name of the page[5]. The created page appears in the Document bar section (where it can be edited and changed) Note: the page can be set as a pop-up[6] page. 1 these properties are not those of the individual page but are common to all pages 2 also visible from the tab Resources > Fonts 3 and from the drop-down menu Project > Export language to file... 4 and from the drop-down menu Project > Import language from file... 5the page name must not contain spaces (e.g. New Page returns an error; NewPage (with no spaces) or New_Page (with underscore) are acceptable names. No other characters are accepted (E.g. /, <,>, etc) 6 only one page is shown on the display at any one time. A pop-up page is a page that is appears on top of another page FREE Studio - Quick Start page 55 Initial page The property of “initial” page must be assigned[7] The initial page can be the page used for the “fundamental state display” e.g. the default page that appears when the instrument is not in use. The fundamental state display can therefore be an image[8] (e.g. logo or company name) or a page that displays important values (e.g. temperature, pressure, setpoint etc.) for easy reference Note: if the initial page is not set, a compilation error will be returned. Managing pages Click the right mouse button to rename, copy or delete a page, etc. Insert page New page Messages From the Project panel, right-click the Messages node and select Insert new message page to create a new message page[9]. Message pages are similar to other pages but each one bears a unique ID Below is an example of a “message” page call with syntax Call from a User Interface script: dummyboolean:=Video_SendEvent(kWM_MSG, MessageID) Call from an Application program: dummyboolean:=sysHmi_Message(MessageID). Message page example of message pages tree example of message 1 page Template From the Project panel, by right-clicking on a page you can export the page (ending in .pex), or select Export page as template to save the page as a template page[10]. (ending in .petx) From the drop-down menu Project > Template management you can manage templates by adding .petx pages to the Template List. The added pages will also appear in the Templates panel as a library and can be used by dragging and dropping them in the project, creating the desired template from time to time. 7 8 9 10 it can be modified from the Pages section (node). The initial page is identified by a “play” icon (red triangle). technically known as a “splash” identified in the tree as a Warning triangle on a yellow background a template is a model or form that must be compiled based on a predefined structure FREE Studio - Quick Start page 56 Template list Template library Instance of a template page Properties PANEL Every object that will be drawn on the page has properties that can be set from the Properties tab. Depending on the object selected from the Page bar in the Properties tab, the elements required to correctly manage the object on the page will be shown or hidden The complete list can be consulted in the Online Help. The most frequently used ones are listed here. Properties TAB[11] Each individual page has properties listed as follows: Default Description Default Description CharDimX 6 CharDimY 8 Defines the page grid guides min(1,1) for positioning the objects Title bar NO Inserts a title with a preset width Page border NO Inserts a page border Font EWP2_8x16 character size Caption * defines the content of the title bar Back color “white” Background colour Appearance Flat defines the page border Text color “black” text colour Each time that these fields are modified, an asterisk (*) appears next to the name of the page. To save the change, always use the RETURN key. ACTIONS PANEL This panel enables you to define the “actions” assigned to the Evolution keys for navigating the menu on the display. Actions are divided into • Local Actions: actions that are specific to the individual page concerned • Global Actions: actions that are common to all pages in the menu/project Evolution has 5 keys: Right, Left, Up, Down and Enter. You can also associate an action to a long press of each of the 5 keys[12] (identified by the prefix Long, e.g. LongUp). In addition to the 4 keys there are 10 virtual keys identified with VK_F1, ..., VKF10[13] The virtual keys are associated to a procedure written in ST language. 11 12 13 do not confuse with the corresponding item “Properties” in the Project tab, Pages section (node) long press of about 3-5 seconds also see UserInterface manual (Online Help) FREE Studio - Quick Start page 57 For example, suppose that we want to set the time of the RTC clock. We create the relative page We associate the page to a virtual key VK_F1 (Close) in Local Actions. The procedure in ST language is as follows: sysClock_update := TRUE; uint_ret := Video_SendEvent[14](kWM_KEY,kKEY_VK_F1); To insert an action, click the right mouse button and select Insert action. The selected action is highlighted yellow. Select Remove action to delete the action highlighted in yellow The following actions can be associated to each key 14 Action column Description Notes Call call of a procedure to call a procedure simply write in the Link column the name of the procedure you want to call OpenPage opens a page write in the Link column the name of the page you want to open Close closes the page NextField moves to the next value in a field PrevField moves to the previous value in a field Edit enables you to edit, e.g. write a value in a field pair with the relevant key. Note: automatically returns to the start page the standard functions predefined as VideoSentEvent, etc. (to be handwritten) are described in the UserInterface manual FREE Studio - Quick Start page 58 Application parameters From the menu Project > Parameter management[15] you can link the parameters of an application developed in Application Note: • Id=0 is reserved for EVK1000 or links between a UserInterface project and an Application that reside on the same hardware • Id≠0 to be set in the event of a connection to an external device (i.e. displaying data from another device or from hardware other than the target on which the UserInterface is executed) Click Add Device to import the desired parameters file (.parx). Modbus or EWDMI[16] or Modbus and CANOpen[17] addressing can be associated to each set of parameters. The set of parameters will be shown in the appropriate tab of the Target vars and parameters panel PROPERTIES TAB/VARIABLE To use the variable, drag and drop it from the imported tab into the page[18] The properties of the variable will be identified in the Properties/Variable tab with the “@ syntax” The variable will be identified with @file name[19].variable name To modify it simply select the Variable field, move onto the box and click on the three dots (...) The Variable parameter selection window appears, which shows the available resources that can be associated to the box Note: in the same way you can create a “progress” box and associate a variable. In this case, the status / graphic progress bar of the variable is shown instead of its value. PLC variables Note: Valid only for projects with EVD/EVP target The remote HMI target only supports the @ syntax for the use of parameters/status variables of the related Application project. From the menu Project > Link PLC variables file you can link the variables of a PLC application developed in Application Import the desired “EXP variable” file (.exp). The set of parameters will be shown in the relative PLC vars tab in the Target vars and parameters panel. 15 or from the corresponding Parameter management icon 16Smart 17Evolution 18 alternatively from the menu Page>New Edit insert a box that you want the corresponding variable to be associated to 19 without extension (e.g. freeEvolution_1.plc, .plc will not be displayed) FREE Studio - Quick Start page 59 generating documentation Using the icon Generate Doc. you can create documentation linked to the Doc fields (Properties panel, Doc tab) Through a browser[20] you can view the generated documentation by clicking on the link Open documentation. the documentation gives all information relating to the project: • number of pages • program languages • initial page (name of initial page) • visual list of pages (as they are presented on the display) Example of documentation generated using the icon Generate Doc. 20 Internet Explorer or equivalent FREE Studio - Quick Start page 60 Project PANEL / Resources TAB In this tab the following elements (nodes) can be used: • Fonts for managing pages (create, delete, import/export etc.) • Bitmaps for managing images to be inserted in the pages • String table for managing strings to be used in the various pages • Enumeratives for managing enumerable sets to be used in the various pages • Image lists • Sets for managing sets of strings / parameters to be used in the various pages Bitmaps UserInterface can be used to import images (specifically bitmaps, such as icons, logos etc.) to be used in the menu pages. Click on the node Bitmaps > Import bitmap. The corresponding window appears for importing the image. Click the browse button to select the image and the Import button to import it. Example of import of free logo We recommend that you import black/white images of suitable size. The display can support an image of approximately 100x50px. The imported bitmap will be in the Bitmaps[21] node. To insert the bitmap in a page: • insert an “image” box (menu Page > New Image or use the corresponding icon) • define the dimensions of the image from the Properties panel using XDim and YDim (e.g. 100x50px) • again from the Properties panel select the bitmap from the field of the same name String table UserInterface allows you to define strings that can be used when creating pages. Using the menu String>Insert or its respective icon Insert Record you can create an association[22] between a “string” and its corresponding description. In the ID field the string is defined as IDS_stringname[23]. In the Caption field enter a description of the string. 21 if not renamed it will be assigned a default name consisting of the image name preceded by the prefix bmp (e.g. logofree-> bmplogofree) 22 technically referred to as “transcoding” 23you are recommended to use this prefix to prevent the descriptions that appear on the display being confused with the transcoding in UserInterface FREE Studio - Quick Start page 61 By selecting the page from the menu Project/Project you can associate the desired string to a text field using the menu Properties>Caption[24]. The text that will appear on the display will be the text inserted in the description[25]. Enumeratives UserInterface also allows you to define strings by means of enumerable sets that can be used when creating pages. An enumerable set is an array of values that are not necessarily consecutive. Each value is associated to a description that will be shown on the Evolution display. Move onto the Enumeratives node and use the menu Record>Insert or the respective Insert Record icon to create the sets that you want to use[26] Each set will be shown as a subnode of Enumeratives. Move onto the corresponding node and use the menu Record>Insert or the respective Insert Record icon to enter the array values. After creating (or defining) the enumerative from the Resources tab, open the Project tab and, selecting the page / element of the desired page, you need to associate the corresponding Enum to the Format field. The three examples show • definition of an enumerative CelFarEnum consisting of 2 values for defining the degrees of temperature (0=Celsius, 1=Fahrenheit). • definition of an enumerative consisting of 4 non-consecutive values for defining USB commands (values 8,9,10,12) • use of CelFarEnum on a page The order of the elements can be changed with the icons Move Up s/ Move Down t definition of CelFarEnum Enum with non-consecutive values use of CelFarEnum Image Lists Similarly to Enum it is possible to create lists of images associated to ranges of values. The image shown on the display will change depending on the state of the variable associated to the list. A list is created and a bitmap (see corresponding node) is associated to each image, indicating its reference range. After creating (or defining) the list from the Resources tab, open the Project tab and, selecting the page/element (created with “New animation”) of the desired page, you need to associate the bitmap list to the Imagelist field The three examples show • definition of a Modeimg list of 2 bitmaps for displaying Cool mode and Heat mode. The range of values is reduced to one value in this case (0 for Cool, 1 for Heat) • use of Modeimg on an “Icons” page, associating the Modeimg list with the animation. A state variable must obviously be associated, depending on which the image will change However a static bitmap must be inserted as an image via Page > New Image or using the respective icon. 24 25 26 in practice it is also possible to associate images but for the sake of simplicity we have only dealt with text fields here if the Description field is empty, the string IDS_xxx will appear the default name is Enum1, Enum2, etc. Select the box to change the name FREE Studio - Quick Start page 62 definition of Modelmg use of Modelmg Sets Often there is the need to create a group of very similar pages (for example a scroll menu for showing a set of parameters in the same folder) UserInterface allows you to define Sets that can be used when creating this type of page, without having to replicate the page n times. A set is an array of strings or variables/parameters[27] Move onto the Sets node and use the menu Record>Insert or the respective icon Insert Record to create the sets that you want to use[28] The type of set can be • String e.g. a string defined in a string table • Variant e.g. a variable/parameter Each set will be shown as a subnode of Sets. Move onto the corresponding node and use the menu Record>Insert or the respective icon Insert Record to enter new items in the array Strings In the case of a String type Set the string is selected by moving onto the box and clicking on the three dots (...) The Resource string selection window appears, which shows the available strings[29] that can be associated to the array The visibility (Visible column) for strings is TRUE - not modifiable Variant In the case of a Variant type Set, the variable is selected[30] in the same way by moving onto the column Variable/Parameter. The Variable/parameter selection window appears, which shows the available variables that can be associated to the array. 27 28 29 30 including any alarms the default name is Set1, Set2, etc. Select the box to change the name previously defined in the string table (see) in this case the term “variable” refers to genuine variables in their own right, PLC parameters, BIOS, alarms etc. FREE Studio - Quick Start page 63 Using the Filter option you can filter the display of the variables/parameters • • • The Format column shows the default U.M. of the parameter. The user can manually associate an Enum Similarly the Min Max columns show the default range of the parameter, which can be modified by the user[31] The Text align column aligns the string to the left, right or centre. After creating the Set from the Resources tab, open the Project tab Previously a page was created that you want to replicate using Sets (for example in order to manage the analogue outputs BIOS_CFG_AO) Selecting the appropriate field, you need to associate the corresponding Set to the field Assoc_var using the prefix #, and with the suffix (0) to indicate the first element of the array. Note: The field must be of the Edit type (for example in order to manage the analogue outputs #SetParValCfgA0(0)) The three examples show • definition of a Variant Set SetParValCfgA0 of size 5 to define array of output configuration parameters • definition of an enumerative AnaOutTypeEnum of 3 values (voltage, current, ON/OFF) • use of #SetParValCfgA0(0) on a page (which results in the production of 5 pages that differ in terms of the configuration of parameter SetParValCfgA0(1),..., SetParValCfgA0(5)[32] • note that the Edit field “IO Modulated” is associated by means of the Format field to the Enumerative AnaOutTypeEnum Note that in the example there is another Edit field associated to a Set. It is possible to use multiple Sets on the same page. You are advised to define Sets of the same size if used on the same page SetParValCfgA0 AnaOutTypeEnum use of #SetParValCfgA0() 31e.g. for a parameter that defines a COOL, HEAT and AUTO machine mode it is possible to hide one or more values at UI level even if at PLC (or application level) there are 3 usage modes 32 note that the array starts from the value (0) whereas when defining Sets the first value is 1, therefore Set(1) corresponds to #Set(0) FREE Studio - Quick Start page 64 CONNECTION panel definitions Panel • Evolution As mentioned in the previous chapters Connection is the entry point for starting to develop projects. The Connection workspace defines the hardware structure of an Evolution project and manages the network and data exchange protocols between Evolution (binding). The Connection workspace dedicated to developers has various sections for creating and managing Evolution[1] devices, as well as for compiling the entire project, e.g. as mentioned in Target • creating the PLC application using Application • defining the graphical interface of Evolutions using UserInterface • compiling the Build project • downloading the project via Device A The sections (panels) are listed below: C D B E Section Panel Name / Section Panel Description Application A B 1 / Project Tool bar (Main bar) Project (Workspace) This section shows the work tools in the form of icons. Some tools can be selected by means of key combinations (shortcuts). See relevant chapter for details The Project panel can be used to manage the project and one or more Evolution* devices • from the project you can manage the device network (Network list) • The various protocols are configured In each device - see panel C including Panel (EVP) and EVK1000 terminal. Evolution means EVD (with display), EVC (no display) FREE Studio - Quick Start page 65 Section Panel Name / Section Panel Description Application This section contains • General project management tab • Network list tab C / Configuration panel (Edit) D Catalog Device catalogue E Output Messages Depends on the selected Evolution device • General Evolution configuration tab Inside the device (e.g. Evolution EVD) • PLC for configuration of IEC application developed with Application • HMI for configuration of User Interface menu • CANopen for configuration of corresponding protocol • RS485 for configuration of corresponding protocol • Plugins for configuration of protocols using plug-in This panel shows all the devices available from the catalogue. Note: Dynamic visibility of devices based on selections (e.g. plugins) This panel shows the messages relating to the development of the project (file opening, reading/writing errors, status of connection to device, etc.) Note: the connection to the target device is also visible in the bottom right of the screen by means of coloured messages (see Application Download) *Connection manages one or more Evolution (EVD, EVC, EVK1000 terminal) and EVP devices Smart can be inserted in the network as a slave device via RS485 The EVE expansion module can be inserted in the network as a slave device via RS485 or CANOpen The display of the panels can be set from the drop-down menu View > panel name and the panels can be organised as the user wants in terms of size and layout. Studio saves the last settings made The panel View > Compiler toolbar is an icon that is visible or hidden in the Main menu Configuration panel (Edit) The screens below show the various default devices/nodes available for the various targets. The devices for EVD are indicated in the table above in section C. EVD EVP EVC and EVK are devices available as “root” nodes of the project (see Project Panel paragraph). Panel (EVP) • PLC • HMI • CANopen • RS485 • Ethernet Note that there are no on-board Ethernet plugins FREE Studio - Quick Start page 66 EVC • PLC • Remote HMI • CANopen • RS485 • Plugins Note that the HMI is the remote type EVK terminal • CANopen Note that the only available protocol is CANOpen There are no plugins PLC and HMI are inherited from Evolution To start connection Panel • Evolution First Start-up 1. Click on the Launch FREE Studio icon on your Desktop 2. Click on the FREE Studio Connection icon. 1 2 The program appears as shown in the picture: You can now: • Add a new device to the project • Add/remove a network from the Network list Existing projects have the extension .con CREATING A NEW PROJECT (WORKSPACE) To create a new project, simply save the Untitled[1] project and rename it with a name of your choice (CTRL+S) To add a device to the project, either click on Add new device to the project[2] or simply drag and drop the FreeEvolution icon from the Catalog panel on to the project name. 1 2 saving the project creates in your PC a new folder with the chosen name that functions as the Workspace or from the Project menu, right-click on Untitled (or project name if already saved) > Add FREE Studio - Quick Start page 67 example of Add (Device) You are advised to rename each Evolution device with an appropriate name (the default name is FreeEvolution1, FreeEvolution2, etc.) In the workspace you can see the name of the device and the version)[3] creating a new project CTRL+S adding Evolution to the project Note example of adding 2 Evolution devices Device catalogue 3 there may be more than one Evolution in Catalog with different versions (to view all versions, go to menu Options > Show all versions in catalog or tick the tick box when the dialogue window appears) FREE Studio - Quick Start page 68 example: EVD + 2 EVK terminals The two keyboard EVK terminals both connect to the CANOpen node CANOpen node virtual channels channel1:124; channel2: 123 virtual channels channel1:124; channel2: 123 The CANOpen node has two default virtual channels that can be connected to a maximum of 2 EVK1000 terminals The default virtual channels are 124 for the first terminal and 123 for the second EVK1000 terminal Click on ? from the CANOpen node to view the values The default address of the Keyboard EVK_1 terminal is 127, the default virtual channel 124 and the default CanOpen baudrate 500Kb/s. Thus, when physically connecting an EVK1000 terminal to an EVD with the default settings, simply upload remote HMI from the EVK BIOS menu. In other cases, such as for Keyboard EVK_2 (which has the address 126), it will be necessary to set the address 126 and the virtual canal 123 from the EVK BIOS menu. FREE Studio - Quick Start page 69 Project panel Each Evolution device has the following resources, which are shown as nodes of the target target workspace description what to do Notes EVD EVC EVP PLC PLC project move onto the node and click the right mouse button to open Application see Getting Started (Application) EVD EVP HMI menu for creating pages move onto the node and click the right mouse button to open User Interface see Getting Started (User Interface) EVD EVC Remote HMI menu for creating pages move onto the node and click the right mouse button to open User Interface see Getting Started (User Interface) target device description what to do Notes EVD EVC EVP EVK CANOpen* on-board Evolution serial as standard EVD EVC EVP RS485* on-board Evolution serial models EVD7500 and expansion modules EVE75xx EVP Ethernet EVD EVC Plugins** always available select the Mode and add the device from the catalogue check availability check availability optional modules available separately check availability * also available as serials on plug-in module **e.g. Ethernet plug-in You can create both PLC and HMI from scratch or import existing projects and projects from the catalogue PLC project From the panel Project > PLC node click the right mouse button and select Open with Free Studio Application By default you will be prompted to save the project FreeEvolution_n_PLC See Application for information on development. To summarise: • develop the PLC code with Application • create parameters and state variables of the PLC application • compile and download application onto Evolution and debug if necessary • close Application and return to Connection The saved project .ppjs is located in the Connection folder / workspace. HMI project From the panel Project > PLC node click the right mouse button and select Open with Free Studio UserInterface By default you will be prompted to save the project FreeEvolution_n_HMI See User Interface for information on development. To summarise: • develop the HMI menu or pages with UserInterface • the parameters and state variables of the previously created PLC application link to the menu and will be visible in section H of UserInterface Target vars & parameters • check the connection mode, appropriately configuring the connection parameters • compile the HMI pages and download them onto Evolution • close UserInterface and return to Connection The saved project .pajx is located in the Connection folder / workspace. FREE Studio - Quick Start page 70 The device will be added to a list (highlighted in yellow) Press the Reload Device List button to populate the table with the list of devices connected to the HMI project and to use the pages remotely if so required Remote HMI project Same as HMI Project PLC Configuration adding an existing project HMI configuration adding an existing project and reloading devices list Download project Use the menu Tools>Build or F7 to create the .CFN configuration file From the panel Tools > Open with Free Studio Device, open Device After configuring the device, e.g. the BIOS communication parameters, you will be able to download: • PLC application • HMI pages • configuration file Cfg files using the Download All button Note: each of the 3 files can be downloaded independently from the other two by moving the mouse pointer onto the respective icon, clicking the right mouse button and running the corresponding download. protocol management Each protocol can be used in different ways If Mode is Not used the corresponding device is not used target CANOpen RS485 Ethernet Profibus EVP Master (for field) Master (for HMI remoting and binding) Modbus Master (for HMI remoting and field) Enable Modbus Master (for HMI remoting and binding) - EVD EVC Master (for field) Slave (for binding) Modbus Master (for field) - DP Slave-V0 EVK Master (for HMI remoting) - - - - For settings consult the Online Help (by pressing F1) The catalogue will show all the devices that can be added (”appended” using drag and drop) to the corresponding protocol and no others. In the case of Slave and Ethernet the “Binding” device is added. To “Add a source device” the network must be set. The maximum number of devices that can be added to the individual node is checked from Studio and indicated by means of the relative message. (E.g. max 2 EVK on CANOpen)[4]. On the RS485 protocol you can also connect generic Modbus devices. 4 see also FREE Evolution and FREE Panel installation manual FREE Studio - Quick Start page 71 SIMULATION panel definitions Smart Evolution The Simulation workspace dedicated to the developer has various sections for simultaneously executing applications and pages (Evolution) in a simulation environment without needing to have a target connected to the PC. Simulation can simulate the execution of • PLC application created using Application • Graphic HMI interface of Evolution created using UserInterface Execution can therefore also occur on the same PC used for development. The IEC application can therefore be “downloaded” onto the Simulator rather than onto the physical target. We suggest starting Simulation from Application Below is the list of sections (panels) as it appears on the first screen (empty workspace)[1] Here you need to manually connect the IEC application and/or HMI[2] pages to the Simulator A B C D E F G 1compared with other workspaces (Application, UserInterface etc.) it is not essential to interact with the Simulation window. When not in use it 2 can be reduced with the Evolution only key FREE Studio - Quick Start page 72 Section Panel Name / Section Panel Description Simulation This section shows the work tools in the form of icons. 4 to start IEC (PLC) Application to stop IEC (PLC) Application A / Show HMI window to show/hide HMI (virtual instrument) Tool bar (Main bar) Show I/O panels to show/hide the I/O panels Show full control window to reduce/expand the window Workspace file with the preselected name that functions as a workspace You can create multiple workspaces with different applications (Smart+Evolution) and/or HMI pages (Evolution) Target name Target name Not modifiable by the user. Examples: • FreeSmart 412.5 for Smart target • FreeEvolution423.5 for Evolution target Note: check from Application >Project > Select target that the version number in the target name is equal to or higher than 5 (e.g. FreeEvolution423.5). D PLC Project PLC application name E HMI Project name of HMI pages F I/O panels I/O panels I/O window management G Output window messages - B C Workspace if field is blank, from Edit > Edit workspace, click on the three dots (…) to select the corresponding file Edit Workspace[3] from Edit > Edit workspace, click on the three dots (…) to select • Target name: file containing all the information needed to reconstruct the runtime of the (real) target .TGSX file [4] • PLC Project: IEC (PLC) application .PPJS / .PPJX file • HMI Project: HMI pages .PAJX file PLC IEC application already present 3 4 select HMI pages .PAJX Manual editing. There is no need to “edit” the workspace when opening Simulation from Application the .TGSX file is created automatically by Application in the folder FREE Studio > Catalog > FreeEvolution >Simulation FREE Studio - Quick Start page 73 SIMULATION Evolution First Start-up [1] 1. Click on the Launch FREE Studio icon on your Desktop 2. Click on the FREE Studio Simulation icon. 1 2 The (empty) workspace appears as shown in figure 2 You can now: • Create a new project (workspace) .WKSX “New ...” • Open an existing project “Open …” CTRL+0 • Open recent projects “Recent file ...” by selecting from a list Simulation projects (workspace) have the extension .WKSX opening simulation from application [2] Alternatively, from the Application workspace click on the corresponding Simulation Mode icon[3] 1 2 1. A dialogue window opens from where you can: • Create a new workspace • Open an existing workspace (.WKSX) 2. Click OK. The following will appear: • the Simulation panel[4] • TCP/IP connection[5]: local connection between the Application and Simulation workspaces From Application click on Download code to “download” the IEC application to the Simulator. 1 2 3 4 5 the Simulation tool is available for Smart and Evolution. We suggest opening Simulation directly from Application. See following paragraph we suggest opening Simulation directly from Application. Available for Smart and Evolution. toggle function. Clicking on the Simulation icon opens / closes the Simulation workspace if Simulation does not start you need to change the target. See Troubleshooting section reduced to an icon on the main bar FREE Studio - Quick Start page 74 In panel A[6] there are two icons for viewing the corresponding panels • Show IO Windows panels that indicate the status of the I/O • Show HMI Window graphic and interactive representation of Evolution See the example for an Evolution target IO panels Clicking on the corresponding icon I/O panels brings up various windows/panels corresponding to the inputs/outputs. Analog signal properties The I/O panels window is an “index” window that lists all the windows (visible if the tick box is selected) From this window you can add a window or delete/rename the listed windows To add a variable, drag and drop the element you want to monitor from Application to one or more windows Analogue inputs and outputs[7] can all be simulated: For inputs, a slider is available for modifying the read value For outputs, a status / progress bar is available. For digital outputs, green if the output is not active, red if active The other elements that can be simulated are[8] • Global shared • Target variables Note: Also includes BIOS parameters and EEPROM parameters[9]. 6 7 8 9 the full description is available in the Simulation manual. Press F1 to view the PDF for digital I/O see HMI Window in general each object that has a Modbus address Evolution only FREE Studio - Quick Start page 75 Each element on the various panels has properties that can be edited using icon Signal Properties From this window you can view / modify • Signal label: label of the variable/resource • Variable name: non-modifiable. Indicates the name present in the IEC code • Read only if the tick box is selected, the variable is read-only • Min value/Max value: the ranges of the resources are set by default. You can manually define / reduce the range that you want to view by selecting the tick box HMI Window Clicking on the corresponding icon brings up the visual representation of the Evolution target (virtual instrument) HMI Window From this window you can simulate the status of digital inputs and outputs If the output is active it is coloured red EEPROM parameters can be reset using the Rst E2 key Finally you can navigate in the menu using the keys of the virtual tool, as if operating on the physical target opening simulation from user interface [10] Exactly the same as Application. Click on the corresponding Simulation Mode icon[11] Smart The example for a Smart target is exactly the same 10 11 we suggest opening Simulation directly from Application. Available for Smart and Evolution. toggle function. Clicking on the Simulation mode icon opens / closes the Simulation workspace FREE Studio - Quick Start page 76 Eliwell Support Eliwell Technical Support Eliwell provides access to fully trained, professional technical personnel to answer its customers” questions precisely and reliably. Our technicians are on hand every day, to respond to any technical requirements relating to the installation and operation of all Eliwell instruments. If you have any questions or require support, contact Eliwell Technical Support: Tel. +39 0437 986 250 E-mail: [email protected] Before contacting Eliwell Technical Support please check the software version of Eliwell FREE Studio. From the drop-down menu select Help > About The following screen appears[1]: Quote software Version, Build and Computer ID Online Help During each program development stage, pressing the F1 key opens a PDF document containing the entire Online Help in printable format STUDIO PROGRAMMABLE CONTROLLERS Development software for free Smart The software solution in an integrated suite for quick, easy programming Help On Line FREE Studio offers developers On-line Help to assist programmers with each stage of program development. 1 Example for Application. Same screenshot for Device. For Evolution users, the screenshot is the same for UserInterface and Connection FREE Studio - Quick Start page 77 Online help - LED[2] From the panel Project>Resources>Help access the LED reference for the developer[3] section which contains a description of the characteristics of the icons used in FREE Smart and how to manage them using target variable sysLocalLeds[]) Website restricted area The Eliwell website www.eliwell.com includes a restricted area, access to which is by password only. Once accredited to access the restricted area with a personal Username and Password, users can view documents, information, product updates and software which is not openly visible on the site. Click here to visit the respective web page and obtain all the necessary information for registering The FREE Studio documentation is available to registered users in the section Applications > Programmables > FREE WAY > FREE Studio. Software updates are available to registered users in the section Technical Support > Programmables Area > FREE WAY > FREE Studio. Applications and libraries are available to registered users in the section Technical Support > Programmables Area > FREE WAY > FREE Studio > FREE Applications. 2 3 only available for Smart. see full screen (CTRL+U) FREE Studio - Quick Start page 78 TROUBLESHOOTING The tables below show some examples of error messages and the corrective action to be taken. For messages not shown here, contact Eliwell Technical Support or consultwww.eliwell.com Application Error message Panel Effect Resolution Communication target not connected Check the COM port settings using the drop-down menu Communication > Settings EWDMI Properties Communication target not connected disconnect communication hardware (e.g. DMI, USB/485 converter, etc) Note: disconnect the target end first and then the PC end Output compilation error connect FREE Smart target device to PC by means of DMI Panel Effect Resolution Connection Status target not connected Check the communication settings by using the menu Communication > Settings EWDMI Properties or by editing the string from the menu Communication > Advanced Panel Effect Resolution Simulation doesn't start from panel Project > Select target select the correct target from those available and confirm with Change ComServer icon not visible in the applications bar Invalid memory image file. Please upload memory image from the target Device Error message invalid connection string simulation Error message no target definition for simulator (TGSX) found Unable to run simulator - FREE Studio - Quick Start page 79 shortcuts The table shows some of the key combinations (shortcuts) available for enabling/disabling the main functions of Application. For Device see next table and/or Notes column. Connection and User Interface have shortcuts for opening, saving and compiling projects The “toggle” function indicates that the function is enabled if disabled and vice versa by using the same sequence of keys. For example: CTRL+U enables Full Screen; pressing CTRL+U disables it again[1] The Online Help is activated using the F1 key Menu Function Function Shortcut Notes ALL ONLINE HELP HELP F1 printable HELP in PDF format ALWAYS AVAILABLE ApplicatioN Shortcuts 1 Menu Function Function Shortcut Notes Edit Print Print CTRL+P *** Edit Cut Cut CTRL+X *** Edit Copy Copy CTRL+C *** Edit Paste Paste CTRL+V *** Edit Save Save CTRL+S *** View > Toolbars Full screen Full Screen CTRL+U Toggle*** View > Toolbars IEC FBD bar FBD bar CTRL+d Toggle View > Toolbars LD bar LD bar CTRL+a Toggle View > Toolbars SFC bar SFC bar CTRL+q Toggle View > Toolbars project bar project bar CTRL+j Toggle View > Toolbars network network CTRL+m Toggle View > Toolbars document bar document bar CTRL+n Toggle View > Tool Windows workspace workspace CTRL+w Toggle View > Tool Windows output output CTRL+r Toggle*** View > Tool Windows library library CTRL+l Toggle View > Tool Windows watch window watch window CTRL+t Toggle*** View > Tool Windows asynch graphic window asynch graphic window CTRL+k Toggle*** PROJECT COMPILE COMPILE F7 if more than one project, compiles only selected project Communication Download code Download code F5 Debug Inserts new items into watch Add symbol to watch F8 when the variable is selected (drag & drop not needed) Debug Inserts new items into watch Inserts new items into watch Shift + F8 chosen from a list in Device, the display of the panels is defined by the View menu, by checking individual headings or leaving them unchecked FREE Studio - Quick Start page 80 Menu Function Function Shortcut Debug Add symbol to a debug window F10 Debug Inserts new items into a debug window Shift + F10 Debug Add/remove break point F12 Debug Add/remove text trigger F9 Debug Add/remove graphic trigger Shift + F9 Debug Remove all triggers CTRL+Shift + F9 Debug Trigger list CTRL+I Notes *** also applies to Device DEVICE Shortcuts Menu Function Function Shortcut Notes Edit Print Print CTRL+P *** Edit Cut Cut CTRL+X *** Edit Copy Copy CTRL+C *** Edit Paste Paste CTRL+V *** Full screen Full Screen CTRL+U Toggle*** View > Tool Windows output output CTRL+r Toggle*** View > Tool Windows watch window watch window CTRL+t Toggle*** View > Tool Windows asynch graphic window asynch graphic window CTRL+k Toggle*** PARAMETERS read selected read selected CTRL+SHIFT+R PARAMETERS write selected write selected CTRL+SHIFT+R the selected parameters are highlighted in yellow View > Toolbars PARAMETERS select all select all CTRL+A Operation to be performed with care The next operation could be writing all parameters and/or resetting the default values *** also applies to Application FREE Studio - Quick Start page 81 Evolution USER INTERFACE Shortcuts Menu Function Function Shortcut Notes CONFIGURATOR BAR new project NEW PROJECT CTRL+N *** CONFIGURATOR BAR open project OPEN PROJECT CTRL+O *** CONFIGURATOR BAR generate code (compile) GENERATE CODE (COMPILE) F7 *** also applies to Connection CONNECTION Shortcuts Menu Function Function Shortcut Notes MAIN BAR new project NEW PROJECT CTRL+N *** MAIN BAR open project OPEN PROJECT CTRL+O *** MAIN BAR Save Save CTRL+S *** also applies to User Interface FREE Studio - Quick Start page 82 APPENDIX - project development examples project 1 - counter In the pages that follow, we will guide you through the procedure for writing, testing and downloading to FREE Smart a simple COUNTER program written in ST language, which performs a count and displays a “saw-tooth” on the oscilloscope. The COUNTER program counts the local variable a from 0 to MAXSCALE1. When a reaches MAXSCALE1 it will be re-initialised to -100. As previously described in First Start-up, • start Application, • create a new COUNTER project • create a COUNTER program in ST language In the central Edit section, write the COUNTER program code in ST language. COUNTER program if a>=MAXSCALE1 then a:=-100; else a:=a+1; end_if; b:=a*10; count:=a; counter1:=b; Local variables In the variables section we create the DINT type local variables a and b (use the drop-down menu Variables > Insert, or the icon Insert record) and associate the Init Value 0 (zero). The variables a and b are of no use outside the COUNTER program, and are therefore defined as local. Variables and global constants In the program, we have also included a constant which we will define as “global”: • the constant MAXSCALE1 must be created in the panel Project >Global Variables Constants, which we will create here in the same way as we create a local variable. MAXSCALE1 has a preset value of -100 so it is not necessary to define it as a variable but as a constant Global shared variables Should you want to display the result of the counter on the target, in the program we have also included 1 variable which we will define as Global shared[1]: The variable count, which we will create, is obtained from the panel Resources>Modbus Objects > Status variables and not from the section Edit/Variables, when we enter a new record. In this case it will be necessary to also define how the name of the variable will appear on the FREE Smart 7-segment display (e.g. label of up to 4 digits, for example CNT for count) and mapping between Application Type and Device Type. In the COUNTER program we have included another variable, counter1[2], which we will define in the same way. In this case, we do not define how it appears on the display. The software will propose COUn by default (instead of COUnter), in other words it will use the first 4 letters on the 4-segment display. 1 note that the folder “Global shared” appears if, and only if, we define the variable in the tab Resources>Modbus Objects > Status variables 2note that if we had created a variable counter and not counter1 at the compilation stage, we would have had an error (name conflict between COUNTER program and variable) FREE Studio - Quick Start page 83 Fundamental state display By clicking on Resources>FREE Smart we choose what to show as the fundamental state display[3] We choose the variable count (which is the value of the local variable “a”) We update the program by entering an always active or always inactive alarm if alarm then alarm1:=0; else alarm1:=1; end_if; The alarm variable must be defined as a local variable - of BOOL type (Boolean). FALSE is proposed by default as the initial value - to change it simply key in TRUE. The alarm will be always active. We can enter a description such as “Alarm always active” Alarm1 must be defined in the panel Resources>Alarms. As a label we enter ALM1 Menu creation At this point we can create • the customised menu PRG1 for entering any parameters defined by the developer (or use the existing BiOS parameters) • the customised menu SET1 for entering the 2 variables count and counter1 Task If we go back to the Project tab and select the task Timed we can add the program COUNTER. Compilation We compile the project - drop-down menu Project >Compile (or F7) Note: the project is compiled without errors and without the need to use a FREE Smart connected to the PC To summarise... ... see screenshots COUNTER program - Project tab 3 COUNTER program - Resources tab fundamental state display as you can see, the choice includes the default I/O + the variables created by the developer FREE Studio - Quick Start page 84 COUNTER program - Resources tab defining Variables COUNTER program - Resources tab menu Set (SET1) COUNTER program - Resources tab Alarms menu COUNTER program - Resources tab defining Variables Notes in the Project tab, the global shared variables appear only after they have been declared in the Resources tab. In the example: • Alarms allarme1 • Parameters PAR1 • Variables count and counter1 Connecting to FREE Smart and downloading the application After connecting FREE Smart to the DMI and PC on the USB port and making the appropriate checks on the COM and baud rate (see relevant chapter) we can connect to the target: • from the drop-down menu Communication > Connect or icon Connects to the target connect to FREE Smart • if connection is successful, the message CONNECTED appears in green at the bottom right of the screen[4] • from the drop-down menu Communication > Download code (F5) or icon Code download now download the application to FREE Smart • one or more dialogue boxes[5] will appear, indicating that the application will be downloaded. Downloading could take a few seconds IEC application existing on target continue confirmation reset PLC reset confirmation application download in progress The application is not operating on FREE Smart. 4 5 should this not be the case, see Download on target or Troubleshooting depending on whether the target has already been programmed or not FREE Studio - Quick Start page 85 Watch and Oscilloscope On the display of the target device, the count[6] value appears which ranges from -100 to +100. Note that the alarm LED appears because the alarm is active In the Status menu, we can check for the presence • of the folder SET1 with the variables CNT and COUNt • of the folder AL with the alarm ALM1 to 1 On Application we can test the value of the variables and display them as text or graphics simply by dragging the variable from the code in the panel Watch and Oscilloscope See screenshot below • • • Note how the local variables a and b cycle from -100 to 100 (x 10 for variable b), as do the corresponding variables count and counter1 "Allarme" is an always true Boolean variable (TRUE shown in red[7]) and allarme1 is fixed at 1 The variable count is displayed in the oscilloscope and we can see the “saw-tooth” Saving the project We can save the project as counter.ppjs or a name of our choice, generate an .rsm file, password-protect it and export it as a library object (.pll). Device The project can be opened with Device: we open the tool of the same name, from which we can read or write one or more BIOS parameters, change them and/or download the default again. It is possible to read the current value of the variables defined by the developer but not change them Device does not require the user to know any programming language; the source code is not visible. Device requires you to connect to the target device again (click on the respective icon). The central panel shows the protocol references, address, etc. The default name of the target device is FREESmart_1[8]. When the target device is connected, you can read the parameters or write the default or changed parameters. 6 count is set as a fundamental display. If you do not set any variable, the message PLC appears By pressing F5, FREE will appear and you can access the variables and parameters of BIOS 7if you change "Allarme" from TRUE to FALSE, re-compile and download the new application, the alarm LED will switch off and the variable will be indicated in green in the Watch panel 8by simply using the copy/paste function, you can create a twin project FREESmart_2, change the BIOS parameters and download them to the target device or a second target device FREE Studio - Quick Start page 86 Reading parameters Suppose we can't read all the parameters (Read all device parameters) As we can see, there are configuration parameters which have default values other than those present on the target device (highlighted in blue) Displaying variables As with Application, with Device it is also possible to display the variables simply by dragging them to the Watch and Oscilloscope panels. Writing parameters Suppose we want to download all the CL parameters (local BIOS) and no others. Select all the parameters - drop-down menu Parameters>Select all (CTRL+A) or using the respective icon . The parameters are all highlighted in yellow. Write drop-down menu Parameters>Write selected (CTRL+SHIFT+W) (or using the icon W) All the CL parameters will be downloaded to the target device. CF folder parameters CF31 and Ui26 with different default values from the application Watch/Oscilloscope variables count and counter1 CL parameters (all) download in progress We can save the project as Counter.CFN or a name of our choice. FREE Studio - Quick Start page 87 project 2 - counter2 FUNCTION block Starting from the COUNTER program described in the previous example, we create a function block and we modify the IEC application by adding code for the switching of a LED / relay. Saving the project We save the COUNTER project by renaming it COUNTER2: from the drop-down menu File>Save project as proposes the COUNTER work folder. Go up one level, create a new COUNTER2 folder and save the project as COUNTER2. Creating a function block Create a new function block COUNTERST in ST language. Copy/paste the COUNTER program into the Edit panel of the function block with several variants COUNTERST program (function block) if a>MAX then a:=-100; elsif enable then a:=+1; end_if; out:=a; Local input and output variables In section B[1] variables we create the following variables: • a as local variable • MAX and enable as input variables to the function block • out as output variable from the function block The function block will therefore have 2 input variables, one output variable and one local variable which will save the status of the counter in each instance of the function block 1 see Application Panel Definitions FREE Studio - Quick Start page 88 We now write the COUNTER2 program in which the functional block will be called The function block will have 2 instances CounterSt1, CounterSt2 defined as local variables of CounterSt type As we write the code, note how Application guides the developer writing the code by proposing the variables to pass to the function block[2] The Boolean variable in this case will serve to switch • a suitably configured relay • an LED[3] of the target on the basis of a defined condition We now write the new code COUNTER2 COUNTER2 program CounterSt1(enable:=not Enable_Counter1,MAX:=MAXSCALE1); counter1:=CounterSt1.out; CounterSt2(enable:=Enable_Counter2,MAX:=MAXSCALE1/2); counter2:=CounterSt2.out; alarm:=(counter1>counter2); if alarm then alarm1:=1; Alarm_relay := TRUE; else alarm1:=0; Alarm_relay := FALSE; end_if; if (counter1<=counter2) then sysLocalLeds[6]:=1; else sysLocalLeds[6]:=0; end_if; 2 in the example 2 input variables (identified by an icon with the arrows on the left, and the output with the arrows on the right) 3 we use the variable target sysLocalLeds. See relevant section FREE Studio - Quick Start page 89 In the Resources tab, it is necessary to create and/or rename, from the previous project, the EEPROM parameters, status variables, etc. It is also necessary, if desired, to add the resources to the Prg menu and set menu In the I/O mapping menu, lastly, it is possible to associate resources to the inputs/outputs We associate Enable_Counter1 to a digital input and Alarm_relay to an output The program is now completed Exporting to target device From the drop-down menu Developer>Export application to catalog remember to export the project to catalogue so as to enable Device to re-use it for downloading to the target. Before exporting to catalogue, use the drop-down menu Project>Options to assign to the project a release (e.g. the same name counter2), a version (e.g. 1.0) and compile the project again. This will enable Device to recognise the IEC application on the target when it is downloaded. Compile the project and download it to target by means of Application or Device. The counter will display a count from -100 to 100 in the same way as the IEC COUNTER application previously described. In this case, the Alarm LED will switch to the compressor LED[4] once the defined threshold has been reached. 4 SysLocalLeds[6], The alarm LED is SysLocalLeds[16] FREE Studio - Quick Start page 90