1
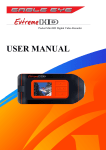
USER MANUAL Please read the user manual clearly for avoiding any wrong opeartion, current manual is not the newest and not complete, please contact us if any query. ~1~ CATALOGUE MAIN FEATURE ................................................................................................................................................. 4 INSTALL & USE ................................................................................................................................................. 5 Camera Buttons ............................................................................................................................................. 5 Remote Controller .......................................................................................................................................... 6 Install Battery .................................................................................................................................................. 7 Install Mount ................................................................................................................................................... 8 Install Camera to Waterproof Case ................................................................................................................ 9 Note: Press the Color button 2 seconds at the back of waterproof case, camera will Power on and start video Record directly, press once to pause and restart the record, press the button 2 seconds again, the camera will power OFF directly & automatically. ....................................................................... 9 Install Memory Card ..................................................................................................................................... 10 Camera USB charge .................................................................................................................................... 11 Charging time and using time ..................................................................................................................... 12 Battery icon .................................................................................................................................................. 12 Video record and Taking picture ................................................................................................................. 13 Video Playback............................................................................................................................................. 14 Picture playback ........................................................................................................................................... 15 Delete files .................................................................................................................................................... 16 Camera connect to TV ................................................................................................................................. 17 Camera connect to PC ................................................................................................................................. 18 SYSTEM MENU ............................................................................................................................................... 19 Booting Picture ............................................................................................................................................. 19 Icon Instruction ............................................................................................................................................. 19 Main Menu .................................................................................................................................................... 20 Fast setting ................................................................................................................................................... 21 Language setting ......................................................................................................................................... 21 Date & Time setting ...................................................................................................................................... 22 ~2~ Record Mode setting .................................................................................................................................... 23 Video Resolution setting .............................................................................................................................. 24 SPECIFICATION .............................................................................................................................................. 25 ~3~ MAIN FEATURE 480 x 240 , 1.5” TFT LCD screen 5MP HD CMOS sensor 170° Super wide angle under 720P, 127° wide angle under 1080P Full HD 1080P video, H.264 code compression in MP4 video format, easy to play and edit 50M Waterproof, shock proof Wireless RF Bidirectional remote controller Kinds of video record mode, support take pictures 4X Digital Focus under 720P Optional video resolution 16:9 FULL HD 1920 x 1080p 30FPS 4:3 FULL HD 1440 x 1080p 30FPS 16:9 HD 1280 x 720p 60FPS 4:3 WVGA 30FPS 848 x 480 Optional picture resolution 4000 x 3000 12MP 3200 x 2400 8MP 2592 x 1944 5MP AV playback Support 64GB TF card max High speed USB2.0 for data transfer and power charge, HDMI & RCA output ~4~ INSTALL & USE Camera Buttons 1,MIC input 8,Down/Zoom -/Remote pair 2,HDMI output 9,Power On/Capture 3,USB/RCA video output 10,REC/ Confirm 4,Power charge indicator 11, MIC 5,1.5”TFT LCD 12, Speaker 6,UP/Zoom + 13, REC indicator 7,Main Menu ~5~ Remote Controller Video record Power Take picture Single press the “ Power” button on camera to open the remote receiving mode. ( Blue indicator on camera will turn on). Press the “ Menu” button once to close the remote receiving mode(Blue indicator) for saving power if not use. 1. Long time press ( 3 Seconds) button to power on or power off the remote controller. The power indicator will turn on to green. 2. Single press will flash, press button twice to power on the camera, the green indicator button again to power off the camera. 3. After the operation above, single press indicator will turn on and flash, single press button to start video record, again to stop video record and video clip will be saved automatically. 4. Take picture, single press the button to take a picture, the indicator beside will flash once during this operation. NOTE:Here has indicator beside each button, if the REC indicator does not flash, that means the camera is not starting record or remote controller is too far away from the camera to receive signal. ( Same as the picture capture feature ). Charge the Remote Controller Install the remote controller with the offered charging case, connect to PC USB or DC5V USB charger, the RED indicator beside the power button will turn ON, and will turn OFF after full charged. ~6~ Install Battery Install the battery correctly as the picture showed below: Open the battery cover Put the battery into the housing Close the battery door ~7~ Install Mount Open the standard mount, and put the camera into it as picture showed below. ~8~ Install Camera to Waterproof Case Open the door in front of waterproof case, and put camera into it. Close the front door Note: Press the Color button 2 seconds at the back of waterproof case, camera will Power on and start video Record directly, press once to pause and restart the record, press the button 2 seconds again, the camera will power OFF directly & automatically. ~9~ Install Memory Card a ,Please install the TF card according to the picture showed below: b ,Camera does not have built in memory, support 1GB~32GB TF card expand. c ,Usable memory could be checked in the system after inserted the TF card. There without the card icon on the screen if no TF found Screen will display the TF card icon and show the rest memory ATTENTION: Please use the original TF card to avoid any Compatibility problem like card error or no card found. It is better to format the memory card in the camera system if first time use. ~ 10 ~ Camera USB charge Connect camera with PC or other DC5V charger to charge, USB cable offered with this camera. The blue LED indicator at the bottom(open the door )will turn ON if camera connected with correct charging device. Blue LED indicator at the bottom will turn OFF after full charged. ~ 11 ~ Charging time and using time Charging Time 3.5 Hours under power on (approximately) 2 Hours under power off (approximately) Standby 3.5 Hours (approximately) REC time 110 Minutes(1080P) Battery icon 76% - 100% Power 36% - 75% Power 10% - 35% Power < 10% Power Note: a . It is better to uninstall the battery when camera is free. b . Please do not use up the power completely before charging. c . It is better to do a full charge operation when first time use the battery. ~ 12 ~ Video record and Taking picture a . Press 【POWER】button to power on the camera, press 【REC】button to start record video, REC icon ( Red color ) will display on the screen. Press 【PREV/NEXT】to adjust the focus under 720P ( Zoom in/Zoom out). Press【REC】again to stop video record and video clip will be saved automatically. b. Camera installed to the waterproof case, long press the【REC】 button 3 seconds to power on the camera and video record will start at the same time, long press the 【REC】 button 3 seconds to stop the video record and camera will power off automatically at the same time. c . Press 【POWER】button to power on the camera, press 【POWER】 button again to take a picture, camera icon (Red color) will display on the screen, the icon will return to white color after successfully captured, available to use 【PREV/NEXT】 to adjust focus. ~ 13 ~ The camera can’t take pictures if installed in the waterproof case, please use remote controller to do this. Video Playback Press 【MENU】button to enter the main menu, use 【PREV/NEXT】to select the video folder, here has a number at the corner to show the quantity of the video clips inside. Press 【REC】button to confirm and enter the folder, the video clips display in thumbnail 2 x 3 . Use【PREV/NEXT】to select the video clip, and press【REC】to confirm, press【REC】again to play the video. ~ 14 ~ Picture playback Press 【MENU】 button to enter the main menu, use 【PREV/NEXT】to select the picture folder, here has a number at the corner to show the quantity of pictures inside. Press 【REC】button to confirm and enter the folder, the video clips display in thumbnail 2 x 3 . Use【PREV/NEXT】to select the picture, and press【REC】to confirm, press 【REC】again to view. ~ 15 ~ Delete files Long press 【REC】button under playback mode, the delete option will display on the screen as below. Press 【PREV/NEXT】button to change option. No:Will cancel operation and quit Yes:Will delete selected file ALL:Will delete all files in the folder Press 【REC】to process the operation NOTE: The files can not recovery after delete, please back up in advance. ~ 16 ~ Camera connect to TV A,USB - RCA cable to connect camera with TV Connect the RCA side to TV ( YELLOW-VIDEO ; WHITE-AUDIO), connect the Micro-USB side to camera: B,Connect with TV by HDMI cable “ HDMI to Micro HDMI ” cable is necessary for this operation. Connect the standard HDMI to TV, and Micro-HDMI to camera. Picture below: NOTE: The Max resolution is 1080P when playback by connecting with TV(monitor). Real-time display output resolution is 480I . ~ 17 ~ Camera connect to PC Connect camera with computer by USB cable, transfer the files and power charge. After connected with computer and power on the camera, the camera screen will display USB connect icon like below: Under power on state to read the memory card and charge the power. Under power off state to charge the power only. ~ 18 ~ SYSTEM MENU Booting Picture Icon Instruction 1920x1080 Video size Record icon 28000M Available memory Capture icon 15:33:24 Available time of Continuous shot memory icon 2010/09/21 System date Memory card icon 04:27:48 System time Power indicate ~ 19 ~ Main Menu Icon Instruction: Video folder: Number will display at the corner to show the quantity of video clips Picture folder: Number will display at the corner to show the quantity of video clips Video setting: recording and capture settings System setting ( Language, date & time, format …etc ) ~ 20 ~ Fast setting Long press 【POWER】button 2 seconds to power on the camera, press 【MENU】to enter the main menu, press 【REC】 to confirm and enter the system setting menu. Language setting Select language menu and press【REC】to enter, use【PREV/NEXT】 to choose suitable language, then press 【REC】again to confirm. ~ 21 ~ Date & Time setting Press 【PREV/NEXT】to select the option and press 【REC】 button to active the setting. Red color means active setting, press 【PREV/NEXT】to change the setting. Press 【REC】again to confirm and go to next option. After settings, press 【REC】 to save and quit automatically. ~ 22 ~ Record Mode setting Press 【MENU】to enter the system menu, press 【REC】 to confirm and enter the record setting. Select “ REC mode” and press【REC】to enter the setting. Press【PREV/NEXT】to select and press【REC】again to confirm and save the setting automatically. Normal REC: Press the【REC】button to start the video record, press 【REC】 again to stop record, time length of video clip is optional and could be set under “Loop setting”. Time Flies:Time flies effect ~ 23 ~ Motion Detect:The camera will start video record while movement detected face to the lens. Video Resolution setting Press【PREV/NEXT】 to select, and press【REC】to enter the setting. Select the suitable resolution RESOLUTION FRAME RATES RATIO 1920x1080 FULL HD 1080p 30fps 16:9 1440x1080 FULL HD 1080p 30fps 4:3 60fps 16:9 60fps 4:3 1280x720 848x480 HD 720p QVGA ~ 24 ~ SPECIFICATION ITEM PERFORMANCE ROM 32MB TF CARD 1-64GB TFT LCD SENSOR MAIN SPEC VIDEO AUDIO SIZE 1.5 INCH RESOLUTION 480x240 SIZE 1/2.5 INCH PIXELS DIMENSI ON OTHER SPEC SDHC SUPPORT CMOS 2592H x 1944V OUTPUT HDMI/USB MIC BUILT IN OUTPUT HDMI/USB SPEAKER BUILT IN USB USB 2.0 BATTERY 3.7V, 950mAh LI-ION DC DC 5V, 1000mA OPTIONAL INTERFACE POWER REMARK CAMERA DIMENSION 82 x 42 x 25mm WEIGHT 92G WATERPROOF CASE 29G MOTION DETECTION YES TIME FILIES YES LOOP RECORD YES CONTINUOUS SHOT YES DIGITAL FOCUS YES TIME STAMP YES ~ 25 ~ OPTIONAL WITH BATTERY ITEM PERFORMANCE PICTURE FLIP YES AUTO SCREEN OFF YES LOW POWER PROTECTION YES AUTO POWER OFF YES REMARK 180° upright 5、10、20 MINS FULL HD1920 × 1080 30FPS VIDEO RECORD FULL HD1440 × 1080 30FPS OPTIONAL SIZE HD 1280 × 720 60FPS HD 1280 × 720 30FPS SPEC QVGA 848×480 60FPS 4000 × 3000 TAKE PICTURE PLAY BACK OPTIONAL SIZE 3200 × 2400 8MP 2592 × 1944 5MP SOUND RECORD YES PICTURE YES VIDEO FORMAT 12MP LANTERN SLIDE MP4 H.264/MPEG4 PLAY SPEED OPTIONAL X1, X2,X 4,X 8 Note: Camera will lost warranty if disassembled or fall into water. ~ 26 ~ Please login www.jeasun.net for more product information. ~ 27 ~