1
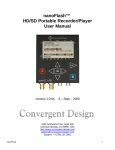
Flash XDR™
User Manual
For Firmware Version 1.5.92
16 – Dec – 2010
4465 Northpark Drive, Suite 400
Colorado Springs, CO 80907 USA
http://www.convergent-design.com
++(720) 221-3861
“cd” -- “support” -- “at” -- “convergent-design” -- “.com”
Flash XDR User’s Manual
Convergent Design, Inc
2
Flash XDR User’s Manual
Table of Contents
1)
2)
3)
4)
5)
6)
7)
8)
9)
Welcome and Overview. . . . . . . . . . . . . . . . . . . . . . . . . . . . . . . . . . . . . . . .
The Essentials: Required Reading (Quickstart) . . . . . . . . . . . . . . . . . . . . .
Input / Output Connections . . . . . . . . . . . . . . . . . . . . . . . . . . . . . . . . . . . . .
Front Panel Controls . . . . . . . . . . . . . . . . . . . . . . . . . . . . . . . . . . . . . . . . . .
LCD Screen Layout . . . . . . . . . . . . . . . . . . . . . . . . . . . . . . . . . . . . . . . . . . .
Menu Navigation . . . . . . . . . . . . . . . . . . . . . . . . . . . . . . . . . . . . . . . . . . . . .
System Configuration: Date/Time, Time-code, Trigger . . . . . . . . . . . . . . .
Video Setup: Data-Rate, CODEC, PSF I/O . . . . . . . . . . . . . . . . . . . . . . . .
Audio Setup: Embedded/Analog, Line/Mic, Gain Setting . . . . . . . . . . . . . .
10) Compact Flash: Capacity, Usage. . . . . . . . . . . . . . . . . . . . . . . . . . . . . . . .
11) File Naming Conventions . . . . . . . . . . . . . . . . . . . . . . . . . . . . . . . . . . . . . .
12) Viewing Options / Software Accessories . . . . . . . . . . . . . . . . . . . . . . . . . .
13) NLE Support (FCP, Avid, Vegas, Premiere, Matrox Axio). . . . . . . . . . . . . .
14) Firmware Update Procedure . . . . . . . . . . . . . . . . . . . . . . . . . . . . . . . . . . . .
15) Applications: Multi-Cam Recording, Multi-Display Playback. . . . . . . . . . . .
16) Accessories: Cables, Covers, Remote Switches, Mounts . . . . . . . . . . . . .
17) Tips and Troubleshooting: Error Messages. . . . . . . . . . . . . . . . . . . . . . . . .
18) Safety and ESD Protection. . . . . . . . . . . . . . . . . . . . . . . . . . . . . . . . . . . . . .
19) Specifications . . . . . . . . . . . . . . . . . . . . . . . . . . . . . . . . . . . . . . . . . . . . . . .
20) Connector Pin-Outs . . . . . . . . . . . . . . . . . . . . . . . . . . . . . . . . . . . . . . . . . .
21) Mounting Plate Dimensions and Hole Pattern . . . . . . . . . . . . . . . . . . . . . .
22) Warranty and Obtaining an RMA . . . . . . . . . . . . . . . . . . . . . . . . . . . . . . .
23) Version History . . . . . . . . . . . . . . . . . . . . . . . . . . . . . . . . . . . . . . . . . . . . . .
4
5
6
8
10
11
11
14
16
19
20
21
22
23
24
25
26
27
28
30
31
32
34
©2009-10 Convergent Design, Inc. All Rights Reserved. No part of this publication may be
reproduced, stored in a retrieval system, or transmitted, in any form or by any means, electronic,
mechanical, photocopying, recording or otherwise, without prior written permission.
Convergent Design, Inc
3
Flash XDR User’s Manual
Welcome and Thank You
Congratulations on selecting Convergent Design HD/SD Portable Recorder, Flash XDR. It is
manufactured in the USA and shipped from the factory in the most secure packaging available.
Please inspect the contents of the package. In the unlikely event that you find any shipping damage
or missing components, please contact us.
Shipping Contents
Your Flash XDR shipping container should come packaged with the following:
1. Flash XDR recorder/player
2. Power Supply (100 to 240 VAC Input; 12V DC @ 1.5A Output)
3. USB Compact Flash Reader with USB Cable
Flash XDR Overview
Flash XDR is a revolutionary solid-state HD/SD recorder/player that uniquely utilizes the very highquality Sony XDCAM 4:2:2 CODEC to write native Quicktime, MXF (video/audio/time-code), or MPG
files onto affordable Compact Flash media. Flash XDR breaks ground in terms of weight, power,
size, ruggedness and ease of use. We are confident you will agree that the video quality is
indistinguishable from uncompressed (at 100+ Mbps Long-GOP or 180+ Mbps I-Frame modes).
Product Support Contacts
1.
2.
3.
4.
5.
6.
Support E-Mail: “cd” -- “support” -- “at” -- “convergent-design” -- “.com”
Sales E-Mail: “cd” -- “sales” -- “at” -- “convergent-design” -- “.com”
Main Telephone: ++(720) 221-3861
Sales Telephone: ++ (803) 278-0941
Web Site: http://www.convergent-design.com
Forum: http://www.dvinfo.net/conf/convergent-design-flash-xdr/
Convergent Design, Inc
4
Flash XDR User’s Manual
The Essentials (Quickstart)
1. Register your Flash XDR by sending a simple e-mail to “cd” -- “support” -- “at” -“convergent-design” -- “.com” with your name and the serial number off the right side of the
Flash XDR. You will get automatic notification of firmware updates and service bulletins.
2. Use only the qualified Compact Flash cards for the specified bit rates:
1. Lexar 32/16/8 Gbyte 400x / 600x CF cards up to 280 Mbps
2. *Transcend 400x 64 Gbyte CF cards up to 180-220 Mbps (ver1.5.55)
3. Transcend 600x 32/16 Gbyte CF cards up to 280 Mbps (ver1.5.91)
4. *Delkin UDMA 420x-450x 64/32/16 Gbyte CF cards to 180-220 Mbps (ver1.5.91)
5. Delkin UDMA 625x 32/16 Gbyte CF cards up to 280 Mbps (ver1.5.91)
6. SanDisk Extreme 32 Gbyte CF cards up to 280 Mbps
7. SanDisk Extreme Pro 64/32 Gbyte CF cards up to 280 Mbps
*Please note that card performance may vary from card to card. The bit rate will
automatically be clipped during record for under-performing cards. (ver1.5.25)
3. Check http://www.convergent-design.com/ for any updates. See page 20 for details on how to
update the firmware. Use a reliable power source during updates! Run a short test after
every firmware update, capture 1 minute of audio / video and play back out of the Flash
XDR and on a computer.
4. Update your NLE to the latest version and check compatibility (page 19)
5. Connect a power source to the 4-pin XLR and press the red power button on the Flash XDR.
6. Set the time and date (page 11)
7. Set the file format to Quicktime (MAC) or MXF (PC) (page 11)
8. Select the Record Trigger Source (page 11)
9. Select the Time-code source and set the initial value (if needed) (page 12)
10. Set the compressed bit-rate and choose I-Frame or Long-GOP CODEC (page 12)
11. Set the PSF In and PSF Out options, depending on your video format (page 12)
12. Set up the audio source, line/microphone input and gain (page 13)
13. Connect a valid HD-SDI source and time-code source (as appropriate). Connect the HD-SDI
output to a compatible monitor. You should see valid video output.
14. Insert a qualified Compact Flash card into CF slot #1 (manufacturer’s logo side up) and format
by pressing <F2> and <F5> simultaneously. Warning: all files will be erased off the card!
15. For a simple test, do a 60-second recording and playback from Flash XDR.
16. As a precaution to protect your video, please consider backing up your data before
inserting CF card into a computer. We suggest using a Nexto 500Gbyte Backup Drive for
this purpose (see accessories, page 21).
17. Insert CompactFlash card with recorded video, preferably via Nexto, but also via USB or
Firewire CF reader for transfer to your NLE system for review / editing. (See other viewing
options, page 17).
18. Charge your batteries or use a reliable AC source to prevent loss of data.
19. Do not remove or insert Compact Flash cards while in record or playback.
20. Enjoy some fantastic video/audio!
Convergent Design, Inc
5
Flash XDR User’s Manual
Input / Output Connections
Left Side Connections
Right Side Connections
Rear Side Connectors
Convergent Design, Inc
6
Flash XDR User’s Manual
Left Side Connections
1. CompactFlash Slots (4): Insert (at least 1) solid-state Compact Flash card(s) face up for
record and playback.
2. CompactFlash LEDs: Compact Flash Status:
> No Light means no card inserted or the card has not been properly recognized.
> Solid green means card is OK and ready for use.
> Flashing Red means card is being written to during a record session (do not remove card).
> Flashing green means card is being read from during playback (do not remove card).
> Solid Red means the card is full (may be removed).
Right Side Connections
3. Ch. 1-2 Balanced Line Out: Analog audio output, 5-pin XLR. (See Connector Pin-Outs, page
28)
4. Mic/ Balanced Line Inputs: Analog left and right (Ch.1 and Ch.2) audio inputs.
Rear Connections
5. Power: 4-pin XLR DC power in, range +6.5V to +20V, 14 to 16 Watts; either from external
battery or included AC adapter.
6. HP Out: Unbalanced headphone audio output (3.5 mm jack). Also, headphone out provides 2
rising beeps at record start, 2 falling beeps at record stop. (ver1.5.25)
7. Remote Control: 4-pin hirose locking connector for external trigger and tally light control.
Close the switch once for record trigger and once again for record stop (see page 28 for pinout). Tally light flashes once a second during normal record, twice a second during record with
less than 5 minutes total record time remaining, 4 times per second with less than 1 minute
total record time remaining. (ver1.5.25)
8. RS-422/RS-485: For RS-422 based deck control and time code, external control of the Flash
XDR and for communications with external devices such as remote controls and/or laptops.
Currently not operational.
9. On/Off (Red): power button. In idle mode, the button responds immediately to turn off/ on the
unit. This button is not responsive to a brief push during a record, nor is it responsive during a
firmware update. However, holding the power button down continuously for 5 seconds at any
time will always power down the unit, regardless of the circumstances.
10. LTC In: Linear Time-Code Input.
11. 1394: 4-pin Firewire connection. Currently not operational.
12. SDI-Out: SDI only, re-clocked stream with embedded audio and time code.
13. SDI/ASI Out: SDI and ASI re-clocked output stream.
14. SDI/ASI In: SDI or ASI video source for recording.
Convergent Design, Inc
7
Flash XDR User’s Manual
Front Panel
Convergent Design, Inc
8
Flash XDR User’s Manual
Front Panel Details
1. LCD Display: Shows the status of the Flash XDR in the various operating modes. Also
displays warning and errors in correspondence with flashing LED error lights. (see p. 10)
2. Navigation Buttons: Allows the user to navigate the menu. (see p. 11)
3. Function Keys: Programmable function keys for various configurations. Currently, the only
keys that function are <F1>, <F2>, <F4> and <F5>, which can be used for updating and
formatting. In the future, the user will be able to customize these keys with a Configuration File
editor tool which we will provide.
a. <F1>: Allows Mic gain adjustment during record for analog audio channel-1 when the
audio input is set to Analog -> Mic. Press once to turn off the capability (and make the
arrows on that side disappear), and once again to enable adjustment during record.
b. <F4>: Performs the same function on audio Chan-2 as the <F1> key does on Chan-1.
c. <F2> & <F5>: These two keys are used together to perform a firmware update or format
of the cards in the unit.
4. Indicator LEDs: Status LEDs for the various play and record mode: Bright red indicates that
data is being recorded to this CF card. Steady green indicates that the card is ready for record
or playback operation. Solid white indicates a playback operation.
5. Record, Stop, Play Buttons: <REC>, <STOP>, and <PLAY> buttons for control of respective
modes. The Flash XDR, when powered on, is in a ready mode. Record or Playback can be
activated by pressing the appropriate buttons, as described below:
a. REC: Press <REC> to start recording a clip to the card. The unit will record to CF slot
one initially and proceed in order if record time exceeds the amount of time available for
one card, allowing the clip to span several cards. If there is no card present or the card
is full, an error message will appear.
b. STOP: Press <Stop> button until the blue LED turns on to terminate record or playback
mode. Also used to cancel a card format.
Note: the STOP button is immediately responsive upon being pressed. To prevent
accidentally stopping a record, see alternative record trigger options (timecode trigger,
remote trigger)(page 11), which de-activate the REC and STOP buttons.
c. PLAY: Press once to enter Playback mode. By default, Play will start with the last
recorded clip. Use the left and right arrow keys to advance / backup to the next /
previous file. You can hold down these keys to move very quickly from file to file.
6. Other button functions:
Delete Last Clip: Press and hold the Stop key, then press left arrow key, to delete last
clip off of currently inserted card which was last recorded to. (ver1.5.25)
Convergent Design, Inc
9
Flash XDR User’s Manual
LCD Screen Layout
The LCD screen will change in appearance depending on the operating mode. Below is the essential
layout information:
1.
2.
3.
4.
5.
Compact Flash Card levels: 0 to 100% full
Individual Compact Flash Level Indicators
Time-code Display
Play Menu Line with current file name displayed
Audio Gain adjustment indicators (Mic input only). During record, allows Mic input gain
adjustment using up and down arrow keys. Activate with F1 (CH1) and F4 (CH2). (You can
also adjust Mic gain via the Audio menu. This is just a mechanism to adjust during record.)
6. Audio Channels 1-2 Level Indicators
7. Audio level markers (-60dB to 0dB)
8. Current Video Source Format
9. Recording (compressed) bit-rate
10. Total remaining record time (minutes) across all cards
11. Audio Over-Range Indicator
12. Microphone Phantom Power (+48V) Indicator.
Convergent Design, Inc
10
Flash XDR User’s Manual
Menu Navigation
Use the up, down, left, right and the center (enter) buttons to navigate through the various menus on
the Flash XDR. Press the right arrow button to go to the next menu level and the left arrow to ascend
up to the previous menu. Use the up/down arrows to modify a selection and (very important) press
the center (enter) button to apply the selection, or else your selection will not be entered.
Below is a detailed explanation of each of the menus:
System
Time (HH:MM:SS / Temperature)
Sets time in Hours: Minutes: Seconds (24 hour format only) and displays internal temperature
(in degrees C)
Date (YYYY MM DD)
Sets the current Year Month Day
(File Format option was formerly here, please see “File=” below to set file format. (ver1.5.91)
Max File Size (100% to 20%)
For long records, set Max File Size to a value ranging from 100% (3.5 Gbytes each) to 20% (~
750 Mbytes each).
(This option is not available at the bit rate of 180 Mbit I-frame or above – at this rate the file
size is 100%.)
File= (1st 2 digits: Unit ID, 01 to 99 or AA to ZZ) (next 3 digits: clip number, 000 to 999)
(last field: File Format .MOV / .MXF / .MPG) (ver1.5.91)
Allows the user to control file naming, to a limited degree. The unit ID is used in the first two
digits of the file name. (See File Naming Conventions, pg 16.) If your shoot involves multiple
units, this can be used to set unique IDs for each unit.
The middle 3 digits are the clip number, which can also be set. Take care not to create
duplicately named files on a single CF card.
Last field sets the file format: QT (Quicktime / .mov file), MXF (.mxf file format), or MPG. See
Software Accessories and NLE Compatibility for playing / editing files.
Pre-Record Buffer
Enables 4-7 seconds of internal storage of video before a record session starts. When the
record session is started, recording will begin 4-7 seconds in the past. (For bit rates up to 100
Mbit, pre-buffer = 7 seconds. For 140 Mbit bit rate, pre-buffer = 4 seconds. )
> The record will begin 4-7 seconds in the past and then will catch up to the present
moment over the course of 10 to 30 seconds recording. When the recording is stopped,
there may be a delay of up to 25 seconds, particularly for very short clips on slower CF
cards, while the internal buffering is being cleared out. This delay is minimized by using
a faster CF card or recording for a minimum of 20 to 30 seconds.
Convergent Design, Inc
11
Flash XDR User’s Manual
> When turning on the Pre-Record Buffer or changing inputs, allow a few seconds for
the internal buffer to fill before beginning a record.
> *** Pre-Record buffer can only be used with bit rates up to and including 140 Mbit.
> An additional 1.5 Watts of power will be consumed while the Flash XDR is in idle (nonrecording) mode when using pre-record buffer. There will be no effect on power
consumption during record.
> It is suggested to turn off Pre-Record Buffer when playing back off the CF cards.
> If this mode is used in combination with “Timecode (TC)” or “TC > Last TC” Trigger
(System->Trigger), the timecodes of the camera's recording and nanoFlash's recording
may not match, as the nanoFlash begins recording in the past (before the camera's
record-run timecode was running), causing a potential timecode mismatch of a few
seconds. Also, with “TC > Last TC” trigger used with Pre-buffer, nanoFlash will be
delayed 1 to 8 seconds to start recording for similar reasons. (ver1.5.91)
Trigger
Selects the record/ stop trigger source. Note that each trigger is mutually exclusive (i.e. only
one trigger is active at a time). This means that, for example, in timecode trigger mode the
Record and Stop buttons will be disabled – only the behavior of the incoming embedded
timecode will start and stop a record.
• Remote Play – Unit will play (but not record). Formatting is also disabled. Remote tally
also becomes a Play mechanism: start (1 press) / pause (1 press) / stop (double press).
In this mode, Remote tally can also be used for Cue Play (in the main menu). (ver1.5.25)
• Timecode – Recording will start when incrementing time-code is detected from the HDSDI input and will stop recording when time-code is not incrementing. This is particularly
useful when wanting to trigger a record session from the camera's record. To use
Timecode Trigger, in addition to this setting System->Trigger->Timecode :
> Set System->Timecode->Source to “Embedded” or “LTC” as appropriate.
> Set the camera's timecode to “Record Run”.
> Most cameras require a tape or solid-state media within the camera to enable
the record function. Also, note that when the media in your camera becomes full,
the time-code will cease to increment and the nanoFlash will stop recording.
> Time-code increment may also take place on some cameras when playing
back from the camera's media, or inserting or ejecting a tape or powering on/off
the camera, causing the recording of very short unexpected clips in these cases.
Use “TC > Last TC”, below, to help minimize unexpected recordings.
> Can be used with Trigger Delay (System->Timecode->Trigger Delay). With
some tape-based cameras which unexpectedly shift the timecode at the start of
record, a trigger delay of 1 to 3 seconds can help to precisely sync the camera's
timecode with Flash XDR timecode. A 1 second setting can also help eliminate
the creation of very tiny files on the Flash XDR caused by slight, random
adjustments of the timecode by some cameras while in idle mode. (ver1.5.91)
• TC > Last TC – Same as Timecode Trigger, above, except that the nanoFlash will only
trigger to record if the incoming timecode is greater than the ending timecode of the last
recorded clip. This helps to minimize unexpected recordings, for example when inserting
or removing media in the camera, or playing back video off of the camera's internal
media. Be aware, however, that if the camera's timecode is re-set to a smaller value, the
Convergent Design, Inc
12
Flash XDR User’s Manual
•
•
•
•
•
nanoFlash may not trigger from the timecode unless the nanoFlash is then turned off and
back on. (ver1.5.55)
Remote switch – Recording is triggered by a remote control switch. Special note: the
keypad is locked out when recording is triggered by the remote switch; this prevents
accidentally pushing the stop button when the Flash XDR is in a backpack (for example).
Also, the remote switch must be held down approximately 1 second to stop the
recording. (See remote switch pin-out, or a cable can be purchased from Convergent
Design.)
Remote level / hold – Again via remote control, except that Record is initiated by
pressing and holding Remote Tally, Record is stopped by releasing Remote Tally.
Record button – Recording is started by pressing the Record Button on the unit, and
stopped by pressing the Stop button.
Remote & Record button – Remote switch and Record button can be used to start /
stop Record. (ver1.5.55)
Power up – Recording is automatically started by applying power and video source,
Record is stopped by removing video source.
Duration HH:MM:SS
If this feature is enabled, each record session will last for the specified HH:MM:SS duration.
Timecode
Sets the time-code source, and (for internally generated timecode only) the drop-frame flag
and the initial value (seed)
Source (Embedded, Internal, LTC)
• Embedded – time-code is extracted from HD/SD-SDI stream from the source
• Internal – time-code is generated internally in the Flash XDR
• LTC – time-code is taken from external LTC input
• Jam Sync - provide momentary timecode jam sync (via the LTC input port) while
unit is in idle mode with a valid input source. If video source is lost, timecode
must be re-sync'ed after video source returns.
Dropframe – [ ] enable (checked) if drop-frame time-code should be generated (only
valid for internal time-code generation and 59.94/29.97 frame rates)
Seed – initial value for internal time-code generating only:
o Set 01:00:05:19 – Allows you to manually set the initial time code. Use the
left and right arrows to navigate to the various settings (HH:MM:SS:FF)
and then use the up and down arrows to increase / decrease the values.
Press the center (Enter) button to save the value
o Time of day – Use time of day time code. A new time of day value is
captured each time a record session is started.
o Reset – set the initial time-code to 00:00:00:00.
Trigger Delay – Seconds to delay Recording when using “Timecode” or “TC > Last TC”
trigger (System->Trigger). (See discussion in Trigger section, above. ) (ver1.5.91)
Create Settings.txt: Primarily a tech support diagnostic tool, creates a file settings.txt with all
current settings. Preferably write to an inserted CF card which is formatted, blank. (ver1.5.25)
About: Displays the current firmware version number.
Convergent Design, Inc
13
Flash XDR User’s Manual
Video
Bit Rate
This option allows the user to set the compressed bit-rate of the video being recorded. Note
that most NLE's place a 50 Mbit label on high bit rate files, but nevertheless accept the high bit
rate files natively. The actual bit rate of a file can be seen in Quicktime Player by using
Window->Movie Inspector, which has a bit rate field. For MXF, the bit rate can be seen in the
XDCAM Viewer (an MXF Player), Product / Version fields (under View->Metadata). (ver1.5.25)
HD Bit Rate (Qt, MXF)
• 18/35 Mbps = Full-Raster (1920x1080/1280x720) 4:2:0 Long-GOP (EX1/EX3)
• 18/35 Mbps = (1440x1080/1280x720) 4:2:0 Long-GOP (XDCAM HD) (ver1.5.25)
• 50/80/100/140/180 Mbps = Full-Raster (1920x1080/1280x720) 4:2:2 Long-GOP
(XDCAM HD 422)
• 100/140/180/220/280 Mbps = Full-Raster (1920x1080/1280x720) 4:2:2 I-Frame
SD Bit Rate (Qt, MXF)
• for Standard Def: 50, (40, 30 ver1.5.25) Mbit IMX 4:2:2 (720x486/720x576)
HD Bit Rate (MPG)
1. 19/25/35 Mbps (1920x1080/1280x720) 4:2:0 Long-GOP
SD Bit Rate (MPG)
1. 5/9 Mbps 4:2:0 Long-GOP
CODEC (Long GOP / I-Frame)
This option selects the XDCAM 422 CODEC format. Long GOP is the standard, and supports
the bit rates at 35, 50, 100, 140, and 180 Mbps. I-Frame only allows recording at 100, 180,
and 220 Mbps. The Flash XDR utilizes the high quality Sony XDCAM 4:2:2 CODEC for video
compression. The data rates of 100 Mbit or greater Long GOP and 180 Mbit or greater IFrame are generally considered to be Master Quality video. The highest quality video from the
Flash XDR is the 180 Mbit Long-GOP video, due to the greater efficiency of Long GOP
recording vs. I-Frame.
Record PSF->Progressive [ ]
Turn “On” to record PSF input video or progressive input video as progressive. Turn “Off” to
record PSF input video or interlaced video as interlaced.
Play Progressive->PSF [ ]
Turn “on” to play 1080p progressive video off of a CF card as PSF video to the video outputs.
( Note: some SDI monitors only accept 1080PSF video, not progressive. In this case,
set “On”.)
Turn “off” to play 1080p progressive video as 1080p. ( Note: HDMI monitors do not support
1080psf23.98 . In this case set “Off”. )
SD Aspect Ratio
For Standard Definition Video input only: select the pixel aspect ratio (16:9 or 4:3). This
setting needs to match the camera's aspect ration setting for SD.
Remove 3:2 Pulldown
Preserves 1080p2398 frame rate from a 1080p2398 source which is outputting as 1080i59.94
Convergent Design, Inc
14
Flash XDR User’s Manual
with 3:2 pulldown, such as Canon cameras in 24F mode. Be sure this feature is turned off if
not needed. Now works with 720p60 sources (to 720p24) (ver1.5.25).
E to E Direct (SDI Output loop-through only)
Sets the SDI loop-through output to the exact same format as the incoming video format (such
as psf). This is particularly useful for looping through a PSF input. However, in E to E mode,
only embedded video/audio/timecode are looped to the output (not analog audio, nor
LTC/internal timecode). ( Note: some SDI monitors only accept 1080PSF video, not
progressive. In this case, set E to E “On” to loop out PSF from a PSF input. )
Time-Lapse
Records individual video frames (as I-Frame only) based on a set time interval
(Hours:Minutes:Seconds). Special points to consider:
> the hour glass on the lcd screen will only change on the selected time interval that we write a
frame.
> when a time-lapse record is stopped, there may be a delay up to the selected time interval to
close the clip. In addition, the clip will end with under a half second of regular speed footage,
which will need to be edited out.
> Use a reliable power source so as not to lose power and lose footage.
> Time-Lapse mode can support all bit rates (up to 220 Mbit) during record on approved CF
cards (including slower CF cards), due to the lower data rate; however, not all CF cards can
play back high bit rate recordings.
> Time-lapse is always I-frame only recording.
Crank [ ] [Recorded Frame Rate] [Crank Frame Rate] (ver1.5.55)
Allows frame rate overcrank / undercrank to provide slow motion / fast motion effects. The
recorded format corresponds to the incoming video format – for example, if 720p60 is the
incoming format, and recorded rate is set to 24, the recorded format will be 720p24. In this
example, if the crank rate is set to 60 then this provides a 2.5x slow motion effect.
Recorded Rate: 24, 25, 30, 50, or 60. Can not exceed incoming video frame rate.
Crank Rate: Frames per second to preserve from the incoming video: 1 to 60. Can
not exceed incoming video frame rate.
> Crank is I-Frame only recording, 50 Mbit minimum, the audio is not for use in this mode.
> In Crank mode, incoming 720p60 can only be used with 60, 30, or 24 recorded rates (and
1080p30 with 30 or 24 recorded rates) .
> Incoming 720p50 can only be used with 50 or 25 recorded rates (and 1080p25 with 25 only).
> Press right or left arrows during record to dynamically adjust crank rate.
> The recorded bit rate of cranked recording is reduced based on the ratio of the recorded
frame rate to the incoming frame rate. For example, a 720p60 incoming signal @ 280 Mbit,
with record rate of 24 (yielding 720p24 recording) will adjust the bit rate by a ratio of 24/60,
giving a recorded bit rate of 112 Mbits /sec. This is necessary due to the way the Flash XDR's
codec handles cranking.
> For best results, set your camera to the full frame rate. For example, for cranking in 720p
PAL set the camera to 720p50 (not 720p25), for cranking in 720p NTSC set the camera to
720p60 (not 720p30 nor 720p24).
> 720p24 / 25 / 30 can not be played out of the Flash XDR at this time.
Convergent Design, Inc
15
Flash XDR User’s Manual
720p60->30, 50->25
(ver1.5.55)
Cuts the frame rate in half for incoming 720p60 or 720p50 signals. Useful, for example, with
cameras with a 720p30 or 720p25 mode which then double the frame rate of the camera's SDI
output. The nanoFlash bit rate in this mode is applied to the reduced frame rate. For example,
@ 280 Mbit from a 720p50 source reduced to 720p25, the 280 Mbit applies across 25 frames.
Record Tally (ver1.5.91)
Places a red bar on SDI output during record, as a record indicator. Also requires Video->E to
E Direct to be activated. In version 1.5.91, this feature is always active when E to E is
selected. In version 1.5.92, this feature is broken.
Flip V (ver1.5.91)
Inverts (flips) the video input vertically. (HD only)
Flop H (ver1.5.91)
Inverts (flips) the video input horizontally. (HD only)
Audio
In (Embedded / Analog)
This menu option allows the user to select between embedded HD/SD-SDI audio input or the
analog audio inputs (on the right side of the Flash XDR).
Out [] Bal
[] HdPh
This menu option enables analog audio outputs (embedded SDI audio output is always
enabled). If the user selects (checks) “Bal”, then the 5-pin two channel analog audio output is
enabled. If the user selects “HdPh”, then the 3.5mm unbalanced headphone jack is enabled.
Both can be selected at the same time.
Analog Settings
This menu option lets the user specify more detailed audio settings.
Note: Analog audio input is not active unless there is also a valid video source.
Src (Line / Mic)
This is the source selection for the analog audio channels 1 and 2, the user can
individually select between Line level (Line) or Microphone level (Mic) inputs. If the
selected source is “Line”, the phantom power is automatically turned off.
Phantom (off/on)
If you are using a +48V phantom powered microphone on an input channel, then you
should turn on phantom power on that channel. Otherwise it must be off to prevent
damage to your equipment. If in doubt, leave it off. Never use phantom power on a
wireless microphone receiver, a ribbon microphone or a T-Powered microphone or for
a 12 Volt microphone.
Convergent Design, Inc
16
Flash XDR User’s Manual
When the message “48V to Mic on ChX?” appears, if you want +48V phantom power
on, confirm by pressing the Center Key twice. Otherwise press the STOP button to
cancel.
Mic Gn 1 (xx)dB 2(xx)dB
The user can also choose the gain with the microphone input, in a range of 10-65dB.
(Generally, most microphones require a gain of 30 to 50 dB for proper levels).
Additionally, Mic gain levels can also be adjusted during a record session. Pressing
<F1> and <F4> will enable channel 1 or 2 to be adjusted (and produce arrow symbols
on the status line), and the gain level is displayed during a record session. Use the up
and down arrow keys to adjust selected Mic channels during record.
Note that the Gain is always fixed at 0dB (unity gain) for line level inputs. If the selected
input is “Line”, then an error message will appear “Line input on ChX” if the gain or
phantom power is attempted to be adjusted.
Audio Channels Recorded: 0, 2, 4, or 8 channels. (ver1.5.25)
Audio Channels Monitoring: Choose audio channels to monitor on headphone output: 1
and 2, 3 and 4, 5 and 6, or 7 and 8. (ver1.5.55)
Play (filename)
Select the file to begin play.
Note: you can mix and match file formats / bit rates / video formats on the same card for
recording, but for playing back all files need to be the same video format and file format.
Note: Play of 720p24 / 25 / 30 is not supported at this time. (ver1.5.25)
During play, the following navigation tools are available: (MXF, QT files only)
> File Skipping: press the right key to jump to the next file, press the left key to jump to the
previous file. Press up key to jump to next clip, press down key to jump to previous clip.
(ver1.5.55) Jumping between files using the arrow keys will cause a very brief distortion of the
video output.
> Pause: press Play (during play or fast forward) to Pause. Press Play again to resume play.
> Fast Forward: press and hold Play for ½ second for 2x, 1 ½ seconds for 4x, 2 ½ seconds for
6x. A fast forward rate bar is displayed on the lcd screeen. Maximum fast forward rate
depends on bit rate and card type. In general:
> to 50 Mbit bit rate: max rate = 6x (SanDisk Extreme 3: 4x)
> 100 Mbit: max rate = 4x (SanDisk Extreme, Extreme 3: 2x)
> 140 / 180 Mbit: max rate = 2x (SanDisk Extreme 3: 1x)
> 220 / 280 Mbit: 1x only
Fast forward beyond a tolerable rate can result in distortion, play may need to be re-started.
Play proceeds forward to the last file on the last card, and then loops back to the 1st file on the
1st card (unless Loop (below) is turned off).
Convergent Design, Inc
17
Flash XDR User’s Manual
Flash XDR can also play XDCAM EX or XDCAM 422 Quicktime files exported from Final Cut
Pro, by running the files through our converter tool to make a Flash XDR compatible MXF copy
of the files. See converter tool in Software Accessories for details.
If you have original Flash XDR files which exist on a computer or other hard drive (not on its
original CF card), and would like to play these files on the Flash XDR, do the following:
> format a compatible CF card on the Flash XDR.
> record a short clip (in the same video format and file format as the soon to be copied
files) – for example, place the lens cover on your camera and record 5 seconds of black.
> copy the desired files into the }CLP{ folder on the card, alongside your just recorded
short clip.
> set the trigger (System->Trigger) to “None” - during record, externally copied files are
ignored by the Flash XDR and overwritten, so this prevents records from happening and
overwriting your copied files.
> In the Play menu, choose the file to begin playing.
> Press “Play” - the clips will play through, and then loop back to the beginning and
repeat indefinitely til stopped.
Cue Play:
Allows playing from a cued frame (based on entered timecode), via Remote Tally only.
Press Remote Tally once to cue to selected timecode + 1 in the play file, press Remote Tally again to
continue playing from cued point. Additionally, set System->Trigger to “Remote Play”. (ver1.5.25)
Loop Record:
In this mode, the nanoFlash will record continuously to card 1, then to card 2,
then back to card 1 (overwriting previous contents), then back to card 2 (again overwriting previous
contents), etc til stopped. The current card is completely erased before any files are written. Do not
use this mode unless willing to have older material overwritten by newer material in a record session.
(ver1.5.25)
Convergent Design, Inc
18
Flash XDR User’s Manual
Compact Flash Capacity and Usage
Formatting CompactFlash cards
Pressing <F2> and <F5> while in the main menu will bring up the options for formatting all of the
cards present in the Flash XDR. Press <F2> and <F5> a second time to proceed with the format or
press the Stop button to cancel the format. Formatting is a very fast operation on the Flash XDR,
requiring under 10 seconds to format four cards. Note: all data will be deleted during a format
operation! During Format, the 1st 7 characters of the CF card Volume name are preserved. If the last
4 characters of the Volume are digits, they will be incremented automatically (to help indicate card
usage). (ver1.5.25)
Important Operating Notes
Use only the qualified Compact Flash Cards: see pg 4 for a list of qualified cards.
1. The Compact Flash card levels (0 to 100% full) are displayed on the upper line of the LCD.
The total remaining capacity across all cards (in minutes) is shown in the lower right corner.
2. NEVER remove a card while Flash XDR is in record or playback modes
3. Treat the card as READ ONLY outside of the Flash XDR. Do not defragment, change the
file structure or file names, change directories, add or delete individual files with any card
used by the Flash XDR.
4. Do not mix video formats (1080p / 1080i etc) or file formats (.mov and .mxf) on the same
card. However, it is permissible to change the bit-rates and the CODEC type (I-Frame /
Long-GOP) on the same card as long as the video format and file format do not change.
5. All CF cards must be formatted in Flash XDR before usage. After all files have been copied
to another drive for safe keeping, the CF cards can be reused by performing a format
operation on the Flash XDR. All data will be erased during a format operation.
6. Never force the card into the CompactFlash slot. Cocking the card or forcing it in could
damage the contact pins and render the slot useless.
7. Typical record capacities are shown below. Note that the record capacity does not depend
on the video format, only the selected bit-rate and the capacity of the CF card(s)
Compact Flash Record Capacity (Minutes)
50 Mbps 100 Mbps
180 Mbps
One 16 GB Card
36
18
12
One 32 GB Card
71
36
24
Four 32 GB Cards
284
144
96
Convergent Design, Inc
19
Flash XDR User’s Manual
File Naming Convention
The video/audio file naming convention is shown below. The file name follows an 8.3 format, where 8
characters identify the file name and 3 characters the extension (.mov or .mxf)
1) Unit ID Number: Unit ID is assigned under the System Menu, and is used to identify
multiple Flash XDR units if needed. The default is 01.
2) Clip Number: The clip number is incremented every time a recording is started. If the Unit
ID number is incremented, the clip number resets to 001.
3) File Number: File number is incremented whenever the file being recorded for a particular
clip reaches the max file size (~3.5GB). It is reset to 001 if the clip number or Unit ID is
incremented. During a record, the clip number and Unit ID will remain constant as the file
number increments. This will go across several card slots if the record time is long enough.
4) File Name Extension: the possible extensions are .mov (Quicktime) or .mxf (MXF files). In
general Quicktime files are used on the Mac and MXF files on the Pc.
Convergent Design, Inc
20
Flash XDR User’s Manual
Viewing Options
To view Quicktime files on the Mac:
> from Quicktime Player with Final Cut Pro 6.0.3 or better installed. (HD/SD files)
> from Quicktime Player with Calibrated Software's XD Decode (HD files):
http://calibratedsoftware.com/QXD.asp
To view Quicktime files on the Pc:
> from Quicktime Player with Calibrated Software's XD Decode (HD files) :
http://calibratedsoftware.com/QXD.asp
> from Quicktime Player with Calibrated Software's IMX Decode (SD files) :
http://www.calibratedsoftware.com/QIMX.asp
To view MXF files on the Mac:
> Sony XDCAM Transfer software combined with Final Cut Pro 6.0.3+ or Calibrated XD Decode:
https://servicesplus.us.sony.biz/sony-software-model-PDZKP1.aspx
http://calibratedsoftware.com/QXD.asp
> VLC Media Player:
http://www.videolan.org/vlc
> MXF4Mac (also for editing in Final Cut Pro) :
http://mxf4mac.com/
To view MXF files on the Pc:
> Sony XDCAM Viewer software:
https://servicesplus.us.sony.biz/sony-software.aspx?model=PDZVX10
> VLC Media Player:
http://www.videolan.org/vlc
> Open Cube:
http://www.opencubetech.com/
Flash XDR MXF files (50 Mbit only) are also now compatible with XDCAM Optical Equipment. The “Free”
naming convention may need to be set on the XDCAM equipment to accept Flash XDR files. SD files are now
also compatible with XDCAM Optical (ver1.5.25).
To view MPG files on the Mac: use VLC Media Player or Quicktime Player.
To view MPG files on the Pc: use VLC Media Player.
** See NLE Support, below, for more viewing options.
Software Accessories
Free QT → MXF Converter (XDCAM EX or XDCAM 422 .MOV Files only) – also makes nonfragmented file copies back to CF cards:
FileConverter 1.6 for Mac
FileConverter 1.6 for Pc (Pc version may also require Java Runtime Environment )
Free MXF → QT Converter (XDCAM 422 .MXF Files only, 50 Mbit and above, at least 2 channels
audio (ver1.5.55)) (Mac version only): Sony XDCAM Transfer 2.10.0 or better (combined with
Final Cut Pro 6.0.3+ or Calibrated XD Decode) – also for importing MXF files into Final Cut Pro:
https://servicesplus.us.sony.biz/sony-software-model-PDZKP1.aspx
Convergent Design, Inc
21
Flash XDR User’s Manual
NLE Support
Note: All recorded bit rates 50 Mbps and above will typically appear in NLE's with a 50 Mbps label.
However, all files are decoded / played out from their actual recorded bit rate. At this time, rendering /
re-encoding of edited footage from the timeline is always forced to 50 Mbps (within NLE's which
support re-encoding of edited footage), regardless of the bit rate of the originally captured video. Also
note that support for true frame rates (true 24, 30, 60) is limited in most NLE's. (ver1.5.25)
Final Cut Pro (6.0.3 or better)
FCP supports decode/ playback of all Flash XDR files generated as QT files. A timeline may be
created for the Flash XDR files (50 Mbps and greater) in Final Cut Pro under the Easy Setup
“XDCAM HD 422”. Rendering / re-encoding (to 50 Mbps only) is also supported.
See tips below for editing shortcuts with Final Cut Pro and Long-GOP MPEG2.
Standard Def video is supported as IMX 50 Mbit.
True frame rates, as well as 720p24/25/30, are supported for decode only. (ver1.5.25)
Avid Media Composer (3.1.1 or better)
I-Frame only formats are supported (MXF files).
Long-GOP formats up to 50 Mbit are fully supported.
Long-GOP 100 Mbit and greater is not yet supported.
Standard Def is supported.
Video formats 720p24 / 25 / 30: not supported at 50 Mbit and above. (ver1.5.25)
With the release of Media Composer 5.0.3.2 patch, support has been added within Avid for AMA
linking to Flash XDR MXF files. This allows direct access to files without the need to import (copy in)
the files. Patch 5.0.3.2 can be found here: Avid | Avid Editor Patches (ver1.5.91)
Sony Vegas (8.0c or better):
All Long-GOP formats are supported (MXF files).
The previous bug in which Vegas displayed 2 green frames at the start of every file has been fixed.
(ver1.5.91)
I-Frame only files are supported in version 9.0c or better.
Standard Def is supported.
(Audio is not accepted in the initial release of Vegas 9, but all other versions accept audio. Also,
Vegas requires a minimum of 2 channels audio.) (ver1.5.25)
Edius 5: All MXF files supported.
Edius 6: Initial release, MXF files not supported. Edius is addressing this problem.
Matrox Axio: Likely all HD and SD MXF files play on Matrox Axio systems.
Adobe Premiere CS4 / CS3: (PC version) with MainConcept MPEG Pro XDCAM plug-in (4.1.1 or
better), supports all nanoFlash MXF files:
http://69.15.88.17/downloads/MainConcept.pdf
http://www.mainconcept.com/site/prosumer-products-4/xdcam-22351/information-22391.html
For Mac versions of Premiere: unconfirmed support of all nanoFlash files, with Final Cut Pro installed
or Calibrated Software's plug-in installed:
http://calibratedsoftware.com/QXD.asp
Convergent Design, Inc
22
Flash XDR User’s Manual
Adobe Premiere CS5:
native support for MXF files.
Audio, timecode incompatibility exists in initial CS5 releases, and was repaired in 5.02 . (ver1.5.91)
Cineform NeoXX (5.2.0 or greater) : (ver1.5.91)
Native support for transcoding MXF files.
Please test compatibility with your system before using the Flash XDR.
Final Cut Pro Editing Techniques
Final Cut Pro now has a shortcut to help minimize rendering when editing MPEG2 natively. Here are
the steps to achieve this with XDCAM HD 422 footage:
1. Set up a sequence / timeline as XDCAM HD 422
2. In Final Cut Pro (6.0.3 or greater) -> User Preferences -> Render Control, set the CODEC to
ProRes
3. Drop your Quicktime clips directly into the timeline (you do not need to transcode first) for
editing
This will render only the effects in your sequence using the I-Frame-Only ProRes 422 CODEC. Areas
of the timeline which do not have effects applied are unaltered. Your sequence is not re-encoded
back to MPEG2 long GOP, in this case.
Firmware Update Procedure
The current updating procedure is to go to http://www.convergent-design.com, proceeding to
download the firmware update file from the front page. The update file will come in a .zip format,
simply extract this zip to a directory. In this file set there will be some user guide .pdf’s, and a folder
called “}UPD{“. Copy that folder only directly onto a formatted CompactFlash card, and insert into
any card slot in Flash XDR. Flash XDR will automatically detect the update file and ask you to press
<F2> and <F5> simultaneously to begin update. If you do not wish to proceed with the update,
simply press the “Stop” button to abort.
Allow 5 minutes for update to finish, til “Update Succeeded” is displayed.
Note: You will need to manually remove the firmware update file (using the delete or format command
on your PC/MAC) before reusing this CF card in the Flash XDR. Be sure to format the card in the
Flash XDR before usage.
Note: be sure to connect the Flash XDR to a stable power supply capable of supplying power
for at least 10 minutes. A fully charged battery or an AC power source, preferably with built-in
UPS backup power, is acceptable. Loss of power during a firmware update will result in an inoperable unit which must be returned to Convergent Design for repair.
Convergent Design, Inc
23
Flash XDR User’s Manual
Typical Applications
Convergent Design, Inc
24
Flash XDR User’s Manual
Flash XDR Suggested Accessories
A wide range of accessories discussed below are available at http://www.nanoflash.net/, or through
your dealer. (ver1.5.25)
Compact Flash Cards (Use only these qualified Compact Flash cards at specified bit rates)
See pg 4 for a complete list.
Compact Flash Readers
1. Lexar FW-800
2. Delkin
3. PCI Express CF Readers
Remote Control
1. Remote tally light button cable (available from Convergent Design) for starting / stopping
record in “Remote” trigger mode
Hard Disk Drive Backup Devices
8. NexTo Drive: 500 GB portable CF drive for intermediary offloading of footage – holds 15
32GB CF cards' worth of data. Connects to computer via USB or ESATA for transfers.
http://www.cvc.de/index.asp?haupt=http://www.cvc.de/shop/asp/ArtikelDetails_sql_2.asp?
Nummer=8851&Sprache=D
Batteries (typically require a d-tap converter cable to the 4 pin XLR power connector)
1. Anton Bauer
2. IDX
3. Ellipz
Camera Mounts
1. Zacuto
2. For the Canon XLH1: see our forum:
http://www.dvinfo.net/conf/convergent-design-flash-xdr/145924-xl-h1-mount-flash-xdr.html
Portabrace Covers
See our forum for a discussion:
http://www.dvinfo.net/conf/convergent-design-flash-xdr/145490-flash-xdr-portabrace-outdoorcover.html
Convergent Design, Inc
25
Flash XDR User’s Manual
Tips & Troubleshooting
Operating Tips
1. Never eject CompactFlash cards during record or playback: The most critical error a user
can cause is pulling out the CompactFlash card prematurely. The file structure needs special
instructions from the microcontroller to properly close the files for them to be read properly. The
use of the power button allows the Flash XDR to stop its current operations, close all files, and
properly “shut down”. Pulling out the card while recording will almost certainly cause total loss
of the current file being recorded on the card. Cards that are being written to will have a solid
red LED next to them, and instructions for the CompactFlash slots are silk-screened above
them on the box.
2. Only use recommended CompactFlash cards: Use only the approved Compact Flash
cards, otherwise your video footage may be corrupted.
3. CF Card Monitoring: Each card slot has a progress bar at the top of the LCD screen. The
total record time remaining in minutes is always displayed on the status line on the right side.
4. CF Card Erase/Formatting Procedure: To format or erase all cards inserted into the unit,
press <F2> and <F5> at the same time and follow prompts.
Troubleshooting Guide
1. No Video Output over SDI
a. Plug the HD-SDI source directly into an HD-SDI monitor to make sure video is flowing
b. If you are trying to connect to an SDI monitor and the output is HD-SDI, is the monitor
HD capable or is it limited to SD?
c. If the video input format is 1080psf, then Flash XDR will automatically output 1080p
during loop-through and record. Check that your monitor will accept the 1080p format.
2. No function of the Flash XDR
a. Check that the unit is powered on with the proper power adapter.
b. Check the record trigger settings.
3. An error message appears
a. Message “Already Recording” appears if the <RECORD> button is pressed twice.
b. Message “Already Playing” appears if the <PLAY> button is pressed twice.
c. Message “No space on card” appears if the card (or cards) in the unit are full, or if the
<RECORD> button is pressed and no cards are present.
d. Message “No clips on card” appears if the <PLAY> button is pressed on an empty
card.
e. Message “Already Stopping” appears if the <STOP> button is pressed while the unit
is closing the files after the first press of <STOP>.
f. Message “NO SRC” on the status line (no video source): no recognized video input.
Convergent Design, Inc
26
Flash XDR User’s Manual
g. Message “Unknown CFX”, where X refers to slots 1-4, appears if a brand new card
needs to be formatted and cannot be recorded to. This message can also occur if a CF
card which has unrecognized external files copied onto the card is inserted to the Flash
XDR.
h. Message “Busy Playing” appears if the <RECORD> or Tally control input is asserted
while the unit is playing a clip. Stop playback first, in order to initiate a record session.
i. Message “Lost Footage, Card Too Slow”, the CF card is not able to keep up with the
video because its write speed is too slow (bit rate is too high for the card to handle).
The bit rate will automatically be lowered and recording will continue.
j. Message “Check manual for CF card cautions” appears if you've inserted a
Transcend CF card and your file format (System->File Format) is set to QT. See note
on pg. 5 about qualified CF cards.
k. “VCXO out of range” : relates to specific hardware on nanoFlash that regulates SDI
input. This may be indicative of a hardware failure; please contact technical support in
the event of seeing this message. (ver1.5.91)
l. Messages listed below are typically errors communicating with the CF cards, and are
caused by one of the following conditions:
> Multiple cards are inserted simultaneously or in rapid succession. Allow a bit of
time between card insertions.
> The card slot connector pins on your unit have been damaged, or are
otherwise failing. You will likely need to return the unit for repair.
> You've hot-swapped a CF card during record or playback. Hot-swapping is not
yet supported. Insert and remove cards only when the unit is in idle mode.
> The CF card has been corrupted. Try formatting the card on a computer.
Otherwise you may need to return the card to the manufacturer.
> The CF card is not supported. See p. 4 for a list of supported cards.
If such a message appears, you will need to power cycle the unit.
These messages are:
i. ATA Idle
ii.
SlotDpc
iii.
DMA WR
iv.
DMA RD
v.Wrcache2000 (this message can appear with new CF cards upon card insertion
to the Flash XDR, and typically indicates a defective CF card.
Convergent Design, Inc
27
Flash XDR User’s Manual
Safety & ESD Precautions
1. Always connect the box to the specified power source: +6.5 to 20 VDC.
2. Keep the Compact Flash slot rubber protector on as much as possible. Avoid servicing the
cards while the unit is in an adverse environment.
3. Take caution when connecting the 1394 plug. The 4-pin 1394 connector on the Flash XDR,
connected with a 6-pin 1394 end to a PC or Mac, can still cause damage to the internal 1394
circuitry if it is cocked when plugged in.
4. Keep the internal operating temperature between -20º C and 80º C. (The internal temperature
is displayed in the System menu.) External ambient temperature needs to be approximately
within the range of -40º C and 60º C. Direct exposure to sunlight and an external cover can
also effect internal operating temperature. Though not likely, overheating of the Flash XDR
can potentially damage the unit, and is not covered under the warrantee. The Flash XDR will
attempt to shut itself down if the internal temperature reaches 95º C.
5. Avoid operating the unit in an unprotected outdoor installation or wet areas. Do not expose
this product to rain, sand, or snow. Avoid conditions which would cause moisture
condensation on the outside cover, or moisture to get into the internal circuitry. Internal
moisture can also potentially damage the unit, and is not covered under warrantee. The Flash
XDR is not water proof. See accessories (p. 21) for information about a partially waterproof
cover for the Flash XDR.
6. Do not drop the unit as this will cause significant damage to several components. Damage
due to dropped units is not covered by the warranty.
7. There are no user serviceable components inside the box. Only a qualified technician should
perform servicing of the unit. Opening the box may void the warranty.
8. Avoid the use of sharp objects near the box as they may scratch the LCD or cut into the rubber
over-molding.
9. Clean only with water with a damp cloth.
10. CAUTION: Electrostatic Discharge (ESD) can damage components in this product. Although
the unit has countermeasures to this hazard installed inside, it is always best to avoid damage
by using extra caution when handling and inserting Compact Flash cards or the LCD screen
and connectors. Always ground yourself (by touching an un-painted grounded metal object)
prior to handling the unit.
11. Do not touch exposed connector pins and do not insert any metal objects in the connectors.
12. Ensure that all connections made to the box (including at the “other end of the cable”) are
made in ESD safe environments.
13. Always transport and store the box in the static protected bag included with the Flash XDR
14. Never connect a wireless microphone to the Flash XDR while the +48V Phantom Power is
turned on, as this may harm your microphone.
15. Use caution when connecting the 4-pin XLR power, 5-pin XLR audio, and 4-pin Hirose GPIO
ports, as the pin-outs for these types of connectors is not always standard across all toolsets.
The pin-out that the Flash XDR uses is detailed on page 27, use this as a guide to ensure that
proper connections are being made and damage is not done to your unit as a result of
improper connections.
Convergent Design, Inc
28
Flash XDR User’s Manual
Specifications
HD/SD-SDI I/O
Formats:
•
•
•
•
•
•
1920x1080i @ 60, 59.94, 50 Hz
1920x1080p @ 30, 29.97, 25, 24, 23.98 Hz
1920x1080psf, @ 30, 29.97, 25, 24, 23.98 Hz
1280x720p @ 60, 59.94, 50, (29.97, 25, 23.98 ver1.5.25) Hz
720x486 @ 29.97 Hz
720x576 @ 25 Hz
Standards:
• SMPTE 274M (1080i), 296M (720p)
• Audio: 24-bit, 48kHz, SMPTE 299M
• Time-Code: RP-188 1080i Lines: 14, 16, 577, 579
Connector: 75Ω BNC
Balanced Analog Audio I/O
• 24-bit A/D and D/A, 2 channels, 48kHz
• Inputs are switchable between line and microphone level with +48V phantom power
• Mic Pre-amp with 10 to 65 dB gain
Connectors: 3-pin XLR (Inputs) and 5-pin XLR (Output)
Unbalanced Analog Audio Out (Headphone)
Connector: 3.5 mm Stereo Plug
Linear Time Code
Standards:
• SMPTE RP-188 (HD)
• HD 1080i Lines: 14, 16, 577, 579
Connector: 75Ω BNC
1394
• Currently not operational
MPEG2 Profiles
• 422P@HL: 100, 140, 180, 220, 280 Mbps VBR 4:2:2 I-Frame Only, 1920x1080i/p,
1280x720p
• 422P@HL: 50, 80, 100, 140, 180 Mbps VBR, 4:2:2 Long GOP, 1920x1080i/p, 1280x720p
• MP@HL: 18/35 Mbps VBR, Long GOP 4:2:0 (XDCAM EX), 1920x1080i/p, 1280x720p
Convergent Design, Inc
29
Flash XDR User’s Manual
•
•
•
•
•
MP@HL: 18/35 Mbps VBR, Long GOP 4:2:0 (XDCAM HD), 1440x1080i/p, 1280x720p
MP@HL: 18 or 25 Mbps VBR, 4:2:0, Long GOP, 1440x1080i
MP@H-14: 25 Mbps CBR, 1440x1080i, 4:2:0, Long GOP, HDV2
MP@HL: 19.7 Mbps CBR, 1280x720p, 4:2:0, Long GOP, HDV1
MP@ML: 50 Mbps CBR, 720x486/720x576, 4:2:2, I-Frame, IMX
File Formats:
• Quicktime .mov (Mac)
• MXF (Pc)
• MPG (dvd authoring, etc)
Physical
Dimensions:
8” (203 mm) deep x 6” (152 mm) wide x 2.5” (63 mm) high
Weight:
2.7 lbs (1.1 kg)
Power
• Unit Input Power: +6.5 to 20VDC, 4-Pin XLR connector
• 13W to 16W
Temperature Range
• Internal Operating: -20º C to 80º C (See System menu for internal temperature readout).
• External Operating: approximately -40º C to 60º C (direct exposure to sunlight or placing
the unit in a cover or enclosed environment can influence the internal temperature)
• Storage: -5ºF to 140ºF (-20º C to 60º C)
Humidity
• Operating Less than 80% (non-condensing)
• Storage: Less than 90% (non-condensing)
Convergent Design, Inc
30
Flash XDR User’s Manual
Mounting Plate Dimensions
(all dimensions shown in inches)
Convergent Design, Inc
31
Flash XDR User’s Manual
User Connector Pin-Outs
(viewed from connector on Flash XDR)
Power: 4-pin XLR
1. Ground connection
2. NC: no connect
3. NC: no connect
4. PWR: +6.5~+20V, 14 to 16 W
Audio Output: 5-pin XLR
1. GND: Signal ground
2. L+: Left channel positive 4. R+: Right channel positive
3. L-: Left channel negative 5. R-: Right channel negative
Remote Control: 4-Pin Hirose
1. START: Record trigger input
2. GND
3. TALLY LED: Tally light power
4. GND
*For your reference, the part number of the 4-pin Hirose is HR10A-7P-4S(73)*
Convergent Design, Inc
32
Flash XDR User’s Manual
RMA and Warranty
Conditions of the Warranty
Convergent Design reserves the right to determine if a repair is subject to the warranty agreement.
Damages caused by products being dropped or mishandled are not covered by this warranty. Also
damage caused by over-voltage conditions on any of the I/O connectors is not covered by this
warranty.
There are no user-serviceable parts inside the cabinet. Opening the cabinet voids the warranty.
Transit damage caused by inadequate packaging also invalidates the warranty agreement. Please
ship the unit in its original packaging, if possible.
All products are shipped prepaid to Convergent Design. For insurance reasons, Convergent Design
cannot accept any product that is returned via U.S. Postal Service. Returns will be accepted from
Federal Express, UPS, DHL, or other comparable freight carrier. Convergent Design returns the
product via a prepaid two-day delivery service within the continental United States, only if the product
is under warranty and subsequently found to be faulty. Out-of-warranty repaired products are
shipped at customer’s expense. Turnaround time for warranty repairs normally will not exceed 48
hours (excluding shipping time), unless extraordinary fault conditions exist.
Labor and defects are covered for the warranty period stated on your original invoice from the original
date of purchase. If you discover a defect, please refer to our Return Merchandise Policy below. The
warranty covers all Convergent Design hardware defective in material or workmanship. During the
warranty period, Convergent Design, at its option, will repair or replace product or product
components, which in its opinion prove defective. Parts and components used in the repair process
may be recycled or repaired, at Convergent Design’s discretion. This warranty service will be
performed at no charge to the registered owner, provided the product is shipped prepaid to
Convergent Design. Convergent Design will return the repaired product via a like carrier, in the
continental United States within 48 hours, shipping time excluded. Convergent Design reserves the
right to determine whether a needed repair is subject to the warranty as per its provisions stated
herein. Transit damage caused by inadequate packing violates the warranty. The warranty will be
void if, in the opinion of Convergent Design, the product has been damaged through accident,
misuse, misapplication, or as a result of service or modification performed not authorized in writing by
Convergent Design.
WARNING: The following are not covered under warranty:
•
Damage due to the use of a power supply other than that supplied with Flash XDR or uncertified batteries.
•
Damage caused by improper connections to external 1394 devices supplying power over the
1394 cable.
•
Damage due to overheating conditions. (The unit will attempt to shut down before damage
can occur, in the event of overheating.)
•
Damage due to exposure to water.
Convergent Design, Inc
33
Flash XDR User’s Manual
•
Damage caused by dropping or otherwise roughly handling the unit.
•
Damage to the internal pins of the CF card slots, which can be caused by jamming the CF
cards into the slot or applying excess pressure on either side of the CF card during insertion.
•
Any loss/ corruption of video/audio data recorded on the Flash XDR, or any loss/ corruption of
data which is in any way associated with the Flash XDR.
Obtaining an RMA
It is our policy that all material and repair returns, whether in warranty or not, are only accepted if an
RMA (Return Merchandise Authorization) number has been issued for the products being returned.
Any unauthorized shipments may be returned, un-repaired at the customer’s expense.
Damaged or defective Convergent Design products that are purchased from Convergent Design may
be returned for replacement only. Convergent Design will not accept returns for any other reason. All
eligible returns require a Return Merchandise Authorization (RMA) number. E-mail Convergent
Design, Inc. at “cd” -- “support” -- “at” -- “convergent-design” -- “.com” to obtain an RMA number.
Items must be returned within 10 days of receiving your RMA number. Returned product must be in
its original packaging with all contents included and must have the RMA number clearly marked on
the outside of the package.
RMA numbers and return address may be obtained from Technical Support.
Convergent Design, Inc.
4465 Northpark Drive
Suite 400
Colorado Springs, CO 80907
EMAIL: “cd” -- “support” -- “at” -- “convergent-design” -- “.com”
WEBSITE: http://www.convergent-design.com
VOICE: ++(720) 221-3861 or ++(866) 654-0080
Version History
Changes in the user manual occur from version to version, with the following notations:
version 1.1.151 (4 – Dec - 2009)
“ver1.5.25” (beta, released 18 – Feb – 2010)
“ver1.5.55” (released 6 – Apr – 2010)
“ver1.5.91” (released 8 – Oct – 2010)
“ver1.5.92” (released 16 – Dec - 2010)
Convergent Design, Inc
34