1
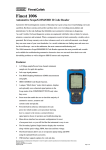
Therminator
tm
Operation, Assembly & Maintenance Manual
Congratulations on your purchase, and thank you for selecting the TherminatorTM brand stainless steel
wort chiller from Blichmann Engineering. We are confident that it will provide you years of service and
many gallons of outstanding beer. This manual will familiarize you with the use of the TherminatorTM,
assembly, and sanitation procedures.
**** PLEASE READ THOROUGHLY PRIOR TO USE FOR IMPORTANT SAFETY INFORMATION ****
IMPORTANT !!
Warning:
Sections labeled “Warning” can lead to serious injury or death if not followed. Please read
these thoroughly and understand them completely before use. If you do not understand
them or have any questions, contact your retailer or Blichmann Engineering
(www.BlichmannEngineering.com) before use.
Caution:
Sections labeled “Caution” can lead to equipment damage or unsatisfactory performance of
the equipment. Please read these sections thoroughly and if you have any questions,
contact your retailer or Blichmann Engineering before use.
Assembly:
Threaded fittings
The TherminatorTM utilizes ½” NPT (National Pipe Taper) male threads for the wort side of the exchanger
(top fittings on the back and front of the exchanger) that will readily mate up with your preferred type of
hose connector. The cooling water side of the exchanger (bottom fittings on the back and front of the
exchanger) is fitted with ¾” male garden hose threads (GHT). High quality hose quick connect fitting
adapters from Blichmann Engineering are available through your retailer.
Caution: If you are using stainless NPT adapter fittings on the wort side of the exchanger (½” NPT) it is
necessary to use a thread sealing tape (TeflonTM type) to prevent thread galling (welding), which is not
covered under warranty. If you feel any grinding while tightening stop immediately as this galling the
threads! Threads, once galled, will not come apart! The key to long thread life is not over tightening, and
using an adequate amount of thread sealing tape. If you are using brass or plastic adapter fittings, the use
of thread sealing tape is still recommended, but optional. No sealing tape is needed on the cooling water
side of the exchanger since it employs non-tapered garden hose threads.
Warning: Always properly secure all hoses with hose clamps or appropriate clamping device for the
adapter fittings you are using before use. Use hose rated for the pressure and temperature of the wort
and cooling water. Failure to do so can result in a hose coming off during use possibly causing severe
burns and or property damage. See Fig. 1 for typical installation of hoses.
Mounting Bracket:
The unit is supplied with a heavy gauge stainless steel “universal” mounting bracket. It can be installed
facing forward, to the rear, facing up or down to best meet your needs. Install the bracket between the
nuts as shown in Fig. 2 below. Do not mount the unit by the fittings!
Fig. 1
Fig. 2
Shown with optional Blichmann Engineering
QuickConnectorTM fittings on the wort in/out.
Cleaning & Sanitation:
Caution: do NOT use any cleaner or sanitizer containing chlorine such as bleach. Over time, this will
pit and erode stainless steel. DO NOT use caustic (lye, Drain-o etc) to clean the chiller – these cleanerswill
damage the copper braze material. Powdered Brewery Wash is just as effective and MUCH safer to use.
Any other non-chlorine sanitizer is acceptable to use. IodophorTM or StarSanTM (see warning below) both
work very well and do not require rinsing.
Prior to the first use, soak the unit in PBW (Powdered Brewery Wash) with the fittings facing up so all air is
purged from the exchanger and all surfaces get wetted. Rocking the unit side-to-side will purge any
entrapped air. Rinse well and then soak in a solution of your favorite non-chlorine sanitizer. Drain and
allow to drip-dry. Do not store the unit full of sanitizer, and do not soak for extended periods in
cleaning solutions (1/2 to 1 hour is usually plenty).
Before each use: If properly cleaned after the previous use, all that is required is to soak the exchanger in a
sanitizing solution. Iodophor, StarSan or similar no-rinse sanitizers work well. Soak it with the fittings
facing up so all air is purged from the exchanger and all surfaces get wetted. Rocking the unit from side to
side will help purge any remaining air from the exchanger. Drain thoroughly.
After each use: Immediately after use, rinse the wort side of the
exchanger with hot tap water utilizing a hose/faucet adapter (not
included, but available from Blichmann Engineering as an
accessory item) as shown in Fig. 3. Rinse in the opposite direction
of normal wort flow first to expel any hop or trub particles that may
have entered the exchanger. Then reconnect and rinse in the
normal wort flow direction. A couple minutes each way is sufficient.
Remove the adapter fittings if used and scrub with a soft brush,
taking care to remove all sealing tape if used. A ½ to 1 hour soak in
hot PBW is recommended after this rinsing to remove any stubborn
deposits and proteins. Rinse thoroughly, then soak the unit in a
2
Fig. 3
sanitizing solution as previously described. Drain and allow to drip-dry. Do not store the unit full of
sanitizer due to potential galvanic corrosion issues. An alternate method to sanitize the unit is to immerse
it in boiling water for 10-15 minutes, which will completely sterilize it.
Storage: Store the TherminatorTM as shown in Fig. 3a with the ends open and
facing down. This will allow any remaining water to drain to the bottom and
evaporate through the openings which will prevent mildew. It is normal for there to
be a bit of trapped water at the fittings, but this will evaporate in a few days.
Fig. 3a
Caution: StarSan users – this is an acid based sanitizer, and although it will not
harm copper for short periods, it will harm the unit if exposed for extended periods.
Prior to storage rinse the unit thoroughly (both wort and cooling water sides) with
hot tap water to remove the residual sanitizer from the unit.
Periodic maintenance: Over time, salts from your cooling water and wort can
accumulate on the surfaces of the exchanger lowering the efficiency and increasing
the chances for contamination. After approximately 6 uses or every 6 months, soak the unit in a mild (5%)
food grade citric or phosphoric acid solution for ½ to 1 hour, filling and draining periodically to ensure
fresh solution reaches the interior of the exchanger. Rinse thoroughly, drain, and drip-dry. If you are
using StarSan (an acid sanitizer) this is not necessary.
Installation & Operation:
For the exchanger to perform properly, it is critical that all surfaces of the exchanger be continuously
flooded with cooling water and wort. If air is trapped in the unit, not only will the exchanger performance
drastically drop, but also you will be oxidizing your wort. It is also permissible to operate the unit with the
fittings facing vertically, but the wort inlet should be facing downward. While other installation
configurations may work, thee recommended positions allow air to naturally purge from the unit. If you
see bubbles of air in your wort hoses, it is likely due to loose fittings or hose clamps allowing air to enter
the system. Tighten as needed.
If you wish to control the cooling water flow rate through the unit, it is permissible to install a valve on the
inlet side of the exchanger. Or simply control the flow using the garden hose bib.
It is highly recommended that you install a filter in front of the chiller (stainless scouring pad, screen type
filters, Y-strainer or similar pre-filter) to ensure particulate matter remains in the brew pot and does not
plug the hoses, pump or exchanger. When boiling is finished, start a strong whirlpool with your stir
paddle by stirring clockwise vigorously. Cover and let it sit for 10-15 min to settle the hops & trub in the
center of the brew pot. Then begin draining and chilling the wort. This will also enhance the flavor and
clarity of your finished beer.
Fig. 4
For gravity flow chilling:
This procedure is used for systems where elevation (gravity) is utilized to
move the wort from the boil kettle to the fermentor. Install the exchanger as
shown in Fig. 4 ensuring that the exchanger is laid on its side and is lower
than the brew pot and at the same level as the bottom of the fermentor (or
below it). If it is raised higher, the wort will quickly drain from the
exchanger exposing a portion of the plates and lowering the capacity of the
unit. Using a hose “pinch-valve” (shown in Fig. 4) after the exchanger is a
good way to control the flow rate of wort through the unit. Do not place the
pinch valve before the exchanger or it may not remain full of wort.
3
For pump chilling:
This procedure is used for systems where a pump is utilized to move
the wort from the boil kettle to the fermentor. Install the exchanger as
shown in the diagram below ensuring that the exchanger is laid on its
side and is lower than the brew pot and at the same level as the
bottom of the fermentor (or below it). If it is raised higher, the wort will
drain from the exchanger exposing a portion of the plates and lower
the capacity of the unit. Place the exchanger after the pump to reduce
the possibility of pump cavitation. It is also advisable to have the
pump and valve on the hot side of the exchanger (pumping hot wort) to
reduce the possibility of bacterial contamination.
Fig. 5
ThruMometer:
We highly recommend using the ThruMometer in-line thermometer
from Blichmann Engineering (shown in Fig. 6) to properly set the
exchanger to the ideal outlet temp (68oF) and cooling water flow rate
as described in the procedure below. The low cost, high precision,
fast response, and mirror smooth interior (easy to sanitize), make it
far superior to any in-line thermometer on the market. Go to
www.BlichmannEngineering.com for details.
Setting flow rates:
Fig. 6
Warning: Ensure all hoses are properly secured as described above.
Surfaces of the exchanger, fittings and hoses may be hot during use.
Before pumping or draining hot wort through your heat exchanger, turn the cooling water on to the
maximum flow rate, which will purge all air from the water side of the exchanger. Slowly increase the hot
wort flow rate until you reach the desired outlet temperature. If using the ThruMometerTM in-line
thermometer and you never see a change in color on the thermometer elements, carefully touch the side of
the ThruMometerTM and determine if the temperature is above 88oF or below 58oF. If above 88oF, slow
down the beer flow rate. If below 58oF, increase the wort flow rate. If it is still too cold, slow down the
water flow rate, leaving the wort flow rate at maximum.
Notes for Southern Climates:
Brewers in southern climates have a particular challenge chilling wort due to the elevated ground water
temperature. Cooling water temperatures can exceed 80oF in the summer, making chilling wort to the
ideal temperature (68oF) impossible. However, the incredible cooling capacity and efficiency of the
TherminatorTM chiller will allow the wort to be chilled much closer to the ground water temp, at a faster
rate, and using less water than any chiller on the market. Obviously, wort flow rate and wort outlet
temperature are trade-offs. A good rule of thumb (assuming 5gpm of water flow) is that the TherminatorTM
will chill about 3-5oF above the cooling water temperature at moderate wort flow rates (about ¾-1gpm),
and about 10oF above the cooling water temperature at higher wort flow rates (about 1.5-2 gpm). Heat
exchanger performance is not linear, so it is difficult to predict exact performance at conditions not shown
in the graph below. Bear in mind that the performance graph is based on cooling the wort to 68oF.
If your cooling water is too hot to cool to your desired wort outlet temperature, you will need to use an
immersion chiller in an ice-bath in conjunction with your TherminatorTM chiller to lower the cooling water
temperature the additional degrees. Since the TherminatorTM chiller will remove the vast majority of the
heat in a very short period of time, much less ice will be consumed. A 20 ft length of 5/8” copper tube
immersed in a 5gal pail of ice and water will usually be sufficient. Pre-chilling the cooling water, instead of
4
post-chilling the wort in another exchanger, reduces the possibility of contamination since the cooling
water chiller doesn’t need to be sanitized.
Therminator Accessories: are available through your Blichmann Engineering retailer. Designed
with the highest quality and attention to detail to give you the best beer possible, with the least hassle.
Back-flush hose assembly
QuickConnectorTM
TherminatorTM Accessory Kit
18” long ½” ID hose with Garden Hose
thread and ½” QuickConnectorTM on
the ends.
Stainless barb available for 1/2” or
3/8” ID hose. Includes silicone o-ring
and nickel plated brass nut (does not
touch liquid). Tightens by hand!
Includes back-flush hose and a pair of
QuickConnectorTM fittings (your choice
of 1/2” or 3/8” barb)
Makes cleaning your TherminatorTM
hassle free!
Makes connecting your TherminatorTM
a snap!
Everything you need for your
TherminatorTM
Troubleshooting:
Not reaching desired wort temperature:
• Use graph on page 6 to estimate cooling capacity with the cooling water temperature and flow rate
in your brewery. Water supplies change temperature depending on the season, and flow can
change with varying system water usage.
• Be sure exchanger is installed at the low point in the system so it is completely full of wort.
• Be sure unit is operated on its side so all the air is purged from the unit.
• Unit is fouled from water salts – see “Periodic maintenance” section above
Not reaching desired wort flow:
• Use graph on page 6 to estimate flow capacity with the cooling water temperature and flow rate in
your brewery. Water supplies change temperature depending on the season, and flow can change
with varying system water usage.
• For gravity drain systems, you may not be able to meet the maximum flow needed based on
available elevation of the brew pot and restriction of the brew pot drain and hoses. The exchanger
itself adds a negligible restriction (about 0.1 PSI or .6” of water column)
• Hose diameter too small causing excessive restriction - use a larger diameter hose.
• Check for blocked or plugged brew pot suction, hose, flow control valve, or exchanger inlet. If
plugged, it is recommended that you install a stainless scouring pad or suction screen to the
suction (inlet) of your brew pot to ensure particulate matter remains in the brew pot. This will also
enhance the flavor and clarity of your finished beer by removing trub from the finished wort.
Sanitation (contamination) problems:
• Thoroughly read “Cleaning & Sanitation” section above specifically:
• Ensure unit is cleaned with hot water, PBW, and sanitizer IMMEDIATELY after each use
• If not cleaned immediately after use, soak in a hot PBW (Powdered Brewery Wash) solution for ½ to
1hr, then rinse thoroughly with hot tap water. If you have the means to circulate hot PBW through
the exchanger this will result in a more thorough cleaning. Circulate in both directions.
• Clean with mild citric or phosphoric acid solution as recommended to remove water salts
• Sanitize with the fittings up to ensure that all air is purged from the system
5
•
•
•
Remove and sanitize adapter fittings after each use
Ensure hoses, pump and other drain fittings are properly sanitized before use
Boiling the exchanger before use will sterilize the unit, but if properly cleaned immediately after use
this is not necessary.
Estimating Performance:
The graph below is used to predict the gallons per minute (gpm) of wort you'll be able to chill from boiling
down to 68oF (ideal fermentation start temp) using water from your garden hose as the cooling media.
Wort specific gravities above 1.040 will perform slightly lower than the graph. Specific gravities below
1.040 will perform slightly better than the graph. Note that small changes in inlet cooling water
temperature and flow can have a large impact on the wort outlet temperature and flow.
Therminator Performance Data
1.040 S.G. 68 F Wort Outlet Temp
Cooling Water Temp (F)
68
66
64
62
5 gpm
60
58
56
3 gpm
54
2 gpm
52
50
0.0
0.5
1.0
1.5
Wort Flow (gpm)
2.0
2.5 Tolerance:
+/- 0.2 gpm
+/- 2 F
1) Measure the cooling water flow rate in your brewery using a bucket of known volume and a stopwatch.
Divide the gallons by the minutes (gal/min). Then measure the cooling water temperature using an
accurate digital type thermometer. Record these values. Note: these values will change throughout the
year.
2) Choose either the 5.0 gpm, 3.0 gpm, or 2.0 gpm line that best matches your cooling water flow rate. If
your flow lies between these lines, it is acceptable to interpolate between them.
3) Go to the point on the Y-axis labeled "Cooling Water Temp (F)" to your cooling water temperature
measured in step (1).
4) Draw a horizontal line to intersect the cooling water flow rate line you selected previously (5.0, 3.0, 2.0
gpm) in step (2)
5) Draw a vertical line at the intersection point down to the X-axis labeled "Wort Flow (gpm)” and read the
wort chill flow rate you'll get at your brewery!
6
Example: If you have 58F cooling water and 5 GPM of flow, draw a horizontal line (see dark line in graph
above) at 58F over to the 5.0 gpm line. Draw a vertical line (see thick dark line in graph above) from the
intersection point down to the X-axis and read 2.0 GPM.
Warranty:
The TherminatorTM is warranted to be free of defects in materials and workmanship for a period of 1yr from
the date of purchase (proof of purchase required).
Specifically EXCLUDED from this warranty are normal wear and tear, damage from abuse, misuse, failure
to follow cleaning and maintenance procedures, thread galling or breakage from over tightening, or failure
to use TeflonTM thread sealing tape where recommended. Blichmann Engineering is not responsible for
incidental or consequential damages arising from use or misuse of this product. This product is intended
for home use only. No warranty or guarantee of suitability (express or implied) is given for commercial use
of this product. Blichmann Engineering must be notified within 7 days of the ship date of any shipping
damage. Owner is responsible for shipping damage outside of this time period. Customer is responsible to
keep all original packing material for warranty returns – Blichmann Engineering, LLC is not responsible for
damage from improperly packaged warrantee returns and these repair costs will be the responsibility of the
customer. Resolution of warranty claims will be either repair or replacement and will be the decision solely
of Blichmann Engineering. Shipping costs for warrantee returns are covered only for the contiguous
United States. User is responsible for packaging costs and shipping damage if not returned in original
packing.
Check out our other great products!
7
Therminator Owners Manual – V8
©Blichmann Engineering, LLC 2008
8