1
PROMULA®
Application Development System
User's Manual and Reference
Copyright 1985-2007 Great Migrations LLC
ALL RIGHTS RESERVED
COPYRIGHT NOTICE
for
PROMULA Application Development System
Version 9.38 Released May, 2007
Published by:
Great Migrations LLC
7453 Katesbridge Ct
Dublin, Ohio 43017
(614) 761-9816
This User's manual for the PROMULA Application Development System is the property of Great Migrations LLC. It
embodies proprietary, confidential, and trade secret information. The User's manual and the files of the PROMULA
Application Development System machine-readable distribution media are protected by trade secret and copyright laws.
The use of the PROMULA Application Development System is restricted as stipulated in the Great Migrations LLC
License Agreement which came with the PROMULA Application Development System product and which you completed
and returned to the Great Migrations LLC. The content of the machine-readable distribution media and the User's manual
may not be copied, reproduced, disclosed, transferred, or reduced to any electronic, machine-readable, or other form except
as specified in the License Agreement with the express written approval of Great Migrations LLC.
The unauthorized copying of any of these materials is a violation of copyright and/or trade secret law.
DISCLAIMER OF WARRANTIES AND LIMITATIONS OF LIABILITIES
THIS USER'S MANUAL IS PROVIDED ON AN "AS IS" BASIS. EXCEPT FOR THE WARRANTY DESCRIBED IN
THE GREAT MIGRATIONS LLC LICENSE AGREEMENT, THERE ARE NO WARRANTIES EXPRESSED OR
IMPLIED, INCLUDING BUT NOT LIMITED TO IMPLIED WARRANTIES OF MERCHANTABILITY OR FITNESS
FOR A PARTICULAR PURPOSE, AND ALL SUCH WARRANTIES ARE EXPRESSLY AND SPECIFICALLY
DISCLAIMED.
IN NO EVENT SHALL GREAT MIGRATIONS LLC BE RESPONSIBLE FOR ANY INDIRECT OR
CONSEQUENTIAL DAMAGES OR LOST PROFITS, EVEN IF GREAT MIGRATIONS LLC HAS BEEN ADVISED
OF THE POSSIBILITY OF SUCH DAMAGE.
Some states do not allow the limitation or exclusion of liability for incidental or consequential damages, so the above
limitation or exclusion may not apply to you.
TRADEMARK
PROMULA is a registered trademark of Great Migrations LLC.
DEFINITION OF PURCHASE
The definition of your particular purchase is specified in the Great Migrations LLC License Agreement which came with
the PROMULA Application Development System product and which you completed and returned to the Great Migrations
LLC. If you have any questions about your rights or obligations as a PROMULA Application Development System user or
believe that you have not received the complete PROMULA Application Development System package that you purchased,
please contact:
Great Migrations LLC
7453 Katesbridge Ct
Dublin, Ohio 43017
(614) 761-9816
Table Of Contents
1. INTRODUCTION ............................................................................................................................................................. 1
1.1 ORGANIZATION OF THE MANUAL ................................................................................................................................... 1
1.2 WHAT IS PROMULA? ................................................................................................................................................... 1
1.3 PROMULA LANGUAGE HIGHLIGHTS ............................................................................................................................ 2
1.3.1 Total Programming Environment........................................................................................................................... 2
1.3.1 Structured Notation ................................................................................................................................................ 2
1.3.2 Language Tutorial.................................................................................................................................................. 3
1.3.3 Language Course ................................................................................................................................................... 3
1.3.4 Tutorial Writer ....................................................................................................................................................... 3
1.3.5 Menu Manager ....................................................................................................................................................... 3
1.3.6 Data Editor............................................................................................................................................................. 3
1.3.7 Report Generator ................................................................................................................................................... 3
1.3.8 Graphics ................................................................................................................................................................. 3
1.3.9 Command Mode ..................................................................................................................................................... 3
1.3.10 Compilation Mode................................................................................................................................................ 4
1.3.11 Conversational Mode ........................................................................................................................................... 4
1.3.12 Multidimensional Data Structures........................................................................................................................ 4
1.3.13 Array or Matrix Equations ................................................................................................................................... 4
1.3.14 Equation Solver .................................................................................................................................................... 4
1.3.15 Variable Management System .............................................................................................................................. 4
1.3.16 Program Management System.............................................................................................................................. 4
1.3.17 Dynamic Simulation ............................................................................................................................................. 5
1.3.18 Windows ............................................................................................................................................................... 5
1.3.19 Mathematical and Statistical Functions ............................................................................................................... 5
1.3.20 Command-Line Recall .......................................................................................................................................... 5
1.3.21 Multi-platform Performance ................................................................................................................................ 5
2. PROMULA BASICS......................................................................................................................................................... 6
2.1. THE PROMULA APPLICATION DEVELOPMENT SYSTEM............................................................................................... 6
2.1.1. Starting PROMULA............................................................................................................................................... 7
2.1.2. The PROMULA Main Menu .................................................................................................................................. 8
2.1.3. Running Interactive Programs in Batch .............................................................................................................. 14
2.1.4. PROMULA Keyboard Conventions..................................................................................................................... 18
2.1.5. Line Editing ......................................................................................................................................................... 19
2.1.6. Printer Control .................................................................................................................................................... 20
2.2. PROMULA APPLICATION PROGRAMMING ................................................................................................................. 20
2.2.1. Data Definition.................................................................................................................................................... 21
2.2.2. Program Control ................................................................................................................................................. 28
2.2.3. Data Manipulation .............................................................................................................................................. 31
2.2.4. Report Generation ............................................................................................................................................... 37
2.2.5. Interface Design .................................................................................................................................................. 41
2.2.6. Application Programming Summary ................................................................................................................... 46
3. PROMULA LANGUAGE REFERENCE..................................................................................................................... 47
3.1 THE PROMULA NOUNS .............................................................................................................................................. 47
3.1.1 Equation ............................................................................................................................................................... 48
3.1.2 Expression -- Arithmetic....................................................................................................................................... 50
3.1.3 Expression -- Boolean .......................................................................................................................................... 51
3.1.4 Expression -- Character ....................................................................................................................................... 51
3.1.5 Expression -- Functional ...................................................................................................................................... 53
3.1.6 Expression -- Logical ........................................................................................................................................... 64
3.1.7 Expression -- Numeric.......................................................................................................................................... 65
3.1.8 Expression -- Relational ....................................................................................................................................... 66
3.1.9 File ....................................................................................................................................................................... 67
3.1.10 Function ............................................................................................................................................................. 72
i
Table Of Contents
3.1.11 Menu................................................................................................................................................................... 73
3.1.12 Numeric Precision .............................................................................................................................................. 75
3.1.13 Parameter........................................................................................................................................................... 76
3.1.14 Procedure ........................................................................................................................................................... 76
3.1.15 Program ............................................................................................................................................................. 76
3.1.16 Relation .............................................................................................................................................................. 77
3.1.17 Segment .............................................................................................................................................................. 78
3.1.18 Set....................................................................................................................................................................... 78
3.1.19 Statement ............................................................................................................................................................ 81
3.1.20 System................................................................................................................................................................. 82
3.1.21 Table................................................................................................................................................................... 83
3.1.22 Time Parameters ................................................................................................................................................ 83
3.1.23 Variable.............................................................................................................................................................. 84
3.1.24 Window -- Basic ................................................................................................................................................. 87
3.1.25 Window -- Advanced........................................................................................................................................... 90
3.2 STATEMENT FORMAT ................................................................................................................................................... 93
3.3 COMMAS AND BLANKS ................................................................................................................................................. 93
3.4 LINE LENGTH ............................................................................................................................................................... 93
3.5 LINE CONTINUATION .................................................................................................................................................... 94
3.6 FORMAT OF PROMULA STATEMENT DESCRIPTIONS................................................................................................... 94
3.7 THE PROMULA STATEMENTS .................................................................................................................................... 95
3.7.1 ASK CONTINUE .................................................................................................................................................. 95
3.7.2 ASK...ELSE........................................................................................................................................................... 95
3.7.3 AUDIT file .......................................................................................................................................................... 100
3.7.4 AUDIT SET......................................................................................................................................................... 101
3.7.5 AUDIT VARIABLE ............................................................................................................................................. 101
3.7.6 BREAK procedure .............................................................................................................................................. 102
3.7.7 BROWSE COMMENT ........................................................................................................................................ 103
3.7.8 BROWSE DIALOG............................................................................................................................................. 103
3.7.9 BROWSE FILE ................................................................................................................................................... 104
3.7.10 BROWSE function ............................................................................................................................................ 104
3.7.11 BROWSE menu................................................................................................................................................. 106
3.7.12 BROWSE SET................................................................................................................................................... 107
3.7.13 BROWSE set ..................................................................................................................................................... 108
3.7.14 BROWSE TABLE.............................................................................................................................................. 108
3.7.15 BROWSE TEXT ................................................................................................................................................ 111
3.7.16 BROWSE TOPIC .............................................................................................................................................. 112
3.7.17 BROWSE VARIABLE ....................................................................................................................................... 112
3.7.18 BROWSE variable ............................................................................................................................................ 113
3.7.19 CLEAR file........................................................................................................................................................ 120
3.7.20 CLEAR variable ............................................................................................................................................... 121
3.7.21 CLEAR WINDOW ............................................................................................................................................ 123
3.7.22 [COMPUTE] Equation .................................................................................................................................... 124
3.7.23 COPY................................................................................................................................................................ 125
3.7.24 DEFINE DIALOG ............................................................................................................................................ 133
3.7.25 DEFINE FILE .................................................................................................................................................. 137
3.7.26 DEFINE FUNCTION ....................................................................................................................................... 139
3.7.27 DEFINE LOOKUP........................................................................................................................................... 143
3.7.28 DEFINE MENU ............................................................................................................................................... 144
3.7.29 DEFINE PARAMETER .................................................................................................................................... 152
3.7.30 DEFINE PROCEDURE ................................................................................................................................... 155
3.7.31 DEFINE PROGRAM ........................................................................................................................................ 159
3.7.32 DEFINE RELATION ........................................................................................................................................ 160
3.7.33 DEFINE SEGMENT......................................................................................................................................... 163
3.7.34 DEFINE SET .................................................................................................................................................... 165
3.7.35 DEFINE SYSTEM............................................................................................................................................. 169
ii
Table Of Contents
3.7.36 DEFINE TABLE ............................................................................................................................................... 171
3.7.37 DEFINE VARIABLE......................................................................................................................................... 174
3.7.38 DEFINE WINDOW .......................................................................................................................................... 178
3.7.39 DO CORRELATE ............................................................................................................................................. 181
3.7.40 DO DESCRIBE................................................................................................................................................. 183
3.7.41 DO DIRECTORY.............................................................................................................................................. 186
3.7.42 DO file .............................................................................................................................................................. 187
3.7.43 DO IF .............................................................................................................................................................. 188
3.7.44 DO IF END ...................................................................................................................................................... 190
3.7.45 DO IF ERROR.................................................................................................................................................. 192
3.7.46 DO IF ESCAPE ................................................................................................................................................ 193
3.7.47 DO IF HELP .................................................................................................................................................... 194
3.7.48 DO IF KEYPRESS............................................................................................................................................ 195
3.7.49 DO IF NULL .................................................................................................................................................... 197
3.7.50 DO INVERT...................................................................................................................................................... 198
3.7.51 DO LSOLVE ..................................................................................................................................................... 200
.7.52 [DO] procedure.................................................................................................................................................. 202
3.7.53 DO REGRESS................................................................................................................................................... 203
3.7.54 DO set............................................................................................................................................................... 206
3.7.55 DO UNTIL........................................................................................................................................................ 207
3.7.56 DO WHILE ....................................................................................................................................................... 208
3.7.57 EDIT menu ....................................................................................................................................................... 209
3.7.58 EDIT TABLE .................................................................................................................................................... 210
3.7.59 EDIT variable................................................................................................................................................... 211
3.7.60 END.................................................................................................................................................................. 217
3.7.61 END PROGRAM .............................................................................................................................................. 218
3.7.62 END SEGMENT ............................................................................................................................................... 219
3.7.63 LEVEL .............................................................................................................................................................. 220
3.7.64 OPEN file ......................................................................................................................................................... 221
3.7.65 OPEN SEGMENT............................................................................................................................................. 223
3.7.66 OPEN WINDOW .............................................................................................................................................. 224
3.7.67 PLOT ................................................................................................................................................................ 225
3.7.68 RATE ................................................................................................................................................................ 231
3.7.69 READ DISK...................................................................................................................................................... 232
3.7.70 READ file.......................................................................................................................................................... 233
3.7.71 READ function.................................................................................................................................................. 235
3.7.72 READ menu ...................................................................................................................................................... 236
3.7.73 READ SEGMENT............................................................................................................................................. 237
3.7.74 READ set .......................................................................................................................................................... 237
3.7.75 READ VALUE segment .................................................................................................................................... 240
3.7.76 READ variable ................................................................................................................................................. 241
3.7.77 READ (variables) ............................................................................................................................................. 244
3.7.78 RUN.................................................................................................................................................................. 246
3.7.79 RUN COMMAND............................................................................................................................................. 246
3.7.80 RUN COMPILER ............................................................................................................................................. 248
3.7.81 RUN DOS ......................................................................................................................................................... 249
3.7.82 RUN EDITOR................................................................................................................................................... 249
3.7.83 RUN PROGRAM .............................................................................................................................................. 250
3.7.84 RUN SOURCE.................................................................................................................................................. 251
3.7.85 SELECT ENTRY ............................................................................................................................................... 251
3.7.86 SELECT FIELD................................................................................................................................................ 253
3.7.87 SELECT file...................................................................................................................................................... 254
3.7.88 SELECT indirect............................................................................................................................................... 257
3.7.89 SELECT menu .................................................................................................................................................. 258
3.7.90 SELECT option................................................................................................................................................. 259
3.7.91 SELECT PULLDOWN...................................................................................................................................... 267
iii
Table Of Contents
3.7.92 SELECT RELATION ........................................................................................................................................ 269
3.7.93 SELECT set....................................................................................................................................................... 271
3.7.94 SELECT SET .................................................................................................................................................... 272
3.7.95 SELECT set IF.................................................................................................................................................. 274
3.7.96 SELECT VARIABLE......................................................................................................................................... 275
3.7.97 SORT ................................................................................................................................................................ 277
3.7.98 STOP ................................................................................................................................................................ 280
3.7.99 STOP PROMULA............................................................................................................................................. 280
3.7.100 TIME............................................................................................................................................................... 281
3.7.101 WRITE COMMENT........................................................................................................................................ 281
3.7.102 WRITE DISK .................................................................................................................................................. 282
3.7.103 WRITE file ...................................................................................................................................................... 283
3.7.104 WRITE function .............................................................................................................................................. 285
3.7.105 WRITE menu................................................................................................................................................... 286
3.7.106 WRITE set....................................................................................................................................................... 287
3.7.107 WRITE TABLE ............................................................................................................................................... 288
3.7.108 WRITE text ..................................................................................................................................................... 289
3.7.109 WRITE TEXT.................................................................................................................................................. 292
3.7.110 WRITE VALUE segment................................................................................................................................. 293
3.7.111 WRITE variable.............................................................................................................................................. 294
4. PROGRAM AND DATA MANAGEMENT ............................................................................................................... 298
4.1 DATABASE MANAGEMENT IN PROMULA................................................................................................................. 298
4.1.1 Program 1 – Create a 'New' Database............................................................................................................... 299
4.1.2 Program 2 – Access an 'Old' Database.............................................................................................................. 300
4.1.3 More About Database Management................................................................................................................... 311
4.2 PROGRAM MANAGEMENT IN PROMULA .................................................................................................................. 313
4.2.1 A Segmented Program with a Database............................................................................................................. 313
4.2.2 Multi-Segment Programs in Separate Disk Files ............................................................................................... 317
5. CONFIGURING PROMULA ...................................................................................................................................... 321
5.1 USING THE GRAPHICS CONFIGURATION PROGRAM..................................................................................................... 321
5.1.1 Selecting Graphics Configurations .................................................................................................................... 321
5.1.2 Managing Custom Graphics Configurations...................................................................................................... 324
5.1.3 Testing PROMULA Graphics............................................................................................................................. 328
iv
Promula Application Development System User's Manual
1. INTRODUCTION
1.1 Organization of the Manual
This manual is divided into five chapters:
CHAPTER 1
introduces you to the PROMULA system's features, capabilities, and requirements and tells you how
to install and run PROMULA on your personal computer.
CHAPTER 2
is an introduction to the PROMULA programming environment and covers some of the language
fundamentals in the context of a simple example.
CHAPTER 3
is the reference chapter for the PROMULA language.
It describes, in alphabetical order, the nouns and verbs of the language. The nouns are the building
blocks, the information elements, of the language. The verbs are the commands of the language;
they tell PROMULA to perform various operations on the nouns.
CHAPTER 4
contains details and examples of database management and program management in PROMULA.
CHAPTER 5
describes the use of the PROMULA configuration program that may be used to set up the physical
configuration of PROMULA's graphics modes.
1.2 What is PROMULA?
PROMULA (processor of multiple language applications) is an application development tool for large-scale analytical
applications. It is a general-purpose, high-level programming language with built-in data management, modeling, report
generation, graphics, and screen management (menus and windows) capabilities. It is the ideal development tool for those
who have outgrown the spreadsheets but do not want to develop applications in a third generation programming language
(such as FORTRAN, PASCAL, BASIC, or C).
Though its intellectual history goes back to the late ‘60's on mainframes, PROMULA was originally developed on PCs in
the early 80's as a high-level generalization of FORTRAN designed to take explicit advantage of the FORTRAN data
structure (multidimensional arrays of primarily numeric, homogeneous data). It is a portable C program and offers the same
character-based functionality on a number of platforms: PC DOS and DOS Extended, 386/486 UNIX, RS/6000 AIX,
VAX/VMS, and Apple Macintosh.
As an application development tool, PROMULA supports the following functions:
-
Data management (organize and selectively manipulate data)
-
Data analysis (establish relationships in the data using an extensive library of mathematical and statistical
functions)
-
Modeling (simulate a problem and possible solutions to it)
-
"What if" analysis (compare alternative decisions about the problem)
-
Report generation (display results in report form)
-
Graphics (display results in plotted form)
1
Promula Application Development System User's Manual
-
Menu management (prepare pick, pop-up and data menus for application prototyping, program control, data
entry, data editing, and data display in a character-based user interface)
-
Window management (create applications with attractive user interfaces using windows)
-
Equation solving (solve systems of simultaneous equations)
PROMULA's high-level, problem-oriented programming language is particularly suited for applications – as opposed to
systems – programmers. It is a highly productive, and elegant, notation for developing analytical, decision-support, or
simulation applications in all kinds of disciplines: business, engineering, or the sciences. PROMULA programs are easier to
write, use, verify, maintain, and document than programs written in spreadsheets or third-generation languages.
In PROMULA, a "database" is a collection of variables. The source of the information in the database may be raw user
input; or it may be calculated by PROMULA itself; or it may be produced by an independent applications program written
in a traditional programming language (such as FORTRAN) and processed by one of the PROMULA compilers or
translators (such as the PROMULA FORTRAN Compiler or the FORTRAN to C Translator).
Used in tandem with the PROMULA FORTRAN Compiler, PROMULA is also an attractive tool for upgrading the user
interfaces of existing FORTRAN applications. PROMULA can deal directly with the information content of programs
written in FORTRAN, without having to re-engineer or re-write such programs. Typically, FORTRAN programs are
computational engines, efficient in "crunching" numeric data but lacking in the area of "user friendliness." With
PROMULA, you can add a friendly user interface shell "on top" of a FORTRAN program, without having to change the
FORTRAN program code by hand. This is done by an automatic restructuring process, done by the PROMULA
FORTRAN Compiler, which involves the separation of a database from the computations of the program and the
management of that database by PROMULA. In this context, a PROMULA database is a collection of FORTRAN
variables — usually in the form of multidimensional arrays — which are manipulated by the FORTRAN computations on
the one hand but can also be used independently by PROMULA for other operations (data input, data edit, report
generation, graphics, etc.).
PROMULA is a transition bridge from third- to fourth-generation approaches in applications development. Because of its
powerful programming capabilities, it is a superior alternative to using spreadsheets or pure database managers in large
scale applications development.
1.3 PROMULA Language Highlights
1.3.1 Total Programming Environment
You can develop complete turnkey applications with PROMULA. The system is designed to capitalize on existing
applications written in a variety of languages and to minimize programming time in developing new applications.
PROMULA is largely self-contained with its own screen editor, language compiler, and operating system interface.
1.3.1 Structured Notation
PROMULA is a structured language especially useful for developing applications quickly. Its elegant notation, structured
concepts and built-in functions will help minimize the time required to develop serious, mainframe-size applications on
your desktop computer.
For you, the problem solver, this means that PROMULA is easier to learn, easier to use and apply in problem solving, and,
thus, faster in producing results. In problem solving, the choice of the right notation is almost half the solution.
2
Promula Application Development System User's Manual
PROMULA programs are easy to write and maintain because PROMULA's English-like notation and logical constructs
make them almost self-documented.
1.3.2 Language Tutorial
This reference aid is an on-line, menu-driven tutorial that allows you to obtain information about PROMULA while you are
programming or using an application.
1.3.3 Language Course
This learning aid is a series of PROMULA source codes designed to demonstrate the PROMULA language constructs
(nouns) and the PROMULA commands (verbs).
1.3.4 Tutorial Writer
A tutorial writer lets you create your own menu-driven, application-specific tutorials by simply typing them in. It converts
whole books or reports into on-line, menu-driven tutorials and/or context-specific on-line help for your applications.
1.3.5 Menu Manager
PROMULA's menu manager prepares pick and data menus for "user friendly" applications. Menu preparation is as easy as
writing the menus on the screen.
1.3.6 Data Editor
A full-screen data editor facilitates data entry and update. Using techniques similar to those found in spreadsheet programs,
PROMULA lets you browse through the "pages" of multidimensional arrays to change their values.
1.3.7 Report Generator
The WRITE commands of the language let you display information in a variety of report formats.
1.3.8 Graphics
PROMULA supports business graphics (point plots, x-y plots, bar plots, etc.) for both monochrome and color display
monitors as well as a variety of printers and plotters. It is even possible to capture plotted displays on disk. High resolution
color graphics are available for EGA and VGA monitors.
1.3.9 Command Mode
In command or direct mode, PROMULA accepts a statement, converts it to executable instructions which are executed by
the computer, then proceeds to the next statement.
You can interrupt a program dialogue, perform local operations in command mode, and return to the same place you left the
program. Not only is this a very useful debugging feature, but it also adds flexibility to your applications and greatly
increases the accessibility of the data and results. You can use PROMULA to generate reports and graphics or do
calculations with the data of your application without having to alter and recompile the program code.
3
Promula Application Development System User's Manual
1.3.10 Compilation Mode
In indirect, or compilation mode, PROMULA compiles a group of statements as a procedure or a program that can be run
later. A procedure can be run by other procedures, including itself.
1.3.11 Conversational Mode
You can interact with a PROMULA program either in command mode or by responding to conversational prompts and
menus. Conversational prompts and menus help you make it easy for others to use your program.
1.3.12 Multidimensional Data Structures
Unlike the two-dimensional view of spreadsheets, PROMULA supports multidimensional data structures. Data arrays in
PROMULA can have up to ten dimensions, making it easy to define and manipulate highly structured information. Many
PROMULA statements have the capability to manipulate multidimensional variables implicitly, leading to great economies
of notation.
The information of a PROMULA program is structured into variables and sets. Variables are multidimensional structures of
information constructed from and subscripted by sets. Variables store the information and sets define the structure of
variables. PROMULA variables can be as large as your disk space allows.
1.3.13 Array or Matrix Equations
PROMULA equations are written in standard algebraic notation. The equation operands may be scalars, vectors or
multidimensional arrays. Implicit and dummy subscripting allows a condensed notation for array equations. This feature is
comparable to a similar capability of the APL language.
1.3.14 Equation Solver
PROMULA's equation solver gives you solutions to systems of simultaneous equations, both linear and nonlinear.
1.3.15 Variable Management System
In PROMULA, a program is information, not just a computational box. In addition to computations, each PROMULA
program has a database. The database contains the input and output variables of the program as well as other supporting
information. You can use the program database independently of the program code, and even interrupt a running program
to work with its database.
In addition to sequential access text files and direct access binary files, PROMULA supports a unique variable management
system. This is a multidimensional array management system that is ideal for managing the information usually stored in
program variables.
PROMULA is different from other DBMS systems, which have limited command languages. PROMULA is a powerful,
fully-featured applications programming language, and it offers you full flexibility in analyzing and using the information
in your databases.
1.3.16 Program Management System
PROMULA has a program manager to help you handle large, mainframe-size programs.
4
Promula Application Development System User's Manual
The source code of a PROMULA application can be broken into separate parts, compiled independently, and then united
and used as a smoothly integrated system. This capability is most useful for the implementation of applications with
extensive memory requirements.
If your variables are too large or there are too many for your work space, you can store them on disk. PROMULA's variable
manager lets you bring only what you need into your work space.
1.3.17 Dynamic Simulation
PROMULA has several features which facilitate the implementation of dynamic simulation applications. You can develop
system dynamics models — models of systems whose variables interact with each other continuously as they evolve over
time.
1.3.18 Windows
PROMULA's powerful windowing commands allow you to modify the appearance of the screen to create professionallooking and user-friendly applications. Custom-designed help screens, popup menus, and flexible color control will
improve the appearance and usability of your programs.
1.3.19 Mathematical and Statistical Functions
PROMULA supports a library of mathematical and statistical functions as well as a number of array (matrix) operations,
such as summation, product, minimum/maximum, sorting, etc.
1.3.20 Command-Line Recall
A buffer stores all commands entered at the keyboard so that they may easily be recalled for modification and reentry. This
feature greatly enhances the utility of PROMULA's Command Mode and its Text and Data Editors.
1.3.21 Multi-platform Performance
PROMULA runs on most of the major computer platforms including IBM/MSDOS, VAX/VMS, Apple Macintosh,
IBM/AIX, SUN/UNIX, IBM/TSO, and platforms supporting the X Window System. Your PROMULA applications can be
used, without modification, wherever PROMULA runs.
5
Promula Application Development System User's Manual
2. PROMULA BASICS
This chapter is intended to introduce computer users with little programming experience and no familiarity with
PROMULA to the basics of the PROMULA language and the PROMULA Application Development System. The first part
of the chapter illustrates how to use the PROMULA application development shell to create and use applications; the
second part of the chapter covers the fundamentals of the PROMULA language in the context of a simple example.
2.1. The PROMULA Application Development System
The following sections describe how to create and manage executable applications using PROMULA. For example,
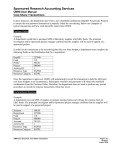
suppose you wish to create a simple application that will let you enter monthly sales and cost figures then compute and
report the monthly profits and the average monthly profit. We have written such a program for you, it is called DEMO.PRM
and it is on the PROMULA distribution disk. The dialog produced by running this program is displayed below:
Please enter the monthly sales figures.
? 13200 12100 14800 16200 15200 17200 18060 18960 19900 20900
? 21950 23050
Please enter the monthly cost figures.
? 9200 8600 10400 11300 10700 12100 12700 13350 14000 14700
? 15440 16210
Monthly Profit and Loss Figures ($)
January
February
March
April
May
June
July
August
September
October
November
December
Sales
Costs
13,200
12,100
14,800
16,200
15,200
17,200
18,060
18,960
19,900
20,900
21,950
23,050
9,200
8,600
10,400
11,300
10,700
12,100
12,700
13,350
14,000
14,700
15,440
16,210
Profit
4,000
3,500
4,400
4,900
4,500
5,100
5,360
5,610
5,900
6,200
6,510
6,840
Average monthly Profit ($) 5,235.00
Figure 2-1: Dialog produced by DEMO.XEQ
The source code for DEMO.PRM is displayed below.
OPEN SEGMENT
"DEMO.XEQ"
STATUS=NEW
DEFINE PROGRAM "A Demo Program"
DEFINE SET
month(12)
acnt(3)
END SET
"Months of the Year"
"Profit and Loss Ledger Accounts"
DEFINE VARIABLE
mp(month,acnt) "Monthly Profit and Loss Figures ($)" TYPE=REAL(10,0)
amp
"Average Monthly Profit ($)"
TYPE=REAL(10,2)
mn(month)
"Month Names"
TYPE=STRING(12)
6
Promula Application Development System User's Manual
acn(acnt)
END VARIABLE
"Profit and Loss Account Names"
TYPE=STRING(12)
DEFINE RELATION
ROW(month,mn)
COLUMN(acnt,acn)
KEY(acnt,acn)
END RELATION
READ mn
January
February
March
April
May
June
July
August
September
October
November
December
READ acn:6
Sales Costs Profit
DEFINE PROCEDURE profits
SELECT acnt(Sales)
WRITE"Please enter the monthly sales figures."
READ mp(acnt,month)
SELECT acnt(Costs)
WRITE"Please enter the monthly cost figures."
READ mp(acnt,month)
SELECT acnt*
mp(m,3) = mp(m,1) - mp(m,2)
amp = SUM(m)(mp(m,3)/12)
WRITE mp
WRITE amp
END PROCEDURE profits
END PROGRAM, DO profits
Figure 2-2: Source Code of DEMO.PRM
This code defines a complete, interactive application that can help its user enter monthly sales and costs figures and
compute and report the monthly profits and the average monthly profit.
2.1.1. Starting PROMULA
Typically you will start PROMULA from the DOS prompt by entering the word "PROMULA". You may include any
PROMULA statement after the word "PROMULA" on the command line. Several examples of this are shown below:
1.
PROMULA
SELECT FOREGROUND=GREEN COMMA=OFF GRAPHICS=HIGH
This will load PROMULA, set the foreground color to green, turn the comma option for numeric displays off, and
select the HIGH graphics mode. PROMULA will start in command mode, not with the PROMULA Main Menu.
7
Promula Application Development System User's Manual
2.
PROMULA
RUN COMPILER "myprog.prm" LIST=DISK "myprog.lst" PAUSE=ON
This will load PROMULA and compile the statements in the file myprog.prm. The statements in myprog.prm and
any output they generate will be saved on disk in the file myprog.lst. After compiling the file, PROMULA will be in
command mode.
3.
PROMULA RUN PROGRAM "myprog.xeq"
This will load PROMULA and start the PROMULA application contained in the file myprog.xeq.
2.1.2. The PROMULA Main Menu
If you start PROMULA with no command line statement, PROMULA will load into memory and display its Main Menu.
The PROMULA Main Menu is designed to give you direct access to a variety of program development functions.
PROMULA V3.00 (09/01/91) IBM PC Version
Main Menu
Key
Function
F1
F2
F3
F4
F5
F6
F7
F8
F9
F10
Exit PROMULA
Restart PROMULA
Run the PROMULA Tutorial
Edit a source file
Compile a source program
Run a program from the console
Resume an interrupted program
Run a program from a disk file
Run a menu of applications
Use the PROMULA Language
Press desired key or move bounce bar and press [ENTER]
Copyright 1988-91 PROMULA Development Corporation,
Application Management System
ALL RIGHTS RESERVED
To begin the desired function, simply press the corresponding function key. On the IBM Personal Computer the function
keys are the ten shaded keys at the left (or at the top) of the keyboard. Alternatively, you may press the numeric keys on
your keyboard or highlight the desired option and press the Enter key.
2.1.2.1. F1 -- Exit PROMULA
Selecting Main Menu option 1 gets you out of PROMULA and returns control to the operating system. All PROMULA
files which are open at this time are automatically closed. Any PROMULA information contained within the memory of the
computer which has not been saved on a disk file, is lost. In addition to closing its open files, PROMULA clears the screen
before ending.
8
Promula Application Development System User's Manual
2.1.2.2. F2 -- Restart PROMULA
Selecting Main Menu option 2 restarts PROMULA. Before the restart, PROMULA closes all application files, clears all
application information from the memory of the computer, and clears the screen.
This is a convenient feature to use when you wish to move from one PROMULA application to another without having to
go back to the operating system.
2.1.2.3. F3 -- Run the PROMULA Tutorial
The PROMULA Tutorial is the reference chapter of this User's Manual in on-line, menu-driven form. The program that
controls the tutorial is called PROMULA.TUT.
You can use the Tutorial in various ways:
1.
Browse through the entire Tutorial once to obtain an overview of PROMULA.
2.
Select a particular topic in the Tutorial when you have a particular question.
To get to the Tutorial while executing a program, press the Esc key to suspend the program and display the Main Menu;
then select Main Menu option 3 to browse the Tutorial and the topic of interest. When you wish to leave the tutorial, press
the End key; this returns you to the Main Menu. You may then return to the interrupted program by selecting Main Menu
option 7.
2.1.2.4. F4 -- Edit a Source File
This clears the screen and initiates the PROMULA Text Editor, which is a fast, full-screen text editor that may be used
from the Main Menu, from command mode, and from inside your applications via the RUN EDITOR statement.
On-line help for the editor is in the dialog file EDITOR.TUT and is accessible by pressing Alt-H.
For example, to edit the demo file DEMO.PRM shown in Figure 2-2, simply press Alt-E and enter the file name DEMO.PRM.
2.1.2.5. F5 -- Compile a Source Program
PROMULA accepts statements in either of two modes: direct and indirect. Main Menu option 5 is used to put PROMULA
into indirect mode. In indirect, or compilation mode, PROMULA converts the statements of an entire "source" file to an
"executable" form, which may be saved on disk for later execution.
Use Main Menu option 5 when you wish to compile a file containing the PROMULA source code. If the results of the
compilation are saved in a segment file, it can be executed either interactively (i.e., directly from the console), using Main
Menu option 6, or in batch mode from a text input file using Main Menu option 8 .
"Compiling a program" means converting it from source instructions to executable instructions. Source instructions are
the statements of a program as you write them for PROMULA to understand and compile, i.e., convert to executable
instructions. Executable instructions in turn are instructions that PROMULA converts to machine instructions which the
computer can execute at run time.
To compile the demo program DEMO.PRM, select Main Menu option 5 and respond to the system prompts, as shown in the
dialog below:
Enter the filename of the program to be compiled
? DEMO.PRM
Where do you want the compilation listing? N)one, C)onsole, P)rinter, or D)isk
? P
9
Promula Application Development System User's Manual
Do you want the compiler to pause on errors? Y)es or N)o
? Y
The dialog above tells PROMULA to compile the source program stored in file DEMO.PRM, to list the results of the
compilation on the printer, and to pause if any errors are detected.
In the dialog above, the questions are issued by PROMULA while the responses (following the ? prompt) are entered by the
user.
The first question asks for the name of the file containing the source code to be compiled. Any filename which is valid for
the operating system is a valid entry for this question. The default extension for source file names is .PRM.
The second question asks where PROMULA should send the compilation listing. The listing may be viewed on the screen,
sent to the printer, saved in a file on disk, or turned off. Viewing the listing on the screen or printer may slow the
compilation down but may make it easier to understand compilation errors. If the listing is sent to the printer, then the
printer needs to be turned on and ready to go before the response to this question is entered. PROMULA does not check to
ensure that this is true and will compile the program without sending it to the printer if you fail to turn the printer on. If the
listing is to be saved on a disk file, you must specify the name of the disk file in response to the next question, as shown in
the second example below. If you want the code to compile as fast as possible, and do not need to view the listing as the
program is compiled enter N for the N)one option.
The third question asks whether or not PROMULA should pause when a compilation error is encountered:
1.
If you respond Y for "yes" to the question, then each time an error is encountered, PROMULA will display the
appropriate error message and will pause with the following message:
Press any key to continue
At this point, if you press the Esc key, the compilation will end and you will return to the Main Menu. If you press any
other key, the compilation will continue.
2.
If you respond N for "no" to the question, then an error message will be displayed for each error, but PROMULA will
continue compiling. Note that the result of any compilation which was continued despite an error will probably not be
well formed.
A similar dialog occurs if you wish to save the compilation output on a disk file:
Enter the filename of the program to be compiled
? DEMO.PRM
Where do you want the compilation listing? N)one, C)onsole, P)rinter, or D)isk
? D
Enter a filename for the compilation listing
? DEMO.LST
Do you want the compiler to pause on errors? Y)es or N)o
? Y
The objectives of this example are to compile the source program DEMO.PRM and to save the compilation listing on a disk
file named DEMO.LST for later viewing or printing.
In the compilation example shown above, three files are involved:
1.
The program source file, DEMO.PRM
10
Promula Application Development System User's Manual
2.
The compilation listing saved on file DEMO.LST
3.
The executable file resulting from the compilation was saved on file DEMO.XEQ, as specified in the OPEN SEGMENT
statement of the source file. It is this file that you may execute interactively, using Main Menu option 6, or execute in
batch mode, using Main Menu option 8.
2.1.2.6. F6 -- Run a Program from the Console
An executable program may be run in one of two ways: interactively or in batch. Interactive execution proceeds as follows:
the program issues prompts via menus, ASK statements, and other interactive commands on the console and expects a
response from the user before it continues execution. In batch mode, on the other hand, program execution proceeds
without pausing for user input from the keyboard. In this mode, all of your responses are expected to have been saved in a
disk file, called the "batch input file".
Main Menu option 6 is used to execute a compiled PROMULA program interactively, i.e., directly from the console and
the keyboard. Selecting Main Menu option 6 results in a dialog such as the one shown below:
Enter the filename of the program to be executed
? DEMO.XEQ
DEMO.XEQ is the name of the executable program that was produced by compiling the DEMO.PRM source program using
Main Menu option 5. The default extension for executable file names is .XEQ. Execution of DEMO.XEQ results in the
following dialogue:
Please enter the monthly sales figures.
? 13200 12100 14800 16200 15200 17200 18060 18960 19900 20900
? 21950 23050
Please enter the monthly cost figures.
? 9200 8600 10400 11300 10700 12100 12700 13350 14000 14700
? 15440 16210
Monthly Profit and Loss Figures ($)
January
February
March
April
May
June
July
August
September
October
November
December
Sales
Costs
13,200
12,100
14,800
16,200
15,200
17,200
18,060
18,960
19,900
20,900
21,950
23,050
9,200
8,600
10,400
11,300
10,700
12,100
12,700
13,350
14,000
14,700
15,440
16,210
Profit
4,000
3,500
4,400
4,900
4,500
5,100
5,360
5,610
5,900
6,200
6,510
6,840
Average monthly Profit ($) 5,235.00
Figure 2-3: Dialog produced by DEMO.XEQ
11
Promula Application Development System User's Manual
While running an application in interactive mode, you may suspend program execution by pressing the Esc key at a
program pause. To resume execution at the point where you exited, select option 7 from the Main Menu.
2.1.2.7. F7 -- Resume an Interrupted Program
You can interrupt an executing program by pressing the Esc key in response to any program prompt. This gets you out of
the program and returns you to the Main Menu. At this point, you have direct access to the program information and
procedures. From the Main Menu you can perform a number of useful operations, like using the editor or using PROMULA
in direct mode (by selecting Main Menu option 10) to perform diagnostic or debugging operations. In direct mode, you may
audit the contents of the program selectively or make other adjustments before resuming execution. This is a very useful
feature for developing and testing programs.
To return to the precise point of execution where you exited the program select option 7 off the Main Menu.
2.1.2.8. F8 -- Run a Program from a Disk File
An executable program may be run in one of two ways: interactively or in batch mode. Interactive execution proceeds as
follows: the program issues prompts, pauses after each prompt, and expects a response from you before continuing
execution. The program issues its prompts on the console and you enter your responses with the keyboard or mouse, one at
a time. In batch mode, on the other hand, program execution proceeds without pause for user input from the keyboard. In
this mode, all of your responses are expected to have been saved "in batch" on a text file, called the batch input file. For
more information about preparing batch input files, see the section entitled Running Interactive Programs in Batch.
It is often inconvenient to execute a program directly from the console. It might be that the program is executed very often
with minor or no data changes. Alternatively, the program might execute very slowly, or an exact record of each execution
might be desired. Whatever the reason, batch execution provides the capability to execute a program in a non-interactive,
file-driven mode. During batch execution, your program reads from a batch input file. The batch input file is a standard text
file produced by any text editor. It contains the responses to the various program prompts in the precise order and form that
they would be entered directly on the keyboard.
Main Menu option 8 is used to execute a compiled PROMULA program in batch mode, i.e., via commands in a "batch
input file" on disk. In contrast, Main Menu option 6 is used to execute a compiled PROMULA program interactively, i.e.,
directly from the console. Selecting Main Menu option 8 results in the sample dialog shown below:
Enter the filename of the batch input file
? DEMO.INP
Where do you want the batch output listing? C)onsole, P)rinter, D)isk
? D
Enter a filename for the batch output listing
? DEMO.OUT
Enter the filename of the program to be executed
? DEMO.XEQ
DEMO.INP is a file containing the responses required by the program DEMO.XEQ and its contents are shown below:
13200 12100 14800 16200 15200 17200 18060 18960 19900 20900 21950 23050
9200 8600 10400 11300 10700 12100 12700 13350 14000 14700 15440 16210
DEMO.OUT is the disk file where the output is saved. This file is shown in Figure 2-4 and can be printed later or browsed
using a text editor. The "batch" output shown here is the same as the output produced by running DEMO.XEQ interactively
and spooling the run directly to the file DEMO.OUT.
12
Promula Application Development System User's Manual
Please enter the monthly sales figures.
? 13200 12100 14800 16200 15200 17200 18060 18960 19900 20900
? 21950 23050
Please enter the monthly cost figures.
? 9200 8600 10400 11300 10700 12100 12700 13350 14000 14700
? 15440 16210
Monthly Profit and Loss Figures ($)
January
February
March
April
May
June
July
August
September
October
November
December
Sales
Costs
13,200
12,100
14,800
16,200
15,200
17,200
18,060
18,960
19,900
20,900
21,950
23,050
9,200
8,600
10,400
11,300
10,700
12,100
12,700
13,350
14,000
14,700
15,440
16,210
Profit
4,000
3,500
4,400
4,900
4,500
5,100
5,360
5,610
5,900
6,200
6,510
6,840
Average monthly Profit ($) 5,235.00
Figure 2-4: Contents of File DEMO.OUT
2.1.2.9. F9 -- Run a Menu of Applications
Main Menu option 9 is used to start the application PROMULA.XEQ. A default PROMULA.XEQ program is distributed
with PROMULA. This application displays a menu from which you may access either the PROMULA course or any of the
sample programs provided with your PROMULA package. The sample programs and the course can help you learn to write
and use your own PROMULA programs.
PROMULA.XEQ is a standard PROMULA executable (its source code is contained in the file PRMDEMO.PRM) and it
may be replaced by a program you create that supports a menu of your own applications. To do this, create a PROMULA
executable called PROMULA.XEQ. Note that the name of the executable file launched by selecting Main Menu option 9
is hardwired in the system and must be PROMULA.XEQ.
2.1.2.10. F10 -- Use the PROMULA Language
Selecting Main Menu option 10 (numeric key 0) puts PROMULA into direct or Command Mode. In this mode,
PROMULA accepts a single statement of source instructions, converts it to executable instructions which are executed by
the computer, and proceeds to the next statement.
Pressing the Esc key or entering the STOP statement gets you out of direct mode and returns you to the Main Menu.
In direct mode, PROMULA issues the prompt
PROMULA?
and expects you to enter a statement on the same line of the screen. To enter a statement, simply type it in and press the
Enter key. After entering a statement, PROMULA will execute it and prompt you again for a new statement.
13
Promula Application Development System User's Manual
Some PROMULA statements have a beginning, an end, and a number of other line entries inbetween. For such a structured
statement, PROMULA issues the short question mark prompt
?
until the end of the statement is entered. The short prompt is intended to remind you that you have not yet ended a
structured statement that you started in an earlier entry line. For example, entering in direct mode the set definitions of
Figure 2-2 would result in the following interaction:
PROMULA? DEFINE SET
?
month(12)
?
acnt(3)
? END SET
PROMULA?
"12 Months of the Year"
"3 Profit and Loss Ledger Accounts"
Any program compiled in batch using the Main Menu (option 5) can also be entered directly from the keyboard in
command mode. The result is the same as compiling in batch mode.
2.1.3. Running Interactive Programs in Batch
PROMULA programs may be executed interactively or in batch. During interactive execution, any questions or prompts
presented by the program are answered by a person using the keyboard and/or mouse. The person responding to the
program is referred to as the user. During batch execution, any questions or prompts presented by the program are
"answered" by one or more lines of text in a file on disk. The file containing the responses is referred to as the batch input
file or batch script.
A batch script can describe any sequence of inputs that PROMULA might expect from a program user. The responses in a
batch script are usually a mixture of batch commands and data for the program. The batch commands may also be used by
persons running PROMULA interactively on a terminal that does not support non-printing keys such as Home, End, and
Escape.
In order to prepare batch input files correctly, it is necessary to understand PROMULA's input model. PROMULA accepts
inputs in one of two forms: Keypresses and Records.
Keypresses are single keystrokes or simultaneous keystroke combinations (e.g., Alt-H). Almost all keypresses are input by
pressing some non-printable key on the keyboard. Keypresses may also be input by "pointing and clicking" on specific
areas of the screen with a mouse. Examples of keypresses are pressing the Page-Down key to move to the next page of a
display, pressing the End key to finish browsing or editing a display, and pressing a key to make a selection from a pick
menu.
Records are strings of printable characters that represent data or responses to program prompts. Most records are input by
reading them from a text file, or by typing them in and pressing the Enter key. Examples of records are PROMULA
statements entered in command mode, and data entered in response to an ASK or READ statement. Another example of a
record is the value entered in response to the
Enter Value or End?
prompt generated by PROMULA's various EDIT statements.
When you prepare a batch script, you have to know exactly what happens when the program runs interactively. You also
have to keep track of when the program expects keypresses and when it expects records. If the program is expecting a
record, type it on the next line of the script. If the program is expecting a keypress, type the batch command for the
keypress on the next line of the script.
14
Promula Application Development System User's Manual
The batch commands are the simple one-character codes shown in Table 2-1 below:
Table 2-1: The PROMULA Batch Language Commands
CODE
s
m
e
r
l
b
a
z
x
i
t
j
u
d
f
p
n
h
1...
11...
!
MEANING
Display the screen image
Escape to main menu
End
Move right one position
Move left one position
Backspace
Move to beginning of current line
Move to end of current line
Delete current character
Toggle insertion characteristics
Tab right
Tab left
Move up one position
Move down one position
First page
Previous page
Next page
Help
Function key 1...
Shift+Function key 11...
Explicit Return or Enter
INTERACTIVE KEYPRESS*
None
Esc
End
Right arrow
Left arrow
Backspace
Ctrl-Left Arrow
Ctrl-Right Arrow
Del
Ins
Tab
Shift-Tab
Up arrow
Down arrow
Home
PgUp
PgDn
Alt-H
F1...
Shift-F1...
Return or Enter
NOTES
1
2
2
2
3
3
3
3
3
3
3
4
* The interactive keypresses presented above correspond to keys on a standard IBM PC-Compatible keyboard.
Keyboard tables for other platforms are included with the PROMULA installation instructions.
Table 2-2 Notes:
(1) Most screen output is suspended during batch execution. The show command(s) may be used to display the screen. If
the run is being saved on disk or printed, the screen will be written to the output file or printed.
(2) The \E and \R batch commands for Escape and Resume an application are no longer compatible with PROMULA's
batch command language. They have been replaced with Main Menu selections so that the batch scripts can more
closely parallel interactive runs. For example, the new and old methods of escaping and resuming from a batch run are
illustrated below:
OLD WAY
PROMULA VERSIONS 2.XX AND EARLIER
NEW WAY
PROMULA VERSIONS 3.XX AND LATER
15
Promula Application Development System User's Manual
batch statements.
.
.
\E
"command mode" statements
.
.
\R
.
.
more batch statements
batch statements.
.
.
m
(or #m as a record)
10 (Main Menu option 10)
"command mode" statements
.
.
#m
7 (Main Menu option 7)
.
.
more batch statements
(3) During batch execution, the command-line buffer is not active, so the use of these keys to control it is not supported.
(4) The exclamation point (!) may be used to indicate that the Return or Enter key is to be pressed when PROMULA is
waiting for a keypress. The enter command is useful for putting PROMULA into data entry mode during batch
execution of an EDIT statement. Use of the exclamation point to signify the return used to enter a record is not
required or allowed.
Notice that the batch commands are printable characters and therefore look like records. If the program is expecting a
record, and you want to enter a keypress, precede the keypress code with a pound sign (#). For example, if the program is
expecting a record, and you want to escape from the application to the main menu, enter #m. If you put just an m, the
program will read m as the value of the record.
There is one exception to these guidelines: if the program is expecting a keypress that is also used as a batch command, you
must precede the keypress with a pound sign. For example, if the program has a popup pick menu option with selection key
m and you want to select the m option in your batch script, put a #m on the next line of the batch script. If you put just an m,
the program will escape to the main menu instead of selecting the program menu's m option.
The easiest way to prepare a batch script is to run the program interactively and make careful notes of the keypresses and
records that are entered. Next, translate the keypresses into batch commands using the relationships in Table 2-1. Each
record is placed on a line in the script just as it would be typed during interactive execution. Optionally, some data records
may be replaced by PROMULA commands. For example, instead of trying to use batch commands to respond to an EDIT
statement, escape from the application and use equations, READ statements, and procedure calls to assign values to the
variables. Of course, this method requires that you know the names of the items contained in the program.
There should be a close parallel between the interactive keypresses and records entered during interactive mode and the
commands and data in the batch script. Plots are the one exception to this rule: during an interactive run, PROMULA
pauses for a keypress after generating a plot; however, during a batch run, PROMULA does not pause after a plot, so no
keypress is needed.
There are two ways to run an application in batch: start the application using Main Menu option 8, or compile the
statements that start the application using Main Menu option 5 or a RUN statement. For example, compiling the following
statements start a batch run of the application contained in the segment file test.xeq; execution starts with the first
statement of the procedure called proc.
OPEN SEGMENT "test.xeq" STATUS=OLD
READ SEGMENT MAIN, DO proc
.
batch commands
.
Example:
16
Promula Application Development System User's Manual
The program batche.prm shown below will be used as an example for the batch run.
OPEN SEGMENT "BATCHE.XEQ" STATUS=NEW
DEFINE PROGRAM "BATCH TEST"
DEFINE VARIABLE
opt
"menu option"
b
"b variable" TYPE=REAL(12,3)
a
"a variable" TYPE=REAL(12,3)
x
"x variable" TYPE=REAL(12,6)
END VARIABLE
DEFINE WINDOW
sw(01,01,28,20, WHITE/BLACK, FULL/SINGLE/WHITE/BLACK)
mw(32,01,78,20, WHITE/BLACK, FULL/SINGLE/WHITE/BLACK)
pw(01,23,78,23, WHITE/BLACK, FULL/SINGLE/WHITE/BLACK)
END WINDOW
DEFINE MENU picmnu
\EDIT\
\COMPUTE\
\DISPLAY\
\QUIT\
END
FIELD 1, SELECT=E,
EDIT VALUES
END
FIELD 2, SELECT=C,
COMPUTE VALUES
END
FIELD 3, SELECT=D,
DISPLAY VALUES
END
FIELD 4, SELECT=Q,
QUIT
END
END picmnu
POPUP(SW,PW)
HELP=0, ACTION=1
HELP=0, ACTION=2
HELP=0, ACTION=3
HELP=0, ACTION=4
DEFINE MENU datmnu
ENTER INPUTS
A = @@@@@@@@@@@@@@@
B = @@@@@@@@@@@@@@@
END
batche.prm (continued)
DEFINE PROCEDURE ctrl
SELECT picmnu(opt)
DO IF opt EQ 4
BREAK ctrl
ELSE opt EQ 1
EDIT datmnu(a,b)
ELSE opt EQ 2
x = a * b
ELSE opt EQ 3
WRITE CENTER (a " * " b " = " x // "PRESS A KEY TO CONTINUE") CLEAR(-1)
END
ctrl
END PROCEDURE ctrl
DEFINE PROCEDURE start
17
Promula Application Development System User's Manual
OPEN mw MAIN
OPEN pw PROMPT
ctrl
CLEAR MAIN
CLEAR PROMPT
WRITE CLEAR(0)
END PROCEDURE start
END PROGRAM, DO start
Let's assume we want to run this program using Main Menu option 5 for two different sets of inputs. The first set of inputs
is (a=1.5, b = 4.0); the second set of inputs is (a=1.2, b = 6.0).
BATCH SCRIPT
COMMENTS
OPEN SEGMENT "batche.xeq"
Open the segment file containing the program.
READ SEGMENT MAIN
Read the program into memory, execution starts with procedure start.
m
SELECT picmnu(opt): expecting a keypress; escape to Main Menu
10
Main Menu: select option 10 to go to command mode.
a = 1.5
Command mode statement: a = 1.5
b = 4.0
Command mode statement: b = 4.0
#m
PROMULA expecting a card, escape to Main Menu
7
Main Menu: select option 7 to resume an interupted application.
#c
SELECT picmnu(opt): expecting a keypress; choose option C, Compute.
#d
SELECT picmnu(opt): expecting a keypress; choose option D, Display.
!
WRITE ... CLEAR(-1):
#e
SELECT picmnu(opt): expecting a keypress; choose option E, Edit
!
EDIT datmnu(a,b): press enter for data entry mode.
1.2
Provide data card for first field of menu (a = 1.2).
!
EDIT datmnu(a,b): press enter for data entry mode
6.0
Provide data card for second field of menu (b = 6.0).
e
EDIT datmnu(a,b): press end to exit.
#C
SELECT picmnu(opt): expecting a keypress; choose option C, Compute.
#D
SELECT picmnu(opt): expecting a keypress; choose option D, Display.
!
WRITE ... CLEAR(-1):
#Q
SELECT picmnu(opt): expecting a keypress; choose option Q, Quit.
Press any key (e.g., Enter)
Press any key (e.g., Enter)
2.1.4. PROMULA Keyboard Conventions
Depending on context, special keys have various effects. Local PROMULA prompts describe what the actions of the
various keystrokes are. Most special keys are used in browsing and editing operations or in picking from menus.
The PgUp, PgDn and Home keys are used for paging through multi-screen displays (browsing). The Ctrl key is used with
the PrtSc key to toggle the printer on and off.
The function keys (or numeric keys) are used for making selections off pick menus. The function keys are also used for
interactively paging through the dimensions of multidimensional reports. The Alt (or Shift) key is used with the function
18
Promula Application Development System User's Manual
keys to make selections off pick menus that have more than ten options; it is also used with most keystrokes of the
PROMULA Text Editor.
The Backspace, Del and Ins keys are used in line editing. The Ins and Del keys are also used in tagging and untagging
elements of lists during execution of the SELECT SET statement.
The Return or Enter key is the "end of record/line feed" signal and completes each PROMULA statement or data record.
The Arrow keys, Home, PgUp, and PgDn keys are used to move through selection lists, data menus, array variable
displays and for file browsing.
The End key is used to end most interactive processes such as variable browsing and editing, menu editing, selection lists,
etc.
See the description of Line Editing and the interactive PROMULA statements for more information on PROMULA's
keyboard conventions.
PROMULA displays a prompt describing the relevant key actions whenever an interactive statement is executed.
2.1.4.1. Esc -- Escape to the PROMULA Main Menu
The Esc key enables you to suspend a PROMULA application and return to the PROMULA Main Menu. The information
in your working space at the point of interruption is still available to you, and you may access it in command mode by
selecting Main Menu option 10. While the program is suspended, you may browse the PROMULA tutorial, show
intermediate results, perform various debugging operations, or even add new procedures and variables to the interrupted
application by typing them in or by using the RUN COMMAND statement to read them from a file.
To return to the interrupted application, press the Esc key again to return to the PROMULA Main Menu and then select
Main Menu option 7 — Resume an interrupted program.
2.1.4.2. Alt-H -- Get Context-sensitive Help
Pressing the Alt-H keys simultaneously will give you context-sensitive help, i.e., it will give you access to that topic within
a help file that is pertinent to the particular point of the application that you are currently working with. This kind of local,
context-sensitive help for the user has to be programmed in advance, i.e., a help file must be available and the logic to
access a particular help topic must be coded into the procedure that you are working with. See DEFINE DIALOG for
instructions on how to build help files, BROWSE DIALOG and BROWSE TOPIC for instructions on accessing help
files, and DO IF HELP and DO IF ERROR VALUE for instructions on how to detect a call for help and branch to fieldspecific help accordingly.
2.1.5. Line Editing
When using PROMULA in direct mode or responding to prompts generated by the PROMULA editor, READ, EDIT, or
ASK statements, you will use PROMULA's line editor. All information entered while in the line editor is saved in the line
editor's buffer so that you may recall previously entered commands and data for modification and re-entry.
The following key conventions are used by the PROMULA line editor:
KEY
Enter
Up-arrow
ACTION
Enter a line for processing and put it on the bottom of the line editor's buffer
move up line editor's buffer (recall previous entries)
19
Promula Application Development System User's Manual
Down-arrow
move down line editor's buffer
Home
clear the input line
PgUp
move to top of line editor's buffer
PgDn
move to bottom of line editor's buffer
Tab
move cursor 8 spaces to the right
Shift-tab
move cursor 8 spaces to the left
Right-arrow
move cursor 1 space to the right
Left-arrow
move cursor 1 space to the left
Ctrl Right-arrow
move cursor to end of line
Ctrl Left-arrow
move cursor to beginning of line
Delete
delete the character over the cursor
Backspace
delete character to left and move cursor 1 space to left
Insert
toggle insert/overwrite mode
2.1.6. Printer Control
You can send output to your printer by doing the following:
1.
Issue the command SELECT PRINTER=ON. This will send all PROMULA output to the printer until you issue the
command SELECT PRINTER=OFF.
2.
On an IBM compatible computer, simultaneously press the Ctrl key and the PrtSc key. This will send all PROMULA
output to the printer until you turn the print toggle off by simultaneously pressing Ctrl-PrtSc again.
3.
On an IBM compatible computer, simultaneously press the Shift key and the PrtSc key. This will send to the printer
the contents of the current screen.
Other printer control options are discussed in Chapter 3 under the SELECT option statement.
Some printer control commands will not work unless your printer is on and properly connected to the computer.
If a SELECT OUTPUT statement is executed before a SELECT PRINTER=ON, output will be saved in the specified
disk file.
2.2. PROMULA Application Programming
The following sections describe how to write the source code for a PROMULA application program.
An application program is an ordered set of instructions that tell the computer how to solve a particular problem, or perform
a particular function, operation, or procedure. The instructions of a program — sometimes called commands, statements, or
source code — are written in a human-readable notation, and describe how the program should work. Every statement
should perform one or more of the following basic functions:
1.
Data Definition
This includes creating a framework for program information that is convenient and logical to work with.
20
Promula Application Development System User's Manual
2.
Program Control
This includes constructing procedures, loops, conditional branches, and other structures that control the sequence of
events that take place during execution of the program.
3.
Data Manipulation
This includes putting information into a data framework and manipulating it in various ways. Operations such as
performing calculations, reading data, sorting, selecting subsets of data, and doing other operations that transform the
inputs of a program into useful information fall into this category.
4.
Report Generation
This includes producing displays of input data and output information. Once a program has transformed the input data
into useful results, it is desirable to produce a report. The report may be text or graphics displayed on the screen,
printed with a printer, or saved in an external file on disk.
5.
Interface Design
This includes creating a functional, attractive interface through which others can use the program easily and
effectively.
In the following discussion, these five basic programming tasks and other important concepts of application programming
are introduced in the context of a simple example called The Budget Program. This simple application helps its user
determine how much extra money he/she will have after paying all of his/her expenses each month. The budget program is
smaller than the typical PROMULA application, but it can serve to illustrate PROMULA's basic programming constructs
and techniques.
2.2.1. Data Definition
KEY TOPICS:
1.
2.
3.
4.
5.
Variables — Scalars and Arrays
Planning the Data Structures for an Application
Defining Sets
Defining Variables
Relating Sets and Variables
2.2.1.1. Variables -- Scalars and Arrays
One of the most essential steps in creating an application program is data definition — the process of creating a framework
for program inputs and outputs that is convenient and logical to work with. To do this, the programmer must specify the
types of information the application will manipulate and must determine an efficient framework for storing this
information.
The basic unit of information storage in PROMULA, and most other computer programming languages, is called a
variable. The information stored in a variable may be in the form of letters, numbers, or other characters, and may be a
single value or a group of values.
Consider for example the value shown in Figure 2-5 below.
Average Monthly Expense ($) 1,001.33
21
Promula Application Development System User's Manual
Figure 2-5: A Scalar Variable
The value, 1,001.33, could be stored in a single PROMULA variable. A single-valued variable like this one is sometimes
referred to as a scalar. A numeric scalar variable is the simplest and smallest type of variable that can be defined in
PROMULA.
Now consider the list of values shown below:
Average Expenses by Expense Category ($)
RENT
FOOD
CAR SERVICE
UTILITIES
CAR INSURANCE
PHONE
409.00
275.24
126.18
88.44
45.00
57.48
Figure 2-6: A One-dimensional Array Variable
The six values above could also be stored in a single PROMULA variable. Since this variable contains a group of values, it
is referred to as an array. Variables with a one-dimensional list structure like the one shown above are sometimes called
vectors. You may be familiar with statistical analysis packages that treat all variables like vectors. The values of this vector
are classified by expense category. This means that the "rows" of the variable are the "expense category" dimension. They
are a set of six elements, the expense categories: rent, food, car service, utilities, car insurance, and phone. The vector's
values would be difficult to interpret if the vector and its rows were not well defined.
Finally, consider the table of values below:
Monthly Expenses by Category ($)
JAN
FEB
MAR
APR
MAY
JUN
JUL
AUG
SEP
OCT
NOV
DEC
RENT
409.00
409.00
409.00
409.00
409.00
409.00
409.00
409.00
409.00
409.00
409.00
409.00
FOOD CAR SERVICE
286.64
143.71
276.76
166.28
280.81
134.35
294.05
99.55
286.98
88.13
275.43
152.85
269.81
103.88
289.93
127.67
261.35
171.10
258.71
127.52
250.12
105.25
272.28
93.81
UTILITIES
86.87
84.78
96.84
98.06
86.77
98.06
87.47
72.28
76.47
88.28
91.41
93.93
CAR INS
45.00
45.00
45.00
45.00
45.00
45.00
45.00
45.00
45.00
45.00
45.00
45.00
PHONE
57.30
50.21
65.53
61.30
58.03
56.45
56.45
50.61
55.64
58.33
69.28
50.67
Figure 2-7: A Two-dimensional Array Variable
The 72 values above could also be contained in a single PROMULA variable. Variables with this "row by column"
structure are sometimes referred to as two-dimensional arrays. You may be familiar with the two-dimensional worksheets
that most spread sheet and financial modeling programs manipulate. The array values above are classified by month and
expense category. The "rows" of the variable are the "month" dimension; they are a set of 12 elements, the months January
through December. The "columns" of the array are the "expense category" dimension. They are a set of six elements, the
22
Promula Application Development System User's Manual
expense categories: rent, food, car service, utilities, car insurance, and phone. Like the vector above, the array's values
would be meaningless if the array and its rows and columns were not well defined.
This progression can be carried further. For example a three–dimensional array can be thought of as a group of twodimensional arrays or tables. PROMULA arrays may have up to 10 dimensions, and the PROMULA language is designed
to make it easy for programmers and users to work with this type of highly structured information.
2.2.1.2. Planning the Data Structures for an Application
In PROMULA you must organize your information into array and scalar variables before your program can manipulate
them. Often it is useful to categorize the variables as being either inputs and/or outputs. For example, the budget program
will manipulate the following inputs and outputs.
BUDGET PROGRAM INPUTS
The essential inputs of the budget program are the worker's monthly expenses and income.
Monthly expenses: For each month, the worker must specify his/her monthly expenses. Since the program is intended to
determine the amount of extra money the worker will have at the end of each month, only those expenses that the worker
must pay each month will be included. The monthly expenses will be divided into six categories: rent, food, car service,
utilities, car insurance, and phone.
For each month, the program will compute the worker's Monthly Income from several other inputs:
Hourly Wage Rate ($/hr.)
the dollars earned per hour (before taxes),
Payable Hours per Month
the number of hours the worker expects to work each month,
Pay Lost to Taxes
the fraction of wages lost to taxes,
Monthly Income Bonus ($) a dollar amount earned by the worker independent of the number of hours worked or the
tax rate. If the worker is salaried, this is the worker's monthly take-home pay.
BUDGET PROGRAM OUTPUTS
The worker's total monthly income and expenses will be computed from the program inputs. The monthly expenses will be
subtracted from the monthly income to give a monthly balance, or the amount of money that will be left over each month
for saving or spending on luxury items or emergencies. In addition, the annual totals and averages will be computed.
Having determined the inputs and outputs required for our program, we may use PROMULA to create a framework for this
information. The figure below shows the PROMULA statements that can create the essential input and output variables of
the budget program.
DEFINE SET
mons(12) "Months"
exps(6) "Expense Categories"
END SET
DEFINE VARIABLE
**
** INPUTS
**
expns(mons,exps)
payhr(mons)
bonus(mons)
taxes
TYPE=REAL(10,2)
TYPE=REAL(10,0)
TYPE=REAL(10,2)
TYPE=REAL(10,4)
"Monthly Expenses by Category ($)"
"Payable Hours per Month (hr.)"
"Monthly Income Bonus"
"Fraction of Pay Lost to Taxes"
23
Promula Application Development System User's Manual
wager
**
**
**
TYPE=REAL(10,2) "Hourly Wage Rate ($/hr.)"
OUTPUTS
incom(mons)
expnm(mons)
balns(mons)
aincom
aexpnm
abalns
END VARIABLE
TYPE=REAL(10,2)
TYPE=REAL(10,2)
TYPE=REAL(10,2)
TYPE=REAL(10,2)
TYPE=REAL(10,2)
TYPE=REAL(10,2)
"Monthly
"Monthly
"Monthly
"Average
"Average
"Average
Income ($)"
Expenses ($)"
Balance ($)"
Monthly Income "
Monthly Expense "
Monthly Balance "
Figure 2-8: Definition of the Inputs and Outputs of the Budget Program
The code above illustrates the basic elements of data definition in the PROMULA language. The PROMULA statements
displayed above are discussed in the following sections.
2.2.1.3. Defining Sets
In PROMULA, a Set is an ordered list of elements that can serve as an index for and define the structure of array variables.
In other words, sets are classification schemes for information. For example, the values in Figure 2-7 are classified by
month and expense category; these two classification schemes could be defined as sets in PROMULA.
In PROMULA, sets are created with the DEFINE SET statement. The sets required to structure the budget program's
inputs and outputs are described in the table below.
Table 2-2: The DEFINE SET Statement for the Budget Program
Set Identifier
Number of Elements (Size)
Descriptor
mons
exps
12
6
Months
Expense Categories
Each set definition includes the set's identifier, size, descriptor, and other optional information. The set identifier is a short,
symbolic name for the set, and is used to refer to the set in other statements of the program. The set size specifies the range
of the set indices and the number of items which may be indexed by the set. The set descriptor is optional and is used to
describe the set for documentation and program interface purposes.
By default, the elements of a set are ordered from 1 to N, where N is the size of the set. In addition, each set element has a
Label and a sequence number. The default labels for sets are formed from the set identifiers and the element sequence
numbers in parentheses as shown below.
Labels for set mons
MONS(1)
MONS(2)
MONS(3)
MONS(4)
MONS(5)
MONS(6)
MONS(7)
MONS(8)
MONS(9)
MONS(10)
Labels for set exps
EXPS(1)
EXPS(2)
EXPS(3)
EXPS(4)
EXPS(5)
EXPS(6)
24
Promula Application Development System User's Manual
MONS(11)
MONS(12)
The default element labels may be changed to other more (or less) descriptive ones by reading values into the set, or by
using a DEFINE RELATION or SELECT RELATION statement to specify user-defined labels for the elements. See
"Relating Sets to Variables" below.
For more information about sets, refer to Chapter 3 of this manual, especially the sections covering the PROMULA noun
set and the DEFINE SET, DO set, SELECT SET, SELECT ENTRY, and SELECT set statements.
2.2.1.4. Defining Variables
Variables are structures that store program information. It is in terms of variables that the data manipulations performed by
a program are expressed.
In PROMULA, variables are created with the DEFINE VARIABLE statement. Each variable definition must include a
unique identifier, and may also include a structure, type, descriptor, and other options for the variable. The variable
definitions for the budget program are shown in Figure 2-8 and are described in Table 2-2 below.
Table 2-3: The DEFINE VARIABLE Statement of the Budget Program
Variable
Identifier
Set
Structure
No. of
Values
Value
Type
Format
(w,d)
Descriptor
expns
incom
payhr
bonus
taxes
mons,exps
mons
mons
mons
-(scalar)
-(scalar)
mons
mons
-(scalar)
-(scalar)
-(scalar)
72
12
12
12
1
REAL
REAL
REAL
REAL
REAL
0,2
10,2
10,0
10,2
10,4
Monthly Expenses by Category ($)
Monthly Income ($)
Payable Hours per Month (hr.)
Monthly Income Bonus
Fraction of Pay Lost to Taxes
1
REAL
10,2
Hourly Wage Rate ($/hr.)
12
12
1
REAL
REAL
REAL
10,2
10,2
10,2
Monthly Expenses ($)
Monthly Balance ($)
Average Monthly Income ($)
1
REAL
10,2
Average Monthly Expense ($)
1
REAL
10,2
Average Monthly Balance ($)
wager
expnm
balns
aincom
aexpnm
abalns
The variable identifier is a short, symbolic name for the variable and is used to refer to the variable in the program. The
variable structure is the scheme according to which its contents are organized and is usually expressed in terms of program
sets. The variable descriptor is a description or label for the variable and is supplied for program documentation and user
interface purposes. The variable format type specifies the kind of values the variable contains and their default display
format.
If no type specification is included with the variable definition, it will have format type REAL(8,0) by default. This means
that when the variable is displayed, each of its values will fill a width of 8 characters and will be rounded to the nearest
whole number (0 decimal digits).
Missing from the above definitions are the contents, or values, of the variables. These may be introduced by the READ
statements or by equations. See "Reading in Data" and "Writing Equations" below. PROMULA initially sets the values of
25
Promula Application Development System User's Manual
variables to zero when they are defined unless a VALUE parameter is included with the variable definition. It is also
possible for a variable to obtain its values from a database. See Chapter 4 for details.
The following figure shows the default displays of some of the program variables defined above. Notice how PROMULA
uses the type specification and other information in the variable definitions to control the displays generated by the WRITE
variable statement:
WRITE expns
Monthly Expenses by Category ($)
MONS(1)
MONS(2)
MONS(3)
MONS(4)
MONS(5)
MONS(6)
MONS(7)
MONS(8)
MONS(9)
MONS(10)
MONS(11)
MONS(12)
EXPS(1)
0.00
0.00
0.00
0.00
0.00
0.00
0.00
0.00
0.00
0.00
0.00
0.00
EXPS(2)
0.00
0.00
0.00
0.00
0.00
0.00
0.00
0.00
0.00
0.00
0.00
0.00
EXPS(3)
0.00
0.00
0.00
0.00
0.00
0.00
0.00
0.00
0.00
0.00
0.00
0.00
EXPS(4)
0.00
0.00
0.00
0.00
0.00
0.00
0.00
0.00
0.00
0.00
0.00
0.00
EXPS(5)
0.00
0.00
0.00
0.00
0.00
0.00
0.00
0.00
0.00
0.00
0.00
0.00
EXPS(6)
0.00
0.00
0.00
0.00
0.00
0.00
0.00
0.00
0.00
0.00
0.00
0.00
WRITE payhr
Payable Hours per Month (hr.)
MONS(1)
MONS(3)
MONS(5)
MONS(7)
MONS(9)
MONS(11)
0
0
0
0
0
0
MONS(2)
MONS(4)
MONS(6)
MONS(8)
MONS(10)
MONS(12)
0
0
0
0
0
0
WRITE taxes
Fraction of Pay Lost to Taxes 0.0000
WRITE wager
Hourly Wage Rate ($/hr.) 0.00
Figure 2-9: Display of some of the variables defined in the Budget Program
For a more comprehensive discussion of variables, refer to Chapter 3 of this manual, especially the sections covering the
PROMULA Noun Variable and the DEFINE VARIABLE statement.
2.2.1.5. Relating Sets and Variables
Although the variables defined above are fully functional, the displays in Figure 2-9 are not complete because the default
labels for the elements of sets mons and exps need to be replaced with more meaningful ones.
There are several methods of relating descriptive information to program sets. One simple and flexible way is to define a
vector variable that is dimensioned by the set whose elements you want to label, then assign appropriate set element
descriptions to the values of the variable and relate the variable to the set. Let's do this for set mons.
First, define a vector variable to contain the set element labels:
26
Promula Application Development System User's Manual
DEFINE VARIABLE
monsn(mons) TYPE=STRING(4) "Month Names"
END VARIABLE
The statement above defines a vector of 12 values called monsn. The format type of this variable's values is STRING(4).
String type variables can contain alphanumeric data (letters, numbers, and other characters.) The default display format for
the values of variable monsn has a width of four characters.
Second, read in the values to be used as labels for set mons using the READ variable statement. In this case, we will use
three-letter abbreviations for each month.
READ monsn:4
JAN FEB MAR APR MAY JUN JUL AUG SEP OCT NOV DEC
The statement READ monsn:4 tells PROMULA to start reading in column one of the next line and to read four characters
for each of the 12 values of the vector variable monsn. The values of monsn after the read are displayed below:
Month Names
MONS(1)
MONS(4)
MONS(7)
MONS(10)
JAN
APR
JUL
OCT
MONS(2)
MONS(5)
MONS(8)
MONS(11)
FEB
MAY
AUG
NOV
MONS(3)
MONS(6)
MONS(9)
MONS(12)
MAR
JUN
SEP
DEC
Third, relate the variable monsn to the set mons using a DEFINE RELATION statement.
DEFINE RELATION
ROW(mons,monsn)
END RELATION
There are four types of relations between sets and variables in PROMULA: ROW, COLUMN, KEY, and TIME. These
are described in the discussion of the DEFINE RELATION statement in Chapter 3. The ROW relation is used to specify
the primary descriptor for a set's elements. The values of the primary descriptor are used to label the elements of the set in
displays of the set and in displays of variables whose rows are classified by the set.
Now, create labels for the elements of set exps. First, define a vector variable to contain the set element labels:
DEFINE VARIABLE
expsn(exps) TYPE=STRING(16) "Expense Categories"
END VARIABLE
Second, assign values to be used as labels for the elements of set exps. In this case, we will do this with equations.
expsn(1)
expsn(2)
expsn(3)
expsn(4)
expsn(5)
expsn(6)
=
=
=
=
=
=
"RENT"
"FOOD"
"CAR SERVICE"
"UTILITIES"
"CAR INS"
"PHONE"
Third, relate the variable expsn to the set exps using a DEFINE RELATION statement.
DEFINE RELATION
COLUMN(mons,monsn)
END RELATION
27
Promula Application Development System User's Manual
A COLUMN relation between a set and a variable tells PROMULA to use the variable's values to label columns classified
by the set in displays of array variables.
After defining, initializing, and relating labels to the program sets, a display of any variable dimensioned by the sets is
much more meaningful. For example, the display of variable expns is shown in the dialog below as an example:
WRITE expns
Monthly Expenses by Category ($)
JAN
FEB
MAR
APR
MAY
JUN
JUL
AUG
SEP
OCT
NOV
DEC
RENT
0.00
0.00
0.00
0.00
0.00
0.00
0.00
0.00
0.00
0.00
0.00
0.00
FOOD CAR SERVICE
0.00
0.00
0.00
0.00
0.00
0.00
0.00
0.00
0.00
0.00
0.00
0.00
0.00
0.00
0.00
0.00
0.00
0.00
0.00
0.00
0.00
0.00
0.00
0.00
UTILITIES
0.00
0.00
0.00
0.00
0.00
0.00
0.00
0.00
0.00
0.00
0.00
0.00
CAR INS
0.00
0.00
0.00
0.00
0.00
0.00
0.00
0.00
0.00
0.00
0.00
0.00
PHONE
0.00
0.00
0.00
0.00
0.00
0.00
0.00
0.00
0.00
0.00
0.00
0.00
For more information about relations between sets and variables, refer to Chapter 3 of this manual, especially the sections
covering the PROMULA noun Relation and the READ set, DEFINE RELATION, and SELECT RELATION
statements.
2.2.2. Program Control
KEY TOPICS:
1.
2.
3.
4.
Procedures
Linear Flow
Conditional Branches
Looping
One of the most important tasks facing an application programmer is setting up structures to control the sequence of events
that take place during program execution. The efficiency of a program and the accuracy of its results are highly dependent
on the correct implementation of these structures. Fortunately, only three types of control structures are needed to handle
the control requirements of any application program. These are Linear Flow structures, Conditional Branch structures,
and Looping structures. In addition, a fourth type of control structure, the Procedure is often used to help modularize the
activities of a program into subunits that work together.
2.2.2.1. Procedures
A large computer program is like a complex machine; it can have many parts. The most fundamental of these parts are the
program's statements. Each statement performs a specific predefined task. In addition to the statements that are available in
the PROMULA language, it is possible to create your own. In PROMULA, a programmer-defined statement is called a
Procedure. A procedure is a set of statements that are executed as a group when the procedure's name is used as a program
statement. This is referred to as "calling" or "invoking" the procedure.
Defining procedures gives programmers the ability to break the programming process into simpler steps. Each procedure
creates a functional program unit that can later be integrated with the other procedures to create the full program.
28
Promula Application Development System User's Manual
When PROMULA encounters a procedure name in a program, it executes the statements of the procedure. When execution
of a procedure finishes, processing continues with the statement following the procedure call. Procedures can call other
procedures including themselves.
For more information on procedures, see the DEFINE PROCEDURE statement in Chapter 3 of this manual.
2.2.2.2. Linear Flow
PROMULA applications use linear control as the primary means of directing their course of action. This means that
executable operations are performed in the order in which they are defined. Thus, execution of a program begins with the
first statement of the first procedure of the program and proceeds to follow the program instructions one-by-one toward the
last statement of the program. After execution of the last statement, the program ends. A schematic of linear program flow
is shown in the diagram below:
Start (Step 1)
Step 2
Step 3
Other Steps...
End (Last Step)
Figure 2-10: Linear Program Flow
Any one of these steps may be a simple statement, a procedure call, or another control structure.
2.2.2.3. Conditional Branches
A linear flow of action through a program in which every statement from the first to the last is executed in sequence is often
inflexible and inefficient. Even worse, it may lead to errors if the data put into the program does not fit the linear logic
defined by the code. In order to efficiently manage complex problems and data, your programs will require flexibility. The
basic element of all complex control structures is the Conditional Branch. Conditional branches are program statements
that can redirect linear flow and create more flexible and responsive execution paths. A schematic of a conditional branch is
shown in the figure below:
FALSE (0)
Process
B
Condition
Process
A
TRUE (1)
29
Promula Application Development System User's Manual
Figure 2-11: A Simple Conditional Branch
Conditional branch statements are often referred to as "IF-THEN-ELSE" statements. For example, the diagram above
illustrates a simple conditional branch that can be read as "If the Condition is true, then do Process A; else (the Condition is
false), do Process B". Process A and/or Process B may also contain Conditional branches.
An IF-THEN-ELSE statement that might be used in the budget program would check the value of the taxes variable to
make sure it "makes sense." Recall that variable taxes is used by the budget program to make a simple adjustment on the
worker's earnings to reflect the fraction of pay lost to taxes. The program expects this value to be between 0.5 and one. In
PROMULA, the DO IF statement is used to create logical branches.
An example of the DO IF statement that could be used to check the value of taxes and write an error message if the value
does not fit the expectations of the program is shown below:
DO IF taxes GT 1
WRITE ("The value of taxes should be less than one.")
ELSE
taxes LE 0
WRITE ("The value of taxes should be greater than or equal to zero.")
ELSE
taxes GT 0.50
WRITE ("The value of taxes should be less than 0.5)
END IF
For more information on Branching refer to the sections covering the DO IF statement and the nouns Boolean Expression
and Relational Expression in Chapter 3 of this manual.
2.2.2.4. Looping
Looping refers to the process of repeatedly performing a set of operations. The basic components of a loop are the body of
the loop, and the DO condition for the loop. The body of the loop is simply the set of instructions that are executed on each
pass through the loop. The DO condition for the loop is a true-false expression that is evaluated before each iteration of the
loop to determine if the instructions in the body of the loop should be performed. PROMULA supports several types of
looping control structures; these include the DO WHILE, DO UNTIL, DO file, and DO set statements, and recursion.
DO WHILE loops execute the instructions in the body of the loop while the DO condition is true.
DO UNTIL loops execute the instructions in the body of the loop until the DO condition is false.
DO file loops are used with text or random files. They execute the instructions in the body of the loop once for each record
of the file and exit when the end of file is reached.
The DO set loop is unique to PROMULA; it is a set-controlled looping structure that executes the instructions in the body
of the loop once for each element of the set's selection vector. A set's selection vector contains the currently active elements
of the set. Thus, the order and range of a DO set loop can be controlled by sorting and/or selecting the elements of the set.
DO set loops are an extremely powerful tool for manipulating PROMULA's set-based array variables.
Recursion is a looping control structure that does not use one of PROMULA's DO loop statements explicitly. It is used to
execute a procedure repeatedly until some "exit" condition occurs. Recall that a procedure is a group of statements that are
30
Promula Application Development System User's Manual
executed as a unit when the procedure's name is used as a statement. Recursion occurs when one of the statements in the
procedure is a call to the procedure itself. A procedure that calls itself is referred to as a recursive procedure.
A simple example of a recursion loop is a procedure that offers the user selections from a menu repeatedly until the user
selects the exit option.
An example is procedure recurs shown below:
DEFINE MENU pickmenu
1 \Exit Procedure\
2 \Action A\
3 \Action B\
4 \Action C\
END
DEFINE VARIABLE
choice
END VARIABLE
DEFINE PROCEDURE recurs
SELECT pickmenu(choice)
DO IF PICK EQ 1
Here is the test of the DO condition.
BREAK recurs
ELSE PICK EQ 2
Statements of Action A
ELSE PICK EQ 3
Statements of Action B
ELSE PICK EQ 4
Statements of Action C
END IF
recurs
Here, the procedure recurs calls itself.
END PROCEDURE recurs
Notice that the last statement in procedure recurs is a call to itself. The DO condition for the recursion loop becomes false
when the user selects option 1 from the menu. The recursion loop is broken when the BREAK procedure statement is
executed. All other menu selections will allow the procedure to be called recursively.
For more information on looping, see the DO WHILE, DO UNTIL, DO set, and DO file, statements in Chapter 3.
2.2.3. Data Manipulation
KEY TOPICS:
1.
2.
3.
4.
Reading in data
Selecting the Elements of a Set
Sorting the Elements of a Set
Writing Equations
Data manipulation is another fundamental programming task that includes loading information into program variables and
manipulating them to create output information.
2.2.3.1. Reading in Data
Getting data into its variables is a basic requirement of all computer programs. One of the easiest ways to read a fixed
amount of information into a variable is to use PROMULA's READ variable statement. This statement is used to read free
format data from the source code of your program or from the keyboard into a variable. Free format means that the format
of the data values does not have to be specified, and the values may be in a variety of arrangements. For numeric data, the
31
Promula Application Development System User's Manual
values need only be separated by blanks or commas, or be on separate lines, and there must be enough values to fill all
active cells of the variable.
For example, the 12 values of the monthly bonus variable defined in Figure 2-8 could be loaded with the values 100, 200,
300, ..., 1200 using any of the following READ variable statements.
READ
JAN
FEB
MAR
APR
MAY
JUN
JUL
AUG
SEP
OCT
NOV
DEC
bonus\5
100
200
300
400
500
600
700
800
900
1000
1100
1200
READ bonus
100 200 300 400 500 600 700
800 900 1000 1100 1200
READ bonus
100 200 300
400 500 600
700 800 900 1000 1100 1200
READ bonus
100 200 300 400 500 600 700 800 900 1000 1100 1200
The READ variable statement may also be used for scalars. For example, the worker's Hourly Wage Rate ($/hr.), variable
wager, and the fraction of Pay Lost to Taxes, variable taxes, could be read in with the following two statements:
READ wager
10.0
READ taxes
0.30
Or, both scalar variables could be read in with a single statement:
READ (wager, taxes)
10.0 0.30
Reading in a multidimensional array like variable expns is a little trickier. As mentioned in the section on defining
variables, PROMULA uses the order of sets in an array variable's definition to control how its data values are read in by a
READ variable statement.
The first set is assumed to index the rows of data values.
The second set is assumed to index the columns of data values.
The third set is assumed to index the two-dimensional blocks of data.
The fourth set is assumed to index the three-dimensional blocks of data, and so on.
For example, the array expns is defined with set mons as its first (row) dimension, and set exps as its second (column)
dimension. Therefore, array expns could be assigned values identical to those displayed in Figure 2-7 with the following
READ statement:
READ expns
409 286.64
409 276.76
409 280.81
409 294.05
409 286.98
409 275.43
409 269.81
Expense Categories go across (the columns)
143.71 86.87 45 57.30
166.28 84.78 45 50.21
134.35 96.84 45 65.53
99.55 98.06 45 61.30
88.13 86.77 45 58.03
152.85 98.06 45 56.45
103.88 87.47 45 56.45
Months go down (the rows)
32
Promula Application Development System User's Manual
409
409
409
409
409
289.93
261.35
258.71
250.12
272.28
127.67 72.28 45 50.61
171.10 76.47 45 55.64
127.52 88.28 45 58.33
105.25 91.41 45 69.28
93.81 93.93 45 50.67
If the data values were rotated relative to the definition of array expns, sets could be included with the READ variable
statement to explicitly indicate the rows and columns of the input data. Again, the first set is assumed to index the rows of
data values, the second set is assumed to index the columns of data values; the third set is assumed to index the twodimensional blocks of data; the fourth set is assumed to index the three-dimensional blocks of data, and so on.
READ expns(exps,mons)
409 409 409 409 409 409 409 409 409 409 409 409
286.64 276.76 280.81 294.05 286.98 275.43 269.81 289.93 261.35 258.71 250.12 272.28
143.71 166.28 134.35 99.55 88.13 152.85 103.88 127.67 171.10 127.52 105.25 93.81
86.87 84.78 96.84 98.06 86.77 98.06 87.47 72.28 76.47 88.28 91.41 93.93
45 45 45 45 45 45 45 45 45 45 45 45
57.30 50.21 65.53 61.30 58.03 56.45 56.45 50.61 55.64 58.33 69.28 50.67
There is no need for formats or loops to read in the values of an array variable. The definition of the variable contains all
the information needed to control the read so that the data values are put into the appropriate cells of the array.
The examples above are simplistic and are based on reading from the source code of your program or from the keyboard.
PROMULA can also read data from complicated fixed and variable length text and binary (random) files. These techniques
are discussed in Chapter 3 in the sections covering the READ variable, READ variables, and READ file statements.
2.2.3.2. Selecting Sets
A common programming requirement is the selection of a subset of your data. For example,
1.
to select the values of an array indexed by particular set sequence numbers before using the array in calculations or
input/output operations,
2.
to select only those values of a variable that meet a given criteria,
3.
to put the values of an array into an order that is not directly possible by using PROMULA's SORT statement.
Whatever your needs, having access to sets as the indexes of multidimensional data gives you a powerful and flexible
means of selecting and sorting subsets of your data.
The SELECT set statement is used to select the elements of a set. This is also called changing a Set selection vector.
The simplest set selection uses a literal specification of set element numbers to specify the elements of the set that are to
remain active. For example, to select the fall and spring months, the following statement could be used:
SELECT mons(9-11,3-5)
The statement above tells PROMULA to change the range and order of set mons to the fall and spring months —
September to November and March to May. In other words, the set's selection vector now contains the following values:
9, 10, 11, 3, 4, and 5 in that order. This means that all actions involving set mons will be performed only on values indexed
by these elements of the set. For example, the statement WRITE expns would produce the following display:
Monthly Expenses by Category ($)
SEP
RENT
409.00
FOOD CAR SERVICE
261.35
171.10
33
UTILITIES
76.47
CAR INS
45.00
PHONE
55.64
Promula Application Development System User's Manual
OCT
NOV
MAR
APR
MAY
409.00
409.00
409.00
409.00
409.00
258.71
250.12
280.81
294.05
286.98
127.52
105.25
134.35
99.55
88.13
88.28
91.41
96.84
98.06
86.77
45.00
45.00
45.00
45.00
45.00
58.33
69.28
65.53
61.30
58.03
To restore a set to its default size and order, use the SELECT set* statement.
Variables may also be used to indicate the elements to be selected. For example, in order to select the months October
through December, and March, the following statements could be used:
DEFINE VARIABLE
m1
m2
m3
END VARIABLE
m1=10
m2=12
m3=3
SELECT mons(m1-m2,m3)
You can reverse the order of a set by using a set selection that specifies a range from the last element to the first element.
SELECT mons(12-1)
If a variable is related to a set by a KEY relation, the variable values may be used to specify set selections. For example,
the statements
SELECT KEY(mons,monsn)
SELECT mons(JAN,FEB,MAY)
will select the months January, February, and May from the set of months. Here, mons is a string variable containing the
three-letter month name abbreviations (see Relating Sets and Variables).
It is also possible to select the elements of a set if the values of a variable dimensioned by the set meet a given criterion.
The SELECT set IF statement is used for these types of selections. For example, in order to select the elements of set
mons that index values of monthly income that are greater than 1500 dollars, the following expression could be used:
SELECT mons IF incom GT 1500
Here, incom is a numeric variable, the monthly income values.
For more information on selecting set elements, see the discussions of the PROMULA noun Set and the PROMULA
statements SELECT set, SELECT SET, SELECT ENTRY, SELECT set IF, and SELECT VARIABLE.
2.2.3.3. Sorting Sets
One of the most common data manipulation tasks is sorting. PROMULA provides a straight forward and flexible means of
sorting of multidimensional data. For example, in order to sort the months of the year (set mons) using the monthly income
values (variable incom) in ascending order, the following statement can be used:
SORT mons USING incom
34
Promula Application Development System User's Manual
The statement above tells PROMULA to sort set mons in ascending order using the values of variable incom. In order for
the SORT statement to work, the variable used as the key for the sort must be dimensioned by the set being sorted.
To sort the set in descending order based on income, use the keyword DESCENDING after the word SORT:
SORT DESCENDING mons USING incom
To restore a set to its default order, use the SELECT set* statement.
It is also possible to use multidimensional arrays as the key for a sort as well. For example, in order to sort the months of
the year using the monthly food expense values, the following statements can be used:
SELECT exps(2)
SORT mons USING expns
The first statement above selects the second column of array expns; this column of the array contains the monthly food
expense values. The second statement tells PROMULA to sort set mons using the values of variable expns. Since the
second column of the set is selected before the sort, the values in the second column of array expns are used to order the
set mons.
For more information and examples of sorting information, see the discussion of the SORT statement in Chapter 3 of this
manual.
2.2.3.4. Writing Equations
Equations are PROMULA statements that can change the values of variables. Equations may involve numeric or string
constants, variables, arithmetic and user-defined functions, and arithmetic and relational operators. For example, the
variable expns could be initialized with the following six equations that use PROMULA's built-in RANDOM number
function:
Equation
Description
expns(m,1) = 409
expns(m,2)
=
RANDOM(250,300)
expns(m,3)
=
RANDOM(85,175)
expns(m,4)
=
RANDOM(70,100)
expns(m,5) = 270/6
expns(m,6) = RANDOM(50,70)
Rent is $409 per month
Food varies between $250 and $300 per month
Car Service varies between $85 and $175 per month
Utilities vary between 70 and 100 per month
Car Insurance is $270 for 6 months
Phone varies between $50 and $70 per month
The equations above use the dummy subscript, m, to drive equations over the elements of set mons. This means the letter m
in the above equations causes each equation to be performed once for each active element of set mons. Recall that the
variable expns is defined as a two-dimensional array classified by month and expense category. The first dimension of the
variable is the "months" dimension; it is a set of 12 elements: the months January to December. The second dimension of
the array is the "expense category" dimension. It is a set of six elements, the expense categories: rent, food, car service,
utilities, car insurance, and phone.
The "column" of the array (expense category) to which each equation applies is indicated explicitly by the number
following the subscript m in the parentheses. The first column of array expns (Rent) is constant at $409/month. Expense
categories 2, 3, 4, and 6 are random values within different ranges; PROMULA's RANDOM function is used with upper
and lower limits to simulate random expenditures in these expense categories. The fifth column of array expns (Car
Insurance) is assigned to the result of the division of 270 by 6 or $45 per month.
35
Promula Application Development System User's Manual
Here is a second example. The monthly income values will be computed by the budget program using the following
equation:
incom = payhr * wager * (1-taxes) + bonus
The equation above uses implicit subscripting. This means that all 12 values of variable incom will be computed from the
single equation above without DO loops or dummy subscripts. PROMULA "knows" that it should perform the expression
for each month because the incom variable was dimensioned by set mons in its definition. Furthermore, the variables
payhr and bonus are also dimensioned by set month, and the correspondence between the month elements of these two
vectors and those of variable incom is maintained automatically by PROMULA when the equation is processed. Thus, the
single equation above is equivalent to the following 12 equations:
incom(1)
incom(2)
incom(3)
incom(4)
incom(5)
incom(6)
incom(7)
incom(8)
incom(9)
incom(10)
incom(11)
incom(12)
=
=
=
=
=
=
=
=
=
=
=
=
payhr(1)
payhr(2)
payhr(3)
payhr(4)
payhr(5)
payhr(6)
payhr(7)
payhr(8)
payhr(9)
payhr(10)
payhr(11)
payhr(12)
*
*
*
*
*
*
*
*
*
*
*
*
wager
wager
wager
wager
wager
wager
wager
wager
wager
wager
wager
wager
*
*
*
*
*
*
*
*
*
*
*
*
(1-taxes)
(1-taxes)
(1-taxes)
(1-taxes)
(1-taxes)
(1-taxes)
(1-taxes)
(1-taxes)
(1-taxes)
(1-taxes)
(1-taxes)
(1-taxes)
+
+
+
+
+
+
+
+
+
+
+
+
bonus(1)
bonus(2)
bonus(3)
bonus(4)
bonus(5)
bonus(6)
bonus(7)
bonus(8)
bonus(9)
bonus(10)
bonus(11)
bonus(12)
The income equation tells PROMULA that the monthly income is equal to the number of hours worked per month (payhr)
times the hourly wage (wager) adjusted for taxes plus the monthly bonus.
Another example of an equation that uses implicit subscripting is the calculation of the difference between the monthly
income and monthly expense values to give the monthly balance figures:
balns = incom - expnm
An important point to remember when writing equations is that a variable may appear on both sides of an equation. In such
equations, the value of the expression on the right hand side of the equals sign is evaluated then passed to the variable on
the left hand side of the equals sign. For example, if the worker plans to work about six hours out of each working day and
five days out of each week, the number of payable hours each month can be estimated by the following statements:
READ payhr
31 28 31 31 31 30 31 31 30 31 30 31
payhr = 6 * payhr * 5/7
The first statement above reads into payhr the total number of days in each month. The second statement converts the days
per month to hours worked per month and stores the results in variable payhr.
PROMULA equations also may use PROMULA's extensive collection of functional operators. One of the most useful of
these is the array summation function, SUM, which can be used to sum up the values of multidimensional arrays. For
example, to compute the monthly total expenditures, it is necessary to sum over the expense categories of variable expns
and save the results in a vector indexed by month, expnm.
expnm(m) = SUM(e)(expns(m,e))
The expression above uses two dummy subscripts to drive the month and expense category dimensions. The single equation
above is functionally equivalent to the following 12 equations:
expnm(1) =expns(1,1) +expns(1,2) +expns(1,3) +expns(1,4) +expns(1,5) +expns(1,6)
expnm(2) =expns(2,1) +expns(2,2) +expns(2,3) +expns(2,4) +expns(2,5) +expns(2,6)
36
Promula Application Development System User's Manual
expnm(3) =expns(3,1) +expns(3,2) +expns(3,3) +expns(3,4) +expns(3,5) +expns(3,6)
expnm(4) =expns(4,1) +expns(4,2) +expns(4,3) +expns(4,4) +expns(4,5) +expns(4,6)
expnm(5) =expns(5,1) +expns(5,2) +expns(5,3) +expns(5,4) +expns(5,5) +expns(5,6)
expnm(6) =expns(6,1) +expns(6,2) +expns(6,3) +expns(6,4) +expns(6,5) +expns(6,6)
expnm(7) =expns(7,1) +expns(7,2) +expns(7,3) +expns(7,4) +expns(7,5) +expns(7,6)
expnm(8) =expns(8,1) +expns(8,2) +expns(8,3) +expns(8,4) +expns(8,5) +expns(8,6)
expnm(9) =expns(9,1) +expns(9,2) +expns(9,3) +expns(9,4) +expns(9,5) +expns(9,6)
expnm(10)=expns(10,1)+expns(10,2)+expns(10,3)+expns(10,4)+expns(10,5)+expns(10,6)
expnm(11)=expns(11,1)+expns(11,2)+expns(11,3)+expns(11,4)+expns(11,5)+expns(11,6)
expnm(12)=expns(12,1)+expns(12,2)+expns(12,3)+expns(12,4)+expns(12,5)+expns(12,6)
The final example illustrates how the annual averages will be computed for the budget program's summary report:
Average Monthly Income :
Average Monthly Expense :
Average Monthly Balance :
aincom = SUM(m)(incom(m)) / mons:N
aexpnm = SUM(m)(expnm(m)) / mons:N
abalns = SUM(m)(balns(m)) / mons:N
Recall that the arithmetic average of a set of values is the sum of the values divided by the number of values used in the
sum. The three equations above do just that; they sum up the monthly values and divide the sum by the number of months
used in the sum. The notation mons:N has a value equal to the number of elements in the selection vector for set mons
(which may be changed by a set selection statement).
It is also possible to define your own functions in PROMULA to use in equations. Defining functions in PROMULA is
done with the DEFINE FUNCTION, and DEFINE LOOKUP statements.
For more information on writing equations, see the discussion of the PROMULA nouns Equation and Expression and the
COMPUTE statement.
2.2.4. Report Generation
KEY TOPICS:
1.
2.
3.
Writing Variables
Saving Reports on Disk
Plotting Variables
Report generation is a critical part of any application program. An application must be able to generate reports that are of
interest to someone or it is not worth writing. PROMULA provides several report generation statements that can manage
multidimensional data for you, as well as a flexible WRITE statement that can be used for complicated or fancy text report
generation. There is also a PLOT statement that can be used to generate a variety of graphic reports.
2.2.4.1. Writing Variables
The budget program computes the monthly expenses, income, and balance as well as the annual total and average expense,
income, and balance. These values can all be displayed in a single one page summary report.
There are several ways to generate such a report. The technique used in the budget program is to collect the values of the
three monthly variables in a two-dimensional (12 x 3) array. The rows of this array are classified by the months of the year,
the columns of the array are classified by the three output categories: Income, Expenses, and Balance. The statements
required to define this array are shown below:
DEFINE SET
mons(12) "Months"
colm(03) "Report table Columns"
END SET
DEFINE VARIABLE
37
Promula Application Development System User's Manual
rtabl(mons,colm) TYPE=REAL(15,2) "Summary Table"
monsn(mons)
TYPE=STRING(4) "Month Names"
END VARIABLE
READ colm KEY(1,10,10)
INCOME
EXPENSES
BALANCE
READ monsn:4
JAN FEB MAR APR MAY JUN JUL AUG SEP OCT NOV DEC
SELECT KEY(mons,monsn)
The DEFINE SET and DEFINE VARIABLE statements above define a two-dimensional variable called rtabl, and a
variable for the month labels called monsn. A READ set statement is used to assign labels to the elements of set colm. A
READ variable statement is used to read in labels for the elements of set mons. Finally, a SELECT RELATION
statement relates the month labels to the set mons.
After computing the values of the output variables, they can be passed to the variable rtabl using the following equations.
rtabl(m,1) = incom(m)
rtabl(m,2) = expnm(m)
rtabl(m,3) = balns(m)
The three equations above initialize all 36 values of variable rtabl: the first column picks up the values of variable
incom; the second column picks up the values of variable expnm; and the third column picks up the values of variable
balns.
The output report variable is now loaded and ready to be displayed. The final report is produced by the WRITE variable
statement below:
WRITE rtabl,
TOTAL(mons),
TITLE("Budget Summary"//,
aincom:L"="aincom/,
aexpnm:L"="aexpnm/,
abalns:L"="abalns)
The WRITE variable statement above includes the TITLE and TOTAL options.
The TOTAL option tells PROMULA to report the specified totals along with the variable's values. In this case, only the
totals over set mons are desired so the mons set is indicated in parentheses following the keyword, TOTAL.
The TITLE option tells PROMULA to replace the default title for the variable (i.e., the variable's descriptor) with the title
specification enclosed in the parentheses. In this case a five-line title is specified: the first line of the title contains the
words "Budget Summary"; the second line of the title is blank as indicated by the two slashes (//) — a slash character tells
PROMULA to go to the next line; the third, fourth, and fifth lines of the title contain the descriptors and values (separated
by equal signs) of the three annual average variables: aincom, aexpnm, abalns. The notation aincom:L is used to
identify the descriptor of the variable aincom in titles and other WRITE statements.
A typical budget program report (produced by the statement above) is displayed below:
Budget Summary
Average Monthly Income =
Average Monthly Expense =
Average Monthly Balance =
38
1,565.00
1,001.33
563.67
Promula Application Development System User's Manual
INCOME
18,780.00
1,580.00
1,490.00
1,580.00
1,580.00
1,580.00
1,550.00
1,580.00
1,580.00
1,550.00
1,580.00
1,550.00
1,580.00
Total
JAN
FEB
MAR
APR
MAY
JUN
JUL
AUG
SEP
OCT
NOV
DEC
EXPENSES
12,016.02
1,028.52
1,032.03
1,031.54
1,006.96
973.91
1,036.79
971.61
994.50
1,018.56
986.85
970.06
964.70
BALANCE
6,763.98
551.48
457.97
548.46
573.04
606.09
513.21
608.39
585.50
531.44
593.15
579.94
615.30
Figure 2-12: Typical report produced by the Budget Program
PROMULA automatically computes and displays the columns totals, and centers the title and the table of values on the
screen. The formatting of the table values (i.e., a width of 15 characters with two decimal digits) is also done automatically
according to the format type specified in the definition of variable rtabl.
It is possible to rotate the dimensions of the WRITE variable display by specifying a set order different from the one used
in the definition of rtabl. For example, the report table could be displayed with months as the columns and the report
categories as the rows by the following statement:
WRITE rtabl\10:10(mons,colm), TOTAL(mons), TITLE("Budget Summary"//,
aincom:L"="aincom/,
aexpnm:L"="aexpnm/,
abalns:L"="abalns)
This WRITE variable statement is almost exactly like the last one except that it includes a local format and set order
specification that will override the ones in the definition of variable rtabl. The format specification \10 means that the
row descriptors should have a width of 10 characters, and :10 means that each column should have a width of 10
characters. The resulting display is shown below:
Budget Summary
Average Monthly Income =
Average Monthly Expense =
Average Monthly Balance =
INCOME
EXPENSES
BALANCE
Total
18,780.00
12,016.02
6,763.98
INCOME
EXPENSES
BALANCE
JAN
1,580.00
1,028.52
551.48
JUL
1,580.00
971.61
608.39
FEB
1,490.00
1,032.03
457.97
AUG
1,580.00
994.50
585.50
1,565.00
1,001.33
563.67
MAR
1,580.00
1,031.54
548.46
SEP
1,550.00
1,018.56
531.44
APR
1,580.00
1,006.96
573.04
OCT
1,580.00
986.85
593.15
MAY
1,580.00
973.91
606.09
NOV
1,550.00
970.06
579.94
JUN
1,550.00
1,036.79
513.21
DEC
1,580.00
964.70
615.30
For more information on writing reports, refer to Chapter 3 of this manual, especially the WRITE variable, WRITE
TABLE, WRITE text, and WRITE menu statements. See also the DO DESCRIBE, DO CORRELATE, and DO
REGRESS statements for information about PROMULA's Statistical Report Generator.
39
Promula Application Development System User's Manual
2.2.4.2. Saving a Report on Disk
There are two ways of saving textual information on disk. One is by writing fixed format to a disk file using the WRITE
file statement. The other is by codirecting screen output to a disk file using the SELECT OUTPUT statement.
Using the WRITE file statement has the advantage that what is sent to the output file is not simultaneously displayed on
the screen. The disadvantage is that the WRITE file statement cannot be used with PROMULA's automatic report
generation statements like WRITE variable, and more explicit instructions are required to format the output. For example,
in order to write the values of the expns array to a text file with the WRITE file statement, the following code would be
required:
DEFINE FILE
tf TYPE=TEXT "A Text File"
END FILE
OPEN tf "expns.dat" STATUS=NEW
DO mons
WRITE tf((exps)(expns(mons,expns))
END mons
WRITE tf(aincom/aincom/abalns)
CLEAR tf
The contents of file expns.dat after execution of the above code is displayed below.
409.00
409.00
409.00
409.00
409.00
409.00
409.00
409.00
409.00
409.00
409.00
409.00
1565.00
1565.00
555.77
286.44
269.90
291.50
269.86
295.66
295.24
260.47
255.69
289.86
287.99
269.20
273.29
115.39
160.10
172.05
111.38
89.88
146.84
142.10
141.09
87.59
135.75
96.19
145.37
97.18
81.95
77.12
95.15
96.78
94.36
95.11
91.46
92.76
73.38
95.47
72.39
45.00
45.00
45.00
45.00
45.00
45.00
45.00
45.00
45.00
45.00
45.00
45.00
66.71
55.94
55.24
67.92
50.37
50.98
52.52
56.32
65.28
64.77
61.09
63.61
This file would be useful as an input file for another program, but it is not very interesting to look at.
If you want to take advantage of PROMULA's automatic report generation statements WRITE variable, WRITE menu,
and the Statistical Report Functions for the creation of report files, you may use the SELECT OUTPUT statement. This
statement can be used to create any text file that can be created with the WRITE file statement, and it can also be used to
send the results of any text display produced by PROMULA, including character graphics, multidimensional displays, and
data menu screens to a text file on disk. The disadvantage of this type of report generation is that output appears on the
screen as it is being sent to disk (although this problem can be gotten around with some sneaky windowing.)
For example, the statements required to reproduce the file expns.dat shown above are simply:
OPEN SELECT OUTPUT "expns.dat" PRINTER=ON
DO mons
WRITE (exps)(expns(mons,expns))
END mons
WRITE (aincom/aincom/abalns)
40
Promula Application Development System User's Manual
SELECT PRINTER=OFF
The statements required to capture the typical budget program report in a file called budget.rpt are
OPEN SELECT OUTPUT "budget.rpt" PRINTER=ON
WRITE rtabl,
TOTAL(mons),
TITLE("Budget Summary"//,
aincom:L"="aincom/,
aexpnm:L"="aexpnm/,
abalns:L"="abalns)
SELECT PRINTER=OFF
For more information about saving a report on disk, refer to Chapter 3 of this manual, especially the WRITE variable,
WRITE TABLE, WRITE menu, WRITE file and SELECT OUTPUT statements.
2.2.4.3. Plotting Variables
PROMULA's PLOT statement is used to generate graphs and charts. For example, the statement
PLOT BAR balns TITLE("Budget Program -- "balns:L/abalns:L" = "abalns)
will display a bar chart of the monthly balance variable, balns.
This sample PROMULA bar plot is displayed below.
The PLOT function has many options and is fully discussed in Chapter 3 of this manual.
2.2.5. Interface Design
KEY TOPICS:
1.
2.
3.
4.
Interactive and Noninteractive Programs
Selections
Editing Data
Multi-page Displays and Windowing
2.2.5.1. Interactive and Noninteractive Programs
The interface of a program is the way in which it interacts with its users (i.e., how it receives and transmits information).
Application program interfaces can be classified as being interactive, noninteractive, or a mixture of the two.
Noninteractive applications are controlled by the instructions they receive from an external text file. These files usually
contain information that tells the program what to do and what data values to use as inputs. Noninteractive programs can be
inflexible because they can only be told to do things that they can read from their command files. They may also be hard to
use if they require the user to create complicated control files. On the other hand, noninteractive programs are sometimes
more convenient than interactive ones since they can run without a user present.
Interactive applications are typically controlled by commands entered with a keyboard or mouse. Such programs conduct a
dialog with the user by displaying menus, asking questions, presenting screens to the user and reacting to the user's
responses. Interactive programs can be more responsive and permissive than noninteractive ones, and they are often easier
for non-programmers to use effectively.
41
Promula Application Development System User's Manual
Noninteractive applications usually require only four of the five basic programming tasks: data definition, program control,
data manipulation, and report generation. The fifth basic programming task, interface design, is optional and is needed only
if you want to create interactive applications.
Interface design involves setting up the screens through which program users can control the program and implementing
the structures that control these screens.
There are two basic actions that an interactive program interface must support: displaying information on the screen and
getting information from the user. These two tasks are often intimately related since the program may display information
on the screen in order to instruct the user about what information is required and how it should be provided. Furthermore,
the course of action through the program depends on the user's responses. Getting information from the user usually takes
one of two forms: letting the user make selections, and letting the user enter data.
2.2.5.2. Selections
Most selections fall into one of the following categories:
1.
2.
3.
selecting from a fixed number of options,
selecting a program variable for input or output purposes,
selecting one or more elements from a variable number of options.
2.2.5.2.1
Selecting from a Fixed Number of Options
Most interactive programs require the user to select from a fixed set of options. PROMULA provides several ways to do
this. The simplest is with the ASK statement. The ASK statement is an interactive conditional branch statement that asks
the user to enter a choice then branches according to the response. For example, a simple program interface may offer the
following options: edit inputs, calculate results, view outputs, and exit. The following procedure contains an ASK
statement that could be used to let the user select one of these options and branch accordingly:
DEFINE PROCEDURE askit
WRITE ("E>dit inputs; C>alculate; V>iew outputs; or press [End] to exit"/)
ASK "Please enter your selection." END
BREAK askit
ELSE E
*
statements for editing inputs
ELSE C
*
statements for calculations
ELSE V
*
statements for viewing outputs
END ASK
askit
END PROCEDURE askit
Another simple way of letting the user select from a fixed set of options is with a Pick Menu. The code below illustrates
how to implement a pick menu that offers the same options as procedure askit above.
DEFINE VARIABLE
choice
END VARIABLE
DEFINE MENU pickmenu
1 \Exit \
2 \Edit inputs\
3 \Calculate\
4 \View outputs\
END
42
Promula Application Development System User's Manual
DEFINE PROCEDURE menuit
SELECT pickmenu(choice)
DO IF PICK EQ 1
BREAK menuit
ELSE PICK EQ 2
*
statements for editing inputs
ELSE PICK EQ 3
*
statements for calculations
ELSE PICK EQ 4
*
statements for viewing outputs
END IF
menuit
END PROCEDURE menuit
2.2.5.2.2
Selecting Variables
Often it is desirable to help the user select a program variable for input or output operations. PROMULA has two constructs
that may be used to implement this type of selection. The first is an extension of the ASK statement; the second is the
SELECT indirect statement.
For example, assume your program has three variables a, b, and c, and you want to help the user select one of the variables
for display on the screen. The simplest way to do this is with a SELECT indirect statement. The statements required to use
the SELECT indirect statement in this capacity are listed below:
DEFINE VARIABLE
a
"a"
b
"b"
c
"c"
indir* "An Indirect Variable"
END VARIABLE
DEFINE PROCEDURE selvar
SELECT indir(a,b,c)
DO IF END
BREAK selvar
END
WRITE indir
END PROCEDURE selvar
You may notice that the definition of variable indir looks different from other variables defined in this chapter — it has
an asterisk (*) at the end of its identifier. This tells PROMULA that indir is an indirect. Indirects can "point" to other
variables. Once they are pointing at a variable, statements using the indirect will use the variable it points to instead of the
indirect itself. The PROMULA statements that can use indirects in this manner are the WRITE variable, BROWSE
variable, EDIT variable, READ variable, SORT, SELECT set IF, and PLOT statements. Thus, one indirect can be
used for the general input/output needs of many program variables.
The statement SELECT indir(a,b,c) will clear the Main Screen (see Advanced Windowing) and list the identifiers and
descriptors of variables a, b, and c for selection. A prompt will appear at the bottom of the screen describing how to select
a variable by moving to the desired variable with the arrow keys and pressing the Enter key.
The second way to let the user select from a list of variables is to use the ASK statement with a VARIABLE = indirect
option. This method also assigns an indirect to the selected variable, but the Main Screen is not automatically cleared, and
the variables are not automatically listed for selection. The statements required to implement a variable selection routine
using the ASK statement are shown below:
DEFINE VARIABLE
a
"a"
b
"b"
43
Promula Application Development System User's Manual
c
"c"
indir* "An Indirect Variable"
END VARIABLE
DEFINE PROCEDURE askvar
AUDIT VARIABLE(a,b,c)
ASK "Enter desired variable name or Press End to Exit" END
BREAK askvar
ELSE VARIABLE=indir
WRITE indir
END ASK
END PROCEDURE askvar
Procedure askvar above uses the AUDIT VARIABLE statement to list the identifiers and descriptors of variables a, b,
and c on the screen. The ASK statement supplies the prompt indicating how to select a variable, picks up the user's
selection, and assigns it to indir.
2.2.5.2.3
Selecting Set Elements
Frequently, it is useful to let the user make selections from program sets, and there are several PROMULA statements that
can be used to implement this type of selection. These include the SELECT ENTRY, SELECT SET, SELECT
VARIABLE, and ASK statements.
The SELECT ENTRY statement is the simplest of these and is used to help the user pick a single element of a PROMULA
set from an interactive selection list.
The SELECT SET statement is similar to SELECT ENTRY except it allows the user to pick several elements of a
PROMULA set from an interactive selection list.
The SELECT VARIABLE statement automatically prompts the user to make selections from all the sets dimensioning a
specified variable.
The ASK statement with the SET=set option can be used to allow the user to make selections from the specified set.
More information and examples of these statements are available in Chapter 3.
2.2.5.3. Editing Data
One of the most critical of all interface functions is editing data. PROMULA offers a general purpose data editor that
facilitates interactive data editing for PROMULA's multidimensional array variables. For example, the statement
EDIT expns
will display the array variable expns for interactive spread-sheet style data editing. The editing screen is displayed below.
44
Promula Application Development System User's Manual
Monthly Expenses by Category ($)
PHONE
JAN
57.30
FEB
50.21
MAR
65.53
APR
61.30
MAY
58.03
JUN
56.45
JUL
56.45
AUG
50.61
SEP
55.64
OCT
58.33
NOV
69.28
DEC
50.67
RENT
409.00
409.00
409.00
409.00
409.00
409.00
409.00
409.00
409.00
409.00
409.00
409.00
End: Exit
FOOD CAR SERVICE
UTILITIES
286.64
143.71
86.87
276.76
166.28
84.78
280.81
134.35
96.84
294.05
99.55
98.06
286.98
88.13
86.77
275.43
152.85
98.06
269.81
103.88
87.47
289.93
127.67
72.28
261.35
171.10
76.47
258.71
127.52
88.28
250.12
105.25
91.41
272.28
93.81
93.93
CAR INS
45.00
45.00
45.00
45.00
45.00
45.00
45.00
45.00
45.00
45.00
45.00
45.00
Fn Shift-Fn PgUp PgDn Home Arrows: Select
Enter:
Edit
Note that, like the WRITE variable statement, the EDIT variable statement uses the information in the variable's
definition to control the appearance of the report.
In addition, your application can use data menus for data entry. Data menus make data entry easier and improve the
appearance of the application. PROMULA's DEFINE MENU statement lets you create data menus simply by typing them
into your source code. The EDIT menu statement is then used to help the user interactively edit information in the menu.
To help the user edit several variables at once, you may use the EDIT table statement.
2.2.5.4. Multi-Page Displays and Windowing
The typical computer terminal is only large enough to display 24 or 25 lines of 80 characters. This can make it difficult to
let the user view large arrays or reports on the screen. Fortunately, PROMULA has several statements which can make this
difficult task easier.
The BROWSE variable statement can be used to let the program user interactively view a multidimensional array variable.
This statement manages a display similar to the one generated by the EDIT variable statement except it does not let the
user change data values
If you want to let the user browse more than one variable on the screen at the same time, the BROWSE TABLE or
BROWSE menu statement can be used.
The BROWSE FILE statement can be used to let the program user view multi-page free form textual reports contained in
external files on disk. The RUN EDITOR command can be used to load a text file into the PROMULA Text Editor.
If you want to create dynamic, multi-color, multi-window displays, you may use PROMULA's DEFINE WINDOW and
OPEN WINDOW statements. To find out more about PROMULA's windowing statements see the discussions of Basic
and Advanced Windowing, and the PROMULA statements DEFINE WINDOW, OPEN WINDOW, and CLEAR
WINDOW.
45
Promula Application Development System User's Manual
2.2.6. Application Programming Summary
The discussion of application programming above is not intended to teach you how to program or to present the elements of
good programming style. These skills can only be developed through experience and practice.
From here, you should play with the source and executable versions of the budget program. These are included on the
PROMULA Sample Applications Disk in the files BUDGET.PRM and BUDGET.XEQ. You should also browse through the
contents of Chapter 3, the PROMULA language reference. Refer to Table 3-3 for a brief description of all the statements
of PROMULA. Once you have an idea of the statements available to you, try writing your own applications. Before you
start writing large scale applications, refer to Chapter 4 for a discussion of database management and program management
issues in PROMULA.
46
Promula Application Development System User's Manual
3. PROMULA LANGUAGE REFERENCE
The purpose of this chapter is to provide the detailed information you need to use the statements of PROMULA and write
PROMULA applications. It is your reference chapter for the structural elements of the PROMULA language — its nouns
and verbs — and it describes the syntax and use of PROMULA statements. The chapter is divided into two sections:
1.
The PROMULA Nouns
This section defines the nouns, or objects, of PROMULA and gives some information about their use in PROMULA
programs.
2.
The PROMULA Statements
This section discusses the purpose, syntax, and other information relevant to the PROMULA statements. Most of the
statements are illustrated by examples. The contents of each section are presented in alphabetical order.
3.1 The PROMULA Nouns
The nouns, or objects, of the PROMULA language are listed in Table 3-1. These are the structural elements of PROMULA
programs. The information of a PROMULA program is stored in these elements.
Table 3-1: The Nouns, or Objects, of the PROMULA Language
Equation
An identity relationship between one variable and an expression of other variables and/or constants
involving arithmetic, relational, functional, and logical operators.
File
A place on disk for storing information. PROMULA uses three types of files: data files for storing
variables, segment files for storing code segments, and dialog files for storing tutorials.
Function
An intrinsic or user-defined operator which returns a single value depending on the values of its arguments.
The returned value is computed according to the functional relationships of the operator.
Menu
A screen template designed to help its user either pick from a list of options or view and/or edit program
variables. There are two types of menus: pick menus and data menus.
Parameter
A variable that allows the transfer of values between a program variable and a procedure.
Procedure
An ordered set of statements that is compiled and executed as a unit.
Program
An ordered set of statements.
Relation
A relationship between a set and a variable. Its purpose is to assign descriptors to the set elements.
Segment
A program segment that may be saved on disk for later execution. Segments are usually linked into
hierarchical tree structures to form large programs that would not otherwise fit in the working space.
Set
An ordered set of elements. Sets are used to dimension the values of array variables. Sets are also used for
sorting and selecting ranges of array values.
Statement A complete instruction in a PROMULA program.
47
Promula Application Development System User's Manual
Table 3-1: The Nouns, or Objects, of the PROMULA Language
System
A system of n real equations with n unknowns whose solution is obtained by solving simultaneously for the
unknowns. The equations may be linear or nonlinear.
Table
A tabular display or report showing the values of several variables.
Variable
A storage structure for information. Variables are manipulated by the statements of a program and are related
to one another by the equations of a program.
Window
A display area for program input and/or output. Basic Windowing supports two functional screens: the
Action Window (upper half of the screen) and the Comment Window (lower half of the screen). Advanced
Windowing supports a system of four functional screens: Main, Prompt, Comment, and Help. The
appearance, location, and behavior of each functional screen is set by defining and opening a specific window
for it.
3.1.1 Equation
Purpose:
Makes the value (or values) of a variable equal to the value (or values) of a numeric or character expression.
Syntax:
var[(subs)]=expression[(subs)]
Remarks:
var
is a variable identifier.
subs
is a list of set identifiers, set element codes or numbers, or dummy subscripts. These subscripts are
usually used with array variables to denote multiple equations that apply to the cells of the
multidimensional arrays.
expression
is a numeric or character expression.
Examples:
1.
Single-valued equations
Below, a, b and c are scalars because there are no sets used in their definitions. Each equation is only done once, and
only one value is assigned.
DEFINE VARIABLE
a
b
c
END VARIABLE
a = b + c
: a is equal to the sum of b and c
a = b*EXP(c): a is equal to b times the exponential of c
a = b LT c : a is equal to 1 if b is less than c; otherwise a is equal to 0
2.
Multiple-valued equations using implicit subscripts
48
Promula Application Development System User's Manual
Below, A and B are both arrays containing six values.
DEFINE SET
row(3)
col(2)
END SET
DEFINE VARIABLE
A(row,col)
B(row,col)
END VARIABLE
The equation
A = 1
makes all six values of array A equal to 1. The subscripts row and col are implicit.
Similarly, the equation
A = B
makes all six values of array A equal to the corresponding values of array B. It does the same work as the following six
equations.
A(1,1) = B(1,1) A(1,2) = B(1,2)
A(2,1) = B(2,1) A(2,2) = B(2,2)
A(3,1) = B(3,1) A(3,2) = B(3,2)
3.
Multiple-valued equations using dummy subscripts
The equation
A(r,c) = B(r,c)
makes all six values of the A array equal to the corresponding values of the B array. The subscripts r and c are dummy
subscripts that stand for the row and col sets.
4.
A Character Equation
Given the following definitions and data:
DEFINE VARIABLE
A
TYPE=STRING(20)
B
TYPE=STRING(20)
C
TYPE=STRING(40)
END VARIABLE
READ A
The cow jumped ov
READ B
er the moon.
the equation
C = A+B
will put the concatenation of strings A and B into variable C.
49
Promula Application Development System User's Manual
WRITE C
The cow jumped over the moon.
5.
A Mixed Character and Numeric Variable Equation
PROMULA is a "loose" typing language. This means that you may mix variables of different types in your
expressions; PROMULA will make the appropriate conversions for you. For example it is possible to write expressions
using variables of type STRING or DATE with variables of the numeric types: REAL, INTEGER, and MONEY. If
a numeric variable is on the left-hand side of an expression, any string type variables on the right-hand side of the
expression containing all numerals will be converted to their numeric values when the result is computed. Similarly, if
a string variable is on the left-hand side of an expression, the results of numeric expressions on the right-hand side are
computed then converted to their numeral string values before they are passed to the left hand side.
DEFINE SET
pnt(4)
END SET
DEFINE VARIABLE
str1(pnt) TYPE=STRING(20) "String Result"
num1(pnt) TYPE=REAL(10,3) "1st Number"
num2(pnt) TYPE=REAL(10,3) "2nd Number"
END VARIABLE
num1(i) = i*2
num2(i) = i*3
str1(i) = num1:-3:0(i) +" PLUS "+ num2:-3:0(i) +" = "+(num1(i)+num2(i))
Given the definitions and assignments made above, the statement
WRITE str1:-40
produces the output below.
String Result
PNT(1)
PNT(2)
PNT(3)
PNT(4)
2
4
6
8
PLUS
PLUS
PLUS
PLUS
3
6
9
12
=
=
=
=
5.000
10.00
15.00
20.00
3.1.2 Expression -- Arithmetic
Definition:
A numeric expression involving at least one arithmetic operator. The operands of arithmetic expressions may be variables,
constants, functions, and other expressions.
Remarks:
The arithmetic operators in order of precedence are:
OPERATOR
EXPRESSION
PRECEDENCE
MEANING
**
A ** B
1
Raise A to the B power
50
Promula Application Development System User's Manual
*
/
–
+
A*B
A/B
A–B
A+B
2
2
3
3
Multiply A times B
Divide A by B
Subtract B from A
Add A to B
The above precedence may be altered by parentheses. In cases of equal precedence the order of evaluation is from left to
right. The SELECT HIERARCHY=ON statement causes operator precedence to be determined by the (left to right) order
of operators in the expression..
Arithmetic expressions may have other numeric expressions as operands.
3.1.3 Expression -- Boolean
Definition:
An expression involving variables, constants, functions, relational and logical operators, and other expressions. A Boolean
expression is either true or false. If true, it has the value 1; if false, it has the value 0.
Remarks:
The relational operators are:
OPERATOR
EXPRESSION
LT
LE
EQ
NE
GE
GT
A LT B
A LE B
A EQ B
A NE B
A GE B
A GT B
MEANING
A less than B
A less than or equal to B
A equal to B
A not equal to B
A greater than or equal to B
A greater than B
The logical operators are:
OPERATOR
EXPRESSION
NOT
AND
OR
NOT A
A AND B
A OR B
MEANING
1 if A is false; 0 otherwise
1 if A and B are true; 0 otherwise
1 if A or B is true; 0 if both are false
A and B may be Boolean variables or Boolean expressions.
3.1.4 Expression -- Character
Definition:
51
Promula Application Development System User's Manual
A formula consisting of character variables and character operators.
Remarks:
A character expression has character operands. Some character expressions have character values; others have numeric
values.
PROMULA has the following character operators:
OPERATOR
EXPRESSION
MEANING
+
A+B
Concatenate B to A
COMPARE
COMPARE(A,B)
Compare string A to string B; return the value 1 if A
equals B, otherwise return the value 0.
Relational
A GT B, A GE B,
A EQ B, A NE B,
A LE B, A LT B
Evaluates the relationship between A and B, the
result is 1 if the relationship is true, otherwise the
result is 0.
Here, A and B are string or numeric expressions. If either A or B is a character expression, the result is the string
concatenation of B to A. If both A and B are numeric expressions, the result is the arithmetic sum of A and B.
Examples:
The dialog below illustrates some examples of character expressions and of mixed (numeric/character) expressions.
DEFINE VARIABLE
A
TYPE=STRING(20)
B
TYPE=STRING(20)
C
TYPE=STRING(40)
V
TYPE=REAL(8,0)
END VARIABLE
READ A
The cow jumped ov
READ B
er the moon.
C = A+B
WRITE C
The cow jumped over the moon.
V = 10
C = V*20 + V
WRITE C
210
The equation
52
Promula Application Development System User's Manual
V = COMPARE(A,B)
returns V = 0, since string A is not equal to string B.
It is also possible to use PROMULA's COMPARE function with a quoted string as illustrated in the example below.
DEFINE VARIABLE
rsp TYPE=STRING(8)
END VARIABLE
DEFINE PROCEDURE comp
WRITE "Do you agree? (Y/N)"
READ rsp
DO IF COMPARE(rsp,"Y")
WRITE ("Why do you agree?")
ELSE COMPARE(rsp,"N")
WRITE ("Why don't you agree?")
END IF
END PROCEDURE comp
NOTE: The COMPARE function is obsolete; it is retained for compatibility with older versions of PROMULA. It is now
possible to use the relational operators EQ, NE, LT, etc. to compare string expressions.
PROMULA is a "loose" typing language. This means that it is allowed to mix character variables and numeric variables in
the same expression. In fact, you may use character variables that contain numeric data as if they were numeric variables.
Although there are some limitations on the use of these mixed expressions, one useful application is the generation of
numbered lists.
DEFINE SET
row(8)
END SET
DEFINE VARIABLE
str(row) TYPE=STRING(10)
val(row) TYPE=INTEGER(1)
END VARIABLE
val(i) = i
str="team # " + val
WRITE str
ROW(1)
ROW(3)
ROW(5)
ROW(7)
team
team
team
team
#
#
#
#
1
3
5
7
ROW(2)
ROW(4)
ROW(6)
ROW(8)
3.1.5 Expression -- Functional
Definition:
An expression involving at least one functional operator.
Remarks:
The built-in functional operators of PROMULA are of three types:
53
team
team
team
team
#
#
#
#
2
4
6
8
Promula Application Development System User's Manual
1.
Arithmetic functions
2.
File management functions
3.
The INDIRECT function
Also, you may define your own functions by using the DEFINE PROCEDURE statement and parameters, or by using the
DEFINE FUNCTION statement.
3.1.5.1 Arithmetic Functions
The built-in arithmetic functional operators of PROMULA are listed in Table 3-2 below
Table 3-2: The Arithmetic Functional Operators of PROMULA
Functional Expression
MEANING
ABS(x)
ARCCOS(x)
ARCSIN(x)
ARCTAN(x)
COMPARE(x,y)
Absolute value of x
Angle (in radians) whose cosine is x
Angle (in radians) whose sine is x
Angle (in radians) whose tangent is x
Compare string x to string y; returns the value 1 if x=y, otherwise it returns the value 0.
(Note: COMPARE is obsolete; use (x EQ y)
Cosine of x (x in radians)
Cotangent of x (x in radians)
Exponential of x (ex)
Integer nearest to x that does not exceed x
Integer nearest to x that does not exceed the magnitude of x
Natural logarithm of x, base e (e = 2.718282)
Common logarithm of x, base 10
Maximum element of vector x(i)
Minimum element of vector x(i)
Multiply over the elements of x, where
x
is an array or array expression
subs is a list of subscripts classifying the elements of x.
Random number. Result depends on number of parameters specified in arg.
Integer nearest to x
Sine of x (x in radians)
Square root of x
Sum over the elements of x, where
x
is an array or array expression
subs is a list of subscripts classifying the elements of x.
Tangent of x (x in radians)
Maximum of x,y,...
Minimum of x,y,...
COS(x)
COTAN(x)
EXP(x)
FLOOR(x)
IFIX(x)
LN(x)
LOG(x)
MAX(i)(x(i))
MIN(i)(x(i))
PRODUCT(subs)(x(subs))
RANDOM(arg)
ROUND(x)
SIN(x)
SQRT(x)
SUM(subs)(x(subs))
TAN(x)
XMAX(x,y,...)
Examples:
1.
The ROUND, FLOOR, and IFIX functions are illustrated in the example below. These three functions are similar in
that they all return integers, but they have subtle differences.
FLOOR(x)
Returns the integer nearest to x that does not exceed x.
54
Promula Application Development System User's Manual
IFIX(x)
Returns the integer nearest to x that does not exceed the magnitude of x. In other words, IFIX(x)
truncates the decimal part of x.
ROUND(x)
Returns the integer nearest to x.
DEFINE VARIABLE
x
a
b
c
END VARIABLE
DEFINE PROCEDURE calc
a = FLOOR(x)
b = ROUND(x)
c = IFIX(x)
WRITE (x:5:2 a:12:2 b:12:2 c:12:2/)
END PROCEDURE calc
DEFINE PROCEDURE test
WRITE "x
FLOOR(x)
ROUND(x)
IFIX(x)"
WRITE "------------------------------------------"
x = -2.25
calc
x = -2.50
calc
x = -2.75
calc
x = 2.25
calc
x = 2.50
calc
x = 2.75
calc
END PROCEDURE test
The output of procedure test is displayed below.
x
FLOOR(x)
ROUND(x)
IFIX(x)
------------------------------------------2.25
-3.00
-2.00
-2.00
2.
-2.50
-3.00
-3.00
-2.00
-2.75
-3.00
-3.00
-2.00
2.25
2.00
2.00
2.00
2.50
2.00
3.00
2.00
2.75
2.00
3.00
2.00
Using the SUM Operator
The SUM operator is used to sum the values of multidimensional expressions.
DEFINE SET
row(3)
55
Promula Application Development System User's Manual
col(2)
page(2)
END SET
DEFINE VARIABLE
AAA(row,col,page) "A 3-dimensional Array" VALUE = 1
AA(row,col)
"A 2-dimensional Array"
A(row)
"A vector"
S
"Sum of AAA"
END VARIABLE
*
* For each row and col, sum AAA over page and place the result in AA.
*
AA(r,c) = SUM(p)
(AAA(r,c,p))
*
* For each row, sum AAA over col and page and place the result in A.
*
A(r) = SUM(c,p) (AAA(r,c,p))
*
* Sum AAA over row, col and page and place the result in S.
*
S = SUM(r,c,p)(AAA(r,c,p))
The results of the definitions and expressions above are illustrated in the dialog below.
WRITE AA
A 2-dimensional Array
COL(1)
COL(2)
ROW(1)
ROW(2)
ROW(3)
2
2
2
2
2
2
WRITE A
A Vector
ROW(1)
ROW(2)
ROW(3)
WRITE S
Sum of AAA
3.
4
4
4
12
Using the MIN and MAX Functions
The MIN and MAX operators may be used to find the minimum and maximum values of multidimensional
expressions respectively. This is demonstrated in the dialog below.
READ A
1 2 3 4 5 6 7 4 3 2
S = MIN(r)(A(r))
WRITE(/"The minimum value in vector A is
The minimum value in vector A is
1
S = MAX(r)(A(r))
56
",S/)
Promula Application Development System User's Manual
WRITE(/"The maximum value in vector A is
The maximum value in vector A is
4.
",S/)
7
Writing Your Own Functions
DEFINE PROCEDURE mod
DEFINE PARAMETER
a
b
c
END PARAMETER
c = a / b
c = (c - IFIX( c ) )*b
END PROCEDURE mod
The procedure mod defined above computes the value of the first parameter modulus the second parameter, and returns
the result in the third parameter. A sample dialog with procedure mod is shown below.
DEFINE VARIABLE
avar
bvar
cvar
END VARIABLE
avar=27
bvar=11
MOD(avar,bvar,cvar)
WRITE(/avar:0:2" MOD "bvar:0:2" = "cvar/)
27.00 MOD 11.00 =
5
avar=47
bvar=13
MOD(avar,bvar,cvar)
WRITE(/avar:0:2" MOD "bvar:0:2" = "cvar/)
47.00 MOD 13.00 =
8
avar=35
bvar=3
MOD(avar,bvar,cvar)
WRITE(/avar:0:2" MOD "bvar:0:2" = "cvar/)
35.00 MOD 3.00 =
5.
2
Using the RANDOM Function.
The RANDOM function can take zero to three arguments.
NUMBER OF
ARGUMENTS
EXPRESSION
VALUE RETURNED
57
Promula Application Development System User's Manual
0
x=RANDOM
a random number between 0 and 1 using the
current seed.
1
x=RANDOM(p1)
a random number between 0 and 1 using p1 as
the seed.
2
x=RANDOM(p1,p2)
a random number between p1 and p2 using the
current seed.
3
x=RANDOM(p1,p2,p3)
a random number between p1 and p2 using p3 as
the seed.
The parameters (p1,p2,p3) may be numeric constants or variables. The seed is an internal PROMULA variable used by
the RANDOM function. The first time the random function is executed, the seed is zero.The RANDOM function
always returns the same value for a given seed and changes the internal seed each time it is executed. Several examples
are shown in the dialog below.
DEFINE VARIABLE
x "X=" TYPE=REAL(10,5)
p1 VALUE=1000
p2 VALUE=2000
p3 VALUE=3000
END VARIABLE
x=RANDOM
WRITE x
X= 0.73275
x=RANDOM
WRITE x
X= 0.53517
x=RANDOM(p1)
WRITE x
X= 0.71217
Using the same seed, p1, gives the same result every time
x=RANDOM(p1)
WRITE x
X= 0.71217
x=RANDOM(p1,p2)
WRITE x
X= 1,403.12500
With two parameters, RANDOM returns a random number
between p1 and p2 using the internal seed.
x=RANDOM(p1,p2)
WRITE x
X= 1,009.17900
x=RANDOM(p1,p2,p3)
WRITE x
X= 1,671.02100
With three parameters, RANDOM returns a random
number between p1 and p2 using p3 as the seed.
x=RANDOM(p1,p2,p3)
WRITE x
X= 1,671.02100
58
Promula Application Development System User's Manual
6.
Procedure functs below shows how a variety of PROMULA's arithmetic functions behave.
DEFINE VARIABLE
xvar "xvar = "
avar "avar = "
bvar "bvar = "
cvar "cvar = "
drg "Factor Converting Degrees to Radians"
END
drg=3.1415 / 180
DEFINE PROCEDURE functs
cvar = 6
avar = EXP(cvar)
WRITE("The Exponential of"cvar\30:0:2,46" = "avar:0:4)
cvar = LN(avar)
WRITE("The Natural Logarithm of"avar\30:0:4,46" = "cvar:0:4)
cvar = 30
avar = SIN(cvar*drg)
WRITE("The Sine Function of"cvar\30:0:2" degrees",46" = "avar:0:4)
cvar = ARCSIN(avar) / drg
WRITE("The ArcSine Function of"avar\30:0:2,46" = "cvar:0:2" degrees")
avar = COS(cvar*drg)
WRITE("The Cosine Function of"cvar\30:0:2," degrees"46" = "avar:0:4)
cvar = ARCCOS(avar) / drg
WRITE("The ArcCosine Function of"avar\30:0:4,46" = "cvar:0:2" degrees")
cvar = 45
avar = TAN(cvar*drg)
WRITE("The Tangent Function of"cvar\30:0:2," degrees"46" = "avar:0:4)
cvar = ARCTAN(avar) / drg
WRITE("The ArcTangent Function of"avar\30:0:4,46" = "cvar:0:2" degrees")
cvar = 2
avar = SQRT(cvar)
WRITE("The Square Root of"cvar\30:0:2,46" = "avar:0:4)
avar = cvar**0.5
WRITE("The 1/2 Power of"cvar\30:0:2,46" = "avar:0:4)
bvar = 3
avar = XMIN(bvar,cvar)
WRITE("The Minimum of"bvar\30:0:1" and "cvar:0:1,46" = "avar:0:2)
avar = XMAX(bvar,cvar)
WRITE("The Maximum of"bvar\30:0:1" and "cvar:0:1,46" = "avar:0:2)
END PROCEDURE functs
The output of procedure functs is displayed below.
The
The
The
The
The
The
The
The
The
The
The
The
Exponential of
Natural Logarithm of
Sine Function of
ArcSine Function of
Cosine Function of
ArcCosine Function of
Tangent Function of
ArcTangent Function of
Square Root of
1/2 Power of
Minimum of
Maximum of
6.00
403.4288
30.00 degrees
0.50
30.00 degrees
0.8660
45.00 degrees
1.0000
2.00
2.00
3.0 and 2.0
3.0 and 2.0
59
=
=
=
=
=
=
=
=
=
=
=
=
403.4288
6.0000
0.5000
30.00 degrees
0.8660
30.00 degrees
1.0000
45.00 degrees
1.4142
1.4142
2.00
3.00
Promula Application Development System User's Manual
3.1.5.2 File Management Functions
PROMULA has six functional operators that can help you manage files.
FILEDELETE
takes a file specification in quotes or a string variable containing a file specification as its argument and
deletes the file and returns 1 if the file was found or 0 if the file was not found in the current directory.
FILEEXIST
takes a file specification in quotes or a string variable containing a file specification as its argument and
returns 1 if the file was found or 0 if the file was not found in the current directory.
FILEEXT
takes a file specification in quotes or a string variable containing a file specification as its argument and
returns the file extension.
FILENAME
takes a file specification in quotes or a string variable containing a file specification as its argument and
returns the file name.
FILEPATH
takes a file specification in quotes or a string variable containing a file specification as its argument and
returns the file path.
FILESIZE
takes the identifier of a random file as its argument and returns the number of records in the file.
GETDIR
takes a file specification in quotes or a string variable containing a file specification (wild card characters
work here) as its argument and generates a selection list in the main screen if any files are found. The
user's selection is stored in the string variable that is assigned to the function. This value can be
systematically disassembled into its components by the FILEEXT, FILENAME, and FILEPATH
functions.
Example:
The FILEEXIST, FILEDELETE, and FILESIZE functions are illustrated by the examples below:
* Create and open two array files and one random file.
DEFINE FILE
file1 TYPE=ARRAY
file2 TYPE=ARRAY
file3 TYPE=RANDOM
END FILE
OPEN file1 "file1.dba" STATUS = NEW
OPEN file2 "file2.dba" STATUS = NEW
OPEN file3 "file3.ran" STATUS = NEW
DEFINE VARIABLE
fexist
"File Exist Status = "
fdelete
"File Delete Status = "
records
"Number of records in a random file = "
fname
TYPE=STRING(20) "File Name"
END VARIABLE
Check whether or not a file exists — The FILEEXIST Function
fname = "file1.dba"
fexist = FILEEXIST( fname )
WRITE fexist
File Exist Status = 1
fexist = FILEEXIST( "file1.xxx")
WRITE fexist
File Exist Status = 0
60
Promula Application Development System User's Manual
Delete a file — The FILEDELETE Function
fdelete = FILEDELETE( fname )
WRITE fdelete
File Delete Status =
1
fdelete = FILEDELETE( "file2.xxx")
WRITE fdelete
File Delete Status =
0
Size of a random file — The FILESIZE Function. file3 is empty so it has a size of zero
records = FILESIZE(file3)
WRITE records
Number of records in a random file =
0
The GETDIR, FILEEXT, FILENAME and FILEPATH functions are illustrated by procedure filefunc in the example
below:
DEFINE VARIABLE
srch
TYPE=STRING(25)
fspec TYPE=STRING(25)
fpath TYPE=STRING(25)
fname TYPE=STRING(9)
fextn TYPE=STRING(4)
END VARIABLE
"Search Path
"Selected File
"Selected File
"Selected File
"Selected File
Specification
Path
Name
Extension
DEFINE PROCEDURE filefunc
srch = "*.txt"
fspec = GETDIR(srch)
DO IF NULL
WRITE("NO FILES MATCH") CLEAR(-1)
filefunc
END
DO IF END
WRITE("NO FILE SELECTED") CLEAR(-1)
BREAK filefunc
END
fpath = FILEPATH(fspec)
fname = FILENAME(fspec)
fextn = FILEEXT(fspec)
WRITE srch:-25
WRITE fspec:-25
WRITE fpath:-25
WRITE fname:-10
WRITE fextn:-4
WRITE CLEAR(-1)
filefunc
END PROCEDURE filefunc
61
=
=
=
=
=
"
"
"
"
"
Promula Application Development System User's Manual
The GETDIR function searches the specified directory for files that match the search mask. If any files are found, the
Main Screen is cleared and the files are displayed for selection. The user can browse up and down this list then press the
enter key to select a file.
S
C:\PRMDOC\PLTARR.TXT
C:\PRMDOC\DEFSET2.TXT
C:\PRMDOC\PIE.TXT
C:\PRMDOC\FIG1A.TXT
C:\PRMDOC\HDRFTR.TXT
C:\PRMDOC\BIFUNC.TXT
C:\PRMDOC\SUMOPR2.TXT
C:\PRMDOC\MINMAX.TXT
C:\PRMDOC\FILEFUNC.TXT
C:\PRMDOC\FILFUNC2.TXT
C:\PRMDOC\FILFUNC3.TXT
C:\PRMDOC\INDIR.TXT
C:\PRMDOC\FUNCOPRS.TXT
C:\PRMDOC\RANDOM.TXT
C:\PRMDOC\SUMOPR1.TXT
C:\PRMDOC\SUMOPR3.TXT
C:\PRMDOC\OWNFUNC1.TXT
C:\PRMDOC\MODFUNC.TXT
C:\PRMDOC\OWNFUNC2.TXT
C:\PRMDOC\NEWSTAT.TXT
End: Exit
Arrows PgUp PgDn Home: Move
Enter: Select
You can use the DO IF NULL statement to test if any matches for the GETDIR search were found, and you can use the
DO IF END statement to test if the user pressed the End key instead of pressing Enter to make a file selection.
Assuming the user selects NEWSTAT.TXT from the list, the filename functions will break down the selected file
specification into its component parts and return the results to string variables on the left-hand side of the equations. The
WRITE statements in procedure filefunc display the following results.
Search Path
Selected File
Selected File
Selected File
Selected File
Specification
Path
Name
Extension
=
=
=
=
=
*.txt
C:\PRMDOC\NEWSTAT.TXT
C:\PRMDOC
NEWSTAT
TXT
3.1.5.3 The INDIRECT Function
PROMULA allows you to assign place-holder variables to other variables using the ASK statement and the SELECT
indirect statement. These place-holder variables are called indirects. Indirects are defined as scalar variables that have an
asterisk (*) following their identifier. The INDIRECT function is used to determine if an indirect is assigned to a variable.
It is a useful accessory to both the ASK statement and the SELECT indirect statement. The syntax and use of this function
are described below:
Syntax:
INDIRECT(indir[,varlist])
Remarks:
62
Promula Application Development System User's Manual
indir
is the identifier of an indirect variable.
varlist
is a list of variable identifiers.
The INDIRECT function returns a one if indir is assigned to a variable in varlist; otherwise it returns a zero.
Example:
Here is an example of using the INDIRECT function.
DEFINE VARIABLE
a
"A value ="
b
"B value ="
c
"C value ="
indir*
END VARIABLE
TYPE=REAL(10,4) VALUE=1
TYPE=REAL(10,4) VALUE=2
TYPE=REAL(10,4) VALUE=3
DEFINE PROCEDURE selvar
SELECT indir
DO IF END
BREAK selvar
END
DO IF INDIRECT(indir,a)
WRITE ("You have selected variable A"/)
ELSE INDIRECT(indir,b,c)
WRITE ("You have selected variable B or variable C"/)
END IF INDIRECT
WRITE indir
WRITE (indir:L)
WRITE (/"Press any key to continue") CLEAR(-1)
selvar
END PROCEDURE selvar
Execution of procedure selvar and selection of variable b produce the following results:
63
Promula Application Development System User's Manual
Ident
A
B
C
Description
A value =
B value =
C value =
End: Exit
Arrows PgUp PgDn Home: Move
Enter: Select
You have selected variable B or variable C
B value = 2.0000
B value =
Press any key to continue
3.1.6 Expression -- Logical
Definition:
A numeric expression involving at least one logical operator. A logical operator operates on true-false expressions to
produce the value 1 if the resultant expression is true, or the value 0, if the resultant expression is false.
The logical operators, in order of precedence, are:
OPERATOR
EXPRESSION
MEANING
NOT
AND
OR
NOT A
A AND B
A OR B
1 if A is false; 0 otherwise
1 if A and B are true; 0 otherwise
1 if A or B is true; 0 if both are false
64
Promula Application Development System User's Manual
A and B are evaluated as true-false expressions.
3.1.7 Expression -- Numeric
Definition:
A formula for computing a numeric value or values. It consists of a sequence of operands and operators. The operands may
be variables, constants, and other expressions. The operators specify the operation to be performed on the operands.
Remarks:
In order of precedence, the operators are shown in Table 3-3.
Operations at the same level of precedence in the list are performed in left to right order. To alter the order in which
operations are performed, use parentheses. Operations within parentheses are performed first. Inside parentheses, the above
order of operations is maintained. To force left-to-right precedence for all operators, execute a SELECT
HIERARCHY=OFF statement.
Table 3-3: The Precedence of Operators in PROMULA
OPERATOR
EXPRESSION
PRECEDENCE
MEANING
f(x)
1
Evaluate the function f(x)
A**B
A*B
A/B
A-B
A+B
A
2
3
3
4
4
5
Raise A to the B power
Multiply A times B
Divide A by B
Subtract B from A
Add A to B
Take the negative of A
A LT B
A LE B
A NE B
A EQ B
A GE B
A GT B
6
6
6
6
6
6
A less than B
A less than or equal to B
A not equal to B
A equal to B
A greater than or equal to B
A greater than B
NOT A
A AND B
A OR B
7
8
9
Not A
A and B
A or B
Functional
f( )
Arithmetic
**
*
/
+
Relational
LT
LE
NE
EQ
GE
GT
Logical
NOT
AND
OR
65
Promula Application Development System User's Manual
3.1.8 Expression -- Relational
Definition:
A numeric expression involving at least one relational operator. A relational expression compares two operands and is
either true, if the result of the comparison is true, or false, if the result of the comparison is false. It has either the value 1, if
true, or the value 0, if false.
Remarks:
The relational operators are:
OPERATOR
EXPRESSION
MEANING
LT
LE
EQ
NE
GE
GT
A LT B
A LE B
A EQ B
A NE B
A GE B
A GT B
A less than B
A less than or equal to B
A equal to B
A not equal to B
A greater than or equal to B
A greater than B
Examples:
1.
The expression 5 LT 7 has the value 1 (TRUE); the expression 5 GT 7 has the value 0 (FALSE).
2.
Given the following definitions:
DEFINE VARIABLE
A(10)
B(10)
END VARIABLE
A(i) = i
the equation
B = A LT 5
produces the following results:
A
A LT 5
B=A LT 5
1
2
3
4
5
6
7
8
9
10
True
True
True
True
False
False
False
False
False
False
1
1
1
1
0
0
0
0
0
0
66
Promula Application Development System User's Manual
3.1.9 File
Definition:
A place on disk that stores information.
Remarks:
Files allow you to extend the storage available to your programs beyond the central memory of the computer. Files also
allow you to save information on disk for use at a later time. In addition, files are one means by which you may transfer
data to and from other programs or computers.
Your computer has two kinds of memory:
1.
Primary memory (also known as system memory, central memory, RAM (Random Access Memory), on-line memory,
core, or working space).
2.
Secondary memory (also known as disk memory, off-line memory, peripheral memory, or mass storage).
Since the access time for primary memory is faster than disk memory, primary memory is more expensive than disk
memory and, thus, it is available in relatively small quantities. At the time of this printing, a system memory of one
Megabyte (enough to store about one million characters) is average for a typical personal computer. Disk memory, on the
other hand, is relatively inexpensive and comes in the form of removable diskettes or fixed disks, which can hold many
megabytes of data; the smallest disk drives can hold ten Megabytes of data; the largest can hold several thousand
Megabytes.
The extension of your programs to disk memory is inevitable, and for large-scale programing applications necessary. The
reasons for this are:
1.
Programs written and compiled now need to be saved for use later.
2.
Large-scale programs are usually data intensive, often manipulating millions of data values during a single execution
cycle. It is usually impossible to store all of these values within the central memory of the machine, so off-line disk
storage is needed to extend the data storage area required by the execution of the program.
3.
PROMULA data files need to be used by other software systems or programs written in other languages.
4.
PROMULA programs need to use data created by other software or programs written in other languages.
PROMULA has a database manager and a program segment manager to help you manage your program if it becomes so
large that it does not fit in your working space.
Large program management is achieved by using files. PROMULA files can be classified as falling into one of the three
functional types:
1.
Data files for storing data in text or binary form.
2.
Segment files for storing the executable code and data of PROMULA applications.
3.
Dialog files for storing on-line help libraries.
The above three types of files, used alone or in combination, give you the flexibility and power to develop and manage
large-scale applications.
67
Promula Application Development System User's Manual
3.1.9.1 Data Files
Data files are used for the storage and retrieval of program data or variables; thus, they extend the data storage available to
a program.
Data files are of four types:
1.
Text files of sequential-access records
2.
Random files of direct-access records
3.
Inverted files that index the records of random files
4.
Array files of value-addressable multidimensional variables.
3.1.9.1.1
Text Files
Text files are files that contain text and may be created and/or changed by a text editor. Text consists of ASCII codes; thus,
text files are also known as "ASCII files".
Text files are sequential-access files of variable-length text records. Each record consists of data items that are laid out in
lines of variable length (up to a maximum of 255 characters).
Sequential access means that in order to access the (N+1)th record in the file you must first access the (N)th record.
The items in a text record may be laid out by a person using a text editor, or by a computer program.
The DEFINE FILE statement defines a text file.
The OPEN file statement opens a text file for use.
The READ file statement reads data from a text file.
The WRITE file statement writes data to a text file.
The CLEAR file statement physically closes a text file, saving its current contents.
The DO file statement allows you to access all records of a text file in sequential order (from Record 1 to Record N, where
N is the last record of the file).
3.1.9.1.2
Random Files
Random files are random-access files of fixed-length binary records. Each record consists of a fixed number of variables.
The variables of a random file may be scalar items that each fill a single field and/or multidimensional arrays that fill many
fields. Random files may be used to build "relational databases" (i.e., with a tabular structure) in PROMULA.
Random-access means that you may access any record in the file arbitrarily without having to access all records before it in
the file. In this respect, they are more efficient than text files.
A record number is associated with each record in a random file. This number varies from 1 to N, where N is the total
number of records in the file. It is via the record number that you can access any record of the file in random-access
fashion.
68
Promula Application Development System User's Manual
The DEFINE FILE statement defines a random file.
The DEFINE VARIABLE statement defines the record structure, i.e., the variables, of a random file.
The OPEN file statement opens a random file for use.
The READ file statement reads one complete record of data from a random file.
The WRITE file statement writes one complete record of data to a random file.
The CLEAR file statement physically closes a random file saving its current contents.
The SELECT file statement allows you to access at random any record in the file by specifying the desired record number.
It is this feature that distinguishes random files from text files.
The DO file statement allows you to access all records of a random file in sequential order (from Record 1 to Record N,
where N is the last record of the file).
PROMULA random files may be used directly by programs written in languages such as FORTRAN and C. For example,
the FORTRAN READ statement can read PROMULA random files, provided you specify three parameters: the file name
(or number), the record number, and the record length (in bytes). The length of a record is simply the number of values in
the variables of the record multiplied by 4 (note that each character in a STRING type variable is considered as a value, so
that a variable with TYPE=STRING(10) has a length of 40 bytes).
3.1.9.1.3
Inverted Files
Inverted files offer a means to make rapid selections from a random file based on the values of variables in the records of
the random file.
Inverted files are used only by PROMULA, and are closely related to random files.
The DEFINE FILE statement defines an inverted file.
The OPEN file statement opens an inverted file for use.
The READ file statement reads data from an inverted file.
The WRITE file statement writes data to an inverted file.
The SELECT file statement makes selections from an inverted file.
The CLEAR file statement physically closes an inverted file, saving its current contents.
The DO file statement sequentially accesses the selected records of an inverted file.
The definition and use of Inverted files is illustrated in the examples given in the SELECT file statement.
3.1.9.1.4
Array Files
Array files are value-addressable, random-access files that contain indexed, multidimensional arrays of data. Though stored
on disk, the variables of array files are defined via the DEFINE VARIABLE statement in the same way as program
variables that are stored in your working space. Obviously disk variables can store many more values than standard
program variables.
Though unique to PROMULA, array files may be converted to text data (ASCII files) for transfer to other programs or
other computers, using the COPY file and WRITE statements.
69
Promula Application Development System User's Manual
Moreover, the values of array files can also be used directly by programs written in other languages, such as C or
FORTRAN.
The method of access for array files is direct — any array or any connected subset of an array may be accessed at random.
Array files are value-addressable; if desired, you may access information by single cell (or value).
The DEFINE FILE statement defines an array file.
The DEFINE VARIABLE statement defines the array structure, i.e., the variables, of an array file.
The OPEN file statement opens an array file for use.
The READ DISK statement reads data from an array file.
The WRITE DISK statement writes data to an array file.
The CLEAR file statement physically closes an array file, saving its current contents.
The COPY file statement allows you to display the contents of an array file or to copy an array file into another array file
or into a text file for transfer to other programs.
The AUDIT file statement allows you to list the contents of an array file.
A virtual access method is also available via the DISK option of the DEFINE VARIABLE statement. This allows you to
use the variables of array files without using explicit READ DISK and WRITE DISK statements. See Chapter 4 for
examples of this.
3.1.9.2 Segment Files
The code of any PROMULA program may be divided into a hierarchy. This is particularly useful when the program is
large, which happens when either the program code, the program data, or both, become larger than your working space.
Segment files are used for the storage and retrieval of program segments. They are needed primarily so that previously
written program segments can be saved and loaded for later use.
Segment files contain not only the executable code of a program, but also the values associated with the variables of the
program. By breaking a program into segments, you partition both the code space and the data (value) space for the
variables in the code, thus extending both.
The OPEN SEGMENT statement opens a segment file on disk.
The DEFINE PROGRAM and DEFINE SEGMENT statements mark the beginning of a program segment.
The READ SEGMENT statement reads the information in a segment file from disk.
The END PROGRAM and END SEGMENT statements write a segment file to disk.
The READ VALUE and WRITE VALUE statements allow you to retrieve and update the variable values in a program
segment without explicitly accessing the variables themselves.
3.1.9.3 Dialog Files
Dialog files are on-line help files that can be accessed in a menu-driven or random manner. A dialog file is defined as a
collection of topics. Each dialog topic definition consists of:
70
Promula Application Development System User's Manual
1.
A short title (up to 25 characters)
2.
The topic text (which can have as many characters as you wish)
Upon execution, a dialog file will display its contents to the user in a menu-driven, conversational format — hence its
name.
Dialog files provide a powerful method of generating on-line, conversational help systems for your applications. They
provide a menu-driven framework for tutorials; all you need to do is type in the topic headers and the tutorial text.
A dialog file is initially defined as a series of topics via the DEFINE DIALOG statement.
Upon execution of the BROWSE DIALOG statement, the topic titles form a menu from which you may select and browse
the topic texts. A specific topic may be displayed with the BROWSE TOPIC statement.
Dialog files are demonstrated in the examples given in the DEFINE DIALOG statement.
3.1.9.4 Access Methods
PROMULA supports three basic ways to access the contents of a datafile:
1.
Sequential access — In text files. Here, information is accessed in terms of variable length text records. The records
are accessed in sequence, one record at a time, starting at 1 and ending at N, where N is the last record in the file.
Before accessing the (N+1)th record, you must first access the (N)th record.
2.
Random access — In random files. Here, information is accessed in terms of structured fixed length binary records.
The records are accessed at random, one record at a time, by simply specifying the record number or by using an
inverted file to select the records of the file that contain a field that matches a specified key.
3.
Direct access — In array files. Here, information is accessed in terms of variables, the notion of record does not
apply. The variables may be either single-valued (scalars) or multi-valued (arrays). Array file variables are valueaddressable, i.e., you may access single data cells (values) in them or any connected subset of their values.
For example, if A is a four-dimensional variable classified by row, column, page, and year, then you have the
following direct access options:
1.
You can access all values of A.
2.
You can access a three-dimensional part of it, say, all the rows, columns and pages for a particular year.
3.
You can access a two-dimensional part of it, say, all the rows and columns for a particular page and year.
4.
You can access a one-dimensional part of it, say, all the years for a particular row, column and page.
5.
You can access a single cell of it, say, the value for row=3, column=2, page=2, and year=10.
This kind of selectivity is particularly useful when you have very large arrays in your disk database that do not fit in
your working space. In addition to the direct access method, variables in array files may be accessed virtually or
dynamically via local variables. See Chapter 4 for details of this.
3.1.9.5 File Names
Each file has two names: a logical name and a physical name.
71
Promula Application Development System User's Manual
The logical name is the name by which the file is referenced in a PROMULA program. A logical name can be any string of
alphanumeric characters whose first character is alphabetic. Only the first six characters are significant.
The logical name for a segment file is introduced via the DEFINE SEGMENT statement. For unsegmented programs, the
DEFINE PROGRAM statement introduces a segment file with the logical name MAIN.
The logical name for a data file is introduced via the DEFINE FILE statement.
The physical name is the name by which the file is known to the operating system. A physical file name must be specified
according to the file naming conventions of the particular operating system that you are using.
Before a given file can be accessed, it must be opened, i.e., declared to the operating system via its physical file name.
The physical name of a segment file is specified via the OPEN SEGMENT statement.
The physical name of a data file is specified via the OPEN file statement.
3.1.9.6 Interface PROMULA Files with Other Software
PROMULA text files may be used directly by other software or programs written in other languages, such as FORTRAN
and C.
In the case of text files, this interface is automatic. By definition, a text file is a file that may be treated as text. To show its
contents, for example, you may use the TYPE, COPY, or PRINT command of your operating system. To change the
contents of a text file, you may use a text editor.
It is through text files that PROMULA communicates with other software, such as electronic spreadsheets, word
processors, and database managers.
To access PROMULA text files by programs written in other languages, such as FORTRAN or C, you need to use the
appropriate OPEN, READ, and WRITE statements of these languages.
Users of the virtual data management capabilities of the PROMULA language translators or the PROMULA Virtual
Memory Management Library may create C or FORTRAN programs that can access PROMULA's array databases.
3.1.10 Function
Definition:
A function is a curve on the (x,y) plane. It is defined by a set of points whose coordinates are given by the values of two
array variables, the x-variable and the y-variable.
Remarks:
The table of values below defines a function f(x):
A FUNCTION f(X)
X-VARIABLE
Y-VARIABLE
x(1)
x(2)
x(3)
.
y(1)
y(2)
y(3)
.
72
Promula Application Development System User's Manual
.
.
x(n)
.
.
y(n)
For an arbitrary argument x the function f(x) returns the value on the curve defined by the above table of points. The value
of the function is computed by using two-point linear interpolation between the points defining the function.
PROMULA allows multidimensional arrays to be used as function value vectors provided that both arrays have the same
set classifying their first dimension.
Functions may be used in equations and conditional expressions.
The DEFINE FUNCTION and DEFINE LOOKUP statements define a function.
Expressions that act on their X and Y variables modify a function.
The READ function statement modifies a function and its X and Y variables.
The WRITE function and BROWSE function statements display a function in tabular form.
The PLOT statement displays a function in graphical form.
3.1.11 Menu
Definition:
A screen template which is designed to help its user to either pick from a list of options or view and/or edit the values of
program variables.
Depending on content and intended use, there are two kinds of menus:
1.
2.
Pick menus for helping the user select an option
Data menus for helping the user view and/or edit program variables
Menus are manipulated by several statements:
DEFINE MENU
SELECT menu
EDIT menu
READ menu
WRITE menu
BROWSE menu
SELECT PULLDOWN
SELECT FIELD
Defines a menu
Helps the user make a selection from a pick menu
Helps the user enter information into a data menu
Helps the user enter information into a data menu
Displays a data menu
Draws a data menu then pauses until the next user event (keypress or mouse click)
Creates and displays a pulldown pick menu for selection
Modifies the selection fields of a simple or popup pick menu
3.1.11.1 Pick Menus
Depending on thier definition and behavior, there are three types of pick menus:
1.
2.
3.
Simple, one-window pick menus defined with a basic DEFINE MENU statement
Popup, two-window pick menus defined with a DEFINE MENU POPUP statement
Pulldown pick menus defined with a SELECT PULLDOWN statement
Simple and Popup pick menus are executed by the statement:
73
Promula Application Development System User's Manual
SELECT menu(option)
where menu is the name of the menu, and option is a variable that will contain the number of the selection picked.
Pulldown pick menus are executed by the statement:
SELECT PULLDOWN option = menudesc
where menudesc is the description of the pulldown menu, and option is a variable that will contain the number of the
selection picked.
In both cases, the value of option may be used to determine alternative execution paths.
When displayed, all pick menus contain a number of selection fields. You may highlight the desired field by pressing the
arrow keys. To execute your selection, press the Enter key. For all pick menus, you may also chose an option by
positioning the mouse sprite over the desired field and clicking the mouse button. Simple and popup pick menu fields may
also be selected by single keypresses as described below.
Simple pick menus allow you to easily create a simple selection display. In these menus, a number of selection fields are
laid-out on a single screen template. Each selection field in the menu is text that is bracketed by two backslashes (\) in the
menu template. The selection fields are ordered from 1 to n as you go from left to right and from top to bottom of the menu
template.
When a simple pick menu is used in a SELECT menu statement, PROMULA clears the window opened to the Main
Screen, displays the menu, and highlights the first selection field. Selections may be made using the function keys (or the
numeric keys) directly. The F1 (numeric 1) key picks the first selection in the menu, the F2 (numeric 2) key picks the
second selection, and so forth. If you have more than ten selection fields, then press the Alt or Shift key together with one
of the ten Function keys to get up to twenty selections. For example, pressing Alt-F1 picks the 11th selection.
Popup menus give you the ability to define a network of menus that function as a unit. They also allow you to create menus
that use any printable key for selections, and to define context sensitive help for each selection field. A popup menu
definition consists of a top level menu definition and zero or more submenu definitions. Each menu definition consists of a
selection screen and a group of FIELD statements. Each selection screen in a popup menu contains a number of selection
fields. Each selection field in the menu is text that is bracketed by two backslashes (\). The selection fields are ordered from
1 to n as you go from left to right and from top to bottom of the menu template.
Each selection field in the selection screen of a popup menu requires a FIELD statement. The FIELD statement contains
the following information:
1.
2.
3.
4.
a descriptor for the selection field,
a key code that allows the user to select the field with a single keystroke,
an optional reference to field-specific on-line help,
and an action code that is used to branch to alternate execution paths depending on the user's selection.
When defined, a popup menu is associated with a pair of windows: The first window will display the selection screen(s);
the second window will display the field descriptions.
Pulldown menus are displayed in a dynamic system of windows that drop-down from a user-defined menu bar window.
The menu bar window, the values of the selection field labels, and the action codes returned by menu selections are all
defined by the parameters of the SELECT PULLDOWN statement when it is executed. The field labels and action codes
of the SELECT PULLDOWN statement may be variables or constants. Pulldown menu selections may only be made by
highlighting the desired selection field and pressing enter or by pointing and clicking with a mouse.
74
Promula Application Development System User's Manual
3.1.11.2 Data Menus
Data menus contain a number of fields to be displayed and/or edited by the user. Each field in the menu is denoted by a
series of contiguous at signs, @, or contiguous tilde characters (~). The number of field characters should be equal to the
desired number of characters in the data value that will be displayed in the field. The fields are ordered from left to right
and from top to bottom of the menu template. Fields defined with at signs will be editable and are referred to as data fields,
fields defined with tilde characters will not be editable and are referred to as display-only fields.
To execute a data menu, enter the following statement:
EDIT menu(vars)
where menu is the name of the data menu, and vars is a list of variables that correspond to the fields of the menu. The
variables in the list must be arranged in the same order as the fields in the menu to which they correspond.
Upon execution, the data menu becomes a screen display that has the first data field highlighted by the bounce bar. Use the
movement keys to move the bounce bar to the desired data field. To edit the highlighted data field, press the Enter key and
enter the new value, as prompted at the bottom of the menu.
Examples:
The definition and use of menus are illustrated in the examples given with the DEFINE MENU, SELECT PULLDOWN,
and SELECT FIELD statements.
3.1.12 Numeric Precision
PROMULA stores REAL numbers with six significant digits and INTEGERs with ten significant digits.
REAL numeric expressions are evaluated in double precision to maintain at least six significant digits.
INTEGER and MONEY expressions are evaluated to ten significant digits of accuracy.
PROMULA allows mixed-mode arithmetic. A real variable is rounded to the nearest integer when equated to an integer
variable.
On the IBM PC, Reals less than ABS(8.43E-37) cause underflows in calculations. Real values greater than ABS(3.37E+38)
cause overflows. Integers are valid in the range (231 3, 231 3), about ± 2.1 billion. Integers outside this range cause
overflows and cannot be processed by the system. Money type variable values are valid in the range (231 3, 231 3),
about ± 2.1 billion cents or 21 million dollars. Overflows and underflows in calculations cause errors.
The value zero, of course, is valid, except in denominators of divisions where it does not make sense, or in logarithms.The
PROMULA system can be configured to allow these types of math errors; see the SELECT MATHERROR statement.
Examples:
1.
Given the following definitions:
DEFINE VARIABLE
A
"A real value"
B
"An integer value"
END
TYPE=INTEGER(8)
A=10.6
the equation B = A rounds the value of A to yield the value
B = 11
75
Promula Application Development System User's Manual
2.
The equation B = IFIX(A) on the other hand, truncates the value of A to yield
B = 10
3.1.13 Parameter
Definition:
A parameter is a numeric variable which is used locally within a procedure and is used to transfer data values to and from
the procedure.
Parameters are used to transfer data values to and from procedures.
Parameters may be scalars or multidimensional arrays, but they cannot be passed as string type variables.
A parameter identifier cannot be defined or referenced outside a procedure.
See DEFINE PARAMETER and DEFINE PROCEDURE for more details and examples.
3.1.14 Procedure
Definition:
A procedure is a group of statements that are compiled as a unit under a unique identifier for later reference and execution.
Remarks:
A procedure definition or compilation is initiated with the DEFINE PROCEDURE statement and is terminated by the
END statement.
Procedure execution is initiated by entering the procedure identifier, optionally preceded by the word DO. When a
procedure is called, its statements are executed sequentially in the same order as they are defined.
Procedure execution ends after the last statement of the procedure is executed or when a BREAK procedure statement is
executed. After ending, execution continues with the statement after the original procedure call that started the procedure.
3.1.15 Program
A PROMULA program is an ordered set of statements that allows you to transform input data to output information. A
statement is a complete instruction in a PROMULA program. Input data is given or known information which you "read
into" the program; output information is what the program computes and "writes out" for you.
A PROMULA program has two states: source and executable. When you first write it, the program is in its source state.
From its source state, the program is transformed to its executable state by the process of compilation. In its source state, a
program can be modified with a text editor and compiled but not executed. The computer can execute a program only if it
has been successfully compiled and is in an executable state.
The two main operations of the PROMULA system are program compilation and program execution. Both of these
operations can be performed either directly, with interactive input from the console (Options 10 and 6 of the Main Menu),
or indirectly, with batch input from disk (Options 5 and 8 of the Main Menu).
To write and/or edit PROMULA source programs, you can use your own text editor or PROMULA's Text Editor — Main
Menu option 4 .
76
Promula Application Development System User's Manual
3.1.16 Relation
Definition:
A relation is a rule of correspondence between the elements of a set and the contents of a variable indexed (subscripted) by
that set.
A set is a classification scheme and as such it is an abstraction. Its elements are usually ordered from 1 to n, where n is the
size of the set. However, if related to a variable of n values the elements of the set take on a less abstract meaning.
For example, the set month is an ordered set of the numbers 1, 2, ..., 12. The string variable mn(month) contains 12 values
that are the month names January, February, ..., December. If the set month and the variable mn are related, then the
elements of the set month and the values of the variable mn have the following correspondence:
Set month
Variable mn
1
2
.
.
.
12
January
February
.
.
.
December
PROMULA supports four kinds of relations:
ROW
specifies the variable whose values will serve as the primary descriptor for a set's elements. The primary
descriptor values are used to label rows of values classified by the set in WRITE, BROWSE, and EDIT
statements. They are also used in bar plots, page headings, and displays of the set itself.
COLUMN
specifies the variable whose values will serve as the column descriptor for a set's elements. The column
descriptor values are used to label columns of values classified by the set in WRITE, BROWSE, and
EDIT statements.
KEY
specifies the variable whose values will serve as the codes for a set's elements. If no ROW relation for the
set is specified, the code values, also referred to as keys, are used as the primary descriptors for the set. If
no COLUMN relation for the set is specified, the code values are used as column descriptors. In addition,
set codes may function as set element identifiers in displays of the set and in coded set selections.
TIME
specifies the variable whose values will serve as the time values for a set's elements. If no ROW relation for
the set is specified, the time values, also referred to as keys, are used as the primary descriptors for the set.
If no COLUMN relation for the set is specified, the time values are used as column descriptors. In addition,
time values may function as set element identifiers in displays of the set and in coded set selections. If a set
has a TIME relation, it becomes a Time Series Set.
A related feature is PROMULA's TYPE=set option for variables. A variable of this type displays the row descriptor of the
set element which corresponds to its value. For example, if a variable, ms, has the type specification TYPE=month(15),
and ms contains the value 2, then the statement
WRITE (ms)
would display the word February with a width of 15 characters. Furthermore, if ms is assigned any value that is not
between 1 and 12, (the range of set month) it is given the value zero instead.
See DEFINE RELATION and SELECT RELATION for more details.
77
Promula Application Development System User's Manual
3.1.17 Segment
Definition:
The segment is a part of a program that may be saved on disk for later loading and execution.
Remarks:
A program segment is bounded by a DEFINE SEGMENT statement at its beginning and an END SEGMENT statement
at its end.
A large program may be segmented into a hierarchical tree structure of segments.
For simple one-segment programs, the program segment should be initiated by a DEFINE PROGRAM statement and
ended with an END PROGRAM statement. The enclosed program segment is given the default name MAIN.
Chapter 4 describes program segmentation in detail.
3.1.18 Set
Definition:
A finite set of discrete elements that are ordered from 1 to N, where N is the size of the set.
Remarks:
A set has the following characteristics:
A unique identifier
A size
An optional descriptor
An optional format specification for displays of the set and arrays dimensioned by the set
An optional disk reference to descriptors of the set's elements
Sets are used primarily as subscripts of array variables and serve to build their multidimensional structure. They may also
be used to control program flow and to provide descriptive information for reports.
The descriptors associated with the elements of a set classify the values of variables subscripted by the set and serve as the
row, column, and page headings of such variables.
The default descriptors of the elements of a set are:
SET(1), SET(2),..., SET(N)
where SET is the set identifier.
A set is defined by the DEFINE SET statement.
The contents of a set may be displayed via the WRITE set and BROWSE set statements.
The sets of a program may be listed via the AUDIT SET and BROWSE SET statements.
The order and range of a set may be modified by the SELECT set, SELECT set IF, and SORT statements. The current
range and order of a set's elements are stored in a structure referred to as the set's selection vector.
78
Promula Application Development System User's Manual
The elements of a set may be selected interactively via the SELECT SET, SELECT ENTRY, ASK...ELSE SET, and the
SELECT VARIABLE statements.
Sets may be used to drive DO loops with the DO set statement.
Descriptive information may be associated with set elements with the DEFINE RELATION, SELECT RELATION, and
READ set statements.
The descriptors of a set may be displayed as the values of a variable by using the TYPE=set type specification in the
variable's definition.
PROMULA has some special notation for use with sets that can be useful in working with sets and multidimensional
variables. This notation is discussed below.
set:M
A scalar containing the maximum size of set. This is the value of N used in defining
the set.
set:N
A scalar containing the current size of set.
set:S[(i)]
A vector containing the element sequence numbers of the selection vector of set.
The (i) subscript is optional and is used to indicate which element of the selection
vector is being referenced. The default is i = 1. Set:S is useful as an iteration counter
in a DO set loop or as a switch between alternate execution paths.
In addition, set:S(1) contains the sequence number of the element corresponding to
the minimum (maximum) value of a vector after a SORT (DESCENDING)
statement.
set:R
A scalar containing the current range of set. Initially, set:R = set:M.
set:V[(i)] A vector containing the values associated with a TIME related set. This variable is
useful in dynamic simulation applications.
Normally, you will not assign values to these variables. However, if you want to make your own assignments, you will
have to use the PROMULA verb, COMPUTE. For example, it is possible to change the default range of a set to 1 through
m with the following statements:
COMPUTE set:R = m
SELECT set*
You should not increase the size of a set above its definition size, as this can result in loss of program information.
To restore the range of a set to its default, use the statements
COMPUTE set:R = set:M
SELECT set*
Examples:
1.
Defining a Set
DEFINE SET
month(12) "Set of 12 Months"
acnt(3)
"Account"
END
79
Promula Application Development System User's Manual
2.
Using Sets as Subscripts to Define Array Variables
DEFINE VARIABLE
md(month,acnt) "Data by Month and Account"
END VARIABLE
3.
Selecting Set Elements
SELECT
SELECT
SELECT
SELECT
SELECT
SELECT
4.
month(1,6,9-12)
month*
SET (month)
ENTRY (month)
VARIABLE (md)
month IF md GT 4
Special Set Notation:
Some of the special notations for sets (set:M, set:R, set:N, set:S) are illustrated in the dialog below.
DEFINE SET
pnt(4)
END SET
DEFINE VARIABLE
x "X="
END VARIABLE
DO pnt
WRITE (pnt)
END pnt
PNT(1)
PNT(2)
PNT(3)
PNT(4)
x=pnt:M
WRITE x
X= 4
x=pnt:R
WRITE x
X= 4
x=pnt:N
WRITE x
X= 4
SELECT pnt(3,2,4)
x = pnt:S(3)
WRITE ("pnt:S(3) = "x)
pnt:S(3) =
4
DO pnt
x=pnt:S
WRITE ("pnt:S = "x)
x=pnt:N
WRITE ("pnt:N = "x)
END
pnt:S =
3 Note that within a DO set loop, the size of the set
(set:N)
pnt:N =
1 is one element.
pnt:S =
2
pnt:N =
1
80
Promula Application Development System User's Manual
pnt:S =
pnt:N =
4
1
x=pnt:N
WRITE x
X= 3
5.
Using sets directly from a database.
Sets may be defined as part of the structure of an array file (see DEFINE SET). These disk sets may be accessed
directly — without having the database definition in memory by using the file:set notation. For example, the following
code creates a database with three sets.
DEFINE FILE
af TYPE=ARRAY
END
OPEN af "test.dba" STATUS=NEW
DEFINE SET af
rec(1000)
fld(8)
pag(10)
END SET af
... The rest of the database definition (e.g., variables and relations).
CLEAR af
The sets in file test.dba can be manipulated by PROMULA by opening the array file — STATUS=OLD, then using
the file:set notation.
For example af:rec is the identifier of the 1000 element set in the array file test.dba.
3.1.19 Statement
Definition:
A complete instruction in a PROMULA program.
Remarks:
There are two types of statements: line and structured. Line statements are entered on a single line which may be continued
to additional lines according to the rules of line continuation. Structured statements, on the other hand, require more than
one line of code; they start in one line and end in another with a number of other lines in-between. A structured statement
may contain other line or structured statements in it. All structured statements end with an END statement.
Examples:
The statement
WRITE a
is a line statement.
81
Promula Application Development System User's Manual
The statement
DEFINE VARIABLE
a
b
END
is a structured statement.
All PROMULA statements begin with one of the verbs of the language, except for equations which begin with the optional
verb COMPUTE, procedure execution statements which begin with the optional verb DO, and data lines.
All definition statements are structured. They begin with the verb DEFINE and end with the verb END.
PROMULA statements have no line numbers and may begin anywhere on an input line.
Blanks or commas must be used to separate distinct statement parts.
A statement may be as long as you wish; however, if it is longer than 80 characters it is good style to continue the statement
on the next input line by using a comma at the end of the current line. You may use as many continuation lines as you wish.
3.1.20 System
Definition:
A system of n equations and n unknowns.
A system has a name, n parameters (or unknowns), and n equations. The number of equations in a system, n, can be as large
as you can fit in your working space.
The system is defined by the DEFINE SYSTEM statement.
Equations are written in the usual algebraic notation:
f(x1, x2,...) = g(x1, x2,...)
where f and g are arbitrary real, continuous functions of x1, x2,...
The solution of a system is obtained by an iterative process which you start by making an initial guess for all of the
unknowns.
A system sys with parameters x1, x2,... may be solved by simply entering its name and specifying an ordered list of
scalar variables a1, a2,... corresponding to the parameter list. The number and order of variables in the variable list
must agree with the number and order of the parameters as defined in system sys:
sys(a1,a2,...)
The solution of system sys, if it exists, will be returned as the values of the variables a1, a2,...
If the attempt to solve system sys does not converge after a reasonable number of iterations, then you are given the
message to try another starting guess for the unknowns.
A diagnostic is also given if the system does not have a real solution.
See also the DO LSOLVE statement which may be used to solve systems of linear equations.
82
Promula Application Development System User's Manual
Examples:
An example of system definition and system solution is given in the DEFINE SYSTEM statement.
3.1.21 Table
Definition:
A tabular report (or display) of several variables.
A table has a body and an optional title and format. The body of the table contains the names of the variables whose values
will be displayed as the 'body' of the table. The format specifies the width of the rows and columns of the table.
The values of the variables in a table are classified by a common set. This common set classifies the columns of the table.
You may include as many variables as you wish in the body of a table.
A table may be 'browsed' by using the BROWSE TABLE statement. This allows you to browse the pages of a table one at
a time.
A table may be 'written' by using the WRITE TABLE statement. This allows you to display or print the table in its
entirety.
A table may be 'edited' by using the EDIT TABLE statement. This allows you to browse the pages of a table one at a time
and change its values.
Tables may also be defined using the DEFINE TABLE statement.
3.1.22 Time Parameters
Definition:
In PROMULA, the words TIME, DT, BEGINNING, and ENDING are reserved keywords that name four scalar
parameters that are used mainly in dynamic simulation applications. Such applications contain procedures involving time
series variables and time integration algorithms.
These four internal variables are used with the dynamic simulation subsystem of PROMULA where they are used explicitly
with the level and rate statements to specify approximate (first order) integrations of level variables over time:
level(TIME + DT) = level(TIME)
+
DT * rate(TIME)
Here, the value of a variable at time (TIME + DT) is equal to its value at time TIME plus the product of DT times the rate
of change of the variable at time TIME.
In the dynamic simulation, these parameters have the following meanings:
TIME
DT
BEGINNING
ENDING
The TIME variable
A time increment for the TIME variable
The beginning value of TIME
The ending value of TIME
Some of the sample programs on the PROMULA Demo Disk are dynamic simulation models converted to PROMULA and
contain examples that use these parameters.
83
Promula Application Development System User's Manual
See the RATE, LEVEL, and TIME statements as well as the discussion of Dynamic procedures in this Chapter for more
information on these constructs.
3.1.23 Variable
Definition:
A place for storing numeric or character information. A variable may have a single value or a number of values. A singlevalued variable is called a scalar. A variable with many values is called an array.
Remarks:
A variable has the following characteristics:
A unique identifier
A structure
A value or values
A format type
An optional descriptor
A storage type
The identifier of a variable is its symbolic name. It may have up to six alphabetic and numeric characters, the first being
alphabetic. No special characters are allowed. Any characters over six are ignored. Two variables may not share the same
identifier.
The structure of an array variable is defined by the sets or numeric constants classifying its dimensions. An array may
have up to ten dimensions or subscripts. A scalar variable has no internal structure, since it only has one value.
The values of a variable are the pieces of information it contains. The number of values in a scalar variable is one. The
number of values in an array variable is equal to the product of the sizes of the sets structuring it. These values are arranged
in rows, columns, and pages. The rows are classified by the first set of the variable; the columns are classified by the
second set; the pages by the third set, and so forth.
The Format Type of a variable is the kind of information that it contains. PROMULA has eight format types:
REAL
contains real numbers (numbers with decimal digits) in the ranges:
(-3.37E+38,-8.43E-37)
0
(+8.43E-37,+3.37E+38)
Reals outside these ranges are not valid and cause underflows or overflows in calculations,
which result in errors.
INTEGER
contains integer numbers (whole numbers) in the range:
(-231-3,+231-3) about ± 2.1 billion
Integers outside this range cause overflows and cannot be processed by the system.
STRING
contains character values, i.e., strings of characters.
CODE
contains codes. Codes are short character strings that are used for set selections. For
example, JAN and FEB may be used to select the months of January and February.
84
Promula Application Development System User's Manual
contains money values (dollars and cents). This type is useful for accounting arithmetic
where one-cent accuracy is important. Money variables maintain ten significant digits of
accuracy. The range of MONEY type variables is
MONEY
(-2**31-3,+2**31-3) about ± 2.1 billion cents or 21 million dollars.
DATE
contains date values. Dates are values of the form mm/dd/yy, where mm is a month
number, dd is a day number, and yy is a year number. Internally, the date value is stored
as a numeric quantity equal to yymmdd. Alternative date formats (e.g., dd/mm/yy or
mm/dd/yyyy) are available by executing a SELECT DATE statement.
UPPERCASE
contains string values that are automatically converted to uppercase when they are input
from the keyboard.
set
contains integers from 0 to N. If the values of the set type variable are within the range of
set, the descriptors of set are displayed, otherwise, the variable is assigned and displays
the value 0. This type of variable is useful for helping the user enter or verify categorical
data.
Details and examples of using the various format types are presented with the discussion of the DEFINE VARIABLE
statement.
The descriptor of a variable is a string of characters that will be used as a default title when the variable is displayed by the
report generator.
Variable descriptors and identifiers can be displayed in write statements and in titles through use of the :I, :L, :D operators.
The notation variable:I can be used to indicate that the identifier of a variable is to be displayed.
The notation variable:L can be used to indicate that the descriptor of a variable is to be displayed.
The notation variable:D can be used to indicate that the identifier, followed by a colon, a space, and the descriptor for the
variable is to be displayed.
These operators may be used with indirects to display the identifier and/or descriptor of the variable that the indirect is
"pointing" at.
For example, given the following definition
DEFINE VARIABLE
pop "POPULATION SIZE"
END VARIABLE
the following relations are true
pop:L =
pop:D =
pop:I =
POPULATION SIZE
POP: POPULATION SIZE
POP
The storage type of a variable determines where it resides, in RAM memory, or on disk, and whether or not its values can
be cleared from memory. Depending on where their values are stored, variables are of three types: fixed, scratch, and
disk. In addition, there are two pseudo-storage types: virtual and dynamic associated with disk access. Additional
information about the storage types is presented in Chapter 4.
The DEFINE VARIABLE statement creates new variables and databases.
The READ statements put values into variables from a file or the keyboard.
85
Promula Application Development System User's Manual
The EDIT statements allow a program user to interactively modify variable values.
The WRITE, BROWSE, and PLOT statements display variables in tabular or graphical form.
Equations modify the values of variables.
Functions define relationships between pairs of variables.
Relations define relationships between sets and variables.
The DO IF, DO UNTIL, and DO WHILE statements use the values of variables to control program flow.
The Statistical Functions generate statistical reports based on the values of selected variables.
Examples:
1.
Defining fixed variables in memory
DEFINE VARIABLE
A(row,col)
"A
B
"A
C
"A
D
"A
M
"A
END VARIABLE
2.
2-Dimensional Array"
Scalar"
String Variable" TYPE=STRING(8)
Date"
TYPE=DATE(8)
Money Variable"
TYPE=MONEY(10)
Defining scratch variables in memory
DEFINE VARIABLE SCRATCH
scr
"A Scratch Variable"
END VARIABLE
3.
Defining disk variables on a file
DEFINE VARIABLE file
dsk
"A Disk Variable"
END VARIABLE file
4.
Defining virtual variables in memory
DEFINE VARIABLE
dd "A fixed Disk Variable"
END VARIABLE
5.
DISK(file,dsk)
Using variables in equations
B = SUM(r,c)( A(r,c) )
B = PRODUCT(r,c)( A(r,c) )
6.
Putting values into a variable with an equation
A=1
A=RANDOM(1000,2000)
A(i,j)=j*i+(i-1)*(j EQ 1)
7.
Reading values into a variable
DEFINE SET
86
Promula Application Development System User's Manual
row(3)
col(2)
END
DEFINE VARIABLE
a(row,col) "A 2-Dimensional Array"
END VARIABLE
READ A
1 2
3 4
5 6
8.
Displaying a variable
WRITE a
A 2-Dimensional Array
COL(1)
1
3
5
ROW(1)
ROW(2)
ROW(3)
COL(2)
2
4
6
WRITE a::2(col,row) TITLE("Display of "a:L)
Display of A 2-Dimensional Array
COL(1)
COL(2)
9.
ROW(1)
1.00
2.00
ROW(2)
3.00
4.00
ROW(3)
5.00
6.00
Using disk variables directly off an array database — The file:variable notation
Suppose you have created an array database and you wish to access one of its variables. The name of the database is
array.dba and the name of the variable is sales. The example below shows how to browse the variable sales
directly.
DEFINE FILE
f1
END
OPEN f1 "array.dba"
BROWSE f1:sales
The syntax for such direct reference of disk variables is: file:var, where file is the array file containing the variable var
that you wish to access. Disk variables may also be accessed directly off an array database by using the COPY file,
IMAGE command.
3.1.24 Window -- Basic
PROMULA lets you split the screen into two sections. The upper section is called the Action window; it is used for
interactive displays such as data editing and selection menus and lists; the lower section is called the Comment window; it
is normally used for providing comments about what is happening in the Action window.
The default length of the Action window is 25 lines; the default length of the Comment window is 0 lines. To set the length
of the Comment window, use a SELECT COMMENT=n statement, where n is the number of lines desired in the
Comment window.
87
Promula Application Development System User's Manual
Windows provide the means for writing tutorial programs. In such programs you show the execution of something in the
Action window and provide comments about it in the Comment window.
The statements of Basic Windowing are:
SELECT COMMENT=n starts windowing mode, sets the length of the Comment window to n
lines, where n is an integer in the range 1 to 22, and splits the screen by
drawing a dividing line that is n spaces from the bottom.
SELECT COMMENT=0 gets you out of Basic windowing mode and closes the Comment
window.
WRITE COMMENT
writes text in the Comment window without prompting for browsing.
BROWSE COMMENT
writes text in the Comment window with prompting for browsing.
The displays of all other input/output statements are shown in the Action window.
The following procedure is an example of Basic Windows:
DEFINE PROCEDURE window
SELECT COMMENT=12
WRITE TEXT
This text was produced by the WRITE TEXT statement.
Note that it shows up in the Action Window (upper half of screen).
END
BROWSE COMMENT
The PROMULA code that produced the text in the above window is:
WRITE TEXT
This text was produced by the WRITE TEXT statement.
Note that it shows up in the Action Window (upper half of screen).
END
END
WRITE COMMENT
This text was produced by the WRITE COMMENT statement.
Note that it shows up in the Comment Window (lower half of screen).
END
BROWSE TEXT
The PROMULA code that produced the text in the window below is:
WRITE COMMENT
This text was produced by the WRITE COMMENT statement.
Note that it shows up in the Comment Window (lower half of screen).
END
END
END PROCEDURE window
Upon execution of this procedure, the following display results:
88
Promula Application Development System User's Manual
This text was produced by the WRITE TEXT statement.
Note that it shows up in the Action Window (upper half of screen).
The PROMULA code that produced the text in the above window is:
WRITE TEXT
This text was produced by the WRITE TEXT statement.
Note that it shows up in the Action Window (upper half of screen).
END
After pressing any key, the following display results:
The PROMULA code that produced the text in the window below is:
WRITE COMMENT
This text was produced by the WRITE COMMENT statement.
Note that it shows up in the Comment Window (lower half of screen).
END
Press any key to continue
This text was produced by the WRITE COMMENT statement.
Note that it shows up in the Comment Window (lower half of screen).
89
Promula Application Development System User's Manual
3.1.25 Window -- Advanced
The windowing capabilities discussed in the previous section are the most basic type of windowing available to
PROMULA users. For users who wish to create a truly professional-looking user interface for their applications, the
Advanced Windowing capabilities are available.
In PROMULA the custom design of the screen is specified using the DEFINE WINDOW and OPEN WINDOW
statements. The DEFINE WINDOW statement allows you to create windows. The OPEN WINDOW statement allows
you to assign one of your custom-designed windows to handle a specific set of display functions.
The OPEN WINDOW statement takes two parameters:
1.
2.
The functional type of the screen to which you want to assign the window.
The name of a window that you want to use for the screen of this functional type.
These two parameters are discussed below.
The screen parameter of the OPEN WINDOW statement specifies the functional screen to be assigned a window.
PROMULA supports five types of functional screens; each one is used for a particular set of operations. The five types of
screens: MAIN, PROMPT, COMMENT, ERROR, and HELP, are discussed below:
1.
MAIN
The Main Screen is used for most of the input/output operations done by an application. These operations are
performed by the following statements:
ASK...ELSE
AUDIT / BROWSE / EDIT / WRITE variable
AUDIT / BROWSE / SELECT SET
AUDIT / BROWSE / SELECT VARIABLE
AUDIT / BROWSE / WRITE / set
AUDIT / COPY file
BROWSE / EDIT / SELECT / WRITE menu
BROWSE / EDIT / WRITE TABLE
BROWSE / WRITE function
BROWSE / WRITE TEXT
BROWSE FILE
PLOT (in character mode)
SELECT ENTRY
SELECT indirect
Statistical Functions
table
variable = GETDIR(filespec)
WRITE text
The PROMULA Text Editor uses the colors of the Normal Text in the Main Screen.
2.
PROMPT
The Prompt Screen is used for displaying the prompts produced by the following PROMULA statements.
ASK CONTINUE
ASK...ELSE
BROWSE / SELECT VARIABLE
BROWSE / EDIT variable
BROWSE / SELECT SET
BROWSE set
BROWSE FILE
BROWSE / EDIT / SELECT menu
BROWSE function
BROWSE / EDIT TABLE
BROWSE TEXT
SELECT ENTRY
SELECT indirect
variable = GETDIR(filespec)
PROMULA's command mode prompt uses the Prompt Screen.
If a user-defined window is not opened to the Prompt Screen, PROMULA displays prompts at the bottom of the Main
Screen.
90
Promula Application Development System User's Manual
If a window is opened as the Prompt Screen, it will automatically appear on the screen whenever PROMULA needs to
display prompts.
3.
COMMENT
The Comment Screen is used for displaying the output of the WRITE COMMENT and BROWSE COMMENT
statements.
If a user-defined window is not opened to the Comment Screen, PROMULA displays comments in the Main Screen.
4.
ERROR
The Error Screen is used for displaying execution error messages.
If a user-defined window is not opened to the Error Screen, PROMULA displays an error message in the Main Screen.
5.
HELP
The Help Screen is used to display on-line help. The Help Screen will contain the display produced by the BROWSE
DIALOG and BROWSE TOPIC statements.
In addition, on-line help in response to an Alt-H is displayed in the Help Screen.
If a window is not opened to the Help Screen, PROMULA uses the Main Screen for displaying on-line help.
If a window is opened as the Help Screen, it will automatically appear on the screen whenever PROMULA needs to
display the output of help statements.
The window parameter of the OPEN WINDOW statement specifies which user-defined window should be assigned to a
functional screen. A Window is a rectangular section of the screen. The name, location, appearance, and popup type of the
rectangle are specified by a DEFINE WINDOW statement.
The popup type of window determines what happens to information on the screen that is covered when the window is
opened. There are two popup types, Static and Popup.
When a static window is associated with a functional screen, it is immediately displayed on the screen. Any text that gets
covered by the static window is lost and cannot be restored (unless it is written to the screen again). A static window,
including its borders and contents, will remain on the screen even after it is closed by a CLEAR WINDOW statement.
This feature makes static windows useful for creating a backdrop for your application or displaying instructions or
comments about a running program. A window will be static if it does not have the optional keyword POPUP in its
definition.
When a popup window is associated with a functional screen, it is not immediately displayed. A popup window is only
displayed while the functional screen associated with it is in use. The window is opened whenever a statement that uses the
associated functional screen is executed. After execution of such a statement, the window is removed from the display, and
any text that was covered by the window is automatically redrawn. Popup windows are useful for displaying on-line help or
other messages that will only be shown briefly. A window is of type Popup if it has the optional keyword POPUP in its
definition.
The DEFINE WINDOW statement is used to define the name, location, appearance, and popup type of a window.
The OPEN WINDOW statement is used to open a window on a specific functional screen.
The CLEAR WINDOW statement is used to end the association between a window and a functional screen.
91
Promula Application Development System User's Manual
Screen areas can also be assigned to serve as the display areas for popup and pulldown pick menus. This feature is
described in the context of the DEFINE MENU and SELECT PULLDOWN statements respectively.
Examples:
The code below is a simple example of Advanced Windowing .
DEFINE WINDOW
cwind(1,1,78,4,
WHITE/BLACK,FULL/HEAVY /WHITE/BLACK)
mwind(10,10,69,18,WHITE/BLACK,FULL/SINGLE/WHITE/BLACK,BLACK/WHITE)
pwind(1,23,78,23, WHITE/BLACK,FULL/HEAVY/WHITE/BLACK,BLACK/WHITE) POPUP
END WINDOW
DEFINE SET
row(4)
col(5)
END SET
DEFINE VARIABLE
A(row,col) "THE VALUES OF VARIABLE A" TYPE=REAL(9,2) VALUE=10
END VARIABLE
DEFINE PROCEDURE demo
OPEN cwind COMMENT
OPEN pwind PROMPT
OPEN mwind MAIN
WRITE COMMENT
Edit the values below according to the instructions in the prompt
at the bottom of the screen, or press [End] to continue.
END
EDIT A
END PROCEDURE demo
Procedure demo produces the following screen.
92
Promula Application Development System User's Manual
Edit the values below according to the instructions in the prompt
at the bottom of the screen, or press [End] to continue.
THE VALUES OF VARIABLE A
ROW(1)
ROW(2)
ROW(3)
ROW(4)
End: Exit
COL(1)
10.00
10.00
10.00
10.00
COL(2)
10.00
10.00
10.00
10.00
COL(3)
10.00
10.00
10.00
10.00
COL(4)
10.00
10.00
10.00
10.00
Fn Shift-Fn PgUp PgDn Home Arrows: Select
COL(5)
10.00
10.00
10.00
10.00
Enter: Edit
3.2 Statement Format
In general, PROMULA is a free-form language. Its statements may start anywhere on the input line, and as many blanks or
commas as desired may be inserted between the various parts of the statement to improve readability.
PROMULA statements are not identified by line number; thus, PROMULA programs have no GO TO statements.
Comment lines may be inserted almost anywhere in the source code and are identified by having an asterisk in column 1. It
is possible to include in-line comments with some statements — for example after the procedure name in a DEFINE
PROCEDURE statement.
Full-line comments (i.e., those introduced by an asterisk in column 1) are not recognized as comments in two places: free
form text blocks like those used for the DEFINE MENU and BROWSE/WRITE TEXT/COMMENT statements, and in
the data lines for the READ variable statement. The slash character (/) in column one may be used to insert comments into
the data lines for the READ variable statement
3.3 Commas and Blanks
Commas or blanks play an important role in the syntax of PROMULA statements. They are delimiters and are used to
separate the different parts of a statement. Multiple delimiters are treated as a single delimiter, except when they are part of
a character string.
3.4 Line Length
93
Promula Application Development System User's Manual
An input line in PROMULA may contain up to 255 characters. Pressing the Enter key enters the line. Given the width of
most screens or printers, keeping each statement no longer than 80 characters will make your programs easier to read and
work with.
3.5 Line Continuation
If a statement is too long to fit on a single line, you may continue it on the next line. Continuation of a statement may be
indicated in one of three ways, depending on context:
1.
If you are entering a character string, then continuation is automatic. The first character of the next line is concatenated
directly behind the last character of the preceding line, except that multiple trailing blanks are reduced to a single
blank.
2.
If you are entering an equation, then continuation to the next line is indicated by the last non-blank character of the
current line, which must be a comma or an arithmetic, relational, or logical operator.
3.
In all other cases, continuation to the next line is indicated by entering a comma as the last non-blank character of the
current line.
3.6 Format of PROMULA Statement Descriptions
The following sections describe the statements of PROMULA. Each statement description consists of four parts:
1.
The purpose of the statement
2.
The general syntax of the statement
3.
Remarks about the syntax and the statement
4.
Examples demonstrating the syntax and use of the statement.
The notation for the syntax follows these rules:
1.
Words in capital letters are PROMULA keywords and must be entered as shown. They may be entered in any
combination of uppercase and lowercase. PROMULA converts all words to uppercase (unless they are character
data or part of a quoted string).
2.
You must supply any items in lowercase letters.
3.
Items in square brackets ([ ]) are optional.
4.
An ellipsis (...) on a line by itself under an item indicates that you may repeat the item as many times as you wish,
on separate lines.
For example, the notation
DEFINE SET
set(n) ["desc"]
...
END [comment]
describes the syntax of the DEFINE SET statement, and says the following:
94
Promula Application Development System User's Manual
1.
Enter the words DEFINE SET to begin the definition.
2.
Enter a set identifier, set, followed by a left parenthesis, (, followed by an integer, n, followed by a right
parenthesis, ), followed by an optional descriptor, desc. If you include a descriptor, it must be enclosed in quotes,
".
3.
You may enter as many set definitions as you wish. This is denoted by the ellipsis, ...
4.
Enter the word END to end the set definitions. This may be followed by a comment, if you wish.
An ellipsis (...) in a line after an item indicates that you may repeat the item as many times as you wish, on that line or on
lines with the appropriate continuation character.
For example, the notation
PLOT (var1[,var2,...])
indicates that you may include one or more var specifications in the argument of the PLOT statement.
The meanings of the lowercase items that you must enter to form a statement are described in the Remarks of each
statement description.
3.7 The PROMULA Statements
3.7.1 ASK CONTINUE
Purpose:
Interrupts execution and issues the message
Press any key to continue?
Syntax:
ASK CONTINUE
Remarks:
You may insert this statement anywhere inside a procedure to stop execution and give the user of the procedure the option
to continue execution or exit to the Main Menu. If the user presses the Esc key he is returned to the main menu; any other
key (or clicking the mouse button) results in continued execution.
This statement is a simple pause and is a useful feature for conversational applications or debugging.
To execute a pause without issuing the prompt, use a WRITE CLEAR(-1) statement.
3.7.2 ASK...ELSE
Asks the user something and executes a group of statements depending on the response.
Syntax:
ASK "prompt", response
statement
...[ELSE [response]
statement
95
Promula Application Development System User's Manual
...]
END
Remarks:
prompt
is a message or prompt for the user.
response
is a possible user response to prompt. Possible responses are of three types:
[WORD =] code
SET = set
VARIABLE = indir[(vars)]
where
statement
code
is a string of characters which must be entered in upper or lower case to qualify as a valid
response. PROMULA recognizes only the first six characters of code as a valid response;
the rest are ignored.
set
is a set identifier and allows the user to make set selections (see Example 2 below).
indir
is the identifier of an indirect variable which acts as a pointer to other variables and allows
the user to select a variable for subsequent input/output operations. You must put an asterisk
(*) after the identifier of indir in its definition to tell PROMULA that it will be used as an
indirect variable. Calculations with indirect variables are not allowed. (See Example 3
below).
vars
is a list of variables from which the user is expected to make a selection. The selected
variable is transferred to indir for the input/output purposes of the ASK statement only. If
this list is omitted, all variables in the program are included in the list. (See Example 3
below).
is any executable statement (i.e., no definitions), including other ASK statements.
The ASK statement behaves like the DO IF statement, i.e., it provides an alternative path of execution if a condition is met.
The conditions of an ASK statement are satisfied if a user response matches one of the allowed responses specified either
by the ASK statement or by one of the ELSE statements included in the ASK.
A user response is checked against the responses of the ASK statement sequentially from top to bottom. When a match
occurs, program execution proceeds to the statements following the matched response until the next ELSE or END
statement, whichever comes first.
The SET=set option allows the user to make set selections. Appropriate user responses are set sequence numbers, set
codes, or scalar variables with values in the set range. The SELECT SET, SELECT ENTRY, and SELECT VARIABLE
statements provide alternative means of helping the user make a set selection.
The VARIABLE=indir option allows the user to select a program variable for input/output purposes by entering the
variable identifier. The SELECT variable statement and the INDIRECT function are also useful tools for helping the user
select a variable and working with interactive variable selections.
A null ELSE statement, i.e., one with a blank response, is executed only if all the other preceding ELSE statements fail.
For this reason, the null ELSE statement is usually the last one.
NOTE: The ASK statement is not case sensitive.
96
Promula Application Development System User's Manual
ASK statements may be nested to any depth.
ASK statements are allowed only inside procedures.
Examples:
1.
The following is a procedure containing a simple ASK statement.
DEFINE PROCEDURE yesno
ASK "Do you wish to continue? (yes/no)", yes
WRITE("Continue")
yesno
ELSE no
WRITE("Stop")
END ask
END PROCEDURE yesno
The purpose of the procedure is to issue the question "Do you wish to continue? (yes/no)" and take one of
two execution paths depending on user response. A sample dialog with procedure yesno is displayed below.
yesno
Do you wish to continue? (yes/no) An invalid response causes the
xxx
question to be asked again.
Do you wish to continue? (yes/no)
yes
Continue
Do you wish to continue? (yes/no)
no
Stop
The yes path writes the message Continue and issues the prompt Do you wish to continue?, thanks to the
recursive nature of PROMULA procedures. The no path issues the message Stop and exits the ASK statement. Any
other user response causes the prompt Do you wish to continue? to be issued again. Exit from this ASK
statement is only possible if you respond no.
2.
The example below shows how to use the SET=set option in order to make alternative set selections. The procedure
selmon allows you to make various selections from the elements of the set month by entering set codes, variable
identifiers, or set element sequence numbers. The definitions and initializations of the example variables are shown
below.
DEFINE SET
month(12)
END SET
DEFINE VARIABLE
mv(month) "Month Value"
mc(month) "Month Code"
TYPE=CODE(5)
mn(month) "Month Name"
TYPE=STRING(12)
x
"x Value"
y
"y Value"
indir*
"An Indirect Variable"
END VARIABLE
DEFINE RELATION
KEY(month,mc)
ROW(month,mn)
97
Promula Application Development System User's Manual
END RELATION
DEFINE PROCEDURE selmon
ASK "Select months or LIST or END" END
ELSE LIST
WRITE month
selmon
ELSE SET=month
WRITE("The selected months are")
WRITE mv
END ask
END PROCEDURE selmon
READ mv
1 2 3 4 5 6 7 8 9 10 11 12
READ mc
JAN FEB MAR APR MAY JUN JUL AUG SEP OCT NOV DEC
READ mn
January
February
March
April
May
June
July
August
September
October
November
December
Given the definitions and initializations above, we can execute procedure selmon to demonstrate the behavior of the
ASK statement for making set selections. A sample dialog with procedure selmon is shown below.
selmon
Select months or LIST or END
? LIST
Member
Description
JAN
January
FEB
February
MAR
March
APR
April
MAY
May
JUN
June
JUL
July
AUG
August
SEP
September
OCT
October
NOV
November
DEC
December
Select months or LIST or END
? may,dec
The selected months are
Month Value
(1)
5
12
May
December
selmon
Select months or LIST or END
98
Promula Application Development System User's Manual
? 6-9
The selected months are
Month Value
(1)
6
7
8
9
June
July
August
September
x = 5
y = 7
selmon
Select months or LIST or END
? x,y
The selected months are
Month Value
(1)
5
7
May
July
3.
This example shows how to use the VARIABLE=indir option in order to select a program variable. Here, indir is an
indirect variable that serves as a substitute for other selected variables.
DEFINE PROCEDURE selvar
ASK "Select variable or LIST or END", END
ELSE LIST
AUDIT VARIABLE
selvar
ELSE VARIABLE=indir
WRITE indir
selvar
END ask
END PROCEDURE selvar
The procedure selvar allows you to select one of the variables of a program by entering the variable's identifier in
response to an ASK statement. A sample dialog with procedure selvar is shown below.
DO selvar
Select variable or LIST or END
? LIST
Identifier Description
MV
Month Value
MC
Month Code
MN
Month Name
X
X Value
Y
Y Value
INDIR
An Indirect Variable
Select variable or LIST or END
? mv
Month Value
January
February
March
April
May
99
(1)
1
2
3
4
5
Promula Application Development System User's Manual
June
July
August
September
October
November
December
Select variable or LIST or END
? x
x Value 5
Select variable or LIST or END
? end
6
7
8
9
10
11
12
3.7.3 AUDIT file
Purpose:
Produces a listing of the sets and variables in an array file.
Syntax:
AUDIT file
Remarks:
file is the identifier of the array file you wish to audit.
Examples:
The following code illustrates the AUDIT file statement:
DEFINE FILE
arr1 TYPE=ARRAY
END FILE
"A Primary Array Data File"
OPEN arr1 "arr1.dba", STATUS=NEW
DEFINE SET arr1
yrs(10)
"Year"
pag(03)
"Pages"
sic(5)
"SIC Codes"
END SET arr1
DEFINE VARIABLE arr1
DUR(yrs)
TYPE=REAL(8,0)
EMP(pag,yrs) TYPE=REAL(8,0)
EMPT(yrs)
TYPE=REAL(8,0)
WSEMP(yrs)
TYPE=REAL(8,0)
SICST(sic)
TYPE=STRING(30)
YEAR(yrs)
TYPE=STRING(5)
END VARIABLE arr1
"Manufacturing Durables Employment"
"Employment by Industry"
"Total Employment"
"Total Wage and Salary Employment"
"Names for Industrial Categories"
"Years"
The statement AUDIT arr1 produces the listing below.
Identifier
YRS
PAG
SIC
Description
Year
Pages
SIC Codes
100
Promula Application Development System User's Manual
DUR
EMP
EMPT
WSEMP
SICST
YEAR
Manufacturing Durables Employment
Employment by Industry
Total Employment
Total Wage and Salary Employment
Names for Industrial Categories
Years
3.7.4 AUDIT SET
Purpose:
Produces a full or partial listing of the sets in a program.
Syntax:
AUDIT SET[(sets)]
Remarks:
sets
is a list of set identifiers. If omitted, all program sets are listed.
The AUDIT SET statement lists the identifiers and descriptors of the program sets. If sets is omitted, the sets are listed in
the order in which they were defined; otherwise, they are listed in the order specified by sets.
Examples:
The dialog below demonstrates the AUDIT SET statement.
DEFINE SET
month(12)
row(3)
col(10)
END SET
"12 Months"
"3 Rows"
"10 Columns"
AUDIT SET
Identifier
month
row
col
Descriptor
12 Months
3 Rows
10 Columns
3.7.5 AUDIT VARIABLE
Purpose:
Produces a full or partial listing of the variables in a program.
Syntax:
AUDIT VARIABLE[(vars)]
Remarks:
vars
is a list of variable identifiers. If omitted, all program variables are listed.
101
Promula Application Development System User's Manual
The AUDIT VARIABLE statement lists the identifiers and descriptors of the program variables. If vars is omitted the
variables are listed in the order in which they were defined; otherwise, the sets are listed in the order specified by vars.
Examples:
The dialog below demonstrates the AUDIT VARIABLE statement.
DEFINE VARIABLE
x "The x-values"
y "The y-values"
END VARIABLE
AUDIT VARIABLE
Identifier
Descriptor
x
The x-values
y
The y-values
3.7.6 BREAK procedure
Purpose:
Escapes from the current procedure.
Syntax:
BREAK proc
Remarks:
proc is the name of the procedure that contains the BREAK procedure statement.
Upon execution, the BREAK procedure statement escapes from the current procedure and returns control to the program
unit which called the procedure. After returning, execution continues with the statement after the procedure call that
originally executed proc.
Examples:
The following example illustrates use of the BREAK statement to escape from a DO UNTIL loop.
DEFINE VARIABLE
x "x = "
END VARIABLE
DEFINE PROCEDURE proc
DO UNTIL x GT 10
x = x + 1
WRITE x
DO IF x GT 5
WRITE "Leaving proc"
BREAK proc
END IF
END UNTIL
END PROCEDURE proc
DEFINE PROCEDURE call
DO proc
WRITE "Back from proc"
102
Promula Application Development System User's Manual
END PROCEDURE call
Executing procedure call generates the output shown below.
DO call
x = 1
x = 2
x = 3
x = 4
x = 5
x = 6
Leaving proc
Back from proc
3.7.7 BROWSE COMMENT
Purpose:
Displays text for browsing in the "Comment" window (Basic Windows) or the active Comment Screen (Advanced
Windows).
Syntax:
BROWSE COMMENT
text
...
END
Remarks:
text
is any text that you enter. The text will be clipped to the width of the window opened to the Main or Comment
Screen or the Comment Window. No more than 255 lines (approximately 40 pages) of text may be stored in a
single BROWSE COMMENT statement.
The keyword END must be entered starting in column 1 and must be capitalized.
The text will be shown by page in the Comment Screen of the display. A prompt at the bottom of the Prompt Screen will
describe how to browse the text.
For more details, see the sections on Basic Windows and Advanced Windows.
See also the BROWSE menu statement.
3.7.8 BROWSE DIALOG
Purpose:
Displays a dialog menu for browsing the topics of a dialog file.
Syntax:
BROWSE DIALOG filespec
Remarks:
103
Promula Application Development System User's Manual
filespec
is a quoted string or string variable containing the name of the physical disk file where the dialog file that you
want to browse is stored. This name is formatted according to the file naming conventions for your operating
system.
Upon execution, the BROWSE DIALOG statement displays a menu whose selection fields are the titles of the topics
contained in the dialog file. From this menu, you may browse any of the topics. The display will be shown in the window
opened to the Help Screen if one is active.
Examples:
The use of this statement is demonstrated in the context of the example given in the DEFINE DIALOG statement.
3.7.9 BROWSE FILE
Purpose:
Displays a text file for browsing.
Syntax:
BROWSE FILE filename
Remarks:
filename
is a quoted string or string variable containing the name of the text file to be displayed for browsing. This
name is any valid file specification and is used to identify the file to the operating system.
Upon execution, PROMULA clears the Main Screen and displays the specified text file for browsing. A prompt in the
Prompt Screen will tell the user how to browse the file.
NOTE:
On the IBM PC, the size of the files you can browse is limited to 32K or less. To browse larger files you may
invoke the PROMULA Text Editor or use the RUN DOS command to invoke your own file viewing system.
See the RUN EDITOR and RUN DOS statements.
The display will be clipped to the width of the window opened to the Main screen.
Examples:
1.
The statement
BROWSE FILE "demo.prm"
will display the file demo.prm for browsing.
2.
Similarly, the following statements
DEFINE VARIABLE
fname TYPE=STRING(12) "File Name"
END
fname="demo.prm"
BROWSE FILE fname
will display the file demo.prm for browsing. Here, fname is a string variable containing the string demo.prm.
3.7.10 BROWSE function
104
Promula Application Development System User's Manual
Purpose:
Displays the values of a function in tabular form for browsing.
Syntax:
BROWSE func[fmt] [TITLE(text)]
Remarks:
func
is the identifier of a function defined by the DEFINE FUNCTION or DEFINE LOOKUP statement.
fmt
is a format specification of the form \p:w:d to indicate the position of the display, the width of the values
displayed, and the number of decimals in real values, where
p
is an integer indicating the width in characters of the row descriptors for the display.
w
is an integer indicating the width of the columns of values. A negative width parameter left justifies the
values in each column.
d
is an integer indicating the number of decimal places to be displayed for each value. If d is an "E", the
values will be displayed in exponential notation.
For functions defined by the DEFINE LOOKUP statement, the default format is p=10, w=8 and d=2.
For functions defined by the DEFINE FUNCTION statement, w and d have the values specified in the DEFINE
VARIABLE statement for the function variables, and p is the width specified in the definition of the row
descriptors of the set subscripting the function.
text
is a title for the display and can contain text, variables, and other formatting characters as described in the WRITE
text statement.
Upon execution, the BROWSE function statement clears the Main Screen and displays the values of the function in
tabular form for browsing. A prompt in the Prompt Screen will tell the user how to browse the function.
Examples:
The BROWSE function statement is illustrated below:
DEFINE SET
pnt(60)
END SET
DEFINE VARIABLE
x(pnt) "The X values"
y(pnt) "The Y values"
p(pnt) "PNT Names"
TYPE=STRING(10)
END VARIABLE
x(i) = i
y(i) = i**2
p(i) = "PNT# "+i
SELECT ROW(pnt,p)
DEFINE FUNCTION
fx(x,y)
END FUNCTION
Given the definitions above, the statement
105
Promula Application Development System User's Manual
BROWSE fx:10:4,
TITLE("Y=f(x)=x**2"/"-------------------------")
would clear the Main Screen and produce a tabular display of function fx for browsing as shown below.
Y=f(x)=x**2
------------------------(1)
PNT# 1
PNT# 2
PNT#
PNT#
PNT#
PNT#
PNT#
PNT#
PNT#
PNT#
PNT#
PNT#
PNT#
PNT#
PNT#
PNT#
PNT#
PNT#
PNT#
End: Exit
3
4
5
6
7
8
9
10
11
12
13
14
15
16
17
18
19
(2)
1.00
2.00
1.00
4.00
3.00
4.00
5.00
6.00
7.00
8.00
9.00
10.00
11.00
12.00
13.00
14.00
15.00
16.00
17.00
18.00
19.00
9.00
16.00
25.00
36.00
49.00
64.00
81.00
100.00
121.00
144.00
169.00
196.00
225.00
256.00
289.00
324.00
361.00
Fn Shift-Fn PgUp PgDn Home Arrows: Browse
3.7.11 BROWSE menu
Purpose:
Displays a "data" menu including the values of its data fields. This statement is useful for displaying a screen of text and
data.
Syntax:
BROWSE menu(vars)
Remarks:
menu
is the identifier of a data menu. A data menu is a screen template which is designed to help its user to edit and
display data. The fields in a data menu are previously defined in a DEFINE MENU statement.
vars
is a list of variable identifiers that contain the values of the data fields to be displayed. The variables in the list
must be in the same order as the data fields in the menu (from left to right and top to bottom) to which they
correspond.
Data menus contain a number of data fields to be displayed by the user. In the DEFINE MENU statement, each data field
is denoted by a series of contiguous "at signs", @, or "tilde signs", ~, equal in number to the desired number of digits in the
data field. The data fields are ordered from left to right and from top to bottom of the menu template.
106
Promula Application Development System User's Manual
Upon execution, the data menu is displayed in the Main Screen. The values of the variables are displayed in the places
marked by @ or ~ characters. Execution pauses, and the user is allowed to view, but not modify, the values in the menu.
When the user is ready to continue, he/she presses a key or clicks the mouse button.
The use of the BROWSE menu statement is especially helpful if you want to show a data menu in read-only mode.
3.7.12 BROWSE SET
Purpose:
Produces a full or partial listing of the sets in a program for browsing.
Syntax:
BROWSE SET[(sets)]
Remarks:
sets
is a list of set identifiers. If sets is omitted, all the program sets are listed in the order in which they were defined;
otherwise, selected sets are listed in the order specified by sets.
Upon execution, PROMULA clears the Main Screen and lists the identifiers (codes) and descriptors of the specified sets. A
prompt appears in the Prompt Screen describing how to browse the list.
Examples:
Given the folowing definitions
DEFINE SET
month(12)
row(04)
col(10)
END
"12 Months"
"04 Months"
"10 columns"
the statement
BROWSE SET
produces the display below for browsing.
107
Promula Application Development System User's Manual
Ident
MONTH
ROW
COL
Description
12 Months
04 Rows
10 Columns
Press any key to continue
3.7.13 BROWSE set
Purpose:
Shows the selection keys, descriptors, order, and range of the currently active elements of a set.
Syntax:
BROWSE set
Remarks:
set
is the identifier of the set being shown.
Upon execution, the BROWSE set statement clears the Main Screen and lists the elements of set for browsing.
Examples:
DEFINE SET
month(12)
END SET
DEFINE VARIABLE
mn(month) "Month Name"
TYPE=STRING(12)
END VARIABLE
READ mn:4
JAN FEB MAR APR MAY JUN JUL AUG SEP OCT NOV DEC
SELECT ROW(month,mn)
Given the definitions and relations above, the statement BROWSE month, produced the display below.
3.7.14 BROWSE TABLE
Purpose:
Displays a table of several variables on the screen to let you browse their values by page.
108
Promula Application Development System User's Manual
Syntax:
BROWSE TABLE(sets) [,TITLE(title)] [,FORMAT(rw,cw)]
BODY(["text1",] var1[fmt1] [,"text2",] var2[fmt2],...)
Remarks:
sets
is a list of the identifiers of the sets classifying columns and pages of the variables in the table. The first set
will classify the columns of the table; the other sets, if any, will classify the pages of the table. Sets
dimensioning table variables which are missing from the list will classify the rows of the table. The sets list
sets must contain at least one set (or the number 1 for browsing a group of scalar variables) and must be
missing those set identifiers which will classify the rows of the multidimensional table variables.
title
is text you wish to show as a title for the table.
text1
is any text that you wish to use as a subtitle for the values of var1. This text may not contain variables.
var1
is the identifier of the first variable in the table.
fmt1
is the desired format for the values of var1.
text2
is any text that you wish to use as a subtitle for the values of var2. This text may not contain variables.
var2
is the identifier of the second variable in the table.
fmt2
is the desired format for the values of var2.
rw
is the width in characters of row descriptors.
cw
is the width in characters of table columns.
Upon execution, the BROWSE TABLE statement clears the Main Screen, displays the first page of the table, and issues
the following prompt at the bottom of the Prompt Screen:
End: Exit
Fn Shift-Fn PgUp PgDn Home Arrows: Browse
The highlighted portions of the message represent the following keypress options:
Fn
press the Fn function key to browse up the nth dimension of the array, where n varies
from 1 to 10. The F1 key browses up the 1st dimension, the F2 key browses up the 2nd
dimension, and so forth.
Shift-Fn
press simultaneously the Shift and Fn keys to browse down the nth dimension of the
array. The Shift-F1 key browses down the 1st dimension, the Shift-F2 key browses
down the 2nd dimension, etc.
Browsing
keys
The four movement arrows at the right-hand section of the keyboard allow you to move
the cursor to the desired value. The PgUp and PgDn keys are used to move up and
down the pages of the display.
Home
moves the cursor to the "top" of the display, which is the first value on the screen.
End
press the End key to exit editing mode or to exit browsing mode.
Examples:
109
Promula Application Development System User's Manual
The following program demonstrates the BROWSE TABLE statement:
DEFINE SET
row(5)
col(10)
END SET
DEFINE VARIABLE
a(row,col) "A Data Set"
b(row,col) "B data set"
tot(col)
"The Total of A and B"
END VARIABLE
DEFINE PROCEDURE brstab
SELECT WIDTH=70
BROWSE TABLE(col),
TITLE("The Table Title"),
FORMAT(20,10),
BODY(tot:0:1/"The A Values"/,a:0:2,/"The B Values"/,b)
END PROCEDURE brstab
a = 1
b = 2
tot(c) = SUM(r)( a(r,c) + b(r,c) )
Executing procedure brstab produces the display below.
The Table Title
The Total of A and B
COL(1)
15.0
COL(2)
15.0
COL(3)
15.0
COL(4)
15.0
COL(5)
15.0
1.00
1.00
1.00
1.00
1.00
1.00
1.00
1.00
1.00
1.00
1.00
1.00
1.00
1.00
1.00
1.00
1.00
1.00
1.00
1.00
1.00
1.00
1.00
1.00
1.00
2
2
2
2
2
2
2
2
2
2
2
2
2
2
2
2
2
2
2
2
2
2
2
2
2
The A Values
ROW(1)
ROW(2)
ROW(3)
ROW(4)
ROW(5)
The B Values
ROW(1)
ROW(2)
ROW(3)
ROW(4)
ROW(5)
End: Exit
Fn Shift-Fn PgUp PgDn Home Arrows: Browse
Pressing the F2 key, "browses up" the column or second dimension, as shown in the screen below:
110
Promula Application Development System User's Manual
The Table Title
The Total of A and B
COL(6)
15.0
COL(7)
15.0
COL(8)
15.0
COL(9)
15.0
COL(10)
15.0
1.00
1.00
1.00
1.00
1.00
1.00
1.00
1.00
1.00
1.00
1.00
1.00
1.00
1.00
1.00
1.00
1.00
1.00
1.00
1.00
1.00
1.00
1.00
1.00
1.00
2
2
2
2
2
2
2
2
2
2
2
2
2
2
2
2
2
2
2
2
2
2
2
2
2
The A Values
ROW(1)
ROW(2)
ROW(3)
ROW(4)
ROW(5)
The B Values
ROW(1)
ROW(2)
ROW(3)
ROW(4)
ROW(5)
End: Exit
Fn Shift-Fn PgUp PgDn Home Arrows: Browse
Note that this page shows columns six through ten of the table. Note also that the primary descriptors of set row are used as
the row descriptors of the table. This is because set row was deliberately omitted from the sets specification in the
BROWSE TABLE statement for this example.
See also the DEFINE TABLE, EDIT TABLE, and WRITE TABLE statements.
3.7.15 BROWSE TEXT
Purpose:
Displays text for browsing in the Action Window (Basic Windows) or the Main Screen (Advanced Windows).
Syntax:
BROWSE TEXT
text
...
END
Remarks:
text
is any text that you enter.
The keyword END must be entered starting in column 1 and must be capitalized.
Upon execution, the text will be shown by page in the Action Window or the current Main Screen of the display. A prompt
at the bottom of the Prompt Screen will let you browse the text. The text will be clipped to the width of the window opened
to the Main Screen or the Action Window. No more than 255 lines (approximately 40 pages) of text may be stored in a
single BROWSE TEXT statement.
111
Promula Application Development System User's Manual
For more details, see the discussion of the PROMULA noun Window.
3.7.16 BROWSE TOPIC
Purpose:
Browse a specific topic from a dialog file.
Syntax:
BROWSE TOPIC filespec n
Remarks:
filespec
is a quoted string or string variable containing the name of the physical disk file where the dialog file that you
desire to browse is stored. This name is formatted according to the file naming conventions for your operating
system.
n
is the dialog topic sequence number, as defined by its place in the dialog file, of the specific topic you wish to
browse.
Upon execution, the BROWSE TOPIC statement displays the specified topic for browsing.
Examples:
The use of this statement is demonstrated in the context of the example given in the DEFINE DIALOG statement.
3.7.17 BROWSE VARIABLE
Purpose:
Produces a full or partial listing of the variables in a given program for browsing.
Syntax:
BROWSE VARIABLE [(vars)]
Remarks:
vars
is a list of variable identifiers. If vars is omitted, the variables are listed in the order in which they were defined;
otherwise, the sets are listed in the order specified by vars.
The BROWSE VARIABLE statement differs from the AUDIT VARIABLE statement in that it lets you interactively
browse a "long" list of variables while the audit does not.
Examples:
Given the definitions below:
DEFINE VARIABLE
a "The A Value"
b "The B Value"
c "The C Value"
END VARIABLE
the statement BROWSE VARIABLE produces the following display.
112
Promula Application Development System User's Manual
Ident
A
B
C
Description
The A Value
The B Value
The C Value
Press any key to continue
3.7.18 BROWSE variable
Purpose:
Displays a multidimensional variable on the screen and lets you browse its values by page.
Syntax:
BROWSE var[fmt][[ORDER](sets)][TITLE(title)][DISPLAY(dvar)][option][TRANSPOSE]
Remarks:
var
is the identifier of the variable you wish to browse.
fmt
is a format specification indicating the width of row descriptors, the width of the columns displayed, and the
number of decimals in real values, as follows:
\p:w:d
where
p
is an integer specifying the width in characters for row descriptors. The default width is the width
specifications of the row descriptors related to the set subscripting the rows of the display.
w
is an integer specifying the width in characters for each column of values. The default is the width
specification in the definition of var. A negative width parameter left justifies the values of var in each
column.
113
Promula Application Development System User's Manual
d
is an integer specifying the number of decimals to display for real numeric values. The default is the
decimal specification (if applicable) in the definition of var. If d is an "E", the values of var will be
displayed in exponential notation (base-10), and will show seven digits and six decimal places.
If omitted, w and d are the parameters specified in the TYPE specification for var, and p is the width
specifications of the row descriptors related to the set sub-scripting the rows of the display.
sets
is a list of the sets classifying the values of var. The order in which the sets are listed specifies the structure of
the display: the first set classifies the rows of the display, the second set classifies the columns, and the third to
last set classify the pages of the display. The keyword ORDER is optional. If it is omitted, sets specification
must follow immediately after the optional format specification.
title
is any text you wish to show as a title for the table. The title may include variables, and other format characters
according to the rules defined in the WRITE variables statement.
dvar
is a variable used to control the display of variable var. dvar should be subscripted by the set that defines the
rows of the display. PROMULA will display values of var only for those rows corresponding to elements of
dvar that contain nonzero values. See Example 4 below.
option
is one of the following mutually exclusive BROWSE variable options:
TOTAL[(sets)]
displays totals over the selected sets for browsing along with values of var. If sets is
omitted, all the marginal and grand totals for var will be displayed.
PERCENT(set)
displays the percent distribution of the total over set of var.
CHANGE(n)
The CHANGE option allows the user to show a table of percent change in time series data
for a previously defined time series variable. A time series variable is one which is
subscripted by a time series set.
The percent change for time t is computed from values for time t and t-1, where t and t1 are two consecutive selections of the time set. The selections depend on the current local
setting of the set. They may or may not be consecutive time points. There may be more than
one time unit between them.
Following the keyword, CHANGE, a real number within parentheses is required. It
represents the number of time units to be used in computing percent change. Internally it is
divided by the difference in time values for selections t and t-1.
Suppose values for 1970 and 1975 are used in computing the percent change. That is, the
user has selected these years for computation and output generation. Also, he wants to
compute an annual percent change, so one time unit (a year) is designated on the CHANGE
option (CHANGE(1)). The change for 1975 is computed as the difference in values for
1970 and 1975, divided by the 1970 value, and multiplied by 1/5 (for annual change). A
factor of 100 gives the percent change from 1970 to 1975 in one year increments.
In the tabular display the words, Percent Change in, are placed in front of the original
descriptor (from the variable definition). If the TITLE option is used with the CHANGE
option, no words are prefixed.
GROWTH(n)
The GROWTH option allows the user to show a table of growth rates in time series data for
a previously defined time series variable. n is an integer constant that specifies the number
of time units with which each change is associated. A time series dataset or array is one
which is subscripted by a time series set. The growth rate for time t is computed from
values for time t and t-1.
114
Promula Application Development System User's Manual
Following the keyword, GROWTH, a real number within parentheses is required and
stands for the number of time units between each pair of values for which growth rate will
be computed. Internally, it is divided by the difference in time values for selected t and t1.
Suppose the user has selected 1970 and 1975 and wishes to show annual growth rates
(GROWTH(1)). The growth rate for 1975 is computed as a quotient — value for 1975
divided by value for 1970 — raised to the power 1/5 (1.0/(1975-1970)). One is subtracted
from this quantity to get a growth rate, and a factor of 100 gives the final result as a percent
rate from 1970 to 1975 in one year increments.
In the tabular display, the words, Growth Rate in, are placed in front of the original title
unless a TITLE option is specified.
MOVING(n)
The MOVING option allows the user to show a table of moving averages in time series
data for a previously defined time series array. Following the keyword MOVING, an integer,
n, within parentheses, gives the number of single unit time increments over which the
moving average is computed. The moving av-erage for time t is computed from values for
time t,...,t(n-1), where the t's are consecutive time points. They are not consecutive
time set selections, based on a local setting of the time set. Rather, they are time points as
defined by the time values related to the set subscripting var.
In the tabular display the words, Moving Average for, are placed in front of the original
title unless the TITLE option is specified.
If the keyword TRANSPOSE is included with the statement and the structure for the display is not explicitly specified, the
display will be transposed. This means that the first and last dimensions of the default display will be swapped.
Upon execution, the BROWSE variable statement clears the screen, displays the first page of the array and issues the
following message at the bottom of the display:
End: Exit
Fn Shift-Fn PgUp PgDn Home Arrows: Browse
The highlighted portions of the message represent the following options:
Fn
press the Fn function key to browse up the nth dimension of the array, where n varies from 1 to 10.
The F1 key browses up the 1st dimension, the F2 key browses up the 2nd dimension, and so forth.
Shift-Fn
simultaneously press the Shift and Fn keys to browse down the nth dimension of the array. The
Shift-F1 key browses down the 1st dimension, the Shift-F2 key browses down the 2nd dimension,
etc.
Browsing keys
The four movement arrows at the right-hand section of the keyboard allow you to move the cursor
to the desired value. The PgUp and PgDn keys are used to move up and down the pages of the
display.
Home
moves the cursor to the "top" of the display, which is the first value on the screen.
End
press the End key to exit editing mode or to exit browsing mode.
Examples:
1.
Given the following definitions:
115
Promula Application Development System User's Manual
DEFINE SET
row(3)
col(2)
page(2)
END SET
DEFINE VARIABLE
a(row,col,page) "A 3-Dimensional Array"
END VARIABLE
the statement BROWSE a clears the screen and produces the following display:
A 3-Dimensional Array
PAGE(1)
COL(1)
0
0
0
ROW(1)
ROW(2)
ROW(3)
End: Exit
COL(2)
0
0
0
Fn Shift-Fn PgUp PgDn Home Arrows: Browse
Pressing the F3 key, "browses up" the page or third dimension, as shown in the screen below:
116
Promula Application Development System User's Manual
A 3-Dimensional Array
PAGE(1)
COL(1) COL(2)
0
0
0
0
0
0
ROW(1)
ROW(2)
ROW(3)
End: Exit Fn Shift-Fn PgUp PgDn Home Arrows: Browse
Pressing the Shift and F3 keys simultaneously, "browses down" the third dimension, as shown in the screen below:
A 3-Dimensional Array
PAGE(1)
COL(1) COL(2)
0
0
0
0
0
0
ROW(1)
ROW(2)
ROW(3)
End: Exit Fn Shift-Fn PgUp PgDn Home Arrows: Browse
NOTE:
2.
\
Pressing the F1 and F2 keys do not have any effect in this example, since all elements of both the "row"
and "column" dimensions of the array fit within the screen.
The following dialog illustrates the BROWSE variable options.
DEFINE SET
117
Promula Application Development System User's Manual
yr(5), "The Years"
END SET
DEFINE VARIABLE
yval(yr)
"The Year Values"
value(yr) "A Time Series" TYPE=REAL(30,2)
END VARIABLE
DEFINE RELATION
TIME(yr,yval)
END RELATION
yval(y) = 69 + y
value(y) = 10 * y
BROWSE value TOTAL
A Time Series
Total
70
71
72
73
74
150.00
10.00
20.00
30.00
40.00
50.00
BROWSE value PERCENT(yr)
Percent Distribution of A Time Series
Total
70
71
72
73
74
100.00
6.67
13.33
20.00
26.67
33.33
BROWSE value GROWTH(1)
Growth Rate in A Time Series
71
72
73
74
100.00
50.00
33.33
25.00
BROWSE value CHANGE(1)
Percent Change in A Time Series
71
72
73
74
100.00
50.00
33.33
25.00
BROWSE value MOVING(2)
Moving Average for A Time Series
71
72
73
74
15.00
25.00
35.00
45.00
118
Promula Application Development System User's Manual
3.
The example below illustrates how to browse a variable directly from an array disk file.
Suppose you have created an array database and you wish to access one of its variables. The name of the database is
array.dba and the name of the variable is sales. The example below shows how to browse the variable sales
directly. In fact, the file:variable notation may be used to access any variable in an array file. See Chapter 4 for
more information on working with PROMULA's array files.
DEFINE FILE
f1
END
OPEN f1 "array.dba"
Once the array file is opened, its variables may be accessed directly using the file:variable notation. For example, the
statement BROWSE f1:sales displays the disk variable sales on file f1 as shown below.
Sales by Year ($1000)
(1)
10,000
12,000
13,000
(1)
(2)
(3)
End: Exit
Fn Shift-Fn PgUp PgDn Home Arrows: Browse
The syntax for such direct reference of disk variables is: file:var, where file is the array file containing the
variable var that you wish to access. The notation file:set may be used to refer to sets on an array file.
Variables on a disk file may also be browsed directly by using the COPY file IMAGE statement.
4.
The example below illustrates the DISPLAY option of the BROWSE variable statement. There are no values shown
for rows 1 and 6 of the display because variable dvar contains a zero in these rows.
DEFINE SET
tst(2) "Tests"
grd(10) "Grade Ranges"
END SET
DEFINE VARIABLE
cnt(grd,tst) TYPE=REAL(8,1)
grdn(grd)
TYPE=STRING(20)
dvar(grd)
TYPE=REAL(8,0)
END
"Frequency by class and grade range"
"Grade Range Names"
"Display Flag" VALUE=1
DO grd
119
Promula Application Development System User's Manual
READ (grdn:13)
END grd
CLASS A
100-75
74-50
49-25
24-0
CLASS B
100-75
74-50
49-25
24-0
READ cnt(tst,grd)
0 12 32 21 6 0 16 34 18 7
0 11 33 15 12 0 18 30 20 7
dvar(1)=0
dvar(6)=0
SELECT KEY(grd,grdn)
The statement BROWSE cnt:20:1 DISPLAY(dvar) produces the display below.
Frequency by class and grade range
TST(1)
TST(2)
100-75
74-50
49-25
24-0
12.0
32.0
21.0
6.0
11.0
33.0
15.0
12.0
100-75
74-50
49-25
24-0
16.0
34.0
18.0
7.0
18.0
30.0
20.0
7.0
CLASS A
CLASS B
End: Exit
Fn Shift-Fn PgUp PgDn Home Arrows: Browse
3.7.19 CLEAR file
Purpose:
Saves the contents of an open file on disk and then closes the file.
Syntax:
CLEAR file
Remarks:
120
Promula Application Development System User's Manual
is the logical identifier of the open file that you wish to save and close.
file
A logical file identifier is created by the DEFINE FILE statement. A file is physically opened with the OPEN file
statement.
See the description of the PROMULA noun File for more information about PROMULA's file system.
3.7.20 CLEAR variable
Purpose:
Clears scratch variables from memory.
Syntax 1:
CLEAR *
Clears all scratch variables from memory.
Syntax 2:
CLEAR (vars)
Clears only specified scratch variables from memory.
Remarks:
vars
is the list of those variable identifiers that are to be cleared.
The values of a scratch variable are not stored permanently in memory; they can be cleared or scratched from memory
when you need to make room for the values of other variables. This statement gives you the power to do what is sometimes
called "dynamic memory allocation." This is discussed in more detail in Chapter 4.
Examples:
The code below defines variables of four types:
DEFINE VARIABLE
fixd, "A Fixed Variable"
END VARIABLE
DEFINE VARIABLE SCRATCH
scr, "A Scratch Variable"
END VARIABLE
DEFINE SET
row(3)
END SET
DEFINE FILE
filea TYPE=ARRAY
END FILE
OPEN filea "filea.dba",STATUS=NEW
DEFINE VARIABLE filea
dsk(row), "A Disk Variable on 'filea'"
END VARIABLE
121
Promula Application Development System User's Manual
DEFINE VARIABLE
rp
dd, "A Dynamic Disk Variable", DISK(filea,dsk(rp))
END VARIABLE
The variable fixd occupies a fixed space in memory and cannot be cleared by the CLEAR statement.
The variable scr is a scratch variable and can be cleared from memory by the CLEAR statement.
The variable dsk is a disk variable, its three values are permanently stored on disk, in a file named filea.dba.
The variable dd is a dynamic scalar subset of the disk variable dsk; its single value is related to one of the three values of
the variable dsk. Variable dd may be cleared from memory by the CLEAR statement.
The dialog below shows that the four variables initially have the value zero:
WRITE fixd
A Fixed Variable 0
WRITE scr
A Scratch Variable 0
WRITE dsk
A Disk Variable on 'filea'
ROW(1)
0
ROW(2)
0
ROW(3)
0
WRITE dd
A Dynamic Disk Variable 0
The following statements:
fixd = 10
scr = 20
READ dsk
1 2 3
rp = 2
READ DISK dd
put values into the variables:
WRITE fixd
A Fixed Variable 10
WRITE scr
A Scratch Variable 20
WRITE dsk
A Disk Variable on 'filea'
ROW(1)
1
ROW(2)
2
WRITE dd
122
ROW(3)
3
Promula Application Development System User's Manual
A Dynamic Disk Variable 2
The statement
CLEAR*
clears the values of the scratch variable, scr, from memory; the fixed variable fixd, and the disk variable, dsk, are not
effected as can be verified in the dialog below:
WRITE fixd
A Fixed Variable 10
WRITE scr
A Scratch Variable 0
WRITE dsk
A Disk Variable on 'filea'
ROW(1)
1
ROW(2)
2
ROW(3)
3
The treatment of dynamic variables, such as dd, is a little more difficult to illustrate. dd is cleared from memory by the
CLEAR statement, but as soon as it is referenced in an expression, such as a WRITE statement, or used in the right-handside of an equation, PROMULA automatically reads it in from disk. The dialog below illustrates this behavior.
STATEMENTS
MEANING
dd = 100
WRITE dd
A Dynamic Disk Variable 100
Variable dd is given a value via an equation.
rp = 2
READ DISK dd
WRITE dd
A Dynamic Disk Variable 2
Variable dd is given a value via an explicit
READ DISK statement.
rp = 3
WRITE dd
A Dynamic Disk Variable 2
CLEAR dd
WRITE dd
A Dynamic Disk Variable 3
Variable dd is given a value via an implicit read disk
operation that occurs after it is CLEARed from
memory then used in a WRITE statement.
rp = 1
CLEAR dd
scr = dd
WRITE scr
A Scratch Variable 1
WRITE dd
A Dynamic Disk Variable 1
Variable dd is given a value via an implicit read disk
operation that occurs after it is CLEARed from
memory then used on the right-hand-side of an
equation.
3.7.21 CLEAR WINDOW
Purpose:
123
Promula Application Development System User's Manual
Tells PROMULA to stop using a user-defined window as the display area for a functional screen.
Syntax:
CLEAR type
Remarks:
type
is the type of functional screen to be returned to its default behavior, and can be one of the following:
MAIN
PROMPT
COMMENT
ERROR
HELP
the Main input/output Screen
the Prompt Screen
the Comment Screen
the Error Screen
the Help Screen
This statement ends the association between a window and a functional screen that was started by a previous OPEN
WINDOW statement.
The effect of this statement depends on the popup type of the window that was opened to the functional screen being
cleared.
Clearing a screen that was opened to a popup window (i.e., a window that was defined with the POPUP option),
immediately removes the window from the display. Furthermore, any text that was covered by the window will be
redrawn.
Clearing a screen area that was opened to a static window only ends the association between the window and the
screen. The window and its contents remain on the screen.
To permanently erase a static window from the display after closing it, you must clear the display with the statements
CLEAR MAIN
WRITE CLEAR(0)
Alternatively, you may "erase" a window by opening a static window on top of it (i.e., by covering it up).
See also DEFINE WINDOW and OPEN WINDOW statements, and the discussion of Advanced Windows.
3.7.22 [COMPUTE] Equation
Purpose:
Makes the value (or values) of a variable equal to the value (or values) of a numeric or character expression.
Syntax:
[COMPUTE] var[(subs)] = expression[(subs)]
Remarks:
var
is a variable identifier.
subs
is a list of set identifiers or dummy subscripts. When used, such subscripts denote multiple equations that
apply to the cells of multidimensional arrays.
expression
is a numeric or character expression.
Examples:
124
Promula Application Development System User's Manual
The verb COMPUTE is required for use with the expressions involving the set colon operators. For example, given the
definition below
DEFINE SET
rec(100)
END SET
the statements
COMPUTE rec:R = 50
SELECT rec*
will redefine the default size of set rec changing it from 100 to 50.
The length of the rec's selection vector may be set to 10 elements by the statement
COMPUTE rec:N = 10
The set may be restored to its original size by the statements
COMPUTE rec:R = rec:M
SELECT rec*
There are many examples of equations in the discussion of the PROMULA nouns Equation and Expression.
3.7.23 COPY
Purpose:
1.
Copies the data and structure of an array file into another array file, or copies the definition, and optionally the data, of
an array file to a text file or to an output device, such as the screen or the printer.
2.
Copies the definition of an array file into memory so its variables can be directly accessed by PROMULA without
having to include the file structure definition or any disk variable definitions in your program. See the discussion of
data management in Chapter 4.
Syntax 1:
COPY file1 [INTO file2] [varspec] [DATA] [RAW]
Remarks:
Syntax 1 is typically used to make full or partial copies of an array database or to generate a listing of its structure and/or
data.
file1
is the identifier of the source (input) file. This must be an existing array file, i.e., has been opened with
STATUS=OLD
file2
is the identifier of the target (output) file. This must be a new array or text file, i.e., has been opened with
STATUS=NEW. If the INTO file2 option is omitted, the results of the copy will be written to the current
output device(s), screen and/or printer.
varspec
a list of variables in file1 to be copied and may take one of the following forms.
125
Promula Application Development System User's Manual
INCLUDE(vars)
specifies a partial copy to file2 that includes only selected variables from file1.
Where vars is the list of variables in file1.
EXCLUDE(vars) specifies a partial copy to file2 that excludes selected variables from file1. Where
vars is the list of variables in file1.
If varspec is omitted, all the variables in the dataset are included in the copy.
The varspec option may only be used with array files.
indicates that both the structure and values of selected variables in file1 are to be copied. Here, structure
means the set, variable, and relation definitions in file1.
DATA
When making a text copy of an array file using the DATA option, local set selections are obeyed and the
relevant SELECT set statements are written in the output. See Example 5.
indicates that you wish to make a raw copy of file1 in file2. This copy works like your operating system’s
generic file copy command. This is the quickest mode of the COPY statements and may not be used with any
other options.
RAW
Syntax 2:
COPY file IMAGE
Remarks:
file
is the identifier of the array file containing the data you wish to access.
Syntax 2 reads the set, variable, and relation definitions of an array file into memory giving PROMULA direct access to
the information in the file.
This is an alternative to using local variables to virtually access disk variables in an array file.
Although this feature requires less programming, it does not give you full control over how large array variables are
"paged" into memory for processing. The variables remain on disk and are accessed directly, (i.e., the values of the
variables are accessed on disk and are not read into memory.)
In summary, the COPY statement allows four types of copy operations:
1.
Copy from one binary data file to another. This is an efficient way to make copies of binary (array and random) files
for direct use by PROMULA. If a full copy of structure and data is desired, use the RAW option for maximum copying
speed.
2.
Copy from an array to a text file. This is a way to convert binary data files into text data files that may be used as text
data by other PROMULA programs or by other software.
3.
Copy an array file to an output device — the console or printer.
4.
Copy an array file definition into memory for direct access using an IMAGE copy.
Examples:
The following examples of the COPY statement make copies of a database called original.dba. The definition of this
database is shown below.
126
Promula Application Development System User's Manual
DEFINE FILE
orignl TYPE=ARRAY
END FILE
"Original Database"
OPEN orignl "original.dba" STATUS=NEW
DEFINE SET orignl
rec(4)
col(6)
END SET orignl
DEFINE VARIABLE orignl
a(rec,col) TYPE=REAL(10,1) "The A Matrix"
b(rec,col) TYPE=REAL(10,1) "The B Matrix"
recn(rec) TYPE=STRING(10)
coln(col) TYPE=STRING(10)
END VARIABLE orignl
DEFINE RELATION orignl
ROW(rec,recn)
COLUMN(col,coln)
END RELATION orignl
recn(i)=
coln(i)=
a(i,j) =
b(i,j) =
"ROW # " + i
"COL # " + i
i+10*j
i+10*j
Example 1: Copy to the Console
Given the definition of file original.dba above, the statement
COPY orignl
will display the full definition of file original.dba on the console. This output shows the names of the sets, variables and
relations stored in the original database.
DEFINE FILE
ORIGNL, TYPE=ARRAY
END
OPEN ORIGNL"ORIGNL.dba", STATUS=NEW
DEFINE SET ORIGNL
REC(4)
COL(6)
END
DEFINE VARIABLE ORIGNL
A(REC,COL), TYPE=REAL(10,1), "The A Matrix"
B(REC,COL), TYPE=REAL(10,1), "The B Matrix"
RECN(REC), TYPE=STRING(10)
COLN(COL), TYPE=STRING(10)
END
DEFINE RELATION ORIGNL
ROW(REC,RECN)
COLUMN(COL,COLN)
END
The statement
127
Promula Application Development System User's Manual
COPY orignl EXCLUDE (a,b) DATA
will display a partial definition of file original.dba. The EXCLUDE option tells PROMULA to exclude the variables a
and b from the report, and the DATA option causes the values of the remaining variables to be displayed along with their
definitions.
DEFINE FILE
ORIGNL, TYPE=ARRAY
END
OPEN ORIGNL"ORIGNL.dba", STATUS=NEW
DEFINE SET ORIGNL
COL(6)
REC(4)
END
DEFINE VARIABLE ORIGNL
COLN(COL), TYPE=STRING(10)
RECN(REC), TYPE=STRING(10)
END
DEFINE RELATION ORIGNL
COLUMN(COL,COLN)
ROW(REC,RECN)
END
READ COLN:10
COL # 1
COL # 2
COL # 3
COL # 4
READ RECN:10
ROW # 1
ROW # 2
ROW # 3
ROW # 4
COL # 5
COL # 6
Example 2: Full Copy — array file to array file
The next example illustrates how to make a full copy of the database in a separate disk file. This option is most useful for
making working or backup copies of your databases. The copy will behave exactly as the original.
The DATA option is required to have the values in the original file copied with the definitions.
After copying orignl into fulcpy, the COPY statement is used to display the contents of fulcpy on the console.
DEFINE FILE
fulcpy TYPE=ARRAY "Full Copy of Original Database"
END FILE
OPEN orignl "original.dba" STATUS=OLD
OPEN fulcpy "fullcopy.dba" STATUS=NEW
COPY orignl INTO fulcpy DATA
After copying orignl into fulcpy, the COPY statement is used to display the contents of fulcpy on the console.
COPY fulcpy DATA
DEFINE FILE
FULCPY, TYPE=ARRAY
END
OPEN FULCPY"FULCPY.dba", STATUS=NEW
DEFINE SET FULCPY
REC(4)
COL(6)
END
DEFINE VARIABLE FULCPY
A(REC,COL), TYPE=REAL(10,1), "The A Matrix"
128
Promula Application Development System User's Manual
B(REC,COL), TYPE=REAL(10,1), "The B Matrix"
RECN(REC), TYPE=STRING(10)
COLN(COL), TYPE=STRING(10)
END
DEFINE RELATION FULCPY
ROW(REC,RECN)
COLUMN(COL,COLN)
END
READ A:12:E
1.100000E1 2.100000E1 3.100000E1 4.100000E1
1.200000E1 2.200000E1 3.200000E1 4.200000E1
1.300000E1 2.300000E1 3.300000E1 4.300000E1
1.400000E1 2.400000E1 3.400000E1 4.400000E1
READ B:12:E
1.100000E1 2.100000E1 3.100000E1 4.100000E1
1.200000E1 2.200000E1 3.200000E1 4.200000E1
1.300000E1 2.300000E1 3.300000E1 4.300000E1
1.400000E1 2.400000E1 3.400000E1 4.400000E1
READ RECN:10
ROW # 1
ROW # 2
ROW # 3
ROW # 4
READ COLN:10
COL # 1
COL # 2
COL # 3
COL # 4
COL # 5
5.100000E1
5.200000E1
5.300000E1
5.400000E1
6.100000E1
6.200000E1
6.300000E1
6.400000E1
5.100000E1
5.200000E1
5.300000E1
5.400000E1
6.100000E1
6.200000E1
6.300000E1
6.400000E1
COL # 6
The RAW copy is also useful for making a full working or backup copies of your databases and it is the fastest copy mode.
The copy will behave exactly as the original.
Example 3: COPY EXCLUDE, COPY INCLUDE
The next example illustrates how to make a partial copy of your database in a separate disk file.
The first copy uses the EXCLUDE option to exclude variable a from the copy. The second copy uses the INCLUDE
option to include only variables coln and recn in the copy. Notice that without the DATA option, the values in the
original file are not copied into the new file.
DEFINE FILE
prtcpy TYPE=ARRAY "Partial Copy of Original Database"
END FILE
OPEN prtcpy "prtcpy.dba" STATUS=NEW
COPY orignl INTO prtcpy EXCLUDE(a)
After the copy, the statement COPY prtcpy DATA may be used to verify the results as displayed below.
DEFINE FILE
PRTCPY, TYPE=ARRAY
END
OPEN PRTCPY"PRTCPY.dba", STATUS=NEW
DEFINE SET PRTCPY
REC(4)
COL(6)
END
DEFINE VARIABLE PRTCPY
B(REC,COL), TYPE=REAL(10,1), "The B Matrix"
RECN(REC), TYPE=STRING(10)
COLN(COL), TYPE=STRING(10)
END
DEFINE RELATION PRTCPY
ROW(REC,RECN)
COLUMN(COL,COLN)
END
129
Promula Application Development System User's Manual
READ B:12:E
0.000000E0
0.000000E0
0.000000E0
0.000000E0
READ RECN:10
0.000000E0
0.000000E0
0.000000E0
0.000000E0
0.000000E0
0.000000E0
0.000000E0
0.000000E0
0.000000E0
0.000000E0
0.000000E0
0.000000E0
0.000000E0
0.000000E0
0.000000E0
0.000000E0
0.000000E0
0.000000E0
0.000000E0
0.000000E0
READ COLN:10
CLEAR prtcpy
OPEN prtcpy "prtcpy.dba" STATUS=NEW
COPY orignl INTO prtcpy INCLUDE(coln,recn) DATA
COPY prtcpy DATA
DEFINE FILE
PRTCPY, TYPE=ARRAY
END
OPEN PRTCPY"PRTCPY.dba", STATUS=NEW
DEFINE VARIABLE PRTCPY
RECN(REC), TYPE=STRING(10)
COLN(COL), TYPE=STRING(10)
END
READ RECN:10
ROW # 1
ROW # 2
ROW # 3
ROW # 4
READ COLN:10
COL # 1
COL # 2
COL # 3
COL # 4
COL # 5
COL # 6
Example 4: Full Copy — array file to text file
The following example shows how to make a copy of a database definition in a text file on disk.
DEFINE FILE
txtcpy TYPE=TEXT "TEXT File For Copy"
END FILE
OPEN orignl "original.dba" STATUS=OLD
OPEN txtcpy "textcopy.prm" STATUS=NEW
COPY orignl INTO txtcpy DATA
CLEAR txtcpy
CLEAR orignl
The file textcopy.prm is shown below. This text file could be edited or used directly to create a copy of the original
database.
DEFINE FILE
ORIGNL, TYPE=ARRAY
END
OPEN ORIGNL"ORIGNL.dba", STATUS=NEW
DEFINE SET ORIGNL
REC(4)
COL(6)
END
DEFINE VARIABLE ORIGNL
A(REC,COL), TYPE=REAL(10,1), "The A Matrix"
B(REC,COL), TYPE=REAL(10,1), "The B Matrix"
RECN(REC), TYPE=STRING(10)
130
Promula Application Development System User's Manual
COLN(COL), TYPE=STRING(10)
END
DEFINE RELATION ORIGNL
ROW(REC,RECN)
COLUMN(COL,COLN)
END
READ A:12:E
1.100000E1 2.100000E1 3.100000E1
1.200000E1 2.200000E1 3.200000E1
1.300000E1 2.300000E1 3.300000E1
1.400000E1 2.400000E1 3.400000E1
READ B:12:E
1.100000E1 2.100000E1 3.100000E1
1.200000E1 2.200000E1 3.200000E1
1.300000E1 2.300000E1 3.300000E1
1.400000E1 2.400000E1 3.400000E1
READ RECN:10
ROW # 1
ROW # 2
ROW # 3
ROW # 4
READ COLN:10
COL # 1
COL # 2
COL # 3
COL # 4
4.100000E1
4.200000E1
4.300000E1
4.400000E1
5.100000E1
5.200000E1
5.300000E1
5.400000E1
6.100000E1
6.200000E1
6.300000E1
6.400000E1
4.100000E1
4.200000E1
4.300000E1
4.400000E1
5.100000E1
5.200000E1
5.300000E1
5.400000E1
6.100000E1
6.200000E1
6.300000E1
6.400000E1
COL # 5
COL # 6
Example 5: Partial Copy — array file to text file using local set selections
The following example shows how to make a partial copy of a database definition in a text file on disk. In this case, local
set selections will restrict which data elements are be output by the DATA option. In order to use this feature, the sets on
the database and the local sets must have the same identifiers.
DEFINE FILE
txtcpy TYPE=TEXT "TEXT File For Copy"
END FILE
OPEN orignl "original.dba" STATUS=OLD
OPEN txtcpy "textcopy.prm" STATUS=NEW
DEFINE SET
rec(4)
col(6)
END SET
SELECT rec(1-2) col*
COPY orignl INTO txtcpy DATA
CLEAR txtcpy
CLEAR orignl
The file textcopy.prm is shown below. This text file could be edited or used directly to create a partial copy of the
original database.
DEFINE FILE
ORIGNL, TYPE=ARRAY
END
OPEN ORIGNL "ORIGNL.dba", STATUS=NEW
DEFINE SET ORIGNL
REC(4)
COL(6)
END
DEFINE VARIABLE ORIGNL
A(REC,COL)TYPE=REAL(10,1), "The A Matrix"
131
Promula Application Development System User's Manual
B(REC,COL)TYPE=REAL(10,1), "The B Matrix"
RECN(REC)TYPE=STRING(10)
COLN(COL)TYPE=STRING(10)
END
DEFINE RELATION ORIGNL
ROW(REC,RECN)
COLUMN(COL,COLN)
END
SELECT REC(1,2)
Notice that PROMULA inserts set selection statements
SELECT COL(3,5,6)
here, and also restricts the range of data values for the
READs.
READ A:12:E
3.100000E1
3.200000E1
READ B:12:E
3.100000E1
3.200000E1
READ RECN:10
ROW # 1
ROW
READ COLN:10
COL # 3
COL
5.100000E1
5.200000E1
6.100000E1
6.200000E1
5.100000E1
5.200000E1
6.100000E1
6.200000E1
# 2
# 5
COL # 6
Example 6: IMAGE Copy
The dialog below illustrates the use of the COPY IMAGE statement. The file arr1org.dba is an array file on disk.
DEFINE FILE
demo TYPE=ARRAY
END FILE
OPEN demo "arr1org.dba" STATUS=OLD
COPY demo
DEFINE FILE
DEMO, TYPE=ARRAY
END
OPEN DEMO"DEMO.dba", STATUS=NEW
DEFINE SET DEMO
YRS(4), "yrs"
SIC(4), "SIC"
END
DEFINE VARIABLE DEMO
EMP(SIC,YRS), TYPE=REAL(8,0), "Employment by Industry"
SICST(SIC), TYPE=STRING(30), "Names for Industrial Categories"
YEAR(YRS), TYPE=STRING(5), "Years"
END
DEFINE RELATION DEMO
KEY(YRS,YEAR)
KEY(SIC,SICST)
END
* Notice no sets or variables are available before the COPY IMAGE
AUDIT SET
AUDIT VARIABLE
* The COPY demo IMAGE statement will read in the set, variable and
* relation definitions in the array file for virtual access
132
Promula Application Development System User's Manual
COPY demo IMAGE
* Notice all the sets and variables in arr1org.dba are now
* available for use after the COPY IMAGE
AUDIT SET
Ident Description
YRS
yrs
SIC
SIC
AUDIT VARIABLE
Ident Description
YEAR
Years
SICST Names for Industrial Categories
EMP
Employment by Industry
WRITE emp
Employment by Industry
TRANSPORTATION
AGRICULTURE
INFORMATION
BANKING
1990
1
2
3
4
1991
2
4
6
8
1992
3
6
9
12
1993
4
8
12
16
3.7.24 DEFINE DIALOG
Purpose:
Defines a dialog file for later use as on-line help or menu driven documentation.
Syntax:
DEFINE DIALOG "filespec"
intro
...
END
TOPIC "title1"
text1
...
END
TOPIC "title2"
text2
...
END
...
END [DIALOG]
Remarks:
filespec
is the name of the physical disk file that will store the dialog file. This name is formatted according to the file
naming conventions for your operating system.
intro
is the text introducing the dialog menu.
title1
is the title for the first topic (up to 25 characters).
text1
is the text of the first topic.
133
Promula Application Development System User's Manual
title2
is the title for the second topic.
text2
is the text of the second topic.
The keyword END must be entered starting in column 1 and must be capitalized.
You may specify as many topics as you wish provided the resultant dialog file menu fits in the Help Screen that will be
active when the dialog file is browsed.
Dialog files are PROMULA programs which consist of text organized into one or more topics. Each topic consists of:
1.
2.
A short title (up to 25 characters)
The topic text
The BROWSE DIALOG statement allows you to browse a dialog file. Upon execution of the BROWSE DIALOG
statement, the topic titles form a menu from which you may browse the topic texts in a menu-driven, conversational format
— hence its name.
The BROWSE TOPIC statement displays a specific topic for browsing.
The PROMULA Tutorial is a collection of dialog files which you may browse by selecting option 3 off the Main Menu.
Examples:
1.
The following program illustrates the definition of a dialog file. This file has three topics, entitled:
Introduction
Lesson 1
Lesson 2
All topics have text associated with them.
The executable file is stored on a disk file named b:dialog.tut.
DEFINE DIALOG "b:dialog.tut"
PROMULA Primer
_______________________________________________________________________________
The primer is a series of topics. Each topic contains text that you can
browse.
END
TOPIC "Introduction"
The primer is a series of lessons. The lessons are designed to show you
how to write PROMULA programs. Though arranged in order of increasing
complexity, the lessons may be run in any order.
Sometimes the information displayed does not fit in the windows. Use the
movement keys at the right end of your keyboard to browse long messages. The
up and down arrows let you scroll one line at a time. The PgDn key displays
the next page. The PgUp key displays the previous page. The Home key brings
you back to the first page of the message.
END
TOPIC "Lesson 1"
In this lesson, we discuss the DEFINE PROGRAM statement.
In case you don't know, a "program" is a sequence of instructions that tell
134
Promula Application Development System User's Manual
PROMULA what to do. A PROMULA instruction is called a "statement" or a
"command."
END
TOPIC "Lesson 2"
In this lesson we discuss the DEFINE VARIABLE statement, which is
used to define the variables in your program.
END
END DIALOG
3.7.24.1 Executing the BROWSE DIALOG Statement
The statement BROWSE DIALOG "b:dialog.tut" produces the following display:
PROMULA Primer
_______________________________________________________________________________
The primer is a series of topics. Each topic contains text that you can
browse.
Introduction
Lesson 1
Lesson 2
End: Exit
Arrows Home: Select
Enter: Browse
In this menu, the topic Introduction is highlighted first. Use the movement keys to select a topic, and press the Enter
key to pick a topic for browsing. If you select the Lesson 2 topic, the screen below is displayed.
135
Promula Application Development System User's Manual
In this lesson we discuss the DEFINE VARIABLE statement, which is
used to define the variables in your program.
Press any key to continue
3.7.24.2 Executing the BROWSE TOPIC Statement
The BROWSE TOPIC statement displays a specific topic from a dialog file.
To display the first topic in the dialog file use the following statement:
BROWSE TOPIC "b:dialog.tut", 1
This produces the following display:
136
Promula Application Development System User's Manual
The primer is a series of lessons. The lessons are designed to show you
how to write PROMULA programs. Though arranged in order of increasing
complexity, the lessons may be run in any order.
Sometimes the information displayed does not fit in the windows. Use the
movement keys at the right end of your keyboard to browse long messages. The
up and down arrows let you scroll one line at a time. The PgDn key displays
the next page. The PgUp key displays the previous page. The Home key brings
you back to the first page of the message.
Press any key to continue
3.7.25 DEFINE FILE
Purpose:
Defines a file that may be used as a program database, an input datafile, or an output report file.
Syntax:
DEFINE FILE
file [TYPE=type] ["desc"]
...
END
Remarks:
file
is the file identifier.
type
is the file type, and can be one of the following:
ARRAY
for a random-access file of sets, variables, and relations. You can include as many sets,
variables, and relations per file as you wish (within the capacity of your disk space). Array
files are unique to PROMULA, they are especially well suited for the storage and retrieval of
multidimensional information.
TEXT
for a sequential-access file of variable-length text records. Each record consists of items (or
fields or scalar variables) that are laid out in lines of variable length (up to a maximum of 255
characters per line).
RANDOM
for a random-access file of fixed-length binary records. Each record consists of a fixed number
of variables. The variables of a random file may be scalar items, or multidimensional arrays.
You can specify as many variables per record as you wish (within the capacity of your
137
Promula Application Development System User's Manual
working space). You can include as many records as you wish (within the capacity of your
disk space).
INVERTED(n)
for a random-access file of user-specified keys associated with the records of a random file.
An inverted file provides a fast and efficient way to search a random file with symbolic keys.
n is an efficiency parameter that should equal your best estimate for the number of records that
will match a given key. The safest but probably not the most efficient value for n is the
number of records in the random file. Inverted files with a larger n require more disk space but
they usually require less time to search.
If the TYPE clause is omitted from the file definition, the file will be assumed to be an array file.
desc
is a file descriptor. This descriptor is only useful for program documentation purposes; it is an inline comment.
For an ARRAY or RANDOM file, the variables whose values are stored on file are defined by means of the DEFINE
VARIABLE file statement.
The OPEN file statement physically opens a file to the place on disk where the data that you want to access through file
is stored. Existing files should be opened STATUS=OLD, new files should be opened STATUS=NEW. A file must be
opened before it can be used.
The CLEAR file statement closes the disk file that was assigned to a file by a previous open.
The READ DISK and WRITE DISK statements allow you to explicitly transfer information between your program
memory space and the variables in an array file.
The READ file and WRITE file statements allow you to physically transfer information between your program memory
space and the variables in text and random files.
Examples:
The following statements
DEFINE FILE
txt
"TEXT file"
TYPE=TEXT
dbf
"RANDOM File"
TYPE=RANDOM
dba
"ARRAY File"
TYPE=ARRAY
dbi "INVERTED File"
END FILE
TYPE=INVERTED(10)
define three files: txt, which is a text file that may be used for test input and output, dbf, which is a random type file, and
dba, which is an array file.
The structure of the array file, dba, could be used to contain weather data by the following code:
OPEN dba "wthr.dba" STATUS=NEW
DEFINE SET dba
days(31) "Day"
mons(12) "Month"
year(10) "Year"
END SET dba
DEFINE VARIABLE dba
wthdsc(days,mons,year) TYPE=STRING(20) "Description"
138
Promula Application Development System User's Manual
hitemp(days,mons,year)
lotemp(days,mons,year)
hihumd(days,mons,year)
lohumd(days,mons,year)
hibarp(days,mons,year)
lobarp(days,mons,year)
END VARIABLE dba
TYPE=REAL(10,1)
TYPE=REAL(10,1)
TYPE=REAL(10,2)
TYPE=REAL(10,2)
TYPE=REAL(10,2)
TYPE=REAL(10,2)
"High Temp"
"Low Temp"
"High Humidity"
"Low Humidity"
"High Barometric Pressure"
"Low Barometric Pressure"
CLEAR dba
Notice that an array file must be physically opened before its structure can be defined. This is because PROMULA
physically initializes the entire file when its structure is defined for the first time.
To add variables to an existing array file, open the file STATUS=OLD.
Alternatively, this weather data coud be set up with random and inverted files as follows:
DEFINE VARIABLE dbf
wthdsc TYPE=STRING(20)
hitemp TYPE=REAL(10,1)
lotemp TYPE=REAL(10,1)
hihumd TYPE=REAL(10,2)
lohumd TYPE=REAL(10,2)
hibarp TYPE=REAL(10,2)
lobarp TYPE=REAL(10,2)
wthdat TYPE=DATE(10)
END VARIABLE dbf
"Description"
"High Temp"
"Low Temp"
"High Humidity"
"Low Humidity"
"High Barometric Pressure"
"Low Barometric Pressure"
"Date"
DEFINE VARIABLE dbi
datekey
TYPE=DATE(10)
daterec
TYPE=INTEGER(10)
END VARIABLE dbi
"Date Key"
"Record"
Notice that random and inverted type files do not have to be opened when their structure is defined. Of course, they have to
be opened when they are accessed.
For examples of using random and inverted files, see the SELECT file statement.
For examples of reading and writing to text files, see the READ file and WRITE file statements.
For additional examples on the use of array file databases in transferring data to and from disk, see Chapter 4.
See also the COPY statement and the discussion of the file management functions
FILESIZE, FILENAME, FILEEXT, FILEPATH, and GETDIR.
FILEDELETE, FILEEXIST,
3.7.26 DEFINE FUNCTION
Purpose:
Defines a single-valued function as the linear interpolation between points defined on the x-y plane. A function expresses
an arbitrary relationship of one variable, the y-variable, to another variable, the x-variable. It is defined in terms of two
arrays or variables. The first array contains the values of the x-variable while the second contains the values of the yvariable. These variable values are the x-y coordinates of the points defining the function.
Syntax:
DEFINE FUNCTION
func(arrx,arry)
ifunc(arry,arrx)
139
Promula Application Development System User's Manual
...
END
Remarks:
func
is the function identifier.
ifunc is the identifier of the inverse of function func. Note, the order of arrx and arry is reversed.
arrx
is the identifier of the real fixed or scratch variable containing the x-coordinates of the points defining the function.
arry
is the identifier of the real fixed or scratch variable containing the y-coordinates of the points defining the function.
arrx and arry must be local variables: they may not be disk variables or variables used to access disk variables.
arrx and arry must have the same set as their first dimension. This is the set that "indexes" the function. The second and
higher dimensions of arrx and arry will be fixed at the first element of their respective selection vectors when the value
of the function is computed.
Although it is allowed for the sets dimensioning the second and higher dimensions of arrx to be different from those
dimensioning arry, doing so will interfere with the displays produced by the WRITE, BROWSE, and PLOT function
statements.
Functions are used in conditional expressions and in arithmetic expressions on the right-hand side of equations to yield the
y-value corresponding to some x-value argument.
The value of a function for an arbitrary argument is obtained by 2-point linear interpolation between the points defining the
function. For an argument outside its domain, the function returns the y-value of the function's nearest end point.
The argument of a function may be a constant, a scalar, a multidimensional variable, an arithmetic expression of many
variables, or another function.
A function of x, y=func(x), gives you the value of y for a given value of x. The inverse function of x, x=ifunc(y), gives you
the value of x for a given value of y (see Example 2 below).
In addition to their computational use, functions may be displayed in tabular form with the BROWSE function and
WRITE function statements, and may be viewed in plotted form via the PLOT statement.
Examples:
1.
The statements
DEFINE SET
point(4)
END SET
DEFINE VARIABLE
a(point)
"x-coordinates"
b(point)
"y-coordinates"
x
y
END VARIABLE
DEFINE FUNCTION
stepf(a,b)
END FUNCTION
READ a
140
Promula Application Development System User's Manual
-1 0 .00001 1
READ b
-1 -1
1 1
define the step function y=stepf(x) shown below:
Y
X
The step discontinuity at (0,0) is represented approximately to within =0.00001. For an arbitrary argument x, the
expression y=stepf(x) yields a value y, as follows:
y = +1
y = -1
y = -1
IF x > 0.00001
IF x = 0.0
IF x < 0.0
This is illustrated by the dialog below.
x = -10
y = stepf(x)
WRITE y
-1
x = +10
y = stepf(x)
WRITE y
1
2.
Consider the arbitrary function shown below.
141
Promula Application Development System User's Manual
Y
An Arbitrary Function
40
30
20
10
0
-10
-20
X
-30
-4
-2
0
2
4
What are the values of y when x is -4, 1.5, or 2.6? What are the values of x when y is 18.2, 22, or 34? The dialog
below shows how to answer these questions.
DEFINE SET
dpnt(7) "Points Defining Function"
xpnt(3) "Arbitrary Points"
END SET
DEFINE VARIABLE
fx(dpnt) "Function X Values"
TYPE=REAL(10,2) VALUE(-3,-2,-1,0,1,2,3)
fy(dpnt) "Function Y Values"
TYPE=REAL(10,2) VALUE(-20,0,10,16,20,24,30)
x(xpnt) "Arbitrary X Values" TYPE=REAL(10,2)
y(xpnt) "Arbitrary Y Values" TYPE=REAL(10,2)
END VARIABLE
DEFINE FUNCTION
fun(fx,fy) "An Arbitrary Function"
ifun(fy,fx) "The Inverse of an Arbitrary Function"
END
DEFINE PROCEDURE shofun
WRITE
TABLE(xpnt)
TITLE("Function
y=fun(x)"),BODY(x,y),FORMAT(20,10)
END
READ x
-4 +1.5 +2.6
y=fun(x)
shofun
Function Values, y=fun(x)
XPNT(1)
XPNT(2)
XPNT(3)
Arbitrary X Values
-4.00
1.50
2.60
Arbitrary Y Values
-20.00
22.00
27.60
READ y
18.2 22 34
x=ifun(y)
shofun
Function Values, y=fun(x)
XPNT(1)
XPNT(2)
XPNT(3)
Arbitrary X Values
0.55
1.50
3.00
Arbitrary Y Values
18.20
22.00
34.00
142
Values,
Promula Application Development System User's Manual
3.7.27 DEFINE LOOKUP
Purpose:
Defines a functional relationship between two sets of numbers.
Syntax:
DEFINE LOOKUP
name(np) [xyoption]
END LOOKUP
Remarks:
name
is the identifier of the function
np
is the number of X-Y pairs that define the function.
xyoption
is used to specify values for the ordered pairs in the function and is of the form
[X](X1,X2,...Xnp),Y(Y1,Y2,...,Ynp)
The X-Y option on the DEFINE LOOKUP statement is used to specify the independent, X, and dependent,
Y, values associated with the function.
Each list of values must contain the number of points defined for the function, np. The X- and Y-values that define a
function may also be specified via the READ function statement.
Functions defined by the DEFINE LOOKUP statement behave very much like functions defined by the DEFINE
FUNCTION statement. Both types of functions are used primarily on the right-hand-side of equations or in conditional
expressions. They yield, by linear interpolation or extrapolation, the Y-value corresponding to the specified argument, or Xvalue. In this sense, a function is viewed as a set of ordered pairs of numbers that specify the X- and Y-coordinates of the
points defining the function. The argument used in the function call may be a numeric constant, a variable, or an arithmetic
expression.
The important difference between the two types of functions is that functions defined by the DEFINE FUNCTION
statement are related to a set that defines the number of X-Y pairs for the function and may contain descriptive information
for the X-Y pairs, and to a pair of arrays that contain the X-Y values. Changes in the set or in the X or Y arrays changes the
appearance and behavior of the function. Functions defined by the DEFINE LOOKUP statement, on the other hand, are
not related to sets or variables; they contain a fixed set of paired numbers which are identified only as part of the function,
and can only be changed by the READ function statement.
The value of a function for an arbitrary argument is obtained by 2-point linear interpolation between the points defining the
function. For an argument outside its domain, the function returns the y-value of the function's nearest end point.
The argument of a function may be a constant, a scalar, a multidimensional variable, an arithmetic expression of many
variables, or another function.
In addition to their computational use, functions may be displayed in tabular form with the BROWSE function and
WRITE function statements, and may be viewed in plotted form via the PLOT statement.
Examples:
The following example illustrates the DEFINE LOOKUP statement.
DEFINE LOOKUP
143
Promula Application Development System User's Manual
f1(10) X(1.0,2.0,3.0,4.0,5.0,6.0,7.0, 8.0, 9.0,10.0),
Y(1.2,2.3,3.8,4.5,5.5,6.9,9.9,12.0,14.5,15.9)
f2(10)
END LOOKUP
Here, the DEFINE LOOKUP statement is used to create two functions. f1, which gets initial values in its definition with
an xyoption; and f2 which has its initial values equal to zero. Both of these functions have 10 ordered X-Y pairs.
See also the READ function, WRITE function, BROWSE function, PLOT and DEFINE FUNCTION statements for
more information on functions.
3.7.28 DEFINE MENU
Purpose:
Defines a screen menu for later use.
A screen menu is a type of program interface designed to help its user either to pick from a list of options or to display
and/or edit data values.
Depending on content, intended use, and appearance, there are two kinds of menus:
1.
Pick menus to help the user make a selection from a set of options using the SELECT menu statement. There are
three types of pick menus: (1) Simple, one-window pick menus defined with a basic DEFINE MENU statement, (2)
Popup, two-window pick menus defined with a DEFINE MENU POPUP statement, and (3) Pulldown pick menus
defined with a SELECT PULLDOWN statement
2.
Data menus to create screens for data entry or display using the EDIT menu statement
This section describes the DEFINE MENU statement. For additional information and examples of using menus, refer to
the examples at the end of this section and to the sections covering the SELECT menu, EDIT menu, SELECT
PULLDOWN, and SELECT FIELD statements.
Syntax 1: Simple Pick Menu Definition
DEFINE MENU menu [VARIABLE]
text...
...
text... \choice1\ \choice2\ text...
text... \choice3\ \choice4\ text...
...
END
Remarks:
menu
is the menu identifier.
text
is arbitrary text that you may enter anywhere in the menu template to describe menu selection fields. To
produce fancy menu displays, you may use any character that you can enter with your text editor including
those that are not shown explicitly on the keyboard.
choicen
is the label for the nth selection field in the pick menu. The selection fields are ordered from 1 to n as you go
from left to right and from top to bottom of the menu. Up to 20 selection fields may be defined.
The text and choicen elements may contain any character except:
the backslash character (\), which is reserved to set off the selection fields of the menu
144
Promula Application Development System User's Manual
the at character (@), which is reserved to set off data fields to be edited in data menus
the tilde character (~), which is reserved to set off display-only fields in data menus.
VARIABLE
is a keyword labeling the pick menu as a VARIABLE pick menu. This keyword is only required if you intend
to use the SELECT FIELD statement to modify the menu at runtime.
Simple pick menus are much simpler to define than popup pick menus, but are not as flashy or flexible as popup or
pulldown pick menus.
Syntax 2: Popup Pick Menu Definition
DEFINE
MENU
[VARIABLE]
menu1,
text...
text... \choice1\
text... \choice3\
...
END
POPUP(swind,twind)
MENU HEADER
SELECTION SCREEN
DEFINITION
\choice2\ text...
\choice4\ text...
FIELD
n,
SELECT=char,
HELP=topic,
ACTION=code
desc
...
END
...
MENU menu2
text...
text... \choice11\ \choice12\ text...
text... \choice13\ \choice14\ text...
...
END
FIELD
n,
SELECT=char,
HELP=topic,
ACTION=code
desc
...
END
...
END menu1
FIELD STATEMENT
SUBMENU DEFINITION
Remarks:
A popup menu definition consists of a top level menu definition and several optional submenu definitions. Each menu
definition consists of a selection screen and a group of FIELD statements. The keyword POPUP following the identifier
of a menu indicates to PROMULA that the menu is a popup pick menu.
menu1
is the identifier of the menu.
swind
is the name of the screen area defined via a DEFINE WINDOW statement that will display the selection
screens when the menu is executed.
twind
is the name of the screen area defined via a DEFINE WINDOW statement that will display the description of
each selection field as it is highlighted during menu execution.
145
Promula Application Development System User's Manual
text
is arbitrary text that you may enter anywhere in the menu template to describe menu selection fields. To
produce fancy menu displays, you may use any character that you can enter with your text editor including
those that are not shown explicitly on the keyboard.
choicen
is the label for the nth selection in the pick menu. The selection fields are ordered from 1 to n as you go from
left to right and from top to bottom of the menu template.
The text and choicen elements may contain any character except:
the backslash character (\), which is reserved to set off the selections in pick menus
the at character (@), which is reserved to set off data fields to be edited in data menus
the tilde character (~), which is reserved to set off data fields to be displayed but not edited in data menus.
n
is an integer that indicates to which selection field the FIELD statement corresponds.
char
is a character that can be used to select the desired field. Any printable character may be used.
topic
is the sequence number, as defined by its place in a dialog file, of a specific topic containing information
relevant to the selection field. The dialog file used is determined by a SELECT HELP statement. Pressing
Alt-H will select this topic from the program's help file and display it in the Help Screen. If no help has been
defined, you can enter a 0 for this parameter.
code
is a number between 0 and 255 or the name of a submenu defined in this DEFINE MENU statement. If code
is a number, the value will be returned when the field is selected; if code is a submenu name, the submenu
will be displayed for selection.
desc
is text that describes the selection field.
menu2
is the identifier of a submenu. Each submenu is defined in the same way as the top level menu except that the
submenu header only includes the name of the submenu.
VARIABLE
is a keyword labeling the pick menu as a VARIABLE pick menu. This keyword is only required if you intend
to use the SELECT FIELD statement to modify the menu at runtime.
Syntax 3: Data Menu Definition
DEFINE MENU menu
text...
...
~~~~~
text...
@@@@@
text...
@@@@@
...
END
~~~~~~~
@@@@@@@ text...
@@@@@@@ text...
Remarks:
menu
is the menu identifier.
text
is arbitrary text that you may enter anywhere in the menu template to describe menu selection fields. To
produce fancy menu displays, you may use any character that you can enter with your text editor including
those that are not shown explicitly on the keyboard.
This text may contain any character except:
the backslash character (\), which is reserved to set off the selections in pick menus
the at character (@), which is reserved to set off data fields to be edited in data menus
the tilde character (~), which is reserved to set off data fields to be displayed but not edited in data menus.
146
Promula Application Development System User's Manual
@@@@@@@@
marks the space in the template where the value of a program variable will be displayed for editing.
~~~~~~~~
marks the space in the template where the value of a data field will simply be displayed and will not be
available for editing.
Data menus contain a number of fields to be viewed and/or edited by the user. Each field in the menu is denoted by a series
of contiguous "at signs", @, equal in number to the desired number of characters in the data field. The fields are ordered
from left to right and from top to bottom of the menu template.
Examples:
The following example illustrates the definition and use of one screen pick and data menus; it illustrates the DEFINE
MENU statement as well as the SELECT menu and the EDIT menu statements.
Define several variables for use with the example.
DEFINE VARIABLE
a
b
tot
date
name
option
END VARIABLE
"A value"
"B value"
"Sum of A + B"
"Date"
"Name"
"Menu selection"
TYPE=DATE(8)
TYPE=STRING(10)
Define a Data Menu.
DEFINE MENU data
********************************* A Data Menu *****************************
*
*
*
Enter/Edit Inputs
*
*
*
*
*
*
Name
: @@@@@@@@@@
Date: @@@@@@@@
*
*
*
*
A Value: @@@@@@@@
*
*
*
*
B Value: @@@@@@@@
*
*
*
***************************************************************************
END
Define a Pick Menu.
DEFINE MENU pick
********************************* A Pick Menu ******************************
*
*
*
Main Selection Menu
*
*
*
*
*
*
*
*
Press the desired Function key
*
*
F1 \Return to PROMULA\
*
*
or
*
*
F2 \Edit Input Values\
*
*
1. Press the UP and DOWN arrow keys
*
147
Promula Application Development System User's Manual
*
F3 \Calculate Totals\
to move the bounce bar
*
*
*
*
F4 \Display Results\
2. Press the Enter key to pick
*
*
*
****************************************************************************
END
Define a procedure to control the execution of menu "pick" and menu "data"
DEFINE PROCEDURE start
* Select from Menu "pick"
SELECT pick(option)
* Edit a Data Menu
DO IF option EQ 2
EDIT data(name,date,a,b)
start
END option 2
* Compute Totals
DO IF option EQ 3
tot=a+b
start
END option 3
* Display Results
DO IF option EQ 4
WRITE ("Name
","Date
","A Value
WRITE (name\1,date\11,a\21,b\31,tot\41)
ASK CONTINUE
start
END option 4
END start
","B Value
","Sum of A + B")
The statement SELECT pick(option) in procedure start produces the display below:
*********************************
A
Pick
Menu
*********************************
*
* bar highlights the first selection Return to PROMULA, which is the text between the first two backslashes in
A bounce
*
Selection
Menu
the definition
of menu pick. You may make Main
a selection by
*
*
1. pressing a function key F1, F2, F3, or F4 (or a numeric key 1,2,3,or 4).
*
2. using the movement keys and the Enter key to pick a selection.
*
3. pointing and clicking in the selection field (between the back slashes) with a mouse or other pointer device.
*
*
If you *
select option 2 — Edit Input Values — PROMULA will execute the statement EDIT data(name,date,a,b)
and will* display the following EDIT menu display:
Press the desired
148
Promula Application Development System User's Manual
********************************* A Data Menu *****************************
*
*
*
Enter/Edit Inputs
*
*
*
*
*
*
Name
:
Date: 00/00/00
*
*
*
*
A Value:
0
*
*
*
*
B Value:
0
*
*
*
***************************************************************************
End: Exit
Arrows Home: Select
Enter: Edit
Here, the bounce bar is highlighting the ten spaces following the text "Name
:". By pressing the Enter key, you may
introduce a particular name for this data field. By using the movement keys, you may edit the rest of the data fields to
produce the following display:
********************************* A Data Menu *****************************
*
*
*
Enter/Edit Inputs
*
*
*
*
*
*
Name
:
Mark J.
Date: 08/21/91
*
*
*
*
A Value:
1
*
*
*
*
B Value:
2
*
*
*
***************************************************************************
End: Exit
Arrows Home: Select
Enter: Edit
The following example illustrates the definition and use of Popup pick menus. First, the structural entities of the program:
variables, windows, and menus are defined.
DEFINE VARIABLE
149
Promula Application Development System User's Manual
a
b
prd
date
name
option
END VARIABLE
"A value"
"B value"
"Product of A * B"
"Date"
"Name"
"Menu selection"
TYPE=DATE(8)
TYPE=STRING(10)
DEFINE WINDOW
wwind(0,5,79,21,WHITE/BLACK,NONE)
swind(1,1,78,3,WHITE/BLACK,FULL/HEAVY)
twind(1,23,78,23,WHITE/BLACK,FULL/SINGLE)
END WINDOW
DEFINE MENU pick, POPUP(swind,twind)
Main Selection Menu: R)eturn E)dit C)alculate
END
FIELD 1, SELECT=R, HELP=0, ACTION=10
RETURN -- Return to PROMULA
END
FIELD 2, SELECT=E, HELP=0, ACTION=20
EDIT -- Edit Input Values
END
FIELD 3, SELECT=C, HELP=0, ACTION=menu2
CALCULATE -- Calculate Totals
END
FIELD 4, SELECT=D, HELP=0, ACTION=40
DISPLAY -- Display Results
END
************** Define of a submenu called menu2
MENU menu2
Calculations Menu: R)eturn C)ompute
END
FIELD 1, SELECT=R, HELP=0, ACTION=pick
RETURN -- Return to Main Selection Menu
END
FIELD 2, SELECT=C, HELP=0, ACTION=30
COMPUTE -- Compute the product of A and B
END
END pick
D)isplay
DEFINE MENU data
********************************* A Data Menu *****************************
*
*
*
Enter/Edit Inputs
*
*
*
*
*
*
Name
: @@@@@@@@@@
Date: @@@@@@@@
*
*
*
*
A Value: @@@@@@@@
*
*
*
*
B Value: @@@@@@@@
*
*
*
***************************************************************************
END
Next, a procedure to control the program is defined.
DEFINE PROCEDURE ctrl
SELECT pick(option)
DO IF option EQ 10
150
Promula Application Development System User's Manual
* Exit procedure
BREAK ctrl
ELSE option EQ 20
* Edit a Data Menu
EDIT data(name,date,a,b)
ELSE option EQ 30
* Compute Product
prd = a * b
ELSE option EQ 40
* Display Results
WRITE ("Name
","Date
","A Value
","B Value
WRITE (name\1,date\11,a\21,b\31,prd\41)
WRITE (/"Press any key to continue.") CLEAR(-1)
END option
ctrl
END ctrl
","Product of A * B")
Before using the menu, you must open up a window to the main screen using the statement OPEN wwind MAIN. Executing
procedure ctrl produces the display below:
Main Selection Menu:
R)eturn
E)dit
C)alculate
D)isplay
RETURN -- Return to PROMULA
A bounce bar highlights the 1st selection R)eturn, which is the text between the two backslashes in the definition of menu
pick. The descriptions of the selection fields appear in the screen area, twind. You may press the selection characters R,
E, C, or D to make a selection, or use the movement keys and the Enter key to pick a selection.
Pressing the E key will execute the statement EDIT data(name,date,a,b) which produces the following screen:
151
Promula Application Development System User's Manual
Main Selection Menu:
R)eturn
E)dit
C)alculate
D)isplay
********************************* A Data Menu *****************************
*
*
*
Enter/Edit Inputs
*
*
*
*
*
*
Name
:
Date: 00/00/00
*
*
*
*
A Value:
0
*
*
*
*
B Value:
0
*
*
*
***************************************************************************
End: Exit
Arrows Home: Select
Enter: Edit
EDIT -- Edit Input Values
Here, the bounce bar is highlighting the ten spaces following the text "Name
:". By pressing the Enter key, you may
introduce a particular name for this data field. By using the movement keys, you may edit the rest of the data fields to
produce the following display:
After editing, you will return to the menu below, from which you can calculate the product of A and B, and display results
in the Main Screen.
3.7.29 DEFINE PARAMETER
Purpose:
Defines numeric parameters for procedures. Parameters are used to transfer data values to and from procedures.
Syntax:
DEFINE PARAMETER
param[(sets)]["desc"][TYPE=type]
...
END
Remarks:
param is the parameter identifier.
sets
is a list of sets that define the structure of the parameter.
desc
is a parameter descriptor.
type
is the type of the parameter and may be one of the following:
REAL
to specify real values
152
Promula Application Development System User's Manual
INTEGER to specify integer values
MONEY
to specify money values.
Other types of parameters are allowed, but they are of limited use because their values cannot be passed to or from
the actual arguments of the procedure.
A parameter is a numeric variable which is used locally within a procedure. Parameters may be scalars or multidimensional
arrays. A parameter identifier cannot be defined or referenced outside a procedure.
A procedure proc with parameters a, b, c,... may be called into execution by simply entering its name and specifying an
ordered list of variables (often referred to as the actual arguments of the procedure) corresponding to the parameter list.
The type and order of variables in the variable list must agree with the type and order of the parameters as defined in
procedure proc.
proc(x,y,z,...)
If the parameters are multidimensional arrays, the variable arguments of the procedure must be followed by the identifiers
of the sets that dimension them.
proc(x(set1,set2,...),y(set1,set2,...),z(set1,set2,...),...)
NOTE: The values of parameters do not use any storage, nor do they retain their values between procedure calls.
Examples:
The procedure minx defined below has three parameters:
DEFINE PROCEDURE minx
DEFINE PARAMETER
a
"Value to be compared with b"
b
"Value to be compared with a"
c
"Min of (a,b)"
END PARAMETER
c = a
DO IF b LT c
c = b
END IF
END PROCEDURE minx
The purpose of this procedure is to compare the value of b with the value of a and to return the minimum of the two values
in parameter c.
This procedure, when called by another procedure cmin, compares two variables, x and y, and returns the minimum of the
two in variable z, as shown in the dialog below:
DEFINE VARIABLE
x
y
z
END VARIABLE
DEFINE PROCEDURE cmin
minx(x,y,z)
WRITE ("x=",x," ","y=",y,"
END PROCEDURE cmin
x = 3
y = 4
cmin
x=3 y=4
","MIN(x,y)=",z)
MIN(x,y)=3
153
Promula Application Development System User's Manual
Procedure cmin calls into execution procedure minx. The calling statement is:
minx(x,y,z)
From this, you can see that variable x corresponds to parameter a, variable y corresponds to parameter b, and variable z
corresponds to parameter c.
Procedure stats takes as its argument a two-dimensional array of values. It displays the values of each column of the array
in ascending order and computes and displays the number of values, the total, and the mean of each column.
DEFINE SET
pnt(5)
col(2)
END SET
DEFINE VARIABLE
xval(pnt,col) TYPE=REAL(10,2) "X VALUES"
END VARIABLE
DEFINE PROCEDURE stats
DEFINE PARAMETER
vec(pnt,col) "Input Table"
n
"Number of Values"
tot
"Total of Input Vector"
ave
"Average of Input Vector"
END PARAMETER
DO col
SORT pnt USING vec
n=col:s
WRITE CENTER("INPUT VECTOR #"n:-2/"------------------")
DO pnt
WRITE CENTER(vec:6:2)
END
SELECT pnt*
tot = SUM(i) vec(i)
n
= pnt:N
ave = tot/n
WRITE CENTER("
n = "n:-5,"TOTAL = "tot:-10:2,"MEAN = "ave:-10:3/)
END col
END PROCEDURE stats
READ xval(col,pnt)
31 11 21 91 41
32 42 52 12 12
Given the defintions above, the statement
stats( xval(pnt,col) )
produces the report below.
n = 5
INPUT VECTOR #1
-----------------11.00
21.00
31.00
41.00
91.00
TOTAL = 195.00
MEAN = 39.000
154
Promula Application Development System User's Manual
n = 5
INPUT VECTOR #2
-----------------12.00
12.00
32.00
42.00
52.00
TOTAL = 150.00
MEAN = 30.000
3.7.30 DEFINE PROCEDURE
Purpose:
Defines a group of statements for later execution as a single unit.
Syntax:
DEFINE PROCEDURE proc [comment]
statement
...
END comment
Remarks:
is the procedure identifier.
proc
statement is any executable statement.
comment
is optional text you wish to enter as an in-line comment.
Definitions are not allowed within procedures, except for the DEFINE PARAMETER statement, which defines procedure
parameters. Similarly, data for a READ statement is not allowed in a procedure.
A procedure is executed by the [DO] procedure statement, i.e., by simply entering its name.
PROMULA supports recursive procedures, i.e., a procedure can call itself into execution. A procedure can call other
defined procedures into execution.
Examples:
1.
The following statements
DEFINE PROCEDURE hello -- write a greeting
WRITE "Hello there!"
END PROCEDURE hello
define the procedure hello whose sole purpose is to issue the message Hello there!, as shown in the dialog below
DO hello
Hello there!
2.
The following procedures rdsales and tsales
DEFINE PROCEDURE rdsales
WRITE "Enter Monthly Sales"
155
Promula Application Development System User's Manual
READ sales
END PROCEDURE rdsales
DEFINE PROCEDURE tsales
rdsales
total = SUM(month)( sales(month) )
WRITE ("Total Annual Sales ",total)
END PROCEDURE tsales
execute as follows:
tsales
Enter Monthly Sales
1000 1100 1200 1150 1300 1350
1400 1600 1000 1100 1570 1600
Total Annual Sales 15,370
Above, procedure tsales calls procedure rdsales into execution to produce the same results as those of Example 2.
3.
The following is a procedure with parameters
DEFINE PROCEDURE xmax
DEFINE PARAMETER
a
b
c "Max of (a,b)"
END PARAMETER
DO IF a GE b
c = a
ELSE
c = b
END IF
END PROCEDURE xmax
The purpose of this procedure, xmax, is to compare two values and return the larger of the two, as shown in the dialog
below:
DEFINE PROCEDURE callxmax
xmax(x,y,z)
END PROCEDURE callxmax
x = 2
y = 3
callxmax
WRITE z
3
3.7.30.1 Dynamic Procedures
Dynamic procedures are used in dynamic simulations. In dynamic simulations modeling, variables interact with each other
and change over time. PROMULA has several features that facilitate the development of dynamic models: these include
time series sets, system Time parameters, the TIME, RATE, and LEVEL statements, and dynamic procedures.
Dynamic procedures contain RATE and LEVEL statements which divide the procedure into three separate sections.
1.
The Initial section. Here, all time parameters have the values that were assigned by the last TIME statement. The
variables DT, BEGINNING, and ENDING maintain these original values throughout the run of the dynamic
procedure. The Initial section includes all the statements in the procedure preceding the RATE section and its
equations are evaluated once — at the beginning time point (or interval) of the simulation period.
156
Promula Application Development System User's Manual
2.
The RATE section. The start of the RATE section is indicated by the RATE statement. The RATE section is the
second section of a dynamic procedure and its equations are evaluated at each time point (or interval) of the simulation
run. In contrast to LEVEL equations, both sides of RATE equations are evaluated at the same time point (or interval).
At the end of the RATE section, the value of the time parameter TIME is examined. If TIME+DT exceeds the value
of ENDING, the execution of the procedure ends. If TIME+DT does not exceed the value of ENDING, then TIME is
incremented by DT, and the execution of the procedure proceeds to the LEVEL section.
3.
The LEVEL section. The start of the LEVEL section is indicated by the LEVEL statement. The LEVEL section
follows the RATE section and its equations are also evaluated at each time point (or interval) of the simulation. The
lefthand side of each LEVEL equation, however, is evaluated at TIME+DT in terms of the time variables on the
righthand side which are evaluated at TIME — the previous time point (or interval). It is the equations of the LEVEL
section which move the dynamic variables through time. After execution of the statements in the LEVEL section,
execution returns to the beginning of the RATE section.
Examples:
An example of a dynamic procedure is shown below:
DEFINE PROCEDURE DYNAM1
** Begin Initial Section
WRITE CENTER("Initial Section. Time=",TIME)
POPT=100000
** End Initial Section / Begin Rate Section
RATE (BRTYR=BRTV, MRTYR=MRTV)
WRITE CENTER(/"Rate Section. Time=",TIME)
DRGV = DRG(TIME)
BTHS = POPT * BR * BRTV
MGNTS = POPT * MR * MRTV
DTHS = POPT * DR * DRGV
WRITE POPT
WRITE BTHS
WRITE MGNTS
WRITE DTHS
WRITE BRTV::4
WRITE MRTV::4
WRITE DRGV::4
** End Rate Section / Begin Level Section
LEVEL ( POPYR=POPT, BTHYR=BTHS, DTHYR=DTHS, MGTYR=MGNTS)
WRITE CENTER (/"Level Section, Time=", TIME)
POPT = POPT + (DT * BTHS) + (DT * MGNTS) - (DT * DTHS)
WRITE POPT
END PROCEDURE DYNAM1
In procedure DYNAM1, the population size is set to 100,000 in the initial section. The RATE section computes local variables
BRTV, and MRTV by linear interpolation of the values of the exogenous time series variables BRTYR and MRTYR and uses these
values to compute time-specific values for BTHS, and MGNTS. The value of DRGV is computed via function DRG then used in
computing DTHS. In the LEVEL section, the results are transferred from the endogenous scalar variables, POPT, BTHS,
DTHS, and MGNTS to the output time series variables, POPYR, BTHYR, DTHYR, MGTYR as specified in the LEVEL statement;
and the value of POPT is computed to reflect the changes that occurred during the last time interval.
The code required to implement the procedure above to model population values over time is displayed below.
DEFINE SET
timeb(3) "Set of Years for Birth Rate Trend"
TIME(1990,1995,2000)
timem(4) "Set of Years for Migration Rate Trend" TIME(1990,1993)
year(16) "Set of Years to Be Modeled"
TIME(1990,2005)
END SET
157
Promula Application Development System User's Manual
DEFINE VARIABLE
BR
"Annual Birth Rate
DR
"Annual Death Rate
MR
"Annual Migration Rate
BRTV
"Birth Rate Trend Value
MRTV
"Migration Rate Trend Value
DRGV
"Death Rate Graph Value
BRTYR(timeb) "Birth Rate Trend"
MRTYR(timem) "Migration Rate Trend"
POPT
"Total Population
BTHS
"Births per Year
DTHS
"Deaths per Year
MGNTS
"Net Migrants per Year
POPYR(year) "Total Population"
BTHYR(year) "Births"
DTHYR(year) "Deaths"
MGTYR(year) "Net Migrants"
END VARIABLE
" VALUE = 0.0065
" VALUE = 0.05
" VALUE = 0.001
"
"
"
VALUE(1,0.8,0.8)
VALUE(1,1,-1,-1)
"
"
"
"
DEFINE LOOKUP
DRG(3),X(1990,1995,2005), Y(1,0.8,0.7)
END LOOKUP
DEFINE TABLE
tab(year), FORMAT(20,10), BODY(POPYR,BTHYR,DTHYR,MGTYR)
END REPORT
DEFINE PROCEDURE dynam1
WRITE CENTER("Initial Section. Time=",TIME)
POPT=100000
RATE (BRTYR=BRTV,MRTYR=MRTV)
WRITE CENTER(/"Rate Section. Time=",TIME)
DRGV = DRG(TIME)
BTHS = POPT * BR * BRTV
MGNTS = POPT * MR * MRTV
DTHS = POPT * DR * DRGV
WRITE POPT
WRITE BTHS
WRITE MGNTS
WRITE DTHS
WRITE BRTV::4
WRITE MRTV::4
WRITE DRGV::4
LEVEL ( POPYR=POPT,BTHYR=BTHS, DTHYR=DTHS, MGTYR=MGNTS)
WRITE CENTER (/"Level Section, Time=", TIME)
POPT = POPT + (DT * BTHS) + (DT * MGNTS) - (DT * DTHS)
WRITE POPT
END PROCEDURE dynam1
Given the definitions above, the statements
TIME(1, 1990, 1993),SIZE(5,0)
dynam1
SELECT year(1-4)
tab TITLE "Results for Dynamic Simulation (DT = 1 Year)"
generate the following report as the population simulation procedure DYNAM1 "moves through time".
Initial Section. Time= 1990
158
Promula Application Development System User's Manual
Total Population
Births per Year
Net Migrants per Year
Deaths per Year
Birth Rate Trend Value
Migration Rate Trend Value
Death Rate Graph Value
Rate Section. Time=1,990
(1990) 100,000
(1990) 650
(1990) 100
(1990) 5,000
(1990) 1.0000
(1990) 1.0000
(1990) 1.0000
Total Population
Level Section, Time=1,991
(1991) 95,750
Total Population
Births per Year
Net Migrants per Year
Deaths per Year
Birth Rate Trend Value
Migration Rate Trend Value
Death Rate Graph Value
Rate Section. Time=1,991
(1991) 95,750
(1991) 597
(1991) 96
(1991) 4,596
(1991) 0.9600
(1991) 1.0000
(1991) 0.9600
Total Population
Level Section, Time=1,992
(1992) 91,847
Total Population
Births per Year
Net Migrants per Year
Deaths per Year
Birth Rate Trend Value
Migration Rate Trend Value
Death Rate Graph Value
Rate Section. Time=1,992
(1992) 91,847
(1992) 549
(1992) -92
(1992) 4,225
(1992) 0.9200
(1992) -1.0000
(1992) 0.9200
Total Population
Level Section, Time=1,993
(1993) 88,080
Rate Section. Time=1,993
Total Population
(1993) 88,080
Births per Year
(1993) 504
Net Migrants per Year
(1993) -88
Deaths per Year
(1993) 3,876
Birth Rate Trend Value
(1993) 0.8800
Migration Rate Trend Value (1993) -1.0000
Death Rate Graph Value
(1993) 0.8800
Results for Dynamic Simulation (DT = 1 Year), 1990 to 1993
Total Population
Births
Deaths
Net Migrants
1990
100,000
650
5,000
100
3.7.31 DEFINE PROGRAM
Purpose:
159
1991
95,750
597
4,596
96
1992
91,847
549
4,225
-92
1993
88,080
504
3,876
-88
Promula Application Development System User's Manual
Defines the beginning of a program and an optional program descriptor. Physically, it clears working space and is the first
instruction of the default executable program segment called MAIN.
Syntax:
DEFINE PROGRAM ["desc"]
statement
...
[END PROGRAM] [DO proc]
STOP
Remarks:
desc
is a descriptor for the program. Tabular reports produced by the program have desc as part of their page heading.
The SELECT HEADING statement turns the heading on and off.
proc
is the identifier of a procedure that should be executed at startup of the program — when the program segment is
loaded.
The DEFINE PROGRAM statement is optional, i.e., you do not have to use it; if you do use it, however, it must be the
first statement of your program.
If you plan to save the program on disk for later execution, then you must use the DEFINE PROGRAM statement to
specify the beginning of the executable program, and the OPEN SEGMENT statement to open a file on disk in which to
store the program.
The END PROGRAM statement specifies the end of an executable program and writes it to a previously opened segment
file. The default segment identifier of a saved executable program is MAIN.
The STOP statement simply stops execution of a program and returns control to the PROMULA Main Menu or to
command mode depending on how the program was started.
Examples:
OPEN SEGMENT "sample.xeq" STATUS=NEW
DEFINE PROGRAM "A Sample Program"
DEFINE PROCEDURE start
WRITE CENTER(/////"Hello World!")
END PROCEDURE start
END PROGRAM, DO start
STOP
The code above defines a short "hello world" program. The program will be saved on disk as the file sample.xeq. The
title, A Sample Program, will appear with the current date and a page number at the upper right-hand corner of all
subsequent displays produced by the WRITE variable statement, unless you turn it off with the SELECT HEADING =
OFF statement.
3.7.32 DEFINE RELATION
Purpose:
Defines a relation between the elements of a set and the contents of a vector variable structured by that set.
Syntax:
DEFINE RELATION [file]
160
Promula Application Development System User's Manual
type (set,vec)
...
END
Remarks:
file
is the identifier of an array file that has been opened to a location on disk with the OPEN file statement. If file is
specified, the relation will become part of the array file structure.
set
is the identifier of the set whose elements are to be related to the values of the vector vec.
vec
is the identifier of the vector variable whose values are to be related to the elements of the set.
type
is the type of relation between set and vec and may be one of the following:
ROW
specifies the variable whose values will serve as the primary descriptor for a set's elements. The
primary descriptor values are used to label rows of values classified by the set in WRITE,
BROWSE, and EDIT statements. They are also used in bar plots, page headings, and displays of
the set itself.
COLUMN
specifies the variable whose values will serve as the column descriptor for a set's elements. The
column descriptor values are used to label columns of values classified by the set in WRITE,
BROWSE, and EDIT statements.
KEY
specifies the variable whose values will serve as the codes for a set's elements. If no ROW relation
for the set is specified, the code values, also referred to as keys, are used as the primary descriptors
for the set. If no COLUMN relation for the set is specified, the code values are used as column
descriptors. In addition, set codes may function as set element identifiers in displays of the set and
in coded set selections.
TIME
specifies the variable whose values will serve as the time values for a set's elements. If no ROW
relation for the set is specified, the time values, also referred to as keys, are used as the primary
descriptors for the set. If no COLUMN relation for the set is specified, the time values are used as
column descriptors. In addition, time values may function as set element identifiers in displays of
the set and in coded set selections. If a set has a TIME relation, it becomes a Time Series Set.
A relation is not valid unless vec is an array variable having set as its first dimension.
The SELECT RELATION statement may also be used to define relations between sets and variables.
Examples:
The following example illustrates using variables and relations to create descriptors for sets and array variables:
DEFINE SET
row(3)
col(2)
state(2)
year(2)
END SET
DEFINE VARIABLE
rows(row)
cols(col)
stcode(state)
yearv(year)
vara(row,col,state,year)
"Row Descriptors"
"Column Headings"
"State Codes"
"Year Values"
"A 4-Dimensional Array"
161
TYPE=STRING(20)
TYPE=STRING(8)
TYPE=CODE(5)
TYPE=INTEGER(5)
VALUE(1)
Promula Application Development System User's Manual
END VARIABLE
Given these definitions, the statement WRITE vara produces the display below.
A 4-Dimensional Array
STATE(1), YEAR(1)
COL(1)
COL(2)
1
1
1
1
1
1
ROW(1)
ROW(2)
ROW(3)
STATE(1), YEAR(2)
COL(1)
COL(2)
1
1
1
1
1
1
ROW(1)
ROW(2)
ROW(3)
STATE(2), YEAR(1)
COL(1)
COL(2)
1
1
1
1
1
1
ROW(1)
ROW(2)
ROW(3)
STATE(2), YEAR(2)
COL(1)
COL(2)
1
1
1
1
1
1
ROW(1)
ROW(2)
ROW(3)
Note here that the row, column, and page descriptors of vara are the default descriptors of the sets row, column, state,
and year. In order to replace these labels with more meaningful ones, the DEFINE RELATION statement may be used as
shown below.
DEFINE RELATION
ROW(row,rows)
COLUMN(col,cols)
KEY(state,stcode)
TIME(year,yearv)
END RELATION
rows(i) = "This is Row " + i
cols(i) = "Column " + i
READ stcode
NY CA
162
Promula Application Development System User's Manual
READ yearv
1981 1982
After defining the relations and initializing the label variables, the WRITE vara report is more meaningful.
A 4-Dimensional Array
NY, 1981
Column 1 Column 2
This is Row 1
This is Row 2
This is Row 3
1
1
1
1
1
1
CA, 1981
This is Row 1
This is Row 2
This is Row 3
Column 1 Column 2
1
1
1
1
1
1
A 4-Dimensional Array
NY, 1982
This is Row 1
This is Row 2
This is Row 3
Column 1 Column 2
1
1
1
1
1
1
CA, 1982
Column
This is Row 1
This is Row 2
This is Row 3
1 Column 2
1
1
1
1
1
1
Note here that the contents of the variables rows, cols, stcode, and yearv have now become the row, column, and page
descriptors of the multidimensional array vara.
Set descriptors and keys may also be specified by the READ set statement, and changed by the SELECT relation
statement.
3.7.33 DEFINE SEGMENT
Purpose:
Defines a program segment as part of a hierarchical tree structure of segments.
Syntax:
DEFINE SEGMENT seg ["desc"]
statement
...
END SEGMENT seg [DO(proc)]
163
Promula Application Development System User's Manual
Remarks:
seg
is the identifier of the segment.
desc
is an optional descriptor for the segment.
statement is any PROMULA statement including other segment definitions. Segments may be nested to any desired
level of nesting.
is a procedure defined within the segment. This procedure is automatically called into execution when the
segment is read into your working space.
proc
Segments are the components into which a large program is organized in order to fit within a limited amount of working
space. The segments of a program are stored on disk. Together with array database files, program segmentation provides
the means for constructing large programs that are not limited by the size of your working space.
A segment contains both executable code and data. The data is stored in the variables of the segment. The code of the
segment stores the equations and procedures that act on the segment variables.
The END SEGMENT statement serves three purposes:
1.
It marks the end of the segment started with a previous DEFINE SEGMENT statement.
2.
It writes the segment onto the disk file specified previously by an appropriate OPEN SEGMENT or DEFINE
PROGRAM statement.
3.
It specifies the identifier of a procedure that will be executed by default when the segment is read in.
To bring a segment into your working space from disk, use the OPEN SEGMENT and READ SEGMENT statements.
This brings in both the executable code and the data values stored in the variables of the segment. If the segment you wish
to bring in is part of the currently open segment file, only a READ SEGMENT statement is needed.
To bring only the data values of a segment into your working space, use the READ VALUE segment statement.
To write to disk the data values of a segment, use the WRITE VALUE segment statement.
Examples:
The following program skeleton
DEFINE PROGRAM "A Segmented Program"
OPEN SEGMENT "prog.xeq", STATUS=NEW
statements of MAIN
...
DEFINE SEGMENT seg1
statements of seg1
...
DEFINE PROCEDURE one
statements of one
...
END one
END SEGMENT seg1, DO(one)
DEFINE SEGMENT seg2
statements of seg2
...
END SEGMENT seg2
END PROGRAM
STOP
164
Promula Application Development System User's Manual
defines a program with the following segment structure:
Main
Seg1
Seg2
This program is physically stored on a disk file whose file name is prog.xeq. The program is entitled A Segmented
Program and has three components: the top segment MAIN and the two segments seg1 and seg2 that are subordinate to
MAIN. That is, whereas MAIN can call into execution seg1 and seg2, seg1 and seg2 cannot call into execution MAIN.
Neither can the segments seg1 and seg2 be in your working space simultaneously. When seg1 is in working space with
MAIN, seg2 remains on disk in the segment file prog.xeq, and vice versa.
When seg1 is read into working space by MAIN the procedure one is automatically called into execution.
A more detailed example of program segmentation is given in Chapter 4. See also DEFINE PROGRAM, END
PROGRAM, OPEN SEGMENT, READ SEGMENT, and END SEGMENT.
3.7.34 DEFINE SET
Purpose:
Defines an enumerated set of elements.
Syntax:
DEFINE SET [file]
set(n)[,"desc"][option]
...
END
Remarks:
file
is the identifier of an array file that has been physically opened to a location on disk with the OPEN file
statement. If file is specified, the set definition will become part of the array file structure.
set
is the set identifier.
n
is the number of elements in the set.
desc
is a descriptor for the set.
option
is used to associate information with the set elements and is one of the following:
TIME(a,b) or TIME(m1,m2,...,mn)
Where
a
is a positive number specifying the beginning point of the time series.
b
is a positive number greater than a specifying the ending point of the time series.
m1,m2,...,mn
are increasing positive values for the time series.
165
Promula Application Development System User's Manual
The TIME option on the DEFINE SET statement is used to create time series sets. The values specified in the
TIME option define values which are set in one-to-one correspondence with the set elements. The list of values
associated with the TIME option is processed as though it were fixed length; therefore, if the values' points are
evenly spaced, they may be specified via the beginning and ending values a and b; the system will calculate the
remaining values via interpolation.
The time values serve two very important functions.
1.
They facilitate communication with program users. In the SELECT VARIABLE and ASK...ELSE
SET=set statements, the user may enter the time values to specify set elements rather than using the
element sequence numbers. Time values are also used in forming titles, subheadings, row labels, and
column labels for displays of variables subscripted by time series sets and in displays of the sets generated
by the WRITE set, BROWSE set, SELECT ENTRY, SELECT SET, and SELECT VARIABLE
statements. The time values may also be used to make set selections in the SELECT set statement and to
indicate subscript values in array expressions.
2.
They are used in calculations involving time-series variables. Several PROMULA statements use the
arithmetic values of the time points in performing their functions. The RATE and LEVEL statements use
the time values to interpolate time series data for each time point within a dynamic simulation, or to save
time series data at the time points during the simulation. The BROWSE and WRITE variable statements
use the time point values to calculate growth rates, percent change, and moving averages for time series
data. The REGRESS and CORRELATE statements use the time values when time series are being
analyzed as a function of TIME.
Time series sets have a special PROMULA notation associated with them, set:V. This notation refers to the
vector of values subscripted by set which contain the time series values.
KEY(w[,diskopt])
Where
w
is the maximum width in characters for codes associated with the set.
diskopt
is a reference to a database variable that contains the code values.
The KEY option on the DEFINE SET statement is one way to specify that short keys (codes) are to be
associated with set elements.
The information supplied with the KEY option specifies the maximum width in characters of each code and,
optionally, the location of those codes on a database.
Codes may get their values from a diskopt parameter, a READ set statement, or a relation to a variable on
disk or in the program via the SELECT RELATION or DEFINE RELATION statements.
The set element codes are used in several ways. In the ASK...ELSE, SET=set and SELECT VARIABLE
statements the user may enter the set codes to specify their selections rather than entry sequence numbers.
Another use of set codes is displays of set elements by the SELECT ENTRY, SELECT SET, WRITE set and
BROWSE set statements. The code values may also be used to make set selections in the SELECT set
statement and to indicate subscript values in array expressions.
ROW(w[,diskopt])
Where
w
is the maximum width in characters for codes associated with the set.
166
Promula Application Development System User's Manual
diskopt
is a reference to a database variable that contains the code values.
The ROW option on the DEFINE SET statement is one way to specify that row labels (stubs) are to be
associated with set elements.
The information supplied with the ROW option specifies the maximum width in characters of each stub and,
optionally, the location of those stubs on a database.
Stubs may get their values from a diskopt parameter, a READ set statement, or a relation to a variable on disk
or in the program via the SELECT RELATION or DEFINE RELATION statements.
Set stubs are the primary labels for set elements. They are used by the BROWSE, EDIT and WRITE variable
statements to form titles, subheadings, and row labels for the various reports. They also appear in BAR and
PIECHART plots, plots of multi-dimensional variables, and in displays of sets generated by the SELECT
ENTRY, SELECT SET, WRITE set, and BROWSE set statements.
COLUMN(w,l[,diskopt])
Where
w
l
diskopt
is the maximum width in characters for column headings associated with the set.
is the number of lines in each column heading associated with the set.
is a reference to a database variable containing the set column heading values.
The COLUMN option on the DEFINE SET statement is one way to specify that column headings (spanners)
are to be associated with set elements.
The information supplied with the COLUMN option specifies the width in characters, the number of lines for
each spanner and, optionally, the location of those spanners on disk.
Spanners may get their values from a diskopt parameter, a READ set statement, or a relation to a variable on
disk or in the program via the SELECT RELATION or DEFINE RELATION statements.
The set column headings are used by the BROWSE, EDIT, and WRITE statements to label the columns of
multidimensional arrays
diskopt — The DISK Suboption
As discussed above, the user has the option to specify a DISK suboption for the KEY, ROW, or COLUMN
options associated with a set definition. This suboption is used when the values to be used for the option are
located in an array file on disk. The syntax of the disk option is
DISK(filid,varid)
Where
filid is the identifier of an array file.
varid is the identifier of the vector variable whose values will be used for the stubs, spanners, or codes
for set.
At run time, filid is opened to the array file which contains the variable varid that contains the values to be
used for the KEY, ROW, or COLUMN option.
Examples:
167
Promula Application Development System User's Manual
DEFINE SET
product(6) "6 products"
month(12) "12 Months"
END SET
The set product has six elements and is used to classify the product dimension of data. The set month has twelve elements
and classifies monthly data. The sets product and month classify arrays of data organized by product and/or by month.
For example, the statements
DEFINE VARIABLE
sales(product,month)
msales(month)
END VARIABLE
"Monthly Sales by Product"
"Total Monthly Sales"
define two variables, sales and msales. Variable sales is a two-dimensional array that has six rows classified by the
product set, and 12 columns classified by the month set. Variable msales is a vector variable of 12 monthly values.
The file option of the DEFINE SET statement is used to put set definitions into the structure of an array file.
DEFINE FILE
fil1 TYPE=ARRAY
END FILE
OPEN fil1 "array.dba" STATUS=NEW
©
DEFINE SET fil1
row(10) "SET ROW"
col(10) "SET COL"
END SET
DEFINE VARIABLE fil1
a(row,col) TYPE=REAL(10,3) "THE A MATRIX"
b(row,col) TYPE=REAL(10,3) "THE B MATRIX"
END VARIABLE
CLEAR fil1
Given the array file definition above, the statement
COPY fil1
produces the following report.
DEFINE FILE
FIL1, TYPE=ARRAY
END
OPEN FIL1"FIL1.dba", STATUS=NEW
DEFINE SET FIL1
ROW(10), "SET ROW"
COL(10), "SET COL"
END
DEFINE VARIABLE FIL1
A(ROW,COL), TYPE=REAL(10,3), "THE A MATRIX"
B(ROW,COL), TYPE=REAL(10,3), "THE B MATRIX"
END
Note that the sets row and col are on file fil1 along with the variables they subscript.
168
Promula Application Development System User's Manual
3.7.35 DEFINE SYSTEM
Purpose:
Defines a system of n equations and n unknowns for later solution, where n can be as large as you can fit in your working
space.
Syntax:
DEFINE SYSTEM sys
DEFINE PARAMETER
x1[,"desc1"]
x2[,"desc2"]
...
xN[,"descn"]
END
eqn1
eqn2
...
eqnN
END [sys]
Remarks:
sys
is the system identifier.
x1
is the identifier of the 1st unknown.
x2
is the identifier of the 2nd unknown.
xN
is the identifier of the Nth unknown.
desc1 is a descriptor for the 1st unknown.
desc2 is a descriptor for the 2nd unknown.
eqn1
is the 1st equation of the system.
eqn2
is the 2nd equation of the system.
equN
is the Nth equation of the system.
Equations are written in the usual algebraic notation:
f(x1,x2,...) = g(x1,x2,...)
where f() and g() are arbitrary real, continuous functions of x1, x2,...
A system sys with parameters x1, x2,... may be solved by simply entering its name and specifying an ordered list of
scalar variables a1, a2,... containing guesses for the unknowns.
sys(a1,a2,...)
The number and order of variables in the variable list must agree with the number and order of the parameters as defined in
system sys.
169
Promula Application Development System User's Manual
The solution of a system is obtained by an iterative process base. If it exists, the solution of system sys, will be returned as
the values of the variables a1, a2,.... If the attempt to solve system sys does not converge after a reasonable number of
iterations, then an error message is displayed and you may try another starting guess for the unknowns. A diagnostic is also
given if the system does not have a real solution.
Examples:
The following program demonstrates how to define and solve a system of 3 equations and 3 unknowns.
Define a system of 3 equations with 3 unknowns.
DEFINE SYSTEM sys1
DEFINE PARAMETER
x, "1st unknown"
y, "2nd unknown"
z, "3rd unknown"
END
1*x + y*y = 1/z
x*y - y/z = -8
5*z - x*1 = y - 2
END sys1
Make an initial guess for the solution of system sys1 and solve.
DEFINE VARIABLE
a1
" 1st Unknown"
a2
" 2nd Unknown"
a3
" 3rd Unknown"
END VARIABLE
TYPE=REAL(10,5)
TYPE=REAL(10,5)
TYPE=REAL(10,5)
a1 = 1
a2 = 1
a3 = 1
sys1(a1,a2,a3)
Write the solution values for system sys1.
WRITE
1st
WRITE
2nd
WRITE
3rd
a1
Unknown -5.00000
a2
Unknown 2.00000
a3
Unknown -1.00000
Procedure solv1 solves system sys1 and displays the solutions repeatedly by trying different initial guesses.
DEFINE VARIABLE
iter "Iteration Counter"
END VARIABLE
DEFINE PROCEDURE solv1
WRITE "Enter 3 values as your initial guess for the solution of 'sys1'"
READ (a1,a2,a3)
iter = 1
DO WHILE iter LE 3
sys1(a1,a2,a3)
WRITE(/, "A solution for 'sys1' is:")
WRITE a1
WRITE a2
170
Promula Application Development System User's Manual
WRITE a3
a1 = a1+1
a2 = a2+1
a3 = a3+1
iter = iter+1
END WHILE
END solv1
Running the solv1 procedure produced the following dialog.
solv1
Enter 3 values as your initial guess for the solution of 'sys1'
1 1 1
A solution for 'sys1' is:
1st Unknown -5.00000
2nd Unknown 2.00000
3rd Unknown -1.00000
A solution for 'sys1' is:
1st Unknown 1.00000
2nd Unknown 2.00000
3rd Unknown 0.20000
A solution for 'sys1' is:
1st Unknown -5.00000
2nd Unknown 2.00000
3rd Unknown -1.00000
3.7.36 DEFINE TABLE
Purpose:
Defines a multi-variable tabular report for the program.
Syntax:
DEFINE TABLE
tabl(sets) [,TITLE(text)][,FORMAT(rw,cw)],
BODY(["text1",] var1[fmt1] [,"text2",] var2[fmt2],...)
...
END
Remarks:
tabl
is the identifier of the table.
sets
is a list of the identifiers of the sets dimensioning the variables in the table. Upon display, the descriptors of
the first set become the column headings of the table; the descriptors of the other sets, if any, classify the
pages of the table. The descriptors of all sets missing from the list become the row descriptors of the table.
This list must contain at least one set.
text
is any text you wish to show as a title for the table. The title may include variables and other format characters
according to the rules defined in the WRITE text statement.
text1
is any text that you wish to use as a subtitle for the values of var1. This text may not contain variables.
171
Promula Application Development System User's Manual
var1
is the identifier of the first variable in the table.
fmt1
is the desired format for the values of var1. Usually, this is used to specify the number of decimal digits for
var1.
text2
is any text that you wish to use as a subtitle for the values of var2. This text may not contain variables.
var2
is the identifier of the second variable in the table.
fmt2
is the desired format for the values of var2.
rw
is the width in characters for row descriptors.
cw
is the width in characters for table columns.
A table definition includes a structure specification, in terms of sets, a body, and an optional title and format. The body of
the table contains the names of the variables whose values will be displayed as the 'body' of the table. You may include as
many variables as you wish in the body of a table. The format specifies the width of the row descriptors and columns of the
table.
Typically, the values of the variables in a table are classified by a common set which will classify the columns of the table.
To define a table of scalars, let sets equal 1.
To display a table, use the table's identifier as a program statement.
By default, tables defined by the DEFINE TABLE statement are written to the output device (screen, or printer) when they
are called (i.e., they behave like a WRITE table statement.) You may override this default and use the same table for
interactive data browsing or data entry by executing a SELECT BROWSE statement. See the SELECT option statement
for details.
Tables may be written in a disk file by using a SELECT OUTPUT statement.
The title defined for a table may be locally overridden with a custom title by including a title specification with the call to
the table. For example, when displaying a table called tabl, the statement
tabl TITLE(newtext)
will display tabl with the title specified by newtext instead of the title specified in the definition of tabl.
Examples:
The following example illustrates use of the DEFINE TABLE statement.
First, a group of financial variables and several other variables that will be used to construct a financial summary report are
defined and initialized. The data for the financial variables were obtained from a database (not shown). See the
FPLAN.PRM example on the PROMULA Demo Disk for details.
DEFINE SET
col(13)
END SET
DEFINE VARIABLE
*
* TABLE DATA VARIABLES
172
Promula Application Development System User's Manual
*
netsal(col)
empcos(col)
msrvce(col)
dep(col)
taxes(col)
tcosts(col)
opinc(col)
intinc(col)
intexp(col)
clcost(col)
othexp(col)
ibtax(col)
itax(col)
netinc(col)
"Net Sales"
"Employment Costs"
"Materials and Service"
"Depreciation"
"Income Taxes"
"Total Costs"
"Operating Income"
"Interest, Dividends and Other Income"
"Interest and Other Debt Charges"
"Estimated Plant Closedown Costs"
"Other Expenses"
"Income (Loss) Before Income Taxes"
"Income Taxes"
"Net Income (Loss)"
*
* TABLE SUPPORT VARIABLES
*
cdesc(col) "The Column Descriptions"
sub1(col)
dash(col) TYPE=STRING(10)
eqls(col) TYPE=STRING(10)
END VARIABLE
TYPE=REAL(8,1)
TYPE=REAL(8,1)
TYPE=REAL(8,1)
TYPE=REAL(8,1)
TYPE=REAL(8,1)
TYPE=REAL(8,1)
TYPE=REAL(8,1)
TYPE=REAL(8,1)
TYPE=REAL(8,1)
TYPE=REAL(8,1)
TYPE=REAL(8,1)
TYPE=REAL(8,1)
TYPE=REAL(8,1)
TYPE=REAL(8,1)
TYPE=STRING(7)
SELECT KEY(col,cdesc)
dash=" --------"
eqls=" ========"
cdesc(i)=1977+i
cdesc(11)="1978-82"
cdesc(12)="1983-87"
cdesc(13)="1978-87"
The code below defines a table called report and a procedure that computes and displays the table.
DEFINE TABLE
report(col),
FORMAT(40,10),
TITLE("ACME Corporation"/,
"Ten-Year Financial Summary"/,
"(Million Dollars)"/),
BODY(eqls / netsal /,
"Costs and Expenses:",
empcos msrvce dep taxes dash sub1 dash opinc/,
"Other Income (Expense):",
intinc intexp clcost othexp dash ibtax itax dash netinc eqls)
END TABLE
DEFINE PROCEDURE wrrep
SELECT col(11-13)
sub1=empcos+msrvce+dep+taxes
SELECT LINES=60,ZERO=DASHES,HEADING=OFF,COMMA=ON,MINUS=PARENTHESES
report
SELECT col*
SELECT LINES=25,ZERO=ON,HEADING=ON,COMMA=OFF,MINUS=LEADING
END PROCEDURE wrrep
The report produced by running procedure wrrep is shown below.
ACME Corporation
Ten-Year Financial Summary
173
Promula Application Development System User's Manual
(Million Dollars)
Net Sales
Costs and Expenses:
Employment Costs
Materials and Service
Depreciation
Income Taxes
Operating Income
Other Income (Expense):
Interest, Dividends and Other Income
Interest and Other Debt Charges
Estimated Plant Closedown Costs
Other Expenses
Income (Loss) Before Income Taxes
Income Taxes
Net Income (Loss)
1978-82
========
1983-87
========
1978-87
========
18,334.7
28,795.2
47,129.9
7,864.1
7,740.1
902.1
298.6
-------16,804.9
-------1,529.8
12,208.4
13,476.9
1,483.1
371.7
-------27,540.1
-------1,255.1
20,072.5
21,217.0
2,385.2
670.3
-------44,345.0
-------2,784.9
195.9
(199.0)
---------1,526.7
630.8
-------895.9
========
276.4
(389.0)
(650.0)
(51.0)
-------441.5
(86.2)
-------527.7
========
472.3
(588.0)
(650.0)
(51.0)
-------1,968.2
544.6
-------1,423.6
========
See the WRITE table, BROWSE table, and EDIT table statements for more details on the use of multi-variable reports.
3.7.37 DEFINE VARIABLE
Purpose:
Defines a local variable.
Syntax
DEFINE VARIABLE [SCRATCH] [file]
var[(sets)][,"desc"][,TYPE=type] [values] [diskrel]
...
END
Remarks:
var
is the identifier of the variable. This is the name by which you refer to the variable in your programs. var may
contain letters and numbers, but the first character must be a letter. Each variable identifier must be different
from all other identifiers in a given program segment. Only the first six characters of the identifier are
significant. If the identifier is followed by an asterisk (*), the variable may be used as an indirect for general
purpose input/output operations.
SCRATCH
is a keyword indicating that the variable is to reside in scratch storage.
174
Promula Application Development System User's Manual
file
is the identifier of an arrray or random file. If file is specified, var will be treated as a disk variable and its
values will be contained in the disk file that file is physically opened to. See the SELECT file statement for
a discussion of random files, and Chapter 4 for a discussion of array files.
NOTE: If file is specified, the SCRATCH, values, and diskrel options are not allowed.
sets
is a list of set identifiers or numeric constants specifying the dimensions of the variable. If omitted, the
variable is a scalar, i.e., it has a single value.
In default input and output operations, the first set will classify the rows of values, the second set will classify
the columns of values, the third set will clasify the two-dimensional blocks of values, etc.
desc
is a descriptor for the variable. It shows up as the title of subsequent displays of the variable produced by the
report generation statements WRITE, BROWSE, EDIT, PLOT.
type
is the type format specification of the variable and may be one of the following:
REAL(w,d)
contains real numbers in the ranges:
(-3.37E+38,-8.43E-37)
0
(+8.43E-37,+3.37E+38)
Reals outside these ranges are not valid and cause underflows or overflows in
calculations, which result in errors.
INTEGER(w)
contains integer numbers in the range:
(-231–3,+231–3) about ± 2.1 billion
Integers outside this range cause overflows and cannot be processed by the system.
STRING(w)
contains character values, i.e., strings of characters.
CODE(w)
contains codes. Codes are short character strings that are used for set selections. For
example, JAN and FEB may be used to select the months of January and February.
MONEY(w)
contains money values (dollars and cents). This type is useful for accounting arithmetic
where one-cent accuracy is important. Money variables maintain ten significant digits
of accuracy. The range of MONEY type variables is
(-2**31-3,+2**31-3)
about ± 2.1 billion cents or 21 million dollars.
DATE(w)
contains date values. Dates are values of the form mm/dd/yy, where mm is a month
number, dd is a day number, and yy is a year number. Internally, the date value is
stored as a numeric quantity equal to yymmdd. Alternative date formats (e.g.,
dd/mm/yy or mm/dd/yyyy) are available by executing a SELECT DATE statement.
UPPERCASE(w)
contains string values that are automatically converted to uppercase when they are input
from the keyboard.
175
Promula Application Development System User's Manual
set(w)
contains integers from 0 to N. If the values of the set type variable are within the range
of set, the descriptors of set are displayed, otherwise, the variable is assigned and
displays the value 0. This type of variable is useful for helping the user enter or verify
categorical data.
Where
w
is an integer denoting the width (in characters) of subsequent displays of the values of var. The
maximum width for a code type variable is 6 characters.
d
is an integer denoting the number of decimal digits in subsequent displays of the values of real variables.
If d is 10 or greater, the number will be shown in exponential notation — base 10. The value will show
six decimal places.
If type is omitted, the variable will have type REAL(8,0)
values
is a value specification defining initial values for var. Use of this option is restricted to local, REAL type
variables. values may take one of four different forms:
VALUE(a) or
VALUE=a
assigns the value a to all the cells of the variable.
VALUE(a,b)
assigns the first value to a, the last value to b, and interpolates the remaining cells of
the variable.
VALUE(a,b,c...) assigns the values a,b,c... in order. If too many values are specified, the extra
values are ignored. If too few are specified, the remaining values are set to zero. In
order to simplify the specification of multiple values, the N*VALUE notation may be
used. Thus,
VALUE(50*99.9, 30*99.0, 10*95.0, 5*90.0, 5*80.0)
would be a quick way to specify 100 values.
If values is omitted, the variable will be initialized by PROMULA: numeric variables are initialized with
the value zero, and string type variables are initialized with "empty strings".
diskrel
is a disk relation indicating that the variable is to be used for virtual or dynamic access of a disk variable.
Variables are storage places for information. Depending on how their values are stored, variables are of three types: fixed,
scratch, and disk.
Fixed
Fixed variables are accessed from a fixed space in primary memory (RAM). They are defined with a DEFINE
VARIABLE statement.
The values of fixed variables may be saved in a segment file on disk by the END SEGMENT, END
PROGRAM, and WRITE VALUE segment statements.
Using fixed variables in calculations will result in the fastest execution speed.
Fixed variables are sometimes referred to as local variables.
Scratch
Scratch variables are accessed from a scratch space in primary memory. They are defined with a DEFINE
VARIABLE SCRATCH statement.
176
Promula Application Development System User's Manual
Their values can be cleared from memory with a CLEAR statement to make room for other scratch variables.
The values of scratch variables cannot be saved in a segment file on disk.
Computations using scratch variables will be slower than using fixed variables because PROMULA must do
more internal calculations to access their values.
Scratch variables are sometimes referred to as local variables.
Disk
Disk variables are stored on disk in an array file. They are defined with a DEFINE VARIABLE file
statement. Disk variables are also referred to as database variables.
The values of disk variables may be accessed directly on disk and they may be accessed dynamically or
virtually in memory via scratch or fixed variables which are related to them.
See Chapter 4 for a discussion of relating local and disk variables.
Example: The set type variable
When displayed, a set(w) type variable will show the contents of the set element whose index value it contains. This
correspondence is only valid for index values between 1 and the size of the set, all other values are converted to 0. The
following example illustrates the TYPE=set(w) option.
DEFINE SET
emp(4)
END SET
DEFINE VARIABLE
empn(emp) "Employee Names" TYPE=STRING(10)
emps(emp) "Employee List" TYPE=emp(40)
empc
"An Employee"
TYPE=emp(10)
END VARIABLE
DEFINE RELATION
row(emp,empn)
END RELATION
READ empn
George
Fred
Lois
Mark
Given the above defintions, the set type variable may be used for displaying categorical data as illustrated in the dialog
below.
WRITE emps
Employee List
George
Fred
Lois
Mark
0
0
0
0
emps(i) = i
WRITE emps
Employee List
George
Fred
George
Fred
177
Promula Application Development System User's Manual
Lois
Mark
Lois
Mark
WRITE empc
An Employee
0
empc = 4
WRITE empc
An Employee
Mark
3.7.38 DEFINE WINDOW
Purpose:
Define a window.
Syntax:
DEFINE WINDOW
name(area[,text][,border][,bar]) [POPUP]
...
END
Remarks:
name
is the logical identifier of the window.
area
is a list of four numbers defining the location and size of the window. The syntax of this list is
X1,Y1,X2,Y2
where
X1
Y1
X2
Y2
defines the leftmost column of the window
defines the topmost row of the window
defines the rightmost column of the window
defines the bottom-most row of the window
For a 25 row by 80 column text screen, row values must be in the range 0 to 24 and column values must be in
the range 0 to 79. Any window area that is off the screen or is overlapped by another window will not be
visible.
text
is a list of up to four keywords separated by slashes that define the appearance of normal text in the window.
The syntax of this list is
foregr/backgr[/BRIGHT][/BLINK]
where
foregr
backgr
BRIGHT
BLINK
defines the foreground color
defines the background color
causes the foreground to be bright
causes the text to blink
178
Promula Application Development System User's Manual
Valid colors are BLACK, WHITE, GREEN, RED, YELLOW, BLUE/CYAN, PURPLE/MAGENTA,
NAVY/DARK BLUE.
border
is a list of up to six keywords separated by slashes that define the appearance of a border for the window. The
syntax of this list is
type/style/foregr/backgr[/BRIGHT][/BLINK]
where
type
defines the location of a border for the window and may be one of the following:
NONE
TOP
BOTTOM
BANDED
FULL
HEADER
FOOTER
style
defines the style of the border and may be one of the following:
SINGLE
DOUBLE
HEAVY
foregr
backgr
BRIGHT
BLINK
for no border
for a top border
for a bottom border
for a top and bottom border
for a complete border
for a header border
for a footer border
for a single line border
for a double line border
for a heavy line border
defines the foreground color
defines the background color
causes the foreground to be bright
causes the text to blink
Valid colors are BLACK, WHITE, GREEN, RED, YELLOW, BLUE/CYAN, PURPLE/MAGENTA,
NAVY/DARK BLUE.
The border is displayed one character outside of the area defined by the area parameter of the window
definition.
bar
is a list of up to three sets of up to four keywords separated by slashes that define the appearance of
highlighting in highlighted prompts, pick and popup menus, EDIT statements, and the list selection
statements SELECT indirect, SELECT ENTRY, and SELECT SET, and the GETDIR function.
The syntax of the bar specification is
colors1,colors2,colors3
where
colors1
defines the colors of standard highlighting in the window.
These colors will be used for highlighting and prompts generated by various PROMULA
statements and for the currently highlighted but not selected elements in selection lists. The
default colors are black on cyan.
colors2
defines the colors of a selected but not currently highlighted element in the SELECT SET
statement. The default colors are black on green.
179
Promula Application Development System User's Manual
colors3
defines the colors of a currently highlighted and selected element in the SELECT SET
statement. The default colors are black on red.
Each color specification has the following form:
foregr/backgr[/BRIGHT][/BLINK]
where
foregr
backgr
BRIGHT
BLINK
defines the foreground color
defines the background color
causes the foreground to be bright
causes the text to blink
Valid colors are BLACK, WHITE, GREEN, RED, YELLOW, BLUE/CYAN, PURPLE/MAGENTA,
NAVY/DARK BLUE.
is the optional keyword POPUP. When present, the window will behave as a "popup" window; i.e., when the
window is closed, the contents of the screen that was on the screen in the window area before the popup
window was opened will be redrawn. Popup windows are often used to provide on-line help or warning
messages.
POPUP
Examples:
The following example illustrates how to use header and footer style windows. A static "frame" window is needed to make
the sides of the box that will contain the Main Screen. This frame will be opened first, then the static header and footer
windows will be opened on top of it. Finally, the window to be used as the Main Screen that fits inside the "box" created by
the first three windows is opened.
DEFINE WINDOW
head(01,01,78,03,WHITE/BLACK,HEADER/SINGLE)
fram(01,01,78,24,WHITE/BLACK,FULL/SINGLE)
foot(01,23,78,23,WHITE/BLACK,FOOTER/SINGLE)
work(02,05,77,21,WHITE/BLACK,NONE)
END WINDOW
OPEN fram MAIN
OPEN head MAIN
WRITE CENTER(/"This WRITE statement appears in the window called 'head'")
OPEN foot MAIN
WRITE CENTER(/"This WRITE statement appears in the window called 'foot'")
OPEN work MAIN
WRITE CENTER(/"This WRITE statement appears in the window called 'work'")
ASK CONTINUE
The code above produces the following display:
180
Promula Application Development System User's Manual
This WRITE statement appears in the window called 'head'
This WRITE statement appears in the window called 'work'
Press any key to continue
This WRITE statement appears in the window called 'foot'
See also the OPEN WINDOW and CLEAR WINDOW statements as well as Advanced Windows in Chapter 1 for more
information on the use of windows. See also the sample applications distributed on the PROMULA Demo Disk.
3.7.39 DO CORRELATE
Purpose:
Produces a report of one or more correlation matrices for all pairings of specified variables. The correlation coefficients (R)
are computed by the following formula:
R=
i(xi – x )(yi – y )
i(xi – x )2 i(yi –
where xi and yi are the variables to be correlated and
y )2
x and y are their respective means.
Syntax:
DO CORRELATE [(sets)] (vars)
Remarks:
sets
is a list of set identifiers subscripting the arrays to be correlated.
The specification of sets defines the index of the observations and the order of report pages produced. The last
set in sets specifies the index of the observations to be correlated, any preceding sets specify the order in which
pages of the report are displayed. The generation of report pages corresponds to the specification of the sets in
sets from left to right — left varying the fastest.
181
Promula Application Development System User's Manual
The default value for sets is the reverse of the set specification used in defining the highest dimensional variable
(i.e., the variable having the greatest number of dimensions) in vars with the first set in this definition indexing
the observations, and the remaining sets heading report pages.
vars
is a list of variable identifiers specifying the arrays to be correlated. The list may also contain the time parameter
TIME if all the variables in vars share a time series set as one of their indexes (a time series set is a set which has
a TIME specification in its definition or which shares a TIME relation with a variable.) This list must contain at
least two variables. Inclusion of TIME will include the time series value vector as one of the variables in the
correlation matrix.
One-dimensional arrays (vectors), are used in correlation calculations directly. Two- and higher-dimensional
arrays are partitioned into sets of observations, and a separate matrix is generated for each active "page" and
"column" of the highest dimensional array in vars. The variables specified in vars should have at least one set in
common.
A title — Correlation Matrix — is printed at the top of each page. Subtitles including the row descriptors for sets
specified in sets appear when more than one report page is generated.
Examples:
The following code illustrates the DO CORRELATE statement.
DEFINE SET
grp(2)
"Test Groups"
tim(10) "Time Points" TIME(0,9)
END SET
DEFINE VARIABLE
rspv(tim,grp) "Response by Group and Time"
dosv(tim,grp) "Dose at Each Time Point"
END VARIABLE
READ dosv(grp,tim)
0.5
1.0
1.5
2.0
0.5
1.0
1.5
2.0
READ rspv(grp,tim)
1.3
2.1
3.5
6.0
0.3
1.9
3.6
6.2
2.5
2.5
15.0
15.0
17.5
17.5
20.0
20.0
22.5
22.5
25.0
25.0
6.6
5.3
6.1
3.3
6.0
2.7
11.2
10.7
5.7
5.5
5.7
9.7
Given the definitions above, the statement
DO CORRELATE(grp,tim) (dosv,rspv,TIME)
produces the display below.
Correlation Matrix, 0 to 9
GRP(1)
DOSV
RSPV
TIME
DOSV
1.000
0.581
0.948
RSPV
0.581
1.000
0.687
TIME
0.948
0.687
1.000
GRP(2)
DOSV
182
RSPV
TIME
Promula Application Development System User's Manual
DOSV
RSPV
TIME
1.000
0.603
0.948
0.603
1.000
0.738
0.948
0.738
1.000
3.7.40 DO DESCRIBE
Purpose:
Produces a report of one or more tables of 12 descriptive statistics for specified variables. The statistics are as follows:
1.
2.
3.
4.
5.
6.
Number of observations
Number of excluded observations
Number of valid observations
Arithmetic mean
Variance
Standard error
7.
8.
9.
10.
11.
12.
Standard deviation
Skewness
Kurtosis
Range
Minimum value, and
Maximum value.
Syntax:
DO DESCRIBE [(sets)] (vars[::fmt])
Remarks:
sets
is a list of set identifiers subscripting the array(s) to be described.
The specification of sets controls the analysis of the variables specified in vars by defining the index of the
observations and the order of report pages produced. The last set in sets specifies the index of the observations,
any preceding sets specify the order in which pages of the report are written. The ordering of report pages
corresponds to the specification of the sets in sets from left to right — left varying the fastest.
The default value for sets is the reverse of the set specification used in defining each variable in vars with the
first set in this definition indexing the observations, and the remaining sets heading report pages.
vars
is a list of variable identifiers specifying the arrays to be described.
One-dimensional arrays (vectors), are treated as a single set of observations. Two- and higher-dimensional arrays
are partitioned into sets of observations.
fmt
is an integer specifying the number of decimal digits for the reported statistics. The default fmt is the number of
decimals specified by the TYPE specification in the definition of the variable(s) specified in vars. The report
generator uses the following number of decimal digits for each statistic:
Format of reports produced by the DO DESCRIBE statement
STATISTIC
1.
2.
3.
4.
5.
6.
7.
NUMBER OF
DECIMALS DIGITS
0
0
0
fmt
fmt
fmt+1
fmt+1
Number of observations
Number of excluded observations
Number of valid observations
Arithmetic mean
Variance
Standard error
Standard deviation
183
Promula Application Development System User's Manual
8.
9.
10.
11.
12.
fmt+2
fmt+2
fmt
fmt
fmt
Skewness
Kurtosis
Range
Minimum value
Maximum value
A title — Descriptive Statistics for vardesc — is printed at the top of each page (vardesc is the descriptor of the array
being described). Subtitles that consist of the row descriptors for sets specified in sets appear when more than one report
page is produced.
Examples:
The following code illustrates the DO DESCRIBE statement. First, a three-dimensional variable, a, is defined and
displayed:
DEFINE SET
row(4)
col(2)
pag(2)
END SET
DEFINE VARIABLE
a(row,col,pag) "VALUES BY ROW AND COL"
END VARIABLE
a=RANDOM(5000,9999)
The values of variable a may be displayed by the statement, WRITE a.
VALUES BY ROW AND COL
PAG(1)
COL(1)
6,079
8,046
8,567
8,988
ROW(1)
ROW(2)
ROW(3)
ROW(4)
COL(2)
6,825
5,052
8,882
7,825
PAG(2)
COL(1)
7,007
6,613
6,611
5,152
ROW(1)
ROW(2)
ROW(3)
ROW(4)
COL(2)
6,409
7,083
9,819
5,168
The report produced by the statement
DO DESCRIBE(col,row) (a::2)
is shown below. Set row is the last set in sets so it indexes the observations, set col is used to partition the data for each
table. Set pag is not specified in sets so its descriptors do not appear in the titles of the tables and the statistics reported
correspond to the first level of pag.
Descriptive Statistics for VALUES BY ROW AND COL
184
Promula Application Development System User's Manual
COL(1)
No of Observations
Number Excluded
Valid Observations
Arithmetic Mean
Variance
Standard Error
Standard Deviation
Skewness
Kurtosis
Total Range
Minimum Value
Maximum Value
4
0
4
7,919.92
1,241,510.00
1,286.603
1,114.231
-0.8583
-0.8961
2,909.62
6,078.70
8,988.32
Descriptive Statistics for VALUES BY ROW AND COL
COL(2)
No of Observations
Number Excluded
Valid Observations
Arithmetic Mean
Variance
Standard Error
Standard Deviation
Skewness
Kurtosis
Total Range
Minimum Value
Maximum Value
4
0
4
7,146.30
1,990,345.00
1,629.047
1,410.796
-0.3267
-1.1999
3,935.86
5,052.46
8,988.32
The statement DO DESCRIBE(a::2) would use the default value for sets (i.e., (pag,col,row)) and would produce
tables of statistics for variable a indexed by row for all combinations of pag and col in the following order:
PAG(1),
PAG(2),
PAG(1),
PAG(2),
COL(1)
COL(1)
COL(2)
COL(2)
The statement DO DESCRIBE(row) (a::2) would produce a table of statistics for variable a indexed by row for the first
active elements of sets of pag and col. No pag or col descriptor subtitle would appear in the report title.
The statement DO DESCRIBE(col,row) (a::2) would produce a table of statistics for variable a indexed by row for
each level of set col and the first active element of set pag. Set col's row descriptors would be used as a subtitle in the
report titles.
COL(1)
COL(2)
The statement DO DESCRIBE(col,pag,row) (a::2) would produce tables of statistics for variable a indexed by row
for all combinations of pag and col in the following order:
COL(1),
COL(2),
COL(1),
COL(2),
PAG(1)
PAG(1)
PAG(2)
PAG(2)
185
Promula Application Development System User's Manual
3.7.41 DO DIRECTORY
Purpose:
Executes a group of statements once for each file in the current directory that matches a given file specification.
Syntax:
DO DIRECTORY filespec INTO fname
statement
...
END
Remarks:
filespec
is a string variable or a quoted string containing the file specification that you wish to search for; wild card
characters are allowed.
fname
is the name of the string variable that will be assigned each file name that matches the file specification.
statement is any executable statement, including other DO statements, except definitions.
The statements from DO DIRECTORY statement is an example of a "DO loop."
Examples:
The following example demonstrates the DO DIRECTORY statement.
* Create three files on disk
DEFINE FILE
file1
file2
file3
END
OPEN file1 "file1.fil" STATUS = NEW
OPEN file2 "file2.fil" STATUS = NEW
OPEN file3 "file3.fil" STATUS = NEW
CLEAR file1
CLEAR file2
CLEAR file3
DEFINE VARIABLE
fname
"File Name"
END VARIABLE
TYPE=STRING(15)
The DO DIRECTORY loop below finds all files that match the specification *.fil, passes each one to the string variable
fname, and writes the value of fname.
DO DIRECTORY "*.fil" INTO fname
WRITE fname
END DO DIRECTORY
The output of the loop above was
File Name
File Name
File Name
FILE1.FIL
FILE2.FIL
FILE3.FIL
186
Promula Application Development System User's Manual
3.7.42 DO file
Purpose:
Accesses sequentially all the records of a text file or a random file.
Syntax:
DO file
statement
...
END
Remarks:
is the identifier of a text or random file.
file
statement is any executable statement, including other DO statements, except definitions.
The statements from DO file to END are an example of a "DO loop."
The statements of the DO file loop are executed repeatedly as many times as there are records in the file. The order of
iterations through the DO loop is 1,2,...N, where N is the number of the last record in the file. At each iteration a new
record in the file is accessed, and the statements within the DO loop are executed.
If file is type TEXT, an explicit READ file(variables) statement is required to transfer data from the text file to program
variables. If file is type RANDOM, the data in the record is automatically passed to the variables of the random file as each
record is accessed.
Examples:
1.
Copy a text file to a random file
DEFINE FILE
txt1 TYPE=TEXT
ran1 TYPE=RANDOM
arr1 TYPE=ARRAY
END FILE
OPEN ran1 "ran1.ran", STATUS=NEW
DEFINE VARIABLE ran1
item1 "Item 1"
TYPE=REAL(8,0)
item2 "Item 2"
TYPE=STRING(8)
item3 "Item 3"
TYPE=DATE(8)
END VARIABLE
OPEN txt1 "txt1.txt", STATUS=OLD
DO txt1
READ txt1(item1:8,item2:8,item3:8)
WRITE ran1
END txt1
2.
Copy a text file to an array file
OPEN arr1 "arr1.arr", STATUS=NEW
DEFINE SET
rec(100)
"Records"
187
Promula Application Development System User's Manual
END SET
DEFINE VARIABLE arr1
var1(rec) "Variable 1"
var2(rec) "Variable 2"
var3(rec) "Variable 3"
END VARIABLE
TYPE=REAL(8,0)
TYPE=STRING(8)
TYPE=DATE(8)
DEFINE VARIABLE
rn
"Record Number"
END VARIABLE
rn=1
DO txt1
READ txt1(var1(rn),var2(rn),var3(rn))
rn=rn+1
END txt1
3.
Copy a random file to an array file
rn=1
DO ran1
var1(rn) = item1
var2(rn) = item2
var3(rn) = item3
rn=rn+1
END ran1
4.
Copy an array file to a random file
rn = 1
DO rec
SELECT ran1(rn)
item1 = var1
item2 = var2
item3 = var3
WRITE ran1
rn=rn+1
END rec
5.
List a random file
DO ran1
WRITE(item1:8,item2:8,item3:8)
END ran1
3.7.43 DO IF
Purpose:
Executes a group of statements once if a condition is met.
Syntax:
DO IF condition
statement
...
[ELSE [condition]
statement
...]
END
188
Promula Application Development System User's Manual
Remarks:
condition is any Boolean expression, i.e., an expression that is either true or false. If true, the statements immediately
following are executed until the next END or ELSE statement, whichever is first. If false, the statements
immediately following are not executed and execution proceeds to the next ELSE or END statement,
whichever is first.
statement is any executable statement (no definitions), including another DO statement. The group of executable
statements between the DO IF and the next ELSE (or END) statement, or between an ELSE and the next
ELSE (or END) statement, is called a branch of the DO IF statement.
A branch is executed only if all previous conditions are false and the condition of the branch is true; otherwise, execution
proceeds to the evaluation of the condition of the next branch.
DO IF statements may be nested to any depth.
DO IF statements may have multiple ELSE statements. In a DO IF with multiple ELSE statements, the conditions of the
ELSE statements are evaluated sequentially from top to bottom: if the first condition is false the second condition is
evaluated, and so forth, until a true condition is found or the END is encountered.
If an ELSE statement has no condition specified, it is assumed to be the complement of all previous conditions. That is, if
all the previous conditions are false, the null ELSE statement is true. For this reason, a null ELSE statement, if desired,
should always be specified last.
Examples:
DEFINE VARIABLE
x
y
END VARIABLE
DEFINE PROCEDURE doif
DO IF x GT y
WRITE("x= ",x:5:2,", y=
ELSE x EQ y
WRITE("x= ",x:5:2,", y=
ELSE
WRITE("x= ",x:5:2,", y=
END IF
END PROCEDURE doif
",y:5:2/"x is greater than y")
",y:5:2/"x is equal to y")
",y:5:2/"x is less than y")
A dialog with procedure doif is displayed below.
x = 1.2
y = 3.4
doif
x= 1.20, y= 3.40
x is less than y
x = 4.5
doif
x= 4.50, y= 3.40
x is greater than y
x = 3.4
doif
x= 3.40, y= 3.40
x is equal to y
189
Promula Application Development System User's Manual
In this example, the procedure doif checks whether the variable x is less than, equal to, or greater than the variable y, and
issues a message appropriately.
3.7.44 DO IF END
Purpose:
Executes a group of statements once if the user presses the END key in response to a prompt or pick menu.
Syntax:
DO IF END
statement
...
END
Remarks:
statement is any executable statement (no definitions), including another DO statement.
The group of executable statements between the DO IF END and the END statement are executed if the user presses the
END key in response to a prompt or menu, typically from a SELECT SET, SELECT ENTRY, SELECT indirect,
SELECT variable or SELECT menu statement that uses the End key as an escape. This test can help you avoid
complications that may come up when the user ends from a selection statement without making a valid selection. After
these statements are executed, PROMULA automatically re-executes the statement preceding the DO IF END block.
Examples:
1.
The procedure below uses a DO IF END statement to force the user to make a set selection via the SELECT ENTRY
statement.
DEFINE SET
yrs(5)
END SET
DEFINE WINDOW
cwind(1,22,78,23,white/black/bright,full/single,yellow/black),POPUP
mwind(0,0,79,20,green/black,none,white/black,yellow/red/bright)
END WINDOW
DEFINE VARIABLE
yrsn(yrs) "Year Names" TYPE=STRING(10)
yrsv(yrs) "Year Values"
END VARIABLE
yrsv(i) = i
yrsn(i) = yrsv+" yrs."
SELECT ROW(yrs,yrsn)
DEFINE PROCEDURE getyrs
OPEN cwind, COMMENT
OPEN mwind, MAIN
WRITE COMMENT
Please select the number of years you will serve.
YOU MUST SERVE AT LEAST 1 YEAR!
190
Promula Application Development System User's Manual
END
SELECT ENTRY(yrs)
DO IF END
getyrs
END IF END
yrsv = yrs:S
WRITE ("Your must serve ",yrsv:-2,"years!
END PROCEDURE getyrs
Identifier
1
2
3
4
5
THANK YOU!")
Description
1 yrs.
2 yrs.
3 yrs.
4 yrs.
5 yrs.
End: Exit
Arrows PgUp PgDn Home: Move
Enter: Select
Please select the number of years you will serve.
YOU MUST SERVE AT LEAST 1 YEAR!
2.
The DO IF END statement may also be used to detect a null set selection. This usage is obsolete; it is available only to
keep PROMULA compatible with previous versions. Use the DO IF NULL statement instead.
DEFINE SET
mn (12) "12 Months"
END SET
DEFINE VARIABLE
lmt
"Lower Limit value"
mv(mn) "Monthly values"
END VARIABLE
mv(i) = i*10
DEFINE PROCEDURE null
WRITE ("Enter the Lower Limit.")
READ lmt
SELECT mn IF mv GT lmt
DO IF END
WRITE("There are no months with value greater than"lmt)
WRITE("Try again.")
null
END IF END
WRITE mv:40
191
Promula Application Development System User's Manual
END PROCEDURE null
A dialog with procedure null is shown below.
null
Enter the Lower Limit.
? 200
There are no months with value greater than
Try again.
200
Enter the Lower Limit.
? 100
Monthly values
MN(11)
MN(12)
110
120
3.7.45 DO IF ERROR
Purpose:
Executes a group of statements if a specific error is generated by the previous statement.
Syntax:
DO IF ERROR n
statement
...
END
Remarks:
is the number of the error. The error messages and their numbers are listed in Chapter 6 of this manual.
n
statement is any executable statement (no definitions), including another DO statement.
If the specified error occurs during execution of the statement immediately preceding the DO IF ERROR statement,
PROMULA will execute the group of executable statements between the DO IF ERROR and the END then re-execute the
statement immediately preceding the DO IF ERROR statement.
Example:
Procedure chkval uses the DO IF ERROR statement to detect an arithmetic overflow or underflow.
DEFINE PROCEDURE chkval
WRITE "Please enter a value."
READ val
ans = 100/val
DO IF ERROR 538
WRITE ("Please enter a nonzero value.")
READ val
END IF ERROR
WRITE ("The answer is ",ans:-8:3)
END PROCEDURE chkval
192
Error 538 is caused by an
arithmetic overflow or underflow.
Promula Application Development System User's Manual
A dialog with procedure chkval is shown below.
DO chkval
Please enter a value.
? 0
Please enter a nonzero value.
? 10
The answer is 10.000
3.7.46 DO IF ESCAPE
Purpose:
Executes a group of statements if the user pressed the Esc key in response to a prompt generated by the previous statement.
Syntax:
DO IF ESCAPE
statement
...
END
Remarks:
statement
is any executable statement (no definitions), including another DO statement.
If the user presses Esc in response to a prompt (or selection menu), PROMULA will execute the group of executable
statements between the DO IF ESCAPE and the END statement then re-execute the statement immediately preceding the
DO IF ESCAPE statement.
This statement is usually used to help prevent complications that can result if the user escapes from an application instead
of giving a valid response to a prompt.
Example:
Procedure noesc uses the DO IF ESCAPE statement to trap and escape.
DEFINE PROCEDURE noesc
WRITE "Please enter the value."
READ val
DO IF ESCAPE
WRITE ("There is no escape!")
END IF ESCAPE
WRITE ("The value is ",val:-8:3)
END PROCEDURE noesc
A dialog with procedure noesc is shown below.
DO noesc
Please enter the value.
? [Esc]
There is no escape!
? 100
193
Promula Application Development System User's Manual
The value is 100.000
3.7.47 DO IF HELP
Purpose:
Executes a group of statements if the user presses the Alt and H keys simultaneously in response to a prompt.
Syntax:
DO IF HELP
statement
...
END
Remarks:
statement
is any executable statement (no definitions), including another DO statement.
When the user enters Alt-H in response to a prompt, PROMULA executes the group of executable statements between the
DO IF HELP and the END statement then re-executes the statement immediately preceding the DO IF HELP statement.
This statement is usually used to provide the user with information relating to a Data menu or a Pick menu.
This statement and the SELECT HELP statement are useful for customizing on-line help for your applications.
Pressing Alt-H in response to a Popup pick menu will cause PROMULA to display a specific topic of a dialog file as
indicated in the definition of the pick menu.
Examples:
In the example shown on the next page the dialog file dohelp1.hlp provides context-specific help for the user editing the
data menu data.
The DO IF ERRORVALUE statement is used to branch according to location of the currently highlighted field on the data
menu.
If you press Alt-H when the cursor is on the field wt — which is the 3rd field in the data menu — you will get the message
"Please enter your weight in kilograms." — which is the 3rd topic in the dialog file dohelp1.hlp.
ERRORVALUE is an internal PROMULA variable that contains the sequence number of the currently highlighted field in
data and pick menus.
Define a dialog file with help messages.
DEFINE DIALOG "dohelp1.hlp"
Data Entry Help Messages
Select the desired message by using the movement keys.
Press [ENTER] to access the desired (highlighted) message.
Press [END] to return to the previous menu.
Press [ESC] to exit to the PROMULA Main Menu.
END
194
Promula Application Development System User's Manual
TOPIC "NAME"
Please enter your last name in all CAPITAL letters.
END
TOPIC "AGE"
Please enter your age in years.
END
TOPIC "WEIGHT"
Please enter your weight in kilograms.
END
END
Define a procedure for editing a data menu and providing field-specific help for the data variables in the data menu.
DEFINE VARIABLE
name
"User Name" TYPE=STRING(12)
age
"User Age (years)"
wt
"User Weight (Kilograms)"
END VARIABLE
DEFINE MENU data
Data Entry Menu
Name
Age
Weigh
t
:
:
:
@@@@@@@@@@
@@@@@@@@@@
@@@@@@@@@@
Please enter the information.
Press
Alt-H
questions.
if
you
have
any
END
DEFINE PROCEDURE getdata
EDIT data(name,age,wt)
DO IF HELP
DO IF ERRORVALUE EQ 1
BROWSE TOPIC "DOHELP1.HLP", 1
ELSE ERRORVALUE EQ 2
BROWSE TOPIC "DOHELP1.HLP", 2
ELSE ERRORVALUE EQ 3
BROWSE TOPIC "DOHELP1.HLP", 3
END IF ERRORVALUE
END DO IF HELP
END PROCEDURE getdata
3.7.48 DO IF KEYPRESS
Purpose:
Executes one or more statements if the user presses a prespecified key in response to a prompt.
Syntax:
stat1
DO IF KEYPRESS(keyid)
statement
...
END
Remarks:
195
Promula Application Development System User's Manual
stat1
is an interactive statement; for example, an ASK, SELECT, BROWSE or EDIT statement.
keyid
is a keypress name (See Appendix C).
statement is any executable statement (no definitions), including another DO statement.
The DO IF KEYPRESS statement is an extension of the DO IF ESCAPE capability and behaves in the same manner. If
the user presses the key named by keyid in response to an interactive statement, PROMULA will execute the group of
executable statements between the DO IF KEYPRESS and the END statement then re-execute stat1.
There are two limitations of this capability:
1.
No more than five DO IF KEYPRESS blocks may follow a single statement.
2.
The keypress identified by keyid must be available and defined for the current keyboard (See Appendix C).
Be warned that use of the DO IF KEYPRESS statement is inherently nonportable, and your application will require source
code changes if it is moved across the various platforms on which PROMULA runs.
Example:
Procedure test uses the DO IF KEYPRESS statement to trap keypresses during an EDIT variable statement.
DEFINE SET
row(20)
col(10)
END
DEFINE VARIABLE
var(row,col) "A variable matrix"
dvar(row,col) "Difference in variable matrix"
filen, TYPE=STRING(20)
END
var(r,c) = r + c * 100
DEFINE PROCEDURE prt
filen = "var.out"
SELECT OUTPUT filen LINES=100 width=132 PRINTER=ON
WRITE var
SELECT LINES=25 WIDTH=80 PRINTER=OFF
END
DEFINE PROCEDURE dif
dvar(y,c) = var(y,c) - var(y,1)
BROWSE dvar TITLE(var:D, "Differences from base case")
END
DEFINE PROCEDURE test
EDIT var TITLE(var:D//,
"Press ALT-P to save
",/.
:Atd-D to see difference")
DO IF KEYPRESS(ALTP)
prt
END
DO IF KEYPRESS(ALTD)
dif
END
END
196
Promula Application Development System User's Manual
3.7.49 DO IF NULL
Purpose:
Executes a group of statements once if a null condition occurs.
Syntax:
DO IF NULL
statement
...
END
Remarks:
statement is any executable statement (no definitions), including another DO statement.
The DO IF NULL statement, can be used to detect a null set selection resulting from a SELECT set IF statement. It may
also be used to detect if the GETDIR function did not find any files matching the search specification.
A SELECT set IF condition statement results in a null condition if the selection condition is false for all elements of the
set. When this occurs, PROMULA does not select a null set; it selects the complete set. The DO IF NULL statement
allows you to detect the null selection and take appropriate action and prevent subsequent abnormal calculations, or other
undesirable effects.
A GETDIR function results in a null condition if no files matching the search specification are found.
After the statements in the DO IF NULL block are executed, the SELECT set IF or GETDIR statement that caused the
null selection is re-executed.
Examples:
The following example illustrates the use of the DO IF NULL statement to detect a null set selection.
DEFINE SET
mn (12) "12 Months"
END SET
DEFINE VARIABLE
lmt
"Lower Limit value"
mv(mn) "Monthly values"
END VARIABLE
mv(i) = i*10
DEFINE PROCEDURE null
WRITE ("Enter the Lower Limit.")
READ lmt
SELECT mn IF mv GT lmt
DO IF NULL
WRITE("There are no months with value greater than"lmt)
WRITE("Try again.")
null
END IF NULL
WRITE mv:40
END PROCEDURE null\
A dialog with procedure null is shown below.
197
Promula Application Development System User's Manual
null
Enter the Lower Limit.
? 200
There are no months with value greater than
Try again.
200
Enter the Lower Limit.
? 100
Monthly values
MN(11)
MN(12)
110
120
See the section on file management functions for an example of how to use the DO IF NULL statement to detect a "no
match" condition from the GETDIR function.
3.7.50 DO INVERT
Purpose:
Compute the inverse of a matrix.
Syntax:
DO INVERT(row,col) arr
Remarks:
row
is the identifier of a set dimensioning the matrix to be inverted.
col
is the identifier of a set dimensioning the matrix to be inverted.
arr
is the square subarray to be inverted. arr must be dimensioned by the sets row and col. The results of the
inversion will overwrite arr.
The ranges of row and col must be equal in size when DO INVERT is called, and the solution process will be restricted to
the first selected entry of the remaining sets subscripting arr.
Example:
DEFINE SET
arow(3)
acol(3)
brow(3)
bcol(3)
page(2)
END SET
DEFINE VARIABLE
a (page,arow,acol)
ia(page,arow,acol)
um(page,brow,bcol)
END VARIABLE
"A matrix"
"INVERT(A)"
"UNIT MATRIX"
TYPE=REAL(10,6)
TYPE=REAL(10,6)
TYPE=REAL(10,6)
198
Promula Application Development System User's Manual
SELECT page(1)
READ a(arow,acol,page)
1 2 3
2 2 3
3 3 3
a(2,arow,acol) = a(1,arow,acol) * 2
SELECT page*
DEFINE PROCEDURE test
DO page
*
* Set IA equal to A
*
ia = a
*
* Invert IA and display the result.
*
DO INVERT (arow,acol) ia
WRITE ia(arow,acol,page) TITLE(/"INVERT (arow,acol) a")
*
* Verify result by computing and displaying the matrix product of A and IA.
*
um(p,i,k) = SUM(j) ( a(p,i,j) * ia(p,j,k) )
WRITE um(brow,bcol,page) TITLE(/"VERIFY: UNIT MATRIX?")
END page
END PROCEDURE test
SELECT HEADING=OFF
The results of procedure test are displayed in the dialog below.
test
INVERT (arow,acol) a
PAGE(1)
AROW(1)
AROW(2)
AROW(3)
ACOL(1)
ACOL(2)
ACOL(3)
-1.000000 1.000000 0.000000
1.000000 -2.000000 1.000000
0.000000 1.000000 -0.666667
VERIFY:
UNIT MATRIX?
PAGE(1)
BROW(1)
BROW(2)
BROW(3)
BCOL(1)
1.000000
0.000000
0.000000
BCOL(2)
0.000000
1.000000
0.000000
BCOL(3)
0.000000
0.000000
1.000000
INVERT (arow,acol) a
PAGE(2)
AROW(1)
AROW(2)
AROW(3)
ACOL(1)
ACOL(2)
ACOL(3)
-0.500000 0.500000 0.000000
0.500000 -1.000000 0.500000
0.000000 0.500000 -0.333333
VERIFY:
199
UNIT MATRIX?
Promula Application Development System User's Manual
PAGE(2)
BROW(1)
BROW(2)
BROW(3)
BCOL(1)
1.000000
0.000000
0.000000
BCOL(2)
0.000000
1.000000
0.000000
BCOL(3)
0.000000
0.000000
1.000000
3.7.51 DO LSOLVE
Purpose:
Solve one or more systems of linear equations.
Syntax:
DO LSOLVE(row,col [,pag1,pag2,...]) (amat, bmat)
Remarks:
row
is the identifier of a set dimensioning both amat and bmat.
col
is the identifier of a set dimensioning amat.
pag1,pag2,... are the identifiers of sets subscriprting bmat.
amat
is the identifier of the coefficient matrix.
bmat
is the identifier of the result matrix.
The statement
DO LSOLVE (i,j,p) (A,B)
will compute the solution vectors X(j,p) for the system of linear equations
A11 * X1p + a12*X2p + ... + a1j * Xjp = b1p
A21 * X1p + a22*X2p + ... + a2j * Xjp = b2p
...
Ai1 * X1p + ai2*X2p + ... + aij * Xjp = bip
The solution vectors X(j,p) will overwrite the B(i,p) values.
The ranges of i and j must be equal in size when DO LSOLVE is called, and the solution process will be restricted to the
active range of the sets subscripting the arguments.
Example:
DEFINE SET
arow(3) "Linear Equation"
acol(3) "Product Term"
page(2) "Page of System"
END SET
200
Promula Application Development System User's Manual
DEFINE VARIABLE
a(arow,acol) "Coefficient Matrix"
b(arow,page) "Result Vectors"
x(arow,page) "Solution Vectors"
y(arow,page) "Test Result Vectors"
END VARIABLE
READ a
1 2 3
2 2 3
3 3 3
READ b
6 14
7 15
9 18
DEFINE PROCEDURE test
*
* Copy the result vectors B(i,page) into the vectors X(i,page).
*
x = b
*
* Solve system of linear equations for each page.
*
DO LSOLVE(arow,acol,page) (a, x)
*
* Verify the Results. A(i,j) . X(i,p) = should equal B(i,p).
*
y(i,p) = SUM(j) ( a(i,j) * x(j,p) )
WRITE a::2
WRITE b::2
WRITE x::2
WRITE y::2
END PROCEDURE test
The results of procedure test are displayed in the dialog below.
test
Coefficient Matrix
ACOL(1) ACOL(2) ACOL(3)
1.00
2.00
3.00
2.00
2.00
3.00
3.00
3.00
3.00
AROW(1)
AROW(2)
AROW(3)
Result Vectors
PAGE(1) PAGE(2)
6.00
14.00
7.00
15.00
9.00
18.00
AROW(1)
AROW(2)
AROW(3)
Solution Vectors
PAGE(1) PAGE(2)
1.00
1.00
1.00
2.00
1.00
3.00
AROW(1)
AROW(2)
AROW(3)
Test Result Vectors
201
Promula Application Development System User's Manual
PAGE(1) PAGE(2)
6.00
14.00
7.00
15.00
9.00
18.00
AROW(1)
AROW(2)
AROW(3)
.7.52 [DO] procedure
Purpose:
Executes a procedure.
Syntax:
[DO] proc [,SUBTITLE "text"]
Remarks:
proc
is the identifier of a procedure.
text
is a string of characters that will be appended to the titles of reports produced by procedure proc.
Example:
This example illustrates several title modification options and the variable:L notation. Notice that the displayed title
TITLE parameter first, followed by the scenario name, the run identifier, the subtitle, and finally, the time interval.
DEFINE SET
row(2)
run(2)
tim(10) TIME(1990,1999)
END SET
DEFINE VARIABLE
a(row,tim) TYPE=REAL(5,1)
sname
TYPE=STRING(12)
END VARIABLE
a(i,j)=i*j
sname="SCENARIO x"
"THE A MATRIX"
READ row
row 1
row 2
READ run
RUN 1
RUN 2
DEFINE PROCEDURE proc
SELECT run(2)
SELECT RUNID=run SCENARIO=sname
WRITE a\7:7 TITLE(a:L)
END PROCEDURE proc
The statement
DO proc SUBTITLE "This is the subtitle"
produces the display below
202
Promula Application Development System User's Manual
THE A MATRIX
SCENARIO x, RUN 2, This is the subtitle, 1990 to 1999
1990
1.0
2.0
row 1
row 2
1991
2.0
4.0
1992
3.0
6.0
1993
4.0
8.0
1994
5.0
10.0
1995
6.0
12.0
1996
7.0
14.0
1997
8.0
16.0
1998
9.0
18.0
1999
10.0
20.0
3.7.53 DO REGRESS
Purpose:
Produces a report of one or more pages of the results of multivariate least-squares regression for specified variables by
finding the best fit for the following model:
Y = o + 1*X1 + 2X2 + , ... , + nXn
Y is the dependent variable, the Xi are the independent predictor variables, and the i are the regression coefficients.
Syntax:
DO REGRESS [(sets)] (vars) [output]
Remarks:
sets
is a list of set identifiers subscripting the array(s) to be regressed.
The specification of sets controls the analysis of the variables specified in vars by defining the index of the
observations and the order of pages produced. The last set in sets specifies the index of the observations, the
preceding sets specify the order in which pages of the report are displayed. The ordering of report pages
corresponds to the specification of the sets in sets from left to right — left varying the fastest. The default
value for sets is the reverse of the set specification used in defining the highest dimensional variable in vars
with the first set in the definition indexing the observations, and the remaining sets heading report pages.
vars
is a list of variable identifiers specifying the arrays to be regressed. The list may also contain the time parameter
TIME if all the variables in vars have a time series set as one of their indexes. The first variable specified in
vars will be treated as the dependent variable (Y), the remaining variables will be treated as the independent
regressors (Xi). vars must contain at least two variables. One-dimensional arrays (vectors), are used in
regression calculations directly. Two- and higher-dimensional arrays are partitioned into sets of observations,
and a separate report is generated for each page and column of the highest dimensional array in vars.
output
is a list of output specifiers that allow the storage of regression results in program variables. If any output is
stored in variables, no report is displayed. output may consist of one or more of the following:
COEFF
TVALUE
STDERR
STDDEV
RSQUAR
=
=
=
=
=
cf
tv
se
sd
rs
to store the regression coefficients in variable cf
to store the Student's t statistic for the regression coefficients in variable tv
to store the standard errors of regression coefficients in array variable se
to store the standard deviation(s) of regression model(s) in variable sd
to store the R-Square(s) of regression model(s) in variable rs
The output variables should be dimensioned so that they can pick up the desired regression results; see the
example below.
203
Promula Application Development System User's Manual
The following values may be reported/stored:
1.
The regression coefficient (i), Student's t statistic, and standard error, for each independent variable in the model and
for the intercept, o (referred to as CONS in the report).
2.
The overall variance and standard deviation of the regression model.
3.
The adjusted coefficient of correlation between the observed and predicted values of the dependent variable.
A title — Regression Analysis Results — is printed at the top of each page. Subtitles consisting of the row descriptors for
sets specified in sets appear when more than one report page is produced.
Examples:
DEFINE SET
grp(2)
"Test Groups"
tim(12) "Time Points" TIME(1,12)
trm(3) "Regression Terms (Independent Variables + CONSTANT)"
END SET
DEFINE VARIABLE
*
* REGRESSEION INPUTS
*
rsp(tim,grp) "Response Variable By Group and And Time"
iv1(tim,grp) "Independent Variable 1 by Group and Time"
iv2(tim,grp) "Independent Variable 2 by Group and Time"
*
* REGRESSION OUTPUTS
*
cf(trm,grp)
"Coefficients of the Regression Terms"
tv(trm,grp)
"T-Value for the Coefficients of the Regression Terms"
se(trm,grp)
"Stderr Errror for the Coefficients of the Regression Terms"
sd(grp)
"Standard Deviation of Regression Model"
rs(grp)
"R-Square of Regression Model"
END VARIABLE
SELECT grp(1)
READ iv1(grp,tim)
16.7 17.4 18.4 16.8 18.9 17.1 17.3 18.2 21.3 21.2 20.7 18.5
READ iv2(grp,tim)
30.0 42.0 47.0 47.0 43.0 41.0 48.0 44.0 43.0 50.0 56.0 60.0
READ rsp(grp,tim)
210 110 103 103 91
76
73
70
68
53
45
31
iv1(t,2) = iv1(t,1)
iv2(t,2) = iv2(t,1)
rsp(t,2) = rsp(t,1)
SELECT grp*
READ TRMS ROW(1,6)
IV1
IV2
CONS
DEFINE PROCEDURE doregr
*
* Regression -- Report
*
DO REGRESS(grp,tim) (rsp,iv1,iv2)
*
204
Promula Application Development System User's Manual
* Regression -- Save Output
*
DO REGRESS(grp,tim) (rsp,iv1,iv2),
COEFF = cf,
TVALUE = tv,
STDERR = se,
STDDEV = sd,
RSQUAR = rs
WRITE TABLE(grp,trm) TITLE(///"Regression Results") FORMAT(50,10),
BODY(cf::4 tv::4 se::4 sd::4 rs::4)
END PROCEDURE doregr
The output of procedure doregr is displayed below
Regression Analysis Results, 1 to 12
GRP(1)
Term
IV1
IV2
CONS
Coefficient
T-Value
S.E.
-6.592777
-1.357
4.859254
-4.503562
-4.204
1.071156
415.113000
5.031
82.517400
Variance=598.0237
Standard Deviation=24.45452
Adjusted R-Square=0.7164
GRP(2)
Term
IV1
IV2
CONS
Coefficient
T-Value
S.E.
-6.592777
-1.357
4.859254
-4.503562
-4.204
1.071156
415.113000
5.031
82.517400
Variance=598.0237
Standard Deviation=24.45452
Adjusted R-Square=0.7164
Regression Results
IV1
Coefficients of the Regression Terms
T-Value for the Coefficients of the Regression Ter
Stderr Errror for the Coefficients of the Regressi
Standard Deviation of Regression Model
R-Square of Regression Model
GRP(1)
-6.5928
-1.3567
4.8593
24.4545
0.7164
GRP(2)
-6.5928
-1.3567
4.8593
24.4545
0.7164
GRP(1)
-4.5036
-4.2044
1.0712
24.4545
0.7164
GRP(2)
-4.5036
-4.2044
1.0712
24.4545
0.7164
GRP(1)
415.1130
5.0306
82.5174
GRP(2)
415.1130
5.0306
82.5174
IV2
Coefficients of the Regression Terms
T-Value for the Coefficients of the Regression Ter
Stderr Errror for the Coefficients of the Regressi
Standard Deviation of Regression Model
R-Square of Regression Model
CONS
Coefficients of the Regression Terms
T-Value for the Coefficients of the Regression Ter
Stderr Errror for the Coefficients of the Regressi
205
Promula Application Development System User's Manual
Standard Deviation of Regression Model
R-Square of Regression Model
24.4545
0.7164
24.4545
0.7164
3.7.54 DO set
Purpose:
Executes repeatedly a group of statements. The number and order of iterations is determined by the number and order of the
elements of the set, as defined by the set’s current selection vector.
Syntax:
DO set
statement
...
END
Remarks:
is the identifier of a set.
set
statement is any executable statement (no definitions), including other DO statements.
The statements from DO set to END are usually called a "DO set loop".
The statements between the DO set and END statements are executed once for each element in the current set selection
vector for set. By default, the set selection vector contains N elements ordered from 1 to N; where N is the size of set as
specified in its definition. The order and range of the elements of the selection vector may be modified by the various set
selection statements and the SORT statement.
Within an iteration of the DO set loop, the range of set is fixed to a single element, and vectors subscripted by set are
treated as scalars in calculations and other expressions; multidimensional array variables subscripted by set are evaluated
at the current value of the subscript set.
If a DO set loop executes properly for each active element in set, the range and order of set after the loop will be the
same as before the loop started. However, if execution of the loop aborts abnormally, the range of set will be fixed at the
element that was active when the abort occurred.
Examples:
In this example, the procedure doset contains a DO set loop. The statements between the DO month statement and the
END DO month statement are executed once for each active element in the selection vector for set month.
The variable month:S has the value of the current selection of the month set. Similarly, the variable mv has the value
mv(m), where m is a scalar subscript which will be assigned the current value of the month subscript.
DEFINE SET
month(12)
END SET
DEFINE VARIABLE
m
"Month Number"
mv(month) "Monthly Value"
END VARIABLE
206
Promula Application Development System User's Manual
DEFINE PROCEDURE doset
DO month
m = month:S
mv = m * 10
WRITE CENTER("The current month number is " m:-5 " The monthly value is " mv:-5)
END month
END PROCEDURE doset
Executing procedure doset produces the output below.
The
The
The
The
The
The
The
The
The
The
The
The
current
current
current
current
current
current
current
current
current
current
current
current
month
month
month
month
month
month
month
month
month
month
month
month
number
number
number
number
number
number
number
number
number
number
number
number
is
is
is
is
is
is
is
is
is
is
is
is
1
2
3
4
5
6
7
8
9
10
11
12
The
The
The
The
The
The
The
The
The
The
The
The
monthly
monthly
monthly
monthly
monthly
monthly
monthly
monthly
monthly
monthly
monthly
monthly
value
value
value
value
value
value
value
value
value
value
value
value
is
is
is
is
is
is
is
is
is
is
is
is
10
20
30
40
50
60
70
80
90
100
110
120
The number of iterations as well as the order of execution is dictated by the current selection vector of the set controlling
the DO set loop. For example the statements
SELECT month(1,12,6)
doset
produce the output below
The current month number is 1
The current month number is 12
The current month number is 6
The monthly value is 10
The monthly value is 120
The monthly value is 60
3.7.55 DO UNTIL
Purpose:
Executes repeatedly a group of statements until a given condition is met.
Syntax:
DO UNTIL condition
statement
...
END
Remarks:
condition is any Boolean expression, i.e., an expression that is either true or false. If false, the statements between the
DO UNTIL and the END statement are executed; if true, the statements between the DO and END are not
executed.
statement is any executable statement (no definitions), including a DO statement.
207
Promula Application Development System User's Manual
The group of statements together with the DO and END statements is called a DO UNTIL loop. DO loops may be nested
to any depth.
The value of condition is computed before each iteration of the DO loop.
Examples:
The following dialog demonstrates the execution of a DO UNTIL loop:
DEFINE VARIABLE
x
END VARIABLE
x = 0
DO UNTIL x GT 3
WRITE (x,"Top of the loop")
x = x+1
WRITE (x,"Bottom of the loop")
END UNTIL
0 Top of the loop
1 Bottom of the loop
1 Top of the loop
2 Bottom of the loop
2 Top of the loop
3 Bottom of the loop
3 Top of the loop
4 Bottom of the loop
From this example, you can see how easy it is to construct infinite loops — simply remove the equation x = x+1.
3.7.56 DO WHILE
Purpose:
Executes repeatedly a group of statements while a given condition is met.
Syntax:
DO WHILE condition
statement
...
END
Remarks:
condition
is any Boolean expression, i.e., an expression that is either true or false. If true, the statements between
the DO WHILE and the END statement are executed; if false, the statements between the DO and END
are not executed.
statement
is any executable statement (no definitions), including a DO statement.
The group of statements together with the DO WHILE and END statements is called a DO WHILE loop. DO loops may
be nested to any depth.
The value of condition is computed before each iteration of the DO loop.
208
Promula Application Development System User's Manual
Examples:
The following dialog demonstrates the execution of a DO WHILE loop:
DEFINE VARIABLE
x
END VARIABLE
x = 0
DO WHILE x LT 3
WRITE (x,"Top of the loop")
x = x+1
WRITE (x,"Bottom of the loop")
END WHILE
0 Top of the loop
1 Bottom of the loop
1 Top of the loop
2 Bottom of the loop
2 Top of the loop
3 Bottom of the loop
3.7.57 EDIT menu
Purpose:
Displays a data menu for editing.
Syntax:
EDIT menu(vars)
Remarks:
menu
is the identifier of a data menu.
vars
is a list of variable identifiers that contain the values of the data fields being edited. The variables in the list must
be arranged in the same order as the menu data fields to which they correspond.
Data menus contain a number of data fields to be edited by the user. In the DEFINE MENU statement, each data field is
denoted by a series of contiguous 'at' (@) or 'tilde' (~) characters, equal in number to the width of the data field. The data
fields are ordered from left to right and from top to bottom of the menu.
Upon execution, the data menu becomes a screen display that has the first data field highlighted. Use the movement keys to
highlight the desired data field. To edit the highlighted data field, press the Enter key and enter the new value, as prompted
at the bottom of the screen.
Data fields may also be selected by "point and click" operations with a mouse.
The menu display will be clipped by the boundaries of the window opened to the Main Screen.
Examples:
The use of the EDIT menu statement is illustrated in the context of the example given in the DEFINE MENU statement.
209
Promula Application Development System User's Manual
3.7.58 EDIT TABLE
Purpose:
Displays a table of several variables on the screen to let you interactively edit their values.
Syntax:
EDIT TABLE(sets)[,TITLE(title)][,FORMAT(rw,cw)],
BODY(["text1",] var1[fmt1] [,"text2",] var2[fmt2],...), option
Remarks:
sets
is a list of the identifiers of the sets classifying columns and pages of the variables in the table. The first set
will classify the columns of the table; the other sets, if any, will classify the pages of the table. Sets
dimensioning table variables which are missing from the list will classify the rows of the table. The sets list
sets must contain at least one set (or the number 1 for browsing a group of scalar variables) and must be
missing those set identifiers which will classify the rows of the multidimensional table variables.
title
is any text you wish to show as a title for the table. The title may include variables and other format characters
according to the rules defined in the WRITE variables statement.
text1
is any text that you wish to use as a subtitle for the values of var1. This text may not contain variables.
var1
is the identifier of the first variable in the table.
fmt1
is the desired format for the values of var1. Usually, this is used to specify the number of decimal digits for
var1.
text2
is any text that you wish to use as a subtitle for the values of var2. This text may not contain variables.
var2
is the identifier of the second variable in the table.
fmt2
is the desired format for the values of var2.
rw
is the width in characters of row descriptors.
cw
is the width in characters of table columns.
option
is one of the following:
BY ROW
BY COLUMN
BY VALUE
to edit values by row (entering a value moves the bounce bar to the right)
to edit values by column (entering a value moves the bounce bar down)
to edit values by single value (bounce bar does not move automatically). This is the
default
A table is a display or report of several variables whose values are classified by a common set (or sets). The common sets
classify the columns and pages of the table.
A table has a body and an optional title and format. The body of the table contains the identifiers of the variables whose
values will be displayed as the body of the table.
You may include as many variables as you wish in the body of a table.
210
Promula Application Development System User's Manual
You may include slash characters "/" between the specifications of variables and descriptive text to insert blank lines in the
display.
If you wish to 'write' an entire table, instead of 'editing' it by page, use the WRITE TABLE statement.
Upon execution, the EDIT TABLE statement clears the Main Screen, displays the first page of the table and issues the
following message at the bottom of the display:
End: Exit
Fn Shift-Fn PgUp PgDn Home Arrows: Select Enter: Edit
The highlighted portions of the message represent the following options:
press the Fn function key to browse "up" the nth dimension of the array, where n varies from 1 to 10. The F1
key browses "up" the 1st dimension, the F2 key browses "up" the 2nd dimension, and so forth.
Fn
Shift-Fn press simultaneously the Shift and Fn keys to browse "down" the nth dimension of the array, where n varies
from 1 to 10. The F1 key browses "up" the 1st dimension, the F2 key browses "up" the 2nd dimension, and so
forth. The Shift-F1 key browses "down" the 1st dimension, the Shift-F2 key browses "down" the 2nd
dimension, etc.
Arrows
PgUp
PgDn
The four movement arrows at the right-hand section of the keyboard allow you to move the cursor to the
desired value. The Page-Up and Page-Down keys may be used to move up and down the pages of the display.
Home
moves the cursor to the "top" of the display, which is the first value on the first page.
Enter
press the Enter key to initiate editing mode. This causes the following:
1. highlights the value to be edited with a block cursor
2. issues the following message at the lower left-hand corner of the Prompt Screen:
Enter value or End?
At this point you may change the marked value by entering a new one and pressing the Enter key. The cursor
moves to the next value to edit, and so forth.
press the End key to exit editing mode or to exit browsing mode.
End
The WRITE TABLE statement and tables defined by the DEFINE TABLE statement will behave like the EDIT TABLE
statement if a SELECT BROWSE=VALUES \ ROW \ COLUMN statement has been executed.
Examples:
See the descriptions of the BROWSE TABLE and DEFINE TABLE statements for an example of a table.
3.7.59 EDIT variable
Purpose:
Displays a variable on the screen to let you
1.
browse the variable by page
211
Promula Application Development System User's Manual
2.
change its values in screen-editing mode.
Syntax:
EDIT var[fmt][ORDER(sets)][TITLE(title)][DISPLAY(dvar)][option]
Remarks:
var
is the variable identifier.
fmt
is a format specification indicating the width of row descriptors, the width of the columns displayed, and the
number of decimals in real values, as follows:
\p:w:d
where
p
is an integer specifying the width in characters for row descriptors. The default width is the width
specifications of the row descriptors related to the set subscripting the rows of the display.
w
is an integer specifying the width in characters for each column of values. The default is the width
specification in the definition of var. A negative width parameter left justifies the values of var in each
column.
d
is an integer specifying the number of decimals to display for real numeric values. The default is the
decimal specification (if applicable) in the definition of var. If d is an "E", the values of var will be
displayed in exponential notation (base-10), and will show seven digits and six decimal places.
If omitted, w and d are the parameters specified in the TYPE specification for var, and p is the width
specifications of the row descriptors related to the set subscripting the rows of the display.
sets
is a list of the sets classifying the values of var. The order of the sets in this list specifies the structure of the
display: the first set classifies the rows of the display, the second set classifies the columns, and the third to last
set classifies the pages of the display. The keyword ORDER is optional; if omitted, sets must immediately
follow the optional format specification.
title
is any text you wish to show as a title for the table. The title may include variables, and other format characters
according to the rules defined in the WRITE text statement.
dvar
is a variable used to control the display of variable var. dvar should be indexed by the set that defines the rows
of the display. PROMULA will display values of var only for those rows corresponding to elements of dvar
that contain nonzero values. See Example in the section on the BROWSE variable statement.
option
is one of the following:
BY ROW
BY COLUMN
BY VALUE
to edit values by row (entering a value moves the bounce bar to the right).
to edit values by column (entering a value moves the bounce bar down).
to edit values by single value (bounce bar does not move automatically). BY VALUE is the
default.
Upon execution, the EDIT variable statement clears the Main Screen, displays the first page of the array and issues the
following message at the bottom of the display:
End: Exit
Fn Shift-Fn PgUp PgDn Home Arrows: Select Enter: Edit
212
Promula Application Development System User's Manual
The highlighted portions of the message represent the following options:
press the Fn function key to browse "up" the nth dimension of the array, where n varies from 1 to 10.
Fn
Shift-Fn press simultaneously the Shift and Fn keys to browse "down" the nth dimension of the array, where n varies
from 1 to 10. The F1 key browses "up" the 1st dimension, the F2 key browses "up" the 2nd dimension, and so
forth. The Shift-F1 key browses "down" the 1st dimension, the Shift-F2 key browses "down" the 2nd
dimension, etc.
Arrows
PgUp
PgDn
The four movement arrows at the right-hand section of the keyboard allow you to move the cursor to the
desired value. The Page-Up and Page-Down keys may be used to move up and down the pages of the display.
Home
moves the cursor to the "top" of the display, which is the first value on the first page.
Enter
press the Enter key to initiate editing mode. This causes the following:
1. highlights the first value to be edited with a block cursor
2. issues the following message at the left-hand corner of the Prompt Screen:
Enter value or End?
At this point you may change the marked value by entering a new one and pressing the
Enter key. The cursor moves to the next value to edit, and so forth.
press the End key to exit editing mode or to exit browsing mode.
End
Examples:
Given the following definitions:
DEFINE SET
row(3)
col(2)
page(2)
END SET
DEFINE VARIABLE
a(row,col,page) "A 3-Dimensional Array"
END VARIABLE
the statement
EDIT a
clears the screen and produces the following display:
213
Promula Application Development System User's Manual
A 3-Dimensional Array
PAGE(1)
COL(1)
0
0
0
ROW(1)
ROW(2)
ROW(3)
End: Exit
COL(2)
0
0
0
Fn Shift-Fn PgUp PgDn Home Arrows: Select Enter: Edit
To browse "up" the pages or third dimension, press the F3 key to get the following display:
A 3-Dimensional Array
PAGE(2)
COL(1)
0
0
0
ROW(1)
ROW(2)
ROW(3)
End: Exit
COL(2)
0
0
0
Fn Shift-Fn PgUp PgDn Home Arrows: Select Enter: Edit
214
Promula Application Development System User's Manual
You may now begin editing the array. The value in cell ROW(1), COL(1) is highlighted. Press the Enter key to change
the value in this cell. The following display results:
PAGE(2)
COL(1)
0
0
0
ROW(1)
ROW(2)
ROW(3)
Enter value or End: 1
Enter the value 1 and press the Enter key. The following display results:
215
COL(2)
0
0
0
Promula Application Development System User's Manual
A 3-Dimensional Array
PAGE(2)
COL(1)
1
0
0
ROW(1)
ROW(2)
ROW(3)
COL(2)
0
0
0
Enter value or End: 2.6
The cursor now highlights the value in the ROW(1), COL(2) cell. Type the value 2.6 and press the Enter key. The
following display results:
A 3-Dimensional Array
PAGE(1)
COL(1)
1
0
0
ROW(1)
ROW(2)
ROW(3)
Enter value or End:
216
COL(2)
3
0
0
Promula Application Development System User's Manual
The value 2.6 is rounded up to 3 because variable a was defined with the default type, REAL(8,0). Internally, however, the
value is stored correctly as 2.6. This is verified below.
Press the End key. The following display results:
A 3-Dimensional Array
PAGE(2)
COL(1)
1
0
0
ROW(1)
ROW(2)
ROW(3)
End: Exit
COL(2)
3
0
0
Fn Shift-Fn PgUp PgDn Home Arrows: Select Enter: Edit
Press the End key again. This gets you out of editing mode.
To verify the above editing, the following dialog shows the values of a by column, row and page, with two decimal digits:
WRITE a(col,row,page):10:2
A 3-Dimensional Array
PAGE(1)
COL(1)
COL(2)
ROW(1)
ROW(2)
ROW(3)
0.00
0.00
0.00
0.00
0.00
0.00
ROW(1)
ROW(2)
ROW(3)
1.00
2.60
0.00
0.00
0.00
0.00
PAGE(2)
COL(1)
COL(2)
3.7.60 END
Purpose:
217
Promula Application Development System User's Manual
Ends a structured group of statements.
Syntax:
END [comment]
Remarks:
comment
is an optional comment that you may wish to use in order to distinguish one END statement from another.
The following statements require an END statement:
*
*
*
*
*
*
*
*
ASK...ELSE
BROWSE COMMENT
BROWSE TEXT
DEFINE DIALOG
DEFINE FILE
DEFINE FUNCTION
DEFINE MENU
DEFINE PARAMETER
DEFINE PROCEDURE
DEFINE RELATION
DEFINE SET
DEFINE SYSTEM
DEFINE VARIABLE
DEFINE WINDOW
DO DIRECTORY
DO FILE
DO IF...ELSE
DO IF END
DO IF ERROR
DO IF ESCAPE
DO IF HELP
DO IF KEYPRESS
DO IF NULL
DO set
DO UNTIL
DO WHILE
FIELD (in Popup Menu definitions)
TOPIC (In Dialog files)
WRITE COMMENT
WRITE TEXT
These structured statements contain free form text; therefore, the END statement must be capitalized and start in
column 1, to distinguish it from other occurrences of the word "end" in the text. No comment is allowed after these
END statements.
The END SEGMENT and END PROGRAM statements are special cases of the END and are discussed in the following
two sections.
3.7.61 END PROGRAM
Purpose:
Ends a program and writes the executable code and data to the currently open segment file on disk. The logical identifier of
the segment is "MAIN". Both the program code and the data values of its variables are saved on disk.
218
Promula Application Development System User's Manual
Syntax:
END PROGRAM [MAIN] [,DO(proc)]
Remarks:
MAIN
is the default identifier of any executable program module.
proc
is the identifier of a procedure in segment MAIN. When the program is read in, this procedure is executed
automatically.
Upon compilation, this statement terminates the program and writes on a disk file the information of the program. The start
of the program is the DEFINE PROGRAM statement. The program is written on the disk file specified on the last OPEN
SEGMENT statement. To execute the program, use the OPEN SEGMENT and READ SEGMENT statements.
Examples:
The statements below define a program, named by default MAIN, and write the executable program code on a disk file
named hello.xeq:
OPEN SEGMENT "hello.xeq", STATUS=NEW
DEFINE PROGRAM "A Program"
DEFINE PROCEDURE proc
WRITE("Hello, World!")
END proc
END PROGRAM, DO(proc)
To read this program for execution, use the statements
OPEN SEGMENT "hello.xeq"
READ SEGMENT MAIN
or the statement
RUN PROGRAM "hello.xeq"
The procedure proc is executed automatically at program startup.
This program could also be started by selecting option 6 from the PROMULA Main Menu and specifying "hello" as the
name of the program to be executed.
3.7.62 END SEGMENT
Purpose:
Ends the definition of a program segment and writes the segment code and data to the currently open segment file.
Syntax:
END SEGMENT seg [,DO(proc)]
Remarks:
219
Promula Application Development System User's Manual
seg
is the identifier of a segment as it appeared on the DEFINE SEGMENT statement that began the segment.
proc
is the identifier of a procedure in segment seg. When the segment is loaded, this procedure is executed
automatically.
Upon compilation, this statement writes on a disk file the information of the segment. The start of the segment is the
DEFINE SEGMENT seg statement. The segment is written in the disk file specified on the last OPEN SEGMENT
statement.
To load the segment for execution, use the READ SEGMENT statement.
Examples:
The statements below define a two segmented program, the program contains the top-level segment, MAIN, and two levelone segments named seg1 and seg2. The code and data of all three segments are saved on a disk file named
program.xeq:
OPEN SEGMENT "program.xeq", STATUS=NEW
DEFINE PROGRAM "MAIN"
DEFINE PROCEDURE start
READ SEGMENT seg1
READ SEGMENT seg2
END PROCEDURE start
DEFINE SEGMENT seg1
DEFINE PROCEDURE proc
WRITE ("Hello from seg1")
END proc
END SEGMENT seg1, DO(proc)
DEFINE SEGMENT seg2
DEFINE PROCEDURE proc
WRITE ("Hello from seg2")
END proc
END SEGMENT seg2, DO(proc)
END PROGRAM DO start
To read this program for execution, use the statement
RUN PROGRAM program.xeq
The procedure named start in segment MAIN executes automatically because it is indicated in the DO clause of the
END PROGRAM statement. Procedure start then uses the READ SEGMENT statement to load seg1 and seg2 in
sequence. When each segment is loaded, the procedure proc, defined in the segment executes automatically.
3.7.63 LEVEL
Purpose:
Is used in dynamic simulation procedures and has two functions.
1.
It signals the start of the LEVEL section of a dynamic procedure.
2.
It declares the endogenous time series variables to be computed and stored at the fixed time points of the time series
sets classifying the output time series.
220
Promula Application Development System User's Manual
Syntax:
LEVEL (ots1 = ev1 [, ots2 = ev2, ...] )
Remarks:
ots1
is an output time series (i.e., an array variable that is indexed by a time series set.)
ev1
is an endogenous variable that is used explicitly in the LEVEL (and/or RATE) sections of a dynamic procedure.
ots2
is an output time series variable for a second LEVEL statement equation.
ev2
is an endogenous variable for a second LEVEL statement equation.
The equations of the LEVEL statement form a list of correspondence between output time series and endogenous variables
that are used locally in the equations of the LEVEL (and/or RATE) section of a dynamic procedure. Based on this
equivalence, the values of the output time series will be computed and stored at the fixed time points of the time index
classifying the series.
Only those endogenous variables that are intended to be saved for later use as a time series need to be included in the
endogenous variables list of the LEVEL statement.
The values of an output time series at each time point of the time series set are set equal to the values of the local
endogenous variable corresponding to the nearest simulation time point plus or minus DT/2, where DT is the time
parameter DT. The value of an output series at a time point t is set equal to the computed value of the corresponding
endogenous variable that is associated with the interval (tDT/2, t+DT/2). This interval is closed at DT/2 and open at
t+DT/2. If t is the exact midpoint of the interval, then the tDT/2 value applies.
Execution of a LEVEL statement causes the TIME parameter to be incremented by DT units from its value in the
preceding RATE section.
The LEVEL statement may only be used inside a procedure; it cannot be used in command mode.
Examples:
For more information on dynamic simulation with PROMULA, see the discussion of Dynamic Procedures in the
DEFINE PROCEDURE section of this chapter and the discussion of the RATE statement.
3.7.64 OPEN file
Purpose:
Opens a disk file for physical write/read operations of data to/from disk.
Syntax:
OPEN file filespec [STATUS=status] [READONLY]
Remarks:
file
is the identifier of a file in your program.
filespec
is a quoted string or string variable containing the name of the disk file to be opened. filespec may contain
any filename that is valid for your operating system.
221
Promula Application Development System User's Manual
is one of the following options:
status
NEW
to open a new file of any type. When using the OPEN file statement with STATUS=NEW,
any file with the same name as filespec will be deleted before the new file is opened.
OLD
to open an existing file of any type. Attempting to open a non-existing file with
STATUS=OLD will cause an execution error. You may use the FILEEXIST function to test
if a file exists. OLD is the default status.
DYNAMIC
to open an existing array file for automatic dynamic access. When an array file is opened with
DYNAMIC status, PROMULA attempts to read the entire contents of the file into memory. If
there is enough memory, the variables in the file may be accessed from memory — with a
significant reduction in access time. If there is not enough memory to load the file,
PROMULA will report an execution error. When the file is closed, its entire contents will be
written out to disk. Automatic dynamic access is generally limited to small databases or
machines with large and/or virtual memory.
VIRTUAL
to open an existing array file for paged virtual access. When an array file is opened with
VIRTUAL status, PROMULA attempts to read/write large sections of the data. If there is
enough memory, the variables in the file may be accessed from memory — with a significant
reduction in access time. If there is not enough memory to "page-in" the file, PROMULA will
report an execution error. When the file is closed, its entire contents will be written out to disk.
The VIRTUAL status requires less memory than DYNAMIC status, but it is generally
limited to small databases or machines with large and/or virtual memory.
If the keyword READONLY is included with the OPEN file statement, the file is given read only status by the operating
system; it may be read from but not modified, and it may be accessed by more than one user at the same time.
Examples:
1.
In this example, the array file, file1, is created on disk as the file file1.dat. A database of 1000 records each
containing 10 fields of 20 characters of information is built in file1.dat.
DEFINE FILE
file1
END FILE
OPEN file1 "file1.dat", STATUS=NEW
DEFINE SET file1
rec(1000)
fld(10)
END SET
DEFINE VARIABLE file1
data(rec,fld) TYPE=STRING(20) "A Disk Variable"
END VARIABLE file1
CLEAR file1
2.
To use file1 created in Example 1 you need to enter the following statement:
OPEN file1 "file1.dat" STATUS=OLD
See Chapter 4 for details on database management.
222
Promula Application Development System User's Manual
3.7.65 OPEN SEGMENT
Purpose:
Opens a segment file on disk for physical write/read operations.
Syntax:
OPEN SEGMENT filespec [,STATUS=status]
Remarks:
filespec
is a quoted string or string variable containing the name of the segment file to be opened. filespec may
contain any filename that is valid for your operating system.
status
is one of the following options:
NEW
OLD
to mean a new file. A new file is one which does not yet exist.
to mean an existing file.
If omitted, the default is STATUS=OLD.
CAUTION!
When using the OPEN file statement with STATUS=NEW, any file on the current directory with the
same name as filespec will be deleted before the new file is opened.
An old file is one which already exists. You may read from an old segment file and modify existing data values, but you
cannot add new data to it.
Once opened under the STATUS=NEW option, you may write to a new file using the DEFINE PROGRAM and
DEFINE SEGMENT statements. The actual write operation is done at the conclusion of the segment definition, i.e., it is
initiated by the END SEGMENT or END PROGRAM statement.
Once opened, you may load program segments into your working space with the READ SEGMENT statements.
Examples:
1. Define a segmented program.
OPEN SEGMENT "program.xeq", STATUS=NEW
DEFINE PROGRAM "Segmented Program"
statements of MAIN
...
DEFINE SEGMENT seg1
statements of seg1
...
DEFINE SEGMENT seg11
statements of seg11
...
END SEGMENT seg11
END SEGMENT seg1
DEFINE SEGMENT seg2
statements of seg2
...
END SEGMENT seg2
END PROGRAM
223
Promula Application Development System User's Manual
In the above code, the file program.xeq was opened on disk and a number of program segments were written in it.
These segments are organized into the following hierarchical tree structure:
Main
Seg1
Seg2
Seg11
The DEFINE PROGRAM and END PROGRAM statements define the beginning and end, respectively, of the
MAIN segment of the tree.
The DEFINE SEGMENT and END SEGMENT statements define the beginning and end, respectively, of the other
segments in the above tree.
Note that segments seg1 and seg2 are subordinate to MAIN at level 1. Segment seg11, at level 2, is subordinate to
segment seg1.
2.
The statements
OPEN SEGMENT "program.xeq" ,STATUS=OLD
READ SEGMENT MAIN
allow you to use the segment file created in Example 1.
3.7.66 OPEN WINDOW
Purpose:
Tells PROMULA to associate a user-defined window with a specific type of functional screen.
Syntax:
OPEN wind TYPE
Remarks:
wind
is the identifier of the window that you wish to open. This window must be previously defined in a DEFINE
WINDOW statement.
TYPE
is the type of functional screen that will be shown in the window, and can be one of the following:
MAIN
PROMPT
COMMENT
ERROR
HELP
the Main Screen
the Prompt Screen
the Comment Screen
the Error Screen
the Help Screen
Upon execution, the OPEN WINDOW statement will open the window called name to serve as the display area for the
logical screen TYPE.
224
Promula Application Development System User's Manual
If wind is a static window, it will be drawn on the screen upon execution of the OPEN. If wind is a popup window, it will
not be displayed until an operation requiring a screen of type TYPE is executed.
See also DEFINE WINDOW and CLEAR window statements as well as the discussion of Advanced Windows in this
chapter.
3.7.67 PLOT
Purpose:
Produces graphic displays of program variables and functions.
Syntax 1:
PLOT [type](varx,vary1[,vary2,...]) [,option]
Remarks:
There are five different syntaxes for the PLOT statement, depending on what type of information you want to plot.
Syntax 1 produces X-Y line plots in which one or more Y variables are plotted against an X variable. The maximum
number of varys that can be plotted simultaneously is six.
type
is the type of line plot desired and may be one of the following:
LINE
POINTS
VALUES
for a line plot
for a scatter point plot
for a line plot with only those X-Y points marked that coincide with the intersections of the vertical
and horizontal tic mark/coordinates
If type is omitted, the result is a line plot with the points marked. If you have configured PROMULA's graphics
to do so, each line in LINE and VALUES plots will be shown in a different color, so that the lines may be
distinguished from one another. If only black and white graphics are available, the lines will have different
patterns. See Chapter 5, for a discussion of specifying line colors and patterns and other aspects of configuring
PROMULA graphics.
varx
is the identifier of the variable whose values are the x-coordinates of the points being plotted.
vary1 is the identifier of the variable whose values are the y-coordinates of the points on the first curve being plotted.
vary2 is the identifier of the variable whose values are the y-coordinates of the points on the second curve being plotted.
varx and the vary's must be subscripted by the same set
Syntax 2:
PLOT btype(vary1[,vary2,...]) [,option]
Remarks:
Syntax 2 produces bar plots in which one or more variables are used to form a display of bars whose lengths are
proportional to the magnitude of the variables' values. The maximum number of variables that can be plotted
simultaneously is six. The number of bars displayed depends on the resolution of the monitor. The ROW descriptors of the
set that subscripts the first variable being plotted will appear as labels for the x-axis tic marks.
btype is the type of bar plot desired and may be one of the following:
225
Promula Application Development System User's Manual
BAR
STACK
for a parallel bar plot
for a stacked bar plot
vary1 is the identifier of the variable whose values define the lengths of the first set of bars plotted.
vary2 is the identifier of the variable whose values define the lengths of the second set of bars plotted.
Syntax 3:
PLOT [type or btype]([set:V,]tvar) [,option]
Remarks:
Syntax 3 produces plots of variables which are subscripted by a time series set. Both line and bar plots can be specified by
Syntax 3. The difference is that line plots can be generated without specifying a variable to scale the x-axis; the values of
the time-series set will be used to define the x-coordinates of the points being plotted.
type
specifies the type of line plot and is described above in Syntax 1.
btype specifies the type of bar plot and is described above in Syntax 2.
set:V is a special notation for the vector of values associated with the time series set, set.
tvar
is the identifier of a variable subscripted by a time series set.
Syntax 4:
PLOT [type or btype](func) [,option]
Remarks:
Syntax 4 produces plotted displays of PROMULA functions. Both line and bar plots can be specified by Syntax 4. In line
plots, the X values of the function will be the x-coordinates of the points being plotted, and the Y values of the function will
be the y-coordinates. In bar plots, the X and Y values will be plotted on the same graph.
type
specifies the type of line plot and is described above with Syntax 1.
btype specifies the type of bar plot and is described above with Syntax 2.
func
is the identifier of a function defined by the DEFINE FUNCTION or DEFINE LOOKUP statement.
Syntax 5:
PLOT PIECHART (vary) [,TITLE(text)]
Remarks:
Syntax 5 produces pie charts.
vary
is the identifier of the array variable whose values define the size of the sectors of the pie chart. Up to nine sectors
may be displayed on a given pie chart. The row descriptors of the set that subscripts vary will appear in a legend
for the chart, the percent of the pie for each sector will also be computed and displayed in the legend.
226
Promula Application Development System User's Manual
NOTE:
Printing pie charts on some high resolution laser printers may not work because the image is too complex and
may overload the printer's memory.
PLOT Statement Options
Syntaxes 1 through 4 above, have an option parameter associated with them which allows you to customize the
appearance of the plot. The option parameter is a list of additional specifications for the plot and may be one or all of the
following:
BROWSE(set1, set2,...)
to allow the user to browse the "pages" of a plot of one or more multidimensional
arrays. If applicable, set1 will be incremented/decremented by pressing F1/Shift-F1;
set2 will be incremented/decremented by pressing F2/Shift-F2; and so on. A prompt
describing how to browse the plots will appear at the bottom of the screen.
GRID=type
to define a grid for the plot. Here, type is one of the following:
HORIZONTAL for horizontal lines between the tic marks on the Y-axis
VERTICAL
for vertical lines between the tic marks on the X-axis
BOTH
for horizontal and vertical lines
LEGEND(leg1,leg2,...)
to define a legend for the plot. Here, leg1 is a string variable or quoted string
containing a short legend for vary1, the first variable of the plot. leg2 is a legend for
vary2, the second variable of the plot, and so forth.
LINE(pat1,pat2,...)
to define alternative line patterns for unmarked line plots. Here, pat1 is a string
variable or quoted string containing 16 characters which defines a repeating pattern for
the vary1 line; pat2 defines a repeating pattern for the vary2 line, and so forth. The
defaults are defined by PROMULA's graphics configuration program.
OVER(set)
to automatically create a multi-line or multi-bar plot for a y-variable dimensioned by
set. Up to six lines or bars, one for each dataset corresponding to an active element of
set, will be displayed.
POINT(pnt1,pnt2,...)
to define alternative line patterns for marked-point plots. Here, pnt1 is a string variable
or quoted string containing 1 character which defines the character to use for marking
points of vary1; pnt2 defines a point character vary2, and so forth. The default
characters are *, +, &, @, $, and #.
TITLE(text)
to display a title for the plot. This title may include variables, text, and other formatting
characters according to the rules described in the WRITE text statement. The default
title is the descriptor of vary1. For plots of two or higher dimensional arrays, the
descriptors of all sets (except the set classifying the x-axis) dimensioning the variables
plotted are also part of the title. For plots of time series variables, the beginning and
ending values of the time interval associated with the time series are appended to the
title of the plot.
XLABEL(xlabel)
to display a label for the x-axis. xlabel may include variables and/or quoted text. The
default is no x-label.
YLABEL(ylabel)
to display a label for the y-axis. ylabel may include variables and/or quoted text. The
default is no y-label.
XRANGE(xrange)
to define a scale for the x-axis. Here xrange is one of the following:
227
Promula Application Development System User's Manual
xmin,xmax,xtics
xmin,xmax
xtics
The XRANGE option will scale the x-axis from a minimum of xmin to a maximum of
xmax. xtics is the number of tic-marks for the x-axis. The default values for xmin,
xmax, and xtics are computed by PROMULA using the extremes of the variables
scaling the x-axis. The values may be literal numeric constants or numeric variables.
YRANGE(yrange)
to define a scale for the y-axis. The specification of yrange is analogous to the
specification of xrange.
The values labeling the tic marks or legends of the plot may be formatted according to the syntax:
var:w:d
where w is width and d is the number of decimal digits.
PROMULA supports four Graphics Modes.
CHARACTER
The default for CHARACTER mode is an 80 column by 25 row monochrome plot that is composed
entirely of standard ASCII characters. The width and height of CHARACTER plots can be modified
by the SELECT WIDTH and the SELECT LINES statements. They can be sent to a disk file with
the SELECT OUTPUT statement.
MEDIUM
The default for MEDIUM mode is CGA medium resolution three-color pixel graphics.
HIGH
The default for HIGH mode is CGA high resolution monochrome pixel graphics.
PLOTTER
The PLOTTER mode is intended to be used to define the manner in which graphics are plotted. The
default for PLOTTER mode is an IBM/Epson dot matrix printer, high resolution, landscape mode.
To specify the desired graphics mode, use the SELECT GRAPHICS statement.
You may change the default configuration for MEDIUM, HIGH, and PLOTTER graphics modes for your system, and
PROMULA even lets you create your own graphics configurations. See Chapter 5, for a discussion of configuring
PROMULA graphics.
To print medium- and high-resolution plots, execute the SELECT PRINTER=ON statement before you generate the plot;
the graphic will appear on the screen while it is being printed.
Examples:
In the code below, the procedure plotdemo, when executed, produces plots of the following four types:
1.
2.
3.
4.
A point plot
A line plot with its points marked
A parallel bar plot
A stacked bar plot
These four high-resolution plots are shown on the following pages.
DEFINE SET
year(10)
228
Promula Application Development System User's Manual
END SET
DEFINE VARIABLE
yv(year)
"Year Values"
ts(year)
"Time Series Values"
tl(year)
"Log of the Time Series"
name
"Run name"
END VARIABLE
TYPE=REAL(8,1)
TYPE=REAL(8,1)
TYPE=STRING(40)
DEFINE RELATION
time(year,yv)
END RELATION
READ yv
70 72 74 76 78 80 82 84 86 88
READ ts
3.1 3.2 3.9 4.5 5.1 4.9 4.5 4.1 4.0 3.5
tl = LN(ts)
DEFINE PROCEDURE plotdemo
PLOT POINTS(yv,ts,tl),
XLABEL"T i m e",
YLABEL"Time Series Values",
TITLE"A Scatter Plot of Actual and Log Values",
LEGEND("Absolutes","Log of Absolute")
PLOT(yv,ts,tl),
XLABEL"T i m e",
YLABEL"Time Series Values",
TITLE"An XY Plot with Marked Observations Of the Absolute and Log",
LEGEND("Actual value","Log of Value")
PLOT BAR (ts,tl),
XLABEL"T i m e",
TITLE"A Parallel Bar Chart of Actual and Log Values of a Time Series",
LEGEND("Actual","Log")
PLOT STACK(ts,tl),
XLABEL"T i m e",
TITLE"A Stacked Bar Chart of Actual and Log Values of a Time Series"
LEGEND("Actual","Log")
END PROCEDURE plotdemo
A Point Plot
A Line Plot With Its Points Marked
A Parallel Bar Plot
A Stacked Bar Plot
229
Promula Application Development System User's Manual
The code below generates a pie chart of variable y. PROMULA pie charts can have up to nine sectors. The variable that has
a ROW relation to the set subscripting the variable being plotted will be used for the legend. The percentage of each sector
is automatically calculated and displayed.
DEFINE SET
pnt(9)
END SET
DEFINE VARIABLE
x(pnt)
"X Values"
y(pnt)
"Y Values"
TYPE=REAL(8,2)
pntn(pnt) "Point Names" TYPE=STRING(15)
pntl(pnt) "Point Legend" TYPE=STRING(15)
END VARIABLE
x(i) = i
y(i) = i * 10
READ pntn:4
GEJ FKG MEJ LCC DLY USA IOU PRM XEQ
DEFINE PROCEDURE test
pntl=pntn+" = "+y
SELECT ROW(pnt,pntl)
PLOT PIECHART(y) TITLE("PIE CHART OF VARIABLE Y")
SELECT ROW(pnt,pntn)
END PROCEDURE test
A Pie Chart
PROMULA supports two-dimensional graphics, and variables specified in the plot will usually be one-dimensional vectors.
If you want to plot two- or higher-dimensional arrays, you should follow these guidelines:
1.
Reduce two- or higher-dimensional variables to a one-dimensional form by selecting a single value for all the sets
structuring the variables being plotted except the one you wish to use as the x-axis of the plot.
PROMULA can determine which sets have been restricted and which have more than one active element. When the
variables are plotted, the values of variable varx across the set with more than one active element will be used to scale
the x-axis and the descriptors of the other sets will appear in a subtitle for the plot.
2.
For X-Y plots (Syntax 1), the Y variables should all be structured by the set that will scale the X axis.
The following example illustrates how PROMULA handles array variables with more than one dimension in plots.
DEFINE SET
row(10) "10 row"
col(6)
"06 col"
pag(2)
"04 pag"
END SET
DEFINE VARIABLE
x(row,col,pag) TYPE=REAL(10,0) "X MATRIX"
y(row,col,pag) TYPE=REAL(10,0) "Y MATRIX"
END VARIABLE
x(i,j,k)=(i+10*j+100*k)/10
y(i,j,k)=(i*j*k)
DEFINE PROCEDURE plotarr
SELECT GRAPHICS=HIGH
SELECT row* col(3) pag(2)
230
Promula Application Development System User's Manual
PLOT LINE(x,y) TITLE("PLOT OF X=(i+10*j+100*k)/10 versus Y=(i*j*k)")
PLOT BAR (x,y) TITLE("BAR PLOT OF X=(i+10*j+100*k)/10 and Y=(i*j*k)")
SELECT row(2) col* pag(2)
PLOT LINE(x,y) TITLE("PLOT OF X=(i+10*j+100*k)/10 versus Y=(i*j*k)")
PLOT BAR (x,y) TITLE("BAR PLOT OF X=(i+10*j+100*k)/10 and Y=(i*j*k)")
END PROCEDURE plotarr
The resultant plots are shown on the following pages.
In the first two plots, the ranges of sets col and pag are restricted to single values, so the values of variable x as
subscripted by set row are used to scale the x-axis.
In the next two plots, the ranges of sets row and pag are restricted to single values, so the values of variable x as
subscripted by set col are used to scale the x-axis.
3.7.68 RATE
Purpose:
Is used in dynamic simulation procedures and has two functions.
1.
It signals the start of the RATE section of a dynamic procedure.
2.
It declares the time dependent variables to be computed at each time point of the simulation by linear interpolation or
extrapolation from specified exogenous time series variables.
Syntax:
RATE (ets1 = lv1 [, ets2 = lv2, ...] )
Remarks:
ets1
is an exogenous time series variable (i.e., an array variable indexed by a time series set.)
lv1
is a local variable that is used explicitly in the RATE section of a dynamic procedure model and is computed at
every time point of the simulation.
ets2
is the exogenous time series variable for a second RATE statement equation.
lv2
is a local variable for a second RATE statement equation.
The equations of the RATE statement form a list of correspondence between previously defined exogenous time series
variables and time-dependent variables that must be used locally in the RATE section of a dynamic simulation model.
Based on this equivalence, the values of the local variable will be computed at the arbitrary time point of the dynamic
simulation by linear interpolation or extrapolation that is based on the fixed time points defining the exogenous time series.
The RATE section is the second section of a dynamic model (after the INITIAL section) and its equations are evaluated at
each time point (or interval) of the simulation run. In contrast to LEVEL equations, both sides of rate equations are
evaluated at the same time point (or interval).
The LEVEL section follows the RATE section and its equations are also evaluated at each time point (or interval) of the
simulation. The LHS of each LEVEL equation, however, is evaluated at TIME+DT in terms of the time variables on the
231
Promula Application Development System User's Manual
RHS which are evaluated at TIME, the previous time point (or interval). It is the equations of the LEVEL section which
move the dynamic variables through time.
Only those exogenous time series that are used explicitly in the RATE or LEVEL section need be included in the
exogenous variables list of the RATE statement.
The RATE statement may only be used inside a procedure. That is, it must not be used in command mode.
For more information on dynamic simulation with PROMULA, see the discussion of Dynamic Procedures in the
DEFINE PROCEDURE section of this chapter and the discussion of the LEVEL statement.
3.7.69 READ DISK
Purpose:
Transfers data from a disk variable in an array file to a local variable in the dynamic access method.
Syntax:
READ DISK(vars)
Remarks:
vars
is a list of dynamic variables.
A dynamic variable is a scratch or fixed variable (also called a local variable) that has a dynamic relationship to a disk
variable. Local variables may be related to disk variables through the DISK option of the DEFINE VARIABLE statement.
See chapter 4 for a detailed description of disk access methods.
Examples:
The following code
DEFINE FILE
filea
END FILE
OPEN filea "test.dba" STATUS=NEW
DEFINE SET
rec(1000) "Record"
END SET
DEFINE VARIABLE filea
dsk(pnt), "A Disk Variable on 'filea'"
END VARIABLE filea
DEFINE VARIABLE
pp "Record Pointer"
scr "A dynamic variable for accessing a single element of dsk",DISK(filea,dsk(pp))
END VARIABLE
defines two variables: dsk and scr. The disk variable, dsk, is a vector of 1000 elements on the disk file named
test.dba. The variable, scr, is a dynamic local variable that is related to dsk. The READ DISK and WRITE DISK
statements transfer a specific value from and to disk as illustrated in the dialog below.
scr = 0
dsk(i) = i
pp = 4
READ DISK(scr)
232
Promula Application Development System User's Manual
WRITE scr
A Scratch Variable in Memory 4
scr = 6
WRITE DISK(scr)
WRITE (dsk:L," ",dsk(pp))
A Disk Variable on 'filea' 6
3.7.70 READ file
Purpose:
Read data from a text file or a random file.
Syntax 1: Read the values of all variables in a record of a random file
READ file
Syntax 2: Read from a text file
READ file (var1 [,fmt1] [,var2 [,fmt2]] [...] )
Remarks:
file
is the identifier of the file whose records you are reading.
var1
is the identifier of the variable whose data is first on each data record.
fmt1
is the format specification for var1 and has the following syntax:
\p:w
where
p
is an integer indicating the starting column on each data line where the value for var1 begins. Thus, the
backslash means: "start reading in column p". If omitted, the reading begins in column 1.
w
is an integer indicating the width of the value and it means "read the next w columns". If omitted, the default
width is the width specified in the definition of var1.
The format specification may be omitted, in which case the data may be entered in free form. In free form, the
values of variables may be entered anywhere on an input line provided they are separated by commas or blanks.
var2
is the identifier of the variable whose data is second on each data record.
fmt2
is the format specification for var2 and may have the same form as fmt1 above. If p is omitted from fmt2,
reading begins in the column following the last character of the last value read.
Examples:
1.
Read from a text file and write to a random file
DEFINE FILE
txt1 TYPE=TEXT
233
Promula Application Development System User's Manual
ran1 TYPE=RANDOM
arr1 TYPE=ARRAY
END FILE
OPEN ran1 "ran1.ran", STATUS=NEW
DEFINE VARIABLE ran1
item1 "Item 1"
TYPE=REAL(8,0)
item2 "Item 2"
TYPE=STRING(8)
item3 "Item 3"
TYPE=DATE(8)
END VARIABLE ran1
OPEN txt1 "txt1.txt", STATUS=OLD
DO txt1
READ txt1(item1:8,item2:8,item3:8)
WRITE ran1
END txt1
2.
Read from a text file and write to an array file
DEFINE SET
rec(100)
END SET
"Records"
OPEN arr1 "arr1.arr",
DEFINE VARIABLE arr1
var1(rec) "Variable
var2(rec) "Variable
var3(rec) "Variable
END VARIABLE arr1
STATUS=NEW
1"
2"
3"
TYPE=REAL(8,0)
TYPE=STRING(8)
TYPE=DATE(8)
DEFINE VARIABLE
rn
"Record Number"
END VARIABLE
rn = 1
DO txt1
READ txt1(var1(rn):8,var2(rn):8,var3(rn):8)
rn = rn+1
END txt1
3.
Read from a random file and write to a text file
DO ran1
WRITE txt1(item1:8,item2:8,item3:8)
END ran1
4.
Read from a random file and write to an array file
rn = 1
DO ran1
var1(rn) = item1
var2(rn) = item2
var3(rn) = item3
rn = rn+1
END ran1
5.
Read a two-dimensional array from a text file using a DO set loop to drive the row dimension and a set identifier in the
read statement to drive the column dimension. Given the following data file (with physical file name smn.txt):
11
22
15
31
11
50
17
32
10
41
12
19
234
10
21
14
17
20
19
25
38
27
56
28
67
Promula Application Development System User's Manual
47
156
494
478
57
211
620
496
73
267
730
468
55
203
646
539
72
273
775
499
38
155
504
521
27
109
433
493
19
89
402
481
35
142
525
592
51
230
760
623
79
286
817
618
76
264
734
584
The following code will read the two dimensional data set.
DEFINE FILE
inpt
END FILE
"Data Input File"
DEFINE SET
stratum(6)
month(12)
END SET
"6 Usage Strata"
"12 Months"
TYPE=TEXT
DEFINE VARIABLE
smn(stratum,month) "Customers by Stratum and Month"
END VARIABLE
TYPE=REAL(12,0)
OPEN inpt "smn.txt" STATUS=OLD
DO stratum
READ inpt( (month) (smn:6:0(stratum,month)))
END stratum
CLEAR inpt
3.7.71 READ function
Purpose:
Reads values into a function.
Syntax:
READ func
x1 x2 ... xn
y1 y2 ... yn
Remarks:
is the identifier of a function defined by a DEFINE FUNCTION or DEFINE LOOKUP statement.
func
x1 x2 ... xn are values to be read into the X variable of the function.
y1 y2 ... yn are values to be read into the Y variable of the function.
Examples:
DEFINE SET
pnt(4)
END SET
DEFINE VARIABLE
x(pnt) "The X values"
y(pnt) "The Y values"
END VARIABLE
235
Promula Application Development System User's Manual
DEFINE FUNCTION
fx(x,y) "Y=f(x)"
END FUNCTION
READ fx
10 20 30 40 50 60
101 202 303 404 505 606
Given the above definitions, the value of the function and its X and Y value vectors may be displayed via WRITE
statements as shown in the dialog below.
WRITE fx
(1)
10
20
30
40
PNT(1)
PNT(2)
PNT(3)
PNT(4)
(2)
101
202
303
404
WRITE x
The X values
PNT(1)
WRITE y
10
PNT(2)
20
PNT(3)
30
PNT(4)
40
303
PNT(4)
404
The Y values
PNT(1)
101
PNT(2)
202
PNT(3)
3.7.72 READ menu
Purpose:
Displays a "data" menu to let you "read" values into all the data fields of the menu. This command is used when the values
of all the data fields in the menu are to be changed.
A data menu is a screen display which is designed to help its user to edit data. The fields in a data menu are previously
defined in a DEFINE MENU statement.
Syntax:
READ menu(vars)
Remarks:
menu
is the identifier of a data menu.
vars
is a list of variable identifiers that contain the values of the data fields being edited. The variables in the list must
be arranged in the same order as the data fields in the menu to which they correspond.
Data menus contain a number of data fields to be edited by the user. In the DEFINE MENU statement, each data field is
denoted by a series of contiguous "at signs", (@), or tilde signs (~), one for each character of the data value. The data fields
are ordered from left to right and from top to bottom of the menu template.
Upon execution, the data menu becomes a screen display that has the first data field highlighted by the bounce bar. The
system is now in edit mode and is ready to accept new data for the data fields in the menu. To begin editing of the first
236
Promula Application Development System User's Manual
highlighted data field, press the [Enter] key and enter the new value as prompted at the bottom of the menu. Continue this
process until all the data fields have been edited.
Remarks:
The use of the READ menu command is similar to the EDIT menu command, except that the READ menu puts the user
in batch or automatic edit mode where he/she is not allowed to pick the data fields to edit. He/She must edit the data fields
sequentially and in the order that they appear on the menu. After the last field is edited, execution of the program
automatically proceeds with the statement following the READ menu statement.
3.7.73 READ SEGMENT
Purpose:
Reads an executable program segment into your working space for execution. A program segment includes both code and
data. To read data values only, use the READ VALUE segment statement.
Syntax:
READ SEGMENT seg [,DO(proc)]
Remarks:
seg
is the identifier of the segment as it appears on the corresponding DEFINE SEGMENT and END SEGMENT
statements. The default identifier of the top segment of any program is MAIN.
proc
is the identifier of a procedure in seg. Upon execution, this procedure is executed automatically.
The segment seg is read in from the disk file specified on the OPEN SEGMENT statement.
Examples:
The following statements open and read in for execution the segment seg1:
OPEN SEGMENT "a:program.xeq", STATUS=OLD
READ SEGMENT seg1
If segment seg1 is subordinate to another segment, say MAIN, then the following sequence must be entered:
OPEN SEGMENT "program.xeq"
READ SEGMENT MAIN
READ SEGMENT seg1
STATUS=OLD
where program.xeq is the name of the segment file on disk containing segment MAIN.
3.7.74 READ set
Purpose:
Reads in labels for a set.
Syntax:
READ set [opt]
data
237
Promula Application Development System User's Manual
Remarks:
set
is the set identifier.
data
are the data lines for the read. One data line is needed for each active element in set.
opt
defines what types of labels are to be read. The default value for opt is ROW(1,20). opt can be one or more of the
following:
ROW[(ic,lc)]
to specify that set row descriptors (sometimes called stubs) are to be read.
ic is a positive integer defining the initial column on each data line where the stub entry begins. The default is
ic=1.
lc is a positive integer (lc > or = ic) defining the last column on each data line where the stub entry ends. The
default is lc=15.
Only one stub per data line is permitted. Note that, if set was defined with a ROW option, the total width of the
field may not exceed the width defined in that option.
COLUMN[(ic,lc,nc)]
to specify that set column descriptors (sometimes called spanners) are to be read.
ic is a positive integer defining the initial column on each data line where the spanner entry begins. The default
is ic=1.
lc is a positive integer (lc > or = ic) defining the last column on each data line where the spanner entry ends.
The default is lc=15.
nc is a positive integer defining the number of columns or characters (including blanks) in each section of the
spanner. The following exact relationship must be satisfied:
(lc - ic + 1)/nc = nl
where nl is a positive integer denoting the number of lines that each column heading will have. The default is
nc=1.
The specification ic, lc, nc can be read as, "read in each spanner from column ic to column lc in steps of
nc." Thus if ic=1, lc=30, nc=10, each data line should contain 30 characters that will form a three line
(nl=(30-1+1)/10=3) column heading with 10 characters on each line.
Only one spanner per data line is permitted. Note that, if set was defined with a COLUMN option, the format of
the spanner data field must conform with the format specified in that option.
KEY[(ic,lc)]
to specify that set codes are to be read.
ic is a positive integer defining the initial column on each data line where the code entry begins. The default is
ic=1.
238
Promula Application Development System User's Manual
lc is a positive integer (lc > or = ic) defining the last column on each data line where the code entry ends.
The default is lc=20.
Only one code descriptor per data line is permitted. Note that if the set was defined with a KEY option, the total
width of the code field may not exceed the defined width.
The set codes are used for three separate purposes. First, if no row descriptors are supplied, then the codes are used
in their place for displays of arrays that are classified by set. Second, if no column headings are supplied, then the
codes are used. Third, when the user wishes to refer to particular set elements, he may use the codes in place of the
element sequence numbers. See the ASK...ELSE and SELECT VARIABLE statements for a discussion of how
set elements are selected with their codes and sequence numbers.
Only one code per data line is permitted. Note that, if set was defined with a KEY option, the total width of the
field may not exceed the width defined in that option. The maximum width of a code is 6 characters.
Examples:
The following example illustrates the READ set statement. Stubs, spanners, and codes are read in for set sta; the codes
appear as the identifiers of the set elements in the WRITE set display. Notice that the default, AGE(n), descriptors are
used as labels for columns classified by set age since no spanners or codes are related to set age. Set yer gets its descriptor
values from the TIME option in its definition.
DEFINE SET
age(3)
yer(2)
sta(3)
END SET
"AGE"
ROW(8)
"YEAR" TIME(1920,2000)
"STATE" ROW(10) KEY(2) COLUMN(10,3)
DEFINE VARIABLE
a(age,sta,yer) "VALUES BY AGE, STATE, AND YEAR"
END VARIABLE
a=RANDOM(2000,9000)
READ sta KEY(21,22) ROW(21,29) COLUMN(1,30,10)
STATE
OF
OHIO
STATE
OF
FLORIDA
STATE
OF
ILLINOIS
READ age ROW(1,6)
00-20
21-40
41-60
Given the definitions and data above, the values for the set labels may be displayed by the various WRITE statements as
shown in the dialog below.
WRITE sta
Identifier
OH
FL
IL
Description
OHIO
FLORIDA
ILLINOIS
SELECT yer(1)
WRITE a
VALUES BY AGE, STATE, AND YEAR
1920
239
Promula Application Development System User's Manual
STATE
OF
OHIO
5,160
6,456
7,295
00-20
21-40
41-60
STATE
OF
FLORIDA
7,664
2,334
2,024
STATE
OF
ILLINOIS
6,141
5,625
7,480
WRITE a(sta,age,yer)
VALUES BY AGE, STATE, AND YEAR
1920
AGE(1)
5,160
7,664
6,141
OHIO
FLORIDA
ILLINOIS
AGE(2)
6,456
2,334
5,625
AGE(3)
7,295
2,024
7,480
See the DEFINE SET, DEFINE RELATION, and SELECT RELATION statements for more information on set
descriptors.
3.7.75 READ VALUE segment
Purpose:
Reads the information of a program or program segment from disk. Only the values of the segment variables are read. To
read both code and data values, use the READ SEGMENT statement.
Syntax:
READ VALUE seg
Remarks:
seg
is the identifier of the segment whose values are being read from disk.
Use the OPEN SEGMENT statement before using the READ VALUE segment statement.
Examples:
The code below opens a segment file on disk called wrvalseg.xeq. This segment is given the default name MAIN since it
is a top-level segment. Segment MAIN contains the single variable, a.
OPEN SEGMENT "wrvalseg.xeq" STATUS=NEW
DEFINE PROGRAM
DEFINE VARIABLE
a "The value of variable A ="
END VARIABLE
END PROGRAM
The effect of the WRITE VALUE segment and READ VALUE segment are illustrated in the dialog below.
a=10
WRITE a
The value of variable A = 10
240
Promula Application Development System User's Manual
The statement, WRITE VALUE MAIN, writes the values of segment MAIN variables (in this case only variable a) in the
segment file on disk called wrvalseg.xeq.
WRITE VALUE MAIN
The value of a variable can be changed by an expression.
a=20
WRITE a
The value of variable A = 20
The READ VALUE MAIN statement will read in the values of the segment MAIN's variables that were stored by the last
WRITE VALUE MAIN statement.
READ VALUE MAIN
WRITE a
The value of variable A = 10
3.7.76 READ variable
Purpose:
Reads data into a variable.
Syntax:
READ var [fmt] [(sets)] [FROM file]
...
data
...
Remarks:
var
is the identifier of the variable whose data is being entered.
sets
is an ordered list of the identifiers of the sets subscripting var. The sets may be listed in any order. If omitted, the
order of the sets is that which appears in the definition of var. For multidimensional variables, this order is
important: the first set in this list defines the rows of the data following, the second set classifies the columns of
the data following, the third set classifies the two-dimensional pages of the data following, the fourth set classifies
the three-dimensional sections of the data following, etc. The current order and range of the elements of the sets
specified in sets controls the assignment of data to variable values.
fmt
is the format specification for the read operation and has the following syntax:
\p:w
where
241
Promula Application Development System User's Manual
p
is an integer indicating the starting position of the read, i.e, the column on each data line where the reading
begins. The backslash means: "start reading in column p". If omitted, the reading begins in column 1.
w
is an integer indicating the width of the read operation and it means "read the next w columns".
The format specification may be omitted, in which case the data may be entered in free form. In free form, the
values of variables may be entered anywhere on an input line provided they are separated by commas or blanks.
data
are the data values associated with var. The data values are entered on input lines which can have a maximum
width of 255 characters each. The input lines and the data values on them must be arranged so that they agree with
the internal structure of the variable, as defined by the DEFINE VARIABLE statement or by sets, and the
format specifications of the READ variable statement (see examples below). The data may be stored in an
external text file if the FROM option is used.
file
is the identifier of a logical file of type TEXT that contains the data for variable var. You must open file to the
text file on disk that contains the data before executing the READ variable statement.
You may read data for more than one variable in a single read operation by using the READ variables statement.
Examples:
1.
Given the definitions
DEFINE SET
row(4)
col(3)
page(2)
END SET
DEFINE VARIABLE
a(row,col,page) "A 3-Dimensional Array"
END VARIABLE
You may enter data in array a via the following READ statement:
READ a
111 121
211 221
311 321
411 421
112 122
212 222
312 322
412 422
131
231
331
431
132
232
332
432
This order of the data entry is according to the order of the sets defining array a. You may verify this by using the
WRITE a statement:
WRITE a
A 3-Dimensional Array
PAGE(1)
COL(1)
COL(2)
COL(3)
111
211
121
221
131
231
ROW(1)
ROW(2)
242
Promula Application Development System User's Manual
ROW(3)
ROW(4)
311
411
321
421
331
431
COL(1)
COL(2)
COL(3)
112
212
312
412
122
222
322
422
132
232
332
432
PAGE(2)
ROW(1)
ROW(2)
ROW(3)
ROW(4)
2.
You may read by col the same data as in Example 1 by using the following statement:
READ a(col,row,page)
111 211 311 411
121 222 321 421
131 231 331 431
112 212 312 412
122 222 322 422
132 232 332 432
3.
You may read selected data values by using the SELECT set statement before the READ statement:
SELECT row(1)
SELECT page(1)
READ a
111 121 131
This read operation is restricted to the first row and the first page of variable a. The values 111, 121, and 131 are
assigned to the first, second, and third columns respectively.
4.
As is the case for other READ statements, numeric data values may be specified with the N*VALUE notation as in the
example below.
DEFINE SET
row(3)
col(10)
END SET
DEFINE VARIABLE
x(row,col) TYPE=REAL(11,3) "-------------- THE X ARRAY --------------"
END
READ x
2*1 2*2 2*3 2*4 2*5
2*6 2*7 2*8 2*9 2*10
2*11 2*12 2*13 2*14 2*15
The data values may be displayed by the statement WRITE x. The output of this statement is shown below.
-------------- THE X ARRAY --------------
ROW(1)
ROW(2)
ROW(3)
COL(1)
1.000
6.000
11.000
COL(2)
1.000
6.000
11.000
243
COL(3)
2.000
7.000
12.000
COL(4)
2.000
7.000
12.000
COL(5)
3.000
8.000
13.000
Promula Application Development System User's Manual
ROW(1)
ROW(2)
ROW(3)
COL(6)
3.000
8.000
13.000
COL(7)
4.000
9.000
14.000
COL(8)
4.000
9.000
14.000
COL(9)
5.000
10.000
15.000
COL(10)
5.000
10.000
15.000
3.7.77 READ (variables)
Purpose:
Read data into more than one variable.
Syntax:
READ(var1[,fmt1][(sets)] [,var2[,fmt2][(sets)] [,...])
...
data
...
Remarks:
var1
is the identifier of the variable whose data is first on each data line.
fmt1
is the format specification for var1 and has the following syntax:
\p:w
where
p
is an integer indicating the starting column on each data line where the value for var1 begins. The backslash
means: "start reading in column p". If omitted, the value begins in column 1.
w
is an integer indicating the width of the value and it means "read the next w columns." If omitted, the default
width is the width of var1 as specified in its definition.
The format specification may be omitted, in which case the data may be entered in free form. In free form, the
values of variables may be entered anywhere on an input line provided they are separated by commas or blanks.
sets
is an ordered list of the identifiers of the sets subscripting var1. The sets may be listed in any order. If omitted, the
order of the sets is that which appears in the definition of var1.
var2
is the identifier of the variable whose data is second on each data line.
fmt2
is the format specification for var2 and may have the same form as fmt1 above. Here, if the format specification,
p, is omitted, reading begins at the character immediately following the last character of the preceding value.
data
are the data values for var1, var2,.... The data values are entered on input lines which can have a maximum
width of 255 characters each. Numeric data may be expressed using the N*VALUE notation.
The DO set statement may be used with the READ variables statement to read data for array variables.
Examples:
244
Promula Application Development System User's Manual
Given the definitions
DEFINE SET
month(12)
END SET
DEFINE VARIABLE
A
B
C
D
mc(month)
mn(month)
END VARIABLE
"A Value = "
"B Value = "
"C Value = "
"D Value = "
"Month Codes"
"Month Names"
you may enter the values 1 and 200, for A and B respectively, as follows:
READ(A:8,B\10:10)
1
200
The following reads data for the vectors mc and mn:
DO month
READ(mc:3,mn\5:12)
END month
JAN January
FEB February
MAR March
APR April
MAY May
JUN June
JUL July
AUG August
SEP September
OCT October
NOV November
DEC December
The following read uses the N*VALUE notation to specify repeated values in the data.
READ(A,B,C,D)
2*1234567 2*9876543
After the read, the data may be displayed by a WRITE TABLE statement. For example the statement
WRITE TABLE(1) BODY(a,b,c,d) TITLE("Table of scalars") FORMAT(10,20)
produces the following output.
Table of Scalars
A
B
C
D
Value
Value
Value
Value
=
=
=
=
1,234,567
1,234,567
9,876,543
9,876,543
245
Promula Application Development System User's Manual
3.7.78 RUN
Purpose:
Compiles a PROMULA source file or runs a PROMULA executable.
Syntax:
RUN file
Remarks:
file
is a string (optionally in quotes) or a string variable containing the name of the disk file where the code that you
wish to compile or execute is stored.
The RUN statement is similar to the RUN PROGRAM statement for executing PROMULA programs from inside a
running application; and to the RUN COMPILER, RUN SOURCE, and RUN COMMAND statements for compiling
PROMULA source codes. But there are several subtle differences:
RUN and RUN PROGRAM may both be used to run PROMULA executable programs. When file is an executable
PROMULA application, the RUN statement will suspend execution of the current application and hide its information
before running file. Since the current application stays resident, there must be enough room for both file and the
original application in memory for this to work properly. The original application will be automatically reloaded when
execution of file is complete and a STOP statement is executed. The RUN PROGRAM statement, clears the original
application from memory before loading file. In addition, RUN can be executed from inside a procedure; RUN
PROGRAM cannot.
RUN and RUN COMPILER may both be used to compile PROMULA source codes. When file is a PROMULA source
code, the RUN statement will suspend execution of the current application and hide its information before compiling file.
The original application will be automatically reloaded when compilation of file is complete and a STOP statement is
executed. The RUN COMPILER statement clears the current application from memory before compiling file. In
addition, RUN can be executed from inside a procedure, RUN COMPILER cannot.
The RUN SOURCE file statement can be used for compiling PROMULA source codes only. It behaves like the RUN
statement in this role except that RUN SOURCE displays the compilation listing on the screen.
The RUN COMMAND file statement can only be used for compiling PROMULA source codes. RUN COMMAND
behaves like the RUN statement except that it does not suspend execution of the current application or hide its information.
The statements in file may use, but not redefine, structures defined in the current application, and any structures defined
in file remain resident with your application after its compilation is complete and control is returned to the current
application.
Examples:
The statement
RUN "program.prm"
will compile the PROMULA program stored in the source file program.prm. The compilation listing will not be shown on
the screen but PROMULA will pause on errors. To have more control over the compilation of PROMULA source codes
from the command line, use the RUN COMPILER statement.
3.7.79 RUN COMMAND
Purpose:
246
Promula Application Development System User's Manual
Compiles a PROMULA source code from within a running application. This allows you to temporarily perform equations,
read in data, and define procedures, variables and other PROMULA structures while running a PROMULA application.
The RUN COMMAND gives you the means to execute a batch file of statements from command mode.
Syntax:
RUN COMMAND file
Remarks:
file
is a quoted string or a string variable that contains the name of a text file containing PROMULA statements.
Upon execution, PROMULA will compile the code contained in file. If the code is well formed and compatible with the
current application (i.e., no redefinitions), the new executable code will become resident with the current application.
Using this statement is like escaping the current application and using PROMULA in command mode. The main
differences are (1) PROMULA reads the statements from a text file instead of from the keyboard, and (2) statements are
executed in batch mode.
If you want to add any interactive input or output statements to the running application, you should put them in a procedure
in a file, then process the file using the RUN COMMAND statement. The procedure may then be executed by escaping
from your application, getting into command mode (F10 from the Main Menu), and entering the procedure name.
WARNING: If there is a DEFINE PROGRAM statement in file, you will clear the current application from memory
and replace it with the code in file.
The last statement in file should be a STOP. This will get you out of batch compilation mode and return control to the
calling program.
Examples:
The source code of PRM2.PRM is shown below. It defines two variables: c and d. The STOP statement returns control to
the calling program.
DEFINE VARIABLE
c
d
END
STOP
The variables defined in PRM2.PRM can be batch loaded using the code shown below. The code below defines two
variables: a and b, and a procedure, runcmd that runs PRM2.PRM.
DEFINE VARIABLE
a
b
END
DEFINE PROCEDURE runcmd
RUN COMMAND "prm2.prm"
AUDIT VARIABLE
END PROCEDURE runcmd
Execution of procedure runcmd produces the following dialog.
DO runcmd
247
Promula Application Development System User's Manual
Ident
A
B
C
D
Description
The AUDIT VARIABLE statement in procedure runcmd shows that variables c and d are now present with variables a
and b. Other PROMULA structures, including procedures, can be added using similar code.
3.7.80 RUN COMPILER
Purpose:
Compiles a PROMULA source code.
Syntax:
RUN COMPILER source LIST = output PAUSE = option
Remarks:
source
is a string (optionally in quotes) or a string variable containing the name of the file to be compiled (the
extension .PRM is assumed if none is specified).
output
directs the compilation listing and is one of the following
option
NONE
to turn off the listing; this option provides the fastest compilations.
CONSOLE
to display the listing on the screen.
DISK file
to save the listing on disk. file is a string or a string variable containing the name of the
file where the listing is to be saved.
PRINTER
to send the listing to the printer.
controls whether or not PROMULA should pause compilation when an error is detected and is one of the
following:
ON
to issue an error message and pause on errors
OFF
to issue an error message and continue on errors
EJECT
to end processing and return to the operating system on errors
The RUN COMPILER statement clears the current application from memory before compiling file. Control returns to
PROMULA command mode when the compilation is complete.
The RUN COMPILER statement cannot be executed inside a procedure.
Examples:
The statement
248
Promula Application Development System User's Manual
RUN COMPILER "program.prm" LIST=DISK "program.lst" PAUSE=ON
will compile the PROMULA code stored in program.prm; the compilation listing will be saved in program.lst.
3.7.81 RUN DOS
Purpose:
Runs an operating system command. This allows you to access the operating system from within a PROMULA program,
perform an OS operation, and return to your program.
Syntax:
RUN DOS command
Remarks:
command
is a quoted string or a string variable containing any command that is valid for your operating system.
When the RUN DOS statement is executed, PROMULA will write itself and the current application to disk in a file called
PROMULA.000; this is often a rather large file (300-500 Kbytes). PROMULA then clears itself from RAM and proceeds
with the OS command. When the OS command finishes, PROMULA reloads itself, deletes the PROMULA.000 file and
returns to the application. Note, on machines with a virtual operating system where much more memory is available,
PROMULA will not write itself to disk.
You should not use the RUN DOS statement to load RAM resident programs.
Be warned that some uses of the RUN DOS statement are inherently non-portable and your application may require source
code changes if it is moved across the various platforms on which PROMULA runs.
Examples:
The statement
RUN DOS "dir b:"
will produce a directory listing for the files on drive b:
Similarly, the statement
RUN DOS "edit myfile.txt"
will run the program edit with a command line argument of myfile.txt.
3.7.82 RUN EDITOR
Purpose:
Loads a file into the PROMULA Text Editor for editing.
Syntax:
RUN EDITOR [filename]
Remarks:
249
Promula Application Development System User's Manual
filename
is a string (optionally in quotes) or a string variable containing the name of the text file you wish to edit.This
name is the file specification you use to identify the file to the operating system.
Upon execution, the text file is brought into your work space for editing using the text editor. The normal text colors for the
Main Screen will be used by the editor.
You may also use the editor while running a PROMULA application by pressing the Esc key to interrupt the application
and, then selecting Main Menu option 4, load the editor.
NOTE:
The amount of memory (capacity) available to the text editor is limited by the amount of memory used by the
application you are running. Thus, if you want to edit a very large file, it is best to clear your application from
memory before using the editor.
Examples:
1.
The statement RUN EDITOR demo.prm or RUN EDITOR "demo.prm" will load the file demo.prm into the editor
for editing.
2.
Similarly, the following statements will bring demo.prm into your work space for editing.
DEFINE VARIABLE
fname TYPE=STRING(20)
END VARIABLE
fname="demo.prm"
RUN EDITOR fname
Where fname is a string variable.
3.7.83 RUN PROGRAM
Purpose:
Runs a PROMULA executable file.
Syntax:
RUN PROGRAM file
Remarks:
file
is a string (optionally in quotes) or a string variable containing the name of the file where the program that you
wish to execute is stored (the extension .XEQ is assumed if none is specified).
The RUN PROGRAM statement clears the current application from memory before executing file. Control returns to
PROMULA command mode when the execution of file is complete. Alternatively, a STOP PROMULA statement in the
application may be used to exit to the operating system.
The RUN PROGRAM statement cannot be executed inside a procedure.
Examples:
The statement
RUN PROGRAM "program.xeq"
250
Promula Application Development System User's Manual
will clear the current application from memory and execute the PROMULA program stored in the executable file
program.xeq.
See the RUN statement for more information on PROMULA's run statements.
3.7.84 RUN SOURCE
Purpose:
Compiles a PROMULA source code and displays the listing on the console.
Syntax:
RUN SOURCE filename
Remarks:
filename
is the name of a text file containing PROMULA statements.
Upon execution, PROMULA will compile the code contained in the file named by filename. The compilation will be
shown on the screen.
After a successful compilation, control can be returned to the calling program by a STOP statement. The RUN SOURCE
statement can be a convenient alternative to using the dialog driven compiler (F5 from the Main Menu). It is most useful
for recompiling all the segments in a multisegment program which should be done whenever the top-level segment is
changed and recompiled.
You can also compile PROMULA source files using the simple RUN statement, but this will not show the compilation on
the console.
3.7.85 SELECT ENTRY
Purpose:
Allows the user to make a selection from a list of set elements.
Syntax:
SELECT ENTRY set
Remarks:
set
is the identifier of a set.
Upon execution, the SELECT ENTRY statement clears the Main Screen and displays the elements of set for browsing.
The display contains the set element codes and their row descriptors. A prompt at the bottom of the Prompt Screen
describes how to browse the list and make a selection. The keyboard action during execution of this statement is described
below:
Browsing keys
Pressing the arrow keys or the PgUp and PgDn keys moves a highlight bar through the list of set
elements.
Enter key
Pressing the Enter key selects the currently highlighted set element, clears the screen, and allows
execution to continue.
End key
Pressing the End key allows the user to exit without making a selection.
251
Promula Application Development System User's Manual
See also SELECT set, SELECT VARIABLE, and SELECT SET statements.
Examples:
The following example demonstrates the SELECT ENTRY statement:
DEFINE SET
dir(4) "4 Directions"
END SET
DEFINE VARIABLE
dirn(dir) "ROW LABELS" TYPE=STRING(10)
END VARIABLE
READ dirn:8
NORTH
SOUTH
EAST
WEST
DEFINE PROCEDURE selent
SELECT ROW(dir,dirn)
SELECT ENTRY dir
WRITE dir
END PROCEDURE selent
Execution of procedure selent and selecting the first element of set dir produces the displays below:
Identifier Description
1
NORTH
2
SOUTH
3
EAST
4
WEST
End: Exit
Arrows PgUp PgDn Home: Move
Identifier Description
1
NORTH
252
Enter: Select
Promula Application Development System User's Manual
3.7.86 SELECT FIELD
Purpose:
Vary the information associated with a pick menu field.
Syntax:
SELECT FIELD menu FIELD = fldnum [, DESCRIPTION = flddsc ]
Remarks:
is the name of the pick menu that is to be modified.
menu
menu must refer to a pick menu that was labeled VARIABLE when it was defined.
fldnum
is an integer expression providing the sequence number of the field in menu that is to be modified. fldnum may
be a numeric constant or a numeric variable.
flddsc
is a quoted string or string variable containing a new label for the field to be modified. The text will be left
justified and truncated to fit in the space allocated for the field in the definition of menu. If the DESCRIPTION
clause is omitted, then the field label is blanked and the bounce bar will never go to the field.
See also the DEFINE MENU statement.
Examples:
The code fragment below may be used to experiment with the SELECT FIELD statement.
DEFINE WINDOW
sw(00,00,79,22,white/black,none)
pw(01,24,79,24,white/black,top/single/navy/black)
END WINDOW
DEFINE MENU pickit, VARIABLE, POPUP(sw,pw)
Your Options are as follows:
---------------------------\[ 1 ] First option
\
\[ 2 ] Second option
\
\[ 3 ] Third option
\
\[ 4 ] Fourth option
\
\[ 5 ] SELECT FIELD
\
END
FIELD 1, SELECT=1, ACTION=1
FIELD 1
END
FIELD 2, SELECT=2, ACTION=2
FIELD 2
END
FIELD 3, SELECT=3, ACTION=3
FIELD 3
END
FIELD 4, SELECT=4, ACTION=4
FIELD 4
END
FIELD 5, SELECT=5, ACTION=5
SELECT FIELD
END
253
Promula Application Development System User's Manual
END MENU
DEFINE VARIABLE
pick
"Selection = "
fldno
"Field Number"
flddes
"Field Description"
END VARIABLE
TYPE=STRING(25)
DEFINE PROCEDURE selfld
ASK "Would you like to change a Menu field: Y or N",Y
WRITE "Enter Field Number (1 thru 9)"
READ fldno
ASK "Would you like to blank or change the field: B or C",B
SELECT FIELD pickit, FIELD=fldno
ELSE C
WRITE "Enter new field descriptor (up to 25 characters)"
READ flddes
SELECT FIELD pickit, FIELD=fldno,DESCRIPTOR=flddes
END
selfld
ELSE N
END
END
DEFINE PROCEDURE demo
SELECT pickit(pick)
WRITE GOTOXY(0,10)
DO IF pick EQ 5
selfld
ELSE
WRITE ("SELECTION = "pick)
END IF
demo
END PROCEDURE demo
3.7.87 SELECT file
Purpose:
Selects a record of a random file for data access, or selects one or more records from an inverted file for data access.
Syntax:
SELECT file(key)
Remarks:
file
is the identifier of the inverted or random file you are accessing.
key
is the sequence number, or the scalar variable whose value is the sequence number of the record you wish to
access. Alternatively, key is a code used for selecting the records of an inverted file.
If file is of type RANDOM, the record with sequence number key is selected. If file is of type INVERTED, all
records containing key are selected.
Examples:
1.
Select the second record in a random file and copy its data to a text file.
254
Promula Application Development System User's Manual
DEFINE FILE
txt1 TYPE=TEXT
ran1 TYPE=RANDOM
END FILE
OPEN ran1 "b:ran1.ran", STATUS=OLD
DEFINE VARIABLE ran1
item1 "Item 1"
TYPE=REAL(8,0)
item2 "Item 2"
TYPE=STRING(8)
item3 "Item 3"
TYPE=DATE(8)
END VARIABLE ran1
OPEN txt1 "b:txt1.txt", STATUS=NEW
SELECT ran1(2)
READ ran1
WRITE txt1(item1:8,item2:8,item3:8)
NOTE:
2.
At the beginning of the reading, the record pointer is at the beginning of the second record; at the end, the
pointer has advanced to the beginning of the third record in file ran1. No advancement will take place if the
record pointer is at the last record.
It is possible to select the records of a random file based on a specific search key by using an inverted file. An example
of this is illustrated below.
*
purtrx is a random file containing 9 transactions records
DEFINE FILE
purtrx
END FILE
TYPE=RANDOM,
"Purchase transaction file"
* Structure of the purtrx record
DEFINE VARIABLE purtrx
transno
"TRANSACTION NO."
stkcode
"STOCK CODE"
stkdesc
"STOCK DESCRIPTION"
stkqty
"STOCK QUANTITY"
stkcost
"STOCK UNIT COST"
END VARIABLE purtrx
TYPE=REAL(5,0)
TYPE=STRING(5)
TYPE=STRING(32)
TYPE=REAL(5,0)
TYPE=MONEY(11)
* Display entire random file
DEFINE PROCEDURE shotrx
OPEN purtrx "purtrx.ran"
DO purtrx
WRITE (transno,stkcode:7,stkdesc,stkqty,stkcost)
END purtrx
END PROCEDURE shotrx
Execution of procedure rdtrx produces the output below.
100
101
102
103
104
105
106
107
108
ADP3
ADP5
ADPAU
BLTCA
BLTOE
ADP5
BLTCA
CAB12
ADP5
Adapter, 3" Galv Steel URD
Adapter, 5" Galv Steel URD
Adapter, Amp URD
Bolts, Carriage 1/2" X 6"
Bolts, Oval Eye 5/8" X 12"
Adapter, 5" Galv Steel URD
Bolts, Carriage 1/2" X 6"
Cable, #12 solTWwire
Adapter, 5" Galv Steel URD
255
5
10
8
50
15
10
100
200
10
1.20
100.95
4.80
0.80
2.89
100.95
0.80
0.04
100.95
Promula Application Development System User's Manual
3.
Read a single record in a random file using a numeric record number
DEFINE VARIABLE
rn "Record Number"
END
DEFINE PROCEDURE seltrx
SELECT purtrx(rn)
READ purtrx
WRITE (transno,stkcode:7,stkdesc,stkqty,stkcost)
END PROCEDURE seltrx
The third record of file purtrx may be displayed using procedure seltrx as shown in the dialog below.
rn = 3
seltrx
102 ADPAU
4.
Adapter, Amp URD
8
4.80
Select records from a random file using an inverted (index) file.
Build an inverted file. Make "Stock Code" key postings. The key values from purtrx are stored in the random file
along with record sequence numbers. purinv is an inverted file used for searching the "direct" file purtrx with
symbolic keys.
DEFINE FILE
purinv
END FILE
TYPE=INVERTED(10), "Inverted file"
DEFINE VARIABLE purinv
purkey
"Stock code key"
TYPE=string(5)
purseq
"Transaction record number" TYPE=integer(5)
END VARIABLE purinv
OPEN purinv "purinv.ran", STATUS = NEW
purseq = 0
DO purtrx
purkey = stkcode
purseq = purseq + 1
WRITE purinv
END purtrx
CLEAR purinv
Procedure selkey may be used to search a random file by key and display the records which match.
DEFINE VARIABLE
key
"User defined stock code"
END VARIABLE
OPEN purinv "purinv.ran", STATUS = OLD
TYPE=string(5)
DEFINE PROCEDURE selkey
SELECT purinv(key)
DO purinv
SELECT purtrx(purseq)
READ purtrx
WRITE(transno\1,stkcode\7,stkdesc\15:0:0,stkqty\50,stkcost\60)
END DO purinv
256
Promula Application Development System User's Manual
END PROCEDURE selkey
A sample dialog with procedure selkey is shown below
* Select all records with
key = "ADP5"
selkey
101
ADP5
Adapter, 5"
105
ADP5
Adapter, 5"
108
ADP5
Adapter, 5"
a stock code "ADP5"
Galv Steel URD
Galv Steel URD
Galv Steel URD
10
10
10
100.95
100.95
100.95
* Select all records with a stock code "CAB12"
key = "CAB12"
selkey
107
CAB12
Cable, #12 solTWwire
200
0.04
* Select all records with a stock code "BLTCA"
key = "BLTCA"
selkey
103
BLTCA
Bolts, Carriage 1/2" X 6"
106
BLTCA
Bolts, Carriage 1/2" X 6"
50
100
0.80
0.80
3.7.88 SELECT indirect
Purpose:
Allows selection of a program variable for subsequent input/output operations.
Syntax:
SELECT indir(varlist)
Remarks:
indir
is the identifier of an indirect variable. Indirects may be used with the WRITE, BROWSE, and EDIT
variable, SORT, DO DESCRIBE, and PLOT statements. Indirects should not be used in calculations,
SELECT SET IF, or the WRITE text statements.
varlist
is a list of variable identifiers. If varlist contains a single identifier, indir will be assigned to it and no
variable selection screen will be displayed. If varlist is omitted, the selection list will display all the
variables in the program except indir.
Upon execution, the SELECT indirect statement clears the Main Screen and displays the list of variables in varlist for
selection. The display contains the variables' identifiers and descriptors as defined in their definitions. A prompt at the
bottom of the Prompt Screen describes how to browse the list and make a selection.
The following keys are active during execution of this statement:
Browsing keys
Pressing the arrow keys or the PgUp and PgDn keys moves a highlight bar that highlights the current
variable.
Enter key
Pressing the Enter key selects the current variable, clears the screen, and allows execution to continue.
End key
Pressing the End key allows the user to exit without making a selection.
See also the ASK...ELSE statement and the INDIRECT function.
257
Promula Application Development System User's Manual
Examples:
The following example demonstrates the SELECT indirect statement:
DEFINE VARIABLE
indir*
xval "THE VALUE OF X" VALUE=10
yval "THE VALUE OF Y" VALUE=20
zval "THE VALUE OF Z" VALUE=30
END VARIABLE
DEFINE PROCEDURE selvar
SELECT indir(xval,yval,zval)
DO IF END
WRITE "Goodbye"
BREAK selvar
END IF
WRITE (indir:L,indir) CLEAR(-1)
selvar
END PROCEDURE selvar
Execution of procedure selvar and selection of variable yval produces the following displays:
Ident Description
XVAL
THE VALUE OF X
YVAL
THE VALUE OF Y
ZVAL
THE VALUE OF Z
End: Exit
THE VALUE OF Y
Arrows PgUp PgDn Home: Move
20
3.7.89 SELECT menu
Purpose:
Displays a pick menu for making a selection.
258
Enter: Select
Promula Application Development System User's Manual
Syntax:
SELECT menu(option)
Remarks:
menu
is the identifier of a pick menu.
option
is a variable that will pick up the number (or action code) of the selection picked. The value of option may
be used to determine alternative execution paths.
A pick menu is a screen display which is designed to help its user pick from a set of selection fields that have been
previously laid out with a DEFINE MENU statement. Two types of pick menus may be used with the SELECT menu
statement: simple, and popup pick menus.
When a simple pick menu is used in a SELECT menu statement, PROMULA clears the window opened to the Main
Screen, displays the menu, and highlights the first selection field.
Simple pick menu selections may be made by using the arrow keys to highlight the desired field and then pressing the
Enter key, or by using the function keys (or the numeric keys) directly. The F1 (numeric 1) key picks the first field in the
menu, the F2 (numeric 2) key picks the second field , and so forth. If you have more than ten selection fields, then press the
Alt or Shift key together with one of the ten Function keys to get up to twenty selections. For example, pressing Alt-F1
picks the 11th selection. When a field is selected, the sequence number of the field (as defined by its relative position on the
menu) will be stored in the variable option, and execution will continue with the statement following the SELECT menu
statement.
When a popup pick menu is used in a SELECT menu statement, PROMULA displays the selection screen for the popup
pick menu in the menu's selection screen window, and displays the field description for the currently highlighted field in the
menu's field description window. The last selected option is highlighted. The first time the menu is executed, the first
selection is highlighted.
Popup pick menu selections may be made by using the arrow keys to highlight the desired field and then pressing the Enter
key. To minimize keystrokes, you may enter a char as defined in one of the SELECT=char parameters of the menu
definition. The SELECT menu statement does not distinguish between upper and lower case alphabetic keypresses; thus, if
SELECT=A, the user may select the field either by pressing the 'A' or 'a' key. When a popup menu selection is made, the
value of code, as defined in the appropriate ACTION=code parameter of the menu definition, will be returned to
PROMULA. If code is the name of a submenu defined in the popup menu, the submenu will be displayed for selection. If
code is a number, its value will be stored in the variable option, and execution will continue with the statement following
the SELECT menu statement.
The user may return from a popup pick menu submenu by pressing the End key.
If your system supports a pointer device (such as a mouse), you may make a pick menu selection by positioning the pointer
in the desired selection field and clicking the pointer/mouse button.
Examples:
An example of the SELECT menu statement is given with the discussion of the DEFINE MENU statement.
A third type of pick menus, pulldown pick menus, are executed with the SELECT PULLDOWN statement.
3.7.90 SELECT option
Purpose:
259
Promula Application Development System User's Manual
Selects PROMULA system options.
Syntax:
SELECT option
Remarks:
option is a list of any or all of the following options.
BACKGROUND=BLACK/ WHITE / NAVY / GREEN / BLUE / RED / PURPLE / YELLOW
to change the color of the Main Screen background.
BROWSE=ON / OFF / ROW / COLUMN / VALUE
to control the behavior of the WRITE variable and WRITE table statements, and tables defined by the DEFINE
TABLE statement.
When BROWSE=OFF, the above statements write the complete variable or table then proceed with the next statement
without pausing. This option is useful for short reports on screen or output that is to be captured on disk (using the
WRITE file or SELECT OUTPUT statements) or sent to a printer. BROWSE=OFF is the default.
When BROWSE=ON, the above statements generate displays which may be viewed in a controlled interactive mode
as if a BROWSE variable or BROWSE table statement had been executed. This option is useful for viewing longer
reports on screen.
When BROWSE=ROW, COLUMN, or VALUE, the above statements may be used for interactive data editing as if
an EDIT variable or EDIT table statement with a BY ROW, COLUMN or VALUE option had been executed.
COMMA=ON/OFF
to show commas in displays of numeric values denoting thousands (e.g., 1,500,000; 1,200.) The default is ON.
DATE=MMDDY2 / MMDDY4 / DDMMY2 / DDMMY4
to select alternative formats for the DATE type variable.
When DATE=MMDDY2 (the default) dates are treated as 8-character strings of the form mm/dd/yy for input-output
purposes. Internally, the date is stored as a numeric quantity of the form yymmdd. For example February 14, 1966 may
be entered or displayed as 2/14/66 and is internally stored as 660214.
When DATE=MMDDY4 dates are treated as 10 character strings of the form mm/dd/yyyy for input-output purposes.
Internally, the date is stored as a numeric quantity of the form yyyymmdd.
When DATE=DDMMY2 dates are treated as 8-character strings of the form dd/mm/yy for input-output purposes.
Internally, the date is stored as a numeric quantity of the form yymmdd.
When DATE=DDMMY4 dates are treated as 10-character strings of the form dd/mm/yyyy for input-output purposes.
Internally, the date is stored as a numeric quantity of the form yyyymmdd.
Note, if you plan to do math on the 10-character date formats, you should pass the date variable to a variable of
TYPE=INTEGER(10) in order to retain at least 10 significant digits.
DEBUG=ON / OFF
260
Promula Application Development System User's Manual
to control whether or not PROMULA pauses after encountering an error during compilations.
When DEBUG=ON, PROMULA issues an error message upon encountering an error in compilation and pauses the
compilation at that point. This is the default.
When DEBUG=OFF, PROMULA issues an error message but does not pause.
ECHOR filespec
to specify a file in which to save an audit trail of PROMULA statements executed from command mode. The syntax of
this statement is exactly like the SELECT OUTPUT statement, but, instead of capturing the output generated by
PROMULA in a text file, this statement causes the PROMULA command mode statements to be captured. It is not
necessary to SELECT PRINTER=ON/OFF to activate/deactivate the command capture.
filespec is a quoted string or string variable containing the name of the file to be used for command capture.
To turn the statement capture off and close the file, execute a SELECT ECHOR "" statement.
FACTOR=var
to specify a variable whose value(s) should be used as a scaling factor for all numeric data reports displayed by the
WRITE variable, and BROWSE variable statements.
To deactivate the FACTOR option, execute a SELECT FACTOR = * statement.
var
is the identifier of the variable to be used as the scaling factor. The value(s) of the scaling factor is multiplied
times each value to be displayed, and the resultant product is shown. If var is a multidimensional array, the set
correspondence (if applicable) is maintained between var and the variable displayed. The default value for var
is one.
FOREGROUND=BLACK / WHITE / NAVY / GREEN / BLUE / RED / PURPLE / YELLOW
to change the color of the Main Screen foreground.
GHEADING=ON / OFF
to turn page headings on plots on or off. The headings will only be produced if a SELECT HEADING=ON statement
has also been executed. The default is ON.
GFORMAT=ON / OFF
to turn the gformat feature of the report generator on or off. When GFORMAT=ON, numeric quantities that are too
large to fit in the specified display width are written in exponential notation. When GFORMAT=OFF, numeric
quantities that are too large are written as asterisks. The default is OFF.
GRAPHICS=CHARACTER / MEDIUM / HIGH / PLOTTER
To select the mode for PROMULA graphics.
When GRAPHICS=CHARACTER, PROMULA's PLOT statement will produce character plots. CHARACTER
mode is appropriate for both monochrome and graphics monitors. This is the default.
261
Promula Application Development System User's Manual
When GRAPHICS=MEDIUM, medium-resolution plots are produced. The default MEDIUM graphics mode is
three-color medium resolution CGA graphics.
When GRAPHICS=HIGH, high-resolution plots are produced. The default HIGH graphics mode is monochrome
high resolution CGA graphics.
When GRAPHICS=PLOTTER, plots will be sent to the printer/plotter. The default PLOTTER/PRINTER graphics
mode is high-resolution monochrome graphics on an Epson-compatible dot-matrix printer.
The actual behavior of each of the graphics modes depends on PROMULA's graphics configuration. The information
above applies to PROMULA's default configuration. See Chapter 6 for a discussion of configuring graphics.
HEADING=ON / OFF / EJECT
to control the page heading used by PROMULA's report generator. The report generator controls displays of
multivariate information including writing multidimensional arrays, writing tables, and displaying results of the
statistical functions. The headings will also appear at the top of plots generated in batch mode.
When HEADING=ON, a page feed character and a header is written at the top of each page. This header includes the
descriptor for the program (if available), the current date (in the form MM/DD/YY), and the word "Page" followed by
the page number which is incremented by 1 as a new page is shown. This is the default.
When HEADING=OFF no header or page feed character is written at the top of each page.
When HEADING=EJECT, only a page feed character is written in the header.
HELP filespec
to select a dialog file to serve as an on-line help file.
filespec
is a quoted string or string variable containing the name of the physical disk file that contains the dialog
file you want to use as an on-line help file.
When the user presses Alt-H in response to a prompt, PROMULA looks for a DO IF HELP statement immediately
following the statement that generated the prompt. If a DO IF HELP block is found, PROMULA executes statements
in the block. If no DO IF HELP block is found, PROMULA checks to see if a dialog file has been specified with the
SELECT HELP statement. If so, PROMULA will display the dialog file for browsing.
If you have opened a window to the Help Screen, the dialog file will be shown in this window; otherwise, the Main
Screen is used. See the DEFINE WINDOW and OPEN WINDOW statements and the discussion of windowing for
details of this feature.
Popup menus have an optional HELP parameter as part of their field statements. This parameter specifies a topic (by
its sequence number) in a dialog file. When the user presses Alt-H in response to a POPUP menu, PROMULA opens
the file specified with the SELECT HELP statement and displays the TOPIC whose sequence number matches the
help code of the currently highlighted field in the POPUP menu.
HIERARCHY=ON / OFF
to control the interpretation of equations.
When HIERARCHY=ON, operator precedence rules are turned on and expressions are evaluated using algebraic
hierarchy precedence. This is the default.
262
Promula Application Development System User's Manual
When HIERARCHY=OFF, operator precedence rules are turned off and expressions are evaluated using left-to-right
(linear) precedence.
LINES=page
to change the number of lines per page to page. The default page length is 25 lines. The length of CHARACTER
mode plots can be controlled by using the SELECT LINES statement. The number of lines written by the WRITE
menu statement also is controlled by the SELECT LINES statement.
page is an integer constant or a numeric variable.
MAP=ON / OFF
to produce a memory map with the compilation listing.
When MAP=OFF no memory map is produced with the listing. This is the default.
When MAP=ON a memory map is produced with the listing.
Each statement line of this listing has four columns of sequence numbers:
The first number, in Column Value, is the relative address of the next available word of "value storage". Depending on
the size of your computer system memory, this number cannot exceed a certain maximum. If it does, you have to use
program segmentation or database management to make your program fit within your working space (see Chapter 4).
The second number, in Column Def, is the relative address of the next available word of "definition storage". You need
concern yourself with this number only if its value exceeds a certain maximum.
The third number, in Column Proc, is the relative address of the next available word of "procedure storage". This, too,
cannot exceed a certain maximum determined by the size of your computer memory. The Proc numbers are also
reported as the Statement address during execution errors, and you may locate the statement generating the error by
looking up the statement in a mapped compilation listing.
The fourth number, in Column Line#, is the sequence number of the statement within the source listing.
Figure 3-1 shows the output produced by the PROMULA compiler for a source program that has the MAP=ON option
in effect.
SELECT MAP=ON
Storage Allocation
Value
Def Proc Line#
11
24
20
2
11
24
20
3
11
24
25
4
11
24
25
5
11
54
25
6
11
78
25
7
11
78
25
8
11
78
25
9
47
98
25
10
83
114
25
11
92
135
25
12
93
154
25
13
93
154
25
14
93
154
25
15
93
154
25
16
93
154
25
17
PROMULA Source Statement
OPEN SEGMENT
"DEMO.XEQ"
STATUS=NEW
DEFINE PROGRAM "A Demo Program"
DEFINE SET
month(12)
"Months of the Year"
acnt(3)
"Profit and Loss Ledger Accounts"
END SET
DEFINE VARIABLE
mp(month,acnt) TYPE=REAL(12,2) "Profit & Loss Figures ($)"
mn(month)
TYPE=STRING(12) "Month Names"
acn(acnt)
TYPE=STRING(12) "Profit & Loss Accounts"
amp
TYPE=REAL(10,2) "Average Monthly Profit ($)"
END VARIABLE
DEFINE RELATION
KEY(month,mn)
KEY(acnt,acn)
END RELATION
263
Promula Application Development System User's Manual
93
93
93
93
93
93
93
93
93
93
93
93
93
93
93
93
93
93
154
154
154
154
154
160
160
160
160
160
160
160
160
160
160
160
160
160
25
34
25
34
25
25
29
46
50
67
70
89
101
106
111
112
113
113
18
19
20
21
22
23
24
25
26
27
28
29
30
31
32
33
34
35
READ mn:4
JAN FEB MAR APR MAY JUN JUL AUG SEP OCT NOV DEC
READ acn:6
Sales Costs Profit
DEFINE PROCEDURE profits
SELECT acnt(Sales)
EDIT mp TITLE("Please enter the monthly sales.")
SELECT acnt(Costs)
EDIT mp TITLE("Please enter the monthly costs.")
SELECT acnt*
mp(m,3)=mp(m,1)-mp(m,2)
amp=SUM(m)(mp(m,3)/12)
WRITE mp
WRITE amp
STOP
END profits
END PROGRAM, DO(profits)
STOP
Figure 3-1: Compilation Output to Printer with SELECT MAP=ON
MATHERROR=ON / OFF
to control math error processing during execution of calculations.
When MATHERROR=ON, PROMULA will stop program execution if it attempts to do a division by zero, a
logarithm of a negative number, or a fractional power of a negative number. This is the default condition. Like all the
SELECT option statements, the SELECT MATHERROR affects the entire program; however, it is possible to
implement local error processing using the DO IF ERROR statement. When MATHERROR=OFF, PROMULA will
give a zero result for these abnormal calculations, and will continue with program execution.
MINUS=LEADING / PARENTHESES
to control the display of negative numbers.
When MINUS=LEADING, negative values are displayed with a leading minus sign. This is the default. When
MINUS=PARENTHESES, negative values are displayed enclosed in parentheses, e.g., the value -10.0 is displayed as
(10.0).
NS=code, ND=code, NA=code, or ERR=code.
to specify a code value to use for the input or output of special values. An alternative syntax is SELECT NS(code),
ND(code), NA(code), ERR(code) where code is up to to six alphanumeric characters. See the discussion of
SELECT SPECIAL below.
OUTPUT filespec
to select a file for subsequent output operations.
filespec is a quoted file name or a string variable that contains the name of a file in which you want to save the
results of output statements. Output will also be displayed on the screen even if another device has been selected.
To use the SELECT OUTPUT statement, follow it with a SELECT PRINTER=ON statement, and any other options
you may want to set for text report generation.
SELECT OUTPUT "report.out" PRINTER=ON WIDTH=132
264
Promula Application Development System User's Manual
After selecting output, most displays produced by PROMULA will be written to the specified disk file. The affected
statements include WRITE text, WRITE variable, COPY file, WRITE function, WRITE table, table, PLOT (in
CHARACTER mode), WRITE menu, WRITE TEXT, and the statistical function reports. To close the file and
inactivate the SELECT OUTPUT statement, execute a SELECT PRINTER=OFF statement.
PAGE=number
to change the value of PROMULA's internal page counter to number. The current page count is displayed in display
headings produced by the report generator.
PATH pathspec
to indicate what the path of the data drive is. Here, pathspec is a valid path specification or a string variable whose
value is a valid path specification, including subdirectory parameters.
You can turn pathing off by executing a SELECT PATH "" statement.
You may locally override the path to pathspec by using an S: as a "drive designation" before file names. For example if
you enter the statement OPEN file "S:mydata.dta" STATUS=OLD, PROMULA will ignore the path designated by
pathspec and look in the current system path for mydata.dta. You cannot turn pathing off by selecting option 2
from the Main Menu.
PRINTER=ON / OFF
to turn the printer on or off.
The statement SELECT PRINTER=ON has the same effect as the simultaneous pressing of the Ctrl key and the
PrtSc key on the IBM PC. You may also print text while in PROMULA by simultaneously pressing the Shift key and
the PrtSc key, this will send the contents of the current screen to the printer.
The SELECT PRINTER=ON/OFF statement is also used to start/stop the spooling of output to a disk file previously
specified by a SELECT OUTPUT statement.
QUOTES=ON / OFF
to control the placement of quotes around row labels, column labels, and page headings in displays produced by the
WRITE variable statement. When QUOTES=ON, double quotes are placed around these descriptors; this may be
useful for setting up data to import into an external spreadsheet program. The default is QUOTES=OFF.
RUNID=set
to specify a character string that will be appended to the variable descriptor during display statements (WRITE,
PLOT, EDIT, etc.).
set is the identifier of a set whose first selected row descriptor will be appended to display titles.
SCENARIO titlespec
to specify a character string that will be appended to the title of displays produced by the text report generator and
plots.
titlespec is a quoted string or a string variable whose value you want to appear as part of the title of all display
titles.
265
Promula Application Development System User's Manual
SPECIAL=ON / OFF
to activate PROMULA's special value processing.
When SPECIAL=ON, PROMULA will process the following codes as special data values: NS = Not specified, NA =
Not available, ND = Not disclosed. These codes will appear in reports and in results of expressions involving variables
containing special values.
When SPECIAL=OFF, PROMULA will treat values of arrays containing special values as if they were zero. This is
the default.
STEP = ON / OFF
to activate/deactivate step mode during execution of a program. When STEP = ON, PROMULA will enter command
mode after each statement, at this point, you may enter any command or do debugging operations as needed. When you
are ready to execute the next statement, press the Escape key. In the default mode, STEP = OFF, execution proceeds
from statement to statement without pausing.
STRING (len)
to change the maximum length of descriptors to len, an integer. The default length is 800 characters per descriptor.
STORE=RAW / VIRTUAL / DYNAMIC
to change the default behavior of the STATUS=OLD option of the OPEN file statement. If STORE=RAW, files
opened with STATUS=OLD or with no explicit status specification are opened with the OLD status. If
STORE=VIRTUAL, files opened with STATUS=OLD or with no explicit status specification are opened with the
VIRTUAL status. If STORE=DYNAMIC, files opened with STATUS=OLD or with no explicit status specification
are opened with the DYNAMIC status. See Chapter 4 for more information.
TRANSPOSE=ON / OFF
to control the orientation of array variable displays produced by PROMULA. Setting TRANSPOSE=ON specifies that
arrays should be displayed in column-major order. For example, if TRANSPOSE=ON, a one-dimensional array will
be displayed across the columns instead of down the rows, a two-dimensional array will be displayed with its first set
dimensioning the columns and the second set dimensioning the rows, a three-dimensional array will be displayed with
its third set dimensioning the rows and the first set dimensioning the pages. In other words, multidimensional arrays
will be displayed as if they had been defined with their first and last sets switched. The SELECT TRANSPOSE
statement affects the displays produced by the WRITE, BROWSE, and EDIT variable statements. The WRITE,
BROWSE, and EDIT variable statements can take a local TRANSPOSE option to override the global setting of
TRANSPOSE locally. If an explicit set order is included with any of these statements, any global or local
TRANSPOSE settings are ignored.
UNITS=var
to specify a variable whose value(s) should be used to perform unit conversions for all numeric data reports displayed
by the WRITE variable, and BROWSE variable statements.
var
is the identifier of the variable to be used as the conversion factor. The value(s) of the conversion factor is
multiplied times each value to be displayed, and the resultant product is shown. If var is a multidimensional
array, the set correspondence is maintained between var and the variable displayed. The default value for var
is one.
To deactivate the UNITS option, execute a SELECT UNITS=* statement.
WIDTH=width
266
Promula Application Development System User's Manual
to change the width of display lines to width, an integer. The default width is 80 characters per line. The width of
CHARACTER mode plots can be controlled by using the SELECT WIDTH statement.
width is a numeric variable or a numeric constant.
ZERO=BLANK / DASHES / ON
to control the display of zero displays produced by PROMULA.
When ZERO=BLANK, zero values in displays are shown as blanks.
When ZERO=DASHES, zero values in displays are shown as a pair of dashes.
When ZERO=ON, zero values in displays are shown as zeros. This is the default.
3.7.91 SELECT PULLDOWN
Purpose:
Defines and displays a pulldown pick menu for selection.
Syntax:
SELECT PULLDOWN option = wind (menudesc)
Remarks:
option
is a variable that will pick up the action code of the selection picked. The value of option may be used to
determine alternative execution paths.
wind
is the identifier of the window that will be used to contain the menu-bar for the pulldown menu. The color
scheme and border style for wind will also be used by any submenus defined in the menudesc. wind should
be a POPUP type window.
menudesc
is the description of the pulldown menu. The syntax of menudesc is as follows:
(fldlbl1, fldcod1 [,fldlbl2, fldcod2] [,fldlbl3, fldcod3] [, ... ]
)
where
fldlbln is a label for the nth menu item. Each fldlbln may be either a quoted string or string variable.
fldcodn is either a numeric action code or a submenu description for the nth menu item. If fldcodn is a
numeric action code, its value will be stored in option when the field is selected and execution
will continue with the code following the SELECT PULLDOWN statement. If fldcodn is a
submenu description the submenu will be displayed for selection.
If fldcodn is followed by a slash (/) in a submenu definition, a line will be drawn across the
submenu.
Each submenu description has the same general form as menudesc.
The fields of the top-level menu are displayed in a row across wind. The fields of any second level submenu drop down
from their parent field. The fields of any third level submenu are displayed to the right of their parent field. The size of the
267
Promula Application Development System User's Manual
"window" used to display a submenu is determined by PROMULA according to the number of fields it contains and the
length of its longest field label.
Examples:
The example below illustrates the use of the SELECT PULLDOWN statement.
DEFINE WINDOW
w1(1,1,78,1,WHITE/BLACK,FULL/SINGLE/NAVY/BLACK,WHITE/NAVY),POPUP
END WINDOW
DEFINE VARIABLE
pick
"The menu selection"
f(10)
"Promula menu fields" TYPE = STRING(12)
v(10)
"Promula menu selection values"
bar(10) "Promula menu fields" TYPE = STRING(12)
END VARIABLE
bar(1) = "File"
bar(2) = "Edit"
bar(3) = "MainMenu"
bar(4) = "Help"
f(1) = "Exit"
f(2) = "Restart"
f(3) = "Tutorial"
f(4) = "Editor"
f(5) = "Compile"
f(6) = "Xeq"
f(7) = "Resume"
f(8) = "Offline >"
f(9) = "Applications"
f(10) = "Language"
v(i) = i + 11
DEFINE PROCEDURE test
SELECT PULLDOWN pick = w1(
bar(1) (
"New",
/,
"Open >", (
"Source",
"Xeq",
"Prm",
"Save",
"Save as",
"Print",
/,
"Exit",
bar(2) (
"Undo",
"Cut",
"Copy",
"Paste",
"Delete",
bar(3)
(
f(1),
/,
f(2),
f(3),
f(4),
f(5),
1,
101,
102,
103),
2,
3
4,
5),
6,
7,
8,
9,
10),
v(1),
v(2),
v(3),
v(4),
v(5),
268
Promula Application Development System User's Manual
f(6),
f(7),
f(8) (
"Fred",
"George",
"Mark",
"Lois",
f(9),
/,
f(10),
bar(4) (
"Help for field",
"Extended help",
"Keys help",
"Help index",
"Tutorial",
"About P90",
)
WRITE CLEAR(0) (////pick)
test
END PROCEDURE test
v(6),
v(7),
201,
202,
203,
204),
v(8),
v(9)),
22,
23,
24,
25,
26,
27),
3.7.92 SELECT RELATION
Purpose:
Defines a relation between the elements of a set and the contents of an array variable indexed or subscripted by that set.
Syntax:
SELECT TYPE(set,vec)
or
SELECT TYPE(set,*)
Remarks:
set
is the identifier of the set whose elements are related to the values of the vector vec.
vec
is the identifier of the vector whose values are related to the elements of the set. vec is usually a STRING TYPE
variable
TYPE
is the type of relation between set and vec and may be one of the following:
ROW
to define row descriptors for the set.
COLUMN to define column descriptors for the set.
KEY
to define codes for the set: this type of relation will cause vec to serve as both column and row
descriptors for set and will allow you to make selections from set using the values of a CODE or
STRING type variable. See the example program in the discussion of the ASK...ELSE section in
this chapter for an illustration of this feature.
TIME
to define time values for the set. This type of relation is used in dynamic simulations modeling.
A relation is not valid unless vec is a vector variable indexed by set.
269
Promula Application Development System User's Manual
To restore the set relation to that specified in a previous DEFINE RELATION statement, use the SELECT type(set,*)
statement.
Examples:
The effect of the SELECT RELATION statement is demonstrated by the following program:
DEFINE SET
year(2)
acnt(3)
END SET
DEFINE VARIABLE
mp(year,acnt)
yn(year)
acn(acnt)
acc(acnt)
END VARIABLE
"2 Years"
"Profit and Loss Ledger Accounts"
"Profit and Loss Figures ($)"
"Year Names"
"Profit and Loss Account Names"
"Profit and Loss Account Names"
TYPE=REAL(10,0)
TYPE=STRING(12)
TYPE=STRING(12)
TYPE=STRING(12)
DEFINE RELATION
ROW(year,yn)
KEY(acnt,acn)
END RELATION
READ yn:5
1987 1988
READ acn:7
Sales Costs Profit
READ acc:7
ACNT-1 ACNT-2 ACNT-3
The dialog below shows how the SELECT RELATION statement can change the column descriptors for set acnt.
WRITE mp
Profit and Loss Figures ($)
1987
1988
Sales
50,000
91,000
Costs
48,000
86,000
Profit
2,000
5,000
* Change the column labels for set acnt using a SELECT COLUMN statement
SELECT COLUMN(acnt,acc)
WRITE mp
Profit and Loss Figures ($)
1987
1988
ACNT-1
50,000
91,000
ACNT-2
48,000
86,000
ACNT-3
2,000
5,000
* The ROW relation between variable acn and set acnt is still in place
WRITE acc:40
Profit and Loss Account Names
Sales
Costs
Profit
ACNT-1
ACNT-2
ACNT-3
* Restore the COLUMN relation between acnt and acn
SELECT COLUMN(acnt,*)
WRITE mp
Profit and Loss Figures ($)
270
Promula Application Development System User's Manual
1987
1988
Sales
50,000
91,000
Costs
48,000
86,000
Profit
2,000
5,000
3.7.93 SELECT set
Purpose:
Selects elements of a set.
Syntax:
SELECT set(list) or SELECT set*
Remarks:
set
is the identifier of the set whose elements are selected.
list
is a list of element selections and may be of the form:
k,l,m-t
where the notation m-t means "from m to t" and where k,l,m, and t are any of the following:
*
1.
integers from 1 to N, where N is the size of the set
2.
identifiers of scalar variables whose values are in the range from 1 to N
3.
the values of CODE or STRING type variables that have been related to set through a KEY relation.
4.
time values that have been related to the elements of the set through a TIME relation.
is an asterisk that means clear the present set selection and restore the set to its default size and order as defined by
the DEFINE SET statement. A set will be restored to a size other than its default size if you have executed a
COMPUTE set:R statement before the restore (see the discussion of sets in Chapter 1).
In its normal setting, a set has a number of elements N that are ordered sequentially from 1 to N. The SELECT set
statement allows you to change both the range and the relative ordering of the set elements.
A set selection is in effect until a new set selection is specified. Following a set selection, all expressions involving
variables that are subscripted by that set are restricted by the range and ordering of the set selection.
A set selection is valid only if it has values between 1 and N, the size of the set.
Examples:
1.
The statement
SELECT month(1,6,9)
selects the 1st, 6th, and 9th element of the set month, i.e., the months January, June and September. All subsequent
calculations or input/output instructions involving variables subscripted by month will be restricted to the selected
months.
271
Promula Application Development System User's Manual
2.
The statement
SELECT month(JAN-JUN)
selects the first six months, January through June, of the set month. Here, JAN and JUN are codes that have been
related to the month set by a KEY relation.
3.
The statements
x = 1
y = 6
SELECT month(x-y)
have the same effect as the statement of Example 2. Here, x and y are real variables that select the first six months,
January through June, of the set month.
4.
The statement
SELECT month(JAN-JUN), year(1980-1984)
selects the elements of more than one set.
5.
The statement
SELECT month*, year*
resets the sets month and year to their default sizes and orders.
3.7.94 SELECT SET
Purpose:
Allows the user to make several selections from a list of set elements.
Syntax:
SELECT SET set
Remarks:
set is the identifier of a set
Upon execution, the SELECT SET statement clears the Main Screen and displays the elements of set for browsing. The
display contains the set element codes/numbers and their descriptors as defined by a DEFINE RELATION or a SELECT
relation statement. A prompt at the bottom of the Prompt Screen describes how to browse and make selections from the
list.
The keyboard action during execution of this statement is described below:
Browsing keys
Pressing the arrow keys or the PgUp and PgDn keys moves a highlight bar through the list of set
elements. The current set element is highlighted in cyan if it has not been selected, or in red if it has
already been selected. These default colors can be modified by a DEFINE WINDOW and OPEN
WINDOW statement.
272
Promula Application Development System User's Manual
Ins key
Pressing the Ins key inserts a set element into the selection vector, and causes its sequence number to
be marked by highlighting it in green or in a color defined via a previous DEFINE WINDOW
statement.
Del key
Pressing the Del key cancels a previous selection.
Enter key
Pressing the Enter key activates selection of the currently highlighted set elements, and allows the
execution to continue. If no elements are high-lighted when Enter is pressed, the set remains in the
same state it was in before the SELECT SET statement.
End key
Pressing the End key allows the user to exit without making any selections.
Examples:
The following example demonstrates the SELECT SET statement:
DEFINE SET
dir(4) "4 Directions"
END SET
DEFINE VARIABLE
dirn(dir) "ROW LABELS" TYPE=STRING(10)
END VARIABLE
READ dirn:8
NORTH
SOUTH
EAST
WEST
DEFINE PROCEDURE selset
SELECT ROW(dir,dirn)
SELECT SET dir
WRITE dir
END PROCEDURE selset
Execution of procedure selset and selection of the first and fourth elements of set dir produce the following two
displays:
273
Promula Application Development System User's Manual
Identifier Description
1
NORTH
2
SOUTH
3
EAST
4
WEST
End: Exit
Arrows PgUp PgDn Home: Move Ins: Tag Del: Untag Enter: Select
Identifier Description
1
NORTH
4
WEST
3.7.95 SELECT set IF
Purpose:
Select elements of a set according to a condition on a variable indexed by the set.
Syntax:
SELECT set IF condition
Remarks:
set
is the identifier of the set whose elements are being selected.
condition
is any true-false expression involving one or more array variables subscripted by set. Only those
elements for which condition is true are selected. If condition is false for all elements, the selection
is null and all elements of set are selected.
To detect and correct for a null set selection use the DO IF NULL statement immediately after the SELECT SET IF
statement. An example of this feature is in the section related to the DO IF NULL statement.
The selections made by SELECT set IF are made from the current selection vector of set. Thus a cascading, nested
selection may be made by executing several SELECT set IF statements in series.
Examples:
274
Promula Application Development System User's Manual
DEFINE SET
month(12)
END SET
DEFINE VARIABLE
mv(month)
"Vector by Month"
END VARIABLE
READ mv
1,0,0,1,0,0,1,0,0,1,0,1
SELECT month IF mv NE 0
After the selection, the selected values of the set may be illustrated by writing a variable subscripted by the set.
WRITE mv
Vector by Month
MONTH(1)
MONTH(4)
MONTH(7)
MONTH(10)
MONTH(12)
1
1
1
1
1
The SELECT statement above selects only those months for which the value of variable mv is not equal to zero.
3.7.96 SELECT VARIABLE
Purpose:
Asks the user a series of set selection questions based on the sets structuring a specified variable.
Syntax:
SELECT VARIABLE var
Remarks:
var
is the identifier of an array variable that will serve to define a series of set selection questions. The order and
identity of set selection questions will be defined by the order and identity of sets structuring var.
This statement provides an alternative to the ASK statement as a way of allowing the user to make set element selections.
Upon execution, the SELECT VARIABLE statement will pose a series of set selection questions to the user for each set
dimensioning var.
Each question will be of the form
Which setdesc entry(s) do you want?
Where setdesc is the descriptor of the set being selected. If no set descriptor was specified when the set was defined, the
set identifier (in capital letters) will be used.
PROMULA will check the validity of the user's responses to ensure that selections are in the range of the set.
275
Promula Application Development System User's Manual
In addition to set codes or element numbers, the following keywords may be entered in response to the SELECT
VARIABLE statement's prompts:
ALL
to select all elements in the range of the set being selected.
LIST
to display the element numbers or codes and descriptors of all active elements of the set being selected.
END
to exit the SELECT VARIABLE statement set selection process.
Example:
The behavior of the SELECT VARIABLE statement is illustrated in the example below. First, two sets are defined: year,
a time series set, and state. Notice that set year has no descriptor and that set state has a strange looking descriptor
specifically for use with the set selection question generated by the SELECT VARIABLE statement. Next, two variables
are defined: pop is a two-dimensional array that will be used in the SELECT VARIABLE statement to control the order of
set selections, staten is a code type variable that can be used to specify selections from set state. Next, variable staten
is related to set state and the variables are initialized. Finally, procedure slcvar is defined to run the SELECT
VARIABLE statement and display the results.
DEFINE SET
year(4) TIME(1990,2020)
state(3) "of the 3 state"
END SET
DEFINE VARIABLE
val(state,year)
staten(state)
END VARIABLE
TYPE=REAL(15,0)
TYPE=CODE(2)
"State Values"
"State Names"
SELECT KEY(state,staten)
READ staten:3
OH CA IL
val(i,j)=i*j*100000
DEFINE PROCEDURE slcvar
SELECT VARIABLE val
WRITE val
END PROCEDURE slcvar
A sample dialog with procedure slcvar is shown below:
DO slcvar
Which of the 3 state entry(s) do you want?
list
Identifier Description
1
OH
2
CA
3
IL
Which of the 3 state entry(s) do you want?
CA
Which YEAR entry(s) do you want?
1990-2010
State Values, 1990 to 2010
CA
1990
200,000
2000
400,000
276
2010
600,000
Promula Application Development System User's Manual
3.7.97 SORT
Purpose:
Sorts the elements of a set based on the values of a variable subscripted by that set.
Syntax:
SORT [order] set USING var
Remarks:
is the order in which the set will be sorted and may be one of the following:
order
ASCENDING
sorts the specified set according to the values of var ordered from low to high. This is
the default order.
DESCENDING
sorts the specified set from high to low.
set
is the identifier of the set whose elements are being sorted.
var
is the identifier of a variable whose values are used to determine the order of the set. The variable var must be
classified by set, i.e., it must have set as one of its subscripts; thus, it cannot be a scalar.
The variable var may be multidimensional, i.e., it may have additional subscripts other than set. In such case, the sorting
is done over the dimension corresponding to the set with all the other sets dimensioning the array fixed at a single element.
If not otherwise specified by a SELECT set statement, all dimensions other than set are fixed at the first element of their
selection vector.
After a sort operation, the sorted order of set remains in effect until a SORT or SELECT SET statement is executed.
If var is a string variable, the elements of set are sorted alphabetically.
Examples:
The following program illustrates the SORT statement.
DEFINE SET
row(10)
col(5)
END SET
DEFINE VARIABLE
var1(row)
var2(row,col)
END VARIABLE
"A 1-Dimensional Array"
"A 2-Dimensional Array"
READ var1
3 45 56 19 21 34 97 89 52 21
READ var2
24 5 56 34 21
98 76 34 27 14
11 23 41 17 32
277
Promula Application Development System User's Manual
54
1
51
11
33
79
33
10
22
49
31
15
21
99
99
3
48
33
67
59
1
2
4
47
22
22
85
98
20
35
46
11
44
69
49
The variable values in their default orders may be displayed by WRITE variable statements.
WRITE var1
A 1-Dimensional Array
ROW(1)
ROW(4)
ROW(7)
ROW(10)
3
19
97
21
ROW(2)
ROW(5)
ROW(8)
45
21
89
ROW(3)
ROW(6)
ROW(9)
56
34
52
WRITE var2
A 2-Dimensional Array
COL(1)
24
98
11
54
1
51
11
33
79
33
ROW(1)
ROW(2)
ROW(3)
ROW(4)
ROW(5)
ROW(6)
ROW(7)
ROW(8)
ROW(9)
ROW(10)
COL(2)
5
76
23
10
22
49
31
15
21
99
COL(3)
56
34
41
99
3
48
33
67
59
1
COL(4)
34
27
17
2
4
47
22
22
85
98
COL(5)
21
14
32
20
35
46
11
44
69
49
The use of the SORT statement is illustrated in the dialogs below.
Sort the elements of set row in ascending order using the values of variable var1.
SORT ASCENDING row USING var
WRITE var1
A 1-Dimensional Array
ROW(1)
ROW(10)
ROW(9)
ROW(7)
3
21
52
97
ROW(4)
ROW(6)
ROW(3)
19
34
56
ROW(5)
ROW(2)
ROW(8)
21
45
89
Sort the elements of set row in descending order using the values of variable var1.
SORT DESCENDING row USING var1
WRITE var1
A 1-Dimensional Array
ROW(7)
97
ROW(8)
89
278
ROW(3)
56
Promula Application Development System User's Manual
ROW(9)
ROW(10)
ROW(1)
52
21
3
ROW(2)
ROW(5)
45
21
ROW(6)
ROW(4)
34
19
Sort the elements of set row in ascending order using the values of the 3rd column of variable var2.
SELECT col(3)
SORT ASCENDING row USING var2
SELECT col*
WRITE var2
A 2-Dimensional Array
ROW(10)
ROW(5)
ROW(7)
ROW(2)
ROW(3)
ROW(6)
ROW(1)
ROW(9)
ROW(8)
ROW(4)
COL(1)
33
1
11
98
11
51
24
79
33
54
COL(2)
99
22
31
76
23
49
5
21
15
10
COL(3)
1
3
33
34
41
48
56
59
67
99
COL(4)
98
4
22
27
17
47
34
85
22
2
COL(5)
49
35
11
14
32
46
21
69
44
20
Sort the elements of set row in descending order using the values of the 5th column of variable var2.
SELECT col(5)
SORT DESCENDING row USING var2
SELECT col*
WRITE var2
A 2-Dimensional Array
ROW(9)
ROW(10)
ROW(6)
ROW(8)
ROW(5)
ROW(3)
ROW(1)
ROW(4)
ROW(2)
ROW(7)
COL(1)
79
33
51
33
1
11
24
54
98
11
COL(2)
21
99
49
15
22
23
5
10
76
31
COL(3)
59
1
48
67
3
41
56
99
34
33
COL(4)
85
98
47
22
4
17
34
2
27
22
COL(5)
69
49
46
44
35
32
21
20
14
11
Sort the elements of set col in ascending order using the values of the 8th row of variable var2.
SELECT row(8)
SORT ASCENDING col USING var2
SELECT row*
WRITE var2
A 2-Dimensional Array
COL(2)
COL(4)
279
COL(1)
COL(5)
COL(3)
Promula Application Development System User's Manual
ROW(1)
ROW(2)
ROW(3)
ROW(4)
ROW(5)
ROW(6)
ROW(7)
ROW(8)
ROW(9)
ROW(10)
5
76
23
10
22
49
31
15
21
99
34
27
17
2
4
47
22
22
85
98
24
98
11
54
1
51
11
33
79
33
21
14
32
20
35
46
11
44
69
49
56
34
41
99
3
48
33
67
59
1
Sort the elements of set col in descending order using the values of the 2nd row of variable var2.
SELECT row(2)
SORT DESCENDING col USING var2
SELECT row*
WRITE var2
A 2-Dimensional Array
ROW(1)
ROW(2)
ROW(3)
ROW(4)
ROW(5)
ROW(6)
ROW(7)
ROW(8)
ROW(9)
ROW(10)
COL(1)
24
98
11
54
1
51
11
33
79
33
COL(2)
5
76
23
10
22
49
31
15
21
99
COL(3)
56
34
41
99
3
48
33
67
59
1
COL(4)
34
27
17
2
4
47
22
22
85
98
COL(5)
21
14
32
20
35
46
11
44
69
49
3.7.98 STOP
Purpose:
Returns control to the calling program after a RUN statement.
Syntax:
STOP
Remarks:
PROMULA's run statements: RUN file, RUN COMMAND, and RUN SOURCE, allow you to run programs while in
command mode or from within procedures.
The STOP statement returns control to the program that executed the last RUN statement. Execution resumes at the
statement following the run statement. See example in the discussion of the RUN COMMAND statement.
The PROMULA Main Menu is at the top of every run chain.
3.7.99 STOP PROMULA
Purpose:
280
Promula Application Development System User's Manual
Stops PROMULA execution and returns control to the operating system.
Syntax:
STOP PROMULA
Remarks:
Sometimes it is useful to stop execution of the PROMULA system altogether and return to the operating system; the STOP
PROMULA statement enables you to do this.
3.7.100 TIME
Purpose:
Initializes the values of the four time parameters used in controlling dynamic simulations.
Syntax:
TIME(dt,beginning,ending) [[SIZE](w,d)]
Remarks:
dt
is a real number that will be used to set the value of DT, the integration interval for time integrals.
beginning
is a real number that will be used to set the value of BEGINNING, the beginning time point or lower
limit of time integrals. The time parameter TIME is also set to the value of beginning by the TIME
statement.
ending
is a real number that will be used to set the value of ENDING, the ending time point or upper limit of
time integrals.
w
is an integer that specifies the width in characters of time parameter values when they are displayed in
reports produced by the report generator.
d
is an integer that specifies the number of decimal digits for time parameter values when they are
displayed in reports produced by the report generator.
Before executing any dynamic simulation models, the control parameters must have been assigned a definite value via the
TIME statement. Note that once they have been defined, the values of the individual parameters may be displayed via the
BROWSE and WRITE statements, and may be changed via equations introduced by the verb COMPUTE. They may also
be referenced on the right-hand side of equations and within conditional expressions.
The current value for the independent variable TIME is initially set equal to the value of BEGINNING. In a program that
has a value of TIME defined, all tabular displays generated by the report generator statements whose columns are not
classified by a time series set will have the current value of time added to the title.
See also Time Parameters in Chapter 1 and the discussion of Dynamic Procedures in the DEFINE PROCEDURE
section of Chapter 3.
3.7.101 WRITE COMMENT
Purpose:
Displays text in the Comment Screen.
281
Promula Application Development System User's Manual
Syntax:
WRITE COMMENT
text
...
END
Remarks:
text
is any text that you wish to display in the Comment Screen. The amount of text displayed is limited by the size of
the Comment Screen.
The keyword END must be entered starting in column 1 and must be capitalized.
Upon execution, the text will be shown in the Comment Screen of the display.
For more details, see the sections on Windowing in the beginning of this chapter.
3.7.102 WRITE DISK
Purpose:
Transfers data from a local variable to a disk variable in an array file in the dynamic access method.
Syntax:
WRITE DISK(vars)
Remarks:
vars
is a list of dynamic variables.
A dynamic variable is a scratch or fixed variable (also called a local variable) that has a dynamic relationship to a disk
variable. Local variables may be related to disk variables through the DISK option of the DEFINE VARIABLE statement.
See chapter 4 for a detailed description of disk access methods.
Examples:
The following code
DEFINE FILE
filea
END FILE
OPEN filea "test.dba" STATUS=NEW
DEFINE SET
rec(1000) "Record"
END SET
DEFINE VARIABLE filea
dsk(pnt), "A Disk Variable on 'filea'"
END VARIABLE filea
DEFINE VARIABLE
pp "Record Pointer"
scr "A dynamic variable for accessing single elements of dsk",DISK(filea,dsk(pp)
END VARIABLE
282
Promula Application Development System User's Manual
defines two variables: dsk and scr. The disk variable, dsk, is a vector of 1000 elements on the disk file named
test.dba. The variable scr is a dynamic local variable that is related to dsk. The READ DISK and WRITE DISK
statements transfer a specific value from and to disk as illustrated in the dialog below.
scr = 0
dsk(i) = i
pp = 4
READ DISK(scr)
WRITE scr
A Scratch Variable in Memory 4
scr = 6
WRITE DISK(scr)
WRITE (dsk:L," ",dsk(pp))
A Disk Variable on 'filea' 6
3.7.103 WRITE file
Purpose:
Write data to a text file or a random file.
Syntax 1:
Write a record of data to a random file
WRITE file
Syntax 2:
Write to a text file
WRITE file(var1[,fmt1] [,var2[,fmt2]] [,...]
Remarks:
file
is the identifier of the file you are writing to.
var1
is the identifier of the variable whose data is first on each data record.
fmt1
is the format specification for var1 and has the following syntax:
\p:w:d
p
is an integer indicating the starting column on each data line where the value for var1 begins. The backslash
means: "start writing in column p". If omitted, the value begins in column 1.
w
is an integer indicating the width of the value and it means "write the next w columns." A negative width
parameter left justifies the value of var.
d
is an integer indicating the number of decimal places to be displayed. If d is an "E", the values will be
displayed in exponential notation.
If w and d are 0, no trailing blanks will be written.
283
Promula Application Development System User's Manual
var2
is the identifier of the variable whose data is second on each data record.
fmt2
is the format specification for var2 and may have the same form as fmt1 above. If p is omitted in fmt2, the
starting column for var2 is immediately to the right of var1.
Examples:
The examples in this section are based on the following definitions:
DEFINE FILE
txt1 TYPE=TEXT
ran1 TYPE=RANDOM
arr1 TYPE=ARRAY
END FILE
OPEN ran1 "b:ran1.ran", STATUS=NEW
DEFINE VARIABLE ran1
item1 "Item 1"
TYPE=REAL(8,0)
item2 "Item 2"
TYPE=STRING(8)
item3 "Item 3"
TYPE=DATE(8)
END VARIABLE ran1
1.
Read from a text file and write to a random file.
OPEN txt1 "b:txt1.txt", STATUS=OLD
DO txt1
READ txt1(item1:8,item2:8,item3:8)
WRITE ran1
END txt1
2.
Read from a text file and write to an array file.
DEFINE SET
rec(100)
END SET
"Records"
OPEN arr1 "b:arr1.arr", STATUS=NEW
DEFINE VARIABLE arr1
var1(rec) "Variable 1"
TYPE=REAL(8,0)
var2(rec) "Variable 2"
TYPE=STRING(8)
var3(rec) "Variable 3"
TYPE=DATE(8)
END VARIABLE arr1
DEFINE VARIABLE
rn
"Record Number"
END VARIABLE
rn = 1
DO txt1
READ txt1(var1(rn):8,var2(rn):8,var3(rn):8)
rn = rn+1
END txt1
3.
Read from a random file and write to a text file.
DO ran1
WRITE txt1(item1:8,item2:8,item3:8)
END ran1
284
Promula Application Development System User's Manual
4.
Read from a random file and write to an array file.
rn = 1
DO ran1
var1(rn) = item1
var2(rn) = item2
var3(rn) = item3
rn = rn+1
END ran1
3.7.104 WRITE function
Purpose:
Writes the values of a function in tabular form.
Syntax:
WRITE func[fmt] [TITLE(text)]
Remarks:
func
is the logical identifier of a function defined by the DEFINE FUNCTION or DEFINE LOOKUP statement.
fmt
is a format specification of the form \p:w:d to indicate the position of the display, the width of the values
displayed, and the number of decimals in real values, where
p
is an integer indicating the width in characters of the row descriptors for the display.
w
is an integer indicating the width, in characters, of the columns of the display. A negative width parameter left
justifies the values displayed.
d
is an integer indicating the number of decimal places to be displayed. If d is an "E", the values will be
displayed in exponential notation.
For functions defined by the DEFINE LOOKUP statement, the default format is p=10, w=8 and d=2.
For functions defined by the DEFINE FUNCTION statement, w and d have the values specified in the DEFINE
VARIABLE statement for the function variables, and p is the value specified in the definition of the row
descriptors of the set subscripting the function variables.
text
is a title for the display and can contain text, variables, and other formatting characters as described in the WRITE
text statement.
Examples:
The WRITE function statement is illustrated below:
DEFINE SET
pnt(6)
END SET
DEFINE VARIABLE
x(pnt) "The X values"
y(pnt) "The Y values"
p(pnt) "PNT Names"
TYPE=STRING(6)
END VARIABLE
285
Promula Application Development System User's Manual
x(i) =
y(i) =
p(i) =
SELECT
i
i**2
"PNT# "+i
ROW(pnt,p)
DEFINE FUNCTION
fx(x,y)
END FUNCTION
DEFINE LOOKUP
gx(6) X(1,2,3,4,5,6) Y(2,8,18,32,50,72)
END LOOKUP
Given the above definitions, the statements
WRITE fx\10:10:4 TITLE(/"Y=f(x)=x**2")
WRITE gx\3:6:1 TITLE(/"Y=g(x)=2x**2")
produce the output below.
Y=f(x)=x**2
PNT#
PNT#
PNT#
PNT#
PNT#
PNT#
1
2
3
4
5
6
(1)
1.0000
2.0000
3.0000
4.0000
5.0000
6.0000
Y=g(x)=2x**2
(1)
(2)
(3)
(4)
(5)
(6)
(1)
1.0
2.0
3.0
4.0
5.0
6.0
(2)
1.0000
4.0000
9.0000
16.0000
25.0000
36.0000
(2)
2.0
8.0
18.0
32.0
50.0
72.0
3.7.105 WRITE menu
Purpose:
Displays a "data" menu including the values of its data fields. This statement is useful for displaying output results in menu
form.
Syntax:
WRITE menu(vars)
Remarks:
menu
is the identifier of a "data" menu.
vars
is a list of variable identifiers that contain the values of the data fields to be displayed. The variables in the list
must be arranged in the same order as the data fields in the menu to which they correspond.
A data menu is a template which is designed to help its user edit and display data. The fields in a data menu are previously
defined in a DEFINE MENU statement.
286
Promula Application Development System User's Manual
Data menus contain a number of data fields to be displayed by the user. In the DEFINE MENU statement, each data field
is denoted by a series of contiguous "at signs", @, or "tilde signs", ~, equal in number to the desired number of digits in the
data field. The data fields are ordered from left to right and from top to bottom of the menu template.
Upon execution, the data menu is displayed on the screen. The values of the data fields are displayed in the places marked
by @ or ~ characters.
Remarks:
The use of the WRITE menu statement is especially helpful if you want to display output data in menu format. You can
send the results of a WRITE menu statement to the printer or to a file using a SELECT OUTPUT and SELECT
PRINTER=ON statement. The default length of the output is 25 lines, this may be modified by a SELECT lines
statement.
3.7.106 WRITE set
Purpose:
Shows the element codes and element descriptors for a set.
Syntax:
WRITE set
Remarks:
set
is the identifier of the set being shown.
Examples:
DEFINE SET
month(12)
END SET
DEFINE VARIABLE
mc(month) "Month Codes" TYPE=STRING(3)
END VARIABLE
DEFINE RELATION
ROW(month,mc)
END RELATION
READ mc
JAN FEB MAR APR MAY JUN JUL AUG SEP OCT NOV DEC
Given the above definitions, the statement
WRITE month
lists the members (or elements or entries) of the set month as shown below
Identifier
1
2
3
4
5
Description
JAN
FEB
MAR
APR
MAY
287
Promula Application Development System User's Manual
6
7
8
9
10
11
12
JUN
JUL
AUG
SEP
OCT
NOV
DEC
3.7.107 WRITE TABLE
Purpose:
Writes a table of several variables on an output device.
Syntax:
WRITE TABLE(sets), [TITLE(title)] [,FORMAT(rw,cw)],
BODY(["text1",] var1[fmt1] [,"text2",] var2[fmt2],...)
Remarks:
sets
is a list of the identifiers of the sets classifying columns and pages of the variables in the table. The first set will
classify the columns of the table; the other sets, if any, will classify the pages of the table. Sets dimensioning
table variables which are missing from the list will classify the rows of the table. The sets list sets must
contain at least one set (or the number 1 for writing a group of scalar variables) and must be missing those set
identifiers which will classify the rows of the multidimensional table variables.
title
is any text you wish to show as a title for the table. The title may include variables and other format characters
according to the rules defined in the WRITE variables statement.
text1
is any text that you wish to precede the values of var1 as a left-justified subtitle. This text may not contain
variables.
var1
is the identifier of the first variable in the table.
fmt1
is the desired format for the values of var1. Usually, this is used to specify the number of decimal digits for var1.
text2 is any text that you wish to precede the values of var2 as a left-justified subtitle. This text may not contain
variables.
var2
is the identifier of the second variable in the table.
fmt2
is the desired format for the values of var2.
rw
is the number of spaces allocated for row descriptors.
cw
is the number of spaces allocated for table columns.
A table is a display or report of several variables whose values are classified by a common set (or sets). The common sets
classify the columns and pages of the table.
A table has a body and an optional title and format. The body of the table contains the names of the variables whose values
will be displayed as the 'body' of the table. The format specifies the width of the rows and columns of the table.
288
Promula Application Development System User's Manual
You may include as many variables as you wish in the body of a table.
A table may be 'browsed' interactively by using the BROWSE TABLE statement.
Examples:
The following program demonstrates the WRITE TABLE statement:
DEFINE SET
row(3)
col(6)
END SET
DEFINE VARIABLE
a(row,col) "A Data Set"
b(row,col) "B data set"
tot(col)
"The Total of A and B"
END VARIABLE
DEFINE PROCEDURE wrttab
SELECT LINES=60
WRITE TABLE(col), TITLE("The Table Title"),
FORMAT(20,10),
BODY(tot::1/"The A Values"/,a::2,/"The B Values"/,b)
END PROCEDURE wrttab
a = 1
b = 2
tot(c) = SUM(r)( a(r,c) + b(r,c) )
Given the above definitions, the statement
DO wrttab
produces the following output.
The Total of A and B
COL(1)
9.0
The Table Title
COL(2)
COL(3)
9.0
9.0
COL(4)
9.0
COL(5)
9.0
COL(6)
9.0
The A Values
ROW(1)
ROW(2)
ROW(3)
1.00
1.00
1.00
1.00
1.00
1.00
1.00
1.00
1.00
1.00
1.00
1.00
1.00
1.00
1.00
1.00
1.00
1.00
2
2
2
2
2
2
2
2
2
2
2
2
2
2
2
2
2
2
The B Values
ROW(1)
ROW(2)
ROW(3)
3.7.108 WRITE text
Purpose:
Writes text in the Main Screen.
289
Promula Application Development System User's Manual
Syntax:
WRITE [param] [(text)]
Remarks:
text
is a specification for the text being written and may contain any of the following:
text
write text enclosed in quotes as is. You can use single quotes within double quotes, or vice
versa, if you want to write quotation marks.
$
begin a new page.
/
begin a new line.
+
suppress automatic carriage return (must be the last character of text). This allows you to
concatenate the output of several WRITE text statements.
var[\p:w:d]
write value of a variable var starting in column p. Allow w spaces for the width of the value
and d spaces for decimals.
A negative w left justifies the value of var.
If w and d are both zero, no trailing blanks will be displayed. This is especially useful for
writing string type variables that may contain unknown numbers of trailing blanks.
param
set
write the value of the current primary descriptor of set.
variable:I
write the identifier of a variable.
variable:L
write the descriptor of a variable.
variable:D
write the identifier of a variable, followed by a colon, a space, and the descriptor for the
variable
is any (or all) of the following:
LEFT
RIGHT
CENTER
to left justify the output (default).
to right justify the output.
to center the output.
CLEAR(s)
to pause s seconds, clear the screen, then continue. A negative s causes a pause until
the user strikes any key, and then clears the screen.
CURSOR=type
to specify the type of the cursor. Three cursor types are possible:
OFF
STANDARD
BLOCK
GOTOXY(x,y)
no cursor
blinking dash (default)
blinking block
to specify x and y screen coordinates for the next write. The visible part of the screen
contains values for x between 0 at the left and 79 at the right, and values for y between
0 at the top and 24 at the bottom.
You may intermix several text and param specifications in the same WRITE text statement.
290
Promula Application Development System User's Manual
Examples:
PROMULA's WRITE statement generates an automatic line-feed after the write. If you want to suppress this action, you
may include a + character as the last character of output. The example below demonstrates this feature and :0:0 formatting.
DEFINE SET
tst(5)
END
DEFINE VARIABLE
x
tstn(tst) TYPE=STRING(10)
END
SELECT ROW(tst,tstn)
tstn(i)="# "+i
DEFINE PROCEDURE wrt
DO tst
x = tst:S
WRITE (tst" x ="x"--fills 8 characters by default. "+)
x = x**2
WRITE ("x**2 = "x:0:0" No trailing blanks with :0:0.")
END tst
END PROCEDURE wrt
Execution of procedure wrt produces the following output.
# 1
# 2
# 3
# 4
:0:0.
# 5
:0:0.
x =
x =
x =
x =
x =
1--fills 8 characters by
2--fills 8 characters by
3--fills 8 characters by
4--fills 8 characters
default. x**2 = 1
default. x**2 = 4
default. x**2 = 9
by default. x**2
No
No
No
=
trailing blanks with :0:0.
trailing blanks with :0:0.
trailing blanks with :0:0.
16 No trailing blanks with
5--fills 8 characters by default. x**2 = 25 No trailing blanks with
This example demonstrates the justify parameter, variable formatting, and several other WRITE text options.
DEFINE PROCEDURE writxt
a=12345
WRITE LEFT ("A=" a) CENTER ("A=" a) RIGHT ("A=" a),
CENTER ("---------------------------------------------------------"),
("A=" a:-15:3 "A=" a /,
"A=" a:-25:3 "A=" a /,
"A=" a:-35:3 "A=" a),
CLEAR(-1),GOTOXY(0,8),CURSOR=OFF, CENTER(,
"
CLEAR(-1)
Waits for a key press, then
"/,
"
clears
"/,
the screen
"
GOTOXY(0,8)
puts the cursor on row 8,
"/,
in column 0
"
CURSOR=OFF
turns off the cursor
"/,
display
"
WRITE CENTER centers this text
"/,
"
A= ",a:-12.3, "
"/,
"
")
END PROCEDURE writxt
291
Promula Application Development System User's Manual
The procedure writxt writes the lines below, then pauses (because of the CLEAR(-1) option.)
A=
12,345
A=
12,345
A= 12,345
-------------------------------------------------------------A=12,345.000
A= 12,345
A=12,345.000
A= 12,345
A=12,345.000
A= 12,345
If the user presses a key, PROMULA clears the Main Screen and writes the display below.
CLEAR(-1)
GOTOXY(0,8)
CURSOR=OFF
WRITE CENTER
Waits for a key press, then clears
the screen.
puts the cursor on row 8, in column 0
turns off the cursor display
centers this text
A= 12,345.000
3.7.109 WRITE TEXT
Purpose:
Displays free form text in the Main Screen.
Syntax:
WRITE TEXT
text
...
END
Remarks:
text
is any text that you want to display in the Main Screen.
292
Promula Application Development System User's Manual
The keyword END must be entered starting in column 1 and must be capitalized in order to distinguish it from other
occurrences of the word "end" in the text.
Upon execution, the text will be shown in the Main Screen (Action Window) of the display.
For more details, see the discussion of PROMULA's Basic Windowing capabilities.
3.7.110 WRITE VALUE segment
Purpose:
Writes the information of a program or program segment to disk. Only the values of the segment variables are written. To
write both code and data values, use the END SEGMENT or END PROGRAM statement.
Syntax:
WRITE VALUE seg
Remarks:
seg
is the identifier of the segment whose values are being written to disk.
Use the OPEN SEGMENT statement before using the WRITE VALUE segment statement.
Examples:
The code below opens a segment file on disk called wrvalseg.xeq. This segment is given the default name MAIN since it
is a top-level segment. Segment MAIN contains the single variable, a.
OPEN SEGMENT "wrvalseg.xeq" STATUS=NEW
DEFINE PROGRAM
DEFINE VARIABLE
a "The value of variable A ="
END VARIABLE
END PROGRAM
The effect of the WRITE VALUE segment and READ VALUE segment are illustrated in the dialogs below.
a=10
WRITE a
The value of variable A = 10
The statement, WRITE VALUE MAIN, writes the values of segment MAIN variables (in this case only variable a) in the
segment file on disk called wrvalseg.xeq.
WRITE VALUE MAIN
The value of a variable can be changed by an expression.
a=20
WRITE a
The value of variable A = 20
293
Promula Application Development System User's Manual
The READ VALUE MAIN statement will read in the values of the segment MAIN's variables that were stored by the last
WRITE VALUE MAIN statement.
READ VALUE MAIN
WRITE a
The value of variable A = 10
3.7.111 WRITE variable
Purpose:
Shows the information in a variable.
Syntax:
WRITE var[fmt][ORDER(sets)][TITLE(title)][DISPLAY(dvar)][option]
Remarks:
var
is the identifier of a variable.
fmt
is a format specification to indicate the position of the display, the width of the values displayed, and the
number of decimals in real values, as follows:
\p:w:d
where
p
is an integer specifying the width in characters for row descriptors. The default width is the width
specifications of the row descriptors related to the set subscripting the rows of the display.
w
is an integer specifying the width in characters for each column of values. The default is the width
specification in the definition of var. A negative width parameter left justifies the values of var in each
column.
d
is an integer specifying the number of decimals to display for real numeric values. The default is the
decimal specification (if applicable) in the definition of var. If d is an "E", the values of var will be
displayed in exponential notation (base-10), and will show seven digits and six decimal places.
If omitted, w and d are the parameters specified in the TYPE specification for var, and p is the width
specifications of the row descriptors related to the set subscripting the rows of the display.
sets
is a list of the sets classifying the values of var. The order of the sets in this list specifies the structure of the
display: the first set classifies the rows of the display, the second set the columns, and the third to last sets
classify the pages of the display. The keyword ORDER is optional; if it is omitted, sets must follow
immediately after the optional format specification.
title
is any text you wish to show as a title for the table. The title may include variables, and other format
characters according to the rules defined in the WRITE text statement.
294
Promula Application Development System User's Manual
dvar
is a variable used to control the display of variable var. dvar should be subscripted by the set that defines the
rows of the display. PROMULA will display values of var only for those rows corresponding to elements of
dvar that contain nonzero values. See Example in the section on the BROWSE variable statement.
option
is one of the following WRITE variable options:
TOTAL[(sets)]
displays totals over the selected sets along with values of var. If sets is omitted, all
the marginal and grand totals for var will be displayed.
PERCENT(set)
displays the percent distribution of the total over set of var.
CHANGE(n)
The CHANGE option allows the user to show a table of percent change in time series
data for a previously defined time series dataset or array.
The percent change for time t is computed from values for time t and t-1, where t and
t-1 are two consecutive selections of the time set. The selections depend on the current
local setting of the set. They may or may not be consecutive time points. There may be
more than one time unit between them.
Following the keyword, CHANGE, a real number within parentheses is required. It
represents the number of time units to be used in computing percent change. Internally
it is divided by the difference in time values for selections t and t-1.
Suppose values for 1970 and 1975 are used in computing the percent change. That is,
the user has selected these years for computation and output generation. Also s/he
wants to compute an annual percent change, so one time unit (a year) is designated on
the CHANGE option (CHANGE(1)). The change for 1975 is computed as the
difference in values for 1970 and 1975, divided by the 1970 value, and multiplied by .2
(for annual change). A factor of 100 gives the final result as a percent change from
1970 to 1975 in one year increments.
In the tabular display the words, Percent Change in, are placed in front of the original
title (from the variable definition). If the TITLE option is used with the CHANGE
option no words are prefixed.
GROWTH(n)
The GROWTH option allows the user to show a table of growth rates in time series
data for a previously defined time series dataset or array. A time series dataset or array
is one which is defined by a time series set. The growth rate for time t is computed
from values for time t and t-1, where t and t-1 are defined as above.
Following the keyword, GROWTH, a real number within parentheses is required and
stands for the number of time units between growth rates. Internally it is divided by the
difference in time values for selected t and t-1.
Suppose the user has selected 1970 and 1975 and wishes to show annual growth rates
(GROWTH(1)). The growth rate for 1975 is computed as a quotient — value for 1975
divided by value for 1970 — raised to the power .2 (1.0/(1975-1970)). One is
subtracted from this quantity to get a growth rate and a factor of 100 gives the final
result as a percent rate from 1970 to 1975 in one year increments.
In the tabular display, the words, Growth Rate in, are placed in front of the original
title unless the TITLE option is specified.
MOVING(n)
The MOVING option allows the user to show a table of moving averages in time series
data for a previously defined time series array. Following the keyword MOVING, an
295
Promula Application Development System User's Manual
integer, n, within parentheses, gives the number of single unit time increments over
which the moving average is computed. The moving average for time t is computed
from values for time t,...,t-(n-1), where the t's are consecutive time points. They
are not consecutive time set selections, based on a local setting of the time set. Rather,
they are time points as defined initially by the time values related to the set subscripting
var.
Suppose the user has selected a five year moving average (MOVING(5)) based on an
annual time series from 1970 to 1990, and he wishes to show only 1975, 1980, 1985,
1990 moving averages. The average for 1990 is computed as the sum of values from
1986 to 1990 divided by the number of time points as defined initially by the TIME
option on the set definition.
In the tabular display the words, Moving Average for, are placed in front of the
original title unless the TITLE option is specified.
Example:
DEFINE SET
row(3)
col(2)
pag(2)
END SET
DEFINE VARIABLE
a(row,col,pag) "A 3-Dimensional Array"
END VARIABLE
a(i,j,k)=i*j*k
Given the defintions above, the statements
WRITE a TITLE ("Unformatted Display of variable A")
WRITE a\6:10:2(pag,col,row) TOTAL(col) TITLE(//"Formatted Display of variable A")
produce the following output.
Unformatted Display of variable A
PAG(1)
COL(1)
1
2
3
ROW(1)
ROW(2)
ROW(3)
COL(2)
2
4
6
PAG(2)
COL(1)
2
4
6
ROW(1)
ROW(2)
ROW(3)
COL(2)
4
8
12
Formatted Display of variable A
ROW(1)
PAG(1)
PAG(2)
Total
3.00
6.00
296
COL(1)
1.00
2.00
COL(2)
2.00
4.00
Promula Application Development System User's Manual
ROW(2)
PAG(1)
PAG(2)
Total
6.00
12.00
COL(1)
2.00
4.00
COL(2)
4.00
8.00
ROW(3)
PAG(1)
PAG(2)
Total
9.00
18.00
COL(1)
3.00
6.00
COL(2)
6.00
12.00
Examples of the other WRITE VARIABLE options are presented with the discussion of the BROWSE VARIABLE
statement.
297
Promula Application Development System User's Manual
4. PROGRAM AND DATA MANAGEMENT
A program that has too much data or too much code will not fit in your working space and will not run. Fortunately, in
addition to its extensive interface design and modeling features, PROMULA has considerable database management and
program management capabilities. Since these capabilities are required for large scale application development they are
given special attention in this chapter. This chapter is divided into two sections: the first discusses the construction and use
of PROMULA's array database files; the second discusses PROMULA's program segment manager.
4.1 Database Management in PROMULA
In PROMULA, a database is a file containing information. The file's type may be TEXT, ARRAY, or RANDOM.
Databases allow your applications to use disk memory to permanently store a copy of program information. Databases may
be shared by several applications, extended, read from, written to, and manipulated by your computer operating system like
other files.
Text files are the least structured type of database, they are simply a collection of variable length text records. The records
of a text file must be accessed sequentially, so they may be difficult or inefficient to access and update. Furthermore, unless
the information in the text file is carefully structured into a predictable pattern, it will be very difficult to work with. The
lack of internal structure in text files is an advantage for some applications since the file may be easily extended by simply
appending text at its end.
Random files are more structured than text files. Random files are composed of fixed length binary records. Each record in
the random file is composed of a collection of variables; the variables may be scalars or arrays. The information in a
random file is accessed one record at a time. The records may be accessed at random – by record number, or through
selection keys – by using an inverted file. Random files may be updated by adding records to the end of the random file, or
by re-writing existing records.
Array files are the most structured type of database. Array files are composed of variables, usually arrays, although scalars
may also be present. An array file can also contain sets and relations. The information in an array file is accessed using sets
and variables. Array files are ideally suited for the science and engineering applications that PROMULA is typically used
for. Because of this, text and random files are rarely used for database management in PROMULA. This chapter focuses on
using array files. Readers interested in the other files should refer to Chapter 3 of this Manual. For the remainder of this
chapter, the terms database and array file will be used interchangeably.
Before discussing the actual syntax of PROMULA's data management language, we should review PROMULA's variable
storage types. Here, the phrase "variable storage type" refers to where PROMULA stores each variable's values.
There are three storage types for PROMULA variables:
Fixed
Fixed variables are accessed from a fixed space in primary memory (RAM). They are defined with a DEFINE
VARIABLE statement. The values of fixed variables may be saved in a segment file on disk by the END
SEGMENT, END PROGRAM, and WRITE VALUE segment statements. Computations run fastest when
they use fixed variables.
Scratch
Scratch variables are accessed from a scratch space in primary memory. They are defined with a DEFINE
VARIABLE SCRATCH statement. Their values can be cleared from memory with a CLEAR statement to
make room for other scratch variables. The values of scratch variables cannot be saved in a segment file on
disk. Computations using scratch variables will be slower than using fixed variables because PROMULA
must do more internal calculations to access their values.
Disk
Disk variables are stored on disk in an array file. They are defined with a DEFINE VARIABLE file
statement. Disk variables are also referred to as database variables. The values of disk variables may be
298
Promula Application Development System User's Manual
accessed directly on disk and they may be accessed dynamically or virtually in memory via scratch or fixed
variables which are related to them.
There are three methods of accessing the values of disk variables:
Direct
In direct access, the file containing the disk variable is opened and the variable is used like a fixed variable.
This is the slowest and least flexible method of accessing disk variables, but it requires no special
programming. With the direct access method, disk variable values are addressed on disk as needed; any
changes made to the disk variable are saved in the array file. In order to use direct access, the definition of the
disk variable must be in memory.
Virtual
In virtual access, an appropriate fixed or scratch variable (called a local variable) is associated with a disk
variable. This local variable is used to access the values of the disk variable on disk. PROMULA manages
transferring the data between the disk and local variable automatically. Virtual access allows programmers to
access disk variables through local variables which are defined in programs that are physically separate from
the ones which defined the disk variables. It also allows programmers to access different disk variables
through a single local variable.
Dynamic
In dynamic access, an appropriate local variable is associated with a disk variable. This local variable is used
to access the values of the disk variable in scratch memory. This method offers the same advantages as virtual
access, but it requires the programmer to transfer values between disk and memory via explicit READ DISK
and WRITE DISK statements. Dynamic access also allows programmers to transfer dimensional sections and
subsets of multi-dimensional disk variables between disk and memory. For example, two-dimensional pages
of a three-dimensional disk variable can be accessed through a two-dimensional local variable. Dynamic
access is also faster than either direct or virtual access because a large number of disk variable values may be
quickly transferred between disk and core memory for processing. Local variables used for dynamic access
are like scratch variables in that their values may be cleared from memory via the CLEAR statement.
4.1.1 Program 1 – Create a 'New' Database
The first step in building a PROMULA database is to define an array file, and open it physically on disk. Since we plan to
build a new database, the array file is opened with STATUS=NEW.
DEFINE FILE
af "Array file for database 'filea.dba'" TYPE=ARRAY
END FILE
*
* Open af; its physical name is filea.dba
*
OPEN af "filea.dba" STATUS=NEW
The next step in building the database is to define the logical structure of the file. Here, the sets, variables, and relations of
the file are physically laid out on disk. To do this, simply use the DEFINE SET file, DEFINE VARIABLE file and
DEFINE RELATION file statements as described in Chapter 3 .
DEFINE SET af
drow(3)
dcol(4)
dpag(2)
END SET
DEFINE VARIABLE af
dat1(drow,dcol,dpag) "A 3-dimensional Array on af"
dat2(drow,dcol)
"A 2-dimensional Array on af"
datb(drow,dcol,dpag) "A 3-dimensional Array on af"
END VARIABLE
299
Promula Application Development System User's Manual
When a database is first created, PROMULA initializes its variables: numeric variables are given the value zero, and nonnumeric variables are initialized with "empty strings". Once the database variables are defined, they may be initialized with
your data. We will do so here by using the disk variables themselves (i.e., by direct access).
READ dat1
111 121 131
211 221 231
311 321 331
112 122 132
212 222 232
312 322 332
141
241
341
142
242
342
dat2(r,c) = dat1(r,c,1) * 10
datb = dat1 * 100
The database structure and data can be physically saved, and its file closed with a CLEAR file statement.
CLEAR af
That's all there is to it. The database is defined and ready to use. Of course this is a very simplistic database; it only
contains three small, numeric, array variables. The methodology for constructing larger, more complex databases
containing all types of PROMULA variables is the same.
1.
Define an array file and open it physically on disk.
2.
Use the DEFINE SET, DEFINE VARIABLE, and DEFINE RELATION statements to define the structure of
the database.
3.
Initialize the variables as desired.
4.
Close the file.
Note, you may add new sets, variables, and relations to an existing database by opening it with STATUS=OLD then
following steps 2 through 4 as desired.
4.1.2 Program 2 – Access an 'Old' Database
After building, the database file is on disk and it may be used by other programs. Using a database makes it possible for
your application to manipulate very large array variables even if they are too large to fit in primary memory. Another
advantage is that database files store a permanent copy of program information separate from the program's segment file,
and this copy may be shared by other applications (including programs written in other languages such as C or FORTRAN)
or even accessed from PROMULA's command mode.
Although it is not required, the program used to build and initialize a database is usually kept in its own file. This "database
build" program need be run only once. Programs that use the database variables are defined in independent source files and
the database variables are accessed virtually or dynamically using local variables.
The first step in creating a program to use an array database on disk is to define an array file to access the database using
the DEFINE FILE statement.
DEFINE FILE
filea "Array file for database 'filea.dba'" TYPE=ARRAY
END FILE
Next, define program variables and relate them to the database variables by including a DISK option in their definitions.
300
Promula Application Development System User's Manual
The DISK option of the DEFINE VARIABLE statement is used to relate local variables to disk variables. The syntax for
this option is described below:
Syntax:
DEFINE VARIABLE [SCRATCH]
var[(sets)][,"desc"][,TYPE=type],DISK(file,dvar[(dsets)])
END VARIABLE
Remarks:
var
is the identifier of a local variable. It is through var that your application will virtually or dynamically access the
disk variable, dvar.
sets
is the list of set identifiers specifying the dimensions of the variable var.
desc
is a descriptor for the variable var.
type
is the format type of var. This type (REAL, INTEGER, STRING), etc. must match the type of dvar. For REAL
type variables, the width and decimal specifications of var are not required to match those of dvar. For all other
types, the width specifications of var and dvar must match.
file
is the identifier of an array file. In order to access dvar through var, the physical file specified when file is
opened must contain dvar.
dvar
is the identifier of the actual disk variable that you want to access through var.
dsets is an optional list of set identifiers, scalar variables or integer constants — one for each dimension of dvar. These
define the local sets and/or pointers which correspond to the disk sets subscripting dvar.
The access method is defined by the specifications of dsets. There are two different ways to specify dsets:
1.
For virtual access, omit the specification of dsets. For example
DEFINE VARIABLE
var(sets) "desc" DISK(file, dvar)
END
PROMULA will handle transferring information between the disk and local variable for you. This is the simplest
approach, but since it may require a great deal of disk access, it may be too slow for computationally intensive
applications. In virtual access, var must have the same shape and size as dvar; an exception to this is overlap mapping
which we will describe in a later section.
2.
For dynamic access, dsets is a subscript list — one subscript for each dimension of dvar. The subscripts may be
numeric scalar variables (pointers), numeric constants, or local set identifiers. You may access specific values of dvar
by assigning values to the subscripts and then executing READ DISK or WRITE DISK statements.
In dynamic access, sets defines the size and shape of the subset of dvar that may be dynamically transferred to and
from disk. The dimensions of var may be any subset of the dimensions of dvar. However, the sizes of sets must not
be larger than their corresponding dsets. The rules of correspondence between sets and dsets here are very much
like the rules of correspondence that govern subscripting multidimensional equations — row to row, column to
column, etc.
The code below uses a variety of DISK options to relate local variables to the disk variables in the database filea.dba
which was built in the last section.
301
Promula Application Development System User's Manual
DEFINE SET
row(3)
col(4)
pag(2)
END SET
* Define fixed variables to use as pointers to disk variable dimensions.
DEFINE VARIABLE
rr
"A Row Pointer"
cc
"A Column Pointer"
pp
"A Page Pointer"
END VARIABLE
* Define fixed variables that will access disk variables virtually
DEFINE VARIABLE
ldat1(row,col,pag) "A 3-dimensional Array" DISK(filea,dat1)
ldatb(row,col,pag) "A 3-dimensional Array" DISK(filea,datb)
ldat2(row,col)
"A 2-dimensional Array" DISK(filea,dat2)
END VARIABLE
* Define fixed variables that will access disk variables
DEFINE VARIABLE
dsv
"Dynamic Scalar"
drv(row)
"Dynamic Vector by row"
dcv(col)
"Dynamic Vector by col"
dpv(pag)
"Dynamic Vector by pag"
drc(row,col)
"Dynamic Array by row and col"
dpc(pag,col)
"Dynamic Array by pag and col"
dpr(pag,row)
"Dynamic Array by pag and row"
END VARIABLE
dynamically
DISK(filea,dat1(rr,cc,pp))
DISK(filea,dat1(row,cc,pp))
DISK(filea,dat1(rr,col,pp))
DISK(filea,dat1(rr,cc,pag))
DISK(filea,dat1(row,col,pp))
DISK(filea,dat1(rr,col,pag))
DISK(filea,dat1(row,cc,pag))
* Define scratch variables that will access disk variables dynamically
DEFINE VARIABLE SCRATCH
sdat1(row,col,pag)
"Dynamic
Array
by
row,
col
DISK(filea,dat1(row,col,pag))
sdatb(row,col,pag)
"Dynamic
Array
by
row,
col
DISK(filea,datb(row,col,pag))
END VARIABLE
and
pag"
and
pag"
Let's look at these examples of how local variables are related to disk variables starting with the local variables ldat1,
ldatb and ldat2.
ldat1(row,col,pag) "A 3-dimensional Array" DISK(filea,dat1)
ldatb(row,col,pag) "A 3-dimensional Array" DISK(filea,datb)
ldat2(row,col)
"A 2-dimensional Array" DISK(filea,dat2)
The above definitions create three array variables. Variable ldat1 is a three-dimensional array for virtually accessing the
disk variable dat1. Variable ldatb is similar to ldat1 except that it is for virtually accessing the disk variable datb.
Variable ldat2 is a two-dimensional array variable for virtually accessing the disk variable dat2.
Notice that each local variable has the same size, shape, and type as the disk variables to which it is related. This is required
for correct virtual access. We will discuss how to access subsets and dimensional sections of disk variables shortly.
The values of the three local arrays do not occupy any value storage because the DISK option in their definition tells
PROMULA that they should be accessed virtually from disk. The virtual access method is indicated because the variables
named in their DISK options are not subscripted. Local variables which are used to access disk variables virtually are
sometimes referred to as virtual variables.
Any changes in the virtual variables are automatically and immediately reflected in the values of the corresponding disk
variables, and vice versa. It is this automatic passing of data to and from disk that makes virtual access slower than
302
Promula Application Development System User's Manual
accessing local variables in memory. Virtual access is acceptable for operations which do not require fast execution, but in
order to use disk variables efficiently, the dynamic access method should be employed.
Now let's look at some examples of dynamic access starting with variable dsv.
dsv
"Dynamic Scalar"
DISK(filea,dat1(rr,cc,pp))
Variable dsv is a local scalar variable related to the disk variable dat1 on disk. It may be used for dynamic access of the
disk variable dat1. Here, dynamic access means explicitly transferring data between disk and memory. Dynamic access is
indicated because the reference to dat1 in the DISK option is subscripted by three items — one for each dimension of the
actual disk variable. Local variables which are used to access disk variables dynamically are sometimes referred to as
dynamic variables.
A value of dat1 on disk may be transferred to dsv by specifying the values of the pointer variables rr, cc, and pp to
indicate which drow, dcol, and dpag element to read; then executing a READ DISK statement. Similarly, the current
value of dsv may be written to a specific cell in array dat1 by specifying the values of the pointer variables rr, cc, and pp
to indicate which drow, dcol, and dpag element to write then executing a WRITE DISK statement. The memory used by
dsv may be cleared for use by other dynamic or scratch variables by a CLEAR statement.
The programmer must make sure that the value of each pointer variable (rr, cc, and pp) is within the range of the disk set
to which it corresponds whenever a READ DISK or WRITE DISK statement is executed.
Notice that the local scalar dsv and the disk array dat1 do not have the same structure. This is allowed in dynamic access.
It is required, however, that the structure (i.e., scalar, vector, two-dimensional array, etc.) of the local variable matches the
structure of the disk variable as referenced in DISK option. We see in the above example that this is true: dsv is a scalar;
and the reference to dat1 in the DISK option, dat1(rr,cc,pp), is also a scalar. dat1(rr,cc,pp) may look like an
array definition to some readers, but since rr, cc, and pp are scalars, instead of sets, it is indeed a scalar — similar to a
reference to a single cell of a three-dimensional array. The programmer indicates that the actual disk variable is three
dimensional by including three subscripts.
Now let's look at the three variables drv, dcv, and dpv.
drv(row)
dcv(col)
dpv(pag)
"Dynamic Vector by row"
"Dynamic Vector by col"
"Dynamic Vector by pag"
DISK(filea,dat1(row,cc,pp))
DISK(filea,dat1(rr,col,pp))
DISK(filea,dat1(rr,cc,pag))
The above definitions create three dynamic vector variables. Variable drv may be used to access an arbitrary row-vector of
the disk variable dat1; variable dcv may be used to access an arbitrary col-vector of dat1; and variable dpv may be used
to access an arbitrary pag-vector of dat1. Recall from Chapter 2 that a vector is simply a one-dimensional, or liststructured variable.
Dynamic access is indicated because the reference to dat1 in the DISK option is subscripted — one set or pointer variable
for each dimension of the actual disk variable.
The correspondence between the local sets and the sets dimensioning the actual disk variable is indicated by the placement
of pointers and set identifiers in the reference to dat1 in the DISK option. Thus, for the variable dpv(pag), dat1 is
referred to as dat1(rr,cc,pag) indicating that the pag dimension of dpv corresponds to the third dimension of the actual
disk variable. Similarly, for the variable dcv(col), dat1 is referred to as dat1(rr,col,pp) indicating that the col
dimension of dcv corresponds to the second dimension of dat1 on disk. The dimensions of the disk variable which do not
correspond to a dimension of the local variable are basepointed (i.e., assumed to take on an arbitrary single value) as
indicated by the use of scalar variables in the reference to the disk variable.
A row-vector of dat1 may be read into drv by specifying the values of the pointer variables cc and pp to indicate which
dcol and dpag to read, then executing a READ DISK statement. Similarly, the current values of drv may be written to a
specific row-vector in dat1 by specifying the values of the pointer variables cc and pp to indicate the dcol and dpag to
303
Promula Application Development System User's Manual
write, then executing a WRITE DISK statement. The memory used by drv may be cleared for use by other dynamic or
scratch variables by a CLEAR statement. Completely analogous techniques may be applied to transfer values for the other
dynamic vector variables.
Notice that the structures of the local vectors drv, dcv, and dpv match the structures of the disk variable referred to in their
respective DISK options. For example, the structure of the disk variable referred to in the DISK option for the col-vector
dcv, dat1(rr,col,pp), is also a vector by col. dat1(rr,col,pp) may look like the definition of a three dimensional
array, but since rr and pp are scalars, and col is a set, it is indeed a vector by col. Analogous relationships hold for the
other local vectors drv and dpv.
The definitions for variables drc, dpr, and dpc are shown below:
drc(row,col)
dpc(pag,col)
dpr(pag,row)
"Dynamic Array by row and col"
"Dynamic Array by pag and col"
"Dynamic Array by pag and row"
DISK(filea,dat1(row,col,pp))
DISK(filea,dat1(rr,col,pag))
DISK(filea,dat1(row,cc,pag))
These variables are dynamic two-dimensional arrays. The variable drc may be used to access a row-by-col array of values
for an arbitrary dpag; the variable dpc may be used to access a pag-by-col array of values for an arbitrary drow; and the
variable dpr may be used to access a pag-by-row array of values for an arbitrary dcol.
As before, dynamic access is indicated because the specification of dat1 in the DISK option is subscripted — one pointer
or set for each dimension of the actual disk variable.
The correspondence between the local sets and the sets dimensioning the disk variable is indicated by the placement of
pointers and set identifiers in the reference to dat1 in the DISK option. Thus for variable dpc(pag,col), dat1 is referred
to as dat1(rr,col,pag) indicating that the pag and col dimensions of dpc correspond to the third and second
dimensions of dat1 respectively. Similarly, for variable dpr(pag,row), dat1 is referred to as dat1(row,cc,pag)
indicating that the pag and row dimensions of dpr correspond to the third and first dimensions of dat1 respectively. The
dimensions of the disk variable which do not correspond to a dimension of the local variable are base-pointed (i.e., assumed
to take on an arbitrary single value) as indicated by the use of scalar variables in the DISK option.
A row-by-col array of dat1 on disk may be read into drc from disk by specifying a value for the pointer variable pp to
indicate which dpag of the array to read then executing a READ DISK statement. Similarly, the current values of drc may
be written to a specific dpag of dat1 by specifying a value for the pointer variable pp to indicate which dpag of the array
to write then executing a WRITE DISK statement. The memory used by drc may be cleared for use by other dynamic or
scratch variables by a CLEAR statement. Completely analogous techniques may be applied to transfer values for the other
dynamic array variables. Again, the programmer must make sure that the value of each pointer variable is kept within the
range of the disk set to which it corresponds.
Finally, let's take a look at definitions of variables sdat1 and sdatb.
DEFINE VARIABLE SCRATCH
sdat1(row,col,pag) "Dynamic Array by row, col and pag"
DISK(filea,dat1(row,col,pag))
sdatb(row,col,pag) "Dynamic Array by row, col and pag"
DISK(filea,datb(row,col,pag))
END VARIABLE
These variables are dynamic three-dimensional arrays. Variable sdat1 may be used to access the entire three-dimensional
array of values in the disk variable dat1, and variable sdatb may be used to access the entire three-dimensional array of
values in the disk variable datb.
The values are transferred to and from disk by WRITE DISK and READ DISK statements. The variables may be cleared
from memory by a CLEAR statement.
304
Promula Application Development System User's Manual
It is up to the programmer to be sure that there is sufficient memory to bring a dynamic variable into memory either
explicitly with a READ DISK statement or implicitly by using it in an expression. This is especially true when dealing
with large dynamic variables.
Note that even though these variables are defined as memory type SCRATCH, they are not truly scratch variables because
their values are stored on disk. In fact, using the DISK option makes the classification of local variables as fixed or scratch
artificial. It is much more meaningful to classify local variables which have a DISK option in their definition as being
either virtual or dynamic.
Before accessing a disk variable, it is necessary to open the file containing it with an OPEN file statement. Be sure not to
use STATUS=NEW when you open an existing datafile or PROMULA will erase the file's contents.
OPEN filea "filea.dba" STATUS=OLD
Once the file specified in the DISK option is physically opened, the disk variables may be accessed. The dialog below
illustrates that the virtual variables do indeed contain the values of the disk variables to which they are related.
WRITE ldat1
A 3-dimensional Array
PAG(1)
ROW(1)
ROW(2)
ROW(3)
COL(1)
111
211
311
COL(2)
121
221
321
COL(3)
131
231
331
COL(4)
141
241
341
COL(3)
132
232
332
COL(4)
142
242
342
PAG(2)
ROW(1)
ROW(2)
ROW(3)
COL(1)
112
212
312
COL(2)
122
222
322
WRITE ldat2
A 2-dimensional Array
ROW(1)
ROW(2)
ROW(3)
COL(1)
1,110
2,110
3,110
COL(2)
1,210
2,210
3,210
COL(3)
1,310
2,310
3,310
COL(4)
1,410
2,410
3,410
WRITE ldatb
A 3-dimensional Array
PAG(1)
ROW(1)
ROW(2)
ROW(3)
COL(1)
11,100
21,100
31,100
COL(2)
12,100
22,100
32,100
COL(3)
13,100
23,100
33,100
COL(4)
14,100
24,100
34,100
COL(3)
13,200
23,200
33,200
COL(4)
14,200
24,200
34,200
PAG(2)
ROW(1)
ROW(2)
ROW(3)
COL(1)
11,200
21,200
31,200
305
COL(2)
12,200
22,200
32,200
Promula Application Development System User's Manual
In order to use a dynamic variable which is a dimensional section of a disk variable, it is necessary to assign values to each
pointer variable that corresponds to a disk set. Each pointer value must be greater than or equal to 1 and less than or equal
to the size of the disk sets to which it corresponds. REAL type pointer variables are rounded to the nearest integer.
For example, variable rr is used as a pointer to the set drow(3) on disk; rr may only take on the values 1, 2, or 3;
variable cc is used as a pointer to the set dcol(4); cc may only take on the values 1, 2, 3, or 4; and variable pp is used as
a pointer to dpag(2); pp may only take on the values 1 or 2.
The statements below set the drow-pointer to 2, the dcol-pointer to 3, and the dpag-pointer to 2.
rr = 2
cc = 3
pp = 2
Once the pointers contain the desired values, the selected data may be transferred from disk into the associated local
variables via a READ DISK statement.
READ DISK dsv drv dcv dpv drc dpc dpr sdat1
After the READ DISK statement, the local variables' values have the values of their associated disk variables. The local
variables may be used like other fixed or scratch variables as illustrated in the dialog below.
*** dsv equals dat1(2,3,2)
WRITE dsv
Dynamic Scalar 232
*** drv(rec) equals dat1(rec,3,2)
WRITE drv
Dynamic Vector by row
ROW(1)
132
ROW(2)
232
ROW(3)
332
COL(3)
232
*** dcv(col) equals dat1(2,col,2)
WRITE dcv
Dynamic Vector by col
COL(1)
COL(4)
212
242
COL(2)
222
*** dpv(pag) equals dat1(2,3,pag)
WRITE dpv
Dynamic Vector by pag
PAG(1)
231
PAG(2)
232
*** drc(row,col) equals dat1(row,col,3)
WRITE drc
Dynamic Array by row and col
ROW(1)
ROW(2)
ROW(3)
COL(1)
112
212
312
COL(2)
122
222
322
COL(3)
132
232
332
COL(4)
142
242
342
*** dpc(pag,col) equals dat1(2,col,pag)
WRITE dpc
Dynamic Array by pag and col
COL(1)
306
COL(2)
COL(3)
COL(4)
Promula Application Development System User's Manual
PAG(1)
PAG(2)
211
212
221
222
231
232
241
242
*** dpr(pag,row) equals dat1(row,3,pag)
WRITE dpr
Dynamic Array by pag and row
PAG(1)
PAG(2)
ROW(1)
131
132
ROW(2)
231
232
ROW(3)
331
332
The values of dat1 on disk may be modified by changing the values of the associated dynamic local variables then
performing a WRITE DISK statement. For example, the statements
drc(r,c) = r*c
WRITE DISK drc
will replace page two (pp = 2) of dat1 with an r*c product matrix, and the statements
dsv = 1000
WRITE DISK dsv
will assign the value 1000 to the page two (pp = 2), column three (cc = 3), row two (rr = 2) cell of dat1. Notice
that the values of the local variable ldat1 are also modified, since it is virtually related to dat1, as illustrated in the dialog
below.
WRITE ldat1
A 3-dimensional Array
PAG(1)
ROW(1)
ROW(2)
ROW(3)
COL(1)
111
211
311
COL(2)
121
221
321
COL(3)
131
231
331
COL(4)
141
241
341
COL(3)
3
1,000
9
COL(4)
4
8
12
PAG(2)
ROW(1)
ROW(2)
ROW(3)
COL(1)
1
2
3
COL(2)
2
4
6
The dynamic variable sdat1 is not automatically modified, since it is not virtually related to dat1. As illustrated below,
sdat1 still has the values of dat1 that were read in by the previous READ DISK statement.
WRITE sdat1
Dynamic Array by row, col and pag
PAG(1)
ROW(1)
ROW(2)
ROW(3)
COL(1)
111
211
311
307
COL(2)
121
221
321
COL(3)
131
231
331
COL(4)
141
241
341
Promula Application Development System User's Manual
PAG(2)
ROW(1)
ROW(2)
ROW(3)
COL(1)
112
212
312
COL(2)
122
222
322
COL(3)
132
232
332
COL(4)
142
242
342
In fact, the values of the disk variable dat1 may be "restored" to their "original" state by transferring the values of sdat1
back to disk with a WRITE DISK statement.
WRITE DISK sdat1
Notice that the values of the local variable ldat1 are also "restored", since it is virtually related to dat1 as illustrated in the
dialog below.
WRITE ldat1
A 3-dimensional Array
PAG(1)
ROW(1)
ROW(2)
ROW(3)
COL(1)
111
211
311
COL(2)
121
221
321
COL(3)
131
231
331
COL(4)
141
241
341
COL(3)
132
232
332
COL(4)
142
242
342
PAG(2)
ROW(1)
ROW(2)
ROW(3)
COL(1)
112
212
312
COL(2)
122
222
322
The dynamic variables associated with dat1 are not changed unless an explicit READ DISK or CLEAR variable
statement is executed. As illustrated in the dialog below.
WRITE dsv
Dynamic Scalar 1,000
WRITE drc
Dynamic Array by row and col
ROW(1)
ROW(2)
ROW(3)
COL(1)
1
2
3
COL(2)
2
4
6
The READ DISK statement transfers values from disk to memory.
READ DISK dsv drc
WRITE dsv
Dynamic Scalar 232
WRITE drc
308
COL(3)
3
6
9
COL(4)
4
8
12
Promula Application Development System User's Manual
Dynamic Array by row and col
ROW(1)
ROW(2)
ROW(3)
COL(1)
112
212
312
COL(2)
122
222
322
COL(3)
132
232
332
COL(4)
142
242
342
4.1.2.1 Accessing Subsets of Disk Variables
The dynamic method for accessing array files described above allows a programmer to access dimensional sections of array
variables on disk and to have different orderings for the dimensions of the local and disk variables. For example, the local
variable dpr defined above is a pag-by-row section of the drow-by-dcol-by-dpag disk variable, dat1.
Sometimes, in addition to accessing dimensional sections and reordering the structure of related disk and local variables,
the programmer wants the local variable to be smaller than the disk variable. In other words, the programmer wants to bring
in a subrange of values from one or more dimensions of the disk variable. The syntax of the DISK option described in the
previous section is not flexible enough to support a floating subrange within a dimension. Consider for example the disk
variable defined below:
DEFINE SET af
dsub(500)
"Survey Subject"
dqst(100)
"Survey Question"
dyer(10)
"Survey Year"
END SET
DEFINE VARIABLE af
data(dsub,dqst,dyer) "Survey Responses by Subject, Question, and Year"
END VARIABLE
Suppose the programmer wants to be able to dynamically access the data for all dsub elements, a single arbitrary dyer
element, and a range, say 20, of the dqst elements. In addition, the programmer wants to access the data through a local
question-by-subject array. With the notation discussed thus far, he/she might try to define the local array as follows:
DEFINE SET
sub(500)
qst(20)
END SET
"Survey Subject"
"Survey Question"
DEFINE VARIABLE
yp
ldata(qst,sub)
END VARIABLE
"Year Pointer"
"Survey Responses"
DISK(af,data(sub,qst,yp))
The problem with this notation is that it will only allow the programmer to access the first 20 elements of set dqst. The
data for dqst elements 21-100 cannot be accessed. Of course, the programmer could try increasing the size of set qst to
100, but that would define a local variable with 500 x 100 = 50,000 values = 200 Kbytes — too large to fit in memory on
most platforms. The programmer might also try using virtual access, but that is slow and does not allow reordering of local
sets. Finally, the programmer might try basepointing the qst dimension of the local array but then he/she could only access
one dqst element at a time. None of these approaches is satisfactory. What is required is a means of having a basepoint
and a local set corresponding to the same disk set. In order to provide for this, an extended DISK option syntax is
available. The extended syntax for defining a dynamic variable that can access a floating subrange of values from a disk
variable is described below.
Syntax:
DEFINE VARIABLE [SCRATCH]
309
Promula Application Development System User's Manual
var[(sets)][,"desc"][,TYPE=type,] DISK(file,dvar[, BASE(dsets1)][, ORDER(dsets2)])
END VARIABLE
Remarks:
var
is the identifier of a fixed or scratch variable. It is through var that your application will dynamically access
the disk variable, dvar.
sets
is the list of local set identifiers specifying the dimensions of the variable var.
desc
is an optional descriptor for the variable var.
type
is the format type of var. This type, REAL, INTEGER, STRING, etc. must match the type of dvar. For
REAL type variables, the width and decimal specifications of var are not required to match those of dvar.
For all other types, the width specifications of var and dvar must match.
file
is the identifier of an array file. In order to access dvar through var, the disk file specified when file is
physically opened must contain dvar.
dvar
is the identifier of the actual disk variable that you want to access through var.
dsets1
is an optional list of set identifiers, scalar variables or integer constants — one for each dimension of dvar.
These define the local sets and pointers which correspond to the disk sets subscripting the dvar.
dsets2
is an optional list of set identifiers and asterisks (*) — one for each dimension of dvar. These define the
correspondence between the local sets and the disk sets which actually subscript dvar. Asterisks are used to
indicate which dimensions of the disk variable are basepointed.
Let's take a look at how to apply this extended syntax to our example.
The database definition is the same:
DEFINE SET af
dsub(500)
"Survey Subject"
dqst(100)
"Survey Question"
dyer(10)
"Survey Year"
END SET
DEFINE VARIABLE af
data(dsub,dqst,dyer) "Survey Responses by Subject, Question, and Year"
END VARIABLE
The programmer wants to be able to dynamically access the data for all dsub elements, a single arbitrary dyer element,
and a range, say 20, of the dqst elements. In addition, the programmer wants to reorder the dimensions of the local
variable as a qst-by-sub array. The syntax required for our example is
DEFINE SET
sub(500)
qst(20)
END SET
"Survey Subject"
"Survey Question"
DEFINE VARIABLE
yp
qp
ldata(qst,sub)
ORDER(sub,qst,*))
END VARIABLE
"Year Pointer"
"Question Pointer"
"Survey Responses"
DISK(af,data, BASE(sub,qp,yp),
310
Promula Application Development System User's Manual
The BASE parameter of the DISK option tells PROMULA that the variables qp and yp are basepoints for the second and
third dimensions of the disk variable, and that the set sub corresponds to its first dimension. The ORDER parameter of the
DISK option tells PROMULA that the local sets sub and qst correspond to the first and second dimensions of the disk
variable, and that ranges of values should be accessed from these dimensions. The third subscript of the ORDER parameter
is an asterisk (*) indicating that a single element of the third dimension of the disk variable should be accessed.
Given the above definition, any 20 consecutive dqst elements may be accessed by assigning the basepoint (first-element)
value to variable qp and then executing a READ DISK statement. The programmer must be careful that the value of qp is
at least 1 and no greater than 80 whenever a READ DISK or WRITE DISK is executed. For example, to read in the data
for dqst elements 41 through 60, assign the value 41 to qp and execute a READ DISK statement.
4.1.3 More About Database Management
4.1.3.1 COPY file IMAGE
It is possible to access a database without having to relate local variables to disk variables. The easiest way to do this is
with the COPY file IMAGE statement. This variation of the COPY statement reads the definition of a database into
memory and makes its sets, variables, and relations available for direct access. For example, if filea.dba is an array file
on disk, the following code would load its definition into memory.
DEFINE FILE
af TYPE=ARRAY
END
OPEN af "filea.dba" STATUS=OLD
COPY af IMAGE
4.1.3.2 The file:variable and file:set notations
It is possible to directly access disk variables using the notation file:var. Where file is the identifier of a file which
has been opened to an array file on disk, and var is the identifier of the database variable you wish to access. Similarly, the
notation file:set may be used to reference sets in an array file.
4.1.3.3 PAGED VIRTUAL and AUTOMATIC DYNAMIC Access
Programs that manipulate database variables through virtual or direct access are easier to write than those that use dynamic
access because explicit READ DISK, WRITE DISK, and CLEAR variables statements are not required. Unfortunately,
virtual and direct access methods can be much slower than dynamic access. It seems the programmer must trade off ease of
programming for execution speed. There is, however, a way to have the best of both worlds.
As described in Chapter 3, the OPEN file statement can open array files as STATUS=VIRTUAL or
STATUS=DYNAMIC. Files opened STATUS=VIRTUAL use paged virtual access. In this mode, large pieces of the
database are transferred from disk to memory automatically by PROMULA. The efficiency of paged virtual access depends
on the structure of the database variables and the way in which the virtual or disk variables are defined and used by the
program. Files opened STATUS=DYNAMIC use automatic dynamic access. In this mode, the database is read into
memory once — when the file is opened, and then it is written back out once — when the file is cleared.
Of course, these methods do not provide the same degree of control that is possible when data access is described via the
READ DISK and WRITE DISK statements. Furthermore, paged virtual and automatic dynamic access can require a great
deal of memory and can only be used with small databases or with machines that have a large or virtual memory.
311
Promula Application Development System User's Manual
4.1.3.4 Increasing PROMULA's Scratch Storage Area.
Paged virtual and automatic dynamic access can only be used with small databases or with machines that have a large
memory. There is, however, a way to increase the paging space (also called scratch storage) used for manipulating dynamic
variables. This is done by including a
-PS=xx -DS=yy -VS=zz switch on the PROMULA command line.
As mentioned in Chapter 3 (see discussion of SELECT MAP), PROMULA divides your working space into three
partitions, each of which can accommodate about 32 Kbytes of storage. The three partitions are entitled Value Storage,
Definition Storage, and Procedure Storage. The Value partition accommodates data values — the contents of variables.
The Definition partition accommodates the definitions of data structures, sets, variables, menus, etc. The Procedure
partition accommodates executable code — the statements of procedures. Your program is too large whenever any one of
these three storage areas is filled. PROMULA's default memory allocation map is shown in Figure 4-2 below. This diagram
indicates that PROMULA creates a 32K partition for each storage area, and that a scratch storage area whose size is
hardware dependent is available at the "top" of memory.
DEFINITION
32K
TOTAL AVAILABLE WORKING SPACE
PROCEDURE
VALUE
32K
32K
SCRATCH
Hardware dependent
The -PS=xx -DS=yy -VS=zz switch allows you to change the allocation of memory. The switch values (xx, yy, and zz)
are integers between 1 and 32. The switches have no effect on machines that employ a virtual memory system.
The amount of storage required by your application can be determined by compiling it with SELECT MAP=ON and
finding the maximum value attained by the storage counters. For example, the listing shown in Figure 4-2 indicates that the
application requires a minimum of 10,011 bytes of value storage, 668 bytes of definition storage, and 92 bytes of procedure
storage. A safe set of allocation switches for this program would be -VS=11 -DS=1 -PS=1. For example, entering the
command line
PROMULA -VS=11 -DS=1 -PS=1 RUN PROGRAM segment.xeq
will start PROMULA and load the application stored in the file segment.xeq. PROMULA will allocate a total of 13
Kbytes for the standard memory partitions and at least 83 Kbytes for scratch storage as diagrammed below.
DEF
1K
PROC
1K
TOTAL AVAILABLE WORKING SPACE
VAL
SCRATCH
11K
Hardware dependent
4.1.3.5 Automatic READ DISK
PROMULA performs an automatic READ DISK operation whenever a dynamic variable is encountered on the right side
of an equation or displayed with a WRITE or BROWSE statement — unless the variable has already been read into
memory. The automatic READ DISK does not automatically move pointer variables, but it does ensure that dynamic
variables have default values. The default for the basepointed dimensions of dynamic variables is the element indexed by
the value of the pointer related to the disk set.
PROMULA never performs an automatic WRITE DISK of a dynamic variable.
4.1.3.6 Overlap Mapping
It is possible to use a single n-dimensional local variable to virtually access several n-1 dimensional disk variables. The
local and disk variables must all be of the same type, and the disk variables must be contiguous in a single database. The
312
Promula Application Development System User's Manual
DISK option should specify the identifier of the first of the contiguous variables to be accessed. For example, the twodimensional local variable data may be mapped across the disk vectors name, adr1, adr2, and phon as shown below:
Database Definition:
Fixed Variable Definitions
DEFINE FILE
af TYPE=ARRAY "ARRAY FILE"
END FILE
OPEN af "test.dba" STATUS=NEW
DEFINE SET
rec(100)
END SET
DEFINE VARIABLE af
name(rec) TYPE=STRING(30) "NAME"
adr1(rec) TYPE=STRING(30) "Address 1"
adr2(rec) TYPE=STRING(30) "Address 2"
phon(rec) TYPE=STRING(30) "PHONE"
END VARIABLE af
CLEAR AF
DEFINE FILE
af TYPE=ARRAY "ARRAY FILE"
END FILE
DEFINE SET
rec(100)
var(4)
END SET
DEFINE VARIABLE
data(rec,var) TYPE=STRING(30) "Data"
DISK(af,name)
END VARIABLE
4.2 Program Management in PROMULA
In addition to helping you manage data with array variables and database files, PROMULA can help you manage large
programs with segments and segment files. If your program code or data becomes too large to fit in your working space,
you may divide it into segments that can be transferred to and from disk on an as needed basis. A segment is a program
unit. When a segment is defined, it is explicitly given a name and is implicitly given a place in a program hierarchy.
Program segmentation and segment files allow you to create very large, structured applications that run in environments
with limited memory. Segment files also allow you to keep large program source codes in separate files so they can be
edited, compiled, and debugged separately.
Figure 4-1 is a schematic of how PROMULA organizes a segmented program; the segments could be kept in separate files
on disk or grouped together in a single file. The resultant program has a hierarchical tree structure in which the lower
segments of the tree inherit the structures and procedures of their parent segments.
Main
Seg1
Seg11
Seg2
Seg3
Seg21
Seg22
Seg211
Seg221
Seg31
Figure 4-1: Hierarchy of a Segmented Program
4.2.1 A Segmented Program with a Database
Figure 4-2 is the listing of an artificially large program that has been "segmented" and "databased" in order to fit in a small
working space.
The program in Figure 4-2 has five variables: var, var1, var11, var2, and var3. Together they require 70,000 words or
280 Kilobytes of storage:
313
Promula Application Development System User's Manual
Storage
Variable
var
var1
var11
var2
var3
Total
Words
50,000
5,000
5,000
5,000
5,000
70,000
Bytes
200K
20K
20K
20K
20K
280K
How do you fit them in a space of, say, 64 Kilobytes? Easy, break the oversized program into smaller pieces and only bring
in the necessary pieces one at a time. This is analogous to using a set of encyclopedias: you work with the one volume that
you are interested in while the rest of them sit on the shelf until they are needed. A mapped compilation listing of the source
code that produced SEGMENT.XEQ is shown below.
Figure 4-2: A Segmented Program with a Database
Storage Allocation
Value
Def Proc Line#
11
24
20
1
11
24
20
2
**************"
11
24
30
3
11
24
30
4
11
39
30
5
11
39
30
6
11
39
30
7
11
39
30
8
11
551
30
9
11
573
30
10
11
595
30
11
11
595
30
12
11
595
30
13
11
613
30
14
11
616
30
15
11
622
30
16
11
622
37
17
11
622
49
18
11
622
53
19
11
622
57
20
11
622
61
21
11
622
62
22
11
622
62
23
11
622
62
24
5011
639
62
25
5011
639
62
26
5011
645
62
27
5011
645
74
28
5011
645
78
29
5011
645
79
30
5011
645
79
31
5011
645
79
32
10011
662
79
33
10011
662
79
34
10011
668
79
35
10011
668
91
36
10011
668
92
37
5011
645
79
38
11
622
62
39
******************"
11
622
62
40
PROMULA Source Statement
OPEN SEGMENT 'segment.xeq', STATUS=NEW
DEFINE PROGRAM "************ Begin Segment MAIN
DEFINE FILE
Filex
END
OPEN Filex "segment.dba", STATUS=NEW
DEFINE SET
row(500)
col(10)
page(10)
END
DEFINE VARIABLE Filex
var(row,col,page), 'Data for Segment MAIN'
END
DEFINE PROCEDURE proc
OPEN Filex "segment.dba", STATUS=OLD
WRITE( 'You are in Segment MAIN')
READ SEGMENT Seg1, DO(proc1)
READ SEGMENT Seg2, DO(proc2)
READ SEGMENT Seg3, DO(proc3)
END proc
DEFINE SEGMENT Seg1 "********** Begin Seg1 ******************"
DEFINE VARIABLE
var1(row,col), 'Data for Segment Seg1'
END
DEFINE PROCEDURE proc1
WRITE('You are in Segment Seg1')
READ SEGMENT Seg11, DO(proc11)
END proc1
DEFINE SEGMENT Seg11 "****** Begin Seg11 *****************"
DEFINE VARIABLE
var11(row,page), 'Data for Segment Seg11'
END
DEFINE PROCEDURE proc11
WRITE('You are in Segment Seg11')
END proc11
END SEGMENT Seg11
END SEGMENT Seg1
DEFINE SEGMENT Seg2 "********** Begin Seg2
DEFINE VARIABLE
314
Promula Application Development System User's Manual
Figure 4-2: A Segmented Program with a Database
11
622
62
5011
639
62
5011
639
62
5011
645
62
5011
645
74
5011
645
75
11
622
62
******************"
11
622
62
11
622
62
5011
639
62
5011
639
62
5011
645
62
5011
645
74
5011
645
75
11
622
62
11
622
62
41
42
43
44
45
46
47
var2(row,page), 'Data for Segment Seg2'
END
DEFINE PROCEDURE proc2
WRITE('You are in Segment Seg2')
END proc2
END SEGMENT Seg2
DEFINE SEGMENT Seg3 "********** Begin Seg3
48
49
50
51
52
53
54
55
56
DEFINE VARIABLE
var3(row,col), 'Data for Segment Seg3'
END
DEFINE PROCEDURE proc3
WRITE('You are in Segment Seg3')
END proc3
END SEGMENT Seg3
END PROGRAM
************************** End Segment MAIN ******************
The program in Figure 4-2 combines program segmentation and database management to give you what is sometimes
called dynamic memory management. Dynamic memory management means being able to develop and use large programs.
The memory management is achieved in two ways: using database files to store program variables, and using program
segmentation to store program code. When the program is compiled, PROMULA creates two files: the program segments
are physically stored on the disk file named SEGMENT.XEQ. The array file Filex is physically stored on the disk file named
SEGMENT.DBA.
segment.dba
Array Database File
segment.xeq
Segment File
Main
var
a three-dimensional
disk variable
Seg1
Seg2
Seg3
Seg11
Figure 4-3: Hierarchical Structure of SEGMENT.XEQ and the database SEGMENT.DBA
This diagram is the organizational chart of the program in Figure 4-2 and its supporting database. The database is stored in
a disk file referred to as Filex in the program. The five segments are linked into a hierarchy of three levels of inheritance.
The level of inheritance is increasing from top to bottom in the diagram. For example, the segment MAIN inherits no
information from other program segments; it is at inheritance level 0. Segments Seg1, Seg2, and Seg3 inherit information
from segment MAIN; they are at inheritance level 1. Segment Seg11 inherits information from segments Seg1 and
MAIN; it is at inheritance level 2.
Segment inheritance in the context of the diagram means the following: to access information in a segment of inheritance
level n you must first gain access to the information in the segment at inheritance n-1 that is directly linked to the segment
at level n. In addition, segments at the same level of inheritance cannot share information directly, i.e., they cannot be in
memory simultaneously. Parallel segments can share information only through a common parent segment and/or through
shared databases. In the program of Figure 4-2, segment inheritance is manifested in terms of the following possible
working space configurations:
315
Promula Application Development System User's Manual
1.
2.
3.
4.
5.
6.
7.
Segment MAIN may exist in working space alone.
Segment Seg1 can exist in working space with segment MAIN alone or with MAIN and Seg11.
Segment Seg11 can exist in working space only with MAIN and Seg1.
Segment Seg2 can exist in working space only with segment MAIN.
Segment Seg3 can exist in working space only with segment MAIN.
Segments Seg1, Seg2 and Seg3 cannot be in your working space simultaneously.
All segments share the information in the master segment MAIN; thus, all segments have access to the information in
the database Filex, which is defined in the MAIN segment.
The storage allocation for the segments is summarized below:
Segment
MAIN
Seg1
Seg11
Seg2
Seg3
Value
11
11
5011
11
11
Begins at
Definition
24
622
645
622
622
Procedure
20
62
78
62
62
Value
11
5011
10011
5011
5011
Ends at
Definition
622
645
668
645
645
Procedure
62
79
92
75
75
Figure 4-4: Storage Allocation Statistics for SEGMENT.XEQ
Notice that the level n segments begin where their parent (level n-1) segments end. The segment MAIN starts with the
DEFINE PROGRAM statement and ends with the END PROGRAM statement. Each of the other segments starts with a
DEFINE SEGMENT statement and ends with an END SEGMENT statement.
Variable var is a disk variable: its values are stored on the array file Filex and, thus, do not take up any RAM space!
This saves you 200 Kilobytes of working space without compromising your ability to access the values of var in your
program. The other four variables — var1, var11, var2, and var3 — occupy fixed spaces in your working space and are
called fixed variables. Each of these variables requires 20 Kilobytes of RAM and is available to you only if you are
working in the program segment where the variable is defined. For example, var1 is available in segments Seg1 and
Seg11; var11 is available only in Seg11; var2 is available only in Seg2; and var3 is available only in Seg3. If all four
fixed variables were in RAM simultaneously they would require 80 Kilobytes of memory. Separately, however, they each
require 20 Kilobytes only, for a maximum requirement of 40 Kilobytes (when both var1 and var11 are in RAM). This
segmentation saves you 40 Kilobytes of RAM space.
Thus, in this example you only require 40 Kilobytes of RAM to use 280 Kilobytes of data values.
Figure 4-5 below contains a sample interaction with the program SEGMENT.XEQ.
Figure 4-5: An Interactive Run with a Segmented Program
PROMULA? RUN PROGRAM segment.xeq
PROMULA? DO proc
You are in Segment
You are in Segment
You are in Segment
You are in Segment
You are in Segment
MAIN
Seg1
Seg11
Seg2
Seg3
PROMULA? AUDIT SET
Identifier Description
ROW
COL
PAGE
316
Promula Application Development System User's Manual
Figure 4-5: An Interactive Run with a Segmented Program
PROMULA? AUDIT VARIABLE
Identifier Description
VAR
Data for Segment MAIN
VAR3
Data for Segment Seg3
var = 10
PROMULA? SELECT row(450-455), col(4-8), page(1)
PROMULA? WRITE var
A Segmented Program with a Database Page 1
Data for Segment MAIN
PAGE(1)
ROW(450)
ROW(451)
ROW(452)
ROW(453)
ROW(454)
ROW(455)
COL(4)
10
10
10
10
10
10
COL(5)
10
10
10
10
10
10
COL(6)
10
10
10
10
10
10
COL(7)
10
10
10
10
10
10
COL(8)
10
10
10
10
10
10
4.2.2 Multi-Segment Programs in Separate Disk Files
If the segments of your program become very large, or if you just want the convenience of being able to edit and debug
them independently, you can store each segment in a separate file.
If you choose to do this, there are several important rules you must follow.
1.
In order to use any structures defined in a segment, you must first physically open the disk file that contains the
segment then read in the segment by executing OPEN SEGMENT and READ SEGMENT statements.
2.
If you change and recompile a parent segment, you must also recompile all the segments "under" it. Lower level
segments and parallel segments, however, can be recompiled without having to recompile their parent segments.
3.
After returning from a lower level segment, you must reopen the parent segment before you can write to it with a
WRITE VALUE segment statement.
Example:
The following example shows how the source code of SEGMENT.XEQ would have to be modified in order for each segment
to reside in a separate disk file.
The file containing segment MAIN is shown below. Notice that it contains a DEFINE PROGRAM statement but no
DEFINE SEGMENT statement.
Procedure proc in this multi-file version of SEGMENT.XEQ has been modified by adding the appropriate OPEN
SEGMENT statements before the READ SEGMENT statements that execute the lower level segments.
MAIN
OPEN SEGMENT "segment.xeq" STATUS=NEW
******************* Begin Main Segment *************
DEFINE PROGRAM "A Segmented Program with a Database"
317
Promula Application Development System User's Manual
DEFINE FILE
Filex
END
OPEN Filex "segment.dba", STATUS=NEW
DEFINE SET
row(500)
col(10)
page(10)
END
DEFINE VARIABLE Filex
var(row,col,page), 'Data for Segment MAIN'
END
DEFINE PROCEDURE proc
OPEN Filex "segment.dba"
WRITE( 'You are in Segment MAIN')
OPEN SEGMENT "seg1.xeq"
READ SEGMENT Seg1, DO(proc1)
OPEN SEGMENT "seg2.xeq"
READ SEGMENT Seg2, DO(proc2)
OPEN SEGMENT "seg3.xeq"
READ SEGMENT Seg3, DO(proc3)
CLEAR filex
END proc
**************** End Main Segment ***********************
END PROGRAM
STOP
The files containing the segments seg1, seg2, and seg3 are shown below. Notice that the file containing segment MAIN
is opened and read at the top of each of these files so that the definitions in segment MAIN can be used. This implicitly
puts seg1, seg2, and seg3 at inheritance level 1 under segment MAIN .
seg1
OPEN SEGMENT "segment.xeq" STATUS=OLD
READ SEGMENT MAIN
OPEN SEGMENT "seg1.xeq" STATUS=NEW
DEFINE SEGMENT Seg1
**************** Begin Segment 1 *******************
DEFINE VARIABLE
var1(row,col), 'Data for Segment Seg1'
END
DEFINE PROCEDURE proc1
WRITE('You are in Segment Seg1')
OPEN SEGMENT "seg11.xeq"
READ SEGMENT Seg11, DO(proc11)
END proc1
**************** End Segment Seg1 ******************
END SEGMENT Seg1
STOP
seg2
OPEN SEGMENT "segment.xeq" STATUS=OLD
READ SEGMENT MAIN
OPEN SEGMENT "seg2.xeq" STATUS=NEW
DEFINE SEGMENT Seg2
**************** Begin Segment Seg2 ****************
DEFINE VARIABLE
var2(row,page), 'Data for Segment Seg2'
END
DEFINE PROCEDURE proc2
WRITE('You are in Segment Seg2')
318
Promula Application Development System User's Manual
END proc2
***************** End Segment Seg2 *****************
END SEGMENT Seg2
STOP
seg3
OPEN SEGMENT "segment.xeq" STATUS=OLD
READ SEGMENT MAIN
OPEN SEGMENT "seg3.xeq" STATUS=NEW
DEFINE SEGMENT Seg3
***************** Begin Segment Seg3 ***************
DEFINE VARIABLE
var3(row,col), 'Data for Segment Seg3'
END
DEFINE PROCEDURE proc3
WRITE('You are in Segment Seg3')
END proc3
**************** End Segment Seg3 ******************
END SEGMENT Seg3
STOP
The file containing seg11 is shown below. Notice that both parent segments: seg1 and MAIN are opened and read at the
top of this file. This implicitly puts seg11 at inheritance level 2 under segments MAIN and seg1.
seg11
OPEN
READ
OPEN
READ
OPEN
SEGMENT
SEGMENT
SEGMENT
SEGMENT
SEGMENT
"segment.xeq" STATUS=OLD
MAIN
"seg1.xeq" STATUS=OLD
seg1
"seg11.xeq" STATUS=NEW
DEFINE SEGMENT Seg11
*************** Begin Segment Seg11 *************
DEFINE VARIABLE
var11(row,page), 'Data for Segment Seg11'
END
DEFINE PROCEDURE proc11
WRITE('You are in Segment Seg11')
END proc11
**************** End Segment Seg11 **************
END SEGMENT Seg11
STOP
The STOP statements at the end of all the files are used during multi-file compilations; they return control to a "job file"
that contains a series of RUN statements that compile the segments of the program in the right order. A job file can be a
convenient way to automatically compile all segments after you have changed segment MAIN.
A simple sequential job file is shown below. Your own job files can be more elaborate allowing you to select individual
segment files for compilation. The important thing to remember is that if you compile a parent segment, all segments
"under" it must also be compiled in order to insure that the beginnings and endings of Value, Definition, and Procedure
storage for each segment are correct and consistent.
WRITE("RUNNING segment.prm")
RUN segment.prm
WRITE("RUNNING seg1.prm")
RUN seg1.prm
WRITE("RUNNING seg11.prm")
RUN seg11.prm
WRITE("RUNNING seg2.prm")
319
Promula Application Development System User's Manual
RUN seg2.prm
WRITE("RUNNING seg3.prm")
RUN seg3.prm
STOP PROMULA
320
Promula Application Development System User's Manual
5. CONFIGURING PROMULA
Most of PROMULA's system options may be configured by each application through the SELECT option statement.
However, the physical configuration of PROMULA's graphics modes may only be controlled through PROMULA's
graphics configuration program PCONFIG.XEQ. This program is a PROMULA application that provides a menu-driven
interface for configuring each of PROMULA's graphics modes to your hardware's capabilities and your preferences so that
you can produce plots on your screen and printer. The program provides the means to select predefined graphics
configurations and to create and manage custom graphics configurations for hardware that does not work under one of the
predefined configurations. Typically, you will only have to configure PROMULA's graphics once — when you first install
PROMULA on your system.
Currently, PROMULA supports graphics configurations for the following types of devices:
1.
2.
3.
4.
5.
6.
7.
8.
9,
10.
11.
12.
13.
14.
15.
16.
17.
18.
CGA medium resolution 3-color graphics adapter
CGA high resolution black & white graphics adapter
EGA 16 color high resolution graphics adapter
VGA 16 color high resolution graphics adapter
IBM/Epson printer, high resolution, landscape
IBM/Epson printer, high resolution, portrait
IBM/Epson printer, medium resolution, landscape
IBM/Epson printer, medium resolution, portrait
IBM/Epson printer, CGA high resolution screen dump
IBM/Epson printer, CGA medium resolution screen dump
HP LaserJet II printer, high resolution, landscape
HP LaserJet II printer, medium resolution, landscape
HP LaserJet II printer, high resolution, portrait
HP LaserJet II printer, medium resolution, portrait
VT 330 SIXEL graphics
VT 240 REGIS graphics
IBM/Epson printer, VGA high resolution screen dump
LN03 Plus Printer, landscape
PROMULA's default graphics configuration is as follows:
MEDIUM mode
HIGH mode
PLOTTER mode
CGA medium resolution 3-color graphics adapter
CGA high resolution black & white graphics adapter
IBM/Epson printer, high resolution, landscape
5.1 Using the Graphics Configuration Program
There are two primary functions of the graphics configuration program:
1.
2.
Selecting a graphics configuration to be used by one of PROMULA's graphics modes.
Managing custom graphics configurations.
5.1.1 Selecting Graphics Configurations
Configuring PROMULA's graphics is a simple two-step process. First, you select the graphics mode you wish to configure.
Then you select the graphics configuration you want to assign to the selected mode.
321
Promula Application Development System User's Manual
Although it is possible to assign any device to any graphics mode, only configurations supported by your hardware will
perform properly. If you misconfigure PROMULA's graphics, it is likely that plots on screen or on the printer will not look
right, or your computer may lock up when PROMULA tries to produce a plot. If either of these events occurs, first try
pressing the Esc key; if that does not help, reboot your computer and reconfigure PROMULA's graphics for a device that is
supported by your hardware.
The following screens illustrate this sequence of steps. First, you run the program PCONFIG.XEQ. The screen below
shows the main menu of the graphics configuration program.
PROMULA GRAPHICS CONFIGURATION PROGRAM
MAIN MENU
F1 Exit to PROMULA Main Menu
F2 Create, Modify, or Delete Custom Graphics Configurations
F3 Configure Graphics Modes
F4 Test PROMULA Graphics
Choosing the third option off the main menu will bring up the graphics mode selection screen shown below. Use the arrow
keys to highlight the graphics mode you wish to configure and press Enter to select it.
322
Promula Application Development System User's Manual
Select the graphics mode you wish to configure, or
press [End].
Identifier Description
1
MEDIUM
2
3
HIGH
PLOTTER
End: Exit
Arrows PgUp PgDn Home: Move
Enter: Select
After selecting a graphics mode to configure, the graphics configuration selection screen is displayed. Use the arrow keys to
highlight the graphics configuration you want to assign to the selected graphics mode and press Enter to select it.
Select a configuration for HIGH graphics mode, or press [End].
Identifier
1
2
3
4
5
6
7
8
9
10
11
12
13
14
15
16
17
Description
CGA medium resolution 3-color graphics
CGA high resolution black & white graphics
EGA 16 color high resolution graphics
VGA 16 color high resolution graphics
IBM/Epson printer, high resolution, landscape
IBM/Epson printer, high resolution, portrait
IBM/Epson printer, medium resolution, landscape
IBM/Epson printer, medium resolution, portrait
IBM/Epson printer, CGA high resolution screen dump
IBM/Epson printer, CGA medium resolution screen dump
HP LazerJet II printer, high resolution, landscape
HP LazerJet II printer, medium resolution, landscape
HP LazerJet II printer, high resolution, portrait
HP LazerJet II printer, medium resolution, portrait
VT 330 SIXEL graphics
VT 240 REGIS graphics
IBM/Epson printer, VGA resolution screen dump
End: Exit
Arrows PgUp PgDn Home: Move
Enter: Select
After making these two selections, your new graphics configuration will be written permanently in the PROMULA
configuration file, PROMULA.PAK, and you will be returned to the graphics configuration program main menu where
you may exit the program and use PROMULA.
323
Promula Application Development System User's Manual
5.1.2 Managing Custom Graphics Configurations
You can use the graphics configuration program to create new graphics configurations that satisfy the requirements of your
hardware and/or your preferences. Changing the line colors and patterns requires no technical knowledge, but changing plot
sizes, especially for printers, requires detailed technical information about your printer's data transfer protocol.
Currently, the following items are used to define a PROMULA graphics configuration:
1.
Device Descriptor
This is a string of up to sixty characters that describes the configuration definition. It is used only for descriptive
purposes, and its value does not affect the behavior of graphics in any way.
2.
Device type
This is a code describing the type of output device that will be used for plots.
0
1
2
3
4
3.
=
=
=
=
=
video
raster-printer, e.g., HP LaserJet
vector-video, e.g., VT 240 Regis Graphics
raster-video, e.g., VT 330 Sixel Graphics
vector-printer, e.g., a Pen Plotter
Horizontal text pixel width
This is the width in pixels of each character of horizontal text that may appear with a plot. Text on plots uses an
internally defined fixed-width font.
4.
Horizontal text pixel height
This is the height in pixels of each character of horizontal text that may appear with a plot.
5.
Vertical text pixel width
This is the width in pixels of each character of vertical text that appears with the plot.
6.
Vertical text pixel height
This is the height in pixels of each character of vertical text that appears with the plot.
7.
Total width in pixels
This is the total width of the plot area in pixels.
8.
Total height in pixels
This is the total height of the plot area in pixels.
9.
Total width in standard units
This is the total width of the plot, including accompanying text, in standard units, typically inches.
10.
Total height in standard units
324
Promula Application Development System User's Manual
This is the total height of the plot, including accompanying text, in standard units, typically inches.
11.
Border color code
In LINE and VALUES plots, this is the color to be used for the border around the plot and all text displayed with the
plot. In all other plot styles (i.e., PIE-CHARTS, MARKED-POINT PLOTS, and BAR PLOTS), the entire image will
be drawn in this color.
12.
Line color codes
These six values specify the colors to be used for the plotted curves in LINE and VALUES plots. The colors
available depend on your hardware. The color codes used by PROMULA are listed below.
SIXTEEN-COLOR GRAPHICS CONFIGURATIONS.
0 = BLACK
4 = RED
8 = GREY
12 = LT RED
1 = BLUE
5 = PURPLE
9 = LT BLUE
13 = LT PURPLE
2 = GREEN
6 = YELLOW
10 = LT GREEN
14 = LT YELLOW
3 = CYAN
7 = WHITE
11
=
LT
CYAN
15
=
LT
WHITE
THREE-COLOR GRAPHICS CONFIGURATIONS.
1=CYAN
2=MAGENTA
3=WHITE
For monochrome monitors and printers the only valid color code is 1.
13.
Line patterns
These six strings of twenty-character values specify the patterns to be used for the plotted curves in LINE and
VALUES plots. The default line patterns are shown below:
14.
SIXTEEN-COLOR
MONITORS
THREE-COLOR
MONITORS
MONOCHROME MONITORS
AND PRINTERS
XXXXXXXXXXXXXXXX
XXXXXXXXXXXXXXXX
XXXXXXXXXXXXXXXX
XXXXXXXXXXXXXXXX
XXXXXXXXXXXXXXXX
XXXXXXXXXXXXXXXX
XXXXXXXXXXXXXXXX
XXXXXXXXXXXXXXXX
XXXXXXXXXXXXXXXX
XXXX
XXXX
XXXX
XXXX
XXXX
XXXX
XXXXXXXXXXXXXXXX
XXXXXXX
X X X X X X X X
XXXX
XXXX
XX XX XX XX
XXXX X XXXX X
Video BIOS type code
This decimal number is used to tell PROMULA the appropriate settings to use for your graphics monitor. For
example, the video BIOS type codes for PROMULA's four video configurations are listed below:
Configuration
Code
1.
2.
3.
4.
4
6
16
18
CGA medium resolution 3-color graphics
CGA high resolution black & white graphics
EGA 16 color high resolution graphics
VGA 16 color high resolution graphics
325
Promula Application Development System User's Manual
For additional information on the Video BIOS type code consult Milton, R. Programmers Guide to PC and PS/2
Video Systems Microsoft Press; Redmond, Washington (1987)
15.
Raster Orientation: 0=portrait, 1=landscape
For raster devices such as printers, this code specifies the orientation of the image.
16.
17.
18.
19.
20.
21.
22.
Raster bandwidth
Raster horizontal bit multiplier
Raster vertical bit multiplier
Raster initialization string
Raster start-of-line string
Raster end-of-line string
Raster end-of-plot string
Items 16 through 22 are used to control raster devices (e.g., printers). See your printer manual for the values of these
parameters.
23.
24.
25.
26.
Vector Draw line string
Vector Write Horizontal Text String
Vector Write Vertical Text String
Vector draw Circle String
Items 23 through 26 are used to control vector devices (e.g., pen plotters). See your plotter manual for the values of these
parameters.
After determining the values of the items to include in a custom graphics definition, you may use the graphics configuration
program to create a configuration that matches these specifications.
First load the program and select option 2 off the main menu. This brings up the custom graphics management menu shown
below.
From this menu, you can create a new custom graphics configuration, or modify or delete an existing one. To create a new
configuration, select option 2 from this menu. This will bring up the configuration selection screen.
Next, select a configuration to use as the basis for the new one.
326
Promula Application Development System User's Manual
Select a configuration to use as the basis for the new
Identifier
1
2
3
4
5
6
7
8
9
10
11
12
13
14
15
16
17
one, or press [End].
Description
CGA medium resolution 3-color graphics
CGA high resoluti9on black & white graphics
EGA 16 color high resolution graphics
VGA 16 color high resolution graphics
IBM/Epson printer, high resolution, landscape
IBM/Epson printer, high resolution, portrait
IBM Epson/printer, medium resolution, landscape
IBM/Epson printer, medium resolution, portrait
IBM/Epson printer, CGA high resolution screen dump
IBM/Epson printer, CGA medium resolution screen dump
HP LaserJet II printer, high resolution, landscape
HP LaserJet II printer, medium resolution, landscape
HP LaserJet II printer, high resolution, p9ortrait
HP laserJet II printer, medium resolution, portrait
VT 330 SIXEL graphics
VT 240 REGIS graphics
IBM/Epson printer, VGA resolution screen dump
End: Exit
Arrows PgUp PgDn Home: Move
Enter : Select
After selecting a template configuration, you can edit its descriptor to give it a unique name.
Edit the description of graphics configuration #19
GCD(19)
CGA high resolution black & white graphics
Enter value or End? NEW CGA HI RES (SMALL PLOT)
Last, enter the parameters associated with the new configuration using PROMULA's interactive data editor on the screen
below.
327
Promula Application Development System User's Manual
Edit the parameters of graphics configuration #19
NEW CGA HI RES (SMALL PLOT)
Device type: 0-video;1,3=raster;2,4=vector
Horizontal text pixel width
Horizontal text pixel height
Vertical text pixel width
Vertical text pixel height
Total width width in pixels
Total height in pixels
Total width in standard units
Total height in standard units
COLOR CODES: 01=BLACK
Background color code
LINE COLORS
(1)
End: Exit
Fn Shift-Fn PgUp PgDn Home Arrows: Select
0
8
8
8
8
500
200
16
12
1
1
Enter: Edit
The custom configuration management menu also offers the options of modifying or deleting existing custom graphics
configurations. If you choose to modify an existing configuration, the list of existing custom graphics configurations will be
displayed and you may select one for editing. If you choose to delete an existing configuration, the list of existing custom
graphics configurations will be displayed and you may select one to be deleted.
5.1.3 Testing PROMULA Graphics
The graphics configuration program also offers the opportunity to test graphics configurations. Selecting the fourth option
from the configuration program's main menu brings up the plot testing control screen. From this screen, you may change
the graphics modes or generate the various types of PROMULA plots.
328
Promula Application Development System User's Manual
Select the style of plot you wish to view, or press END.
CURRENT GRAPHICS MODE IS HIGH
0 = CHANGE GRAPHICS MODE
1
2
3
4
5
6
7
=
=
=
=
=
=
=
NORMAL
LINE
SCATTER
BAR
STACK
PIECHART
VALUES
or press [End] to Exit
?
329