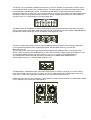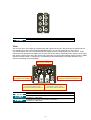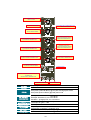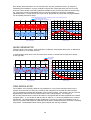
1
S1 MK2 User’s Manual
(Guide/Handbook)
Table of contents
page
Certification.............................................................................................. 1
Warranty and Assistance........................................................................ 1
Limitation of warranty............................................................................. 1
Before using this Synthesizer................................................................ 2
Checking Accessories....................................................................... 2
Environmental Conditions................................................................. 2
Safety Symbols.................................................................................. 3
Grounding Requirements.................................................................. 3
Rack Installation................................................................................ 3
Installation of Instrument Stand (optional)......................................... 3
Repackaging for Shipment................................................................ 3
Warm up time.................................................................................... 3
Introduction.............................................................................................. 4
Connections............................................................................................. 4
Getting started.......................................................................................... 5
Patchbay........................................................................................... 6
Master Controller............................................................................... 6
Oscillators.......................................................................................... 9
Oscillators CV.................................................................................... 10
Mixer.................................................................................................. 11
Ring Modulator.................................................................................. 12
Noise Generator Outputs and Oscillators Outputs............................ 12
LFO.................................................................................................... 13
Low Pass Filter, Audio Input Mixer.................................................... 14
Multi Mode, Audio Input Mixer........................................................... 14
Filters................................................................................................. 15
Low Pass Filter.................................................................................... 15
Multi Mode Filter................................................................................ 18
Envelope Generators......................................................................... 20
Master Amplifier................................................................................. 21
Rear Panel......................................................................................... 23
Calibration................................................................................................. 24
Oscillator scale................................................................................... 24
Oscillator range................................................................................. 25
Master scale & Analog CV................................................................. 25
MIDI............................................................................................................ 26
Startup............................................................................................... 26
CV1 and Gate1/Trigg1....................................................................... 26
Gate2/Trigg2...................................................................................... 27
CV2.................................................................................................... 28
CV3.................................................................................................... 28
CV4.................................................................................................... 28
CV5.................................................................................................... 28
CV6.................................................................................................... 28
How MIDI Messages are Handled..................................................... 29
Program Change............................................................................... 29
Hold Pedal, Legato Pedal.................................................................. 29
All Notes-Off Message....................................................................... 29
All Sound-Off Message...................................................................... 29
Reset All Controllers Message........................................................... 29
Omni On/Off Messages...................................................................... 29
Reset Message Received.................................................................
CV Gate/Trigg Configuration.............................................................
Setting for CV Outputs......................................................................
Setting Parameters...........................................................................
Routing the CV Outputs....................................................................
Parameter Values, Table 1...............................................................
Upgrading Software..........................................................................
Possible Routing of CV Outputs.......................................................
MIDI Implementation Chart...............................................................
Inside the Synthesizer.............................................................................
Oscillators.........................................................................................
Sine Waveform..................................................................................
Triangle Waveform............................................................................
Sawtooth Waveform..........................................................................
Pulse Waveform................................................................................
Triangle + Pulse Waveform...............................................................
Sync, Frequency and Amplitude Modulation.....................................
Noise generator.................................................................................
Ring Modulator..................................................................................
Low Pass Filter...................................................................................
Multi Mode Filter................................................................................
Master Amplifier.................................................................................
Envelope Generators.........................................................................
LFO....................................................................................................
Overdrive...........................................................................................
29
29
30
30
31
32
33
33
33
34
34
34
35
35
36
37
37
39
39
40
44
45
46
47
48
CERTIFICATION
Cwejman certifies that this instrument was thoroughly tested and inspected and found to
meet its published specifications when it was shipped from the factory.
WARRANTY AND ASSISTANCE
All Cwejman products are warranted against defects in materials and workmanship.
This warranty applies for 1 years from the date of delivery. We will repair or replace products,
which prove to be defective during the warranty period provided they are returned to Cwejman.
LIMITATION OF WARRANTY
The foregoing warranty shall not apply to defects resulting from improper or inadequate
maintenance by buyer, unauthorized modification or misuse, accident or abnormal conditions of
operations. No other warranty is expressed or implied. Cwejman specifically disclaims the
implied warranties of merchantability and fitness for a particular purpose. Cwejman shall not
be liable for any special incidental or consequential damages, whether in contract, tort or otherwise.
Copyright 2005 by Cwejman . Printed in Sweden. All rights reserved.
No part of this manual may be reproduced in any form without written permission of Cwejman .
1
Before Using this Synthesizer
Checking Accessories
Upon receipt of this instrument, run the checks shown below:
Run visual checks against any and all damages or imperfections.
Check the quantity and rating of standard accessories to assure their conformance with
the table below.
Should there be any flaw, or damage, or missing or insufficient materials,
contact the dealer or the sales and support office.
Power cable
Interconnection cables, 3.5mm
Rack holders
Rack Holder screws, M5
The Instruction manual
1
6
2
4
1
Environmental Conditions
Do not expose this unit to direct sunlight, corrosive gas, dust or vibration. The ambient temperature
must be +15 to +30°C and the relative humidity must not be greater than 85%. The storage
temperature of this unit is 0 to +50°C.
This unit is designed with the affect of AC power supply line noise taken into consideration. However,
it is recommended that it be used in a place where there is minimum noise. If noise is unavoidable,
use a noise suppresser or the equivalent.
CAUTION!
115
Before turning this unit on, check the supply voltage switch on the Rear Panel
for proper position.
Voltage selector in 115Vac position.
2
Safety Symbols
The WARNING sign denotes a hazard. It calls attention to a procedure, practice or the like which,
if not correctly performed or adhered to, could result in injury or loss of life. Do not proceed beyond
a WARNING sign until the indicated conditions are fully understood and met.
The CAUTION sign denotes a hazard. It calls attention to an operating procedure, practice, or the like,
which, if not correctly performed or adhered to could result in damage to or destruction of part or all of
the equipment. Do not proceed beyond a CAUTION sign until the indicated conditions are fully understood
and met.
Grounding Requirements
The synthesizer is equipped with a three-conductor power cord which, when plugged into an appropriate
receptacle grounds the instrument. The offset pin on the power cord three-prong connector is the ground wire.
Rack Installation
This instrument can be rack mounted by using a rack mounting kit.
Rack Mounting kit; 2 brackets that are attached to the sides of the instrument by 4 M5 screws.
Installation of Instrument Stand (optional)
An instrument stand can be attached to the unit using the instrument stand kit.
Instrument stand kit: 2 stands (right, left) that are attached to the sides of the instrument by 4 M5 screws
(same screws as for rack installation).
Repackaging for Shipment
The following is a general guide for repackaging for shipment.
NOTE: If the instrument is to be shipped to Cwejman Sound for service or repair, attach a tag to the
instrument identifying the owner and indicating the service or repair to be carried out, include the serial
number. Place the instrument in its original container if available. If the original container is not available
wrap the instrument in heavy paper or plastic before placing in an inner container. Use plenty of packing
material around all sides of the instrument and protect panel faces with cardboard strips.
Place the instrument and inner container in a heavy carton or wooden box and seal with strong tape or
metal bands. Mark the shipping container DELICATE INSTRUMENT or FRAGILE.
Warm up time
After start up the unit requires 5 to 10 minutes to allow circuits to stabilise.
Specification
The following is an account of the entire unit and the technical performance of each individual module.
In addition there is a more detailed description of the characteristics of the unit's functions including
descriptions of the modules, measurements of waveforms, spectrum analysis, frequency response, etc.
WEIGHT
DIMENSIONS
POWER
5 kg
440mm (L), 215mm (H), 70mm (D)
115/230Vac ± 10%, 20VA
3
Introduction
The S1 is a semi-modular, analogue monophonic synthesizer. It is easy to get started with since it is prepatched for optimal use of its sound producing possibilities and eliminates the need for external connections
between modules during use. Each module can be disconnected and used separately, e.g. to control or be
controlled by other instruments. This flexibility enables and simplifies experimentation with creation and
reproduction of sound.
We can mention some important features of the S1:
* Three oscillators with seven basic waveforms
* Ring modulator
* Noise generator with two three noise shapes
* Low pass filter with selectable 4 / 6 poles and quasi band pass mode
* Multi mode filter with selectable 2 to 6 poles and three modes
* Wide range envelope generators
* Master amplifier with build-in overdrive stage
* LFO with seven basic waveforms and wide rate range
* Extensive modulation of, virtually, all synthesis parameters
* Build-in MIDI to CV/gate converter with 16-bit resolution
Several parameters can be voltage controlled by external signals and, simultaneously, control external devices
by the build-in MIDI converters voltage outputs (see Rear Panel). The S1 is a stand alone instrument and the
possibility with patching and integrating it into an external modular (or semi-modular) synthesizer makes it
extremely flexible.
Connections
Power; Connect the included power cable with a 115/230Vac outlet.
BEFORE YOU TURN ON THE MACHINE, BE SURE TO CHECK THE VOLTAGE SELECTOR POSITION
ON THE REAR.
AUDIO
Connect the INSTRUMENT OUTPUT of the S1 to your audio system. Use a single-ended or balanced
output cable, depending on what your audio system has to offer. For best audio performance, use the
balanced output. Please refer to your audio systems instruction for reference.
MIDI
If you want to play the S1 via MIDI, connect S1's MIDI IN to the MIDI OUT of your MIDI controller.
Select the corresponding MIDI channels on both the S1 and your MIDI controller.
All MIDI functions of the S1 are explained in detail later in this manual. Please also refer to the instructions
of your MIDI system/controller.
CV/GATE
If you want to play via CV/GATE equipped devices, please use the ANALOGUE INPUTS on the S1 rear panel.
Connect S1's CV IN to the CV OUT (1 Volt/octave) of your analogue sequencer or keyboard and connect
the GATE and/or Trigger or S-Trigger to the appropriate output of your analog controlling device.
MIDI INTERFACE
MIDI IN (and programming), MIDI OUT (only program verification)
and MIDI THRU
CV1
CV2
CV3
MIDI OUTPUTS
MIDI CHANNEL
ANALOG
INPUTS
Fixed: main pitch, 0 to 10 Volts (10 octaves)
Factory preset: Note on Velocity, 0 to 5 Volts
Factory preset: Control Change #05,
Modulation Wheel, 0 Volt ± 5 Volts
CV4
Factory preset: Channel After Touch, 0 to 5 Volts
MASTER CV CV1 incl. all controllers in the Master Controller
GATE1
+15 Volts active
TRIGG1
+15 Volts active
GATE2
+15 Volts active
TRIGG2
+15 Volts active
S-TRIG
Inverted gate, short circuit active
MIDI channel selector
CV
Main pitch, 1 Volt/ octave
GATE
Envelope generator gate, 1 Volt threshold
TRIGG
Envelope generator trigger, 1 Volt threshold
S-TRIG
Inverted gate, short circuit active
4
CALIBRATION
OSC1, OSC2, OSC3, SCALE; 1 Volt/octave
OSC1, OSC2, OSC3, RANGE; ’RANGE’ octave steps
MASTER, SCALE; general scale sensitivity calibration
MASTER, ANALOG CV INPUT; 1 Volt/octave
MAINS INLET
115/230 V
SELECTOR
Power cord inlet
INSTRUMENT
OUTPUTS
BALANCED, 16 dBVmax @ 600 ohm (rear panel)
SINGLE ENDED, 10 dBVmax (front and rear panel)
Switch for mains voltage selection
GETTING STARTED
We guess that the first of all, you want to hear how the S1 sounds. Before you get deeper into this manual
and all the functions of the S1, please take a short tour and make yourself familiar with some of the S1 basics.
Before you power up the S1, turn down the output level knob. The S1 can produce high output levels and
you should make sure not to burn your valuable preamp, speakers or even more, your valuable ears.
FIRST power up the S1 and then turn on your audio system.
Now please bring the controls of the S1 to a simple basic setting:
You can also use this setting as an initial "reset"-patch to where you can go back to as a starting point for
new sounds.
As soon you press a key on your keyboard (or start your sequencer), you should hear the sound of a simple
bass-lead. You may also copy the picture on next page and fill in your own settings.
5
Now begin to experiment:
- Turn the FILTER MIX knob in the MASTER AMP section in position LPF or MMF to hear signals of all
oscillators.
- Change the waveforms and tunings of the oscillators.
- Change the setting of the LPF- and MMF sections (CUTOFF, Q-PEAK, POLE, MODE) and move
the FILTER MIX knob in the MASTER AMP section. See how timbres are changing?
- Turn up the CUTOFF MODULATION (CM) knobs and experiment with the ENVELOPE GENERATOR
settings to add dynamic timbre changes to the sound.
Experiment with the parameters and try to become familiar with the S1. If something might behave
unexpectedly, please be patient. All related issues will be explained in this manual and with some practice,
you will soon be able to manage the S1 and create a universe of great sounds.
Patchbay
As we mentioned before, the S1 is a semi-modular system. All modules inputs and outputs are pre-patched
and can be altered or added by the use of patch-cords. To make the use of the patching capabilities most
easy as possible, there is a specific legend used on all sockets:
- Audio and CV outputs are revealed by white surround.
Since all outputs all short circuit protected,
there is no danger to couple output to output.
- Inputs are labelled in white text.
- Where an input is pre-patched internally, its source
is labelled red in a white box. These internal patches
are bypassed as soon as you insert a plug.
Master Controller
The Master Controller section determinates the master frequency and/or modulation depth to all modules
coupled to it, such as oscillators and filters. The four knobs are easy to understand:
MODULATION LEVEL is pre-patched to the LFO output and determinates the master modulation depth being
aplied to the incomming pitch CV (CV1), hereby modulating all oscillators and filters connected to the master
CV bus.
GLIDE determinates the time to glide from one note to another in 5 octave span.
TRANSPOSE is the master octave setting (± 3 octaves).
FINE TUNE (± 3 semitones).
The three MASTER CV switches disconnect the corresponding
oscillator from the incomming pitch CV. The oscillators are not
tracked anymore by an e.g. keyboard, thus allowing the creation
of sounds that are not related to a tonal scale.
All oscillators FM LEVEL (controlled by knobs) are calibrated (1 Volt/octave) and can be controlled by an
external sequencer or other CV source with calibrated 1Volt/octave signal.
MODULATION INPUT sockets; the inputs for individual
frequency control of the three oscillators are internally prepatched to the LFO's output, OSC1's output and OSC2's
output (as you can see on the labelling of these sockets).
The LFO's output is also pre-patched to the modulation
input for the master controller.
6
This allows you to individually modulate the frequency of each of oscillator and the master controller just by
moving the FM LEVEL knobs in the oscillator section. The same aplied to the MODULATION LEVEL knob
in the MASTER CONTROLLER section. The MODULATION INPUT sockets breaks these pre-patched
signals and allow you to redirect any other signal to frequency control of the oscillators and the master tuning.
The MIDI CV OUTPUTS sockets provide four different control voltages generated by the internal MIDI-CV
converter of the S1, corresponding to incomming MIDI data.
The MIDI-GATES & TRIGGERS sockets provide the gate and trigger signals that are internally connected
(sent) to the envelope generators. Gate and trigger signals, generated by the internal MIDI CONVERTER are
pre-patched to these inputs and can be overriden by inserting patch-cords.
The three corresponding TRIGG & GATE switches determinate the activating of the envelope generators
to received MIDI messages and/or trigger/gate signals, selected MIDI channel (1) or selected
MIDI channel+1 (2).
The first (left) switch selects the trigger signal starting ENVELOPE GENERATOR 1 and the third switch
does the same for ENVELOPE GENERATOR 2. They choose between trigger signals (generated from note
on massages) at MIDI channel 1 or MIDI channel +1 (2) OR " no trigger" (in the middle position).
The second switch selects the MIDI channel for activating of the ENVELOPE GENERATOR 2;
selected MIDI channel (1) or selected MIDI channel+1 (2).
The MASTER CV TRACKING knobs control the cutoff frequency tracking, and allow you to set the filters
to track the master pitch CV from 0% to 200%; you can e.g. make higher notes sound brighter than lower
notes, from no effect thru calibrated 1 Volt/octave (1/1) to extreme 2 Volt/octave (2/1).
Additionally, each filter has the individual CUTOFF MODULATION switch that allows CV3 (Modulation Wheel)
or CV4 (Aftertouch) to control the cutoff frequency.
7
MASTER GLIDE TIME CONTROLLER
1 millisecond to 10 seconds
MASTER TRANSPOSE
6 octaves in 1 octave steps
MASTER TUNING
± 3 semitones
MASTER MODULATION LEVEL
pre-patched to LFO
ENVELOPE GENERATOR 1 SELECTOR
TRIGGER 1, main MIDI channel
TRIGGER 2, main MIDI channel + 1
LOWPASS FILTER
MASTER CV TRACKING
0 to 2 octaves/Volt
MASTER CV1 CONTROL
ON/OFF SELECTOR for
OSCILLATORS 1, 2, 3
MULTI-MODE FILTER
MASTER CV TRACKING
0 to 2 octaves/Volt
ENVELOPE GENERATOR 2 SELECTOR
GATE 1, main MIDI channel
GATE 2, main MIDI channel + 1
MULTI-MODE FILTER CUTOFF
MODULATION
selector CV3-off-CV4
ENVELOPE GENERATOR 2 SELECTOR
TRIGGER 1, main MIDI channel
TRIGGER 2, mani MIDI channel + 1
FREQUENCY CONTROL INPUTS
OSCILLATOR 1, pre-patched to LFO
OSCILLATOR 2, pre-patched to OSCILLATOR 1
OSCILLATOR 3, pre-patched to OSCILLATOR 2
LOWPASS FILTER CUTOFF
MODULATION
selector CV3-off-CV4
MIDI CONVERTER CONTROL OUTPUTS
CV1 MASTER TUNING
CV2 VELOCITY
CV3 MODULATION WHEEL
CV4 AFTER TOUCH
(factory preset)
MODULATION
LEVEL
GLIDE
TRANSPOSE
FINE TUNE
LPF CUTOFF
MASTER CV
TRACKING
MASTER CONTROL INPUT
pre-patched to LFO
ENVELOPE GENERATOR 1
GATE and TRIGGER
EXTERNAL INPUTS
ENVELOPE GENERATOR 2
GATE and TRIGGER
EXTERNAL INPUTS
Master modulation level
1 millisecond to 10 seconds, 5 octave range
-3 to +3 in one octave steps
± 3 semitones.
Low-Pass Filter frequency corner tuning; amount of master control voltage
0 to 2 0ctaves/Volt, detent at 1Octave/Volt
LPF, CUTOFF
MODULATION
Low-Pass Filter frequency corner modulation source selector;
CV3-off-CV4, 5 Octaves range
MMF CUTOFF
MASTER CV
TRACKING
Multi-Mode Filter frequency corner tuning; amount of master control
voltage, 0 to 2 Octaves/Volt, detent at 1Octave/ Volt
MMF, CUTOFF
MODULATION
Multi-Mode Filter frequency corner modulation source selector;
CV3-off-CV4, 5 Octaves range
FREQUENCY MODULATION
Modulation inputs for Oscillators and Master Controller
CONTROLLER
OSCILLATOR 1
OSCILLATOR 2
OSCILLATOR 3
Pre-patched to LFO, 1 Volt/Octave.
Pre-patched to Oscillator 1 output, 1 Volt/octave
Pre-patched to Oscillator 2 output, 1 Volt/octave
MASTER
CONTROLLER
Pre-patched to LFO, 1 Volt/Octave
8
OSCILLATORS
The Oscillators (OSC1-3) are the main sound sources of the instrument. They are identical, except
to their pre-patched frequency modulation sources and the fact that OSC1 can be switched to LFO mode.
Oscillators are equipped with seven waveforms, sync and different frequency and pulse width modulation
routes. Given that, the oscillators offer a great flexibility in wave shaping process.
The oscillator's frequency is controlled by RANGE, TUNE, MASTER CONTROLLER and FM LEVEL.
RANGE determines the octave range of the oscillators within six octaves respective to the coarse tuning of
OSC1 in LFO-mode.
TUNE finetunes the oscillators (± 6 semitones).
FM LEVEL determinates the intensity of frequency modulation. Frequency modulation for oscillators has
different modulation sources (see table on the page 10) for a maximal modulation flexibility. Frequency
modulation, by an audio signal, creates so called "side-bands" that consist of sum and difference of signals
frequencies. These additional frequencies do mostly have a non harmonic sound. Modulation, by low periodic
waveforms, such as LFO or envelope generator creates momentary pitch shift of modulated oscillator common
named vibrato (by LFO) or pitch bend (by envelope generator).
More interesting things happen as soon as both frequencies are in the audio-range. The fast modulation
of the frequency creates so called "side-bands" that consist of sum and difference of signals frequencies.
These additional frequencies do mostly have a non harmonic sound or (with extreme modulation) noise.
Experiment first with sine waves at different frequency ranges, and then go for more complex waveforms.
SYNC means that sync'ed oscillators frequency is tracked by the frequency of controlling oscillator;
OSC3's frequency is syncronized to OSC2's frequency, OSC2's frequency is syncronized to OSC1's
frequency. When the tuned frequency of sync-ed oscillator has the same or multiple of frequency of controlling
oscillator then sync-ed oscillators waveform has no or very little "glitch" which results in a sync-ed smooth
waveform (i.e. sinus waveform). The sync-ed waveforms (with additional FM modulation) are perfect for
cutting edge lead sound and hard, funky basses.
You want to know how to trigger oscillators at zero-crossing to get most natural and static drum sounds?
Simply tune the synced oscillator to a multiple number of cycles (i.e. OSC1 = 110Hz and sync-ed
OSC2 = 880Hz). Listen to the synced oscillator only with a sine wave only and tune it, until the tone sounds
most "pure".
PULSE WIDTH % adjusts the pulse width of the pulse wave from 5% to 95%.
WAVEFORM selects the waveform or a mix of waveforms from an oscillator. PULSE WIDTH control works
also on the waveform mixes where the pulse wave is included.
The different waveforms contain different harmonic structures respective to their overtone content.
Thus they sound different from each other and can be used as raw material for creating different types
of sounds.
This is a brief description of waveforms:
contains low order harmonics with low amplitude and sounds "dull" or "pure". It's very useful for
* Sine
creating of whistles, flutes and other pure sounds.
contains more high order overtones than sine and sounds still "dull" and "pure" but with more
* Triangle
"edge". It is great for flutes or vibraphone-like sounds.
contains many overtones and sounds "rich" and "cutting". It is especially useful for strings,
* Saw
brass and vocal-like sounds
depends on the pulswidth. A symmetric wave (PW 50%) contains only odd harmonics and is
* Pulse
hollow- sounding. The more it differs from the symmetric wave, the more it sounds "edgy" and "nasal".
It is very useful for woodwind-like, pads, bass and string-like sounds.
* Mixed triangle + saw
* Mixed triangle + pulse
* Mixed saw + pulse
9
OSCILLATOR 1
RANGE
AUDIO mode
RANGE
LF mode
TUNE
PULSE WIDTH
Waveforms
0 (C2) to 6 (C8) in 1 octave steps.
8 seconds to 120 milliseconds.
± 6 semitones.
5% to 95%.
Sine, Triangle, Saw, Saw+Triangle, Triangle + Pulse, Saw+Pulse,
Pulse: ± 5 Volts.
OSCILLATOR 2
RANGE
TUNE
PULSE WIDTH
Waveforms
SYNC
0 (C2) to 6 (C8) in 1 octave steps.
± 6 semitones.
5% to 95%.
Sine, Triangle, Saw, Saw+Triangle, Triangle + Pulse, Saw+Pulse,
Pulse: ± 5 Volts.
Hard synchronized to Oscillator 1.
OSCILLATOR 3
RANGE
TUNE
PULSE WIDTH
Waveforms
SYNC
0 (C2) to 6 (C8) in 1 octave steps.
± 6 semitones.
5% to 95%.
Sine, Triangle, Saw, Saw+Triangle, Triangle + Pulse, Saw+Pulse,
Pulse: ± 5 Volts.
Hard synchronized to Oscillator 2.
OSCILLATORS CV INPUTS
These input sockets provide the use of external signals for amplitude (AM)- and pulse width modulation (PWM).
The LEVEL inputs provide amplitude modulation. Modulation of oscillator's level (amplitude) can be provided
by any low frequency- or audio signal, such as; LFO, Envelope Generators, Oscillators or any other signal
source. If audio signals are used, the resulting waveforms are complex and contain in addition to the carrier
frequency two inharmonic sidebands per spectral component. The sound character is familiar to the results of
FM and thus useful for generating of non harmonic sounds and noises.
The PWM inputs of OSC 1 and 2 are hardwired to the outputs of the MIXER described below. The pulse width
of all three oscillators can be modulated by any other signal.
10
CV, LEVEL
CV, PWM
Amplitude modulation input, ± 5 Volts wave @ 5Volts input CV.
Pulse width modulation input, 5% pulse width/ 1Volt input CV.
Mixer
This is a two input / two output DC-coupled mixer with input level controls. The inputs are pre-patched to the
LFO triangle wave and to the ENVELOPE GENERATOR 1, but can be coupled to any other source.
The outputs deliver the sum of the attenuated input signals and its inverted signal (sum+ and sum-). These
outputs are pre-patched to the PWM inputs of OSC1 and 2 (see above). Especially when using the LFO signal,
this can be a useful choice since the mixers outs provide the LFO signal with opposite polarity to OSC1's PWM
respective OSC2's PWM. Consequently, the oscillators pulse width sweeps in opposite directions which
results in interesting sonic possibilities.
INPUT LEVEL CONTROLS
MIXER INPUT 2
pre-patched to ENVELOPE GENERATOR 1
MIXER INPUT 1
pre-patched to LFO TRIANGLE
MIXER OUTPUT
pre-patched to OSCILLATOR 1
PULSE WIDTH MODULATION INPUT
EXT INPUT1
EXT INPUT2
S+ OUTPUT
S- OUTPUT
MIXER OUTPUT
pre-patched to OSCILLATOR 2
PULSE WIDTH MODULATION INPUT
Pre-patched to LFO triangle output, gain = 1.
Pre-patched to Envelope Generator 1 output, gain = 1.
Sum of input 1 and input 2, patched to
Oscillator 1, PWM input.
Inverted sum of Input 1 and Input 2, patched to
Oscillator 2, PWM input.
11
Ring Modulator
A ring modulator is a classic audio effect device and due to the non harmonic character of the output signal,
very useful to create metallic timbres such as bells, sweeping whistles and percussive sounds and tremolo
effects (modulated by low periodic signal like a LFO). Two input signals are needed and pre-patched to
OSC 2 and 3 sine wave outputs. Using the EXT INPUT sockets, any other signal (internal- or external signal
source) can be routed directly into the ring modulator. The AM input enables amplitude modulation effects
(see "Mixer"). The output signal of the ring modulator is routed internally into audio mixer of the Low Pass Filter
and Multi Mode Filter. The OUTPUT socket provide the ring modulator signal for other applications.
OUTPUT LEVEL CONTROL
RING MODULATOR OUTPUT
EXTERNAL SIGNAL INPUTS
pre-patched to
OSCILLATOR 1, 2 SINUS
EXT INPUTS
OUTPUT
LEVEL
Inputs, pre-patched to Oscillator 2, Sine Waveform,
and Oscillator 3 (sine).
Multiplier output.
Amplitude modulation input, 0 dB gain @ 5 Volts.
Noise Generator and Oscillators Outputs
Low frequency oscillator.
In addition to the internal routing, these output sockets provide the oscillator signals and three sorts of noise:
- WHITE noise has a balanced level of all frequencies and can be used to create wind sounds.
- RED noise contains more low frequencies and can be used to create thunder- or ocean-like sounds.
- LOW is a random low frequency signal that can be used as a modulation source to achieve sounds with
random character.
NOISE GENERATOR
White noise, red noise, low frequency noise
OSCILLATOR OUTPUTS OSC1, OSC2, OSC3 outputs
12
LFO, Low Frequency Oscillator
The LFO provides a sub-audio signal for modulation purposes. It is used to achieve periodic modulations
like sweeps, vibrato effects or arpeggios.
RATE determines the frequency of the LFO and is indicated by the LED
WAVEFORM SELECTOR provides seven different waveforms.
The patch-section offers some more LFO functions:
The GATE SOURCE SELECTOR switch enables the LFO to start at a zero-crossing and thus to sync
the LFO to MIDI/GATE 1, MIDI/GATE 2 or to an external signal patched to the EXT GATE socket.
Additional sockets allow the modulation of RATE and LEVEL and provide the LFO-OUTPUT.
Some interesting results can be achieved when the LFO OUTPUT is fed back to the EXT GATE input socket.
WAVEFORM
SELECTOR
RANDOM
RANDOM
SLEW RATE 1
RANDOM
SLEW RATE 2
TRIANGLE
LFO RATE
60 seconds to 16 milliseconds
(0.016Hz to 62.5Hz)
INVERTED
SAW TOOTH
SAW TOOTH
SQUARE
GATE SOURCE SELECTOR
MIDI GATE1/--/GATE2
LFO OUTPUT
RATE CONTROL INPUT
EXTERNAL GATE INPUT
AMPLITUDE CONTROL INPUT
RATE
Waveforms
FM
LEVEL
EXT GATE
60 seconds (0.016 Hz) to 16 milliseconds (62 Hz)
Sample&Hold random (3 speeds), triangle, sawtooth (double rate),
inverted sawtooth (double rate), square, all waveforms ± 5 Volts
Frequency modulation input, 1 Volt/octave
Amplitude modulation input, 0 dB gain @ 5 Volts CV
Synchronization to external signal (1V threshold)
or ”Gate1/Gate 2”
13
Low Pass Filter Audio Mixer
Audio mixer for oscillator 1, 2, 3, ring modulator and pre-patched multi mode filters output.
The output signals of the three oscillators, the ring modulator and the output signal of the multimode filter has
individual levels into the lowpass filter input. The red labelling indicates the saturation level of the filter's input
stage when one source is used. Using more than one signal source, leads to earlier saturation.
Multi Mode Audio Mixer
The output signals of the three oscillators, the ring modulator and pre-patched white noise has individual
levels into the multi-mode filter input. The thick scale indicates the clip level of the filter's input stage when
one source is used (with higf Q-PEAK setting). Using more than one signal source, leads to earlier clip.
LOWPASS FILTER AUDIO MIXER
OSCILLATOR 1, 2, 3, RING MODULATOR
and MULTI-MODE FILTER (pre-patched)
MULTI-MODEFILTER AUDIO MIXER
OSCILLATOR 1, 2, 3, RING MODULATOR
and WHITE NOISE (pre-patched)
14
Filters
The most important sound shaping device of every substractive synthesizer is the filter. It cuts off specific
and adjustable frequency ranges and thus overtones, which can result in drastic sonic changes of the
filtered audio material. In the following, you will find a brief description of a filter in general, more detailed
and technical information can be found on page 38 of this manual.
We distinguish between different TYPES of filters: low pass, high pass, band pass and notch:
* Low pass filter cuts off high frequencies and let low frequencies pass.
* High pass filter cuts off low frequencies and let high frequencies pass.
* Band pass filter cuts off high and low frequencies and let a more or less broad frequency bandpass.
A band pass filter is a low pass and a high pass fliter in series.
* Notch filters do the opposite and cuts out a more or less broad frequency band out of the frequency range.
A notch filter is a low pass and a high pass in parallel.
Low pass filters are the most common used for musicial applications and you'll find two in the S1.
To gain most extensive sonic capabilities, the S1 is also equipped with a multi mode filter, that can work as
low-, high-, and band-pass (see page 42).
Next to the filter type, the slope or NUMBER OF POLES defines the characteristics of a filter.
The slope defines how steep the filter cuts off the attenuated frequency range. It is measured in dB/octave
and one pole is equivalent to 6dB/octave. That means, that the most common 4 pole low pass filter cuts high
frequencies with an attenuation of 24dB/octave and more efficient 6 pole filter cuts 36dB/octave.
The steeper the slope, the more effective the filter works (cuts overtones or undertones). Since lower slopes
also produce very musical and sonically useful results, it makes sense to implement filters with switchable
slope. The S1's filters with its two corresponding 3-slope-settings are most versatile and musically useful.
The next basic parameter is the CUTOFF-FREQUENCY or corner frequency. It defines at which frequency
the filter starts to work, respective to attenuates frequencies. On the S1, the cutoff of both filters can be
adjusted from 16Hz to 16kHz (by CUTOFF knob) and has a total frequency range from 5Hz to 30kHz.
Lets have a look on Q-PEAK. This parameter is also known as "resonance" or "emphasis". It boost the
frequencies in the range of the cutoff and makes the tone sound more "cutting". From a certain level on,
the filter starts self-oscillating and works as a sine wave oscillator.
The configuration of LPF and MMF coupled in series and/or in parallel creates a formant filter for various
vocal like sounds.
LOW PASS FILTER
The Low Pass Filter, in 4 pole mode, emulates the familiar low pass filter in some analogue synthesizer.
S1's Low Pass Filter expands sonic potential by adding a unique designed 6 pole low pass mode and quasi
band pass mode.
LPF is characterized by a non-linear transfer function, so-called saturation mode that is affected by the level
of the incoming signal. In the audio mixer the red markings on the potentiometer scales show the level at
which the filter operates in the saturation mode (For more details see LOW PASS FILTER, page 40).
The design quality of LPF's and new features makes the LPF more flexible than any other low pass filter used
in analogue synthesizers and results in qualities, such as:
* CUTOFF, Q-PEAK and output level are voltage controlled
* 4 and 6 poles low pass mode (24 dB/octave and 36 dB/octave)
* Qasi Band pass mode (6dB/octave high pass on low side and 24dB/octave low pass on high side)
* Saturable; from "warm" and "smooth" sound (at low to moderate level of incoming signal)
to heavy distorted "nasty" and "aggressive" (at high level of incoming signals)
* Ideal as "effect filter" with external sound material
* Low noise
15
FUNCTIONS
CUTOFF controls the filters cutoff- (or corner-) frequency.
POLE selects between 4 pole low pass, quasi band pass (that sounds different than the "true" bandpass of
the MMF) and 6 pole low pass.
Q-PEAK determines the boost of the corner frequency. From "9" on, the filter starts self-oscillating.
To create useful and interesting sounds, the cutoff parameter has to be controlled dynamically.
This is mostly done by the later described envelope generators and/or by modulating the cutoff with
a periodical signal e.g. an LFO- or an audio signal. This is done with the cutoff modulation section (CM).
CUTOFF MODULATION
CM 1 adjusts the corner frequency modulation intensity by ENVELOPE GENERATOR 1.
ENVELOPE GENERATOR 1 switch inverts the control voltage of envelope generator 1.
CM 2 adjusts the corner frequency modulation intensity by ENVELOPE GENERATOR 2.
ENVELOPE GENERATOR 2 switch inverts the control voltage of envelope generator 2
OSC1/LFO adjusts the corner frequency modulation intensity by the triangle waveform of OSC1 respective
to the LFO. Maximum sweep reaching over +/-5 octaves.
OSC1 LFO switch selects the triangle waveform of OSC1 or the LFO as modulation source.
AUDIO
In the patch section of the LPF you'll find the HI Z INPUT which is an additional and patchable input.
It is internally pre-patched to the audio output of the Multi Mode Filter. This level is adjustable in the LPF
MIXER section as described above.
OUTPUT socket allows the filtered audio signal be coupled to any input. It's destinated to
the audio input of the AMP-section (FILTER MIX).
CV
Here you'll find patchable modulation-inputs for the LPF:
CUTOFF can be used to provide other signals than the triangle waveform of OSC1 or the LFO (to which it is
internally routed; see above) as a modulation source for the cutoff frequency. Use the OSC1/LFO knob to
adjust the modulation intensity.
LEVEL can be used for gain-control respectively amplitude-modulation of the LPF output signal.
Q-PEAK enables the resonance to be voltage controlled. Again, using audio signals for cv duty can provide
interesting results.
16
CUTOFF (CORNER FREQUENCY)
TUNING; 16 Hz to 16 kHz
4 POLE / BANDPASS
6 POLE SELECTOR
CORNER PEAK CONTROL
FLAT to OSCILLATION
SOURCE SELECTOR
POSITIVE/ NEGATIVE GOING
ENVELOPE GENERATOR 1
CORNER FREQUENCY MODULATION
by ENVELOPE GENERATOR 1
SOURCE SELECTOR
POSITIVE/ NEGATIVE GOING
ENVELOPE GENERATOR 2
CORNER FREQUENCY MODULATION
by ENVELOPE GENERATOR 2
CORNER FREQUENCY MODULATION
by OSCILLATOR1 TRIANGLE/ LFO
SOURCE SELECTOR
OSCILLATOR 1 TRIANGLE/ LFO
EXTERNAL AUDIO INPUT
pre-patched to
MULTI-MODE FILTER, OUTPUT
FILTER OUTPUT
CORNER FREQUENCY, EXTERNAL
MODULATION INPUT, pre-patched to
OSCILLATOR 1 TRIANGLE/ LFO
CUTOFF
LEVEL
FILTER GAIN CONTROL
Q-PEAK
Q-PEAK CONTROL
Frequency corner; 16 Hz to 16 kHz
Flat to self-oscillation
4/6 poles (24/36 dB/octave) and additional BAND-PASS mode
Envelope Generator 1; 0 to ±10 octaves
CM; CUTOFF
Envelope Generator 2; 0 to ±10 octave
MODULATION
Oscillator 1 (triangle)/LFO; 0 to ±5 octaves
High Z (4 Mohm input impedance),
AUDIO
EXTERNAL INPUT 1 Volt input for gain = 0 dB
AUDIO, OUTPUT Filter output
Frequency modulation input, 1 Volt/octave,
CV, CUTOFF
pre-patched to Oscillator 1 (triangle)/ LFO
CV, LEVEL
Amplitude modulation input, 0 dB gain @ 5 Volts CV
CV, Q-PEAK
Resonance, flat to self-oscillation @ 4 to 5 Volts CV
CUTOFF
Q-PEAK
POLES
17
MULTI MODE FILTER
The MMF is the most flexible filter found in any monophonic synthesizer. The whole circuit solution of
the filter is an analogue "state of the art" and results in remarkable qualities such as:
* Wide frequency range from 5 Hz to 25 kHz
* Vital parameters such as CUTOFF, Q-PEAK and LEVEL (output)
* Selectable 2-, 4- and 6 poles
* Low-, high-, band pass mode
* Very clean sound even in self oscillation mode
* Ideal as "effect filter" with external sound material
* Clean, yet "warm" and "smooth" sound
* Low noise
The Multi Mode Filter, with a wide range of controllable parameters, is especially useful as a tool to create
various high quality sounds and recreate "sounds" from many classic synthesizers, as well.
Those qualities make the Multi Mode Filter a perfect complement to the Low Pass Filter.
Configuration in series or parallel the LPF and MMF filters make it easy to create various vocal like sounds
or filter with an extreme steep slope (up to 72 dB/octave in low pass mode)
FUNCTIONS
CUTOFF controls the cutoff- (or corner-) frequency of the filter from 16Hz to 16kHz.
POLE selects between 2, 4 and 6 pole configuration for 12-, 24-, and 36dB/octave slope
Q-PEAK determines the boost of the corner frequency. From "9" on, the filter starts self-oscillating.
To create useful and interesting sounds, the cutoff parameter has to be controlled dynamically.
This is mostly done by the later described envelope generators and/or by modulating the cutoff with
a periodical signal e.g. an LFO- or an audio signal. This is done with the cutoff modulation section (CM).
CUTOFF MODULATION
CM 1 adjusts the corner frequency modulation intensity by ENVELOPE GENERATOR 1.
ENVELOPE GENERATOR 1 switch inverts the control voltage of envelope generator 1.
CM 2 adjusts the corner frequency modulation intensity by ENVELOPE GENERATOR 2.
ENVELOPE GENERATOR 2 switch inverts the control voltage of envelope generator 2
OSC1/LFO adjusts the corner frequency modulation intensity by the triangle waveform of OSC1 respective
to the LFO. Maximum sweep reaching over +/-5 octaves.
OSC1 LFO switch selects the triangle waveform of OSC1 or the LFO as modulation source.
AUDIO
In the patch-section of the MMF you'll find the HI Z INPUT which is an additional and patchable input.
It is internally prepatched to the WHITE NOISE. This level is adjustable in the MMF MIXER section.
OUTPUT socket allows the filtered audio signal be coupled to any input. It's destinated to
the audio input of the AMP-section (FILTER MIX).
CV
Here you'll find patchable modulation-inputs for the MMF:
CUTOFF can be used to provide other signals than the triangle waveform of OSC1 or the LFO (to which it is
internally routed; see above) as a modulation source for the cutoff frequency. Use the OSC1/LFO knob to
adjust the modulation intensity.
LEVEL can be used for gain-control respective to the amplitude-modulation output signal of the MMF.
Q-PEAK enables the resonance to be voltage controlled. Again using audio-signals can provide interesting
results.
18
CUTOFF FREQUENCY TUNING
16 Hz to 16 kHz
2-4-6 POLE SELECTOR
LOW-PASS/ HIGH-PASS/ BAND-PASS
MODE SELECTOR
CORNER PEAK CONTROL
FLAT to OSCILLATION
SOURCE SELECTOR
POSITIVE/ NEGATIVE GOING
ENVELOPE GENERATOR 1
CUTOFF FREQUENCY MODULATION
by ENVELOPE GENERATOR 1
SOURCE SELECTOR
POSITIVE/ NEGATIVE GOING
ENVELOPE GENERATOR 2
CUTOFF FREQUENCY MODULATION
by ENVELOPE GENERATOR 2
SOURCE SELECTOR
OSCILLATOR 1 TRIANGLE/ LFO
CUTOFF FREQUENCY MODULATION
by OSCILLATOR1 TRIANGLE/ LFO
EXTERNAL AUDIO INPUT
pre-patched to WHITE NOISE
FILTER OUTPUT
CUTOFF, EXTERNAL MODULATION INPUT
pre-patched to
OSCILLATOR 1 TRIANGLE/ LFO
CUTOFF
LEVEL
FILTER GAIN CONTROL
CUTOFF
Q-PEAK
POLES
Q-PEAK
Q-PEAK CONTROL
Frequency corner; 16Hz to 16kHz
Flat to self-oscillation
2/4/6 poles (12/24/36 dB/oct) @ low-pass and high-pass mode
2/4/6 poles (6/12/18 dB/oct) @ band-pass mode
Envelope Generator 1; 0 to ±10 octaves
Envelope Generator 2; 0 to ±10 octaves
Oscillator 1 (triangle)/LFO; 0 to ±5 octaves
High Z (4 Mohm input impedance),
AUDIO
EXTERNAL INPUT 1 Volt input for gain = 0 dB
AUDIO, OUTPUT Filter output
Frequency modulation input, 1 Volt/octave,
CV, CUTOFF
Pre/patched to Oscillator 1 (triangle)/ LFO
CV, LEVEL
Amplitude modulation input, 0 dB gain @ 5 Volts CV
CV, Q-PEAK
Resonance, flat to self-oscillation @ 4 to 5 Volts CV
CM; CUTOFF
MODULATION
19
Envelope Generators
The envelope generators provide control voltages (CV's) that can be used to dynamicy change of parameters,
such as; frequency, amplitude, pulse width, cutoff.
The most common use is in connection with a filter and a voltage controlled amplifier in order to achieve
dynamic timbre- and level-changes. Thus the envelopes of the S1 are internally connected to the oscillators,
filters and the amp, but can be routed elsewhere via the patch-panel.
Both envelope generators are identical.
ATTACK TIME Time needed to reach the envelopes full level after a key is pressed (or the EG is started
otherwise).
DECAY TIME Time needed to fall down from the full level to the sustain level.
SUSTAIN LEVEL Level that is held as long as a key is pressed.
RELEASE TIME Time needed to fall down to zero level after key is released (or other note-off command has
been received).
GATE DELAY TIME Delay time between note-on command and start of the attack-phase.
ENVELOPE OUTPUTS
Provides the control voltages of the envelope and the inverted voltage.
CV INPUTS, external controls of envelopes
Allows the voltage control of all envelope parameters. This is very useful fea ture for modelling of complex
dynamic sounds.
ATTACK TIME
0,5 milliseconds
to 20 seconds
DECAY TIME
0,5 milliseconds
to 20 seconds
SUSTAIN LEVEL
0 to 5 Volts
RELEASE TIME
0,5 milliseconds
to 20 seconds
GATE DELAY TIME
1 milliseconds
to 10 seconds
ENVELOPE OUTPUT
INVERTED
0 to -5 Volts
ENVELOPE OUTPUT
0 to 5 Volts
ATTACK TIME
CONTROL INPUT
DECAY TIME
CONTROL INPUT
SUSTAIN LEVEL
CONTROL INPUT
RELEASE TIME
CONTROL INPUT
20
ENVELOPE LEVEL
CONTROL INPUT
DELAY TIME
CONTROL INPUT
ATTACK TIME
DECAY TIME
SUSTAIN LEVEL
RELEASE TIME
DELAY TIME
CV, ATTACK
CV, DECAY
CV, SUSTAIN
CV, RELEASE
CV, DELAY
CV, LEVEL
OUTPUTS
0.5 milliseconds to 20 seconds
0.5 milliseconds to 20 seconds
0 to 5 Volts
0.5 milliseconds to 20 seconds
1 millisecond to 10 seconds
0.5 milliseconds to 20 seconds @ 0 to 5 Volts CV
0.5 milliseconds to 20 seconds @ 0 to 5 Volts CV
0 to 5 Volts @ 0 to 5 Volts CV
0.5 milliseconds to 20 seconds @ 0 to 5 Volts CV
1 milliseconds to 10 seconds @ 0 to 5 Volts CV
Amplitude modulation, 5 Volts signal peak @ 5Volts CV
Positive going, 0 to + 5 Volts
Negative going, 0 to - 5 Volts
Master Amplifier
The envelope generators provide control voltages that can be used to dynamically change timbres.
This section provides the output stage of the S1. The internally routed audio signals are summed, amplified
and sent to the instrument's outputs.
FILTER MIX adjusts the mix ratio between LPF- and MMF-outputs in any proportion.
OVERDRIVE makes the S1 sound "nasty" and "grungy".
OUTPUT LEVEL controls the overall signal level, sent to your audio system.
AMPL MODULATION
The level of the sound can be dynamically controlled by the envelope generators.
ENVELOPE MIX adjusts the mixing ratio between both envelopes in any proportion.
ENVELOPE MODE switch determines how much the signal is attenuated over time. Logarithmic mode (log)
is very useful for extremely percussive sounds.
The patch section provides:
AUDIO
EXT INPUT can be used to process external audio material in the S1' amp section. It is prepatched to the LPF
output. Its level can be adjusted by the FILTER MIX knob.
OUTPUT provides a master audio output in addition to the one on the backside.
CV
ON / OFF switch makes the S1' amp velocity-sensitive, since it is pre-patched to CV2 (MIDI velocity).
Using the EXT VELOCITY socket, any other signal can be used to control the velocity.
21
LOW-PASS and MULTI-MODE FILTER
AUDIO MIXER
OVERDRIVE CONTROLLER
CLEAN (0) to SATURATED (10)
AUDIO OUTPUT
LEVEL
ENVELOPE GENERATOR 1 & 2
AMPLITUDE CONTROL MIXER
AMPLITUDE CONTROL MODE
LINEAR 20%/Volt
LOG 16 dB/Volt
EXTERNAL AUDIO INPUT
pre-patched to
LOW-PASS FILTER OUTPUT
MASTER AMPLIFIER
AUDIO OUTPUT
VELOCITY CONTROL
SWITCH
EXTERNAL VELOCITY CONTROL
and AMP MODULATION
pre-patched to CV2
AUDIO,
FILTER MIX
AUDIO,
OVERDRIVE
AUDIO, EXT INPUT
AUDIO, OUTPUT
AM,
ENVELOPE MODE
AM,
ENVELOPE MODE
AM, EXT VELOCITY
Mix control for Lowpass Filter and
Multi-Mode Filter audio output.
Overdrive control from clean to full saturated
audio signal output.
Audio input, pre-patched to Lowpass Filter output.
Instruments audio output.
Envelope1 and Envelope2 panning mixer
for amplifiers amplitude modulation.
Linear mode, gain 0 dB @ 5 Volts CV, 20%/ Volt.
log mode, gain 0dB @ 5 Volts CV, 15 dB/ Volt.
Velocity control, pre-patched to CV2.
22
REAR PANEL
23
MIDI INTERFACE
MIDI IN (and programming), MIDI OUT (only program verification)
and MIDI THRU
CV1
CV2
CV3
MIDI OUTPUTS
MIDI CHANNEL
ANALOG
INPUTS
CALIBRATION
MAINS INLET
115/230 V
SELECTOR
INSTRUMENT
OUTPUTS
Fixed: main tune, 0 to 10 Volts (10 octaves)
Factory preset: Note on Velocity, 0 to 5 Volts
Factory preset: Control Change #05,
Modulation Wheel, 0 Volt ± 5 Volts
CV4 Factory preset: Channel After Touch, 0 to 5 Volts
MASTER CV + Glide & Pitch Bend control
GATE1 +15 Volts active
TRIGG1 +15 Volts active
GATE2 +15 Volts active
TRIGG2 +15 Volts active
STRIG inverted gate, short circuit active
MIDI channel selector
CV
main tune, 1 Volt/ octave
GATE envelope generator gate, 1 Volt threshold
TRIGG envelope generator trigger, 1 Volt threshold
STRIG inverted gate, short circuit active
OSC1, OSC2, OSC3 SCALE; for sensitivity 1 Volt/octave
OSC1, OSC2, OSC3 RANGE; ’RANGE’ selectors
octave calibration
MASTER, SCALE; general scale sensitivity calibration
MASTER, ANALOG CV INPUT; analog control
voltage calibration, 1 Volt/octave, 5% range.
Power cord inlet
Switch for mains voltage selection
BALANCED, 16 dBVmax @ 600 ohm (rear panel)
SINGLE ENDED, 10 dBVmax (front and rear panel)
CALIBRATION
OSCILLATOR SCALE
Oscillator 1:
1. Connect MIDI keyboard to synthesizer (MIDI IN).
2. Set oscillator 1 and 2 to sawtooth waveform.
3. Set the LPF MIXER control knobs on oscillator 1 and 2 to position 8, and all other control
knobs to position 0.
4. Set LPF CUTOFF control knob to position 10
5. Set AMP FILTER MIXER control knob to position LPF.
6. On MASTER CV set switch for OSC2 to off.
7. On OSC 1 set RANGE and TUNE to position 0.
8. On OSC 2 or OSC 3 set RANGE switch to position 1, and TUNE to position 0 for 5 octave
keyboard or position 0 for 8 octave keyboard (Master keyboard).
9. Press the lowest C on the keyboard and adjust FINE TUNE on the MASTER CONTROLLER until
both oscillators have the same frequency and minimum phase shift.
10. Press each successively higher C (C3, C4, C5, etc.). Adjust trim potentiometer OSC1, SCALE
on the rear panel for correct frequency. The frequency of Oscillator 1 must correspond to C3,
C4, C5, etc. When correctly adjusted the Oscillator 1 frequency is exactly 2, 4, 8, 16…etc.
times higher than Oscillator 2.
24
Oscillator 2 and 3:
Repeat
1.
the procedure as for Oscillator 1, using one of the other oscillators as reference.
OSCILLATOR RANGE
Oscillator 1:
1. On MASTER CV set switch for OSC1 and OSC2 to ON.
2. On OSC 1 and OSC 2 set RANGE switch and TUNE to position 0.
3. Press any key on the keyboard.
4. Carefully adjust TUNE on Oscillator 1 until both oscillators have the same frequency and
minimum phase shift.
5. Step up the RANGE switch on Oscillator 1 and adjust trim potentiometer OSC1, RANGE for
correct frequency. When correctly adjusted the Oscillator 1 frequency must be 1, 2, 3, 4,…
etc. octaves higher than Oscillator 2 (i.e. exact multiples of one octave).
Oscillator 2 and 3:
Repeat the procedure as for Oscillator 1, using one of the other oscillators as reference.
MASTER SCALE
This procedure tunes the entire instrument. The object is to calibrate CV1 and MASTER CV
(rear panel) for 1 Volt/octave.
If the oscillators correspond internally over 4-5 octaves any one of them may be used for a
reference tone, otherwise an external source must be used.
Perform the calibration using the MASTER SCALE trim potentiometer.
MASTER ANALOG CV
An external analog control voltage from, e.g. an analog synthesizer or other instrument with an
analog control voltage output can control the instrument.
Perform the calibration using the MASTER ANALOG CV trim potentiometer on the rear panel.
) Therefore the source of
NOTE: All the trim potentiometers have limited trim ranges (about 5%..
external control voltage must not deviate by more than 2-3% from 1 Volt/octave.
25
MIDI
General
The MIDI interface is a so-called MIDI to CV & Gate/Trigger that converts MIDI messages to
analog control voltages (CV) and Gate/Trigger (Gate/Trigg) control voltages. There are six CV
channels, CV1-CV6, and two Gate/Trigg ports, Gate1/Trigg1 and Gate2/Trigg2.
All the functions that have an external ’Control Voltage Input’, normally marked ’CV’ can be
controlled via MIDI control voltages CV1-CV4.
The MIDI interface is preconfigured for certain functions, see description below, but can be reconfigurated by first programming the MIDI message that is to control the CV output and then
routing the CV output to the module to be controlled.
For example, CV2 can be configured to be controlled by a foot controller instead of Note-On
Velocity which is the factory-preset configuration. Or CV4 can be programmed to accentuate a
filter at a certain keystroke, so-called accent function instead of the preset configuration which
is Channel After Touch. See CV Gate/Trigg Configuration below.
MIDI channels are selected by the MIDI CHANNEL switch on the Rear Panel. This switch sets
the address in binary form.
MIDI channel 1; all pins down (0000).
I
I
MIDI channel 16; all pins up (1111).
MIDI channel switch, code pattern
Startup
After startup of the instrument all CV outputs are at 0 Volt and Gate/Trigg outputs are actively low
(0Volt). MIDI mode is Mono On, Omni off.
CV1 and Gate1/Trigg1
Function
CV1 is used to control the Main Tune and is permanently programmed for MIDI Note On/Off
messages. When a Note-On message is received a corresponding control voltage is sent to
the CV1 output, Gate 1 goes actively high and Trigg 1 generates a short pulse. When a
corresponding Note-Off message is received, Gate 1 goes actively low and CV1 retains its
value.
CV1 is preprogrammed to produce 0 Volt out with MIDI note number 24. The tone it produces
is selected by, among other things, transposing the Master Controller’s selector and the
oscillator Range switch (see description of oscillators for more detail). The notes with
numbers lower than 24 are ignored by default but can be reprogrammed to provide a total
register of 10 octaves.
If several Note-On messages are received in sequence the most recently received note is
played. For each Note-On message a new Trigg 1 pulse is generated if it is not inhibited by the
Legato mode. When a Note-Off message is received the previous note is sent out and a new
Trigg 1 pulse is generated. Five simultaneous Note-On messages can be stored in the
memory.
CV1 controls, via MASTER CONTROLLER selector switches on the front panel, the frequency
of the oscillators (switches OSC1, OSC2, OSC3) and the frequency corners of the filters (LPF
TUNE and MMF).
26
Gate1 activates Envelope Generator 1 (with fixed connection to Gate1) and/or Envelope
Generator 2. The selection is made by MASTER CONTROLLER selector switches GATE 1
1-off-2 and GATE 2 1-off-2 on the front panel. Gate1 can also control LFO Sync via a switch
in the LFO Gate1-Gate2 section.
Trigg1 is used to retrigger Envelope Generators (attack and decay portion of envelope signal). This can
be disabled by MASTER CONTROLLER selector switches TRIGG 1 1-off-2 and TRIGG 2 1-off-2 on the
front panel.
Connections
CV1 is accessible from both the front and rear panels, see the figures below. Gate1 is accessible as an
output on the rear panel in the MIDI CONVERTER OUTPUTS section. Gate 1 can be complemented by
the signal GATE in the ANALOG INPUTS section on the rear panel. Trigg1 is accessible as an output on
the rear panel in the MIDI CONVERTER OUTPUTS section. TRIGG1 can be complemented by the
signal TRIGG in the ANALOG INPUTS section on the rear panel.
Gate2/Trigg2
Function
Gate2 and Trigg2 follow Note-On messages on the selected MIDI-channel + 1. This is useful,
for example when using the selected MIDI channel for melodies and main rhythm patterns, and
the selected MIDI channel + 1 for added rhythm patterns.
When a Note-On message on MIDI channel + 1 is received, the corresponding Gate2 goes
(actively) high and Trigg2 produces a short pulse. When the corresponding Note-Off message
comes, Gate2 goes actively low. The notes with numbers lower than 24 are ignored by default
but can be reprogrammed to provide a total register of 10 octaves.
If several Note-On messages are received in sequence Gate2 is held (actively) high the entire
time and a new Trigg2 pulse is generated. Five simultaneous Note-On messages can be stored
in the memory.
Gate2 can control Envelope Generator 2 via MASTER CONTROLLER selector switch GATE 2
1-off-2 on the front panel. Gate 2 can also control LFO Sync via a switch in the LFO Gate1-Gate2
sec tion.
Trigg2 is used to control Envelope Generator 1 or Envelope via MASTER CONTROLLER
selector switches TRIGG 1 1-off-2 and TRIGG 2 1-off-2 on the front panel.
Connections
Gate2 is accessible as an output on the rear panel in the MIDI CONVERTER OUTPUTS section.
Trigg2 is accessible as an output on the rear panel in the MIDI CONVERTER OUTPUTS section.
The following two drawings show the MIDI GATES & TRIGGERS at the bottom left of the front panel
and the MIDI CONVERTER OUTPUTS on the rear panel.
MIDI outputs and pre-patched Envelope Generators Gate/Trigg inputs at bottom left on Front Panel
Rear Panel, MIDI Converter outputs
27
CV2
Function
CV2 is preprogrammed for Note-On Velocity but can be reprogrammed, see the following
section Functions for CV Outputs . CV2 is pre-patched for amplitude control but can be deselected by a switch under the AMP-CV section. Default sensitivity is 100% but can be altered,
see CV Gate/Trig Configuration below.
Connections
CV2 is accessible from both the front and rear panels, see the figures above. CV2 can also be
substituted by an external control voltage via an input on the front panel under ’AMP-CV’
section.
CV3
Function
CV3 is preprogrammed for Control Change #1, Modulation Wheel messages, but can be
reprogrammed to react on any MIDI message, see Parameter Programming below.
CV3 is pre-patched for Fixed Modulation CV Select for LOWPASS FILTER and MULTI-MODE
FILTER frequency corner modulation. Default sensitivity is 100% but can be altered, see CV
Gate/Trig Configuration below.
Connections
CV3 is accessible from both the front and rear panels, see the figures above.
CV4
Function
CV4 is preprogrammed for Channel Aftertouch messages, but can be reprogrammed to react
on any MIDI message, see Parameter Programming below.
CV4 is pre-patched for Fixed Modulation CV Select for LOWPASS FILTER and MULTI-MODE
FILTER frequency corner modulation. Default sensitivity is 100% but can be altered, see CV
Gate/Trig Configuration below.
Connections
CV4 is accessible from both the front and rear panels, see the figures above.
CV5
Function
CV5 is preprogrammed for Control Change #5, Portamento (Glide) Time, but can be
reprogrammed to react on any MIDI message, see Parameter Programming below. Default
sensitivity is 100% but can be altered, see CV Gate/Trig Configuration below.
Connections
CV5 is not accessible as an output.
CV6
Function
CV6 is preprogrammed for Pitch Wheel messages, but can be reprogrammed to react on any
MIDI message, see Parameter Programming below. CV6 is prepatched to the Master Controller
for modulation of oscillator pitch and frequency corners of the filters. Default sensitivity is set
to ±24 semitones but can be set anywhere between ±1-24 semitones in semitone steps, see
CV Gate/Trig Configuration below.
Connections
CV6 is not accessible as an output.
28
How MIDI Messages are Handled
Program Change
Program Change messages with patch #01 restore the parameter settings to their default
values. A currently played note is turned off by making both Gate 1 and Gate 2 inactive, the
CV1 output is held at its latest value. The Note Stack is emptied. All CV Outputs on the S1 that
are programmed for a controller or other function output are cleared, the output is set to 0V
and the Pitch Wheel is centered. All other patch numbers are ignored. Note that restoring the
parameter memory via the Program Change message takes a couple of hundred milliseconds
and during this time no other messages will be handled.
Hold Pedal, Legato Pedal
The Hold Pedal message sustains a note being played by keeping the Gate1 output active
regardless of Note-Off messages. The Gate2 output is affected in the same way when the
message is received on selected MIDI channel +1.
Legato Pedal messages cause a legato effect by not making the Trig1 output active for Note-On
messages. The Trig2 output is affected in the same way when the message is received on MIDI
channel+1.
All Notes-Off Message
Turns off a played note. Gate1 is made inactive. Pitch output is held at its latest value.
A played note is not turned off if the Hold pedal is active. Gate2 is affected in the same way when
the message is received on MIDI channel+1.
All Sound-Off Message
Turns off a played note. Gate1 is made inactive. Pitch output is held at its latest value.
A played note is turned off even if the Hold pedal is active. Gate2 is affected in the same way
when the message is received on MIDI channel+1.
Reset All Controllers Message
Resets all controllers to default states. All CV Outputs on the S1 programmed for a controller
or other function output are cleared, the output is set to 0V and the Pitch Wheel is centered.
Omni On/Off Messages
Turns Omni mode on or off. Note that the second byte in Omni On messages is not recognized
since the S1 is a monophonic instrument. A currently played note is turned off by making both
Gate1 and Gate2 inactive but the CV1 output is held at its latest value. The Note Stack is also
emptied.
Reset Message Received
When the reset message is received the MIDI interface performs a warm reset. The description
regarding Power On describes what happens.
CV Gate/Trigg Configuration
Configuring the CV outputs is made in two steps. First a parameter must be set to define
which MIDI message is to control the output. Then the CV output must be routed to the
desired module.
29
Settings for CV Outputs
CV Output 1 is always Pitch Out and it is not possible to use it for anything else.
CV Outputs 2-5 can be programmed to react to MIDI Controllers or a number of pre-defined
functions. These functions are listed below and in Table 1:
1. MIDI Control Change. The CV function parameter is set to 0-119 which corresponds to
controller #0-119. When a CV output is programmed for a Controller only 7-bit values
are handled, i.e. if both Coarse and Fine messages are received for the controller only
the portion that has been programmed is used. Controllers that are used for parameter
programming or other predefined functions cannot be used for a CV output – this
applies to RPN/NRPN controllers, Data Entry controllers and Hold/Legato pedal
controllers. When a CV output is programmed for a controller the CV Range parameter
sensitivity is between 0% - 200%.
2. Note-On Velocity: If the CV Function parameter is set to 121 the CV output produces a value
corresponding to Note-On Velocity for notes that are played. The CV Range parameter determines
sensitivity between 0% - 200%.
3. Accent: If the CV Function parameter is set to 123 the CV output goes high = 5V if the Note-On
velocity reaches a certain value. The CV Range parameter determines the value at which the output
goes high and can be 0-127.
4. Key Aftertouch: If the CV Function parameter is set to 124 the CV output produces a value
corresponding to Key Aftertouch messages for notes that are played. The CV Range parameter
determines sensitivity between 0% - 200%.
5. Note-Off Velocity: If the CV Function parameter is set to 125 the CV output produces a value
corresponding to Note-Off Velocity for notes that are released. The CV Range parameter determines
sensitivity between 0% - 200%.
6. Channel Aftertouch. If the CV Function parameter is set to 126 the CV output produces a value
corresponding to Channel Aftertouch. The CV Range parameter determines sensitivity between
0% - 200%.
7. Unused: If the CV Function parameter is set to 120, 122 or 127 the CV output is blocked and will not
react to any messages. The CV output is set to a constant 0V.
See Table 1 for further details.
CV Output 6 is always Pitch Wheel Out and it is not possible to use it for anything else. Pitch
Wheel Range can be set either by changing the parameter as described below or by RPN message
Pitch Bend Range, 0x0000.
Setting Parameters
Parameters for the CV outputs are set by NRPN messages as follows:
·
Initialize the NRPN Coarse part to 0.
·
Select the parameter by the NRPN Fine part. See Table 1 for details.
·
Send a Data Entry Coarse message with the required value. Since parameters are always between
0-127 the Data Entry Fine message is not needed.
The NRPN Coarse and Fine values will be retained until another NRPN or RPN message is
received or until the S1 is turned off.
Note: When done with parameter changes NRPN Coarse and Fine should be set to 0x7f,
(NRPN/RPN zero value). This is to avoid changing the parameters unintentionally.
Example 1:
The CV2 Function is programmed for Note-On Velocity as default. To change this to react instead
to the Foot Controller (#04) do the following:
·
Send an NRPN Coarse (#99) message with value 0.
·
Send an NRPN Fine (#98) message with value 03 to select the CV2 Function parameter.
·
Send a Data Entry Coarse (#06) message with value 04 to set the new function.
30
Example 2:
The CV2 Output Range is set to 32 as default. To change this to 64 for a 200% range instead do
the following. Presume that the instrument has not received any other messages and has not been
turned off since the last parameter change.
· The NRPN Coarse message need not be set since it will retain its last value.
· Send an NRPN Fine message with value 09 to select the CV2 Range parameter.
· Send a Data Entry Coarse message with value 64 to set the new range.
Example 3:
The CV2 Output Range is now changed but is to be changed to 16 to provide 50% range instead.
· The NRPN Fine message need not to be set since it will retain its last value.
· Send a Data Entry Coarse message with value 16 to set the new range.
Routing the CV Outputs
CV outputs to the different modules are routed via switches on the front panel and/or with patch cables.
Route with switches as follows:
· Turn off the switch on the front panel that the CV output is currently using. Remove any patch cable that
might be connected.
· Find the switch on the front panel that is to be used and select it.
Route with patch cables as follows:
· Remove patch cable from the CV output that is currently in use and turn off any switch that is currently
used for the CV output.
Reroute the patch cable to the new CV output.
31
Table 1, Parameter Values
Parameter Function
NRPN Fine
Value
(NRPN
Coarse = 0)
Data Entry
Coarse Value
Comment
Base Note
01
0-127, default is 24
Lowest possible note
that will be played.
CV1 Function
CV2 Function
02
03
CV3 Function
04
CV4 Function
05
CV5 Function
06
CV6 Function
07
CV1 is always handled as
main tune control. This
parameter currently has no
effect.
0-127
Default is 121 for
Note-On Velocity
0-127
Default is 1 for
modulation wheel
controller
0-127
Default is 124 for Channel
after touch
0-127
Default is 5 for glide time
CV 6 is always handled as
Pitch Wheel out. This
parameter currently has no
effect.
CV2 Range
09
0-63
Default is 32 which
provides 5V full swing at
data=127
63 provides x2, i.e. 5V at
data=64, and 16 provides
x0.5 i.e. 2.5V at data=127.
This can be viewed as 0200% scaling with about
5% resolution.
CV3 Range
CV4 Range
CV5 Range
CV6 Range
10
11
12
13
Same as for CV2
Same as for CV2
Same as for CV2
from 0 to ±24 semitones
32
0-119, respond to
Control Change
messages with this
number.
120 = CV Output is
unused
121 = Note-On
velocity
122 = CV Output is
unused
123 = Accent
124 = Key Aftertouch
125 = Note-Off
velocity
126 = Channel
Aftertouch
127 = CV Output is
unused
Same as for CV2
Same as for CV2
Same as for CV2
Scaling for
controllers, or
Scaling for velocity,
or
Scaling for aftertouch,
or
Accent trigg level
(Note that when
scaling is
programmed, values
larger than 32 will be
ignored and set to 32
instead)
Same as for CV2
Same as for CV2
Same as for CV2
Default is ±24 semitones
Upgrading Software
Software in the S1 CVGate interface can be upgraded via MIDI.
Software is upgraded via a programmer software that runs on any Windows machine. This software
can be downloaded from the official website. The Windows machine must of course also have a
standard MIDI interface.
New software versions for the S1 CVGate can also be downloaded from the official website. For
further details see the website.
Possible Routing of CV Outputs
CV Output
Routings
Ring modulator input
LFO FM/AM input
Etc…
Same as for CV1
Same as for CV1
Same as for CV1
n/a
n/a
CV1, Front/Back panel
CV2, Front/Back panel
CV3, Front/Back panel
CV4, Front/Back panel
CV5 n/a
CV6 n/a
MIDI Implementation Chart
Function
Basic Channel: Default
Changed
Mode:
Default
Messages
Note Number
True Voice
Velocity:
Note-On
Note-Off
Aftertouch:
Key
Channel
Pitch Bender
Control Change
0-127
Transmitted
X
X
X
X
X
X
Recognized
1-16
1-16
4
2, 4
0-127
0-127
O
O
O
O
O
X
O
Program Change
True#
X
O
1
System Exclusive
O
O
System Common:
System Realtime:
X
X
X
O
Aux Messages:
All Sound Off
Reset Controllers
All Notes Off
Omni On
Omni Off
Reset
X
X
X
X
X
X
O
O
O
O
O
O
O = Yes
X = No
Mode 1:
Mode 2:
Mode 3:
Mode 4:
Omni On, Poly
Omni On, Mono
Omni Off, Poly
Omni Off, Mono
33
Remarks
For service
purposes only
INSIDE THE SYNTHESIZER
The S1 synthesizer is an analog instrument (not including the MIDI Converter of course). Most
parameters such as frequency, amplitude, resonance (Q-PEAK), attack time, decay time, etc. are
adjustable via potentiometers on the front panel and can also be voltage controlled via respective CV
inputs.
The main voltage regulator is equipped with a highly stable reference circuit with a stability of 20ppm/deg C
to guarantee long term stability. In addition, great attention has been taken to design of the oscillators to
achieve the highest possible frequency stability; a carefully chosen compensation circuits has been designed
by simulation tool and practically verified to achieve high stability throughout the entire temperature range.
In addition to the application of know-how from the analogue field, modern simulation tools have been used
to optimize and verify the characteristics and performance of all circuits inside the S1.
Since the filters are among the most dominant sound processors in an analog synthesizer great effort
have been taken in their design both in regard to the form of simulation and practical listening tests
with the object of being able to offer two completely different types of acoustical characteristics in the
LPF and MMF. Via countless testing and listening it was determined that the filters, in addition to the
customary 12 and 24dB/octave slope, must also have a 36dB/octave slope. The difference between 24
and 36dB slope may seem to be slight but is highly pronounced to a listener and offers new and highly
useful possibilities in sound modification.
Envelope generators have been developed by simulation in a computer environment. All the
parameters can be voltage controlled within a large time range; Attack, Decay, Release times are
adjustable from 0.5 milliseconds (actually 350 microseconds) to 20 seconds.
S1 is a so called semi-modular synthesizer which means that all modules, e.g. oscillators, filters, etc. are
interconnected in a certain configuration. The configuration can be altered using patches. Connections
between the different modules can be broken and routed to other inputs or outputs. For example, to crossconnect the filters, the MULTI-MODE FILTER external audio input is connected to the LOWPASS FILTER
audio input which can produce unexpected effects such as the generation of sub-octave tones. The list of
possible configurations is, of course, very long so the following is a description of the constituent parts of
the instrument, i.e. the modules.
OSCILLATORS
There are three oscillators that are largely identical (except that OSCILLATOR1 that can be used as
an extra LFO in the LF mode) with five basic waveforms; sine, triangle, sawtooth, variable pulse, and
triangle mixed with variable pulse.
Sine Waveform
An ideal sine wave is the most fundamental signal (tone) that contains only the basic tone. In an analog
synthesizer the sine wave is produced by synthesis that results in a signal that is not completely perfect.
See the illustration below. The left side shows the sine signal and the right side shows its spectrum density.
Aside from the basic signal (440Hz) there are a number of harmonic overtones.
OSCILLATOR OUTPUT, SINE, A440
0.0
440.00 Hz
-10.0
7.5
5.0
-20.0
2.5
OUTPUT (Volts)
-30.0
dBV rms
-40.0
0.0
-50.0
-2.5
-60.0
-70.0
-5.0
-7.5
-80.0
3.00
4.00
5.00
6.00
Time (milliseconds)
7.00
8.00
34
-90.0
1.0k
3.0k
5.0k
7.0k
9.0k 11.0k 13.0k 15.0k 17.0k 19.0k
Frequency (Hz)
In other words the sine wave has its own character, it sounds nearly clean but it can change its timbre by,
e.g.a filter sweep (dynamic) or by a filter with a peak frequency that corresponds with the harmonic
overtones of the signal (static). The illustration below shows the result of modifying the signal with
the Lowpass Filter and Q-peak = 7.
7.5
FILTERED SINUS WAVEFORM BY LOW-PASS FILTER
PEAK @ SECOND HARMONIC TONE
PEAK @ THIRD HARMONIC TONE
PEAK @ FIFTH HARMONIC TONE
5.0
OUTPUT (Volts)
2.5
0.0
-2.5
-5.0
-7.5
3.00
4.00
5.00
6.00
Time (milliseconds)
7.00
8.00
Triangle Waveform
This waveform has a higher content of overtones than the sine wave and consequently sounds
different. The odd overtones are most prominent. The amplitude of the overtones is higher than
those in the sine wave but also diminish more rapidly.
OSCILLATOR OUTPUT, TRIANGLE, A440
0.0
440.00 Hz
-10.0
7.5
5.0
-20.0
2.5
OUTPUT (Volts)
-30.0
dBV rms
-40.0
0.0
-50.0
-2.5
-60.0
-70.0
-5.0
-7.5
-80.0
3.00
4.00
5.00
6.00
Time (milliseconds)
7.00
-90.0
8.00
1.0k
3.0k
5.0k
7.0k
9.0k 11.0k 13.0k 15.0k 17.0k 19.0k
Frequency (Hz)
Sawtooth Waveform
The sawtooth wave is the classic waveform and perhaps the most used in the creation of many
characteristic bass and brass synthesizer sounds. This is due to the fact that the sawtooth wave
contains both even overtones (2, 4, 6,…) and odd overtones (3, 5, 7,…) that have high amplitudes
even for overtones of higher order. By dynamic and/or static filtering the character of the sound can
be altered in many ways. See the illustration below.
OSCILLATOR OUTPUT, SAW TOOTH, A440
0.0
440.00 Hz
-10.0
7.5
5.0
-20.0
2.5
dBV rms
OUTPUT (Volts)
-30.0
-40.0
0.0
-50.0
-2.5
-60.0
-70.0
-5.0
-80.0
-7.5
3.00
4.00
5.00
6.00
Time (milliseconds)
7.00
8.00
35
-90.0
1.0k
3.0k
5.0k
7.0k
9.0k 11.0k 13.0k 15.0k 17.0k 19.0k
Frequency (Hz)
Pulse Waveform
The pulse wave is another classic waveform with variable pulse width and contains very strong
overtones. Unlike the sawtooth wave the overtone content of the pulse wave can be altered by
changing pulse width. For example, a symmetrical pulse contains only odd overtones (3, 5, 7, …).
See the illustration below.
OSCILLATOR OUTPUT, SQR(50%), A440
0.0
440.00 Hz
-10.0
7.5
5.0
-20.0
2.5
dBV rms
OUTPUT (Volts)
-30.0
-40.0
0.0
-50.0
-2.5
-60.0
-70.0
-5.0
-80.0
-7.5
3.00
4.00
5.00
6.00
Time (milliseconds)
7.00
8.00
-90.0
1.0k
3.0k
5.0k
7.0k
9.0k 11.0k 13.0k 15.0k 17.0k 19.0k
Frequency (Hz)
A pulse wave with 26% (or 74%) pulse width contains the following overtones; 2, 3, 5, 6, 7, 9, 10,
11,…). See the illustration below.
OSCILLATOR OUTPUT, FILTERED PULSE(26%), A440
0.0
440.00 Hz
-10.0
7.5
5.0
-20.0
2.5
dBV rms
OUTPUT (Volts)
-30.0
-40.0
0.0
-50.0
-2.5
-60.0
-70.0
-5.0
-80.0
-7.5
3.00
4.00
5.00
6.00
Time (milliseconds)
7.00
-90.0
8.00
1.0k
3.0k
5.0k
7.0k
9.0k 11.0k 13.0k 15.0k 17.0k 19.0k
Frequency (Hz)
A pulse wave with 33% (or 67%) pulse width contains the following overtones; 2, 4, 5, 7, 8, 11,…).
See the illustration below.
OSCILLATOR OUTPUT, PULSE(33%), A440
0.0
440.00 Hz
-10.0
7.5
5.0
-20.0
2.5
dBV rms
OUTPUT (Volts)
-30.0
-40.0
0.0
-50.0
-2.5
-60.0
-70.0
-5.0
-80.0
-7.5
3.00
4.00
5.00
6.00
Time (milliseconds)
7.00
8.00
36
-90.0
1.0k
3.0k
5.0k
7.0k
9.0k 11.0k 13.0k 15.0k 17.0k 19.0k
Frequency (Hz)
For example, if the pulse with 33% pulse width is modified by the Multi-Mode Filter (Highpass mode,
Q- peak = 7) in series with the Lowpass Filter (Q-peak = 7), the result can be as shown in the illustration
below, with dominant 4th and 5th overtones. The basic tone is heavily suppressed and the modified
pulse signal sounds completely different than the original signal.
OSCILLATOR OUTPUT, FILTERED PULSE(33%), A440
0.0
440.00 Hz
-10.0
7.5
5.0
-20.0
2.5
dBV rms
OUTPUT (Volts)
-30.0
-40.0
0.0
-50.0
-2.5
-60.0
-70.0
-5.0
-80.0
-7.5
3.00
4.00
5.00
6.00
Time (milliseconds)
7.00
8.00
-90.0
1.0k
3.0k
5.0k
7.0k
9.0k 11.0k 13.0k 15.0k 17.0k 19.0k
Frequency (Hz)
Triangle + Pulse Waveform
This is a waveform created by combining a triangle waveform and pulse waveform in the ratio 3 to 1.
Even the waveform has a unique character; the flute-pipe sound of the triangle wave combines with
the overtone-rich pulse wave. See the illustration below.
OSCILLATOR OUTPUT, TRIANGLE+PULSE(50%), A440
0.0
440.00 Hz
-10.0
7.5
5.0
-20.0
2.5
OUTPUT (Volts)
-30.0
dBV rms
-40.0
0.0
-50.0
-2.5
-60.0
-70.0
-5.0
-7.5
-80.0
3.00
4.00
5.00
6.00
Time (milliseconds)
7.00
8.00
-90.0
1.0k
3.0k
5.0k
7.0k
9.0k 11.0k 13.0k 15.0k 17.0k 19.0k
Frequency (Hz)
.
Sync, Frequency and Amplitude Modulation
The oscillators can be synchronized (except for oscillator1) and also frequency and amplitude
modulated by each other so that the basic waveforms (sine, triangle, sawtooth, pulse) can be modified
in a multitude of ways. This is a very useful method in the creation of many fundamental waveforms
with completely different character for further modification. Some examples are shown in the
illustration below.
7.5
OSCILLATOR2 SINUS out, FM(OSC1/SIN)+SYNC
7.5
5.0
2.5
2.5
OUTPUT (Volts)
OUTPUT (Volts)
5.0
0.0
0.0
-2.5
-2.5
-5.0
-5.0
-7.5
OSCILLATOR2 PULSE out, FM(OSC1/SIN)
3.00
4.00
5.00
6.00
Time (milliseconds)
7.00
8.00
37
-7.5
3.00
4.00
5.00
6.00
Time (milliseconds)
7.00
8.00
7.5
OSCILLATOR2 FM(OSC1-SAW)+SYNC, 0SC1 & OSC2 SAW out
5.0
5.0
2.5
2.5
OUTPUT (Volts)
OUTPUT (Volts)
28
0.0
0.0
-2.5
-2.5
-5.0
-7.5
OSCILLATOR2 SINUS out, FM+AM(OSC1/SAW)+SYNC
7.5
-5.0
3.00
4.00
5.00
6.00
Time (milliseconds)
7.00
-7.5
8.00
3.00
4.00
5.00
6.00
Time (milliseconds)
7.00
8.00
A simple, yet acoustically interesting synchronized waveform that can be used as a template for creating
Bass lead sounds is shown in the illustration below.
7.5
OSCILLATOR1/PULSE(PW-5%) + OSCILLATOR2/PULSE (PW-95%)
SYNC, A440
5.0
OUTPUT (Volts)
2.5
0.0
-2.5
-5.0
-7.5
3.00
4.00
5.00
6.00
Time (milliseconds)
7.00
8.00
It is possible to create many useful Bass-leads with varying timbre and character by simply varying the
pulse width of the oscillators and increasing the frequency of the synchronized oscillator (Oscillator2)
above the frequency of Oscillator1, (and, for example, filter sweeping). The sound will have more
depth and life, for example, if Oscillator2 is regulated as FM with a little envelope or LFO.
Another example of what the oscillators can produce is noise. By frequency modulating the oscillators
in a ring, Osc1 to Osc2 to Osc3 to Osc1, noisy signals can be created. See the illustration below.
RING FREQUENCY MODULATION, OSCILLATOR1/SINUS out
C5
C2
0.0
-10.0
-20.0
OUTPUT (Volts)
-30.0
dBV rms
-40.0
-50.0
-60.0
-70.0
-80.0
3.00
4.00
5.00
6.00
Time (milliseconds)
7.00
8.00
38
-90.0
1.0k
3.0k
5.0k
7.0k
9.0k 11.0k 13.0k 15.0k 17.0k 19.0k
Frequency (Hz)
Even though these waveforms do not look like noise, they are synthesized noise. By frequency
modulating the oscillators in a ring a multitude of signals are created just like those found in noise.
However, unlike random noise this synthesized oscillator noise can be manipulated in several ways,
e.g. varying the frequency (illustration above) or varying the degree of frequency modulation
(illustration below). In other words, this noise can be played with and noise with varying bandwidth
can be created (resonance effect).
RING FREQUENCY MODULATION, VARIABLE FM LEVEL, OSCILLATOR1/SINUS out
WHITE NOISE SYNTHESIS
BAND-PASS NOISE SYNTHESIS
0.0
-10.0
-20.0
OUTPUT (Volts)
-30.0
dBV rms
-40.0
-50.0
-60.0
-70.0
-80.0
3.00
4.00
5.00
6.00
Time (milliseconds)
7.00
8.00
-90.0
1.0k
3.0k
5.0k
7.0k
9.0k 11.0k 13.0k 15.0k 17.0k 19.0k
Frequency (Hz)
NOISE GENERATOR
There are three noise outputs; white (wide band, unfiltered), red (lowpass filtered with 12 dB/octave)
and low frequency noise (slow random).
In the illustration below white noise and red noise is shown on the left side and spectrum density
on the right side.
WHITE NOISE
RED NOISE
0.0
-10.0
-20.0
OUTPUT (Volts)
-30.0
dBV rms
-40.0
-50.0
-60.0
-70.0
-80.0
30
40
50
60
Time (milliseconds)
70
80
-90.0
1.0k
3.0k
5.0k
7.0k
9.0k 11.0k 13.0k 15.0k 17.0k 19.0k
Frequency (Hz)
RING MODULATOR
The multiplier, even popularly called the ring modulator is a very useful sound processor for the
creation of sounds with non-harmonic overtones and undertones such as bell and wood sounds.
The ring modulator multiplies the amplitude of two incoming signals. This results in two sine-formed
signals with the difference and sum frequencies of the incoming signals. For example, if
the incoming frequencies are 1000 Hz and 200 Hz, two signals with the same amplitude are created
(multiplier gain = 1), one at 800 Hz and the other at 1200 Hz, i.e. the sum and difference of 1000 Hz
and 200 Hz. The fundamental tones are suppressed. However, the real ring modulators is not so
perfect so that there will always be residual products and the fundamental tones cannot be completely
suppressed. The illustration below shows typical outputs from the ring modulator.
39
7.5
RING MODULATOR, INPUTS; OSC2/SIN & OSC3/SIN
7.5
5.0
2.5
2.5
OUTPUT (Volts)
OUTPUT (Volts)
5.0
0.0
0.0
-2.5
-2.5
-5.0
-7.5
RING MODULATOR, INPUTS; OSC2/SAW & OSC3/SQR
-5.0
3.00
4.00
5.00
6.00
7.00
8.00
-7.5
3.00
4.00
Time (milliseconds)
5.00
6.00
7.00
8.00
Time (milliseconds)
With synchronized oscillators a signal can be created with harmonic character but with the
characteristic ring modulator sound. In addition, if one of the oscillators is used to frequency
modulate the synchronized oscillator, the result can be as in the illustration below.
7.5
RING MODULATOR, INPUTS; OSC2/SIN & OSC3/SIN
OSC3 SYNC'ED and FREQUENCY MODULATED by OSC2
5.0
OUTPUT (Volts)
2.5
0.0
-2.5
-5.0
-7.5
3.00
4.00
5.00
6.00
Time (milliseconds)
7.00
8.00
LOW PASS FILTER
The sound processor with greatest effect is the Low Pass Filter and every synthesizer has at least one as
the foremost tool for sound modification.
The Low Pass Filter is a 6-pole construction. The reason for this is as follows; the slope of the filter
must be as steep as possible to provide the greatest filter effect. However, since it is obviously not
always desirable to use a filter with a steep slope, the LPF is equipped with a switch that enables
selection of either 6-pole or 4-pole operation. The illustration below shows the LPF frequency response
for both modes.
0.0
LOW-PASS FILTER, Q-PEAK = 0
4-POLE MODE
6-POLE MODE
-10.0
-20.0
-30.0
dBV rms
-40.0
-50.0
-60.0
-70.0
-80.0
-90.0
-100.0
-110.0
30
50 70 100
200 300 500
1.0k
Frequency (Hz)
40
2.0k
5.0k
10.0k
20.0k
The illustration below shows the suppression of square wave overtones in the LPF.
LOW-PASS FILTER, SQR WAVE IN
4-POLE MODE
6-POLE MODE
0.0
-10.0
-20.0
dBV rms
-30.0
-40.0
-50.0
-60.0
-70.0
-80.0
-90.0
1.0k
3.0k
5.0k
7.0k
9.0k 11.0k 13.0k 15.0k 17.0k 19.0k
Frequency (Hz)
Q-peak affects the amplitude of the corner frequency from flat to self-oscillation. The illustrations
below show the output signals with variable Q-peak, the frequency response for varying Q-peak and
a swept filter in self-oscillation mode.
LOW-PASS FILTER (6 POLE MODE), VARIABLE Q-PEAK
LOW-PASS FILTER (6 POLE MODE), VARIABLE Q-PEAK
Q-PEAK = 4
Q-PEAK = 8
Q-PEAK = 0
Q-PEAK = 4
7.5
7.5
5.0
2.5
2.5
OUTPUT(Volts)
OUTPUT (Volts)
5.0
0.0
0.0
-2.5
-2.5
-5.0
-5.0
3.00
4.00
5.00
6.00
Time (milliseconds)
7.00
8.00
-7.5
3.00
4.00
5.00
6.00
Time (milliseconds)
LOW-PASS FILTER, FREQUENCY RESPONSE, VARIABLE Q-PEAK
Q-PEAK = 0
Q-PEAK = 5
Q-PEAK = 8
0.0
-10.0
-20.0
-30.0
dBV rms
-7.5
-40.0
-50.0
-60.0
-70.0
-80.0
-90.0
-100.0
30
50 70 100
200 300 500
1.0k
Frequency (Hz)
41
2.0k
5.0k 10.0k
7.00
8.00
7.5
LOWPASS FILTER (6 POLE MODE),
SELF-OSCILLATION MODE, MODULATED by LFO/SAW
5.0
OUTPUT (Volts)
2.5
0.0
-2.5
-5.0
-7.5
100
200
300
400
Time (milliseconds)
500
600
LPF is characterized by a non-linear transfer function, so-called saturation mode that is affected by the
level of the incoming signal. In the audio mixer the red markings on the potentiometer scales show
the level at which the filter operates in the non-linear mode (saturation mode). The illustration below
shows the saturation effect.
7.5
LOWPASS FILTER, SATURATION EFFECT
LINEAR MODE (SQR WAVE in, 3Vp-p)
SATURATED MODE (SQR WAVE in, 6Vp-p)
7.5
5.0
2.5
2.5
OUTPUT (Volts)
OUTPUT (Volts)
5.0
0.0
0.0
-2.5
-2.5
-5.0
-5.0
-7.5
LOWPASS FILTER, SATURATION EFFECT
LINEAR MODE (SQR WAVE in, 3Vp-p)
EXTREME SATURATED MODE (SQR WAVE in, EXT AUDIO INPUT)
3.00
4.00
5.00
6.00
Time (milliseconds)
7.00
8.00
-7.5
3.00
4.00
5.00
6.00
Time (milliseconds)
7.00
A complicated saturation effect can be seen, amplitude, amount of resonance, and frequency corner
are affected and altered by the input signal strength.
Spectrum analysis in the illustration below shows that the filter effectively suppresses the square wave
overtones but also adds even harmonic overtones (the most dominant being the 2nd overtone – 2000
Hz). This brings to mind certain characteristics in electron tube amplifiers that from a musical point of
view can be advantageous. It is well known that even overtones often add a musical timbre and
electron tube amplifiers are valued for this, among other things.
42
8.00
LOWPASS FILTER, OSC1/SQR WAVE IN, LEVEL = 7, Q-PEAK = 7
0.0
1000,0 Hz
-10.0
-20.0
dBV rms
-30.0
2000,0 Hz
-40.0
-50.0
-60.0
-70.0
-80.0
-90.0
1.0k
3.0k
5.0k
7.0k 9.0k 11.0k 13.0k 15.0k 17.0k 19.0k
Frequency (Hz)
Parameters such as Q–peak and Level are voltage controlled which enables the filter to modify
signals with modulation of frequency corner. It can also create other tone characteristics with,
e.g. modulation of Q-peak and LEVEL by other means of control. The illustrations below show
some examples.
LOW-PASS FILTER (6 POLE MODE), OSC1 SAW WAVE in
LPF FREQUENCY MODULATED by OSC1/TRIANGLE
7.5
7.5
5.0
5.0
2.5
2.5
OUTPUT (Volts)
OUTPUT (Volts)
LOW-PASS FILTER (6 POLE MODE), OSC1 SQR WAVE in
LPF FREQUENCY MODULATED by OSC1/TRIANGLE
0.0
-2.5
-2.5
-5.0
-5.0
3.00
4.00
5.00
6.00
Time (milliseconds)
7.00
8.00
-7.5
3.00
LOW-PASS FILTER (6 POLE MODE), OSC1 SINUS WAVE in
Q-PEAK MODULATED by OSC1/TRIANGLE
7.5
5.0
OUTPUT (Volts)
-7.5
0.0
2.5
0.0
-2.5
-5.0
-7.5
3.00
4.00
5.00
6.00
Time (milliseconds)
43
7.00
8.00
4.00
5.00
6.00
Time (milliseconds)
7.00
8.00
MULTI MODE FILTER
This filter has musical characteristics that differ from the Low Pass Filter. It has low pass, high pass and
band pass mode and is linear, i.e. has no compression mode. Acoustically it is different and provides a
necessary complement to the Low Pass Filter. Both filters can be connected in parallel or in series
(pre-patched), or cross-connected.
No. of poles for low pass mode: 2-4-6 (12, 24, 36dB/octave)
No. of poles for high pass mode: 2-4-6 (12, 24, 36 dB/octave)
No. of poles for band pass mode: 1-2-3 (6, 12, 18 dB/octave)
The diagrams below show the filter frequency response for all three modes:
Low pass mode, 2-, 4-, 6-pole, Q-PEAK=7
0
-20
2 pole
-40
-60
4 pole
-80
Low pass mode, 2-, 4-, 6-pole, Q-PEAK=7
20
0
AC response (dB)
AC response (dB)
High pass mode, 2-, 4-, 6-pole, Q-PEAK=7
20
0
-20
AC response (dB)
20
2 pole
-40
-60
4 pole
6 pole
-80
-20
2 pole
-40
4 pole
-60
-80
6 pole
6 pole
-100
20
64
256
1024
4096
20000
-100
20
64
256
Frequency (Hz)
1024
4096
20000
-100
20
64
256
Frequency (Hz)
1024
4096
20000
Frequency (Hz)
The output signal of the filter in low pass and band pass mode is shown below: the best way to illustrate
the filtering effect is by using the low pass mode (here with 2-, 4-, and 6 pole).
Low pass mode, 2 pole, Q-PEAK=0
Low pass mode, 4 pole, Q-PEAK=0
6
4
2
2
2
Voltage (V)
4
0
0
0
-2
-2
-2
-4
-4
-4
-6
0
0.001
0.002
-6
0.003
0
0.001
Time (seconds)
0.002
Low pass mode, 6 pole, Q-PEAK=0
6
4
Voltage (V)
Voltage (V)
6
-6
0.003
0
0.001
Time (seconds)
0.002
0.003
Time (seconds)
The filtering in band pass mode (cutoff frequency is equal oscillators frequency, square waveform) is presented
below. Observe the difference in filtering effect with 2, 4 and 6 poles; the square signal has been filtered to an
all most pure sinus signal with 6 pole band pass filter.
Band pass mode, 2 pole, Q-PEAK=4
Band pass mode, 4 pole, Q-PEAK=4
6
4
2
2
2
Voltage (V)
4
Voltage (V)
4
0
0
0
-2
-2
-2
-4
-4
-4
-6
0
0.001
0.002
0.003
-6
0
0.001
Time (seconds)
0.002
Band pass mode, 6 pole, Q-PEAK=4
6
0.003
Time (seconds)
-6
0
0.001
0.002
Time (seconds)
The frequency sweep of the MMF filter in oscillating mode is shown in the illustration below.
7.5
MULTI-MODE FILTER (6 POLE MODE),
SELF-OSCILLATION MODE, MODULATED by LFO/SAW
5.0
2.5
OUTPUT (Volts)
Voltage (V)
6
0.0
-2.5
-5.0
-7.5
100
200
300
400
Time (milliseconds)
44
500
600
0.003
MASTER AMPLIFIER
Attenuation in the voltage controlled amplifier (VCA) is controlled by Envelope Generator 1 and 2 via
the panning mixer (ENVELOPE MIX) and the VELOCITY CONTROL (CV2).
There are two attenuation control modes: Linear and logarithmic (Log).
In linear mode the attenuation follows a linear relationship; 1 volt increase (or decrease ) of control
voltage amplifies (or attenuates) 20% of the incoming signal or expressed in a simple mathematical
formula: gain = X Volts/0.2
In the logarithmic mode attenuation = X Volts * 15 dB
The illustration below shows what the signals look like in the two modes.
7.5
LINEAR MODE
LOG MODE
MASTER AMPLIFIER OUTPUT,
AMPLITUDE MODULATED BY ENVELOPE GENERATOR
OUTPUT (Volts)
5.0
2.5
0.0
-2.5
-5.0
-7.5
50
100
150
200
Time (milliseconds)
250
300
Performance at maximum attenuation of audio signals is shown in the illustration below.
0.0
MASTER AMPLIFIER, ATTENAUTION RANGE
Power Level = 0.31 dBVrms, VCA CV = 5 Volts
Power Level = -84.91 dBVrms, VCA CV = 0 Volts
-10.0
-20.0
-30.0
dBV rms
-40.0
-50.0
-60.0
-70.0
-80.0
-90.0
-100.0
-110.0
900
950
1.0k
Frequency (Hz)
45
1.1k
1.2k
ENVELOPE GENERATORS
Both envelope generators are identical and provide control voltages that can be used to dynamic change
of all voltage controlled parameters, such as; frequency, amplitude, pulse width, cutoff.
The most common use is controlling a filters cutoff frequency and a voltage controlled amplifiers amplitude in
order to achieve dynamic timbre- and level-changes. The envelopes of the S1are internally pre.patched to
different modules, such as; Master Controller, MIXER, LPF and MMF and Master Amplifier. All parameters
such as Attack time, Decay time, Sustain level, Release time, Delay time, and Output level are voltage
controlled. These parameters can be modulated with various waveforms or governed from a voltage source.
For example, when controlled from CV1, the higher one plays on the MIDI keyboard the more Decay time
decreases. In other words, the lower the tones are the longer the Decay times are, and the higher the tones
are the shorter the Decay times are.
Envelope Generator, Attack, Decay &Release=0, Sustain=4
Envelope Generator, variable attack time
8
ADSR AMPLITUDE
ADSR AMPLITUDE
8
6
4
2
0
6
4
2
0
1
2
3
4
5
6
7
8
9
0
10
0
1
2
3
Time (milliseconds)
Envelope Generator, variable release time
6
7
8
9
10
8
9
10
8
ADSR AMPLITUDE
ADSR AMPLITUDE
5
Envelope Generator, variable decay time
8
6
4
2
0
4
Time (milliseconds)
6
4
2
0
1
2
3
4
5
6
7
8
9
0
10
0
1
2
3
Time (milliseconds)
4
5
6
7
Time (milliseconds)
The diagrams below show modulated ATTACK TIME, DECAY TIME and
SUSTAIN LEVEL by external CV sources.
ATTACK, CV modulated by envelope generators output
DECAY, CV modulated by envelope generators output
ADSR AMPLITUDE
8
6
4
2
0
6
4
2
0
1
2
3
4
5
6
7
8
9
0
10
0
1
2
3
Time (milliseconds)
4
5
6
Time (milliseconds)
SUSTAIN, CV modulated by a an external signal
8
ADSR AMPLITUDE
ADSR AMPLITUDE
8
6
4
2
0
0
1
2
3
4
5
6
Time (milliseconds)
46
7
8
9
10
7
8
9
10
LFO's
The Low Frequency Oscillator (LFO) can be used as modulation sources of all voltage controlled
parameters, such as; oscillators frequency, pulse width, and cutoff frequency. LFO's has a wide rate range of
60 seconds (0.01 Hz) to 16 milliseconds (60 Hz). The waveforms shapes can be modified by applying voltage
control for rate speed and output level. LFO can be gated by MIDI GATE's.
LFO's offer seven waveforms:
* Sample & Hold with 2 additional
slewed shapes
* Triangle
* Saw tooth
* Ramp /inverted sawtooth)
* Square
LFO's basic waveforms are shown below:
TRIANGLE WAVEFORM
6
4
4
2
Voltage (V)
Voltage (V)
2
0
-2
0
-2
-4
-6
-4
0
0.3
0.6
-6
0.9
Time (seconds)
2
2
Voltage (V)
Voltage (V)
4
0
0.6
0.9
RAMP WAVEFORM
0
-2
-2
-4
-4
0.3
0.3
6
4
0
0
Time (seconds)
SQUARE WAVEFORM
6
-6
SAW TOOTH WAVEFORM
6
0.6
0.9
-6
0
0.3
0.6
0.9
Time (seconds)
Time (seconds)
SAMPLE & HOLD, SLEW RATE 1
SAMPLE & HOLD, SLEW RATE 2
6
4
2
2
2
Voltage (V)
4
0
0
0
-2
-2
-2
-4
-4
-4
-6
0
0.3
0.6
Time (seconds)
0.9
-6
0
0.3
0.6
Time (seconds)
47
SAMPLE & HOLD, SLEW RATE 3
6
4
Voltage (V)
Voltage (V)
6
0.9
-6
0
0.3
0.6
Time (seconds)
0.9
OVERDRIVE
The Output Mixer combines two signals, a clean signal from the Master Amplifier and a
saturated signal from a saturation stage. The saturation stage is overdriven successively
with the knob from clean to full saturated signal. This gradually produces increasing distortion,
soft clipping, and with hard overdriving successively changes the operating point (as in a
triode) to cause increasingly unsymmetrical clipping. This unsymmetrical clipping results in
the retention of more so-called musical material that would otherwise be lost in symmetrical
clipping.
The illustration below shows the output signal and distortion just below the clipping limit, and the
clipped output signal and accompanying distortion components.
SATURATION STAGE, SIGNAL @ UNDER SATURATION LEVEL
10.0
2.00
0.0
1.50
-10.0
-20.0
0.50
Volts
dBV rms
-30.0
0.00
-40.0
-50.0
0.50
-60.0
-70.0
-1.00
-1.50
-80.0
1.00
Time (milliseconds)
2.00
-90.0
3.00
5.0k
7.0k
9.0k 11.0k 13.0k 15.0k 17.0k 19.0k
Frequency (Hz)
0.0
1.50
-10.0
-20.0
0.50
Volts
dBV rms
-30.0
0.00
-40.0
-50.0
0.50
-60.0
-70.0
-1.00
-80.0
1.00
Time (milliseconds)
2.00
-90.0
3.00
1.0k
3.0k
5.0k
7.0k
9.0k 11.0k 13.0k 15.0k 17.0k 19.0k
Frequency (Hz)
SATURATION STAGE, SIGNAL @ STRONG SATURATION LEVEL
10.0
2.00
0.0
1.50
-10.0
-20.0
0.50
Volts
dBV rms
-30.0
0.00
-40.0
-50.0
0.50
-60.0
-70.0
-1.00
-1.50
3.0k
SATURATION STAGE, SIGNAL @ LIGHT SATURATION LEVEL
10.0
2.00
-1.50
1.0k
-80.0
1.00
Time (milliseconds)
2.00
3.00
-90.0
1.0k
3.0k
5.0k
7.0k
9.0k 11.0k 13.0k 15.0k 17.0k 19.0k
Frequency (Hz)
In the lower waveform it can be seen that distortion consists of both even and odd overtones, with
the second overtone as most significant. Once again this brings to mind the characteristics of the
electron tube amplifier with soft, rising overtones, strong signal and rapidly diminishing overtone
spectrum.
The overdriven signal (left portion of illustration) recovers momentarily from the clipping mode, the same
property found in electron tube amplifiers, but lacks the characteristic recovery time from clipped to linear
condition found in hard-coupled operation amplifiers.
48