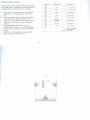
1
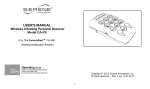
~ S ERENE'" ~ innova1ians USER'S MANUAL Wireless Vibrating Personal Receiver Model CA-PX (For The CentralAlert™ CA-360 Wireless Notification System) Operating Guide Tha n\' IOU for p..ch aslng thIS P'OW<:t Please read :)eforc usa (Keep thiS nm u31 fOf future, r efe re~ Copyright © 2013 Serene Innovations, Inc. All rights reserved. Rev. 0 (a) 11-21-2013 Table of Contents Important Safety Instructions ..... ..... ....... ........ .. .. .. ..... ... 3 Package Content Check ........ ......... ........ ............... .... .. 5 Featu re Identification ... ..... .... ... .......... .......... ... ............. 5 Battery Installation and Charging .......... .......... .. .. ...... ... 7 Product Description ...... ....... .............................. .. ........ 7 Connection and Setup ... .............. ....... ... .......... .... ... .. .... 8 1. Learnin g Accessories .. ..... .. .. ..... ... ..... ..... ... .... .... .. .. 8 2. Learning CA-PX into a CA-360 System .... ........... 10 Testing......... ......... ... ..... ........ ...... ................ .. ............. 12 Operation s... .... ...... ........... .......... ............... ................. 12 Power On/Off and Speaker On/Off switch es ..... .. .... 12 Tu m Flashlight On/Off.. ... .... .......... ..... ...... ..... .......... 12 Sending SOS signal (CA-PX in Standby Mode) ...... 12 Optional Bed Shaker Operation ......... .................. .. .. 12 Alert Signals Ackn owledge ... ..... .............. ..... .......... . 13 Recall Last Activated Alert.. ....... ...... .. .... .. ........ ........ 13 Vibration Pattern Train ing .. ........ .... ... .. .... .... .. ..... ..... 14 Low-Battery Alerts .. .... .... ..... .......... ...... ... .... ........ ..... 15 Cl ear Internal Memory (Factory Default) .. .... ... .... .... 15 Trouble Shooting FAQ ...... .. ...... ........ ............... ............ 15 Cleaning and Mai ntenance ........ .. .. .. ... .. ....... .... ...... ... .17 Other Accessories for the Model CA-PX ....... .. .......... .17 Warranty / Service Information .... .................... ....... .... 18 Specifications .. ........ ........ ........ .. .......... ..... .......... ........ 19 FCC Rules Informati on ........... .. .. ..... ................ ... ..... .. .20 2 - .. Important Safety Instructions 9. Protect the power cord from being walked on or pinched. Pay particular attention at plugs, convenience receptacles and the point where they exit from the device. 10. Only use attachments/accessories specified by the manufacturer. 11 . Unplug this device during lightning storms or when unused for long periods of time . 12. Refer all serviCing to qualified personn el. Servicing is required when the device has been damaged such as: - Power-supply cord or plug is damaged . - liquId has been spilled. - Objects have fallen onto the device. - The device has been exposed to rain or moisture . - The device does not operate normally orhas been dropped . Carefully read this manual before operating the product. Make sure you know how the unit functions and how it operates. Maintain the unit in accordance with the instructions to ensure it functions properly. Keep the instructions With the unit for reference by all users. These instructions, by themselves, do not completely eliminate all danger. Proper accident prevention measures must always be used . Read these instructions in their entirety. Keep these instructions for reference . Be aware of all warnings. Follow all instructions. Do not use this device near water. Clean only with a dry cloth . Do not block any ventilation openings. Install in accordance with the manufacturer's instructions. 8. Do not install near any heat sources such as radiators, heat registers, stoves or other apparatus (including amplifiers) that produce heat. 1. 2. 3. 4. 5. 6. 7. 3 • • .. • WARNING: - Educating children about the dangers of clim bing on furniture to reach the equipment. If you doubt your ability to safely mount our television or set up of the equipment, contact a professional installer for help . • Do not place the unit on a surface that vibrates (e.g. dryer, washing machine, etc.). The unit should only be placed on flat non-vibrating surfaces (i. e. table, shelf, counter-tops etc.) . • Never place this equipment in an unstable location. The equipment may fall, causing serious personal injury or death . Many injuries , particularly to children , can be avoided by taking these simple precautions: - Using cabinets or stands recommended by the manufacturer of the equipment. - Only using furniture that can safely support the equipmen t. - Ensuring the equipment is not overhanging on the edge of the supporting furniture . - Not placing the equipment on tall furniture (i. e. cupboards or bookcases) without anchoring both the furniture and the equipment to a suitable support. - Not placing the equipment on cloth or other materials placed between the equipment and the supporting furniture . WARNING: • To reduce the risk of fire or electrical shock, do not expose this device to rain or moisture . • Do not expose this device to dripping or splashing . Do not place objects filled with liquids, such as vases on or near this device. Liquids can cause a failure and/or a fire hazard . As with any electronic products, use care not to spill liquids into any part of the system . • Do not place any open flame sources, such as lighted candles, on or near this device. 4 ... A CAUTION: Make no modifications to the system or accessories. Unauthorized alterations may comprom ise safety, regulatory compliance, system performance and may void the warranty. Package Content Check Unpack and remove items from the box. Confirm all items are included before disposing of th e shipping box. Items included are: 3 • AM Il.lMU. Re cllarg8ilbfe 8att.ertes 1 - CA-PX Wire less Personal Vibrating Receiver with Belt Clip 1 - USB AC Ada pter 1 - USB to MicroUSB Charging Cable 1 - User's Guide 3 - AAA Ni MH Rechargeable batteries (inside battery compartm ent) Feature Identification General Description The CA-PX is a wireless vibrati ng personal receiver for the hard-of-hearing and deaf/bl ind users. It features a built-in shaker, speaker, fla sher, and blinking icon s for alert notification. 5 - .. Th e CA-PX offers three (3) ways to identify different alerts: blinking icons, unique vibrations and tactile alert identification . It can be used as a sta nd-alone system or as part of the CentralAlert™ CA-360 system. In either case, the CA-PX offers mobility freedom and 24/7 notification anywhere around the home. patterns by feel • Bright flasher can be used as flashlight • Low Battery indicator • Detect all nearby CA-AX audio sensor wireless signals (both registered and unregistered) • Separate On-Off slide switches for Power and Speaker • Able to send out SOS signal • Optional external bed shaker for 100% notification wh ile ch arging • Reversible belt clip Installation • Battery ( 3 x AAA NiMH rechargeable) • Compact, light-weight and reliable • Simple to use • One year warranty Features • A stand-alone vibrating receiver with its registered accessories or as part of the CA 360 Wireless Notification System . • Built-in shaker, flasher, speaker output, and an output port to an optional bed-shaker. • Three ways to identify different alerts : blinki ng icon , unique vibration patterns and tactile alert identification . • Alert types include; land-line telephone ringing , mobile phone , door sensor, baby crying, audio, motion , NOAA and SOS . • Last alert event recall function • Unique vibration pattern training function - help user to recognize/learn different vibration 6 .. • Battery Installation and Charging Product Description 1. Tum Power switch to the OFF position . Pull to remove the battery tab to engage the pre-installed battery. If the tab breaks, remove the security screw and open the battery door to remove the tab. Close the battery door an d re-apply the secu rity screw. Icon Buttons Braille Characters BrBIlie Ch aracte~ Embossed on Buttons D- Door 8 - Baby P- Phone C- Note: Do not use regular alkaline or other non rechargeable batteries, as they will damage the unit and void the warranty. For optimal performances, batteries should be replaced once every year. 2. Plug the AC adapter into the electrical outlet and connect the charging cable to the CA-PX. If this is the fi rst time using the batteries , let the batteries charge for about 3-4 hours before use. Fully charged batteries can last 3-6 days depending on usage. Note: CA-PX must be turned ON during charging 7 to D B P C A M S N 0 R e I Phone A AudWl Aiaml M - MolWln S - SOS N - NOAA L Learn a - on/oft T R -Resel T Tona Icon Buttons Identification Connection and Setup CA-PX applications 1..._ LED IF,"",",gll1 I The CA-PX provides four (4) types of alerting outputs: speaker, flasher, blinking icons and vibrations. The CA-PX is ready to use right out of the box. New sensor accessories must be leamed (or registered) to CA-PX before they can be recognized . When using the CA-PX as a stand alone receiver (without the CA 360 master unit), it can support as many accessory units as the CA-360. l aw BillI!B'l I C:hui~ LE O 1. Learning Accessories CA-PX as a Stand-Alone Receiver Example Application This application demonstrates how a simple wireless notification system can be created using just one CA PX as a receiver unit. It notifies you wh en someone is at the door or if an audio alarm is activated . The entire system is compact, light-weight and ideal for travel use. 8 .~ ~I The example below shows a simple system comprised of a personal receiver (CA-PX), a door knock sensor with door hanger (CA-DXH)' and an audio sensor (CA-AX)2. Si nce no metal mounting clip is visible from the hotel hallway, the use of CA-DXH will not reveal guest that is hard-ot-hearing . It is perfect for use on hotel or dormitory doors where a temporary installation is preferred . / To futher enhance the system effectiveness and user safety, both registered and unregistered CA-AX audio sensor wireless signals can be detected by the CA PX. CA.pX CA-OXH Follow the steps below: Note 1: Model CA-DXH and Model CA-AX are optional accessories and are sold separately. 1. Install batteries in all accessory units that you want to use in the system . 2. Power On the CA-PX. 3. Press and hold the Learn button for 6 seconds until it vibrates (and beeps if the speaker is On) to enter the Learn mode. The Learn button LED will blink fo r about 20 seconds, after which Note 2: Model CA-DXH is a standard door knock sensor mounted on a plastic door hanger. This combination is designed to hang on the interior handle of a door knob for detecting door knocking. 9 ~I •• it wi ll exit the Learn mode. 4. Press and hold the test button on the accessory CA-AX (audio sensor) for more than 10 seconds until CA-PX flashes, vibrates, and beeps (if spea ker is On) twice.This confirms the learning . 5. Repeat the steps 3 and 4 with the CA-DXH accessory. 6. Press the Reset butto n on the CA-PX to exi t the learn ing mode at any time. 7. Test th e system - Press the Test button on each accessory one at a time . Verify that th e corresponding icon button on the CA-PX is activated . The CA-PX wi ll flash , vibrate and beep (if speaker is On) for about 45 seconds. Press Reset to stop at any ti me. 8. Repeat the test with the CA-DXH. Press Reset to stop at any time. 9. Repeat the steps above to learn (or reg ister) and test more accessories as desired . 2. Learning CA-PX into a CA-360 System Example Application This is a typical application for adding a CA-PX to a CA-360 system, in order to improve mobility freedom and coverage area . Each CA-PX must be learned (or registered) to the CA-360 system before before it can be recognized (Up to 10 CA-PX may be added to on e CA-360 master unit). Note: All previously learned accessories in the CA-PX will be lost during this process, and all lost accessories must be learned again through the CA-360 master unit. 10 - 4 . II. C•.>,..P:\ .\ddo4 1nIo .C.-\·J6lI S~'""'" 4. Press Reset button on both CA-360 unit and the CA-PX to end the Learn process. 5. Testing the system : Press and Hold the SOS button on the CA-PX for 2 seconds. This should activate an alert on both the CA-PX and CA-360 units. Press the Reset button on either unit to stop and cancel the alert. 6. Press an accessory .(~uch as a doorbell) that was previously registered to the CA-360 master unit. Verify that both CA-360 and the CA-PX alerts are activated for 45 seconds, or until the Reset button is pressed. 7. The CA-PX is now ready and will alert the user whenever a wireless signal is detected. =: --- - - - - - - - - - - - -, CA=36O luh:m - ~ ..,....,.,,;ro.,. , Exisli"'lg , I -----------_ / ~10 - :L-jf t I / ~ \ ~OAA ~ <hOA ----- I ..J r~~ . . _- - - ------- - -- - -- - -- - - +- -- , Follow the steps below: 1. Place CA-360 master unit in the clock mode (RUN position ), Press and Hold the SOS I TEST button for 6 seconds until it beeps. It will display "LEAr" and ready to learn accessories. 2. Power On the CA-PX. 3. Press and hold the Learn button on the CA-PX for at least 10 seconds until CA-360 beeps twice, and the display shows "SUB" - confirming reg istration is su ccessful. Reminder: All previously learned accessories In the CA-PX will be lost during the process of adding the CA-PX into a CA-360 alert system . All lost CA-PX accessories will need to be learned again into the system through the CA-360 master unit. 11 Testing Turn Flashlight On/Off 1. While in standby mode, press and hold the SOS icon button for 2 seconds.If the CA-PX was registered to a CA-360 system, all receiver units registered in the system are activated for 45 seconds . 2. Press the Reset button to stop and exit the alert. The flash er on the top of the unit can be used as a flashlig ht. 1. Press Reset button once to turn it On. 2. Press the Reset button once again to turn it Off. Sending SOS signal (CA-PX in Standby Mode) Operations To page other receivers for help, Press and hold the SOS button for 2 seconds. A wi reless SOS signal will be transmitted to nearby registered receivers (CA-PX, CA-RX, CA-360). Power On/Off and Speaker On/Off switches Switch Actions OI ' Power tn o. on Sp".kar l~ Oil CA·PX Outputs TUrning OnFluh one•. Vibrate once . and Beaponee (If Sp".ker Is On) Wuk B~ttery Condition Optional Bed Shaker Operation Vibrate One .. With an optional bed shaker (8 S-1 00) attached, CA PX can activate the bed sh aker while charging. This provide tota l notification, even while you sleep. TUrning On Seep onee Turning Oft Anh once. and Vibrate one. Vibrate One. 12 • Alert Signals Acknowledge Recall Last Activated Alert Upon receiving a wireless notification signal from any accessory: Th e last activated alert may be recalled for review purposes. 1. The unit activates a unique motor vibration, bl inking icon button , flasher and sound (if speaker is On). 2. After reviewing the bl inking icon button , the user can then press the Reset button to ackn owledge and stop all alert outputs. The blinking icon button continues to stay lit for 5 more seconds . 3. For a deaf/blind user who cannot visualize the blinking icon button , the user will need to press each icon button sequentiall y to determine the activated icon button . When the correct icon button is pressed, the vi bration will become co ntinuous ind icating this is the correct one. The user can then press the Reset button to acknowledge, and stop all alert outputs. (Note : Each button is embossed with a Braille character). 1. Press and hold the Reset button for 2 seconds and it will recall th e last activated alert. Unique vi bration , blinking icon button and speaker sound will be repeated for 45 seconds. (Note; The flasher wi ll not flash during recall) . 2. A deaf / blind user can press each icon button sequentially to determ ine which icon button is active. When the user presses th e correct icon button , the vi bration will become continuous indicating this is the correct one. Each button is embossed with Braill e. 3. Press the Reset bu tton to stop and exit the mode . 13 Vibration Pattern Training Icon Buttons The CA-PX offers an exclusive training featu re that allows the users to familiarize themselves with the vibration pattern of each alert or icon button . @) -~ (0) @) 1. Press and hold the Learn button while unit is Powered On. The Learn button LED will be On. 2. Press and release any of the alert icon buttons . This activates the vibration pattern for 45 seconds, so the user can feel and learn . (Note: Button icon and speaker sound will also be active.) 3. Press the Reset button to stop or press another button to learn a new vibration pattern . 4. To exit the training session, Power Off the CA PX unit. 5. CA-PX will not respond to any wireless alert signal during the train ing session . Al.ning Acc..uory CA-A)( CA-SOS ® CA-oa. CA-OX. CA-OXH G) ,. A ... A "II (continuous' A /to A " _ 11.,,"" CA-MX CA-NOAA 0 " - e 0 Vlbrodng Pattern_ A _ , I p'US., rwpe.1.ts pcAU~ . .. . pau.. e, rapem AI peiIU A" _ , pau!.e , n!!peats CA-BX .. . p~UI • • CA-CX. CA-360 - CA-CX - I - T@pem pU,••, repe.ilt. PW.i8, r.pe'ats ,. =- 0. 7S ...c.ond shan "'fbrat. - = 2 seeCind long vlb"te P';iJu.se :: 1 ,.eond rlst 14 I Low-Battery Alerts Clear Internal Memory (Factory Default) The CA-PX unit has a built-in, low battery detection to monitor its own battery condition. The low battery indicator (also serves as the charging indicator) wi ll blink if the CA-PX battery is ru nning low. If the CA-PX cannot learn (or register) any accessories or registe r into a CA-360 system after several tries, the internal memory of the CA-PX may need to be cleared . The CA-PX also monitors low battery warning signal s transmitted from learned (or registered) CA-AX audio sensors. If a CA-AX low battery alert Is detected , user must then check all the batteries in the CA-AX accessories used in the system to eliminate this alert. Press and release the Learn button on the CA-PX for at least 18 times in quick succession until it flashes, vibrates and sounds a beep (if speaker is On ). Then relearn all accessories . , Ev."t In dlc.acor Visua l -- ~~ r; CA-PX Low8a:mtl') Notlflc:ation ~ Trouble Shooting FAQ Vb"'~ Se.ps. tfm•• (l r Ip.aur li o n). PLlJlh.s . Cantinuou s Bltnkl"o What type of batteries do I need for the CA-PX? Ans: Install 3 AAA-rechargeable batteries (N iMH ). For optimal performance, it is recommended that the batteries be replaced once a year. n._n ....p.ilb Ev.ry 1ti minutes @ Real_ C"""-l( L"", Battary SIIiJI1.11' To l ..-npOr.u'Y C.,cml CAoAX Law ~~ AI.rt l Hold bu tto n mora mill" a.. conda tD sU'.Ipen d th l .. OII_rt until the next 5Jgn -ll I~ Co nti nuoUI Blinking StOP B llnk lng (No Re... Alowod) FI.u;hu . VJlr:Mat and e•• p... tlOl •• TWICE 111'-pe..1Iker" o n ) wtlh 20 .eeond.. p u•• In ~l:W • • n. Th. n r.p1l.i1bi evelY 10 mlnu• • Fin"', Vlbll"~ . How many accessories can the CA-PX support? Ans: The CA-PX can support the same number of accessories as the CA-360 master unit. _nd e.. p ane. (tf spa.a.k.e r I. o ni r. c.ive d ilgaln 15 I just bought an extra doorbell or door knock sensor, but it did not work. What do I need to do? Ans: All new accessory devices must be learned or registered to the CA-PX unit (and CA-360 if used as the master unit) before they can be recognized or work. See the section in this manual for instructions as how to learn or register an accessory device. What is the maximum distance between accessories and the CA-PX? Ans: About 150 feet in open space (metal inside a wall can reduce this distance). Can I place CA-PX next to my Wi-Fi router? Ans: No. Please keep all other electronic equipment at least 5 feet away. How do I clear all registered accessories from the CA-PX? Ans: Press and release the Learn button at least 1B times in quick succession until it flashes, vibrates and sounds once (if Speaker is On) . How many accessory devices can CA-PX handle? Ans: The CA-PX can handle the same number of accessories as the CA-360 unit. Does CA-PX work with a CentralAlert™ CA-360 system? Ans: Yes . the CA-PX can be used as a remote receiver to a CentralAIert™ CA-360 master unit. Follow th e steps described in the CA-PX Application section to com plete the process. Does CA-PX offer a wireless signal repeater . function? Ans: Yes. CA-PX, CA-RX and CA-360 units offer a wireless repeater/relay function whereby each unit can re-broadcas t the received wireless signals to other similar receivers. This repeater function expands the coverage area of the entire system . How far can the CA-PX be located from CA-360? Ans: About 150 feet in open space (metal inside a wall can redu ce th is distance). 16 . Cleaning and Maintenance Model CA-MX • The surface of the device ca n be cleaned with a soft, dry cloth . • Do not use any sprays near the device . Do not use any solvents, chemicals, or cleaning solutions containing alcohol, ammonia orabrasives. • Do not allow liquids to spill into any openings. Model Wireless motion sensor to detect motion CA-NOAA Wireless NOAA (weather alert) radio output monitor CA-PX Wireless personal pager/receiver unit that performs the same receiving and alerting functions as a CentralAlert™ CA-360 unit CA-RX A CentralAlert™ remote unit that serves as a receiver to expand system coverage area (no clock display) CA-SOS Wireless personal button for paging help BS-100 Extra bed shaker Model Model Other Accessories for the Model CA-PX Model Model CA-AX Model Model Model Model Model Wireless audio alarm sound monitor CA-BX Real-time wireless baby-crying sound monitor CA-CX Wireless cell -phone ringing detector CA-OB Wireless door bell unit CA-OX Wireless door knocking sensor CA-OXH Wireless door knocki ng sensor with plastic door hanger Model 17 - .. Warranty I Service Information Incidental of Consequential Damages: Your CentralAJert™ CA-PX comes with a one-year limited wa rranty. We warra nt during this warranty period - from the date of purchase to the original consumer - the CentralAlert™ CA-PX is free from defects in materials and workmanship under intended home use. In the event that CentralAlert™ CA-PX fails to fu nction properly with in one year of the original purchase (and after 30 days), due to defects in material or workmanship, call Serene Innovations for a Return Authorization Number and Return Instructions, then return the unit with proof of purchase (sales receipt or packing slip, no exceptions) and a check for handling and shipping return of US$9.95 to Serene Innovations. Serene Innovations will eith er repai r or replace the unit (with a refurbished unit or a un it of equal condition) and return it 10 you (using UPS/USPS ground shipping) at no cost to you. If the unit is returned within 30 days of purchase the un its shipping will be prepaid by Serene Innovations with the proof of purchase included . Neither Serene Innovations, Inc. nor the retailer, dealer or selling distributor has Ihe responsibility for any incidental or consequential damages, including, without limitation, commercial loss of profit or for any incidental expenses, loss of time or inconvenience . Some states do not allow exclusion or limitation of incidental or consequential damage, so the above limitation or exclusion may not apply to you . This warranty does not apply to any product that has been accidentally damaged, abused , misused or neglected, used on electrical frequen cy or voltage other than marked on product and/or described in the manual. Defects or errors caused by unauthorized alterations, repairs and/or tampering, are also not covered by this warranty. This Warranty gives you specific legal rights and you may also have other legal rights that vary from state to state. 18 .. Specifications If a defect covered by this warranty should occur, promptly contact a Customer Care Representative by phone , or log onto www.sereneinnovations.com to obtain a Return Merchandise Authorization Number (RMA) and shipping instructions before shipping the product to Serene Innovations. Any shipment without an RMA number, will not be accepted and will be returned to you at your expense . Any authorized retumed product must be accompanied by a proof of purchase and a brief explanation of the problem . Technology Bed Shaker Output Battery Backup 2.4 GHz Smart Code 5 VDC, 150mA 3 x AAA Size NiMH rechargeable Battery Use Time 3 to 6 days depending on usages AC Adapter Input 100-240 VAC , 50 / 60 Hz 5VDC 600-1000 mA AC Adapter Output Operating temperature +10 to 40 C Dimensions: Approximately 57 x 108 x 32 W x D x H mm) w/belt clip Weight Approximately 110 grams (with battery) For out-of-warranty repair and service , please contact our Customer Care Department for a price quote and instructions. SpeCifications are subject to change. 19 FCC Rules Information 1. Where it can be done safely, re-orient the receiving television or rad io antenna. 2. To the extent possible, relocate the television , radio or other receiver, with respect to the cordless phone. 3 . Connect the cordless phone and AC adapter into a different electrical outlet. 4. Consult the dealer or an experienced rad iolTV techniCian for help . Modification: Any modification not expressly approved by the manufacturer of this device could void the user's authority to operate the device. This device complies with Part 15 of the FCC rules. Operation is subject to the following two conditions: (1) this device may not cause harmful interference and (2) th is device must accept any interference received , including interference that may cause undesired operation. This equipment has been tested and found to comply with the limits of a Class 8 digita l device , pursuant to Part 15 of FCC rules. These limits are designed to provide reasonable protection against harmful interference in residential Installation. This equipment generates, uses and can radiate radio frequency energy if not installed and used in accordance with the instructions, may cause harmful interference to radio communications. However, there is no guarantee that interference will not occur in a particular installation . If th is equipment does cause harmfu l interference to radio or television reception, which can be determined by turning the equipment off and on, you may try one of the following methods to correct the interference: Notice: The Industry Canada label identifies certified equipment. This certification means that the equipment meets telecommunication network protective, operational and safety requ iremen ts as prescribed in the appropriate Terminal Equipment Technical Requ irements document(s). The Department does not guarantee the equipment will operate to the user's 20 ....... satisfaction . Caution : Users should not attempt to make such connections themselves, but should contact the appropriate electric inspections authority or electrician , as appropriate. The REN for this amplified telephone is stated on the IC regulatory label located on the bottom of the product. Before installing this equipment, users should ensure that it is permissible to be connected to the facilities of the local telecommun ications company. The equipment must also be installed using an acceptable method of connection . The customer should be aware that compliance with the above conditions may not prevent degradation of service in some situations. NOTICE: The Ringer Equivalence Number (REN) assigned to each terminal device provides an indication of the maximum number of terminals allowed to be connected to a telephone interface. The termination on an interface may consist of a combination of devices, subject only to the requirement that the sum of the Ringer Equivalence Numbers of all the devices does not exceed 5. Repairs to certified equipment should be coordinated by a representative designated by the supplier. Any repairs or alterations made by the user to this eqUipment or equipment malfunctions, may give the telecommunications company cause to request that the user disconnect the equipment. Users should ensure, for their own protection that the electrical ground connections of the power utility, telephone lines and internal metallic water pipe system, (if present) are connected together. This precaution may be particularly important in rural areas. This Class B digital device complies with Canadian ICES-003, RSS 210 Issue 8 Please dispose of used batteries properly, following any local regulations . Do not incinerate . 21 ~ SERENE" ~ Irlnovajion, Serene Innovations, Inc. 14731 Carmenita Road , Norwalk, CA. 90650 Toll Free 866-376-9271, Fax: 560-483-2087 Website: www.sereneinnovations .com Email: [email protected] 22