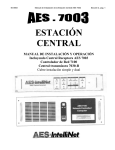
1
IN-SYNC NT IN-SYNC NT USER MANUAL Visa S.p.A. Via I° Maggio, 55 – 31043 Fontanelle (TV) Page 1 112000000014-001-00 – 12/10/2011 Printed in Italy. All rights reserved. IN-SYNC NT Contents 1. Introduction............................................................................................................................................... 3 2. General description and key functions .................................................................................................. 4 2.1. MODE - selecting the mode ................................................................................................................ 4 2.1.1. OFF ............................................................................................................................................................ 4 2.1.2. MAN ........................................................................................................................................................... 4 2.1.3. AUTO ......................................................................................................................................................... 4 2.1.4. TEST .......................................................................................................................................................... 5 2.2. START / STOP (manual) ................................................................................................................... 6 2.3. Closing/opening the unit circuit breaker manually .............................................................................. 6 2.4. Closing/opening the mains circuit breaker manually .......................................................................... 6 2.5. Display and programming keys........................................................................................................... 6 3. Display data and communications ......................................................................................................... 7 3.1. 3.2. 3.3. 3.4. 3.5. 3.6. 3.7. 3.8. 3.9. Information regarding the genset (Start-up page)............................................................................... 7 Details of additional info displayed on Page 1 .................................................................................... 8 Alarm List .......................................................................................................................................... 10 Measurement .................................................................................................................................... 10 Measurement I/O .............................................................................................................................. 11 History ............................................................................................................................................... 11 Setpoints ........................................................................................................................................... 12 Users / Password .............................................................................................................................. 12 Example of how to modify parameters using the password ............................................................. 13 4. Operating configurations ...................................................................................................................... 15 4.1. 4.2. 4.3. 4.4. 4.5. 4.6. 4.7. PGE910 load sharing configuration .................................................................................................. 15 PGE920 load management configuration ......................................................................................... 17 PRE910S import parallel with the mains configuration ..................................................................... 18 PRE920S export parallel with the mains configuration ..................................................................... 19 PRE930S base load parallel with the mains configuration ............................................................... 20 Automatic remote control configuration ............................................................................................ 21 PRE940S configuration: automatic for SPTM mains emergency ..................................................... 22 5. List of parameters .................................................................................................................................. 24 6. Connecting to a personal computer (optional) ................................................................................... 26 7. Troubleshooting ..................................................................................................................................... 27 Visa S.p.A. Via I° Maggio, 55 – 31043 Fontanelle (TV) Page 2 112000000014-001-00 – 12/10/2011 Printed in Italy. All rights reserved. IN-SYNC NT 1. Introduction Thank you for having purchased a generating set equipped with the In-sync NT board. We recommend you read this manual carefully and comply with all standards relative to safety and correct use and maintenance of the generating set. Should any doubts arise while reading the manual or using the unit, please contact a Visa technician. The information contained herein is correct at the time of printing but can be changed without prior notice or notification, in line with our objectives of continuous product development and improvement. This manual, together with the engine and alternator manuals and other documents delivered with the machine, are an integral part of the “Visa Generating Set” (hereinafter called genset). This manual and the attached documentation are intended to be consulted by all those involved in the life cycle of the machine and must therefore, always be kept and made accessible to the user. Compliance with all the safety requirements is the customer's responsibility. The generating set is a machine intended to be used by duly trained personnel. Errors when installing or using the machine can seriously damage the user’s system, the machine itself or injure those involved. There can be hazardous voltages inside the generating set and the control board even with the genset switched off: do not start-up, perform maintenance, repairs or alterations without specific knowledge or precise guidelines. All the operations must always be performed in compliance with the safety standards. Carefully read this manual together with those of the generating set, engine and alternator. If still in doubt, contact a VISA technician or the nearest authorised service centre The In-Sync-NT board is designed to guarantee maximum programming flexibility and this manual contains the description of the most common functions. Please contact our Sales Department for further information regarding programming options. There are two main configurations: PGE & PRE (parallel units and parallel to the mains, respectively), each can be customised as described further on. The In-Sync NT can be programmed according to different requirements and can be integrated with software or hardware. Given the complexity of the equipment, it is recommended to always contact the VISA Technical Department for such operations. The main operating modes are listed below: - PGE900 individual manual mode. - PGE900 automatic remote control. - PGE910 parallel load-sharing manual mode. - PGE920 parallel automatic load management. - PRE910S import parallel with the mains. - PRE920S export parallel with the mains. - PRE930S base load parallel with the mains. - PRE940S Automatic for power failure and short parallel with the mains when the power is restored (SPtM hardware and software basic version to be agreed upon with the Technical Department). - Special modes to be added to the standard modes, upon request The first part of the manual describes the equipment and its main functions, common to all operating modes. The various applications are then dealt with further on. Visa S.p.A. Via I° Maggio, 55 – 31043 Fontanelle (TV) Page 3 112000000014-001-00 – 12/10/2011 Printed in Italy. All rights reserved. IN-SYNC NT 2. General description and key functions The In-Sync NT device has 14 keys dedicated to programming and general functions. The various functions are described in detail in the paragraphs further on. 2.1. MODE - selecting the mode KEY FUNCTION NOTES These keys are used to toggle between OFF, MAN, AUTO and TEST. Press or to move the cursor to the desired mode. Note: a password can be enabled to authorise the operation. The relative procedure is provided below. DANGER: Switching from one mode to another can start-up the engine or de/activate the mains or genset circuit breakers. Before performing any operation, make sure no hazardous situation can occur Description of the operating modes: 2.1.1.OFF When the In-Sync NT device is OFF, the Start and Stop commands on the panel and any external commands, such as remote contacts, special functions and software commands are disabled. The , , , , , commands remain enabled to select other modes or view the information pages. The battery charger and pre-heater (if supplied) work normally. The relay contact in versions equipped with MCB control remains closed when supply voltage is present. If a power failure occurs in such an instance, the genset is not started: the power of the user’s system will be disconnected and reconnected as though the genset were not present. IMPORTANT: If the device is disconnected via the key or the battery/batteries being disconnected, it starts up in the same mode as when it was switched off! Therefore, the operator must pay particular attention when the machine is restarted so as to prevent unexpected start-ups. 2.1.2.MAN When the In-Sync NT device is in MANUAL mode, the genset can be started and stopped via the keys (see paragraph 2.2). The circuit breaker can also be operated manually via the / keys. 2.1.3.AUTO When this function is enabled, it allows the unit to be started and stopped remotely or started-up automatically in the event of a power failure. The manual command keys I/ON position. , and are disabled. The key can also be removed when it is in the DANGER: before selecting the AUTO mode, make sure the genset cannot be started inadvertently due to programming or a connection error Visa S.p.A. Via I° Maggio, 55 – 31043 Fontanelle (TV) Page 4 112000000014-001-00 – 12/10/2011 Printed in Italy. All rights reserved. IN-SYNC NT 2.1.4.TEST In addition to the functions available in the AUTO mode, the input for the empty or loaded generating set periodic test to be performed, is enabled. This function is used to periodically run the generating set to verify its efficiency. DANGER: before selecting the TEST mode, make sure the genset cannot be started inadvertently due to programming or a connection error The In-Sync NT board can control various test modes according to the configuration supplied. Empty Test Loaded Test with short parallel Loaded Test with long parallel The generating set is started-up once the external command is closed but the circuit breaker on board the machine (GCB) is not closed. The genset continues to run on empty without powering the load. Available in all PRE and PGE configurations. Available in all PRE configurations. The genset starts-up when the test is activated, then synchronises with the mains, supplies the load itself and opens the mains circuit breaker. The entire load is then powered by the generating set. The inverse process is performed once the test is complete, thereby transferring the load to the mains and switching the genset off. The entire process takes place with no voltage dips. Available in the PRE910/920/930S configurations. The genset starts-up when the test is activated, then synchronises with the mains, supplies the load while leaving the mains circuit breaker closed. If the load exceeds the power set for the test (basic setting -> base load) the load remains partially powered by the mains. If the load is less, the surplus power is exported to the mains. The periodic test verifies that the genset is working correctly and prevents power failures. Of course, this does not mean the maintenance technician is not required to perform a direct inspection of the genset through which any anomalies can be noted. The periodic test can be performed on empty but the loaded test must still be considered as this is more reliable. Visa S.p.A. Via I° Maggio, 55 – 31043 Fontanelle (TV) Page 5 112000000014-001-00 – 12/10/2011 Printed in Italy. All rights reserved. IN-SYNC NT 2.2. START / STOP (manual) KEY FUNCTION NOTES START Start-up (activated in manual mode) If the genset is in MAN mode Press this key for the engine to start-up once the “pre-start time” elapses (normally 5 s). Engine start-up does not imply the genset circuit breaker is closed. In manual mode, this is STOP This key is used to turn the engine off. Press the key once to open the machine circuit breaker and for the engine to switch to the “cooling” state (empty operation to cool down). The engine goes off after a standard time of 2 minutes. performed by pressing the key (see below). The STOP key is only enabled if the device is used in MANUAL mode with the engine running. 2.3. Closing/opening the unit circuit breaker manually KEY FUNCTION NOTES This key is used to operate the unit circuit breaker. In manual mode, with the unit idle, press the unit circuit breaker to close it, thereby powering the electric load connected to the genset. Press the circuit breaker once again to open it. It is recommended not to use the genset for more than 20 operations/hour in order to prevent the operating mechanism from overheating. 2.4. Closing/opening the mains circuit breaker manually KEY FUNCTION NOTES This key is used to operate the mains circuit breaker in any PRE configuration. In manual mode, press this key to close the circuit breaker, thereby powering the electric load connected to the mains. Press the circuit breaker once again to open it. It is recommended not to use the genset for more than 20 operations/hour in order to prevent the operating mechanism from overheating. 2.5. Display and programming keys KEY FUNCTION The default page displays: - the OFF, MAN, AUTO and TEST mode; - the load in kW connected to the unit; - the READY, LOADED, etc. status; - the OPEN/CLOSED status of the circuit breaker; - the cos, engine revs, any activated timers, cooling time, pre-starting, etc.; Much more information is available by pressing the yellow keys: The ENTER key confirms the selections made. Press ESC to return to the upper level and view the menus. Visa S.p.A. Via I° Maggio, 55 – 31043 Fontanelle (TV) Page 6 . 112000000014-001-00 – 12/10/2011 Printed in Italy. All rights reserved. IN-SYNC NT 3. Display data and communications The In-Sync NT device communicates all the information relative to the generating set, electrical parameters, engine parameters, faults and alarms to the operator via special pages on the display. 3.1. Information regarding the genset (Start-up page) This page is only visible when the device is switched on. It is useful to obtain all the specifications of the genset and the In-Sync NT version, which are necessary when requesting assistance. The type and model of the genset, serial number of the device, software version, selected operating mode and type of electrical layout can be viewed on this page (Figure 1). 6Bh Inteligen Comap 2000 P130S Serial: 081104FE SW ver: 5,3.5,3 Appl: MINT Branch: Standard Figure 1: IMPORTANT INFORMATION REGARDING THE GENSET (page 0 start-up) Figure 1 Key: Generating set model In-Sync NT board serial number Software version Type of application NOTE: this display only appears for a few seconds. The display then switches to the next page (1), described below. Once the device is switched on, it automatically displays PAGE 1 ( Figure 2), and automatically returns when the keys are not used for 4 minutes. 1 2 3 4 7 5 8 6 Figure 2: PAGE 1 Visa S.p.A. Via I° Maggio, 55 – 31043 Fontanelle (TV) Page 7 112000000014-001-00 – 12/10/2011 Printed in Italy. All rights reserved. IN-SYNC NT Figure 2 Key: Cursor positioned on OFF, MAN, AUTO or TEST (for the SPtM application) The exclamation mark indicates a pre-alarm, which is currently not dangerous but must be checked Genset status: Ready, Loaded, Cranking, etc. Mains circuit breaker status: Open (operates with the mains) or BRKs off (open circuit breaker) Engine revs per minute Applied load Power factor Countdown in progress, e.g. cooling time is 120 s, the countdown to zero is displayed. Any active alarms are displayed in a list format: Alarm list 2 Fls Oil press Fls Water Temp Service time The example above indicates 3 active alarms: - the alarm signal given by the oil pressure sensor - the alarm signal given by the coolant temperature sensor - the warning signal given by the timer indicating the next scheduled maintenance is due NOTE: the device will permanently display the alarm messages (faults) together with the PAGE 1 parameters until an operator performs a manual reset. The alarm messages remain saved in the device memory, whereas the warning messages are only displayed when they occur. 3.2. Details of additional info displayed on Page 1 As has been mentioned earlier, page 1 displays a lot of information by simply pressing the or keys. If the keys are pressed several times, all the screens are displayed, returning to the main page at the end. The In-Sync NT device can monitor and measure: phase voltage/phase and frequency of the genset and the mains, status of the mains and the load, calendar and device clock and much more information. Simply press to view the information and the following screens will be displayed in sequence. The following appear on the display: unit frequency, phase-neutral voltage and phase-phase voltage of the unit, (in this case they are 0 as the unit is stopped) Generator phase by phase current value. Visa S.p.A. Via I° Maggio, 55 – 31043 Fontanelle (TV) Page 8 112000000014-001-00 – 12/10/2011 Printed in Italy. All rights reserved. IN-SYNC NT Bus frequency, phase-neutral voltage and phasephase voltage of the bus (the BUS is the downstream system of the machine circuit breaker). Current to Earth value (optional). Active power, power factor, reactive power and apparent power of the unit for each phase. Battery voltage, control board temperature, voltage D+ (alternator battery charger). Values of additional external sensors (optional). Phase displacement of the unit with respect to the bus, its graphical display via the synchroscope; unit voltage and bus voltage, value in V of the engine speed adjustment signal and the percentage of the alternator voltage adjustment. Unit operating hours, number of start-ups, number of failed start-ups, hours left for the first, second, third and fourth scheduled maintenance. Visa S.p.A. Via I° Maggio, 55 – 31043 Fontanelle (TV) Page 9 112000000014-001-00 – 12/10/2011 Printed in Italy. All rights reserved. IN-SYNC NT kW/h, kVA/h produced by the unit, date and time. Unit priority (in the case of multiple machines in parallel), total power available, total power reserve and binary information. All the above-mentioned information is displayed starting from PAGE 1 and pressing the Other pages are available and can be used. or keys. NOTE: if the display backlight is off, this will light up when any key is pressed. The commands will be implemented when the key/s are pressed again. Press to return to the main menu. A menu will appear on which the cursor can be moved: select the desired row and press ENTER (Figure 3). Figure 3: Selection menu 3.3. Alarm List The third page (Figure 4) displays the list of events saved by the In-Sync NT. All the operations carried out by the equipment or the alarms it has detected can be reconstructed. No. reason ► 0 Fls water temp 1 Fls oil press 2 Switched on 3 Fls water temp 4 Fls oil press 5 Switched on 118 Sd min oil level 11:42 : 10 27/04/04 Figure 4: page 3 3.4. Measurement This is page 1 ( Figure 2), described in Paragraph 3.1 on page 7. Visa S.p.A. Via I° Maggio, 55 – 31043 Fontanelle (TV) Page 10 112000000014-001-00 – 12/10/2011 Printed in Italy. All rights reserved. IN-SYNC NT 3.5. Measurement I/O This menu item displays the status of all inputs and outputs. The relative indicative screens are shown below in sequence. 3.6. History The In-Sync NT control unit logs all the events and operations it performs automatically and every external command. These are accessed from the "History" menu Examples are provided further on. The logged date and time are indicated for each event. Those in the example below refer to the cursor position that indicates a diesel low level pre-alarm. Press to display the status of all the inputs and outputs when the event occurred. Press ESC to return to the main Menu. Visa S.p.A. Via I° Maggio, 55 – 31043 Fontanelle (TV) Page 11 112000000014-001-00 – 12/10/2011 Printed in Italy. All rights reserved. IN-SYNC NT 3.7. Setpoints The figures below show how the "Setpoints" screens are accessed. This part of the menu is mostly dedicated to trained technicians who know how the system works. However, it can be accessed freely, but the parameters can only be changed if a password is entered. Therefore, everything is visible but not everything can be modified. A few examples are found in Paragraph 3.9 on page 3. 3.8. Users / Password The figures in this paragraph indicate the screens relative to entering the passwords. The password must be different for each type of user: OPERATOR The default password for the operator is 301. This password allows the MODE keys to be released for the unit mode to be toggled between MAN and AUTO DEALER OPERATOR This is reserved for the dealer called for maintenance purposes. VISA OPERATOR This is reserved for the VISA technician to perform adjustments that affect machine operation. Visa S.p.A. Via I° Maggio, 55 – 31043 Fontanelle (TV) Page 12 112000000014-001-00 – 12/10/2011 Printed in Italy. All rights reserved. IN-SYNC NT 3.9. Example of how to modify parameters using the password All the parameters of the In-Sync NT device are at different protected levels of the menu, access to which is protected by 3 passwords. Some of these parameters can be password-free: namely, the first level of protection is accessible to the customer operator, by entering the password: 301. DANGER: The parameters must only be modified by trained personnel. Follow the steps below to access the editable SERVICE TIME parameters: - Press - Move the cursor on to USERS/PASSWORD using the - Press - position the cursor on OPERATOR and - press - A number (zero) will appear when - Press the yellow key advance quickly). - Confirm by pressing - Press to exit and return to the menu. Position the cursor on the desired menu item, e.g. “Engine protect”. - Press . Position the cursor on the “SERVICE TIME” value (next scheduled maintenance) to be set (1, 2, 3 or 4). - Press - Edit the value of the next interval (in hours) to be set using - Confirm by pressing - Exit by pressing until the main menu is reached. Select MEASUREMENT and press ENTER to return to PAGE 1. to view the menu on the display. key. for the screen below to appear: for the screen below to appear: is pressed. until number 301 is reached (keep the key pressed for the number to . . and . . Visa S.p.A. Via I° Maggio, 55 – 31043 Fontanelle (TV) Page 13 112000000014-001-00 – 12/10/2011 Printed in Italy. All rights reserved. IN-SYNC NT Setting the date and time: - Press to view the menu. Position the cursor on SETPOINTS. - Press Move the cursor on DATE/TIME. - Press - Adjust the date and time using the - Press - Press to return to the menu. Position the cursor on MEASUREMENT. - Press . and keys. to confirm the change. to return to PAGE 1. NOTE: The In-Sync NT device always returns to PAGE 1 once 3 minutes elapse after the last key is pressed. Visa S.p.A. Via I° Maggio, 55 – 31043 Fontanelle (TV) Page 14 112000000014-001-00 – 12/10/2011 Printed in Italy. All rights reserved. IN-SYNC NT 4. Operating configurations The following cases are illustrated for simplicity's sake, considering two generating sets or one generating set and the mains. Similar applications are possible with a maximum of 32 units in parallel. A current transformer (CT) must be installed for applications in parallel with the mains, which detects the current to and from the mains. This must be placed on phase n° 3; placing the CT on a different phase causes a reading error of the cosφ and therefore the power also. Specific regulations govern PRE system configurations, consisting of the genset in parallel with the mains, which regulate this possibility and depend on the local electric utility provider. The local regulations may impose the installation of appropriate devices that interface with the mains; the customer is obliged to verify that such requirements are met. 4.1. PGE910 load sharing configuration This allows the load to be powered simultaneously by two or more units connected in parallel with no synchronisation with the mains. The absorbed load is divided equally between them (50% in the case of 2 units). Example: a customer with a load of 100 kW that can never have power interruptions. A solution could be 2 x 100 kW units (or higher, depending on the type of load), connected in parallel and always on. The failure of one does not suspend the supply since the second unit supplies all the energy required. This solution also allows routine maintenance to be performed on one generating set at a time, without interrupting the power supply. The fuel consumption increases but the risk of voltage dips decreases significantly. Examples: - Important public events, with no mains power supply. - Telephone, television and radio repeaters installed in remote areas, with no mains power supply. - Critical applications. GENSET 1 100 kW GENSET 2 100 kW LOAD 100 kW Visa S.p.A. Via I° Maggio, 55 – 31043 Fontanelle (TV) Page 15 112000000014-001-00 – 12/10/2011 Printed in Italy. All rights reserved. IN-SYNC NT LOAD GENSET 1 GENSET 2 FAULT STOP MAINTENANCE FAULT Note how the load is always powered despite interrupted operation of the two units, caused by a fault or a programmed stop, such as maintenance. This method can also be used if a customer already has a generating set (e.g. 60 kW) and has a larger load to power that exceeds the nominal power of the unit used (60 to 100 kW). Instead of buying a 100 kW unit, a second unit can be supplied whose power is equal to the increase in load (40 kW). The Load sharing application allows the power to be distributed proportionally to the nominal power of the units. In this case, when operating at maximum load, if a fault should occur in one of the two units, there will be an overload in the second unit. In this case, special functions of the In-Sync NT are used to transmit a partial load release command. Even if the units are switched off for routine maintenance to be performed, a load reduction is required. GENSET 1 60 kW GENSET 2 40 kW LOAD 60 100 kW This application must be designed and approved by a Visa spa technician and is provided in this manual for the information to be complete. In this case, the In-Sync NT device must only be programmed by Visa technicians. Visa S.p.A. Via I° Maggio, 55 – 31043 Fontanelle (TV) Page 16 112000000014-001-00 – 12/10/2011 Printed in Italy. All rights reserved. IN-SYNC NT 4.2. PGE920 load management configuration The consumption of the generating set is optimised to use around 75% of the nominal power. One or more units can be switched off during low load periods (e.g. at night) in the case of loads with broad and slow variations. The load management function allows automatic start-up and shutdown limits of the units to be set according to the load variation. The start-up/shutdown of the units can also be controlled manually or via external automatic systems. The order of priority of operation can be set manually or automatically according to the operating hours of the units (uniform wear of the machines). Important note: the unit requires a variable time within the 40 second range to start-up and synchronise itself (depending on the type of unit). It is important that the load is not increased much during this interval so as not to overload the running genset. Where: LOAD GENSET 1 GENSET 2 Load performance Start-up/shutdown of the 1st unit Start-up/shutdown of the 2nd unit This example represents the operation of two units, according to the load applied. Note how unit n°2 (GENSET 2) starts-up when the set value of 40 kW is exceeded and shuts down when the value drops below 30 kW. This application must be designed and approved by a Visa spa technician and is provided in this manual for the information to be complete. In this case, the In-Sync NT device must only be programmed by Visa technicians. Visa S.p.A. Via I° Maggio, 55 – 31043 Fontanelle (TV) Page 17 112000000014-001-00 – 12/10/2011 Printed in Italy. All rights reserved. IN-SYNC NT 4.3. PRE910S import parallel with the mains configuration This option allows the customer to connect his load to the mains, setting a maximum absorbed power limit. Once this is exceeded, the generating set starts-up in parallel with the mains, powering the excess load. This allows the customer to avoid sanctions or disconnections from the mains due to overloads. The genset can also be kept constantly on, ready to make up for variations or started-up once the pre-set load threshold is exceeded. The board automatically detects the power failure and intervenes by opening the circuit breaker interfaced with the mains (MCB), thereby blocking the power supply to the mains. The Sys Start/stop contact must be kept closed for the genset to always be used in parallel with the mains. The process control\import parameter defines the load that will be absorbed from the mains and the rest of the load will be supplied by the genset. Where: LOAD MAINS LOAD GENSET LOAD MCB GCB Load performance Performance of the load absorbed from the mains Performance of the load supplied by the unit Status (open/closed) of the mains circuit breaker Status (open/closed) of the unit circuit breaker Since the genset reacts slowly to the load variations with respect to the mains, the load fluctuations are always met by the mains. The genset reacts to a variation in load with a delay of a few seconds, thereby bringing the absorbed power back to the set value. The load can also be controlled with the genset switched off (SysStart/Stop contact open) and the peak autostart option activated. In this case, hysteresis thresholds must be set for the start and stop functions of the generator so as to prevent frequent start-ups due to load fluctuations. This application must be designed and approved by a Visa spa technician and is provided in this manual for the information to be complete. In this case, the In-Sync NT device must only be programmed by Visa technicians. Visa S.p.A. Via I° Maggio, 55 – 31043 Fontanelle (TV) Page 18 112000000014-001-00 – 12/10/2011 Printed in Italy. All rights reserved. IN-SYNC NT 4.4. PRE920S export parallel with the mains configuration This option allows the genset to run, supplying the mains with constant power whilst powering the load simultaneously. This way, the genset produces all the energy absorbed by the load together with the amount that is to be supplied to the mains. The In-Sync NT board automatically detects a power failure and intervenes by opening the circuit breaker interfaced with the mains (MCB), thereby blocking the power supply to the mains. It will then continue to power the load. When the power is restored (with a programmable delay), it will synchronise with the mains and resume the supply. This is achieved by keeping the SysStart/Stop contact closed and setting the load value to be exported in the Process control\import parameter. The value will be entered as "negative” to indicate to the board that the power is outgoing. Where: LOAD MAINS OUT GENSET LOAD MCB GCB Load performance Performance of the load supplied to the mains Performance of the load supplied by the generating set Status (open/closed) of the mains circuit breaker Status (open/closed) of the unit circuit breaker This application must be designed and approved by a Visa spa technician and is provided in this manual for the information to be complete. In this case, the In-Sync NT device must only be programmed by Visa technicians. Visa S.p.A. Via I° Maggio, 55 – 31043 Fontanelle (TV) Page 19 112000000014-001-00 – 12/10/2011 Printed in Italy. All rights reserved. IN-SYNC NT 4.5. PRE930S base load parallel with the mains configuration This option allows the genset to run for the prevailing supply of the load. As long as the load is less than the set power, it is powered solely by the generator; the excess will be supplied by the mains. The board automatically detects a power failure and intervenes by opening the circuit breaker interfaced with the mains (MCB), thereby blocking the power supply to the mains. In this case, the load shedding contacts should be used, which allow non-priority loads to be released in case of an overload in the generator. When the power is restored (with a programmable delay), it will synchronise with the mains and resume the supply. Setting the value of the power to be exported in Process control\base load, the unit will supply energy up to the set value and the rest will be supplied by the mains. Where: LOAD MAINS LOAD GENSET LOAD MCB GCB Load performance Load absorbed from the mains Load supplied by the generating set Status (open/closed) of the mains circuit breaker Status (open/closed) of the unit circuit breaker This application must be designed and approved by a Visa spa technician and is provided in this manual for the information to be complete. In this case, the In-Sync NT device must only be programmed by Visa technicians. Visa S.p.A. Via I° Maggio, 55 – 31043 Fontanelle (TV) Page 20 112000000014-001-00 – 12/10/2011 Printed in Italy. All rights reserved. IN-SYNC NT 4.6. Automatic remote control configuration The basic version of the In-Sync NT device has an input for a voltage free contact called SYS Start/Stop. Close the contact for the In-Sync NT device to automatically start-up or shutdown the genset (in AUTO mode), managing the start-up times and circuit breaker on board the machine, whilst also turning the engine off automatically if a fault occurs. The genset start-up can be controlled if a suitable device is connected to this input, which activates the opening and closure of the contact (e.g. clock, manual selector, power presence sensor, radio control, etc.). Moreover, the In-Sync NT device provides a potential free contact for possible consent to the changeover switch panel (ATS). In this case, the mains detection must be carried out by an external device and suitable devices must be set-up in the user’s system for the proper connection and disconnection of the electrical load The remote controlled AUTO mode operating cycle is subject to the standard factory-set times, some of which are editable; see Engine params. ATTENTION: The engine starts-up immediately when the mode is switched to Auto with the remote contact closed. Selecting the automatic mode - Turn the device on by bringing the key to the I/ON position; - Wait for the device to display page 1; - Check that the top cursor is positioned on OFF (point 1, figure 2), otherwise, press one of the two MODE keys until OFF is reached; - Check that the remote contact is open; - Press MODE and bring the cursor on AUTO. At this point, contact closure results in unit start-up, stabilising of the revs and closure of the circuit breaker on board the machine. The key can also be removed when it is in the I/ON position If a number of units are used, once the contact is closed (if connected in parallel to all the gensets), all of them will start-up and synchronise. When the contact is opened, the genset opens the circuit breaker on board the machine, remains on for the cooling process and then goes off once the set time elapses (programmable). Refer to the wiring diagram supplied with the genset for the numbering of the terminals and the activated inputs. NOTE: The external contact must be potential free and the recommended section is 2.5 mm2 for a maximum distance of 200 m (the circulating voltage at the top of the contact will be 12V or 24 V DC, depending on the electrical system of the engine). It is important that the wires are insulated from possible sources of interference. Remote fault warning The standard configuration of the In-Sync NT device is equipped with two potential free contact outputs; one for a cumulative warning of the pre-alarms (events that require attention but do not stop the machine) and another for a cumulative warning of the alarms (that stop the machine or prevent start-up). Several other outputs/inputs can be programmed according to agreements reached with the Visa Technical Department. Visa S.p.A. Via I° Maggio, 55 – 31043 Fontanelle (TV) Page 21 112000000014-001-00 – 12/10/2011 Printed in Italy. All rights reserved. IN-SYNC NT 4.7. PRE940S configuration: automatic for SPTM mains emergency The automatic for a mains emergency version of the In-Sync NT device (and short parallel with it when it is restored), allows a system to be controlled automatically according to a pre-set cycle, thereby causing the genset to start-up in the event of a power failure, powering of the user system and the shutdown of the genset once the normal conditions are restored. The main advantage of using the In-Sync NT is that synchronisation can be implemented once the power is restored and the load can be gradually shifted from the unit to the mains without the typical voltage dip in changeover switch panels. This function is activated by selecting the AUTO mode (see paragraph 2.1). The following graph illustrates the temporal sequence of the events and operations. Key: MAINS GENSET MCB GCB MAINS POWER GENSET POWER LOAD POWER 1 2 3 4 5 5-6 6 7 Mains presence Status of the generating set: start-up/shutdown Opening/closing of the mains circuit breaker Opening/closing of the unit circuit breaker Power absorbed from the mains Power supplied by the unit Load consumption Power failure, the mains circuit breaker opens The genset starts-up after a pre-set delay (not to have untimely start-ups) The unit circuit breaker is closed and the genset powers the load Power supply is restored The genset synchronises with the mains and closes the MCB after a programmable delay (to verify mains stability). The load is gradually transferred from the unit to the mains When the genset is unloaded, its circuit breaker opens: the entire load is powered by the mains. The genset stops once the set cooling time elapses Notes: a) A power failure occurs when the supply voltage exceeds the set minimum/maximum threshold or an asymmetry is detected for a period of time set in the mains out-of-range delay parameter. b) The engine start-up cycle is automatically repeated 5 times (can be set up to a maximum of 10). A pause takes place between one attempt and another in order to prevent the starter motor from Visa S.p.A. Via I° Maggio, 55 – 31043 Fontanelle (TV) Page 22 112000000014-001-00 – 12/10/2011 Printed in Italy. All rights reserved. IN-SYNC NT c) d) e) f) g) overheating. The start-up cycle in gensets equipped with pre-chamber engines (low power) is preceded by a start-up time of the spark plugs that lasts 11 s. The time that the engine takes to reach the nominal rotation speed depends on its size and characteristics and varies between 5 and 20 s. The device considers the engine as started-up when the signal deriving from the alternator battery charger has reached the expected value or the frequency of the main alternator of the genset has exceeded 20 Hz. After this time, the engine runs empty for 20 s; this time can be set but it is recommended not to set it to less than 10s. The device controls the correct operation of the genset and protects the engine by shutting down automatically if faults should arise during operation. The device starts counting the time the power supply takes to be restored as soon as the voltage values fall within the set thresholds. 60 s elapse before the load is switched to the mains in order to prevent a sudden changeover due to the possible instability of the values. Mains presence is determined by the values falling within the set thresholds. The power is considered to be restored when the voltage values fall within the set thresholds less the fixed hysteresis. The hysteresis value is 4% for the voltage and 20% for asymmetry. E.g. if the maximum supply voltage out-of-range value is 435V (for a nominal voltage of 400V), the device considers the voltage within range when the value is less than 417.6 V. If during the cooling time, another power failure occurs, the device immediately transfers the load to the genset once again. The standard version of the gensets (PRE940S version) has been conformed to the international standard, which stipulates a system must have two circuit breakers: one installed on board the machine for the unit line (called GCB - genset circuit breaker), and another that acts as a mains interface (called MCB - main circuit breaker). The GCB is installed on board the machine in the standard supply, whereas the MCB is the mains master switch installed on the customer's system (not supplied by Visa). Visa S.p.A. Via I° Maggio, 55 – 31043 Fontanelle (TV) Page 23 112000000014-001-00 – 12/10/2011 Printed in Italy. All rights reserved. IN-SYNC NT 5. List of parameters The editing of the parameters allows the behaviour of the generating set to be adapted to the customer's specific requirements. Since modifications can have implications, which may even be dangerous for the system or the users (the unit starting-up unexpectedly), it is important to be aware that the operation must be solely carried out by trained personnel. Do not change parameters unless you have specific knowledge about them or have received precise instructions. If still in doubt after having consulted the following paragraphs and the Comap manual, contact a VISA technician or the nearest authorised service centre. Password-free parameters These are the most commonly used parameters and are not password-protected in the standard setting. Parameter Next service time Date / Time Description Time left (in hours) for the next scheduled maintenance. The first genset maintenance is scheduled after 50 operating hours. The subsequent intervals depend on the requirements provided by the manufacturer of the engine and the operating conditions. Consult the User Manual of the engine delivered together with the genset. The internal clock is used for the alarms log; the occurrence date and time is logged for each event. First level password-protected parameters These are parameters that allow a customised installation and are to be modified by trained personnel. Parameter Nominal Voltage Max Crank Time Cooling Time Gen > Volt Gen < Volt Priority Description Modifies the nominal voltage of the genset; the output voltage in units operating in parallel must be the same on all the gensets. The maximum adjustment range is +/- 5V Maximum starter motor connection; it may need to be extended by a few seconds in cold countries Cooling time before shutting down; the default value is 120 s Generator maximum voltage protection threshold. If the detected voltage at the terminals of the alternator exceeds this value, the unit is stopped. Generator minimum voltage protection threshold. If the detected voltage at the terminals of the alternator drops below this value, the unit is stopped. Priority of use of the genset. The units with less priority (a higher number) in a PGE920 with load management configuration, will be the first to stop to decrease the load. Visa S.p.A. Via I° Maggio, 55 – 31043 Fontanelle (TV) Page 24 112000000014-001-00 – 12/10/2011 Printed in Italy. All rights reserved. IN-SYNC NT Example of editing the parameters All the parameters of the In-Sync NT device are at different protected levels of the software menu on page 2, access to which is protected by 3 passwords. Some of these parameters can be password-free and the first protection level is free for the customer by entering the password: 301. Follow the steps below to access the user menu: for the screen below to appear: - press - move the cursor to the users/password row by pressing the - press for the three options: VISA OPERATOR, DEALER OPERATOR and OPERATOR to be displayed position the cursor on OPERATOR - press a number (zero) will appear on the right - press the quickly) - press to confirm and then to return to the menu position the cursor on the desired submenu, e.g. on setpoints to edit the ”nominal voltage” - press - position the cursor on basic settings and then press - position the cursor on nominal voltage and press - set the desired value using - press to return to the menu select Measurement to return to the standard page or wait for the automatic exit. key key until number 301 is reached (keep the key pressed for the number to advance and to confirm and confirm by pressing Note: the In-Sync NT device always returns to page 1 once 3 minutes elapse after the last key is pressed. Visa S.p.A. Via I° Maggio, 55 – 31043 Fontanelle (TV) Page 25 112000000014-001-00 – 12/10/2011 Printed in Italy. All rights reserved. IN-SYNC NT 6. Connecting to a personal computer (optional) The In-Sync NT can be connected directly to a PC with an RS232 interface via an RS232 serial crossover cable. Refer to the relative manual for further information regarding the installation and use of the software. Two main programmes are available: GenConfig and Intellimonitor. The Intellimonitor programme must be installed on the PC (direct connection or via modem), based on the Windows platform. This allows the genset to be monitored remotely with the following functions: - the values detected by the control unit read remotely; - viewing the alarms log; - engine control; The second programme, GenConfig, is used to modify the configuration of the board to add or modify logic functions or editable inputs - viewing and modifying the configurations; - selecting the configuration software; - modifying the settings of inputs and outputs; - modifying passwords, command protection; If the connection distance between the PC and the genset exceeds 5 m, interface boards to Ethernet, GSM or other networks are available, which allow the genset to be monitored from one or more points located anywhere in the world. The In-Sync NT keeps track of each event in the historic archive, which can save up to 117 records. The older records are deleted when the archive is full. If the PC is connected to the control unit and the log is loaded, the list can be viewed at a later stage or sent via e-mail for assistance purposes. Configuration files can also be sent to or received from the assistance centre. Visa S.p.A. Via I° Maggio, 55 – 31043 Fontanelle (TV) Page 26 112000000014-001-00 – 12/10/2011 Printed in Italy. All rights reserved. IN-SYNC NT 7. Troubleshooting This chapter covers problems and possible solutions related to the generating set and the control device installed in the electrical panel on board the machine. ATTENTION Do not perform or engage in maintenance, repairs or alterations without having specific knowledge or precise guidelines. All the operations must be performed in compliance with the safety standards. If still in doubt after having consulted the following paragraphs and the engine manual, contact a VISA technician or the nearest authorised service centre. If a fault occurs, the control unit stops the genset storing the reason in the memory and the genset cannot be restarted until the operator performs a manual reset by pressing the key. When a FAULT occurs, read the message on the display, consult the manual and identify and save the fault and the cause before pressing . Do not restart the genset without having assessed and resolved the fault. ATTENTION: If the cause has not been resolved, do not reset or repeat the start-up cycle, especially if ALARM = MOTOR OIL LOW PRESSURE appears on the display. NOTE: the In-Sync NT device enables the alarms 20 s after the engine is started-up. From the start-up command up to this time the engine runs with no protections; therefore, if there are problems in the lubrication circuit and the start-up cycle is repeated several times, this can cause significant damage to the engine. Do not touch the electronic components on the printed circuit of the In-Sync NT board with bare hands. There may be dangerous voltages even with the unit switched off and damage may be caused due to electrostatic loads. Electrical panel Problem Probable causes How to intervene The device does not go on Disconnected/flat battery Blown fuse Interrupted power supply circuit (circuit breaker-key) Check the fuses inside the panel, the key contact closure and the battery voltage. The device goes on but the display is off Display contrast is not correct. The display is defective Circuit breaker does not close Release coil fault Circuit breaker engine fault Incorrect electrical parameters V/Hz Adjust the contrast by pressing and / . Contact the service centre Verify the voltage and frequency Contact the service centre Problems signalled by the In-Sync NT device The In-Sync NT control unit checks many parameters of different importance or criticality; for this reason the alarms are of different importance. All the active “alarms” appear on the display and trigger the buzzer. Visa S.p.A. Via I° Maggio, 55 – 31043 Fontanelle (TV) Page 27 112000000014-001-00 – 12/10/2011 Printed in Italy. All rights reserved. IN-SYNC NT The correct way of interpreting the information is to: - Silence the buzzer by pressing the key. Pause. If the alarm is still active, it is immediately displayed as a description with no operation being required. Take note of the alarm even if it seems easy to understand (a photo with a mobile phone, paper and pen). If it is easily understood, e.g. “Stp min coolant level”, resolve the problem by adding antifreeze to the radiator (in this case) and then press to clear the alarm. If the message is difficult to understand, contact the nearest service centre, clearly reporting the type of alarm displayed. The types of alarm are: - Wrn: warning / pre-alarm; this does not stop the machine but only signals the alarm. The In-Sync NT is indicating a fault that is not hazardous to the unit or people. The unit can operate normally but must be checked. - Fls: Fail sensor; this does not trigger “actions”. The In-Sync NT is indicating a sensor malfunction that is not hazardous to the unit or people. The unit can operate normally but it is best to check the sensor (usually pressure or temperature related). - Stp: engine slow stop; this causes the engine to stop (after cooling) and the machine circuit breaker to open. This is a relatively important type of alarm but not enough to immediately stop the unit. In fact, the engine cooling cycle is performed. - Sd: Shut down; "immediate stop alarm" causes the circuit breaker to open and the engine to stop IMMEDIATELY; e.g. “Sd emergency button” appears if the emergency button is pressed. This is due to a potentially hazardous situation for the unit and people. - BOC: Breaker open; this is an open circuit breaker alarm, which is valid for all the electrically-related alarms with a precautionary solution to open the circuit breaker. The engine stops after the cooling cycle. - Messages may not appear in the list due to customisations and certain events that normally generate a warning can be configured to generate a Shutdown and vice versa The most common pre-alarm messages Warning / pre-alarm messages Meaning/causes How to intervene Wrn - Fuel Min Level Fuel reserve (if a sensor is connected) Top-up the fuel Wrn - Service Time The engine mechanical maintenance interval has elapsed Wrn - Battery Flat Stp - Stop Engine Fail Sd - Low Gen Volt Sd - High Gen Volt Perform maintenance on the engine and set the new interval (about 250 hours) Verify that the engine and static The battery/ies are flat or in any (if installed) battery charger case, below the set minimum works. Check the battery fluid voltage level level. A fault in the engine stop; the engine Check the electrical stop device (solenoid valve – connections electromagnet) does not work Request technical assistance. Use a tool to measure whether the alternator generates voltage or whether the In-Sync NT does Emergency stop due to low voltage not “read” well. Check the in the generator fuses, generator, AVR and connections. Request assistance. Check the generator, AVR and Emergency stop due to high voltage connections. in the generator Request assistance. Visa S.p.A. Via I° Maggio, 55 – 31043 Fontanelle (TV) Page 28 112000000014-001-00 – 12/10/2011 Printed in Italy. All rights reserved. IN-SYNC NT Warning / pre-alarm messages BOC - Gen Unbalance ph 1.2.3 Stp - Cb Fail Fls - Oil Press Fls - Water Temp Meaning/causes How to intervene Circuit breaker is opened due to unit Check the load and divide it voltage asymmetry equally on the three phases Check the belt Engine slow stop due to a fault in Check the alternator battery the alternator battery charger charger Check the wiring Check the oil level Watch out for a fault in the analogue Check the electrical connection oil pressure sensor Replace the sensor Check the coolant Watch out for a fault in the analogue Check the electrical connection temperature sensor Replace the sensor The most common alarm messages Alarm / fault messages STP Min coolant level STP High Temp Meaning/causes How to intervene Engine slow stop due to insufficient radiator liquid Overheated engine Check the liquid level Check the belts Check the cleanliness of the radiator Check the environmental temperature Check the engine temperature Check the electrical load Check the sensor Top-up and check for any leaks; Replace the sensor. Top-up Replace and tighten the belts Clean and perform maintenance Check the air inlets Check the coolant temperature on the relative instrument. Check the electrical load and decrease it Replace the sensor Failed Start-up Defective start-up system Defective fuel system Check the starter motor Check the fuel, fuel filters, electrical connection and shutdown device. Blocked electric fan Check the thermal protection of the electric fan Check the electrical connection Verify what triggered the thermal protection Visa S.p.A. Via I° Maggio, 55 – 31043 Fontanelle (TV) Page 29 112000000014-001-00 – 12/10/2011 Printed in Italy. All rights reserved. IN-SYNC NT Error messages This table describes the error messages that can be signalled by the In-sync NT board A: displayed as an alarm H: saved in the log Message BIN 1-12 ANA 1-10 BOUT 1-12 AOUT 1-4 A+H ECU A+H SHBIN 1-4 A+H SHAIN 1-4 SHBinCfgErr1 A SHAinCfgErr1 A PLC State 1 PLC State 2 PLC State 3 PLC State 4 A Description Indication of a communication error in the additional inputs expansion module. Check: - that the expansion with the corresponding address is powered correctly - that the connections are correct and the terminating resistors are installed correctly - that the can-bus connection wires are not inverted Check the Tx and Rx LEDs of the can-bus port to verify that the module communicates correctly. If they flash rapidly, communication is correct. Communication error with the ECU of the engine. Check - the connections of the CAN1 port to the engine control unit - verify the terminating resistors and the power supply - that the can-bus connection wires are not inverted Communication error with the SHBOUT modules 1-4. Check - that one of the internal controllers is configured as SOURCE (its module configured as SHBOUT (x)) - that the controller is powered - that the target and source controllers are connected to the CAN2 port and the Tx and Rx LEDs of the CAN2 port flash - the CAN16/32 values in the power management screen (each control signals 1 in the position marked by its own address). - The CAN2 connection must conform to the IGS-NT installation guide. See the Recommended Can/RS485 connection Chapter. Communication error with the SHAOUT modules 1-4. Check - that one of the internal controllers is configured as SOURCE (its module configured as SHAOUT (x)) - that the controller is powered - that the target and source controllers are connected to the CAN2 port and the Tx and Rx LEDs of the CAN2 port flash - the CAN16/32 values in the power management screen (each control signals 1 in the position marked by its own address). - The CAN2 connection must conform to the IGS-NT installation guide. See the Recommended Can/RS485 connection Chapter. Configuration error of the shared Binary modules - e.g. more than one source module (SHBOUT) has been configured on the CAN2 bus. Make sure there is only one configured SHBOUT(x) module. Configuration error of the shared Binary modules - e.g. more than one source module (SHAOUT) has been configured on the CAN2 bus. Make sure there is only one configured SHAOUT(x) module. Status indicator of PLC 1, 2, 3 or 4 (for more information, please see the description of Force protect PLC function) Visa S.p.A. Via I° Maggio, 55 – 31043 Fontanelle (TV) Page 30 112000000014-001-00 – 12/10/2011 Printed in Italy. All rights reserved. IN-SYNC NT Message ActCall Fail A ECUDiagBlocked A Wrong config A+H RTCbatteryFlat A Al/Hist. msg 1-16 A+H Batt volt A+H EarthFaultCurr A+H Gen V unbal A+H Gen I unbal A+H BusL I unbal A+H Mains V unbal A+H Mains I unbal A+H Bus V unbal A+H BusL V unbal Description Indication that a call failed. Refer to the InteliCommunication Guide to check the modem/internet connection and the call activation setting Alarm is active when Comms settings: ECU diag = DISABLED. This means that the ECU alarms are not displayed or considered by the board. This is the notification message Incorrect board configuration: indicates that the board hardware does not support the PLC used in the configuration. Send the IDch and DNGL codes read on the information page 2 to the technical support. This message indicates that the backup battery of the board is almost flat. If the board is switched off when the battery is completely flat, all the parameter data and the events log will be lost. The battery must be replaced by a specialised technician. This message can be used as a customised message for additional protection; it can be configured for each parameter inside the board. See GenConfig manual - Protections. Indicates that the genset battery voltage is beyond the set values. Analog protect: Batt >V, Batt <V, and Batt volt del. setpoints. Verify whether the alternator battery charger or the additional battery charger work correctly. Indication of current dispersion to Earth. This protection works in accordance with the parameters: Gener protect: EarthFaultCurr and EthFltCurr del. setpoints. See also parameter EarthFltCurrCT from the Basic settings. Indication of unbalanced generator voltage. See parameters Gener protect: Gen V unbal and Gen V unb del. The unbalanced voltage is calculated as the maximum difference between the voltages of each phase. Indication of unbalanced current. See parameters Gener protect: Gen I unbal and Gen I unb del. The unbalanced current is calculated as the maximum difference between the currents of each phase. Indication of unbalanced bus current See parameters Gener protect: BusL I unbal and BusL I unb del. The unbalanced current is calculated as the maximum difference between the currents of each phase Unbalanced supply voltage See parameters: Mains protect: Mains V unbal and MainsV unb del. The unbalanced supply voltage is calculated as the maximum difference between the voltages of each phase. Unbalanced mains current. See parameters: Mains protect: Mains I unbal and Mains I unb del. The unbalanced mains current is calculated as the maximum difference between the currents of each phase. Unbalanced bus voltage. See parameters: Gener protect (Bus protect): Bus V unbal and Bus V unb del. The unbalanced Bus voltage is calculated as the maximum difference between the voltages of each phase Unbalanced left bus voltage See parameters: BusL protect: BusL V unbal and BusL V unb del. The unbalanced Bus voltage is calculated as the maximum difference between the voltages of each phase Visa S.p.A. Via I° Maggio, 55 – 31043 Fontanelle (TV) Page 31 112000000014-001-00 – 12/10/2011 Printed in Italy. All rights reserved. IN-SYNC NT Message BusR V unbal Dongle incomp A+H Emergency stop A+H CAN2 bus empty A+H ChrgAlternFail A+H Sd Stop fail A+H Overspeed A+H Underspeed A+H Pickup fail A+H Description Unbalanced right bus voltage See parameters: BusR protect: BusR V unbal and BusR V unb del. The unbalanced Bus voltage is calculated as the maximum difference between the voltages of each phase Indication of an incompatible dongle. (usually missing) The IGS-NT-LSM+PMS dongle (green) must be present if the load sharing and power management functions are used in MINT, COX or COMBI. See the Reference Guide to verify when the dongle is required. Emergency stop. Check the input with the emergency stop function This alarm is active if the control does not see any other control connected to the CAN2 bus. This alarm can be de/activated by using the following parameter: Comm settings: CAN2emptDetect. This parameter must be disabled in the genset application. Check the Reg16/Reg32 strings to see which boards are in the same unit. Indication of a fault in the alternator battery charger. This alarm means that the D+ voltage is less than 80% of the board supply voltage, which in turn means that the genset battery is not being charged. Check the operation of the alternator battery charger. Indication of a failed engine stop, i.e. the engine does not signal its stopped state. See parameters: Engine params: Stop time. "stopped engine" conditions: - engine revs (RPM) = 0 - AI: Oil pressure < Starting POil and - Wire D+ is not active - BI: RunIndication 1 and 2 and 3 are not active - Generator voltage < 15V (in all phases) - Generator Frequency = 0 Hz If all these conditions are met, the engine stop status is confirmed after a 2 s delay. The overspeed alarm is adjusted via the following parameters: Engine protect:Overspeed See the following parameters for the underspeed alarm: Engine params:Starting RPM. This protection is active once the engine is started-up and the revs drop below the value set in Starting RPM For more information see the Engine starting procedures description in the reference guide. Pickup failure alarm. This means that the signal deriving from the pickup does not arrive together with the running engine active status. Running engine condition: - engine speed > Engine params: Starting RPM or - AI: Oil press > Starting POil or - Wire D+ is active (this condition is only used if the Engine params: D+ function= enabled) or - BI: RunIndication 1 or 2 or 3 are active or - Generator voltage is > 15 V (in each phase). See Speed pick-up input Refer to the Technical data Chapter in the IGS-NT-x.y.-Installation Guide for information relative to the parameters of the pickup signals. Visa S.p.A. Via I° Maggio, 55 – 31043 Fontanelle (TV) Page 32 112000000014-001-00 – 12/10/2011 Printed in Italy. All rights reserved. IN-SYNC NT Message Sd BatteryFlat A+H WrnServiceTime A+H Not lubricated A Start fail A+H Start blocking A Wrn CylTemp1-32 A+H Wrn MCB fail A+H Stp GCB fail A+H Wrn BTB fail A+H Wrn MGCB fail Sd Oil press B A+H Wrn RSync fail A+H Description This alarm is activated if the board goes back on after a drop in battery voltage caused by the engine being started-up (the voltage drops below 6 volt). The ComAp I-Lba module can help resolve this problem. For information see the IGS-NT-x.y.-Installation Guide. This alarm is activated when at least one of the board service countdowns has reached zero. See parameters Engine protect:Service time X. A value other than zero must be set in the corresponding parameters for the message to be cleared. This alarm remains active before the end of the first lubrication cycle. See the Engine states Chapter in the IGS-NT-x.y-Reference Guide. This alarm is activated if start-up fails. This means that the board has performed all the start-up attempts set in the Engine params: Crank attempts but the engine has not started. For further information see the Engine starting procedures Chapter in the IGS-NTx.y-Reference Guide. This message means that an input set as Startblocking is active and therefore, start-up is blocked. If the startblocking status is active, Notready is displayed in the list of alarms. As soon as the input is disabled the engine is enabled to start-up. The AI Cylinder temperature 1-32 thermal protection is active. Check the value of the corresponding threshold. Fault in the (MCB) mains circuit breaker. See the Circuit breakers operation sequence, GCB/MCB fail detection Chapter in the IGS-NT-x.y-Reference Guide. Fault in the (GCB) generator circuit breaker. See the Circuit breakers operation sequence, GCB/MCB fail detection Chapter in the IGS-NT-x.y-Reference Guide. BTB (bus to bus) fault See the Circuit breakers operation sequence, GCB/MCB fail detection Chapter in the IGS-NT-x.y-Reference Guide. MGCB fault See the Circuit breakers operation sequence, GCB/MCB fail detection Chapter in the IGS-NT-x.y-Reference Guide. Engine stopped by the input configured as low oil pressure. (see the LBI board in the GenConfig for information regarding the signal accepted for this function) Indication that the inverse synchronisation failed. The generator or set of generators has failed to synchronise with the mains within the time set in Sync/Load ctrl:Sync timeout. See the parameters of Sync/Load ctrl and Volt/PF ctrl. Frequency regulation loop, Angle regulation loop and Voltage regulation loop are active during synchronisation and they may have to be recalibrated. The current synchronisation status can be viewed on the measurements screen with the synchroscope, where: the speed, voltage adjustment, slip frequency, generator voltage and supply voltage can be read during the synchronisation process. Visa S.p.A. Via I° Maggio, 55 – 31043 Fontanelle (TV) Page 33 112000000014-001-00 – 12/10/2011 Printed in Italy. All rights reserved. IN-SYNC NT Message Stp Sync fail A+H Wrn Sync fail A+H BOC L1, L2 or L3 under A+H BOC L1, L2 or L3 over A+H Sd L1, L2 or L3 over A+H BOC L12, L23 or L31 under A+H BOC L12, L23 or L31 over Sd L12, L23 or L31 over A+H BOC fgen under A+H BOC fgen over A+H Description Indication of a synchronisation error (timeout sync alarm is active); the generator or set of generators has failed to synchronise with the mains or Bus within the time set in Sync/Load ctrl:Sync timeout. See the parameters of Sync/Load ctrl and Volt/PF ctrl. Frequency regulation loop, Angle regulation loop and Voltage regulation loop are active during synchronisation and they may have to be recalibrated. The current synchronisation status can be viewed on the measurements screen with the synchroscope, where: the speed, voltage adjustment, slip frequency, generator voltage and supply voltage can be read during the synchronisation process. Indication of a synchronisation error (timeout sync alarm is active); the generator or set of generators has failed to synchronise with the mains or Bus within the time set in Sync/Load ctrl:Sync timeout. See the parameters of Sync/Load ctrl and Volt/PF ctrl. Frequency regulation loop, Angle regulation loop and Voltage regulation loop are active during synchronisation and they may have to be recalibrated. The current synchronisation status can be viewed on the measurements screen with the synchroscope, where: the speed, voltage adjustment, slip frequency, generator voltage and supply voltage can be read during the synchronisation process. The voltage of generator L1, L2 and L3 is less than the value set in Gen <V BOC for a time equal to Gen V del. The undervoltage protections are adjusted via parameters Gener protect : Gen <V BOC and Gen V del. This alarm is displayed if the protection refers to the phase-neutral voltage. Therefore, only if the parameter: FixVoltProtSel is set as PHASE-NEUTRAL. 19 The voltage of generator L1, L2 and L3 is more than the value set in Gen >V BOC for a time equal to Gen V del. The overvoltage protections are adjusted via parameters Gener protect : Gen >V BOC and Gen V del. This alarm is displayed if the protection is based on the phase-neutral voltage. Therefore, only if the parameter: FixVoltProtSel is set as PHASE-NEUTRAL. 19 The voltage of generator L1, L2 and L3 is more than the value set in Gen >V SD for a time equal to Gen V del. The overvoltage protections are adjusted via parameters Gener protect : Gen >V SD and Gen V del. This alarm is displayed if the protection is based on the phase-neutral voltage. Therefore, only if the parameter: FixVoltProtSel is set as PHASE-NEUTRAL. 19 The voltage of generator L12, L23 and L31 is less than the value set in Gen <V BOC for a time equal to Gen V del. The undervoltage protections are adjusted via parameters Gener protect : Gen <V BOC and Gen V del. This alarm is displayed if the protection is based on the phase-phase voltage. Therefore, only if the parameter: FixVoltProtSel is set as PHASE-PHASE. The voltage of generator L12, L23 and L31 is more than the value set in Gen >V BOC for a time equal to Gen V del. The overvoltage protections are adjusted via parameters Gener protect : Gen >V BOC and Gen V del. This alarm is displayed if the protection is based on the phase-phase voltage. Therefore, only if the parameter: FixVoltProtSel is set as PHASE-PHASE. The voltage of generator L12, L23 and L31 is more than the value set in Gen >V SD for a time equal to Gen V del. The overvoltage protections are adjusted via parameters Gener protect : Gen >V SD and Gen V del. This alarm is displayed if the protection is based on the phase-phase voltage. Therefore, only if the parameter: FixVoltProtSel is set as PHASE-PHASE. The frequency of the generator is less than the Gen <f limit parameter for a time equal to Gen f del. The under-frequency protection is adjusted via parameters Gener protect : Gen <f and Gen f del. The frequency of the generator is more than the Gen >f limit parameter for a time equal to Gen f del. The over-frequency protection is adjusted via parameters Gener protect : Gen >f and Gen f del. Visa S.p.A. Via I° Maggio, 55 – 31043 Fontanelle (TV) Page 34 112000000014-001-00 – 12/10/2011 Printed in Italy. All rights reserved. IN-SYNC NT Message BOC ReversePwr A+H MP L1, L2 or L3 under A+H MP L1, L2 or L3 over A+H MP L12, L23 or L31 under A+H MP L12, L23 or L31 over A+H MP fmns under A+H MP fmns over A+H BusL L1, L2 or L3 under H Description This alarm is triggered by the inverse power protection. This protection is adjusted via parameters Gener protect : Reverse power and ReversePwr del. This means that one of the engine speed regulators is not working properly or a current transformer is connected wrongly. The supply voltage L1, L2 or L3 is less than Mains < V MP for a time equal to Mains V del. The undervoltage protection is adjusted via parameters Mains protect : Mains protect: Mains <V MP and Mains V del. These alarms are displayed if the protection is set as phase-neutral voltage. In practice, Basic setting: FixVoltProtSel is set as PHASE-NEUTRAL. The supply voltage L1, L2 or L3 is more than Mains > V MP for a time equal to Mains V del. The over-frequency protection is adjusted via parameters Mains protect : Mains >V MP and Mains V del. This alarm is displayed if the voltage protection is based on the phase-neutral voltage. This means that the parameter: Basic settings: FixVoltProtSel is set as PHASENEUTRAL. The supply voltage L12, L23 or L31 is less than Mains < V MP for a time equal to Mains V del. The undervoltage protection is adjusted via parameters Mains protect : Mains protect: Mains <V MP and Mains V del. These alarms are displayed if the protection is set as phase-neutral voltage. This means that Basic setting: FixVoltProtSel is set as PHASE-PHASE. The supply voltage L12, L23 or L31 is more than Mains > V MP for a time equal to Mains V del. The over-frequency protection is adjusted via parameters Mains protect : Mains >V MP and Mains V del. This alarm is displayed if the voltage protection is based on the phase-neutral voltage. This means that the parameter: Basic settings: FixVoltProtSel is set as PHASEPHASE. The mains frequency is less than Mains <f for a time equal to Mains f del. The under-frequency protection is adjusted via parameters: Mains protect: Mains <f and Mains f del. The mains frequency is more than Mains >f for a time equal to Mains f del. The over-frequency protection is adjusted via parameters: Mains protect: Mains >f and Mains f del. The left bus voltage L1, L2 or L3 is less than BusLeft <V for a time equal to BusLeft V del. The relative information will be saved in the board memory. The BusL protect parameter: BusL Volt prot must be set as ENABLED if the Bus events are to be controlled and logged. The voltage must be more than BusLeft <V for the BTB tie to start the synchronisation cycle. In fact, the parameter is used to control the BUS status (BusL Volt prot must be set to ENABLED) This alarm is activated if the protection is set to phase-neutral voltage. This means that the parameter: Basic settings: FixVoltProtSel is set as PHASENEUTRAL. Visa S.p.A. Via I° Maggio, 55 – 31043 Fontanelle (TV) Page 35 112000000014-001-00 – 12/10/2011 Printed in Italy. All rights reserved. IN-SYNC NT Message BusL L1, L2 or L3 over H BusL L12, L23 or L31 under H BusL L12, L23 or L31 over H BusR L1, L2 or L3 under H BusR L1, L2 or L3 over H Description The left bus voltage L1, L2 or L3 is more than BusLeft <V for a time equal to BusLeft V del. The relative information will be saved in the board memory. The BusL protect parameter: BusL Volt prot must be set as ENABLED if the Bus events are to be controlled and logged. The voltage must be more than BusLeft <V for the BTB tie to start the synchronisation cycle. In fact, the parameter is used to control the BUS status (BusL Volt prot must be set to ENABLED) This alarm is activated if the protection is set to phase-neutral voltage. This means that the parameter: Basic settings: FixVoltProtSel is set as PHASENEUTRAL. The left bus voltage L12, L23 or L31 is less than BusLeft <V for a time equal to BusLeft V del. The relative information will be saved in the board memory. The BusL protect parameter: BusL Volt prot must be set as ENABLED if the Bus events are to be controlled and logged. The voltage must be more than BusLeft <V for the BTB tie to start the synchronisation cycle. In fact, the parameter is used to control the BUS status (BusL Volt prot must be set to ENABLED) This alarm is activated if the protection is set to phase-phase voltage. This means that the parameter: Basic settings: FixVoltProtSel is set as PHASEPHASE. The left bus voltage L12, L23 or L31 is more than BusLeft <V for a time equal to BusLeft V del. The relative information will be saved in the board memory. The BusL protect parameter: BusL Volt prot must be set as ENABLED if the Bus events are to be controlled and logged. The voltage must be more than BusLeft <V for the BTB tie to start the synchronisation cycle. In fact, the parameter is used to control the BUS status (BusL Volt prot must be set to ENABLED) This alarm is activated if the protection is set to phase-phase voltage. This means that the parameter: Basic settings: FixVoltProtSel is set as PHASEPHASE. The right bus voltage L1, L2 or L3 is more than BusRight <V for a time equal to BusRight V del. The relative information will be saved in the board memory. The BusR protect parameter: BusR Volt prot must be set as ENABLED if the Bus events are to be controlled and logged. The voltage must be more than BusRight <V for the BTB tie to start the synchronisation cycle. In fact, the parameter is used to control the BUS status (BusR Volt prot must be set to ENABLED) This alarm is activated if the protection is set to phase-neutral voltage. This means that the parameter: Basic settings: FixVoltProtSel is set as PHASENEUTRAL. The right bus voltage L1, L2 or L3 is more than BusRight <V for a time equal to BusRight V del. The relative information will be saved in the board memory. The BusR protect parameter: BusR Volt prot must be set as ENABLED if the Bus events are to be controlled and logged. The voltage must be more than BusRight <V for the BTB tie to start the synchronisation cycle. In fact, the parameter is used to control the BUS status (BusR Volt prot must be set to ENABLED) This alarm is activated if the protection is set to phase-neutral voltage. This means that the parameter: Basic settings: FixVoltProtSel is set as PHASENEUTRAL. Visa S.p.A. Via I° Maggio, 55 – 31043 Fontanelle (TV) Page 36 112000000014-001-00 – 12/10/2011 Printed in Italy. All rights reserved. IN-SYNC NT Message BusR L12, L23 or L31 under H BusR L12, L23 or L31 over H BusL f under H BusL f over BusR f under BusR f over Vb L1, L2 or L3 under H Vb L1, L2 or L3 over H Vb L12, L23 or L31 under H Vb L12, L23 or L31 over Description The right bus voltage L12, L23 or L31 is less than BusRight <V for a time equal to BusRight V del. The relative information will be saved in the board memory. The BusR protect parameter: BusR Volt prot must be set as ENABLED if the Bus events are to be controlled and logged. The voltage must be more than BusRight <V for the BTB tie to start the synchronisation cycle. In fact, the parameter is used to control the BUS status (BusR Volt prot must be set to ENABLED) This alarm is activated if the protection is set to phase-phase voltage. This means that the parameter: Basic settings: FixVoltProtSel is set as PHASEPHASE. The right bus voltage L12, L23 or L31 is more than BusRight <V for a time equal to BusRight V del. The relative information will be saved in the board memory. The BusR protect parameter: BusR Volt prot must be set as ENABLED if the Bus events are to be controlled and logged. The voltage must be more than BusRight <V for the BTB tie to start the synchronisation cycle. In fact, the parameter is used to control the BUS status (BusR Volt prot must be set to ENABLED) This alarm is activated if the protection is set to phase-phase voltage. This means that the parameter: Basic settings: FixVoltProtSel is set as PHASEPHASE. The left bus frequency is less than BusLeft <f for the BusLeft f del. time. The low frequency protection is based on the BusL protect thresholds: BusLeft <f and BusLeft f del. The left bus frequency is more than BusLeft >f for the BusLeft f del. time. The low frequency protection is based on the BusL protect thresholds: BusLeft >f and BusLeft f del. The right bus frequency is less than BusRight <f for the BusRight f del. time. The low frequency protection is based on the BusR protect thresholds: BusRight <f and BusRight f del. The right bus frequency is more than BusRight >f for the BusRight f del. time. The low frequency protection is based on the BusR protect thresholds: BusRight >f and BusRight f del. The Bus voltage L1, L2 or L3 is less than Bus < Hstlimit for a time equal to Bus V del The undervoltage protection is adjusted via parameters Bus protect: Bus < Hst and Bus V del. These alarms are activated if the protection is set as phase-neutral voltage. This means that the parameter Basic settings: FixVoltProtSel is set as PHASE-NEUTRAL. The Bus voltage L1, L2 or L3 is more than Bus > Hstlimit for a time equal to Bus V del. The undervoltage protection is adjusted via parameters Bus protect: Bus > Hst and Bus V del. These alarms are activated if the protection is set as phase-neutral voltage. This means that the parameter Basic settings: FixVoltProtSel is set as PHASE-NEUTRAL. The Bus voltage L12, L23 or L31 is less than Bus < Hst for a time equal to Bus V del. The undervoltage protection is adjusted via parameters Bus protect: Bus < Hst and Bus V del. These alarms are activated if the protection is set as phase-phase voltage. This means that the parameter Basic settings: FixVoltProtSel is set as PHASE-PHASE. The Bus voltage L12, L23 or L31 is more than Bus > Hst for a time equal to Bus V del. The overvoltage protection is adjusted via parameters Bus protect: Bus > Hst and Bus V del. These alarms are activated if the protection is set as phase-phase voltage. This means that the parameter Basic settings: FixVoltProtSel is set as PHASE-PHASE. Visa S.p.A. Via I° Maggio, 55 – 31043 Fontanelle (TV) Page 37 112000000014-001-00 – 12/10/2011 Printed in Italy. All rights reserved. IN-SYNC NT Message f bus under H f bus over H Bus meas error A+H OfL StartBlck A+H StartBlck A+H BOC IDMT A+H MPR Imains IDMT A+H BOR IbusL IDMT A+H BOC ShortCurr A+H BOC Overload A+H MPR Pmains IDMT A+H Description The Bus frequency is less than Bus <f for a time equal to Bus f del. The underfrequency is adjusted via parameters Bus protect: Bus <f and Bus f del. The Bus frequency is more than Bus >f for a time equal to Bus f del. The over-frequency is adjusted via parameters Bus protect: Bus >f and Bus f del. A bus measurement error is generated if the bus voltage is beyond the set limits. See the details of parameters Gener protect:BusMeasError in the IGS-NT-x.yReference Guide. This alarm indicates an error in the setting of certain parameters and prevents startup or charging. Incorrectly combined parameters: ProcessControl: Island enable; ParallelEnable; Synchro enable; MF start enable. See the IGS-NT-x.y-Reference Guide for the SPTM, SPI or COMBI applications in the chapters relative to AUT mode section OFF-MAN-AUT mode This alarm indicates an error in the setting of certain parameters and disables engine start-up. Incorrectly combined parameters: ProcessControl: Island enable; ParallelEnable; Synchro enable; MF start enable. See the IGS-NT-x.y-Reference Guide for the SPTM, SPI or COMBI applications in the chapters relative to AUT mode section OFF-MAN-AUT mode Indicates the protection has been triggered due to the generator IDMT current having been exceeded. The over current protection intervenes in a time that is inversely proportional to the current value. The higher the current, the shorter the response time. The protection is adjusted via parameters Generator protect: 2Inom del and Basic settings: Nomin current. Indicates the protection has been triggered due to the mains IDMT current having been exceeded. The over current protection intervenes in a time that is inversely proportional to the current value. The higher the current, the shorter the response time. The protection is adjusted via parameters Mains protect: Mains2Inom del and Basic settings: Nomin current. The protection is active if Mns2Inom prot is enabled. Indicates the protection has been triggered due to the left bus IDMT current having been exceeded. The over current protection intervenes in a time that is inversely proportional to the current value. The higher the current, the shorter the response time. The protection is adjusted via parameters BusL protect: BusL2Inom del and Basic settings: Nomin current. The protection is active if BusL2Inom prot is enabled Short-circuit current limit exceeded in the generator current. The value set in the Generator protect has been exceeded: Ishort for the time set in Ishort del. Indicates the protection has been triggered due to the IDMT power having been exceeded. The generator overload protection intervenes in a time that is inversely proportional to the power value. The higher the power, the shorter the response time. The overload protection is adjusted via parameters Generator protect: OverldStrtEval and 2POverldStEvDel. Indicates the protection has been triggered due to the IDMT power having been exceeded. The mains overload protection intervenes in a time that is inversely proportional to the power value. The higher the power, the shorter the response time. The overload protection is adjusted via parameters Mains protect: OverldStrtEval and 2POverldStEvDel. The protection is active if Mns2POvrldProt is enabled. Visa S.p.A. Via I° Maggio, 55 – 31043 Fontanelle (TV) Page 38 112000000014-001-00 – 12/10/2011 Printed in Italy. All rights reserved. IN-SYNC NT Message BOR PbusL IDMT A+H BOC NCB fail A+H Wrn BadPwrCfg A+H WrnTstOnLdFail A+H Wrn SpdRegLim A+H Wrn VoltRegLim A+H G L neg A G ph+L neg A G ph opposed A Description Indicates the protection has been triggered due to the IDMT power having been exceeded. The left bus power overload protection intervenes in a time that is inversely proportional to the power value. The higher the power, the shorter the response time. The overload protection is adjusted via parameters BusL protect: OverldStrtEval and 2POverldStEvDel. The protection is active if BusL2POvrldProt is enabled. Fault in the contactor of the neutral conductor. The board has not received the signal of the neutral contactor status auxiliary contact within 400 ms from the command. The power formats vary in the different controllers within the same set of controlled generators. Check the formats set on Gen config in the miscellaneous board. (only editable in the advanced mode) This alarm is displayed if the test on load functions is activated and the unit has not been able to transfer the load from the mains within the time set in Sync/Load ctrl: Load ramp. This message is recorded in the alarms log. Increase the time set in Load ramp or check the engine speed adjustment This alarm indicates that the speed regulator control output has reached its limit. The warning is displayed when the speed control output falls within the values: SpeedGovLowLim+0.2V or SpeedGovHiLim-0.2V for at least 2 seconds. This alarm means that either the regulator is connected incorrectly or the relative parameters are set wrongly. This alarm is disabled if the SPEED down or SPEED up outputs are configured. See the Sync/load control adjustment Chapter in the IGS-NT-x.y-Reference Guide. This alarm indicates that the AVR voltage adjustment output has reached its limit. It is less than 2 % or greater than 98 % of the set values for at least 2 s. This alarm is activated if the voltage regulator is connected incorrectly or one of the adjustment parameters is not configured correctly. The alarm is disabled if one of the outputs is set as AVR up and AVR down. See the Volt/PF control adjustment paragraph in the IGS-NT-x.y-Reference Guide. The generator phases are inverted. Check the connection of the generator phases as one of them is inverted. Incorrect generator phase sequence and one of the phases is inverted. M ph opposed B L neg B ph+L neg The generator phase sequence is incorrect. Check the generator phase connection. One of the generator phases is not connected correctly. The mains phases are inverted. Check the connection of the mains phases. The mains phases are inverted. Check the connection of the mains phases in the transformer. The bus phase sequence is incorrect. Check the connection of the mains phases. The bus phases are inverted. Incorrect bus phase sequence and one of the phases is inverted. B ph opposed BL L neg BL ph+L neg The bus phase sequence is incorrect Incorrect left bus phase sequence and one of the phases is inverted. The left bus phases are inverted BL ph opposed BR L neg BR ph+L ne The left bus phase sequence is incorrect Incorrect right bus phase sequence and one of the phases is inverted. The right bus phases are inverted BR ph opposed hist PLC 1-4 The bus phase sequence is incorrect Default message indicates forced activity from PLC functions M L neg A M ph+L neg Visa S.p.A. Via I° Maggio, 55 – 31043 Fontanelle (TV) Page 39 112000000014-001-00 – 12/10/2011 Printed in Italy. All rights reserved. IN-SYNC NT Message Fault reset ActCallCH1-OK, CH2-OK, CH3-OK H ActCallCH1Fail, CH2Fail, CH3Fail A+H Switched On H Watchdog H System Error H System Log H SetpointChange H Password set H Password chng H AccessCodeSet H AccessCodeChng H Admin action H Terminal H BinaryUnstable H Description Alarms reset command signal. This can be activated from the fault reset key, binary input set as FaultResButton function, modbus or a remote connection (inteliMonitor) Indication of an active call 1-3 Indication of an active call 1-3. See the Inteli Communication Guide for information regarding active calls. See the IGS-NT-x.y-Reference Guide for a description of the settings of the Act.calls/SMS. The board has been switched on. Indication of an internal watchdog. Send the log file with the settings to Comap for verification. These messages can be logged as system errors due to: - Firmware prog.error (programming error) - Disp error (communication problems with the display). - RTC flat battery (see the information relative to this alarm) - SetpointCS err (parameter setting error) - StaticsCS err (statistic value error) - Wrong config (a configuration error has been logged) - Power fail (incorrect power supply - less than 8V) This message indicates that the board log has been deleted via the Clear history function in the GenConfig. This function forms part of the option toolbar. Indication that the changed parameters have been registered. The history file contains the record of the changed parameters. Indication that the password has been set Indication that the password has been changed Indication that the access code has been set Indication that the access code has been changed This means that a change has been made by User 0 (administrator). The following operations can only be carried out by the administrator: - reset the passwords - modify the access permissions - change the user names An external terminal has been connected or disconnected. ForceValue H A binary input is unstable. This problem is usually caused by a fluctuating input due to an incorrect Earth connection. Check the Earth connection of the board. Indication that the forced binary input has been set. The forced on and off parameters are saved TimeModeChange H Indication that the summer/winter time change has been set. See the #SummerTimeMod parameter for the modifications. Visa S.p.A. Via I° Maggio, 55 – 31043 Fontanelle (TV) Page 40 112000000014-001-00 – 12/10/2011 Printed in Italy. All rights reserved. IN-SYNC NT Message GroupsLinked H GroupsUnlinked H Description This indication in the log means that two generating sets have been connected together. The binary input set with the GroupLink function is used for the status indication. The parameters Pwr management: GroupLinkLeft and GroupLinkRight provide the necessary information to understand which gensets are in parallel if the input is active. The GroupLink binary input has been disabled. This means that two previously connected gensets have been disconnected. Time stamp H Adjusting the date and time. See parameters Date/Time:Time stamp act and Time stamp per. Gen Peak start H Indication that the genset has started-up according to peak absorption. See parameters ProcessControl: PeakLevelStart, PeakLevelStop and PeakAutS/S del. for information regarding this function Indication that the genset has stopped after peak absorption. See parameters ProcessControl: PeakLevelStart, PeakLevelStop and PeakAutS/S del. for information regarding this function The generator has started-up via Power management Gen Peak stop H Gen PMS start H Gen PMS stop H Overload H Gen start H Gen stop H Gen MF start H Gen MF stop Gen Rem start Gen Rem stop Load Shed Load Reconnect VectorShift H Other CB trip GCB opened GCB closed MCB opened MCB opened ext MCB closed MGCB opened MGCB closed BTB opened BTB opened ext BTB closed SyncStarted The generator has been stopped via power management Generator overload protection. See parameters Gener protect: OverldStrtEval and 2POverldStEvDel. Careful that this parameter is adjusted via parameters Basic settings: Nominal power setpoint setting. Indication that the genset has been started-up via the start button. Indication that the genset has been stopped via the stop button. Indication that the genset has been started-up via the AMF function Indication that the genset has been stopped via the AMF function Indication that the unit has been started-up via the remote start/stop input Indication that the unit has been stopped via the remote start/stop input Indication that load shedding is activated and the relative output has been closed. See Load shedding parameters Indication that load shedding is deactivated and the corresponding output has been opened. See Load shedding parameters Indication of vector shift protection. See parameters Mains protect:VectorS prot and VectorS limit. Other CB (battery chargers) have been triggered; this information is available for circuit breakers that are controlled by a Comap controller (IG/IS-NT or IM-NT). GCB is open GCB is closed MCB is open MCB is opened by an external operation MCB is closed MGCB is open MGCB is closed BTB is open BTB is opened by an external operation BTB is closed Direct synchronisation has started Visa S.p.A. Via I° Maggio, 55 – 31043 Fontanelle (TV) Page 41 112000000014-001-00 – 12/10/2011 Printed in Italy. All rights reserved. IN-SYNC NT Message RevSyncStarted Ready Idle run Running Warming Soft load Loaded Soft unload Cooling Emerg man Not ready Description Inverse synchronisation has started Unit ready to start-up Engine is on (engine running conditions met) and engine speed and alternator voltage reach the nominal values when running at minimum Genset is on and GCB is waiting to be closed Engine warming function. When used in parallel with the mains, the load is reduced according to the Warming load level setting. For further information regarding this function, see parameters Engine params: Warming load, Warming temp, Max warm time. The genset load is increased according to parameters Sync/Load ctrl: Load ramp, Load gain, Load int, RampStartLevel setpoints setting Loaded genset The genset load is decreased according to parameters Sync/Load ctrl: Load ramp, Load gain, Load int. also consider parameters Sync/Load ctrl: GCB open level and GCB open del. Cooling cycle Binary input for manual emergency operation activated The genset is not ready to start-up. Either the board is in OFF mode or a second level alarm is active. Visa S.p.A. Via I° Maggio, 55 – 31043 Fontanelle (TV) Page 42 112000000014-001-00 – 12/10/2011 Printed in Italy. All rights reserved.