1
17
VR WORX 2: Instructor Manual
EXERCISE 11: DEFINE THE URL AND THE HOT SPOTS
FOR THE CHAPEL_IN NODE
Instructor Note: Remember to demonstrate first, then allow the users to complete the exercise on their own,
following the steps in their User Manuals.
Steps:
1.
Double click on the URL node.
There are no hot spots to make here, but we do need to define the URL that we want.
2.
Click on the change button on the bottom-right of the screen. Type http://
www.arizona.edu. Click OK.
3.
Close the Node Browser window.
4.
Double click on the Chapel_In node.
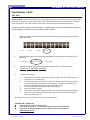
On the right you will see the image of your panorama. You will also see auto generated
hot spots that look like colored rectangles. One should read “To: Chapel_Out.mov”, and
the other should read “To: URL 1.” The area inside these rectangles is the area that a
user can later click on to get to that particular destination. Let’s move these hot spots
around to where we want them to be.
5,
Click on the hot spots tab. Resize the window so you can see the doorway and the
auto-generated hot spots.
6,
Using the arrow tool, move the Chapel_Out.mov hot spot so it is positioned over the
doorway.
If you need to change the size of the rectangle shape, drag the resize handles on the
corners of the rectangle.
7.
Move the url 1 hot spot so it is positioned over the picture frames to the left of the
doorway.
8.
Close the node browser window.
File name: VRWorx_Instructor.pmd
Last modified: 06/20/02
Copyright Arizona Board of Regents, 2002
University of Arizona