1
smartbell
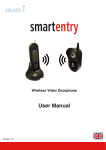
Smart Wireless Doorbell
User Manual
Designed & Engineered
Version 1
in the United Kingdom
Contents
Precautions ..............................................................................................
3
1. Product Overview ................................................................................
4
1.1. Product Features ....................................................................
1.2. Contents .................................................................................
4
4
2. Installation ...........................................................................................
5
2.1. DIY Installation .......................................................................
2.2. Professional Installation .........................................................
2.3. Smartbell Overview ................................................................
5
6
8
3. App Setup ...........................................................................................
3.1. Installing Smartbell App ..........................................................
3.2. Connecting to View Remotely .................................................
4. Software Use .......................................................................................
9
9
11
13
4.1. Settings ...................................................................................
4.2. Software Settings ....................................................................
4.2.1 Search for Screenshot ..............................................
4.2.2 Video .........................................................................
4.2.3 Unlock the Door ........................................................
4.3. Device Settings ......................................................................
4.3.1 Favourite ...................................................................
4.3.2 Change Device Info ..................................................
4.3.3 Move Detection ........................................................
4.3.4 Change Device Network ...........................................
4.3.5 About Device .............................................................
4.3.6 Alarm .........................................................................
4.3.7 Security Settings .......................................................
4.3.8 SD Formatting ...........................................................
4.3.9 Turn Off .....................................................................
13
13
13
14
14
14
15
15
15
15
16
16
16
16
17
5. Ringer ...................................................................................................
18
6. Specifications ......................................................................................
19
Precautions
Thank you for purchasing the smartbell smart wireless doorbell.
Before installing your new system, please read the instructions carefully.
Safety Instructions
1. Please install your system according to this manual to avoid any malfunctions or damage.
2. Never open the smartbell, please contact your installer or place of purchase in the event of product
malfunction.
3. Keep the smartbell away from extreme heat sources and water.
4. Never use any cleaning chemicals or wet cloth to clean the unit. Only use a dry, clean and soft
cloth/micro fibre coth.
5. Do not use the product in places where there are explosive hazards
6. Do not drop the unit or submit to heavy shaking
7. Keep chargers and power supplies away from liquids
8. Use your unit in temperature between -20 and 60° C
9. Storage temperature must be between -10 and 60° C
3
1. Product Overview
1.1 Product Features
See & speak to callers from anywhere in the world
Electric Door Release Feature Supported (Lock not
PIR/Conference/Tamper Function (Not supported on
supplied)
all models, please check with your supplier)
Visitor Memory
Motion Detection
IR LEDs - For low light viewing
Weatherproof - IP55
1.2 Contents
Standard Version:
smartbell
Smart Wireless Doorbell
User Manual
Designed & Engineered
Version 1
1x Wireless
Outdoor Camera
1x Power Cable
in the United Kingdom
1x User Manual
1x Permanent
Power Lead
4x Screw Plug
Covers
1x Safety Screw &
Cover for Bracket
5x Screws
5x Wall Plugs
Plus Ringer Version:
Pro Version
As well as the standard version, the plus ringer
version includes the following:
As well as the standard version, the Pro version
includes the following:
1x Wireless Doorbell
1x Battery for Wireless
Doorbell
1x 20m Extension Cable
Pre Requisites
To complete installation, you will need the following:
Philips Head Screw Driver
Drill (Depending on install location)
Small Flat Head Screw Driver
Patch Ethernet Cable (Length depending on install location from router/home plug/switch)
Terminal Block (Pro Install)
Micro SD Card (For Recording images & video)
Router wifi SSID and Password for Remote Access
4
2. Installation
If you are a professional installer, please go to Section 2.2 on page 6
2.1 DIY Installation
1. Remove the smartbell from the bracket. Use the
bracket as a stencil and place where you wish to install
the smartbell. Then, mark out the screw holes to
secure the bracket.
2. Mark a hole for the power and ethernet cable to
run through. Remove the bracket, and then drill the
holes. We recommend any holes you drill in your
walls are sealed water tight after your cables are
thread through.
AP
Name
3. Attach the bracket to the wall using the wall plugs
and screws included.
4. Push the red/black cables of the permanent power
lead through the hole in the wall and connect to the back
of the smartbell. The red wire into the number 1 slot and
black into the number 2 slot. To do this, push and hold
the grey clip in while pushing in the red//black cables.
When pushed in, release the clip to secure the wire.
At this point, please make a note of the unit’s
Access point (AP) name. This can be found on the
sticker at the back of the unit (shown above, right).
You will need this number later.
5
5. If you will using a wired connection to your router,
run your ethernet cable through the hole and connect
to the back of the smartbell. Attach as shown above.
If you are connecting wireless, skip to step 6.
5. If you choose a wired connection to your router/home
plug/switch, run your ethernet cable through the hole
and connect to the back of the smartbell. Attach as
shown above. If you choose a wireless connection skip
this step and proceed to step 6.
7. Put the screw cap covers in place over the screws at
the back of the smartbell. Attach the smartbell to the
bracket. Secure the unit to the bracket using the provided
screw and place at the bottom of the unit. Then use the
cap to cover (shown above, right).
6. Insert your Micro SD Card (if you have purchased
one) to enable recording.
8. Connect the end of the permanent power lead to
the power supply provided and plug the power supply
into a power source. Your DIY install is complete, for
the next step, go to Section 3 ‘App Set Up’.
2.2 Professional Installation
If there is no power source locally, you can use the optional 20m DC extension lead accessory (see page 4). To use the
additional cable, follow the instructions below.
1. Remove the smartbell from the bracket. Use the
bracket as a stencil and place where you wish to install
the smartbell. Then, mark out the screw holes to secure
the bracket.
2. Mark a hole for the power and ethernet cable to
run through. Remove the bracket, and then drill the
holes. We recommend any holes you drill in your
walls are sealed water tight. After threading the
cables through.
6
3. Attach the bracket to the wall using the wall plugs
and screws included.
4. Take the permanent power lead and plug it into the
DC plug on the power supply provided. Please DO
NOT plug the power supply into your power source at
this point.
AP
Name
5. Connect the red/black end of the permanent
power lead to a terminal block and the optional
20m extension lead. Put the same colours from the
20m extension into the matching connections on
the terminal block.
6. Push the red/black cables of the permanent power
lead through the hole in the wall and connect to the back
of the smartbell. The red wire into the number 1 slot and
black into the number 2 slot. To do this, push and hold
the grey clip in while pushing in the red//black cables.
When pushed in, release the clip to secure the wire.
At this point, please make a note of the unit’s
Access point (AP) name. This can be found on the
sticker at the back of the unit (shown above, right).
You will need this number later.
7
5. If you will using a wired connection to your router,
run your ethernet cable through the hole and connect
to the back of the smartbell. Attach as shown above.
If you are connecting wireless, skip to step 6.
7. If you choose a wired connection to your router/home
plug/switch, run your ethernet cable through the hole
and connect to the back of the smartbell. Attach as
shown above. If you choose a wireless connection skip
this step and proceed to step 6.
9. Put the screw cap covers in place over the screws at
the back of the smartbell. Attach the smartbell to the
bracket. Secure the unit to the bracket using the provided
screw and place at the bottom of the unit. Then use the
cap to cover (shown above, right).
8. Insert your Micro SD Card (if you have purchased
one) to enable recording.
10. Now, plug the power supply into a power source.
Your smartbell is now ready to configure using the
smartbell app. Proceed to Section 3 ‘App Setup’.
2.3 Smartbell Overview
4. IR LEDs
1. Camera
5. PIR Sensor
2. Speaker
6. Name Tag
3. Microphone
7. Doorbell
8
3. App Setup
3.1 Installing Smart-i Bell App
Please follow the steps below to install the Smart-i Bell app. The screen shots shown in the examples are taken
from a Samsung Galaxy Note 4, so these may vary depending on which model of Smartphone/Tablet you use.
1. Turn on the wireless on your Smartphone or Tablet by going to your settings and selecting the wifi option
shown below (right).
2. Select the smartbell wifi from the search list. When selected, type in the password (default password is
12345678).
3. Go to the your App/Google Play store and download the ‘smart-i bell app’.
4. Once installed, the app will then appear on your homescreen. Click the icon to open the App.
5. Press on the ‘Add device’ icon.
9
6. Press the Search in LAN option.
7. The device number shown on screen should match with the sticker on the back of the unit.
8. Select the correct device and fill in the details for the smartbell. The default password for this is 88888888.
Name: Enter any username, for example Smart-i Bell.
Device ID: This is unique to the smartbell you are
adding.
Password: Enter the password of the device you are
trying to add. The default password is 88888888.
9.When all the details are entered, press the
the homesscreen (below).
icon on the top right of the screen. You will be re-directed to
Home WIFI
10
10. Press on the picture to view the smartbell camera and also listen through the microphone to check that you
are connected.
3.2 Connecting to View Remotely
1. Go to the homescreen on the app and press the ‘Arrow’.
2. Press the ‘Change Device Network Mode’ option and press the SSID option. The smartbell will search for
wireless routers.
3. Press on your selected router.
Home WIFI
11
4. Enter your wireless password. Please consult your Wireless Router for details.
Home WIFI
5. When finished, press the ‘Save’
icon in the top right corner and your smartbell will reboot.
6. After saving, you will be taken back to the homescreen. Your smartbell will show as disconnected. It is now
connecting to your chosen router. When finished, it will show as ‘Connected’ as shown below.
Home WIFI
7. Go back to your wireless settings on your Smartphone/Tablet and connect to your router.
8. When you have connected, go back to the smartbell app and check it says connected.
9. Press the picture the picture next to the smartbell to check it is connected and you can view the smartbell live.
If you have multiple devices to install, please repeat the steps.
PLEASE NOTE
You will need to keep the app running in the background so that the smartbell can notify you when a visitor
presses the smartbell. Do not exit the app, instead press the home button on your Smartphone/Tablet to keep the
app open.
12
4. Software Use
4.1 Settings
-To adjust the settings, go to the homescreen on the Smart-i Bell app and press the preview image. The below
options will be displayed on the bottom of the page.
Snapshot
Start
Recording
Answer/Talk
button
Settings
Resolution
1. Snapshot: Take a snapshot of the view from the smartbell (Micro SD Card Needed).
2. Start Recording: Start recording video from the smartbell (Micro SD Card Needed).
3. Answer/Talk: Answer an incoming call from a visitor and enable microphone to speak.
4. Settings: Adjust the settings
5. Resolution: Adjust the resolution of the image from QVGA or HD.
4.2. Software Settings
Click on the ‘Settings’ icon to bring up the following options.
Search for
Video
Screenshot Playback Unlock Door Brightness
Motion
4.2.1. Search for Screenshot
To find a screenshot, enter the date in to the option field and press yes. When found, click the screen to enlarge
the image.
13
4.2.2. Video
Click the option to view all the recorded videos. To view, click the video you wish to play. To search using the date
function, click the
icon in the top right corner of the screen.
4.2.3. Unlock the Door
Press the icon to unlock the door. For door release password, please check the device settings (Section 4.3.7).
Please note that the electric door release is not provided, please check with your supplier.
4.3. Device Settings
When in the homescreen, click the
icon. You will be presented with the following screen.
14
4.3.1 Favourite
Toggle the button right (shown below) to make the smartbell a favourite. When favourited, an orange star will
appear next to that smartbell.
4.3.2 Change Device Info
This option allows you to change the name and ID of the smartbell. When entered, press the save button in the
top right screen. We recommend you make a note of the new name and device ID before and after changing.
4.3.3 Move Detection
This option allows you to adjust how long the smartbell records for once it detects motion.
4.3.4 Change Device Network
This option allows you to search for local wifi connections.
Home WIFI
15
4.3.5 About Device
Displays the firmware, Network Mode and SSID of the smartbell.
4.3.6 Alarm
Turn the tamper alarm on or off. Please note that this is not supported on all models, please check with your
supplier.
4.3.7 Security Settings
Here you can adjust the smartbell secutriy settings.
Wireless Password: This is the units own AP password.
Here you can change it.
Device Password: Change the password that allows you
to connect the smartbell to the app .
Unlock Password: This is for the electronic door release
trigger. Here you can set a password for this function.
Please Note: Please make a note of the passwords if you
change them
4.3.8 SD Formatting
Press this option to format the Micro SD Card in your smartbell. Please note that this will erase all recordings and
images. Please remove the Micro SD Card and back-up images/videos on your PC if you wish to keep them.
16
4.3.9. Turn Off
This option allows you to adjust the notification function.
Turn Off:
When a visitor activates the smartbell, the video image from the smartbell will pop-up on your screen showing the
visitor.
Turn On:
When a visitor activates the smartbell, you will receive an alert sound until the call is answered. In addition, in
your smart device’s notification area, you will see the smartbell logo. Then, press on the notification to show the
visitor and answer the call. If your Smartphone/Tablet is on silent, the device will vibrate.
17
5. Ringer
1. On/Off
2. Activity
Light
4. Reset
Button
5. Battery
Cover
3. Change
Melody
Please note that your Ringer is already synced to your smartbell.
Should you wish to re-sync, push the reset button on the bell and also the doorbell on the smartbell at the same
time.
18
6. Specifications
Smartbell Specifications
Input
DC5 ~ 24V or AC9 ~ 16V
Night Vision / IR Range
Supported / 2 Metres
Audio
2-way intercom
Communications
Ethernet & Wifi Support
Resolution
1280x720 @ 30fps
640x480 @ 30fps
PIR Distance
2 Metres
Conference
Not Suppored on all models
Support
TCP/IP/UDP+P2P
Wireless Standard
IEEE802.11b/g/n
Memory
Micro SD Card (Not Supplied)
Alarm
Tamper Alarm (Not Supplied with all models)
Alarm Connection
Terminal
System Support
iOS & Android
Storage Temperature
-10°C ~ 60°C
Operating Temperature
-20°C ~ 60°C
Weatherproof
IP55
19
Manufactured for:
Smart-i, Unit 2 Valley Point, Beddington Farm Road, Croydon Surrey CR0 4WP
Designed & Engineered
in the United Kingdom
17