1
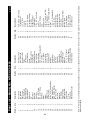
HOW TO ADJUST THE SKI EXERCISER
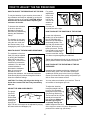
HOW TO ADJUST THE RESISTANCE OF THE SKIS
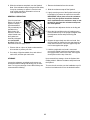
For greater
adjustments
in the cord
length, one
loop of the
cord can be
added to or
removed
from the pulley as shown at the right.
To vary the intensity of your exercise, the amount of
leg resistance can easily be adjusted by moving the
resistance clamp on the upright. CAUTION: Always
dismount the ski exerciser before adjusting the
resistance of the skis.
To increase the resistance
of the skis, raise the
Resistance Clamp (85).
Decrease the resistance by
lowering the Resistance
Clamp.
85
HOW TO ADJUST THE POSITION OF THE HIP PAD
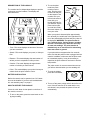
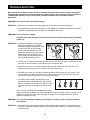
Loosen the Adjustment
53
Knobs (41) on each side of
the Hip Pad Slide (42).
Move the Hip Pad Slide to
the desired position. The
Hip Pad (53) should rest at
hip level, about one inch
42
41
below your navel. The Hip
Pad should be high enough
so it does not restrict leg
movement and low enough
so it does not press against your abdomen.
The intensity of your exercise can also be varied by
using the arm cords (see
the section below), or by
changing the pace of your exercise.
HOW TO ADJUST THE ARM CORD RESISTANCE
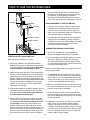
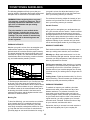
The resistance of the Arm
39 88
Cord (23) can be adjusted
by turning the Resistance
Knob (39) on top of the
Pulley (35). Turn the Knob
clockwise to increase the
35
resistance. Turn the Knob
counterclockwise to
23
decrease the resistance.
Note: As you turn the
Resistance Knob to
increase the resistance, the numbered Resistance
Scale Decal (88) will protrude through the Knob to
show the resistance settings.
Tighten the Adjustment Knobs (41) to hold the Hip Pad
(53) in position. Make sure both Knobs are secure.
HOW TO ADJUST THE ELEVATION OF THE SKI
EXERCISER
Increasing the elevation and the leg resistance will
simulate skiing uphill. This will further develop the
quadriceps muscle group in the front of your thighs,
elevate your heart rate more quickly and provide you
with an even more intense workout.
CAUTION: The Pulley (35) will get hot during use.
Avoid direct contact with the Pulley immediately
after use.
You may select an elevation up to level ten. There is
an increase of two degrees per hole.
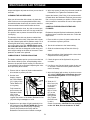
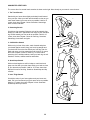
To adjust the elevation,
insert the straight end of a
Leg Pin (74) completely
2
through the holes in the Leg
(76) and Leg Bracket (2).
The bent end of the Leg Pin
74
should point toward the
76
floor as shown. Make sure
that the Leg Pin goes
completely through the
holes. Rotate the bent end
of the Leg Pin to secure it in place. Repeat this
process on the other Leg (not shown).
ADJUST THE ARM CORD LENGTH
The proper
Arm Cord
(23) length
23
should allow
24
Knot
your arms to
extend just
beyond your
hips. The arm cord length can be adjusted by retying
the knots inside the Handgrips (24).
6