1
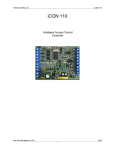
Polimex Holding Ltd. iCON 160 iCON 160 The Intelligent Access Control Controller iCON160 User Manual v1.01.55 2012 © 1 Polimex Holding Ltd. iCON 160 Content 1.Safety instructions...................................................................................................................................................... 3 2.Key Features................................................................................................................................................................ 3 3.Main Properties........................................................................................................................................................... 3 4.Specifications.............................................................................................................................................................. 4 5.Review Of Standard Components Included..............................................................................................................4 6.Product Review........................................................................................................................................................... 5 6.1.Features................................................................................................................................................................. 5 6.2.General View......................................................................................................................................................... 6 7.Types Of Installations And Check Points................................................................................................................. 7 7.1.Items To Check Before Installation..................................................................................................................... 7 7.1.1.Choice Of Cable.............................................................................................................................................. 7 7.1.2.Recommended Cable Lengths And Restrictions:.......................................................................................7 7.2.Check Points During The Installation.................................................................................................................8 7.2.1.Terminating Resistors................................................................................................................................... 8 7.2.2.How To Connect The Terminating Resistors...............................................................................................8 7.2.3.Grounding: Recommendations .................................................................................................................... 8 7.2.4.Connecting The Protective Reverse Diode .................................................................................................9 8. Installation ................................................................................................................................................................ 9 8.1.Determining The ID Of The Device ..................................................................................................................... 9 8.2.Cabling.................................................................................................................................................................. 9 8.2.1.Power Supply.................................................................................................................................................. 9 8.2.2.Connecting The Inputs Of The Controller..................................................................................................10 8.2.3.Connecting The Outputs Of The Controller...............................................................................................10 8.2.4.Connecting Readers To The Controller.....................................................................................................11 9.Communication With The Controller....................................................................................................................... 12 9.1.Communication Over The RS232 Port..............................................................................................................12 9.2.Communication Over The RS485 Port..............................................................................................................12 9.3.From Host PC To LAN To 485........................................................................................................................... 13 9.4.Communication Over The Lan Port ................................................................................................................. 13 10.Operational Status Of The System........................................................................................................................ 14 11.Main Settings........................................................................................................................................................... 15 11.1.Controller Setup............................................................................................................................................... 15 12.Operation................................................................................................................................................................. 17 12.1.Normal operation.............................................................................................................................................. 17 12.2.Master Card Operation..................................................................................................................................... 18 13.Alarm Zones Setup.................................................................................................................................................. 18 13.1.Alarm Zones Configuration............................................................................................................................. 18 13.2.Arming Of Alarm Zones................................................................................................................................... 19 13.3.Disarming Of Alarm Zones.............................................................................................................................. 19 14.Time Schedules....................................................................................................................................................... 19 15.Appendix.................................................................................................................................................................. 20 15.1.Default settings for inputs and outputs for two doors (one sided) mode...................................................20 15.2.Default settings for inputs and outputs for one door (two sided) mode ....................................................21 iCON160 User Manual v1.01.55 2012 © 2 Polimex Holding Ltd. iCON 160 1. Safety instructions Please follow the instructions. This will prevent damage to the technical equipment and ensure the security of users Use AC 220V. Do not connect the power cord to the device while plugged into the power outlet. Do not remove the device from the original box. It has power conductors and parts with life-threatening voltage If you notice white smoke or burning smell immediately disconnect the power cable Do not install the device in dusty and humid room without taking necessary measures Follow the temperature requirements for normal operation of the device Keep away from water and direct sunlight If relocation of input and output cables is necessary disconnect the power cable of the device Do not attempt to repair the device on your own in case of malfunction Do not clean the product with water or chemicals such as gasoline and other strong chemicals No matter how familiar you are with technical equipment, always check the label next to the socket before connecting a cable If you have questions please first check the instructions and if you cannot find a solution for your problem contact an employee of "Polimex Holding." 2. Key Features The Intelligent Controller iCON160 for single door/two directions or two doors/single direction management with two zones for alarm (4 if duplicated). Embedded Web Server for remote monitoring and management. Capacity to store up to 16 400 users and 8 200 events. Two wiegand inputs for readers in one of these modes: card, PIN, card or PIN and card with work code. Built in 6x input terminals (Magnetic contacts, Exit button, fire alarm, etc..), 1-W port for communication with DALLAS 1-W devices (temperature sensors, A / D converters, etc.). 2 alarm inputs with line monitoring for short and open circuit and a special siren output. The controller can operate in standalone or network mode with RS485, RS232, LAN communication. All settings are made through specialized software or built-in keyboard and LCD display. 3. Main Properties Access control for one door double sided or two doors single sided with two zones for alarm (4 zones if duplicated) Number of cards 8 100 or 16 400 depending on the installed memory; Number of events: 4 100 or 8 200 depending on the installed memory; Output for battery charging with discharge protection 12V DC output with short circuit protection and over current Individual work or network mode with RS485, RS232, LAN communication; Interface of readers: 26 or 34 bit WIEGAND (automatic detection) and 4-8 bit numbers for PIN 2 inputs for reader 8 time schedules and 8 holidays schedules Anti pass back function Duress alarm function Siren output with line status detection 1-W port for communication with 1-W DALLAS devices (i-buttons, temperature sensors, RH sensors, A/D converters, etc.). 6x Built- in inputs for door contact, Exit button, Fire detection etc. 6x Built-in relay outputs (including sirene output) 1x Built-in multifunction Analog input 0 ... 10 V 2x Built-in open collector outputs 30V/0.5A Embedded Web Server for remote monitoring and management iCON160 User Manual v1.01.55 2012 © 3 Polimex Holding Ltd. iCON 160 4. Specifications CPU 2 microprocessors Memory Program memory: 128 KByte FLASH + 64 KByte FLASH; Data memory: 1024 kbit or 2048 Kbit E2PROM Capacity of users 8100 or 16 400 (depending on data memory installed) Memory for events 4100 or 8200 (depending on data memory installed) Readers 2 inputs for readers: 26 or 34 bit WIEGAND (automatic detection) and 4-8 bit numbers for PIN Inputs 7 galvanically isolated, 1 fire alarm system input, 2 lines for alarm modules, 1 analog input (0-10V) Outputs 6 relay outputs 125V/3A (including sirene output) and 2 OC outputs 30V/0.5A Communication LAN, RS 232 C, RS 485 Current 230V AC, with built-in pulse rectifier Working amperage (mA) 300 Illuminator Yes Audible indicator Yes Operating temperature -10°C to +50°C Operating humidity (RH) 10 % to 90 %RH (not condensing) Size (mm) 158*91*46 LCD/LED display 2 lines/16 characters LCD with backlight, 19 LEDS Keyboard 6 button keypad Warranty (years) 2 Software Free and Paid 5. Review Of Standard Components Included Picture 1. iCON160 iCON160 User Manual v1.01.55 2012 © 4 Polimex Holding Ltd. iCON 160 6. Product Review 6.1. Features Standalone Mode Controller iCON160 can control one door double sided or two doors single sided. The controller has two readers and upon card reading opens a door or not depending on access rights of the respective card. Security functions are implemented on two alarm lines. Alarm lines can be armed and disarmed with an alarm authorized card. When registering an input or output event (from the reader or exit button) controller generates a corresponding event record (Accsses Granted Accsses Denied). All events are recorded in memory and in the presence of a communication link are sent to specialized management software. Working With Computer Control All activities associated with the controller settings, settings of relays, timeschdules, adding and deleting cards, event management, etc., can be done by computer. Each event sent from the controller to a computer is stored in a database for flexible control of user rights. Data Retention Interruption of power supply controller and user event data are stored in nonvolatile memory. Management With Built-In Keyboard If the iCON160 controller is not connected to the control computer, the integrated keyboard and display can be manually applied the programming data for maps and functional settings. Anti Pass-Back (APB) The anti-passback feature is designed to prevent misuse of the access control system. The anti-passback feature establishes a specific sequence in which access cards must be used in order for the system to grant access e.g. after entering an area the respective card can only be used to exit this area, checking the respective card again on the IN reader will trigger an APB alarm event. There are two types of anti pass-back – local APB, for a single controller and a global APB covering a group of controllers. The global anti pass-back can be set up only in conjuction with the paid version of monitoring software. The controller has to be in one door double sided mode for the local anti pass-back to work. Number of Controlled Doors The iCON160 can controll one door double sided or two doors single sided. Number of Security System Lines The iCON160 has two alarm lines which can be armed and individually. The alarm line can be configured to have two areas each. Inputs The controller has 2 inputs for door contacst, 2 inputs button "Exit", emergency fire input, 1 analog input 0-10V., Three input signal to the LAN processor. Outputs The iCON160 has 5 relay outputs (125V/3A), a siren output to detect the status of outputs and 2 open collector outputs (30V/0.5A) Depending on the managed device controller, the outputs can be switched by jumpers in the normally open (NO) or normally closed (NC). Time Schedules The system has 8 time schedules. Each time schedules can be set up with 4 intervals per day. Holiday Time Schedules The system has 8 time schedules for holidays where you can add dates of holidays for the current year. iCON160 User Manual v1.01.55 2012 © 5 Polimex Holding Ltd. iCON 160 6.2. General View 8 1 4 1 2 ч 3 1 9 10 11 2 4 3 1 4 2 4 1 ч 4 2 3 1 ч 1 2 3 5 ч 1 3 1 12 13 2 14 2 5 5 6 2 2 7 2 Picture 2. General View Picture 3. Status LEDs 1. Connector for AC 220 V AC. 2. Connector for control devices or signal from the controller 3. Connector for a device generating a voltage of 0 to 10 volts, which will be monitored by the controller. 4. Connector for alarm system lines 5. Connector for input devices operating impacts to the controller, they can be changed as NO or NC to GND. 6. Connector for managing the impact of input Fire alarm station. 7. Connector for external siren or buzzer 8. Connector for battery 12 V DC to book the main power supply. 9. Connector for consumers on 12 V DC. 10. Connector for communication cable RS-485 11. Connector for communication cable RS-432 iCON160 User Manual v1.01.55 2012 © 6 Polimex Holding Ltd. iCON 160 12. Connector for communication LAN cable 13. Connector for 1-W port for communication with DALLAS 1-W devices (i-buttons, temperature sensors, RH sensors, A / D converters, etc.) 14. Connectors for 2 readers (26 or 34 bit WIEGAND) J. 6 Jumper to determine whether management of Out 3 to the LAN or controller part. J. 5 Jumper 5 to determine whether management of Out 4 to be on the LAN or Controller part. J. 8 Jumper to determine whether Jumper Out 2 to be NO or NC J. 7 Jumper to determine whether Jumper Out 1 to be NO or NC J. 2 Jumper to determine whether Jumper Out 3 to be NO or NC J. 3 Jumper to determine whether Jumper Out 4 to be NO or NC J. 4 Jumper to determine whether Jumper Out 5 to be NO or NC J. 1 Jumper for setting the operation of the siren 15. LEDs showing the system status - supporting voltages +5 V, +12 V, the presence of communication Rx, Tx. 16. LEDs showing the status of outputs-Out1 to Out5, Sirene, Led 0 (CPU performance of the LAN) 17. LEDs show the status of inputs-IN 1 to IN 7, input from Fire alarm station 7. Types Of Installations And Check Points 7.1. Items To Check Before Installation 7.1.1. Choice Of Cable Example wiring Picture 4. Example wiring 7.1.2. Recommended Cable Lengths And Restrictions: Table with recommended types and lengths Description Specification of cable 1 2 3 4 5 6 AC power Reader - power and data Door Contact Exit Button Sensor Input Door Lock, Alarm Device , Lock (Alarm) RS 232 cable RS 485 cable Maximum length 2х 0.5 мм 22 AWG 4 conductor shielded 22 AWG 4 conductor shielded 150м 300 м 18 AWG 2 conductor unshielded 300 м 24 AWG 2 twisted pair shielded 24 AWG 2 twisted pair shielded 15 м 1200 м iCON160 User Manual v1.01.55 2012 © 7 Polimex Holding Ltd. iCON 160 7.2. Check Points During The Installation 7.2.1. Terminating Resistors Termination of the communication bus is necessary and is recommended especially for longer trunks. The aim is to reduce the level of noise due to the communication bus, which get a stable operating system. For trunks up to 50m length use a 1 kilo-ohm resistor. For buses to 150m length use a 620 ohm resistor. For rails over 150m length use a 300 ohm resistor. 7.2.2. How To Connect The Terminating Resistors Picture 5. How to connect the terminating resistors 7.2.3. Grounding: Recommendations We recommend using a properly constructed system of ground communication lines. Basically there are three grounding points that users can find during installation: 1) Grounding in the soil 2) Grounding in the communication equipment chassis 3) Power grounding It is important to note that you should not connect both ends of the shieldings of communication cables to the grounding system. If this is done, some stray currents can appear when there is a difference in the levels of tension at both ends of the communication cable. Stray current flow will introduce noise and errors in communication respectively. For proper grounding only one end of the shielding (screens) of the communication cables should be grounded. If soil grounding is available connect one end of the shield (screen) to this grounding. If soil grounding is not available, one end of the shielding (screens) of the communication cables should be connected to the chassis grounding of the communication equipment. If you do not find the first two groundings (soil or chassis), connect the end of the grounding wire to the GND of the controller. It should be noted that if the grounding of the chassis is not made properlyit would lead to noise and errors in communication. Then it is better to make a grounding to the GND controller. iCON160 User Manual v1.01.55 2012 © 8 Polimex Holding Ltd. iCON 160 Picture 6. Grounding 7.2.4. Connecting The Protective Reverse Diode If you connect to an inductive locking mechanisms to theoutput relays, these mechanisms will induce high voltages when switched on and off. If users do not connect protective diodes, dangerously high voltage will return to the controller and will damage it. Therefore we strongly recommend protective diodes to be connected to absorb dangerous induced voltage. Picture 7. Connecting the protective reverse diode 8. Installation 8.1. Determining The ID Of The Device Each controller has a unique MAC address, which is created during manufacturing. This is the presentation of the device to the LAN connection. When connected via RS 232 or RS 485, each controller is represented by ID number that can be changed by software. Within one communication bus you should not have controllers with the same ID number. 8.2. Cabling 8.2.1. Power Supply Connect the power cord for 220 VAC to the connectors of the controller labeled LN 220 VAC. Picture 8. Power Supply iCON160 User Manual v1.01.55 2012 © 9 Polimex Holding Ltd. iCON 160 8.2.2. Connecting The Inputs Of The Controller. Picture 9. Connecting the inputs of the controller Connecting the EXIT buttons (input # 1, input # 3) Connect one wire from the EXIT button (button out) to input #1 for Door #1 respectively input #3 for Door #2 and the other wire from the EXIT button to GND. Connecting the door sensors (Door contact sensor) (input # 2, input # 4) Connect one wire from the Door contact sensor of Door #1 to input # 2, respectively Door contact sensor of Door #2 to input # 4 and the other wire from the Door contact sensor to GND. SUMMARY for connecting the inputs to the corresponding doors Control of one door - Door #1: input # 1 to EXIT buton1, input # 2 to Door contact sensor Control of two doors - Door #1: input #1 to EXIT buton1, input #2 to Door contact sensor - Door #2: input #3 to EXIT buton2, input #4 to Door contact sensor Additional external connections (applicable to input #5, input #6, input #7) Connect one wire for an external device to one of the inputs # 5, # 6 or # 7 Connect the other wire for an external device to GND 8.2.3. Connecting The Outputs Of The Controller Picture 10. Connecting the outputs of the controller Connecting the closing mechanism (Power Fail Safe), (Door 1: Output # 1). (Door 2: Output # 3. connect one wire from Output # 1 and Output # 3 as at +12 V connect the other wire from Output # 1 and Output # 3 as at Electric Clamping mechanism (Power Fail Safe) connect the other wire of the electric closing mechanism (Power Fail Safe) to GND Jumpers for setting the outputs are in a NC position Allways follow the method of connection and never forget diodes placed in the locking mechanism! iCON160 User Manual v1.01.55 2012 © 10 Polimex Holding Ltd. iCON 160 Connecting the power closing mechanism (Power Fail Secure), (Door 1: Output #1). (Door 2: Output #3). connect one wire from Output #1 and Output #3 to +12 V connect the other wire from Output #1 and Output #3 to the electric closing mechanism (Power Fail Secure) connect the other wire of the electric closing mechanism (Power Fail Secure) to GND Jumpers for setting the outputs are in NO position Connecting an alarm device to the relevant doors ((Door1 Alarm: Output # 2) (Door2 Alarm: Output # 4) connect one wire from Output #2 and Output #4 to +12 V connect the other wire from Output #2 and Output #4 to the alarm device connect the other (-) wire of the alarm device to GND A SUMMARY for connecting the output corresponding to the doors Control of one Door Door 1: Output # 1 to the electric closing mechanism, Output # 2 to the device to alert Control of two doors Door 2: Output # 3 to the power closing mechanism, Output # 4 to the alarm device Picture 11. Connecting the outputs of the controller 8.2.4. Connecting Readers To The Controller Picture 12. Connecting the readers of the controller connect the (+) wire of the reader to +12 V connector on the controller for the reader connect the (-) wire of the reader to the GND connector on the controller for the reader connect Data 0 of the reader to the D0 connector on the controller for the reader connect Data 1 of the reader to the D1 connector on the controller for the reader When D0 and D1 are exchanged different card IDs are reported by the controller! iCON160 User Manual v1.01.55 2012 © 11 Polimex Holding Ltd. iCON 160 SUMMARY for connecting readers to the corresponding doors Control of one door, one sided Door 1: Reader # 1 is IN for Door #1, Exit buton1 is OUT for Door #1 Control of one doors, two sided Door 1: Reader # 1 is IN for Door #1, Reader # 2 is OUT for Door #1 Control of two doors, one sided Door 1: Reader # 1 is IN for Door #1, Exit buton1 is OUT for Door #1 Door 2: Reader # 2 is IN for Door #2, Exit buton2 is OUT for Door #2 Compatible Readers: 26 or 34 bit WIEGAND (controller automaticly detects the mode) and 4-8 bit numbers for PIN. 9. Communication With The Controller 9.1. Communication Over The RS232 Port This is the mode where you can communicate simultaneously with only one controller per port with a free or paid software. Picture 13. Connecting over RS232 A standard COM port connector with 9 pins is used for connection to your computer. The figure indicates which of the pins are connected to make communication. These are number 2,3 and 5. Plug the COM port connector into the COM port of the computer. If your computer is not equiped with a standard COM port you can use a USB to Com converter. Once you are done with the above mentioned preparations you can supply 220 V AC power to the controller. Plug and socket communication on the computer. Install and run AndromedaTool.exe 9.2. Communication Over The RS485 Port Picture 14. Connecting over RS485 iCON160 User Manual v1.01.55 2012 © 12 Polimex Holding Ltd. iCON 160 This is the mode where you can communicate simultaneously with more than one controller per port with a free or paid software. You need a RS485 to RS232 or Ethernet converter since most computers do not have a RS485 port. A twisted pair cable is mandatory for this kind of communication (UTP or FTP for example). 9.3. From Host PC To LAN To 485 Picture 15. Connecting host PC to LAN to 485 9.4. Communication Over The Lan Port An iCON160 can be used as an entry point for LAN communication and its RS485 port can be connected to other controllers. The controller will act as a converter from LAN to RS485. Picture 16. Connecting over LAN iCON160 User Manual v1.01.55 2012 © 13 Polimex Holding Ltd. iCON 160 Host PC > RS232 > iCON160 Host PC > LAN > iCON160 Host PC > LAN > iCON160 > RS485.....253 devices with RS485 Host PC > Convertor RS232-RS485 > iCON160 Host PC > Convertor RS232-RS485 > iCON160.....253 devices with RS485 10. Operational Status Of The System The s tatus of the system is displayed over LCD and LED diods LEDs are divided into three groups: Picture 17. Status LEDs The Status Group, Outputs Group and Inputs Group Status Group - indicates the presence power supply and communication Led +5V - indicates the presence or absence of +5V voltage Led +12V - indicates the presence or absence of +12V voltage Led Rx - flashing indicates normal communication when receiving data from PC Led Tx - flashing indicates normal communication when transmission data from PC Outputs Group - indicates the status of the outputs, while the diodes are on the corresponding relay outputs are activated Led 1 indicates whether Output1 is enabled Led 2 indicates whether Output2 is enabled Led Siren indicates whether Siren is activated Led 3 indicates whether Output3 is enabled Led 4 indicates whether Output4 is enabled Led 5 indicates whether Output5 is enabled Led 0 – when blinking indicates normal operation of the LAN processor Inputs Group - indicates the status of the corresponding inputs Led Fire indicates whether we have a signal from the Fire Alarm System (if connected) Led 1 shows whether the input # 1 have control GND Led 2 shows whether the input # 2 has control GND Led 3 shows whether the input # 3 has control GND Led 4 shows whether the input # 4 has control GND Led 5 shows whether the input # 5 has control GND Led 6 shows whether the input # 6 has control GND Led 7 shows whether the input # 7 has control GND LCD display The display is successively showing: - the current time, day, month year, ID of the controller iCON160 User Manual v1.01.55 2012 © 14 Polimex Holding Ltd. iCON 160 - the state of inputs and outputs - the state of alarm zones Z1 and Z2 - the state of the siren The first line is showing the current time, day, month year., ID controller The second line is showing the status of inputs and outputs in: 0000 out: 0000 This information is displayed on the screen in the absence of control effects and therefore lack of output control in:0001- is displayed when GND is connected to input #1 (the input is triggered) in:0010- is displayed when GND is connected to input #2 (the input is triggered) in:0100- is displayed when GND is connected to input #3 (the input is triggered) in:1000- is displayed when GND is connected to input #4 (the input is triggered) out:0001- is displayed when output#1 is triggered out:0010- is displayed when output#2 is triggered out:0100- is displayed when output#3 is triggered out:1000- is displayed when output#4 is triggered Combinations of numbers can occur when several inputs/outputs are triggered. . During the next refresh the display is showing the state of the alarm zones Z1 and Z2 Z1 Disarm OPEN Z1 Disarm Normal Z1 Disarm D1 ON Z1 Disarm D2 ON Z1 Disarm D12 ON Z1 Disarm SHORT Z2 Disarm OPEN Z2 Disarm Normal Z2 Disarm D1 ON Z2 Disarm D2 ON Z2 Disarm D12 ON Z2 Disarm SHORT Depending on the hardware configuration of the zones, whether they are configured as normal or duplicates, different conditions appear. During the next refresh the display is showing the status of the siren When an alarm is triggered the siren changes state from "NORMAL" to “GO TO ON" to “POWER ON" SIREN OPEN SIREN NORMAL SIREN GO TO ON SIREN POWER ON 11. Main Settings 11.1. Controller Setup In the left part of the controller are six buttons (<) (>) (^) (v ), RTN, ESC Pressing the RTN enters the MAIN Menu. Pressing ESC exits the MAIN Menu. After entering the MAIN Menu the first menu section is displayed 1.CONTR. MODE Here we can set whether the controller manages one door (two sided) or two doors (one sided) 1.CONTR. MODE > RTN > CONTR. MODE CURRENT: 1 DOOR > RTN – one door (two sided) mode confirmed 1.CONTR. MODE > RTN > CONTR. MODE CURRENT: 1 DOOR > v CURRENT: 2 DOORS > RTN – two doors (one sided) mode confirmed Press the down arrow ”v" to procede to the second section iCON160 User Manual v1.01.55 2012 © 15 Polimex Holding Ltd. iCON 160 2. APB mode - Antipassback function APB mode>RTN>2. APB mode CURRENT: APB off> APB on> ( ) RTN > - Anti pass back function turned off APB mode>RTN>2. APB mode CURRENT: APB off>RTN > - Switch Anti pass back between on and off APB mode>RTN>2. APB mode ( ) CURRENT: APB on > Anti pass back function turned on 3. TIME SH Time Schedule Management D:1 00:00 00:00 I:1 D:1- days of the week I:1- interval number 1(can be from 1 to 4) 08:00 - 08 hour (0 to 24), 00 minutes (0 to 59) D:1 - shows the day of the week we’re setting the control interval for 08:00 00:00 - start time interval I:1 08:00 19:00 - end time of the interval I:1 Time Schedules have to be set up for each day of the week separately! 4. READER MODE Defines the operating modes of the readers R1:Card :only control card R1:Card + Pin :control card and pin code R1:Card + Code :control card and work code R1:Card or Pin :control card or pin code After selecting the desired operating mode press RTN Select reader 2 with the down arrow R2:Card :only control card R2:Card + Pin :control card and pin code R2:Card + Code :control card and work code R2:Card or Pin :control card or pin code 5. DURESS MODE Defines whether DURRES MODE is activated and the code used for DURRES ALARM. R1: ON –DURESS MODE is activated for reader 1, down arrow will change status to OFF for reader 1 and vice versa Select reader 2 with the down arrow R2: ON –DURESS MODE is activated for reader 2, down arrow will change status to OFF for reader 2 and vice versa After pressing RTN you pass to the DURRESS PASSWORD menu DURESS PASSWORD – defines the password for activating the outputs (door output and alarm relay) for the corresponding reader R1: 55 R2: 55 – Passwords for reader 1 and 2 are 55, these are the default passwords. You can change the password with the up and down arrow, pressing the right arrow will change to the reader 2 password. Pressing RTN confirmes last changes. If the RTN button is not pressed over time the program returns to an indicative menu and changes are discarded. 6.RELAY TIME Defines the length in seconds of activation of all outputs (working and alarm) simultaneously. 7.CARD MENU This is the menu for access card management. 7.1 ENTER CARD By pressing the> RTN the display shows this: CARD: 00000 00000 The cursor is indicating which number we’re going to change. The left and right arrows change the position we’re editing, the up and down arrows change the values from 0 to 9. After entering the card number to press RTN. If you iCON160 User Manual v1.01.55 2012 © 16 Polimex Holding Ltd. iCON 160 have a reader connected you can just check the access card you want to add on the reader and the card number will be displayed. If this card is not present in the system NEW CARD is displayed. Press RTN and the default PASSWORD: 1234 is displayed. If you want to change it use the arrows to edit the default password. Press RTN and SELECT READER is displayed. Choose READER 1, READER 2 or READER 1&2 (depending on which reader you want to activate for the card). Press RTN and CONTROL ALARM is displayed. Choose whether this card will have Alarm and Disarm rights and for which zones. Possible values are NOT CONTROL, ZONE 1, ZONE 2 and ZONE 1&2. Press RTN and TIME SCHEDULE N R1> 0 R2> 0 is displayed. Here you can define a time schedule for the card. R1> (0 to8). No Time Schedule applies to access rights of this card if 0 is selected. By default the Time Schedules are 00:00 to 00:00 for every day in the week. Choosing a different Time Schedule without setting up this Time Schedule will have no effect on access rights of the respective card. 7.2 EDIT CARD Edit existing cards. The card number you want to edit can be entered manually as explained in 7.1 or by card reader. 7.3 ERASE CARD Erase existing cards. The card number you want to erase can be entered manually as explained in 7.1 or by card reader. 7.4 ERASE ALL Erase all existing cards. 8. OUTPUT T/S Define if Time Schedules apply to outputs. The outputs will be triggered according to the defined and selected Time Schedule. TIME SCHEDULE N Out1 :0 Out2 :0 Out3 :0 Out4 :0 - default value, no Time Schedule applies to the outputs Out1 :2 Out2 :2 Out3 :2 Out4 :2 – outputs are triggered according to Time Schedule 2 9. DATE&TIME Set up the current date and time of the controller. When using a PC with Andromeda Software the current date and time are adjusted automatically to the PCs date and time whenever communication starts. 12. Operation 12.1. Normal operation Power on When switched controller status LEDs Led +5 V, Led +12 V. The display starts to alternate series about: the current time day month year, ID of the controller, the state of inputs and outputs the state of alarm zones Z1 and Z2 the state of the siren Reading registered card When a registered card (or PIN) is read, the door (OUT #1 or OUT #3) will open for 3 seconds (default setting). LEDs Led1or Led3 will light up. Exit button An exit button can be used. When pressed the door (OUT #1 or OUT #3) will open for 3 seconds (default setting). LEDs Led1or Led3 will light up. Alarms When an unregistered card (or PIN) is read, access will be denied and an alarm (OUT #2 or OUT #4) will be triggered for 3 seconds (default setting). LEDs Led2 or Led4 will light up. iCON160 User Manual v1.01.55 2012 © 17 Polimex Holding Ltd. iCON 160 12.2. Master Card Operation In this mode card no software for card management is used. Instead of a software a master card is used for management. The first card read by the controller becomes the master card in this mode. With the master card you can add a card, remove a card or remove all cards. The LCD display is indicating actions and progress for each action. To activate this mode check the MASTER CARD checkbox and apply settings by pressing OK. Adding a card After checking the master card on a reader the display shows MASTER CARD MODE.ADD CARD. Wait for the display to show EXECUTE ADD CARD. The controller is now in the automatic add card mode. Check all cards you want to have access rights for this reader. The controller returns to normal mode after 5 seconds of inactivity. Deleting a card After checking the master card two times on a reader the display shows MASTER CARD MODE.REMOVE CARD. Wait for the display to show EXECUTE REMOVE CARD. The controller is now in the automatic remove card mode. Check all cards you want to remove access rights for this reader. The controller returns to normal mode after 5 seconds of inactivity. Picture 18. Master card operation Deleting all cards After checking the master card four times on a reader the display shows REMOVE ALL CARDS. Wait for the display to return to normal mode. All cards are removed. 13. Alarm Zones Setup If alarm zones and the siren are not used, the inputs have to be terminated with 1k Ohm resistors. This is to avoid permanent alarms for open circuits. Alarm zone 1 is armed and disarmed by reader 1, respectively alarm zone 2 is armed and disarmed by reader 2. 13.1. Alarm Zones Configuration Set Input #2 (for alarm zone 1) to NC and Input #4 (for alarm zone 2) to NC The door sensors have to be connected to Input #2, respectively to Input #4 The alarm zones have to be wired and connected to alarm sensors according to drawing and connected to the Alarm Zone inputs on the controller A valid card has to be registered for arming and disarming as described in 11. Main Settings, 7.1. NEW CARD or 7.2. EDIT CARD iCON160 User Manual v1.01.55 2012 © 18 Polimex Holding Ltd. iCON 160 Picture 18. Alarm Zones Configuration Picture 19. Connecting the alarm zones The alarm will be triggered when either of the described events take place: 1. When the system is not armed: The loop between Z1 and GND to Z1 and GND is broken 2. When the system is armed: The loop between Z1 and GND to Z1 and GND is broken When the door sensors are triggered i.e. the door is opened before the alarm was disarmed When the alarm sensors in the armed zone are triggered The siren can be stopped only with an alarm zone authorized card When the zone is armed only alarm zone authorized cards have access rights for the door 13.2. Arming Of Alarm Zones While door open check an alarm authorized card TWO TIMES on the according reader Close the door The alarm zone is armed. The controller display shows Z1(Z2) ARMED NORMAL. 13.3. Disarming Of Alarm Zones Check an alarm authorized card on the according reader The alarm zone is disarmed. The controller display shows Z1(Z2) DISARMED NORMAL. 14. Time Schedules Time schedules are intervals for timed output or card access rights management. There are four available intervals per day and eight available time schedules per controller. When time schedule 0 is selected for a card the according card has rights 24/7. When time schedule 0 is selected for an output the according output stays in the predefined default mode, NC respectively NO 24/7 until an event changes the state. iCON160 User Manual v1.01.55 2012 © 19 Polimex Holding Ltd. iCON 160 This is a sample interval for Time Schedule 01 for Monday which can be used for an output or card. Cards with this Time Schedule will have access rights only from 13:00 to 20:00 on every Monday. If this Time Schedule is used for output scheduling, then the output will be triggered from 13:00 to 20:00 on every Monday (respectively the door will be unlocked in this time interval). 15. Appendix 15.1. Default settings for inputs and outputs for two doors (one sided) mode R1>DURESS>OK R1>DURESS>ERR R2>DURESS>OK R2>DURESS>ERR R1>CARD>OK R1>CARD>ERR R1>TIME SH. EN.>OK R1>ANT. PASS E.>OK R2>CARD>OK R2>CARD>ERR R2>TIME SH. EN.>OK R2>ANT. PASS E.>OK DOOR1>OVERTIME DOOR2>OVERTIME EXIT B.DOOR1(Input#1) EXIT B.DOOR2(Input#3) DOOR1: FORSED OPEN DOOR2: FORSED OPEN EMERGEN. INPUT Input#1 Input#2 Input#3 Input#4 Input#5 Input#6 Input#7 iCON160 User Manual v1.01.55 OUT1 3 OUT2 4 4 OUT3 OUT4 3 4 4 OUT5 OUT6 OUT7 3 4 4 4 3 4 4 4 4 4 3 3 5 OPEN 3 4 OPEN 5 4 4 3 4 2012 © 20 Polimex Holding Ltd. iCON 160 15.2. Default settings for inputs and outputs for one door (two sided) mode R1>DURESS>OK R1>DURESS>ERR R2>DURESS>OK R2>DURESS>ERR R1>CARD>OK R1>CARD>ERR R1>TIME SH. EN.>OK R1>ANT. PASS E.>OK R2>CARD>OK R2>CARD>ERR R2>TIME SH. EN.>OK R2>ANT. PASS E.>OK DOOR1>OVERTIME DOOR2>OVERTIME EXIT B.DOOR1(Input#1) EXIT B.DOOR2(Input#3) DOOR1: FORSED OPEN DOOR2: FORSED OPEN EMERGEN. INPUT Input#1 Input#2 Input#3 Input#4 Input#5 Input#6 Input#7 OUT1 3 OUT2 4 4 OUT3 OUT4 3 4 4 OUT5 OUT6 OUT7 3 4 4 4 3 4 4 4 4 4 3 3 1 OPEN 3 4 OPEN 5 4 4 3 4 iCON160 User Manual v1.01.55 2012 © 21