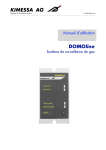
Download User Manual - Kimessa AG
Transcript
User Manual
CANline 04
Alarm and Control system
Copyright © 2015 by KIMESSA –Switzerland
All rights are reserved by KIMESSA. Any reproduction, whether in hard or digital copy, even in part, without
written permission of KIMESSA-Swiss in any design and shape is prohibited.
The information in the documents are created according to current knowledge. Due to ongoing product developments, technical changes or deviations may occur.
KIMESSA AG Rautistrasse 12 CH-8047 Zurich / Switzerland Tel.: +41 (0)44 404 38 38
Fax: +41 (0)44 404 38 39
Email [email protected]
Home www.kimessa.com
Contents
1
GENERAL INFORMATION .................................................................................................................. 4
1.1
1.2
1.3
1.4
1.5
1.6
1.7
1.8
1.9
1.10
1.11
1.12
2
LIMITATION OF LIABILITY ........................................................................................................................................................................... 4
RETENTION OF TITLE.................................................................................................................................................................................. 4
WARNING ................................................................................................................................................................................................. 4
WARRANTY ............................................................................................................................................................................................... 5
CONDITIONS FOR STORAGE AND TRANSPORT ........................................................................................................................................ 5
DISPOSAL OF THE PRODUCT ..................................................................................................................................................................... 5
IMPORTANCE OF INSTRUCTIONS .............................................................................................................................................................. 5
RISK / POTENTIAL HAZARD ....................................................................................................................................................................... 6
SAFETY / RESPONSIBILITY.......................................................................................................................................................................... 6
IF EX-MEASURING SENSORS ARE CONNECTED IN HAZARDOUS AREAS THE FOLLOWING MUST BE OBSERVED: ................................ 6
DEFINITION OF THE SIGNAL WORDS ..................................................................................................................................................... 8
TARGET GROUP, ELECTRICIANS AND MAINTENANCE TECHNICIANS; PERSONAL PROTECTIVE EQUIPMENT ......................................... 8
USAGE .............................................................................................................................................. 11
2.1
INTRODUCTION ...................................................................................................................................................................................... 11
3
CANLINE 04 CONSTRUCTION........................................................................................................... 12
4
INSTALLATION ................................................................................................................................. 13
4.1
4.2
4.3
4.4
4.5
4.6
4.7
4.8
4.9
4.10
4.11
5
CANLINE 04 CONNECTIONS ............................................................................................................ 21
5.1
5.2
5.3
6
CONDITIONS OF USE/INSTALLATION/WHERE AND HOW WILL THE CONTROL UNIT BE MOUNTED? ............................................ 13
MECHANICAL INSTALLATION OF CANLINE 04 ................................................................................................................................... 14
DELIVERY CONTENTS, CANLINE 04 GAS DETECTION CONTROL UNIT ............................................................................................... 15
CANLINE/OPENING/CLOSING THE CONTROL UNIT .......................................................................................................................... 15
INSTALLATION MEASUREMENTS ............................................................................................................................................................. 15
ELECTRICAL INSTALLATION/CONNECTING THE CONTROL UNIT ......................................................................................................... 16
T2 AMP FUSES........................................................................................................................................................................................ 16
POWER SUPPLY ....................................................................................................................................................................................... 16
SENSOR-CABLE BUS-INSTALLATION .................................................................................................................................................... 16
KIMESSA-CABLE ................................................................................................................................................................................ 17
ELECTRICAL INSTALLATION/EMC AND ATEX ................................................................................................................................... 18
WIRING SCHEMATIC FOR 4 X 4..20MA DETECTORS ........................................................................................................................... 22
WIRING SCHEMATIC FOR 4 X DIGITAL BUS DETECTORS...................................................................................................................... 22
WIRING SCHEMATIC FOR REALY CONTACST (STANDARD) ................................................................................................................... 23
USER COMFORT ............................................................................................................................... 24
6.1
6.2
6.3
6.4
6.5
FRONT VIEW, DIMENSIONS AND CONTROL ELEMENTS ........................................................................................................................ 24
FRONT FUNCTIONS ................................................................................................................................................................................ 24
ALARM RESET .......................................................................................................................................................................................... 25
"SWITCH TO INACTIVE" BUTTON FUNCTION, ONE SENSOR ............................................................................................................... 25
" SWITCH TO INACTIVE " BUTTON FUNCTION, SEVERAL SENSORS ..................................................................................................... 25
Copyright © 2015 by KIMESSA –Switzerland Page 2/36
CANline 04 User Manual 18.11.15mb
7
SWITCHING ON ............................................................................................................................... 26
8
MAIN MENU .................................................................................................................................... 27
8.1
8.2
8.3
8.4
8.5
8.6
8.7
8.8
8.9
8.10
8.11
8.12
8.13
9
NORMAL OPERATION / SENSOR DISPLAY ............................................................................................................................................. 28
FIRST STEPS TO THE MENU ..................................................................................................................................................................... 28
SYSTEM INFO MENU ............................................................................................................................................................................. 29
NEXT SERVICE - SYSTEM INFO - ............................................................................................................................................................ 29
QUANTITY OF SENSORS - SYSTEM INFO .............................................................................................................................................. 30
FIRMWARE VERSION - SYSTEM INFO ..................................................................................................................................................... 30
DC VOLTAGE INFO - SYSTEM POWER ................................................................................................................................................. 31
POWER DC CURRENT - SYSTEM INFO.................................................................................................................................................. 31
ALARM HISTORY 1 ... 10 - SENSOR 3 ALARM - HISTORY 2 - SYSTEM INFO ...................................................................................... 32
RELAY CHECK 1 ... 5 / MENU STRUCTURE / SYSTEM INFO .............................................................................................................. 33
EXIT TO MAIN MENU ........................................................................................................................................................................... 34
EXIT TO "NORMAL OPERATION" ........................................................................................................................................................ 35
"NORMAL OPERATION" VIA "EXIT" IN THE MAIN MENU................................................................................................................... 35
DECLARATION OF CONFORMITY .................................................................................................... 36
Copyright © 2015 by KIMESSA –Switzerland Page 3/36
CANline 04 User Manual 18.11.15mb
1 General Information
1.1
Limitation of Liability
Prior to installation and use of KIMESSA products please review the entire manual Carefully read, understand
and observe. KIMESSA assumes no liability for damages arising due to misapplication, installation, storage,
maintenance or non-observance of instructions and those which may arise due to local rules and regulations.
This applies both for property and for personal injury of any kind.
KIMESSA disclaims any liability for any advice and execution errors by personnel which are not permanent
employees of KIMESSA. Even if the dealer is acting on behalf of the company, they shall be liable for their own
actions.
KIMESSA assumes no liability for direct or indirect damages, whether to property or persons, which are direct
or indirect damages through the use of the products.
KIMESSA points out that they are gas detectors for protection of property and persons. Usage in adjacent
areas such as measurement technology or process technology shall be at the user's own risk.
1.2
Retention of title
All information, technical specifications, drawings and images in this manual are confidential information owned
by KIMESSA.
This material may not be distributed, copied in any form, even in part, or be disclosed to third parties without
the written consent of KIMESSA. This includes all currently known and future techniques for reproduction and
distribution of documents in written, image, voice or translation form.
1.3
Warning
KIMESSA's products are focussed on gas detection technology used in the field of safety and sensor technology.
The products are used for protecting people and areas from gas hazards.
An appropriately qualified and equipped design based on the applicable country-specific regulations is mandatory here and must be observed.
Commissioning and regular maintenance according to the operating instructions and the applicable land specific regulations is essential and a precondition for the warranty.
Without regular maintenance, the functionality of products cannot be ensured. Due to the numerous possibilities
of error, maintenance must be carried out by skilled personnel authorized by KIMESSA.
Copyright © 2015 by KIMESSA –Switzerland Page 4/36
CANline 04 User Manual 18.11.15mb
1.4
Warranty
KIMESSA AG guarantees the quality of all its products. It grants a guarantee on the material, under normal use
and regular maintenance, for 12 months from the date of purchase. A later commissioning of the products does
not extend the guarantee period, since for example sensors age due to storage conditions. KIMESSA shall repair or replace free of charge any part which proves to be defective within the warranty period. Excluded from
any warranty and free repair are wear-resistant parts of any kind, such as sensors, batteries, etc. KIMESSA
reserves the right to decide during the warranty period whether a repair is carried out using new parts or equivalent used parts. Furthermore KIMESSA shall decide whether a repair or replacement of the affected parts
shall occur. In case of exchange of the product, equivalent used parts can also be used.
A warranty case neither extends the warranty nor does it newly initiate it.
The warranty only covers the products and components delivered by KIMESSA. All Incremental costs for labour,
directions, accessibility, etc. are not covered by the warranty.
Any (old) parts replaced within and on warranty are the property of KIMESSA and must be handed over or
sent free of charge.
KIMESSA reserves the right, after successful examination, to bill any additional cost incurred due to defects notcovered under warranty.
Special contracts, agreements or country-specific Conditions of Use can be used as deviations or extensions for
this purpose.
1.5
Conditions for storage and transport
To prevent damage, the following points should be noted:
No heavy mechanical stress like throwing,
suspension, stacking
No environment where moisture or rain may cause damage
Do not expose to direct sunlight for an extended period
The storage temperature must not be less than -25oC and higher than+65oC
1.6
Disposal of the product
Only European Union (and EEA). This mark indicates compliance with the EU Directive
(2002/96/EC). This product should therefore not be disposed of along with normal household
waste.
It must be deposited at an official drop off point for disposal of electrical and electronic devices
which is a designated collection point for this purpose or returned in exchange for an equivalent new device from an authorized dealer.
1.7
Importance of Instructions
This guide aims to provide for safe and proper handling of KIMESSA gas detection systems and KIMESSA
transmitters, especially for planners and contractors, as installers, maintenance personnel and operators.
Copyright © 2015 by KIMESSA –Switzerland Page 5/36
CANline 04 User Manual 18.11.15mb
1.8
Risk / Potential hazard
KIMESSA gas detection systems and transmitters pose no risks subject to a proper and appropriate. use of our
systems and components, these represent no hazard. A threat of non-execution or false alarm is only given
when untrained and unauthorized personnel operate the gas detection system, transmitters and input signals.
The responsibility for this, or for the omission of regular maintenance work and the consequences are borne by
the owner of the gas warning system, even if a maintenance contract is in place and service personnel have no
access to the system.
1.9
Safety / Responsibility
The safety function is guaranteed if the gas detection systems, transmitters and other system components are
regularly inspected i.e. once or twice a year by authorized and qualified personnel having obtained training by
the KIMESSA staff for a specific product. The responsibility for compliance with rules and regulations rests with
the owner or his representative, including for regular testing of the system as part of cyclical maintenance.
The applicable regulations for installation, operation and maintenance of gas detection systems
for monitoring of combustible gases and oxygen, for example
(EN / IEC 60079-29-2) and for monitoring of toxic gases such as (EN 45544-4)
must be observed and complied with.
Switzerland,
see customary local guidelines, which are legally binding in the event of an incident (in Switzerland, SWKI- and SES gas and gases).
If the so called ex-gas sensors are connected it should be noted that the sensor is suitable for
use in gas and dust explosion hazard areas (zone 2 and 22).
1.10 If Ex-measuring sensors are connected in hazardous areas the following must
be observed:
Safety information for hazardous areas
• Pay attention to the applicable
- Regulations and specifications (ExVO, BetrSichV, etc.)
- Requirements for testing of personnel ("qualified" person, TRBS 1203)
• Installation, commissioning and periodic inspection must be carried out by suitably qualified personnel
("authorized persons")
• Compliance with important data for explosion protection must be met through the labelling of the product
- G= Gas, D=Dust
- Equipment category 1,2,3 in the 3 zone areas
- Characteristics of the gas: Temperature class (T1..T6), explosion group (IIA, B, C)
- Dust characteristics: Explosion group (III A, B: non-conductive; IIIC: high conductivity); surface temperature, smoulder and ignition temperature
Copyright © 2015 by KIMESSA –Switzerland Page 6/36
CANline 04 User Manual 18.11.15mb
•
The deposit of dust is to be avoided so that the surface temperature does not dangerously increase. (installation position, protection, cleaning measures, etc.)
• Care must be taken to ensure that all technical and organizational precautions are met and their function or effects are tested.
• If an "X" is present after the EC-Type Examination Certificate number, there are special stipulations or
deviations from the standard conditions. In this case, these special instructions can be found in the certificate.
• Before any work (installation etc.) is performed in potentially explosive atmospheres, a work permit
must be submitted by the operator.
If Ex-measuring sensors are connected in hazardous areas the following must be observed:
For work such as installation, electrical connection, repair or opening of the housing, it must be
ensured that
• no explosive atmosphere is present
• no electric voltage is applied
• accidental activation is not possible
• there is a work permit from the operator
Changes to the equipment are not allowed and can lead to triggering an
explosion (ignition)!
Additional information on use in potentially explosive dust atmospheres:
• The details of the maximum surface temperature are valid only for a dust allowance of more than 5
mm. At higher dust allowance the surface temperature must
be reduced
• Determining the maximum permissible surface temperature
- Dust with ignition temperature-TCL: Tmax1= 2/3 TCL
- Dust layer with ignition temperature-T5mm: Tmax2= T5mm – 75oC
- The smaller of the two values is decisive for the maximum
permissible surface temperature
•
During installation and operation of the equipment, it must be ensured that no electrostatic
charges (no high flow rate; cleaning with a damp cloth, etc.) occur on the plastic parts (type
label, plastic housing).
Copyright © 2015 by KIMESSA –Switzerland Page 7/36
CANline 04 User Manual 18.11.15mb
1.11 Definition of the signal words
In this manual some warnings regarding some risks and hazards are used, which can occur when using the device. These warnings also include "Signal words" which should draw attention to the expected level of danger.
The warnings with their signal words are as follows:
Death or serious injury can occur due to a potential risk situation, if
appropriate precautionary measures are not taken.
WARNING
Definition of the signal words
CAUTION
Personal injury, property damage or damage to the environment due to
potentially hazardous situation can occur if appropriate precautions are
not taken.
Can also be used to warn against reckless approach
NOTE
Additional information about the device
Warning
Important notes, when ex-sensors used in potentially hazardous areas
are connected.
Danger of explosion - Please read
1.12 Target group, electricians and maintenance technicians; personal protective equipment
When working on the gas detection system, use your personal protective equipment, safety boots,
helmet, goggles, hand-held measuring instrument, respiratory protection and, if necessary, hearing
protection and gloves.
Please note the regulations concerning the transport and storage of gas bottles.
Gas detection systems are used for protection of persons and property and may be retrieved
or serviced only by trained personnel. A product training and authorisation by KIMESSA is compulsory.
Copyright © 2015 by KIMESSA –Switzerland Page 8/36
CANline 04 User Manual 18.11.15mb
If at the CANline 04 so-called ex-sensor is to be connected,
it must meet the requirements for testing personnel (explosion protection)
Tester
"Trained"
Person
"Competent" person
"Competent" person
explosion protection/
complete Ex-equipment
(risk detection measures)
Training
Instruction
Technical Profession
Studies
technical Qualification
Experience
Usage; application
Desired condition
Possible faults
Timely action
regular use
Annual training
Documented
Experience
Ex systems,
components
Testing/Evaluation
1 year ex-activity
Ex systems, devices
- Production
- Assembly
- Servicing
for many years in
safety technology
Explosion protection
Technical rules
State of the art
Several tests per year
Update:
Training; instruction
Explosion protection
Technical rules
State of the art
regularly updated:
-Further education
-Exchange of experience
Requirements for the testing personnel (calibration / adjustment)
gas detectors
Recognition of
changes in gas detectors
Testing of functionality and assessment of results
Training
(complete 2years)
Personnel Qualification
"Trained"
Person
"Qualified"
professionals
"Competent"
person
"Competent"
person
Regarding
Operational maintenan- TRBS 1203: completed professional traice manual
ning experience, professional activity, ti Operation of devices
mely checks of work tools and further
Measuring principle
training, Fire hazard and protection, au Test gases used
thority to act independent of instructions.
Control functions
Application and usage possibilities for gas
Calibration- adjustment
detection systems
Assessment of results
Measuring principle: Influence of inter Training
fering gases, detection limits, restrictions,
(complete 2years)
maintenance
Physical, chemical properties of gases/vapours
Training (complete 2years)
X
X
X
X
X
X
X
X
X
(Explosion protection, regulations)
Copyright © 2015 by KIMESSA –Switzerland Page 9/36
CANline 04 User Manual 18.11.15mb
Target group, electricians and maintenance technicians; personal protective equipment
Responsibilities
People
Skills
Design changes and
amendments
Planners, architects,
engineers
Knowledge of building, plumbing,
and HVAC, air ventilation and
refrigeration
Transport/storage
Parcel services,
haulers, agents
Professionals in
electrical engineering, electricians,
electrical engineers,
automation technicians, electronic technicians, master of the
electrical trades,
technicians and
engineers
Technicians trained
and authorized by
KIMESSA for commissioning and maintenance
Care and conscientiousness, no
specific prerequisites
Safe handling of tools, laying
electrical conductors, installation of
electrical and electronic equipment
by distributors, RCDs, line circuit
breakers, electric motors, switches,
buttons, sockets, etc. for measuring
the effectiveness of electrical protective measures
Electrical installation
Commissioning, fault
elimination and maintenance of the gas warning
system and signal input
Operation and operation
monitoring
Disposal
Ownership, administration, user
Employee representatives
Safe handling of tools, laying
electrical conductors, installation of
electrical and electronic equipment
by distributors, RCDs, line circuit
breakers, electric motors, switches,
buttons, sockets, etc. for measuring
the effectiveness of electrical protective measures,
product-specific training by
KIMESSA, commissioning and
maintenance of gas detection
systems, dealing with measuring
and testing equipment
Care and conscientiousness, no
specific knowledge is required
the appropriate collection is performed according to EU Directive
(2002/96 / EC)
Personal protective
equipment
as on building sites, safety boots, helmet, goggles, if gas is present,
hand-held measuring
instrument and respiratory protection
in "normal operation"
PSA is not necessary
None
as on building sites, safety boots, helmet, goggles, if gas is present,
hand-held measuring
instrument and respiratory protection
as on building sites, safety boots, helmet, goggles, if gas is present,
hand-held measuring
instrument and respiratory protection
in "normal operation"
PSA is not necessary
None
Copyright © 2015 by KIMESSA –Switzerland Page 10/36
CANline 04 User Manual 18.11.15mb
2 Usage
2.1
Introduction
The universal KIMESSA CANline 04 gas monitor has been designed to ensure safety of persons. The KIMESSA
CANline 04 gas detection control unit is a compact, economic evaluation unit, which is available in different
versions and can handle up to 4 measurement channels.
In addition to the 4 analogue/BUS sensors, several touch displays, relay cards and further modules can be
connected to the CANline 04 control unit. Aside from the 5 internal potential-free relays, there are up to 128
further potential-free, programmable relay contacts, which are provided with 3 alarm thresholds per measuring
point and can be split into 2 fire/ventilation zones or groups. The CANline 04 control unit also has an alarm for
over- and undershooting the measurement signal, with which relevant relays can be programmed that then, for
example, visualize a fault accordingly.
Pressing the SELECT button shows the values of individual sensors. The RESET button is used to reset the system
when limits are exceeded. The control unit has a history function that documents and displays limit exceedances
and errors from the connected sensors precisely to the second. The parameters of the sensor and the entire
system can be programmed with the integrated USB interface.
In conjunction with the KIMESSA BUS sensors, there are many cost-saving cabling possibilities, which also include
connecting in KIMESSA BUS signals so that only one cable has to be run. Other features include the ability to
record over long periods of time using a MicroSD memory card.
The CANline 04 gas detection control unit comes in a panel-mount version as well as in the standard wallmounting housing, each with an integrated power supply.
Copyright © 2015 by KIMESSA –Switzerland Page 11/36
CANline 04 User Manual 18.11.15mb
3 CANline 04 Construction
The CANline 04 consists of a lower part and an upper part, plastic, grey, RAL 7035. The lower part comes
with mounting holes and carries the cable relief and cable glands for the connection cable between the sensor
and the power supply. The connector circuit board in the lower part of the housing contains the 230 VAC
power supply, Wago connection terminal plugs for 4 analogue sensors, the terminals connector for the
KIMESSA CAN BUS, a Modbus RTU connection, a ground terminal, 5 potential-free relay outputs with corresponding connection terminal plugs and fuses. The lower part of the housing is connected to the upper part with
plastic brackets, ensuring that the connection terminal plugs are open and accessible. The circuit board in the
housing cover also carries the circuit board for the OLED display and the service port (USB2 cable) for programming with a computer. On the outside of the housing cover, there is a front panel foil and the display for
operation and visualization of measured values, as well as 3 control buttons concealed under the front panel
foil.
Dimensions:
L.:
W.: H.: 230 mm
130 mm
90 mm
Weight:
1100 gr.
Upper part with CPU board,
display for operation and visualization of measured values
3 adjustment buttons (keypad)
Connection pin socket (P3), for connecting cable and USB
cable, DIP switch and a button battery
Lower part with cable leads,
connector circuit board with power supply,
connection terminal plugs for
analogue sensors, KIMESSA CAN BUS and Modbus RTU
port (RS485), configuration jumper
relays, fuses and ground terminal
Copyright © 2015 by KIMESSA –Switzerland Page 12/36
CANline 04 User Manual 18.11.15mb
4 Installation
4.1
Conditions of use/Installation/Where and how will the control unit be
mounted?
The control unit housing is neither water-proof nor explosion-proof The monitor should be placed in a dry and
non-hazardous area. It can be installed directly onto the wall or into a cabinet.
The ambient temperature for the operation of the CANline 04 gas detection control unit should be between 10 °C to 40 °C. The relative humidity must be between 5% RH (relative humidity) and 95% RH. Ideally, the unit
is installed vertically on the wall or in a cabinet (plastic/metal). For installation in the control cabinet, for example on a DIN rail, two nuts are inserted (metal piece with threading) and secured directly into the rail. For installation onto the control cabinet door, there is a mounting frame. The cable glands are mounted on the lower part
of the CANline 04 housing, facing downwards. It is important to ensure that the gas detection control unit is
always accessible. Note that the upper part of housing opens upwards for wiring, programming and during
maintenance work. It may be necessary to secure the gas detection control unit in exposed locations with a
mechanical bumper buffer device/ram protection. When cleaning in its vicinity, do not expose the control unit
to any contamination and avoid splashing water and vapours.
If ex-sensors are used, refer to the following for ex-sensor installation:
Before the unit (ex-sensor) is installed, the following checks must be carried out
• The device must not show any damage or other conspicuous changes
• The IP protection of the device must conform to the operational and environmental conditions
• The operator must have already defined zones
• Check whether the device category corresponds to the predefined zones
• Check the product documentation, whether any upstream safety devices (fuse, etc.) are required
• Specification of ex-technical requirements, safety characteristics of the potentially explosive substances,
zone areas, ambient temperatures
The following standards and rules are helpful
• BGR-104: Explosion protection regulations
• EN 1127-1: Explosion protection basics and methodology
• TRBS series
Standards for potentially explosive areas
• EN 60079-10-1: Classification of potentially explosive areas
• EN 60079-10-2: Classification of areas with a dust-induced risk of explosion
• EN 60079-14: Installation of electrical equipment in hazardous areas
• EN 60079-17: Inspection and maintenance
Copyright © 2015 by KIMESSA –Switzerland Page 13/36
CANline 04 User Manual 18.11.15mb
Observing the primary task of supervision at gas detectors:
• Direction of propagation of the gases
Upwards, if the gas is lighter than air (natural gas, hydrogen, etc.)
Downwards, if the gas is heavier than air (almost all gases)
• Areas in which gases appear:
In the vicinity above or below a potential leakage point
• Areas in which gases accumulate:
In the upper and lower spaces of a room
• Health protection with regard to toxic gases and oxygen:
Position, mouth height approx. 1.6m
Additional information on use in potentially explosive dust atmospheres:
• The deposit of dust is to be avoided so that the surface temperature does not dangerously increase.
(installation position, protection, cleaning measures, etc.)
• During installation and operation of the equipment, it must be ensured that no electrostatic charges (no
high flow rate; cleaning with a damp cloth, etc.) occur on the plastic parts (type label, plastic housing).
4.2
Mechanical installation of CANline 04
When working on the gas detection system, use your personal protective
equipment, safety boots, helmet, goggles, hand-held measuring instrument, respiratory protection and, if necessary, hearing protection and gloves.
Please note the regulations concerning the transport and storage of gas bottles.
The applicable regulations for installation, operation and maintenance of gas detection systems for the monitoring of combustible gases and oxygen (EN/IEC
60079-29-2) and for the monitoring of toxic gases (EN 45544-4) must be observed
and upheld.
Switzerland: see customary local guidelines, which are legally binding in the event
of an incident
Unpack the gas detection control unit and check for missing parts or transport damage. Also check the technical
specifications. Compare the nameplate with the actual product that you ordered. Be especially careful if additional assembly aids are present, such as mounting plates or installation frames.
Open/close the gas detection control unit, remove it from/install it via the back panel by screwing
in/unscrewing the housing screws (M3 flat screwdriver or M3 Phillips head screwdriver).
Install the control unit directly on the wall or in the control cabinet on DIN rails or on/in the control cabinet door.
After installation, attach the upper part again (plastic brackets). Close the control unit and check the fit: If the
back panel is properly installed, the control unit closes easily.
Copyright © 2015 by KIMESSA –Switzerland Page 14/36
CANline 04 User Manual 18.11.15mb
4.3
Delivery contents, CANline 04 gas detection control unit
4.4
CANline/opening/closing the control unit
D = 212 mm
L = 230 mm
4.5
Installation measurements
E = 84 mm
H = 90 mm
W = 130 mm
26.5 mm
W+ = 156.5 mm
Open/close the gas detection control unit, remove it from/install it via the back panel by screwing
in/unscrewing the housing screws (M3 flat screwdriver or M3 Phillips head screwdriver).
Copyright © 2015 by KIMESSA –Switzerland Page 15/36
CANline 04 User Manual 18.11.15mb
4.6
Electrical installation/Connecting the control unit
Risk of electrical shock!
Electrical operations should only be performed by qualified electrician personnel.
Before opening the unit, disconnect power and secure against inadvertently restarting the power.
When working on the gas detection system, use your personal protective
equipment, safety boots, helmet, goggles, hand-held measuring instrument, respiratory protection and, if necessary, hearing protection and gloves.
Please note the regulations concerning the transport and storage of gas bottles.
4.7
T2 Amp Fuses
All relay outputs are safeguarded with T2Amp (5x20mm). They are located beneath the cover.
4.8
Power supply
The control unit is powered with 230 VAC/0.9 A. Optionally, the control panel is also available as a 24VDC
version. In addition, the number of externally connected nodes should be noted. Their power consumption
should be added to the total power.
4.9
Sensor-Cable BUS-Installation
Recommended: 4-Core control cable, shielded
Cable diameters/Distances
Data transmission is guaranteed up to approx. 1000 m. The power consumption of each node must be added
together.
In each case, the cable cross section must be calculated. The length of the + wire and the −wire and the total
power consumption must be taken into consideration
Copyright © 2015 by KIMESSA –Switzerland Page 16/36
CANline 04 User Manual 18.11.15mb
4.10 KIMESSA-Cable
Recommended:
KIMESSA –Electronic cable, shielded
1506.2 ZK CAVO LIHCH 4x1.00 (30x0.200) DIN 47100 - GIALLO 1021 ∅ 7.10-40°C / +70°C –
These shielded cables for flexible
application, free-moving without
tensile load or forced movements,
are suited for installation in dry environments and may not be used
outside of buildings. LIHH cable for
electronic, computer, measurement and control systems can be used wherever cables with small external diameters are required. The insulation and sheath are made of a special plastic (LSZH) which prevents halogen gases
from being emitted in the case of a fire. KIMESSA electronics cables are therefore suitable for installation in
public buildings (hospitals, theaters, etc. ). The good protection by the shield of a thin and effective copper braid
allows for interference-free signal and impulse transfer. The use of KIMESSA electronics cable is recommended
especially for safety-critical systems in public facilities and plants with high reliability requirements.
Cable structure
Description
Construction Diameter Thickness
mm2 No. / mm
mm mm
1.00 30x0.20
2.10 0.43
Copper, cold drawn
Inner conductor Insulation Thermoplastic, halogen-free TI6
Identification Coloured
Cable structure Conductor in concentric layers
Strands
Coated with flexible plastic, stranded
Supporting element Polyester film
Shielding Copper braid, tinned
Thermoplastic, halogen-free TM7
Cable sheath Cable colour Yellow RAL 1021
Cable diameters/Distances
Data transmission is guaranteed up to approx. 1000 m. The power consumption of each node must be added
together. In each case, the cable cross section must be calculated. The length of the + wire and the −wire and
the total power consumption must be taken into consideration
e.g., total cable length approx. 750 m/cable cross section 0.75 mm2
Cable resistance at 1000 m = 26 ohms 26 Ω/ 1000 mx 750 m x 2 = 39 Ω
20 gas sensor KSEC 504
at 20 mA
0.4 A
U = R x I / U/I = R
Power supply 24 VDC
Total power 0.4 A x 39 Ω = 16 VDC
☺
16 Volt at the end of the cable is just enough; less than a 16 VDC supply is too small
for the CO sensor.
Copyright © 2015 by KIMESSA –Switzerland Page 17/36
CANline 04 User Manual 18.11.15mb
4.11 Electrical installation/EMC and ATEX
The cable is stripped to the desired length and a second
round section is attached so that a sliding piece with a
length of 15-20mm, depending on the cable diameter.
Braided shield
The protruding transparent
plastic auxiliary coat
and the braided rosette are unwinded and cut off
with a side cutter
Plastic auxiliary coat, transparent (for
production reasons) 15-20 mm
The sliding piece now stripped toward the Stripped and
cable gland - 15 to 18 mm. Using two fingers press the
spline end together and slide towards the cable coat, so
that a braided shield forms a rosette.
Spline end
Rosette made of braided
Single parts
Contact ring
Intermediate supports
Shielded cable
Abbildung 1 Kabel mit Rosette
The cable is then inserted into the gland and the
screw joint is put together; make sure that the
braided shield rosette is installed correctly. Use
an appropriate open-end wrench to tighten the
cable gland
(the size depends on the type of
screw joint).
Seal ring
Cap nut
Rosette made of braided
shield
During tightening the gland, hold the cable
tight with the other hand. This way the braided
shilded Rosette keeps its position.
Gland body and nut must be tightened with
a torque of 20 Nm
Copyright © 2015 by KIMESSA –Switzerland Page 18/36
CANline 04 User Manual 18.11.15mb
Risk of electrical shock!
Electrical operations should only be performed by qualified electrician personnel.
Before opening the unit, disconnect power and secure against inadvertently restarting
the power.
When in a potentially explosive area, make sure:
• to check whether the device category corresponds to the predefined zones
• no explosive atmosphere is present
• there is a work permit from the operator
• to comply with applicable rules
• to ensure that the documentation of the devices used in operations such
as installation, electrical connection, repair or opening of the housing is complete
• no electric voltage is applied
• accidental activation is not possible
The transmitter supply line must be shielded or the supply line must be laid in metallic cable routing. If an
unshielded supply line is used, it must be ensured that no other current-carrying line is run along the same
conduit, see Transmitter Datasheet. The supply line must be X-wired (see Transmitter Datasheet) and is limited by
the terminal port in the transmitter to 1.0 mm2.
•
Selecting connection cable
When selecting the cable, the following points should be noted:
- Select cable material with regard to the local
resistance requirements
- ?-wired standard cable with shield
- Conductor cross-section: 1 mm2
- Cable diameter 7.1 mm, KIMESSA special cable
•
Running cable
- If risk of mechanical damage is possible, the cable must be appropriately protected (protective tube,
etc.)
- The cable diameter must be complied with so that the
connection in the cable entry point remains tight
- The gland and the screws of the housing cover must be tightened so that IP protection is maintained.
Excessive pulling damages the seal and thus affects the IP protection
•
-
Grounding system
The external grounding terminal on the housing must be connected
to the potential equalizer of the hazardous area with low resistance
No potential equalization currents may flow between hazardous areas and non-hazardous areas.
Minimum cross-section: 2 x 1.5 mm2 or 1 x 4 mm2
Ground connection of the electrostatic charge with a resistance between 0.2-1 MOhm does not qualify
as grounding
-
Copyright © 2015 by KIMESSA –Switzerland Page 19/36
CANline 04 User Manual 18.11.15mb
Electrical connection of sensors and explosion sensors
-
Make sure that the lines to be connected are not energized. Otherwise,
there is a risk of damage to the unit and of igniting an explosive atmosphere!
Before the device is supplied with voltage, the following inspections (TRBS 1201) must be carried out:
• Inspection of order:
- if the equipment used complies with all safety-related parameters (device category, surface temperature.)
- if the documentation is complete and comprehensive
(permits, regulations, certificates, checks to be carried out, etc.)
• Technical inspection
- Screws, for a tightness of
connection, protective and potential equalizer terminals
housing cover
- Torque of the cable entry point
- Tightness between cable and seal in the cable entry point
- Check whether the device is ready for operation
The parameterization for this application must be carried out
All interfaces such as inputs and outputs for control purposes must be connected and ready.
Copyright © 2015 by KIMESSA –Switzerland Page 20/36
CANline 04 User Manual 18.11.15mb
5 CANline 04 Connections
Do not interchange wires; risk of destruction!
For BUS operation: Pay attention to bus-end resistors
and jumper positions!
Strip the wires to 6 mm, then connect to the appropriate connector terminal and make sure that all individual
wires (especially stranded wires) are clamped
Modbus RTU occupancy
PIN 1: GND
PIN 2: MOD_S_L
Modbus RTU
PIN 3: MOD_S_H
CAN- / MOD- BUS selection for BUS 1
Ground /
Earth
Relay with Control LEDs, fuses and
connection terminal
BUS-End-Resistor
Connection
Sensor 1 and 2
(Analogue)
230 VAC
power connection
Copyright © 2015 by KIMESSA –Switzerland Bus-line
connection 1
Connection
Sensor 3 and 4
(Analogue)
Page 21/36
Bus-line
connection 2
Connection
Reset (external, digital)
CANline 04 User Manual 18.11.15mb
5.1
Wiring Schematic for 4 x 4..20mA detectors
5.2
Wiring Schematic for 4 x digital BUS detectors
Copyright © 2015 by KIMESSA –Switzerland Page 22/36
CANline 04 User Manual 18.11.15mb
5.3
Wiring Schematic for realy contacst (standard)
Copyright © 2015 by KIMESSA –Switzerland Page 23/36
CANline 04 User Manual 18.11.15mb
6 User comfort
6.1
Front view, dimensions and control elements
Dimensions:
Height90 mm
Width230 mm
Depth130 mm
Weight
1.10 kg
6.2
Front functions
Copyright © 2015 by KIMESSA –Switzerland Page 24/36
CANline 04 User Manual 18.11.15mb
6.3
Alarm reset
With "standard programming," an alarm can only be acknowledged with the "RESET button" or by remote
reset, if the alarm has been overstepped again.
With the appropriate programming of the CANline 04 control unit, in the event of an alarm, the acoustic alarm
(signal horn) can be turned off by pressing the "RESET button" or by remote reset.
In any case, an alarm is triggered before the horn can be switched off; there is always an alarm.
6.4
"Switch to inactive" button function, one sensor
The sensor from which the alarm goes off is
switched
to inactive.
It is selected using the "Select" button for the
corresponding sensor and then the "Select" and
the "RESET" buttons simultaneously.
After 20 seconds, an audible beep (100 milliseconds) will be heard
and the buttons
can be released.
The same procedure can be performed in order to manually reactivate the sensor.
The selected sensor is then switched to "inactive" for a period of 4 hours.
After 4 hours, the sensor is automatically reactivated if it has not already been activated manually.
6.5
"Switch to inactive" button function, several sensors
Simultaneously press the "Select," the "OK" and the "RESET" buttons.
After 20 seconds, an audible beep (100 milliseconds) will be heard and you can release the buttons.
The same procedure can be performed in order to manually reactivate the sensors.
All sensors are then switched to "inactive" for a period of 4 hours.
After 4 hours, the sensor is automatically reactivated if it has not already been activated manually.
Copyright © 2015 by KIMESSA –Switzerland Page 25/36
CANline 04 User Manual 18.11.15mb
7 Switching on
After switching on the
CANline 04, the firmware is
loaded and various status messages are displayed until the
"boot up" sequence, which also
serves to stabilize the sensors.
Pellistor sensors, particularly,
need
Fig
4 TESTto warm up. This can be
cancelled with the "RESET"
button.
As seen on the display (right),
the menu can be accessed by
using the buttons.
Copyright © 2015 by KIMESSA –Switzerland Page 26/36
CANline 04 User Manual 18.11.15mb
8 Main Menu
CANline 04 Menu Item - Main Menu
You can quit the menu at any time by pressing
the SELECT + OK buttons
Note: !!!
The points:
- Sensor Settings
- Sensor 1 and Sensor 2... Sensor 4
- Relay 1 - Relay 5
are only in the visible variation, which allows for programming the CANline 04 control unit via the buttons.
Copyright © 2015 by KIMESSA –Switzerland Page 27/36
CANline 04 User Manual 18.11.15mb
8.1
Normal operation / sensor display
In "normal mode" the display will indicate the sensor with the highest gas concentration.
Display of a selected sensor: By pressing the SELECT button, the display will show "Sensor 1 – xx“ (last programmed sensor). By pressing the SELECT button again, the next sensor is displayed until the desired sensor
appears. Now, the display remains on the selected sensor until it is pressed again to release the SELECT button.
Display of the sensor with the highest measured concentration
By pressing the SELECT button twice, use the "> button" to choose Alarm History 1, thereby displaying the sensor with the highest value.
8.2
First steps to the Menu
Pressing the "Ok" button takes you to "System
Info".
Starting from the "System Info," with the
" > " Button (reset)
Proceed sequentially through the menu (shown
at left). With the
" < " Button (Select)
move backwards through the menu. With the
" Ok " button
open the selected menu item to find system information, or to program.
If the "Exit" function is selected and is confirmed
with " Ok ", you will return to "Normal operation".
If you are within a menu and "Exit" is selected
and then "okay" is pressed, you will return to the
Menu structure, shown at left.
If you are in the
Menu, the respective menu item is highlighted in yellow, and the buttons
Previous "<" ; "Ok" and forward ">"
are visible in the display
Copyright © 2015 by KIMESSA –Switzerland Page 28/36
CANline 04 User Manual 18.11.15mb
8.3
System Info Menu
The submenu System Information, and the submenu Alarm History 1 - 10 display system-related information;
only the date (Date) and time (Time)
can be set directly in this menu.
CANline 04
SystemInfo
Relay Check 1
Next Service
Relay Check 2
Quantity of Sensors
Relay Check 3
Firmware Version
Relay Check 4
Power DC Voltage
Relay Check 5
Power DC Current
Sensorsettings
Alarm History 1
Sensor
1
Alarm History 9
Sensor
2
Date
Start 22.04.14
3
Time
Start
9:03:14 (Uhrzeit/ Time)
Exit
Max
7% VOL Gas Konzentration/Concentr.
Max
22.04.14 (Datum/Date)
Sensor
Sensor
4
Sensor
Fault
2
A2
(Datum/Date)
Relay
1
Relay
2
Max
9:49:38 (Uhrzeit/Time)
Relay
3
End
23.04.14 (Datum/Date)
Relay
4
End
11:46:15 (Uhrzeit/Time)
Relay
5
Servicemessage
Exit
8.4
Next Service - System Info -
Indicates when the next service is due,
which is merely informational, and the setting
of the interval is done in the submenu
"Service Message -Set Service interval".
Resetting the message
"Service Now"
can be done in the submenu
"Service Message Service Reset Now,"
whereby the display of the message returns to
"System Info Next Service" in the menu without changing the setting of the interval.
Copyright © 2015 by KIMESSA –Switzerland Page 29/36
CANline 04 User Manual 18.11.15mb
Input:
for "Normal operation," "OK" button; for "System Info," "OK" button; for "Next Service,"
Return to "normal operation" by pressing the ">" button or "<" button until you reach "Exit": "OK" button; for
"System Info,"
with ">" button or "<" button until you reach "Exit": "OK" button: for "Normal operation"
8.5
Quantity of Sensors - System Info
In the "System Info - Quantity of sensor" menu,
the number of programmed sensors appears.
The setting of the sensor-count follows in the submenu
"Sensor Settings - Quantity of sensor"
Input:
for "Normal operation" "OK" button; for "System Info," "OK" button; for "Next Service," ">" button; "Quantity
of sensor"
Return to "normal operation" by pressing the ">" button or "<" button until you reach "Exit": "OK" button; for
"System Info,"
with ">" button or "<" button until you reach "Exit": "OK" button: for "Normal operation"
8.6
Firmware version - System info
In the menu "System Information - Firmware version"
only the factoryloaded firmware version appears.
The version display changes automatically when a different firmware version is loaded.
Input:
for "Normal operation," "OK" button; for "System Info," "OK" button; for "Next Service," ">" button;
„Quantity of Sensors“: „>-button“; „Firmware Version“
Return to "normal operation" by pressing the ">" button or "<" button until you reach "Exit": "OK" button; for
"System Info,"
with ">" button or "<" button until you reach "Exit": "OK" button: for "Normal operation"
Copyright © 2015 by KIMESSA –Switzerland Page 30/36
CANline 04 User Manual 18.11.15mb
8.7
DC Voltage Info - System Power
Information, there is no adjustment!
Only the voltage at terminal "+V"
will be shown, in volts, which can also be measured at
this terminal,
see the first connection configurations.
Input:
for "Normal operation," "OK" button; for "System Info," "OK" button; for "Next Service," ">" button; "Quantity of sensors":
">" button; "Firmware version": ">" button; "Power DC Voltage"
Return to "normal operation" by pressing the ">" button or "<" button until you reach "Exit": "OK" button; for
"System Info,"
with ">" button or "<" button until you reach "Exit": "OK" button: for "Normal operation"
8.8
Power DC Current - System Info
Information, there is no adjustment!
The total dc current demand of the power supply is displayed in mA. The total current varies with the number of
sensors or according to the event, for example, if gas is
being measured.
Input:
for "Normal operation" "OK" button; for "System Info," "OK" button; for "Next Service," ">" button; "Quantity
of sensors":
">" button; "Firmware version": ">" button; "Power DC Voltage": ">" button; "Power DC Current"
Return to "normal operation" by pressing the ">" button or "<" button until you reach "Exit": "OK" button; for
"System Info,"
with ">" button or "<" button until you reach "Exit": "OK" button: for "Normal operation,"
Copyright © 2015 by KIMESSA –Switzerland Page 31/36
CANline 04 User Manual 18.11.15mb
8.9
Alarm History 1 ... 10 - Sensor 3 Alarm - History 2 - System Info
In a buffer memory, the last 10 measured maximum values
for alarm overruns or sensor faults are displayed.
For each maximum value, it displays:
Start date (when the limit is exceeded)
Start-time (when the limit is exceeded)
the maximum gas concentration,
Date at maximum gas concentration,
Time at maximum gas concentration,
End-date (when it falls below the limit),
End-time (when it falls below the limit).
The last event exceeding the limit
appears in Alarm History 1. Whenever a
limit is exceeded
it is recorded in the buffer memory in the Alarm History 1
at which
time the previous incident exceeding the limit
will then be recorded in the Alarm History 2.
The data of the Alarm History 9 are represented as
Alarm History 10
and the data of the previous
Alarm History 10 are no longer visible.
Input:
for "Normal operation," "OK" button; for "System Info," "OK" button; for "Next Service," ">" button; "Quantity of sensors":
">" button; "Firmware version": ">" button; "Power DC Voltage": ">" button; "Power DC Current"
"Alarm History 1 ... 10" (get from one Alarm History 1 ... 10 to the next one with the ">" button).
When by pressing the ">" button you reach the desired alarm history, use the
"OK" button to get into the sub-menu of Alarm History and then use the ">" button to reach "Start" (date) and
continue
with the ">" button until the menu item "End" (Time)
Back in the "normal operation," for each menu item, suchs "end-time," with the "OK" button go back to the
"Alarm History 1 ... 10" and then the ">" button or the "<" button to" Exit ": "OK" button; for "System Info,"
with ">" button or "<" button until you reach "Exit": "OK" button: for "Normal operation"
Copyright © 2015 by KIMESSA –Switzerland Page 32/36
CANline 04 User Manual 18.11.15mb
8.10 Relay Check 1 ... 5 / Menu Structure / System Info
CANline 04
Menu Structure - Relay Check
In the menu "Relay Check 1 ... 5 ",the relays can be manually activated. This is indicated by the green LEDs on the printed circuit
board in the device and the LEDs on the front panel R1, R2, R3
and R4. "Relay check" is a purely Test function, to control relay
wiring, e.g. on an alarm device such as a light or buzzer.
With the function "Relay check," the function of the relays is checked. In the menu, to get to the submenu,
"Relay Check 1 ... 5" is selected.
By pressing the "ok" button twice,
you get into the
Setting level and can go, with the
">" button and "<" button, between the ON and OFF switch; you can hear the selected relay switch, and the
status LED on the front panel shows the change.
Input:
for "Normal operation" "OK" button; for "System Info," "> Button"; "Relay Check 1 ... 5": "Relay check":
"OK" button; "ON / OFF" with "<button /> button" the selected relay's control LEDs light up.
Return to "normal operation" with the "OK" button; for "Relay check," "<" button or "<" button unto "Exit":
"OK" button; for "Relay Check 1 ... 5,": "> Button" or "<button" until "Exit" "OK" button: for "Normal operation"
Copyright © 2015 by KIMESSA –Switzerland Page 33/36
CANline 04 User Manual 18.11.15mb
The "OK" button returns you to the previous menu.
Using the ">", "<" and the" OK" buttons you can go to the next menu item
"Service Message"
8.11 Exit to main menu
Likewise, by using the button functions ">", "OK / SELECT" and ">" buttons you can return
to the main menu.
Copyright © 2015 by KIMESSA –Switzerland Page 34/36
CANline 04 User Manual 18.11.15mb
8.12
Exit to "normal operation"
CANline 04
Menu structure - Exit
8.13 "Normal operation" via "Exit" in the main menu
Likewise, by using the button functions ">", "OK / SELECT" and ">" buttons you can return
to the main menu.
Copyright © 2015 by KIMESSA –Switzerland Page 35/36
CANline 04 User Manual 18.11.15mb
9
Declaration of Conformity
Copyright © 2015 by KIMESSA –Switzerland Page 36/36
CANline 04 User Manual 18.11.15mb


