1
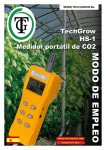
WWW.TECHGROW.NL
TechGrow
HS-1
PORTABLE CO2 METER
Issued: 01-11-2014
MANUAL
Software version: 1.00
TechGrow HS-1
USER MANUAL
CONGRATULATIONS!
You have just purchased the TechGrow HS-1 Portable CO2 meter.
The HS-1 is ideal for measuring the CO2 value and the temperature in any type of area.
The TechGrow HS-1 Portable CO2 Meter uses NDIR (Non-Dispersive Infra Red) technology
for high-reliability readings.
SPECIAL FEATURES:
• Useable in any room.
• Extremely accurate CO2 sensor, produced by SenseAir® Sweden, the leading manufacturer
in CO2 measurement.
• The HS-1 measures the CO2 value and temperature.
• Takes a measurement every second.
• Backlight for working in dark areas.
• CO2 warning alarm.
• Calibration function for CO2.
• Powered by 4 x AA batteries.
• CO2 range: 0-10000 ppm.
• Temperature range: -10° to 60° C.
• Accuracy CO2 ± 50 ppm or ± 5% of the measurement (0-2000).
• Size 60 x 170 x 55 mm.
• Includes batteries and instruction manual.
• Includes convenient storage case.
2
POWER SUPPLY
The HS-1 Portable CO2 meter is powered by 4 x AA batteries. Install the batteries into the battery
compartment on the back side and make sure that the batteries make contact correctly. When the
battery voltage is low, “LOB” will appear on the LCD display and the HS-1 will beep to indicate that
CO2 measurements have failed. Therefore, measurements will not be displayed. Press any key
(except “SET”) to stop the beeping. Replace batteries.
LCD DISPLAY
SYMBOLS:
-HOLD
Shows the last CO2 value and temperature
-MIN/MAX Minimum/Maximum measurements
-LOB
Low battery indicator
-AIRTemperature
°E (C/F)
Celsius/Fahrenheit
KEYPAD:
-SET: On/Off button, enters set up menu.
-CAL/Esc: Exit set up menu.
-CAL/Esc and MODE: Enters CO2 calibration by pushing these buttons simultaneously.
-HOLD: Freezes current measurement, switches HOLD function on/off.
-MODE: Activates backlight, selects unit or increases or decreases value in setup.
-DP/WBT: Selects Air-, DP-, WBT temperature display.
-Mnx/AV: Activates MIN/MAX function. Saves and resets MIN/MAX settings. Also shows MIN/MAX
values.
OPERATION:
Power ON/OFF
Press “SET” to activate or deactivate the HS-1. When the meter is activated you will hear a short
beep. Then the meter runs a 30 second countdown to warm up. After warm up, the normal mode
with the current CO2 value and temperature will appear on the display.
3
TechGrow HS-1
USER MANUAL
MEASURING CO2:
The HS-1 will start measuring after countdown and takes a measurement every second.
NOTE: Keep sufficient distance between faces and the meter because exhaled breath affects the
CO2 value. The HS-1 measurements are very accurately between 0-2500ppm. From 2500ppm and
up, the measurements of the CO2 sensor will be less accurate.
DATA HOLD:
Press “HOLD” to read the measurements. The “HOLD” icon will appear on the left top on the LCD
display. All displayed measurements will maintain unchanged. Press “HOLD” again to deactivate
this function. .
BACKLIGHT
Press “MODE” for longer than 2 seconds to activate/deactivate the backlight function.
ALARM
The HS-1 also features an audible alarm that gives warnings when the CO2 value exceeds the
maximum (see P1.0 for Alarm setup). The HS-1 will beep (80 db) when the CO2 value exceeds the
set-value and can be switched off by pressing a random key, except “SET”. Restart the HS-1 if the
beeping does not stop.
AUTO POWER OFF
The HS-1 will be deactivated automatically after 20 minutes of no activity. To disable this function,
press “SET” and “HOLD” simultaneously for 2 seconds to reactivate the HS-1, until “n” appears on
the display. NOTE: the Auto sleep function will be stopped during the calibration mode
SETUP
Press “SET” in normal mode for more than 1 second to access the setup mode. To exit the setup
mode, press “CAL/Esc” in P1.0 or P3.0 and the HS-1 will return to normal mode.
4
P1.0 CO2 ALARM
In the setup mode, “P1.0” and “AL” are shown on the LCD display.
Press “MODE” to increase the value or press DP/WBT te decrease value. With every push on
these buttons, the alarm will be increased or decreased with 100 ppm from 100 to 9900 ppm.
When the desired alarm value is set, press “Mnx /AV” to save or press “CAL/Esc” to return to “P1.0”
saving all settings.
P3.0 TEMPERATURE SCALE (°C OR °F)
Press “MODE” or “DP/WBT” in “P1.0” to enter “P3.0” to adjust the temperature scale. Press “Mnx/
AV” in front of “P3.1” with the blinking °C bottom left of the LCD display (to switch between °C or °F,
press “MODE” or “DP/WBT”). Next, press “Mnx/AV” to save or press “CAL/Esc” to return to “P3.0”
without saving any settings.
CO2 CALIBRATION
The meter is calibrated at 400ppm at the factory.
Only calibrate the sensor if you suspect a deviation. Our experience has shown that the SenseAir®
sensors that we use can function for two years without calibration, easily.
The sensors are calibrated at the factory with the highest accuracy, but it may occur that after one
year the sensor shows a deviation and has to be calibrated again.
WARNING:
Do NOT calibrate the meter in an area of which the CO2 value is unknown. Otherwise, the meter
will be calibrated automatically as 400ppm, which will lead to inaccurate measurements. It is advised to conduct a manual calibration in outdoor air when the weather is sunny.
+Place the HS-1 on the calibration site.
+Activate the HS-1 and press “CAL/Esc” and “MODE” simultaneously to enter the CO2 calibration
menu.
+400ppm and “CAL” are now blinking on the LCD display while the calibration is busy.
+Wait for 5 minutes until the blinking stops and the calibration is finished and returns to normal
mode.
To stop the calibration, you can deactivate the HS-1 at any moment. NOTE: make sure that the
batteries are full during calibration to prevent interruption or failed calibration.
5
TechGrow HS-1
USER MANUAL
PROBLEM SOLVING:
-The meter does not activate:
Press “SET” for longer than 3 seconds and try to reactivate the HS-1. Also, check if the batteries are placed correctly..
-Slow reaction:
Check if the air ducts on the back of the meter are not blocked.
-Errors:
E01: CO2 sensor is damaged.
E02: The value is under range (probably due to incorrect calibration).
E03: The value is above range.
E07: Too low voltage to measure CO2. Replace batteries.
E17: Retry calibration.
E31: Temperature sensor is damaged or defective.
6
Notes
7
8